
Durban Poizon Indoor


VEG
ДНАТ High-Intensity Discharge/250W
HPS ЛИСМА 250
FLO
Rooster Full Spectrum Light Emitting Diodes/240W
BigCock Design

Box
60*50*120
HoneyBlunt Prod

Fan
107 m3/h
Profit4
Fan
190 m3/h
Profit5

Filt
М-350
Клевер

Contr
RT-820m temp relay
EKF

Drip
20 roots
Xplants

CO2
CO2BAG
CO2BAG

Coco Plug Coco Coir
Simplex
Indoor
Room Type
LST
weeks 3-14
Topping
weeks 4-6
ScrOG
weeks 7-8
15 l
Pot Size
1.5 l
Watering
Start at Harvest
G
Germination6mo ago


Nutrients 1
SeedX
1 mll
HoneyBlunt42 Day 0 — Soaked in 50 ml of RO water with 2 drops of Simplex SeedX.
Day 2 — Two showed taproots, one at 5 mm. Transplanted into coco plugs for germination. Moistened with SeedX solution (4 drops per 100 ml). Placed in a 3-litre plastic container and moved to a warm spot at +27°C. The third hasn't shown a tail yet.
Day 3 — Taproots at 5–10 mm already inside the coco plugs. One has shed its shell.
Day 4 — Both seedlings stretched 2 cm above the plug, one almost shed its helmet. Moved them to the windowsill for some sunlight. In the evening they'll go into the tent under a 250W HPS at 50 cm, under plastic cups with holes — makeshift humidity domes. Fans running continuously in the tent, +27°C under the light at 40 cm distance. The third one drowned.
Day 6 — Stretched 4–5 cm above the plug, one rooted beautifully. The second is leaning on a toothpick for support. Both have pushed out their first pairs of leaves. Final count: 2 out of 3 seeds sprouted from the glass — the third drowned and showed no signs of life.
2 likes
comments
Share
Used method
Glass Of Water
Germination Method
1
Week 1. Vegetation6mo ago

7 cm
Height
18 hrs
Light Schedule
27 °C
Day Air Temp
6.0
pH
No Smell
Smell
70 %
Air Humidity
27 °C
Solution Temp
25 °C
Night Air Temp
0.01 l
Pot Size
0.05 l
Watering Volume
50 cm
Lamp Distance
Nutrients 2
SeedX
1 mll
StartUp
1 mll
HoneyBlunt42 Day 13
End of the first week of veg. Seedlings have stretched to around 7 cm. One has rooted nicely. The second is still being supported. Both looking healthy, pushing their first node of leaves under a 250W HPS.
1 like
comments
Share
2
Week 2. Vegetation6mo ago
2 cm
Height
18 hrs
Light Schedule
24 °C
Day Air Temp
6.0
pH
No Smell
Smell
70 %
Air Humidity
25 °C
Solution Temp
22 °C
Night Air Temp
1.5 l
Pot Size
0.1 l
Watering Volume
50 cm
Lamp Distance
Nutrients 2
StartUp
1 mll
CalMag
0.5 mll
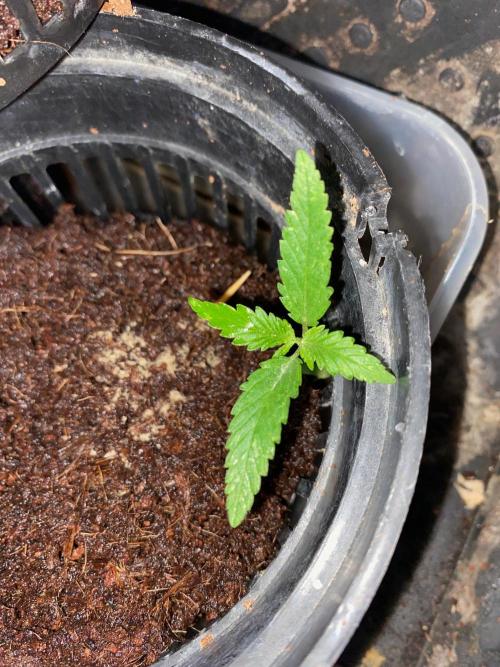
HoneyBlunt42 The plants are coming up nicely. Second node of leaves has developed. Misting with water mixed with CalMag and Simplex Vega.
Been leaving them in the tent overnight for the past couple of days. Five days after transplanting into 1.5-litre pots they're doing well. Will be taking the cup domes off soon.
1 like
comments
Share
3
Week 3. Vegetation6mo ago
7 cm
Height
18 hrs
Light Schedule
26 °C
Day Air Temp
6.0
pH
No Smell
Smell
65 %
Air Humidity
25 °C
Solution Temp
20 °C
Night Air Temp
1.5 l
Pot Size
0.1 l
Watering Volume
50 cm
Lamp Distance
Nutrients 5
StartUp
2 mll
CalMag
0.5 mll
Coco A
2 mll
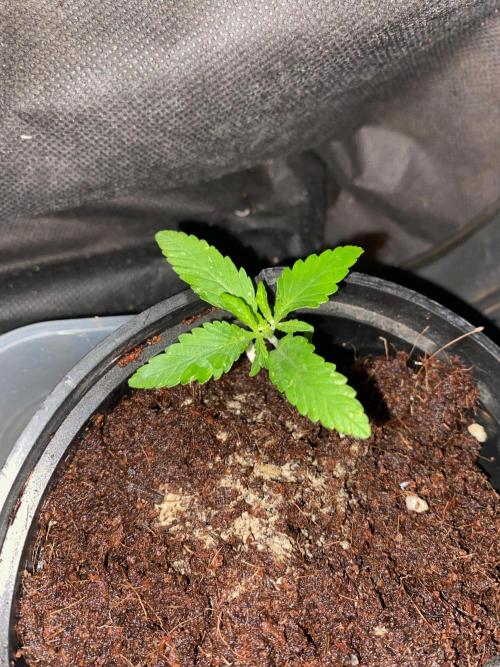
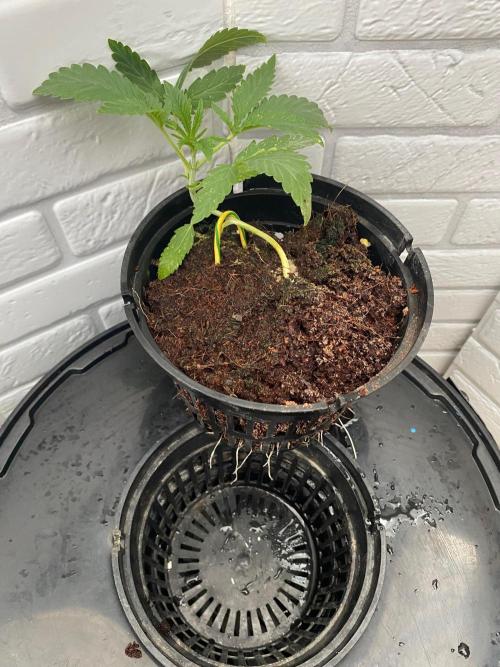
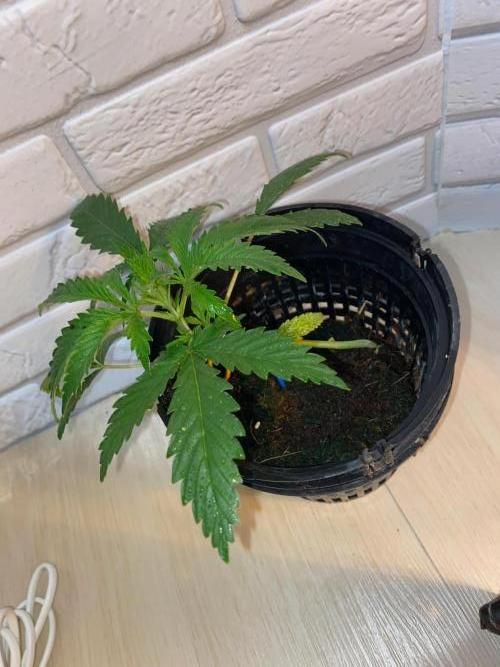
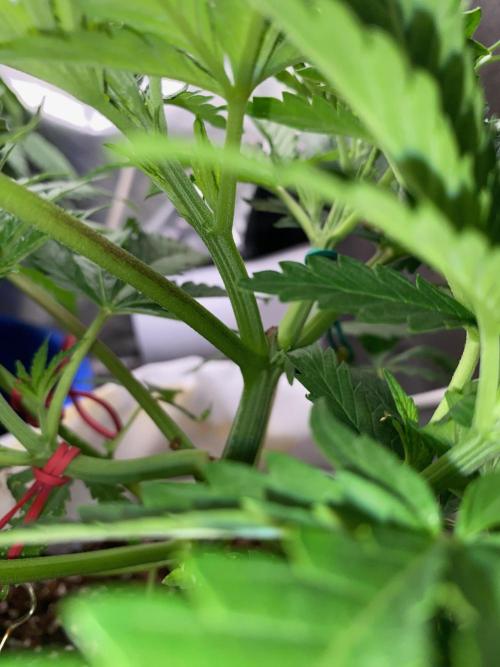
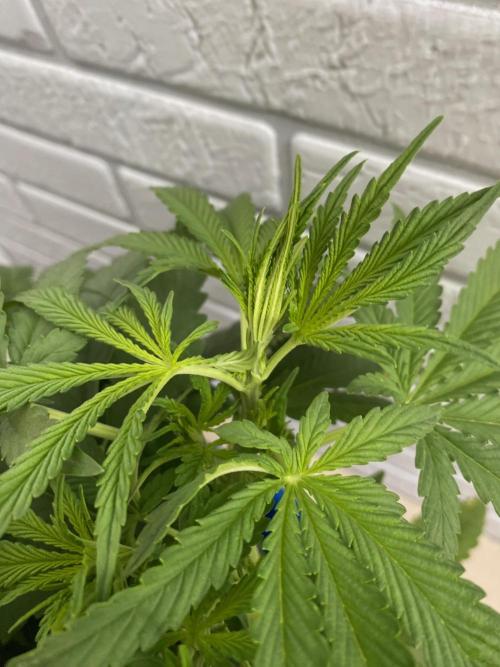
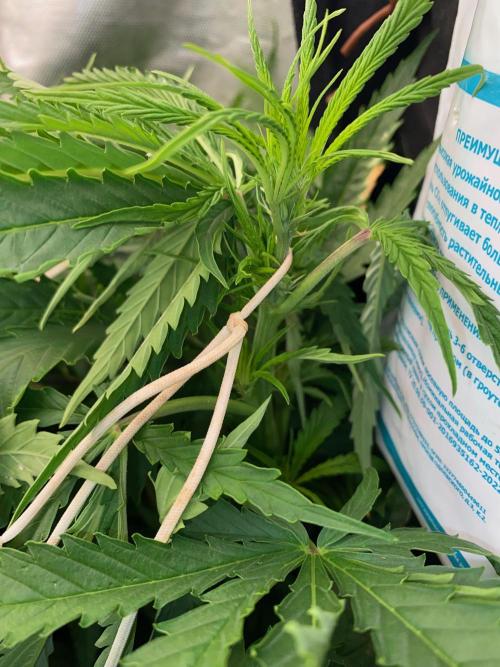
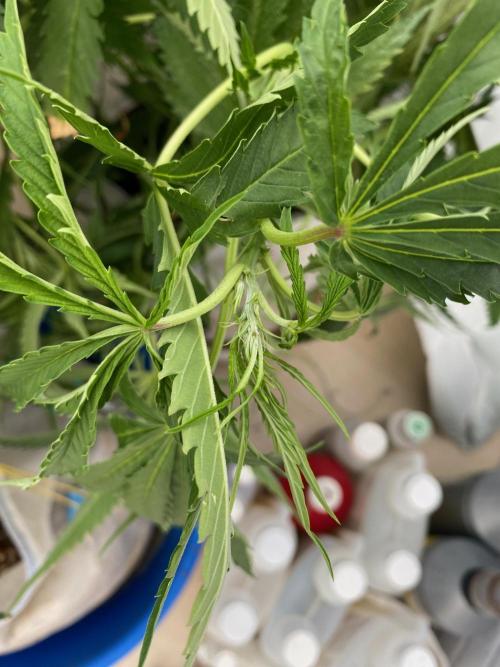
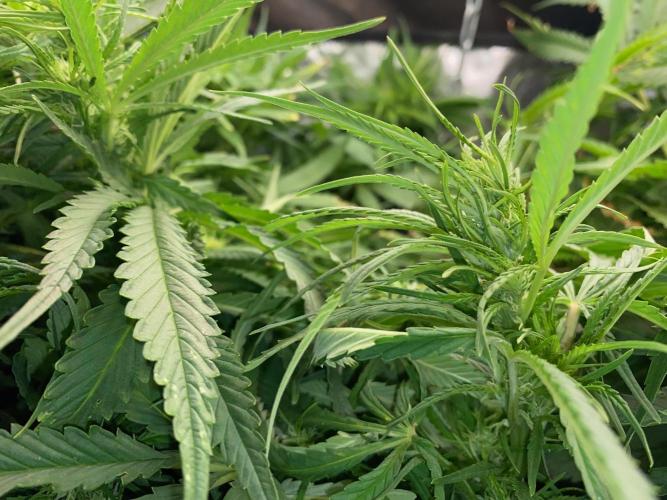
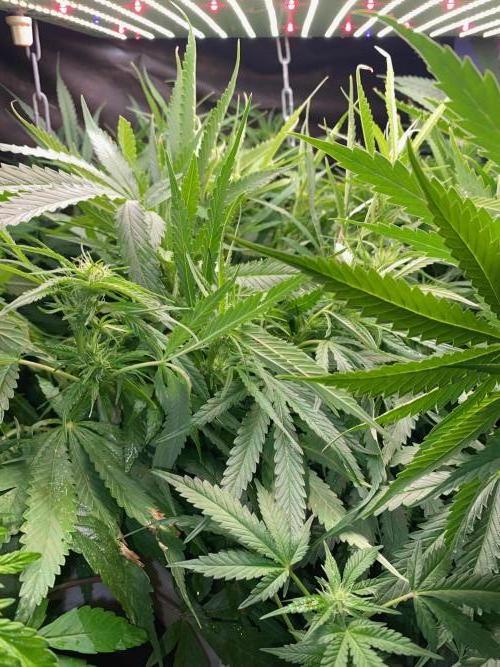
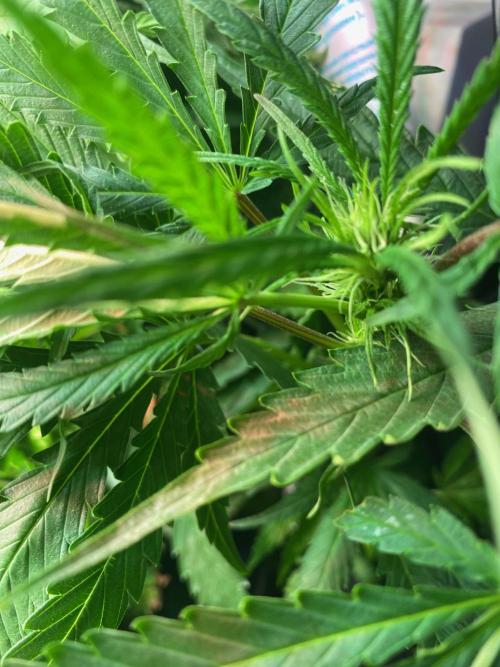
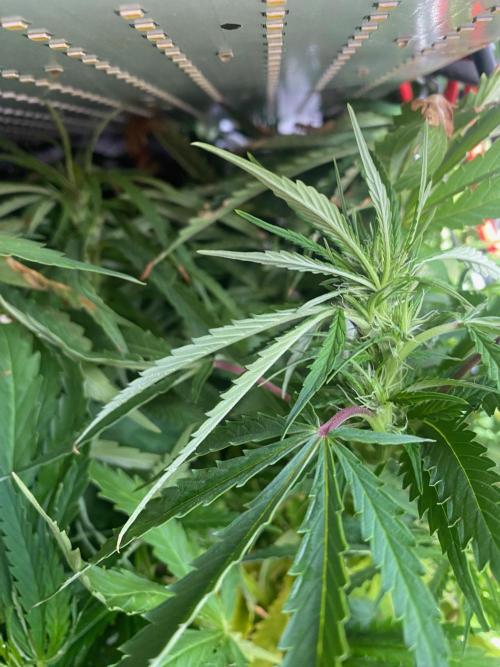
HoneyBlunt42 Stretched to 10 cm, pushing into the 4th node. Looking great.
The weaker plant caught a slight nitrogen deficiency (mild stem reddening on the fan leaves) — was letting it dry out too much under the HPS. With HPS, skipping even a day of misting is enough to fatally dry out the coco in the net cups.
Topdressing with BioRoot stimulator once a week (seaweed extracts in the mix). Focusing the first 30–40 days on building a strong root system. The strongest seedling has already pushed roots out of the net cup and is ready for transplant into coco or hydro.
Planning to transplant into 15-litre pots and flip to 12/12 in about a week. Might hold it in veg for another couple of weeks with some topping and LST using rubber bands — want to build a solid trunk and root system before flipping.
1 like
comments
Share
Used techniques
LST
Technique
4
Week 4. Vegetation6mo ago
14 cm
Height
18 hrs
Light Schedule
27 °C
Day Air Temp
6.0
pH
No Smell
Smell
70 %
Air Humidity
25 °C
Solution Temp
22 °C
Night Air Temp
15 l
Pot Size
0.1 l
Watering Volume
50 cm
Lamp Distance
Nutrients 9
StartUp
1 mll
CalMag
1 mll
Coco A
2 mll
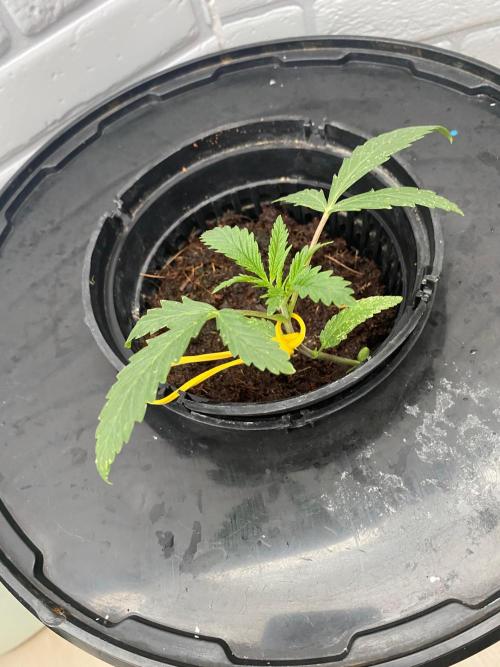
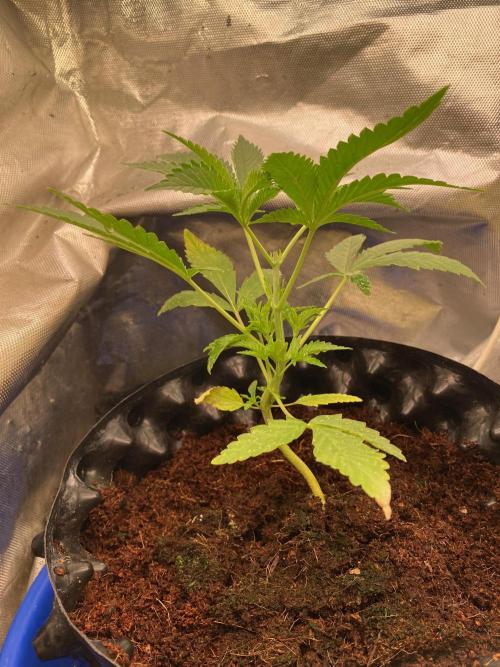
HoneyBlunt42 Day 34
Flipped to 12/12 under a 240W LED. Transplanted the stronger seedling into a 15-litre AeroPot filled with buffered coco substrate. Used a Simplex Coco Brick Mini for the plant — soaked it with 4 litres of standard nutrient solution and got 9 litres of coco substrate out of it. Then added 2–3 grams of OrganicMix BioRoot into the hole, seated the seedling and watered it in with a spray bottle.
Topped it — this is a sativa and my tent is on the shorter side. Without topping and LST the plants hit the light and burn. Planning to flip the second seedling in the next few days as well.
2 likes
comments
Share
Used techniques
LST
Technique
Topping
Technique
5
Week 5. Vegetation5mo ago
16 cm
Height
12 hrs
Light Schedule
27 °C
Day Air Temp
6.0
pH
No Smell
Smell
70 %
Air Humidity
25 °C
Solution Temp
23 °C
Night Air Temp
15 l
Pot Size
0.5 l
Watering Volume
30 cm
Lamp Distance
Nutrients 10
CalMag
1 mll
Coco A
2 mll
Coco B
2 mll
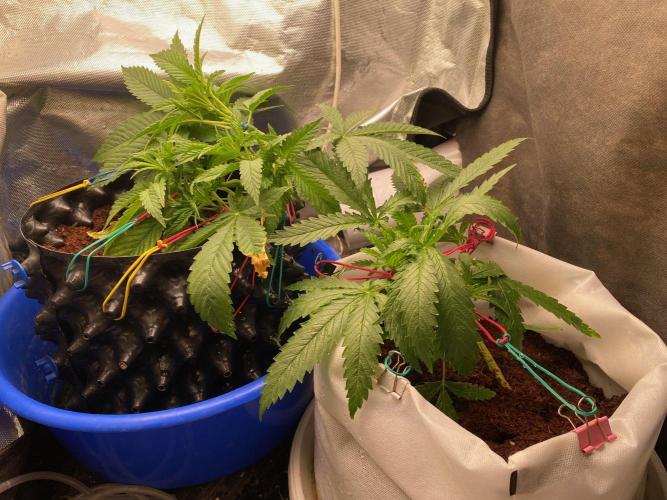
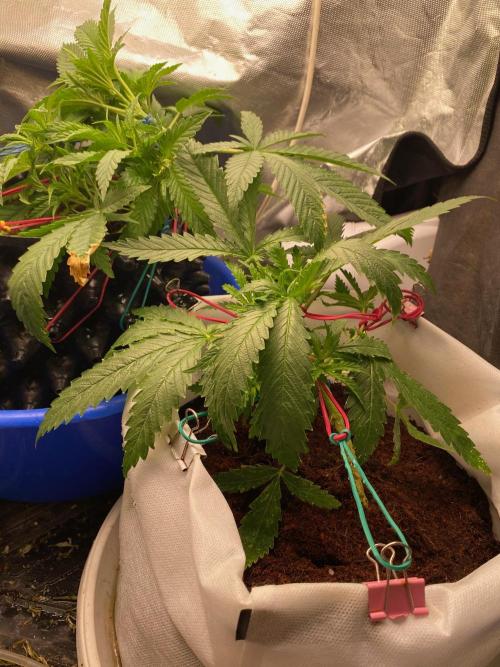
HoneyBlunt42 Day 40
First week since flipping to flower. The plants got a bit cooked — I'd lowered the light to 10 cm, so I raised it back up and they started recovering. Topped them, leaving 3–4 pairs of branches with leaves. Pulling those out toward the edges of the pots with rubber bands.
On the feeding side — a few more additives arrived, so now I'm running the full manufacturer's schedule. Mixing solution in a 15-litre AeroPot with an air stone, giving each plant 0.5 l per day.
Looking pretty healthy since raising the light to 30 cm. Noticing 1–2 cm of new branch growth — after the heat stress stall they're pushing again. The main thing now is keeping up with the bending.
2 likes
comments
Share
Used techniques
LST
Technique
Topping
Technique
6
Week 6. Vegetation5mo ago

22 cm
Height
12 hrs
Light Schedule
27 °C
Day Air Temp
6.0
pH
No Smell
Smell
70 %
Air Humidity
0 °C
Solution Temp
22 °C
Night Air Temp
15 l
Pot Size
0.5 l
Watering Volume
30 cm
Lamp Distance
Nutrients 11
CalMag
1 mll
Coco A
2 mll
Coco B
2 mll
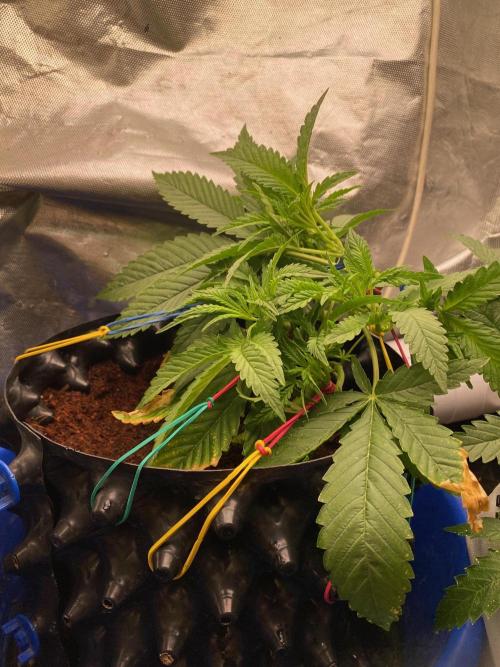
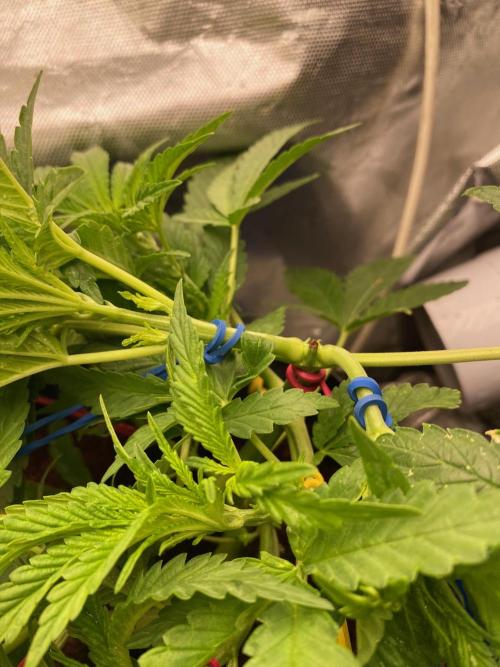
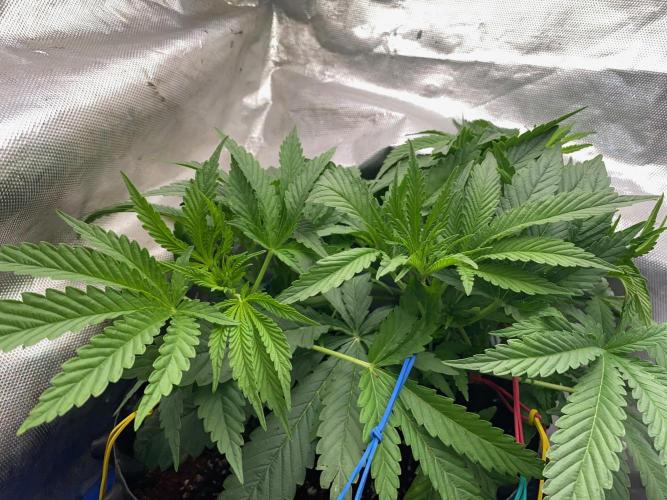
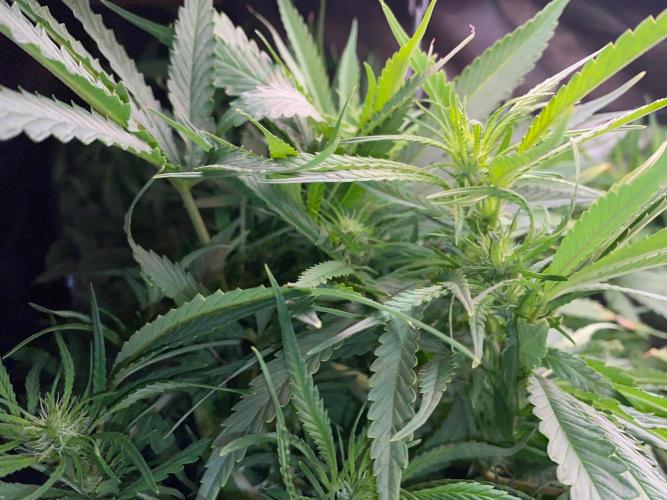
HoneyBlunt42 D 44
Beautiful pre-flower, week two. Fan leaves are palm-sized. Keeping growth in check with rubber bands — bending tops down once or twice a week.
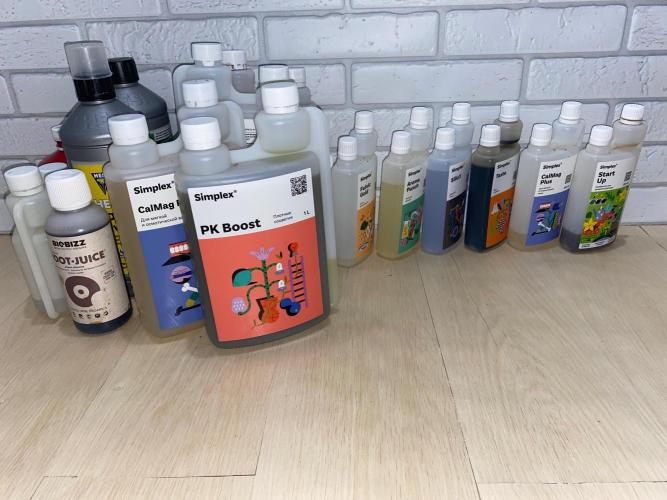
Just got BioBizz RootJuice for the roots. Still fine to add it during pre-veg — watering with 2 ml/l once a week. Everything else follows the Simplex Coco schedule.
How I mix my solution in the AquaPot (15 l):
Start with 13 l of RO water, then add in order:
CalMag — 1 ml/l
SilicX — 0.25 ml/l (wait a minute after CalMag)
Simplex Coco A and B — pre-diluted in separate 1-litre bottles (30 ml Part A in one bottle, 30 ml Part B in the other), 2 ml/l total
Simplex PK Boost — 1 ml/l
Simplex Taste — 1 ml/l
Simplex Aroma Punch — 1 ml/l
Simplex Fulvic Gold — 1 ml/l
Simplex pH Down — 1 ml/l
Let it sit for a few hours with the air stone running before watering.
Noticed slime building up on the air stone after just 4 days. Simplex Taste and Aroma Punch might be worth adding separately from the main solution.
Day 47
Plants are developing actively in week two of pre-flower. Every two weeks I bend and spread the branches out — it slows vertical growth and helps them fill the tent more evenly. Visually they look great, no deficiencies.
2 likes
comments
Share
Used techniques
LST
Technique
Topping
Technique
7
Week 7. Vegetation5mo ago
30 cm
Height
12 hrs
Light Schedule
27 °C
Day Air Temp
6.0
pH
No Smell
Smell
70 %
Air Humidity
0 °C
Solution Temp
22 °C
Night Air Temp
15 l
Pot Size
0.5 l
Watering Volume
30 cm
Lamp Distance
Nutrients 10
CalMag
1 mll
Coco A
2 mll
Coco B
2 mll
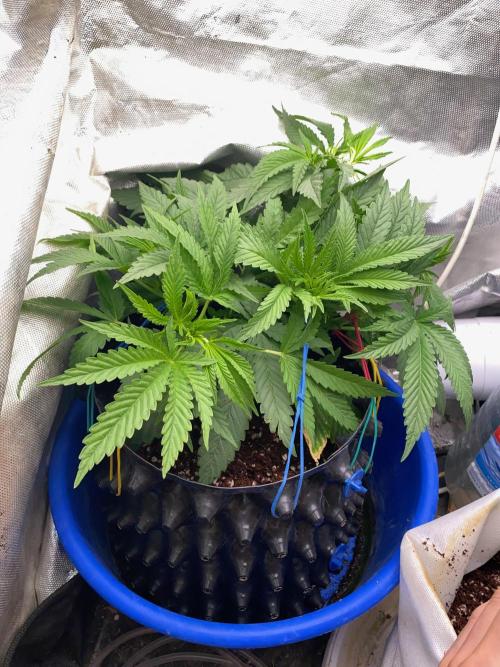
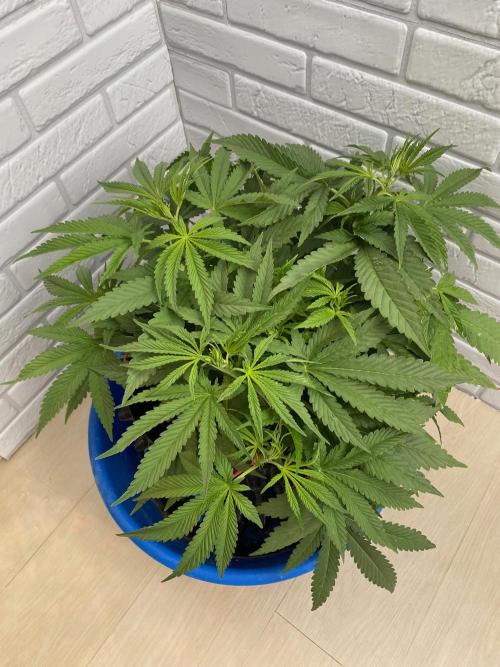
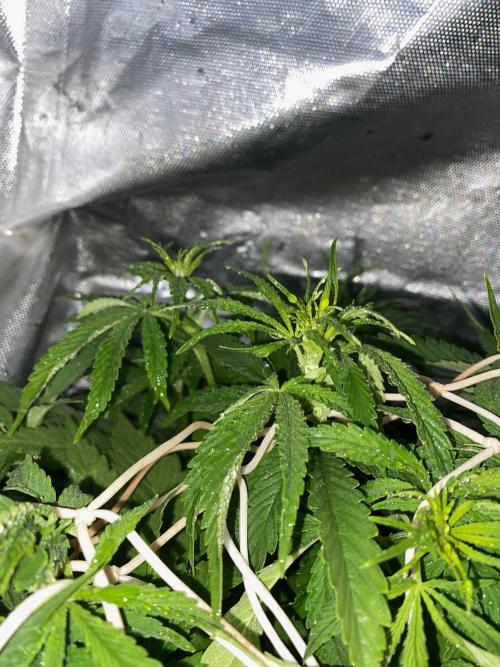
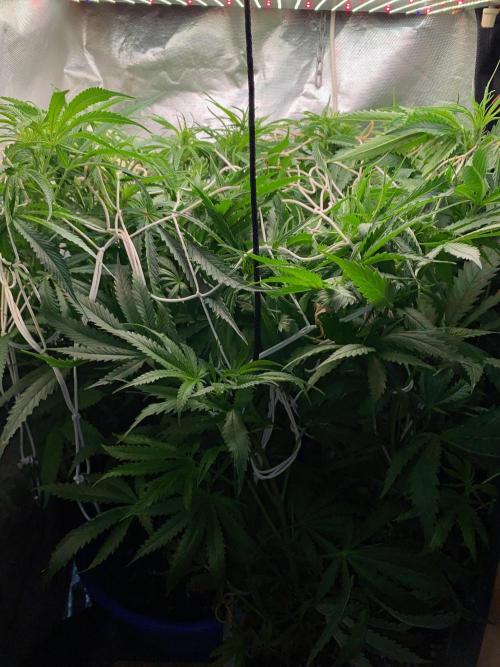
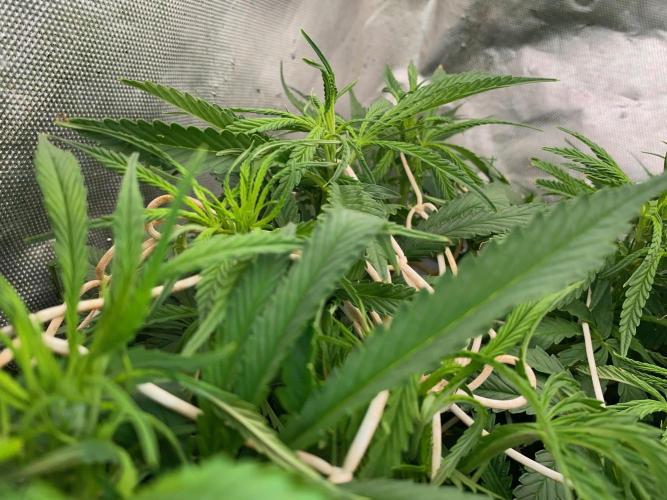
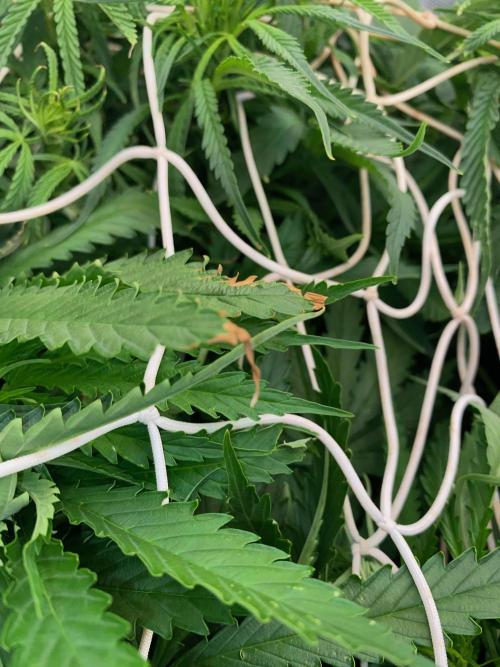
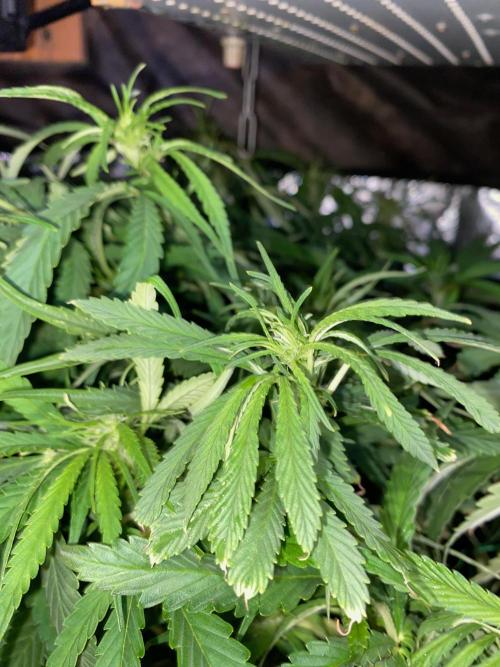
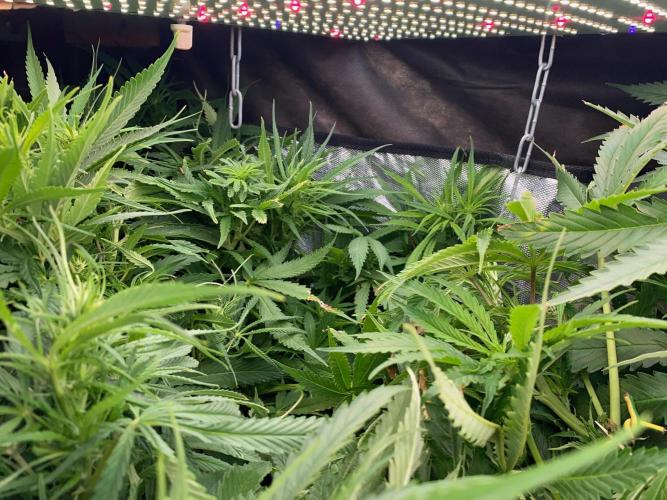
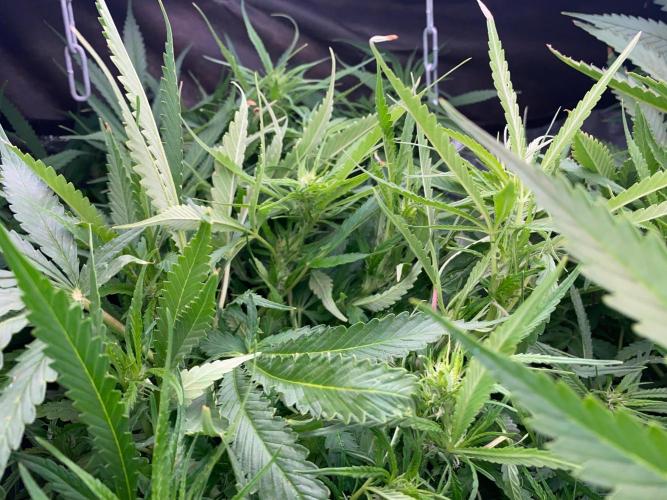
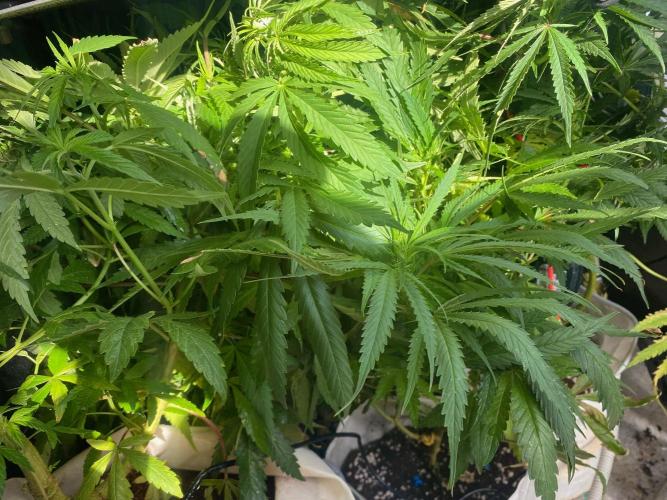
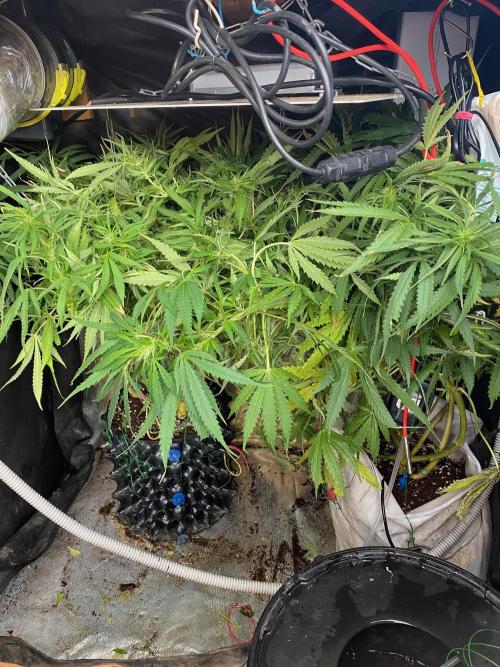
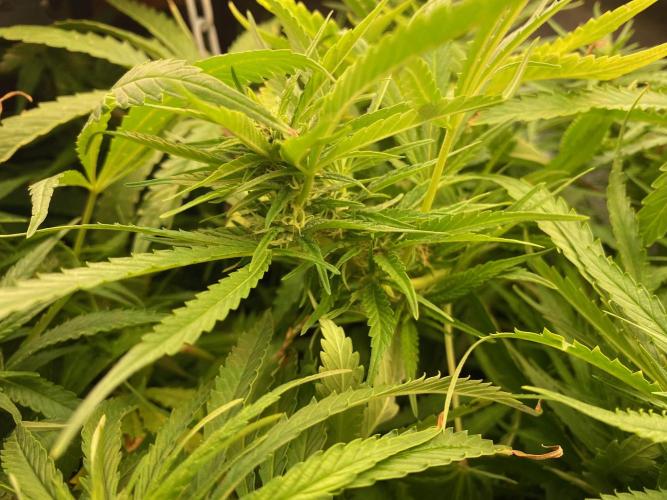
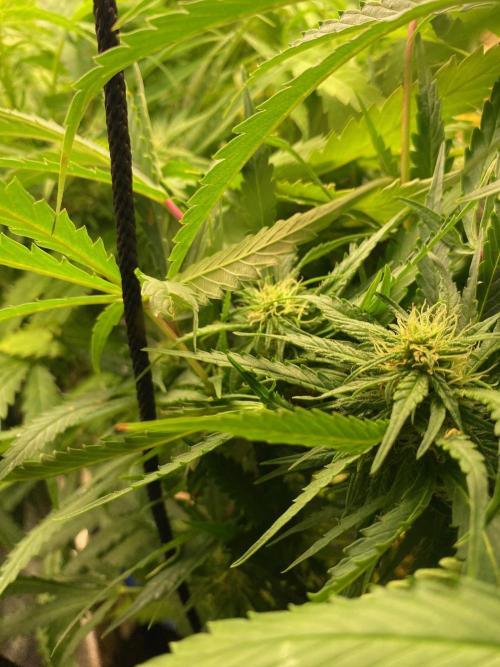
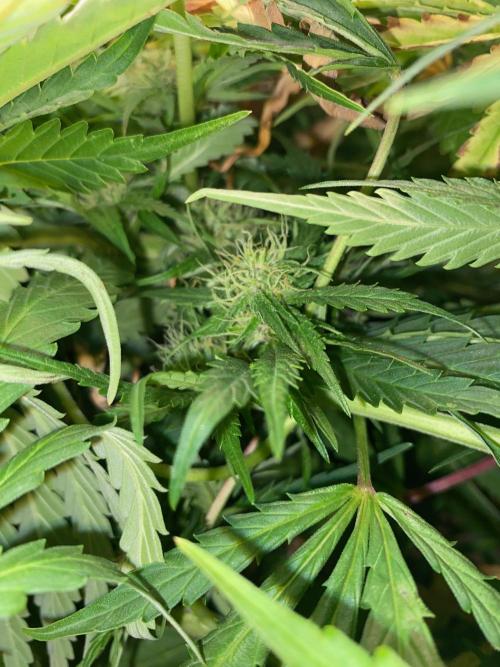
HoneyBlunt42 D54
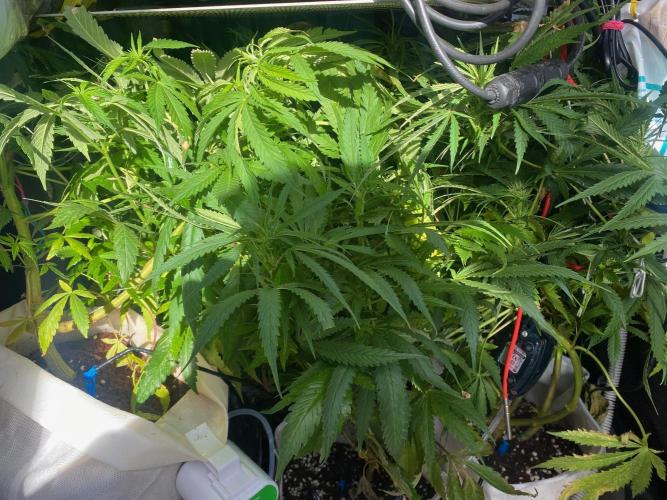
The bushes look healthy — visually 2–3x bigger than at the end of veg. Stretching hard in pre-flower. Threw a net over them and I'm tucking the tops under it. Managing to slow the growth down that way for now.
No buds spotted yet — third week of pre-flower.
This is a sativa that grows up to 2.5 m in the wild. Hoping the net and LST will keep the tops under the light.
Feeding fully by the Simplex schedule, only dropped Simplex Taste and Aroma Punch. Need to check whether the slime is gone from the air stone. The additives I mix separately in a small 1-litre bottle with CalMag and hand-water the plants — not through the auto-watering system.
2 likes
comments
Share
Used techniques
LST
Technique
ScrOG
Technique
8
Week 8. Vegetation5mo ago
50 cm
Height
12 hrs
Light Schedule
24 °C
Day Air Temp
6.0
pH
No Smell
Smell
60 %
Air Humidity
0 °C
Solution Temp
22 °C
Night Air Temp
15 l
Pot Size
0.5 l
Watering Volume
10 cm
Lamp Distance
Nutrients 9
CalMag
1 mll
AromaPunch
1 mll
Taste
2 mll
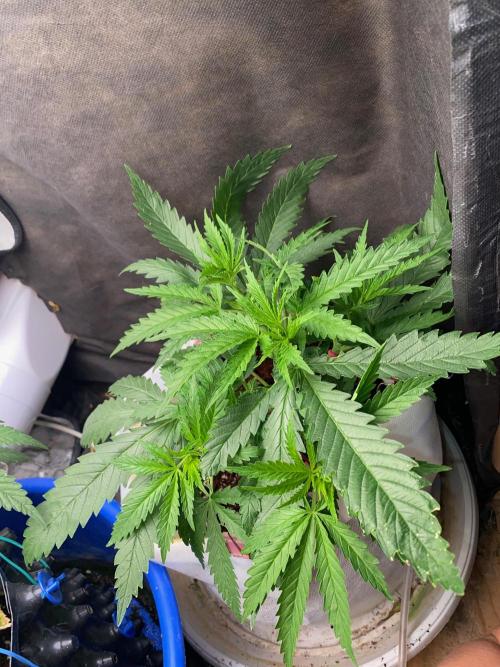
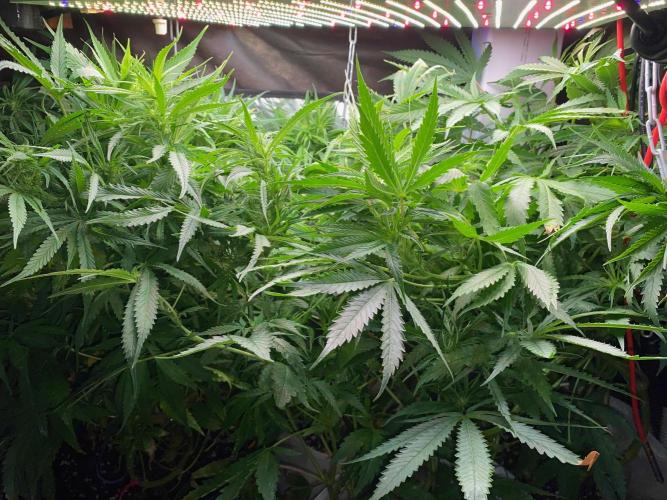
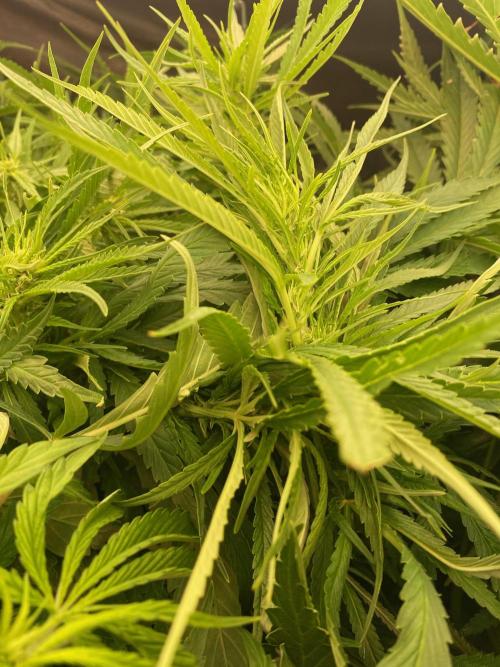
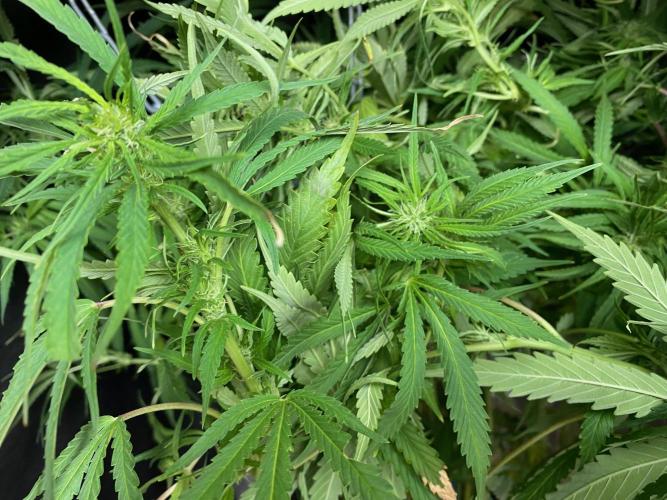
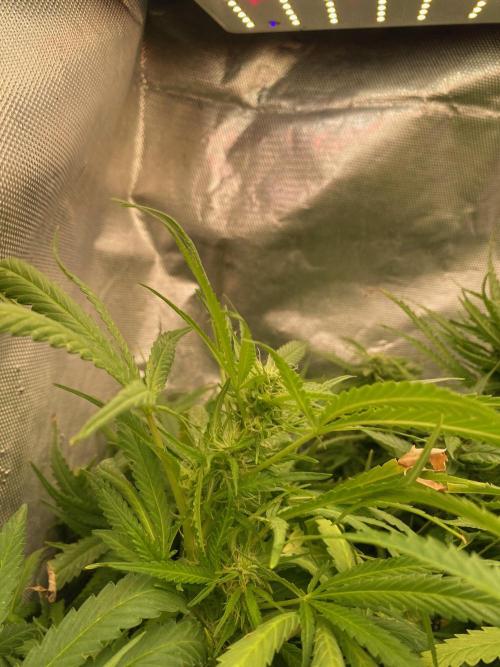
HoneyBlunt42 Plants are actively stretching upward, still in pre-flower. No buds visible yet. Watering from a bottle, 0.5 liters per day.
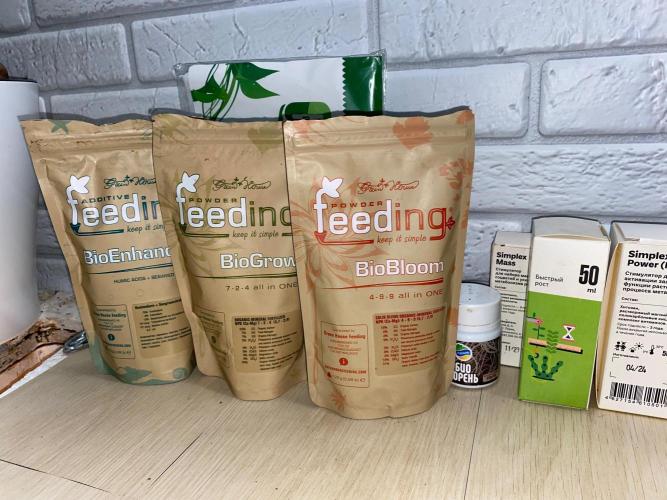
I've been wanting to try Green House Power Feeding Bio for a while — interesting feature: you can mix it once into the top layer of coco and then just water with plain water. Decided to give it a try.
Three days ago, I mixed 30g of Green House BioPower Feeding with 10 liters of coco substrate and top-dressed the plants. Since yesterday, I've been watering only with water plus additives:
CalMag — 1 ml/l
Simplex pH Down — 1 ml/l
Simplex Taste — 2 ml/l
Simplex Aroma Punch — 1 ml/l
Foliar feeding with Simplex Mass and Power stimulators once every 2 weeks (10 drops per liter). Raising the light once a week.
After mixing the charged coco, I burned some of the tops, but now the plants have recovered and are growing vigorously upward. I can barely keep up with tucking them under the net. Stems are getting stronger. Can't wait for flowering!
1 like
comments
Share
Used techniques
ScrOG
Technique
LST
Technique
9
Week 9. Flowering5mo ago
45 cm
Height
12 hrs
Light Schedule
25 °C
Day Air Temp
6.3
pH
No Smell
Smell
240 PPM
TDS
60 %
Air Humidity
0 °C
Solution Temp
22 °C
Night Air Temp
15 l
Pot Size
1 l
Watering Volume
10 cm
Lamp Distance
Nutrients 5
CalMag
1 mll
AromaPunch
1 mll
Taste
2 mll
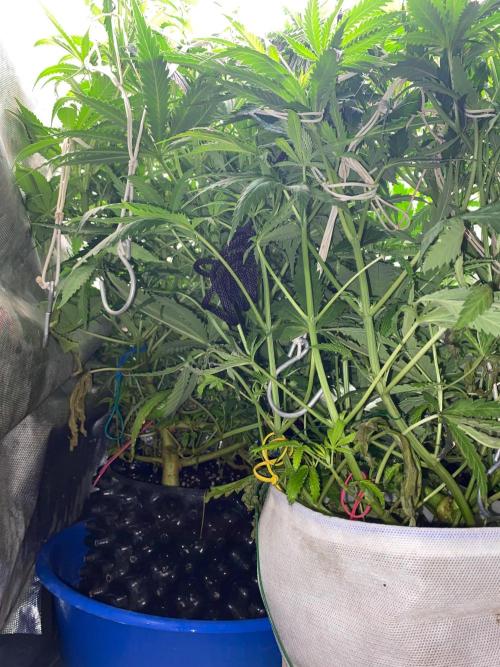
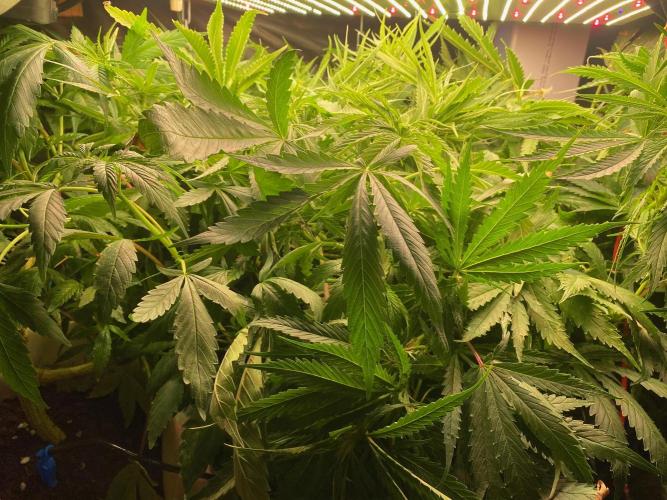
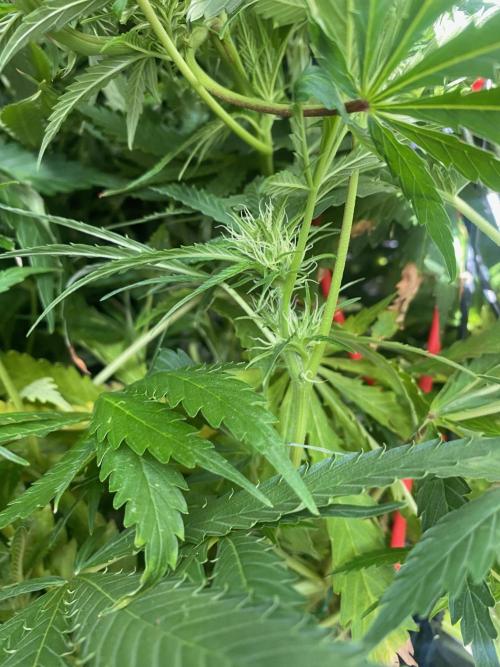
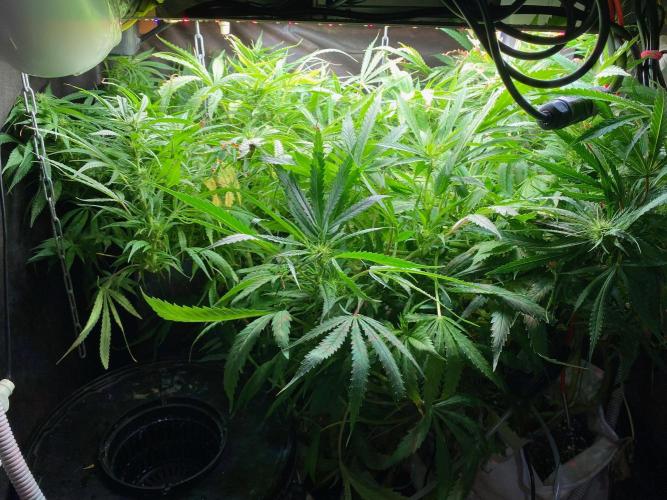
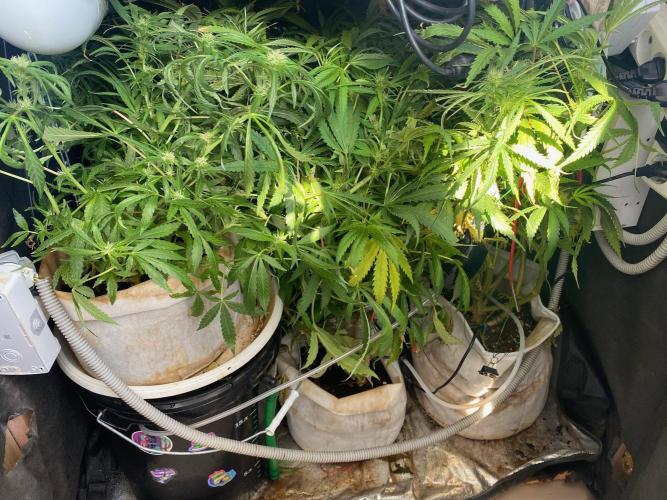
HoneyBlunt42 Day 69
Both plants are looking healthy — top leaves have grown to palm size. They're at 65 cm, again just 2 cm from the light. No burns.
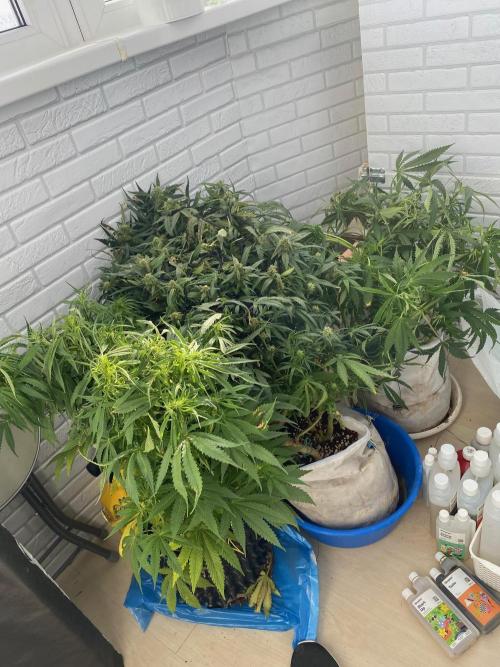
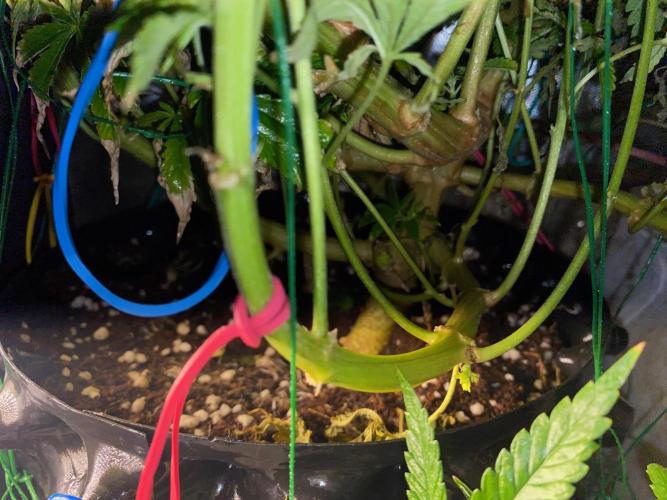
Pulled them out today and realized only one plant has barely started flowering after 4 weeks of 12/12. Looks like I was accidentally light-leaking it when feeding the other box. The plant closer to the door is barely flowering, while the one further back (which was shielded by the first) is already showing bud sites.
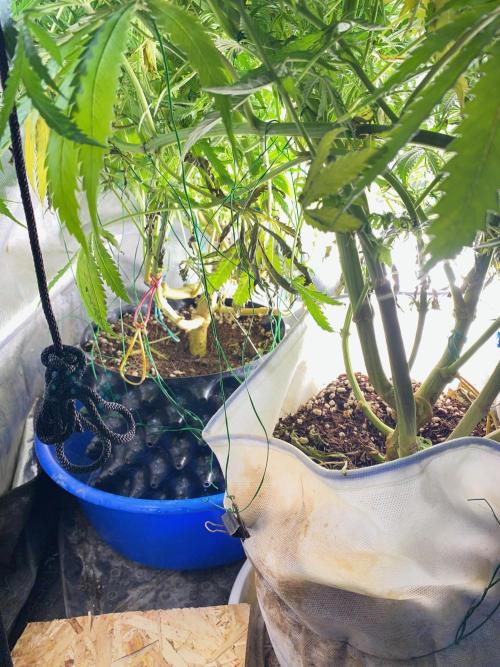
LST'd both girls down to 40–45 cm using soft tie wire — grabbed a roll from the garden store for 100 rubles. Moved them to the lower box, which runs the same light. Swapped them with a Jack Herer sativa that went up to the top box — she's flowering confidently now, and the extra headroom up there is already coming in handy.
While moving the three sativas around, I noticed one pot felt suspiciously light. Confirmed — took 4 L before any runoff came through. Need to water it more frequently and keep it away from the fan.
Overall, expecting an interesting yield from the lower girls in 8–9 weeks from today. Stems are thick, and after topping there are several fat main colas developing. Tops have dodged the light so far — hoping that holds.
Added supplemental lighting — a 150W / 2700K floodlight from Ozon for 1500 rubles. Looks like a solid deal; I'll report back on whether it makes a noticeable difference.
Growth is very active — hoping to get the bending done in time. Stems are still soft and taking LST well.
1 like
comments
Share
Used techniques
LST
Technique
10
Week 10. Flowering4mo ago
50 cm
Height
12 hrs
Light Schedule
27 °C
Day Air Temp
6.1
pH
No Smell
Smell
150 PPM
TDS
55 %
Air Humidity
15 °C
Solution Temp
18 °C
Night Air Temp
15 l
Pot Size
1 l
Watering Volume
9 cm
Lamp Distance
Nutrients 6
CalMag
1 mll
AromaPunch
2 mll
Taste
2 mll
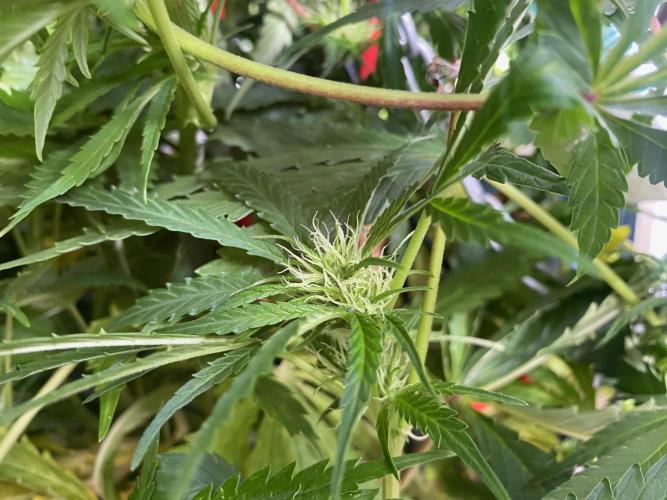
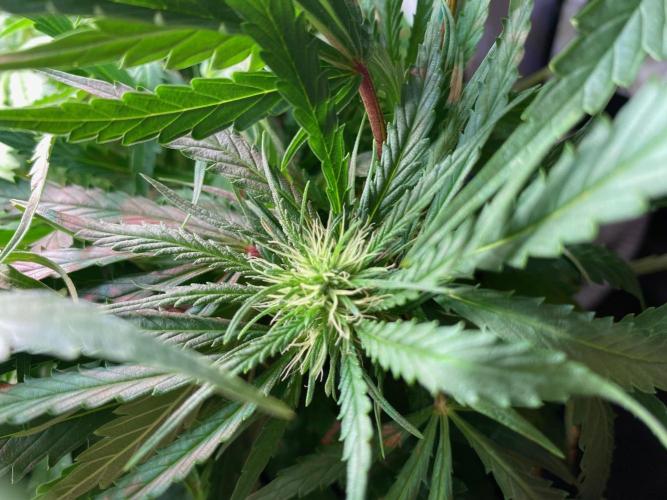
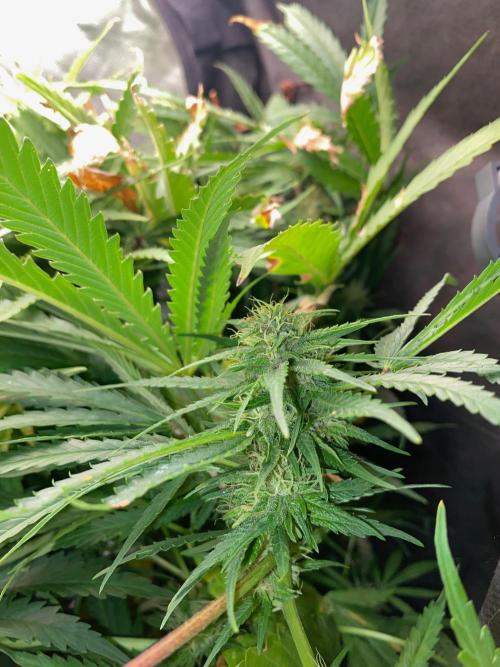
HoneyBlunt42 Day 73
The plants look healthy and deeply green. First buds have appeared — flowering is going great.
Over a week ago I removed the base nutrient Simplex Coco. Now running only Power Feeding Bio — mixed it into the coco and topped the substrate with it. Watering with plain water at pH 5.7–6.3, CalMag, and flavor additives at 1–2 ml/L: Simplex Aroma Punch and Taste.
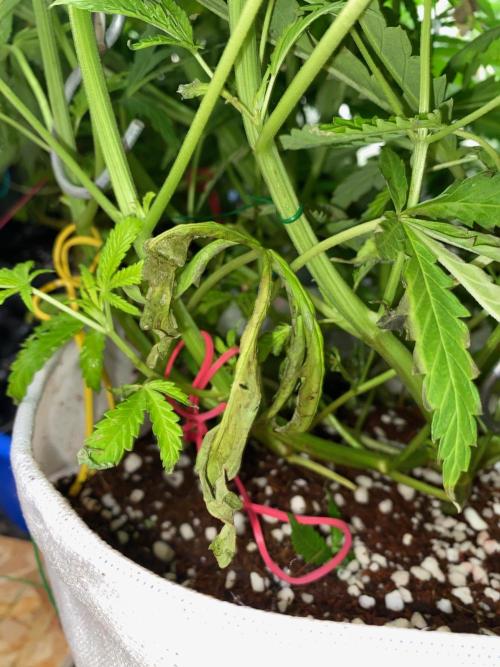
Previously these same plants showed nitrogen toxicity — red petioles on the large fan leaves when using Simplex Coco base at 2 ml/L as per the manufacturer's feed chart. On bio nutrients and water, new growth is coming in clean. Some leaves still show minor spots from previous acid overdose.
A week ago I ordered basic pH and TDS meters from a local marketplace. Now dialing in the water properly: first bringing TDS to the target level with CalMag, then adjusting pH down with Simplex pH Down. Sometimes as little as 1 ml of acid is enough for a 15-liter bucket.
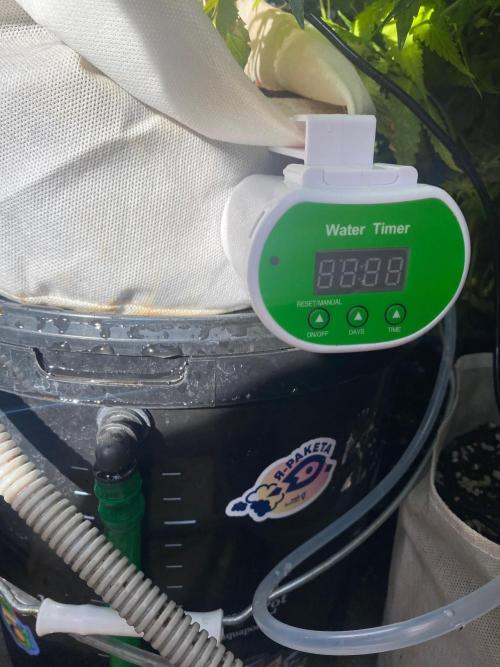
The new auto-irrigation system arrived — in the coming days I'll set up drippers in the substrate and find a 5-liter reservoir for the tank.
The speed at which the Durban plants have started flowering in a fully blacked-out tent is impressive.
Waiting for some fat buds! 🌿
2 likes
comments
Share
Used techniques
LST
Technique
11
Week 11. Flowering4mo ago
55 cm
Height
12 hrs
Light Schedule
24 °C
Day Air Temp
6.1
pH
Weak
Smell
160 PPM
TDS
40 %
Air Humidity
15 °C
Solution Temp
14 °C
Night Air Temp
15 l
Pot Size
1 l
Watering Volume
8 cm
Lamp Distance
Nutrients 4
CalMag
1 mll
AromaPunch
2 mll
Taste
2 mll
HoneyBlunt42 Day 76
One plant is actively flowering, the second is a bit behind. I'm topping the canopy every day to avoid light burn from the lamp. Set up an auto-watering pump that came in from Aliexpress.
The plants look healthy and green, maybe slightly paler than ideal. Thinking of doing one feeding with Simplex Coco mineral base. First time running GHS bio nutrients — not sure yet how well they cover macro requirements.
1 like
comments
Share
Used techniques
LST
Technique
12
Week 12. Flowering4mo ago
55 cm
Height
12 hrs
Light Schedule
24 °C
Day Air Temp
6.0
pH
Weak
Smell
110 PPM
TDS
45 %
Air Humidity
15 °C
Solution Temp
16 °C
Night Air Temp
15 l
Pot Size
1.5 l
Watering Volume
5 cm
Lamp Distance
Nutrients 7
CalMag
1 mll
AromaPunch
2 mll
Taste
2 mll
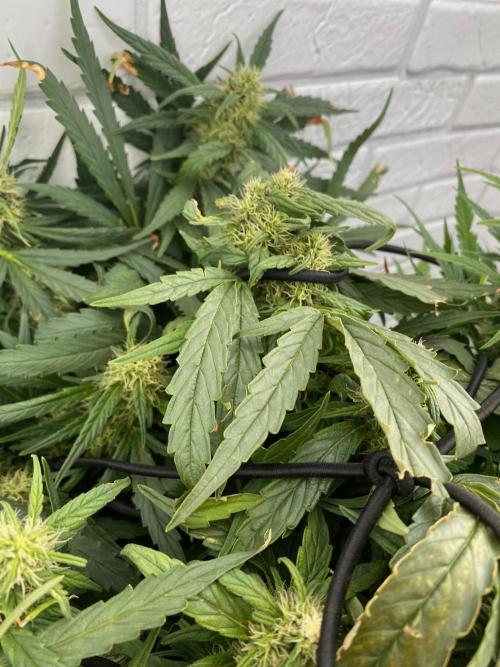
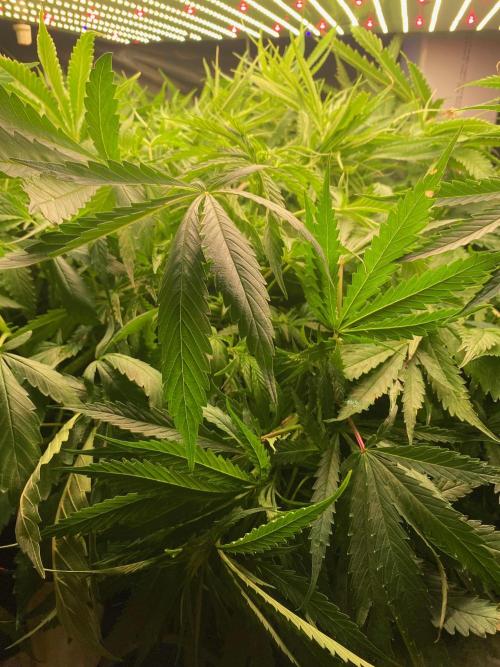
HoneyBlunt42 The bushes are shooting up fast — the fan leaves, palm-sized by now, are already poking into the light. LED is not HPS lamp, good for me :)
I'm training the branches daily with soft wire ties from the garden shop — cheap as chips. Watering with RO water, pH dialled in. A 15-litre reservoir makes it easy to manage PPM and pH, and the air stone keeps the solution well-oxygenated — roots love it.
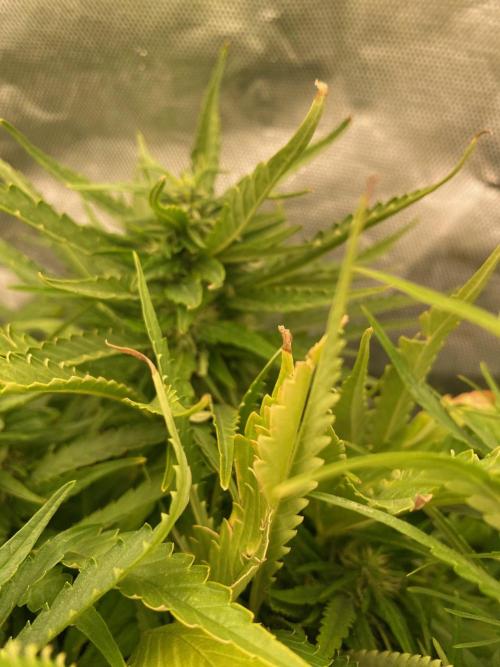
3 weeks in without Simplex Coco base. A couple of days ago the stems started showing a slight red tint. Figured I probably didn't mix enough nutrients into the top layer: I went with 3 grams per litre of substrate — 9 litres of Simplex coco brick and 3 scoops of nutes, carefully blended. Was worried about overdoing it.
Still, even at the minimum dose I got minor burn on the lower leaves. The substrate had been pre-soaked with Simplex Coco base — should've flushed it for a couple of days first with a CalMag solution and pH 5.6–6.3.
Three weeks later I top-dressed with another half scoop (5 g) per pot. For a long-flowering sativa that's pretty standard practice — topdressing every 2–3 weeks works well.
Overall, Bio Feeding is a really straightforward option — accessible and easy to follow even for a beginner like me. Can't wait to taste the end result: never grown bio before, only mineral nutrients.
5 likes
1 comment
Share
Used techniques
LST
Technique
13
Week 13. Flowering4mo ago


56 cm
Height
12 hrs
Light Schedule
26 °C
Day Air Temp
5.8
pH
Weak
Smell
115 PPM
TDS
30 %
Air Humidity
18 °C
Solution Temp
16 °C
Night Air Temp
15 l
Pot Size
1 l
Watering Volume
4 cm
Lamp Distance
Nutrients 7
CalMag
1 mll
AromaPunch
2 mll
Taste
2 mll
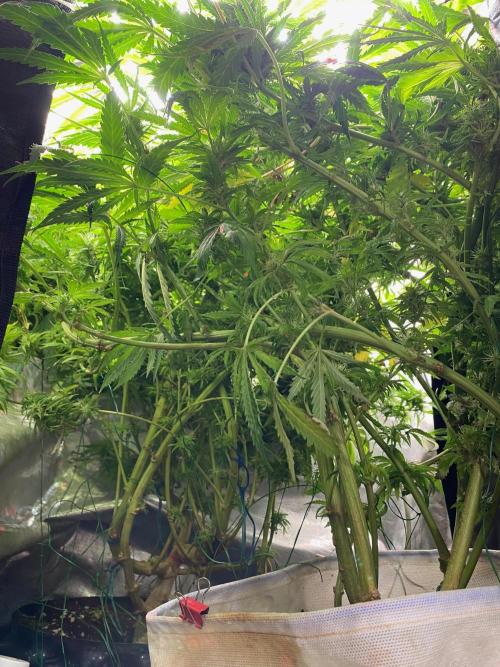
HoneyBlunt42 Day 84
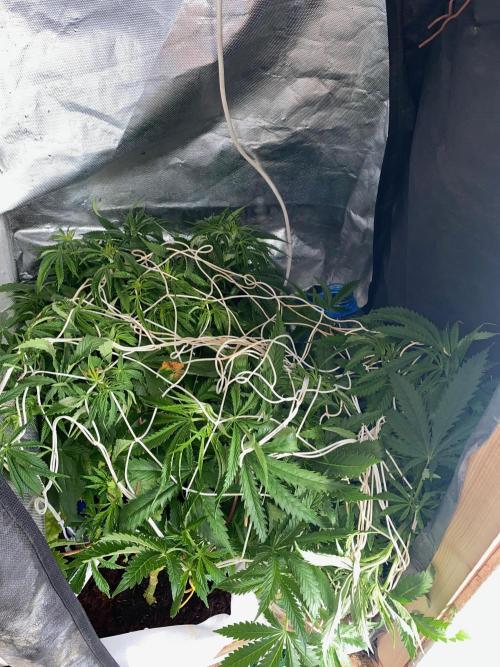
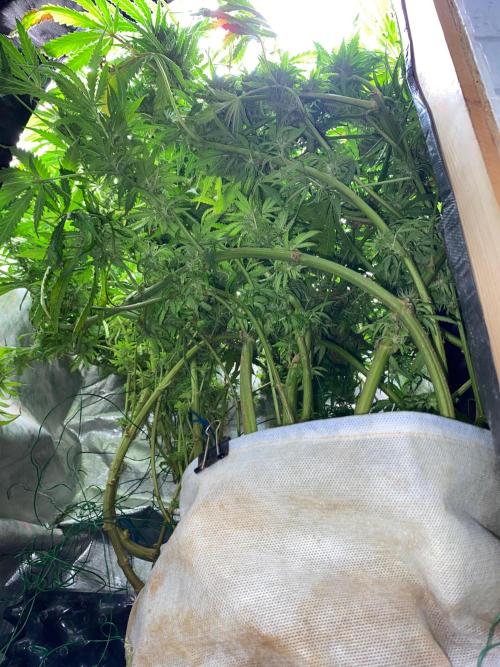
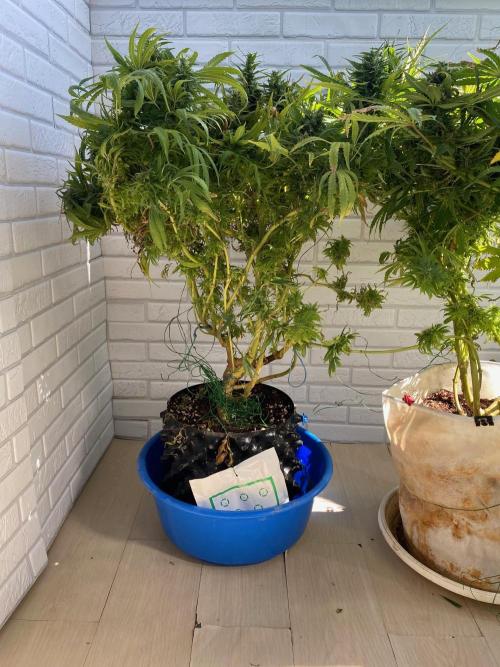
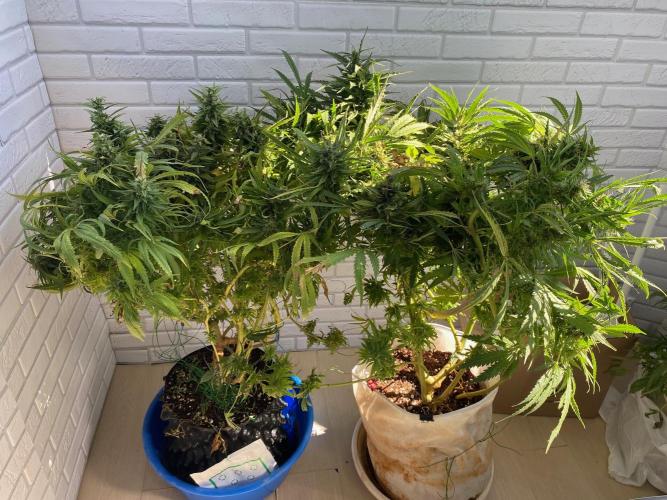
The Durban plants are actively growing foliage and reaching for the light, despite being bent. Every day after the lights go out, I bend their tops parallel to the floor (training). Sometimes the stems break slightly, but they are still flexible enough to recover. In 2-3 weeks, I plan to transplant them to a permanent location, where there will be 20-30 cm of space above the tops for ventilation.
In the next cycle, I think four weeks of vegetation will be enough for ripening. At Gordem Delicatesies (GD), Brazilians have stretched in 20 weeks, sometimes faster. For me, this variety develops more slowly; I'm not chasing maximum speed. Meanwhile, the Jack Herer is ripening in the box above them.
I'm waiting for a manicure table (thanks to Mila for the tip!). As soon as it arrives, I'll start harvesting. I'm glad that with this device I can meet the deadlines precisely.
Day 87
They hit a lamp and set one top on fire. The others miraculously survived. Today I tied the plants to their pots again with wire. I bent them so they were 10-15 cm from the lamp.
Some were tighter. I cut out a 5-liter bag containing the lower branches, which were turning yellow from lack of light, and the leaves the plant had shed on its own. Watering was light but regular.
I watered 3 liters by hand on top of the automatic watering. I added 1.5 liters of Simplex Taste and 1.5 liters of Simplex Aroma Punch. I started adding Simplex SilliX again—organic silicon is needed to strengthen the stems. Right now they look rather stiff; they bend easily by hand. This is a plus in my situation, but in a couple of weeks I want to see stronger, more vigorous central colas in the box.
Mold was appearing on the dry leaves at the bottom that I didn't remove in time. I took out all the bushes and carefully removed all the dry and yellow leaves. I chose the ones that came off without effort. Their plant has already finished growing. After this procedure, the fan was able to blow air through the base, meaning less mold.
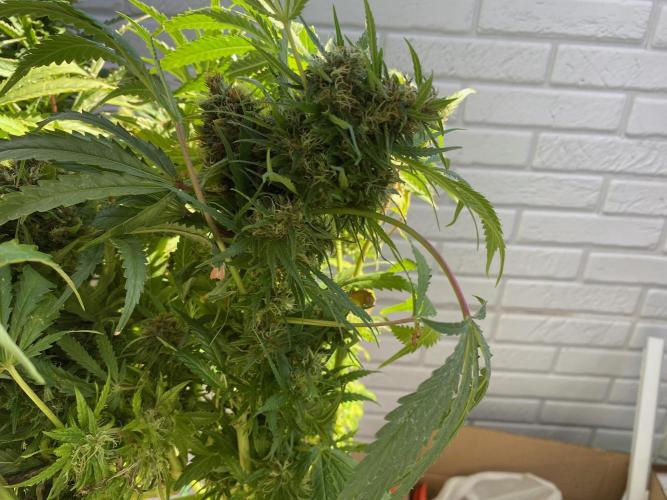
Young buds are ripening on both plants, about 1 cm in diameter. The upper leaves and flowers are healthy; they were eating the lower burdock leaves. It's interesting to watch the biofertilizer from Greens work. I'll add Simplex Mass and Simplex Power separately in the next few days. And after that, HB-101. I'll water with Fitosporin at least once. I also want to add "33 Bogatyrs" bacteria – @NBRZ recommended it.
Once a week, I manually pour a liter of solution with Simplex Taste (very similar to horse manure from the garden) and Simplex Aroma Punch – a potassium-sulfur additive to enhance aroma and flavor.
2 likes
comments
Share
Used techniques
LST
Technique
14
Week 14. Flowering4mo ago

55 cm
Height
12 hrs
Light Schedule
26 °C
Day Air Temp
6.2
pH
Normal
Smell
250 PPM
TDS
40 %
Air Humidity
18 °C
Solution Temp
18 °C
Night Air Temp
15 l
Pot Size
1 l
Watering Volume
10 cm
Lamp Distance
Nutrients 7
CalMag
1 mll
AromaPunch
2 mll
Taste
2 mll
HoneyBlunt42 Day 90
The Sativa plant is beautifully swollen at the top. I've watered it minimally for the last three days.
Today I'll mix up the solution and add a 1 g/l Bio Enchanter. It's alkaline (pH 8), so I'll first dilute 15 liters of the solution with 2 ml/l CalMag in the aquapot to 250 PPM. Then I'll lower the pH to 5.0, as recommended by the fertilizer manufacturer. After that, I'll dissolve a capful—one and a half liters of black powder. These 15 liters should be used within 24 hours.
My slightly drying bushes will appreciate a third of the pot's volume being watered.
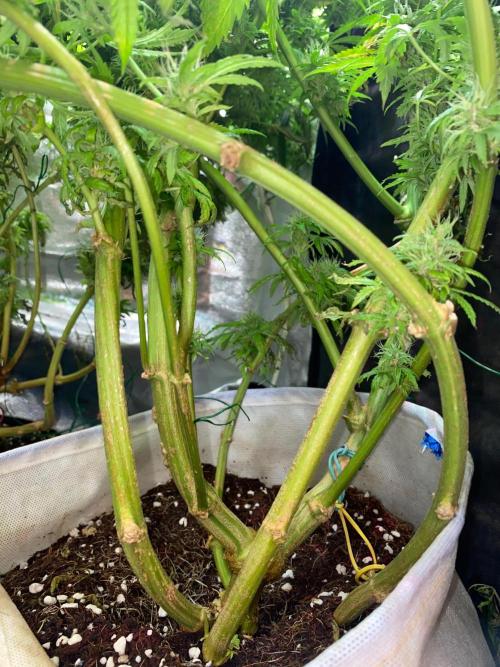
The stems are showing red spots—it looks like I need to add 1-2 g/l Bio Bloom to the coco and mix 2-5 liters of the coco into the top layer. After bending and pruning, the plants feel stronger and healthier.
To correct the nitrogen deficiency, I'll also add a liter of Simplex Start Up 4 ml/l.
Day 95
They're doing well after moving to their new space. I didn't change the photoperiod to avoid stress. Yesterday, I didn't water them at all because they were experiencing water deficiencies. Today, I watered each plant 2 liters of solution, 10% of the solution before draining. I also added a weak concentration of Simplex Coco mineral fertilizer, 1 ml/l.
2 likes
1 comment
Share
Used techniques
LST
Technique
15
Week 15. Flowering3mo ago
57 cm
Height
12 hrs
Light Schedule
26 °C
Day Air Temp
6.5
pH
Weak
Smell
140 PPM
TDS
40 %
Air Humidity
18 °C
Solution Temp
20 °C
Night Air Temp
15 l
Pot Size
1 l
Watering Volume
15 cm
Lamp Distance
Nutrients 8
CalMag
1 mll
AromaPunch
2 mll
Taste
2 mll
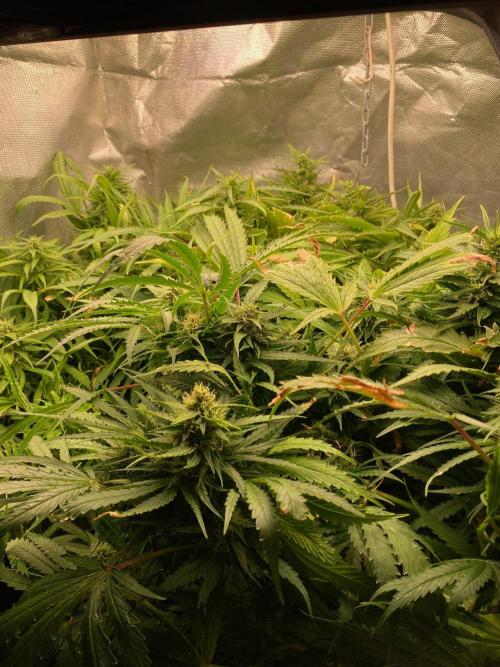
HoneyBlunt42 The buds are gradually swelling, and sugar has appeared. I water them daily with a solution containing CalMag and a pH of 6.5.
Every two weeks, I add a 1 g/l addition of Bio Enchancer. I noticed some pale leaves this week, so I gave them a small amount of a light solution of Hesi Bloom at 2.5 ml/l (half the amount used on the hydro).
At 15 weeks, the coco requires regular watering with an automatic waterer. Sometimes I manage to water two or three times a day, but more often I add a liter of the prepared solution to the pot once a day.
2 likes
2 comments
Share
16
Week 16. Flowering3mo ago
58 cm
Height
11 hrs
Light Schedule
26 °C
Day Air Temp
6.3
pH
Normal
Smell
140 PPM
TDS
40 %
Air Humidity
18 °C
Solution Temp
21 °C
Night Air Temp
15 l
Pot Size
1 l
Watering Volume
10 cm
Lamp Distance
Nutrients 5
CalMag
1 mll
AromaPunch
2 mll
Taste
2 mll
HoneyBlunt42 The plants are doing well. I water each plant daily with 1-2 liters of solution (reverse osmosis water + CalMag 1 ml/l + pH Dow 0.3 ml/l).
I also added Simplex Coco A+B at half strength (1 ml/l) once.
The leaves quickly turned yellow and dried out, and the tops turned pale. I mixed 3 g/l of fertilizer; the full 5 g/l needed to be mixed into the substrate to avoid deficiencies.
3 likes
comments
Share
17
Week 17. Flowering3mo ago


60 cm
Height
11 hrs
Light Schedule
26 °C
Day Air Temp
6.5
pH
Normal
Smell
140 PPM
TDS
40 %
Air Humidity
20 °C
Solution Temp
22 °C
Night Air Temp
15 l
Pot Size
1.5 l
Watering Volume
8 cm
Lamp Distance
Nutrients 3
CalMag
1 mll
AromaPunch
2 mll
Taste
2 mll
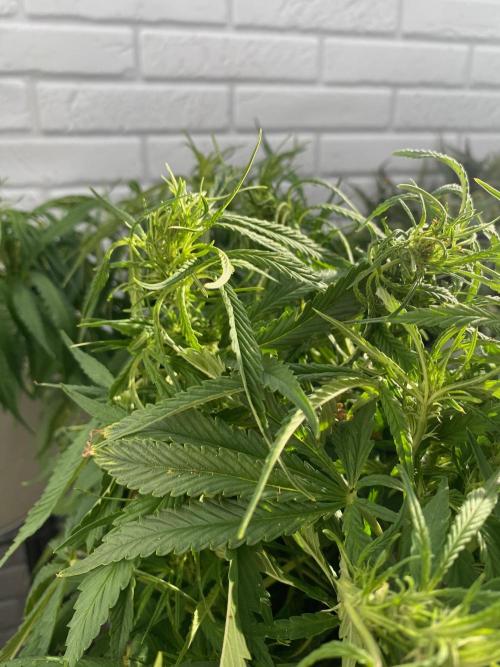
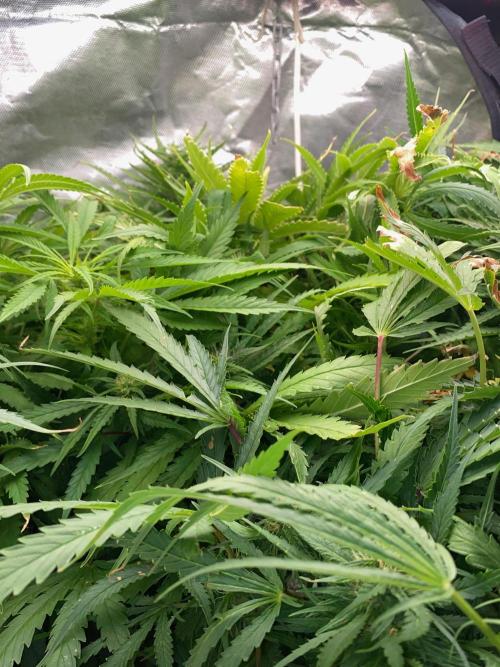
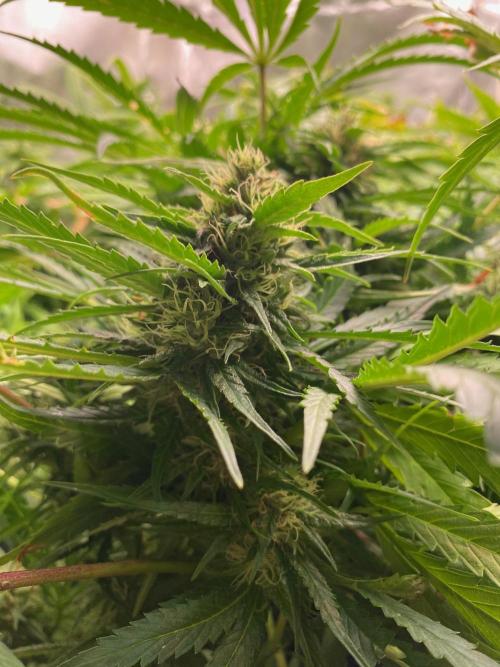
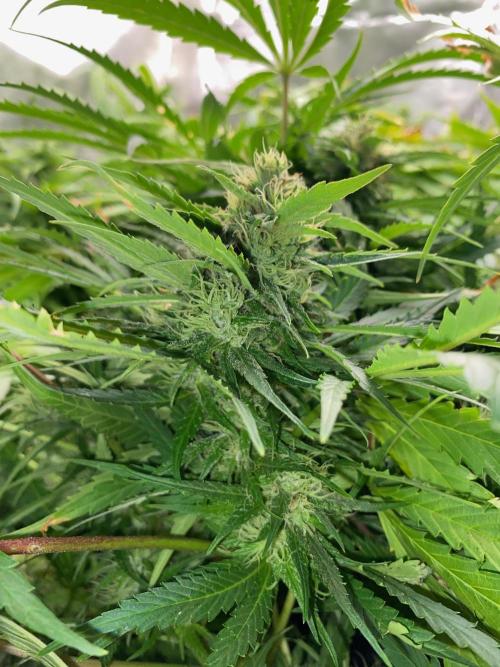
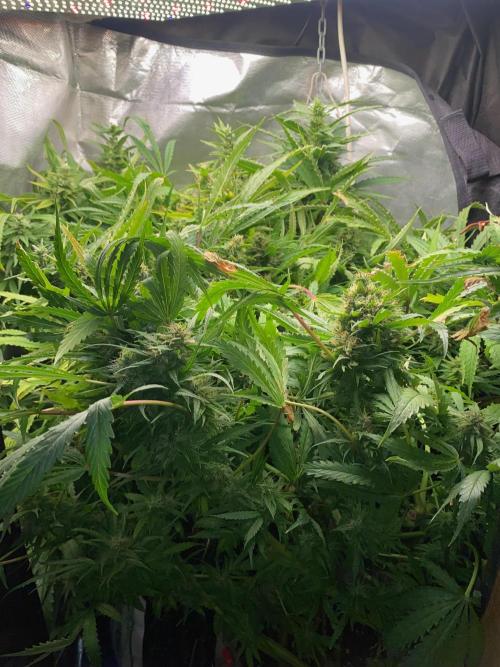
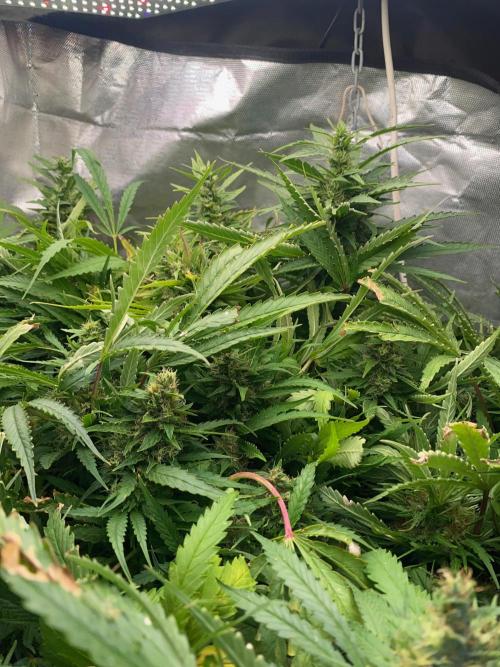
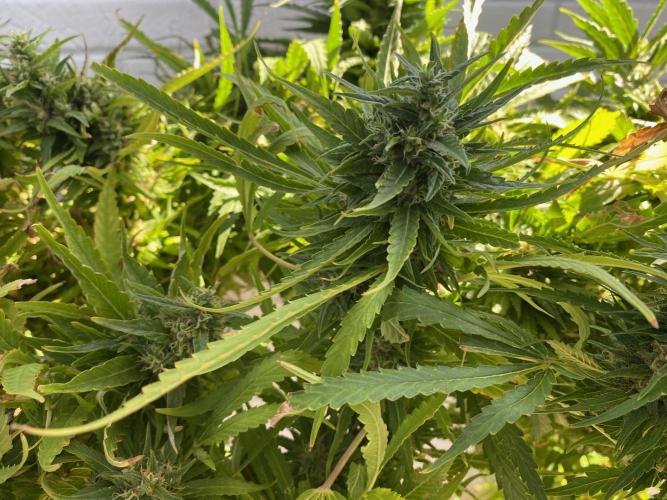
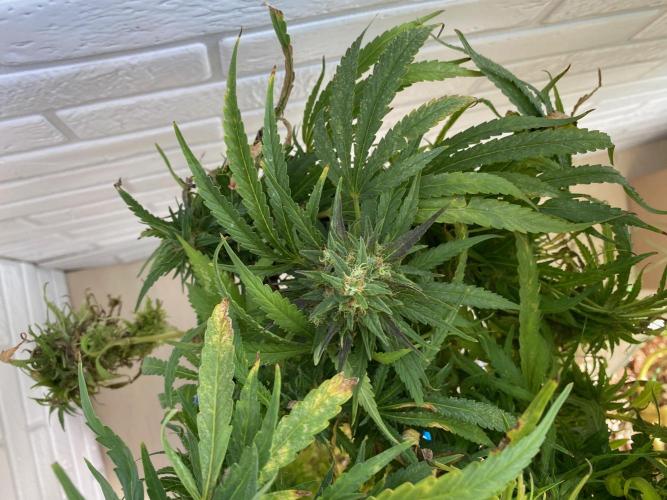
HoneyBlunt42 Durban Poison are flowering beautifully. This Sativa strain is also putting out a few new shoots, even here in week 17.
Either I accidentally let some light in during the day a couple of times, or—more likely—I trimmed away some small lower branches that were dying from light deprivation, and that triggered a minor burst of growth at the tips. Otherwise, they are flowering beautifully; the colas are bulking up, though they haven't really started to densify yet. A powerful aroma has emerged, and a sticky resin residue is starting to linger slightly on my hands. There is almost no visible "sugar" (trichome frosting) on the leaves.
They are drinking about 1–2 liters each per day. For the most part, I’ve been feeding them just water supplemented with Cal-Mag and acidifiers throughout the week. Occasionally, I add 2 ml/L of Simplex Aroma Punch.
I’m hoping to harvest a decent yield this time around; the main stems are certainly robust enough. Seventeen weeks is an insanely long grow cycle. In the future, I’ll be switching to "Fast Flowering" strains (40-day cycles) or varieties with ultra-short flowering periods—something like Jelly Donutz from this same seed bank.
1 like
comments
Share
18
Week 18. Harvest3mo ago
Happy Harvest Day!


8/10
Rated
This strain proved challenging to grow in a very confined space; it is best cultivated in a 1m x 1m grow box. The buds are large, but somewhat airy. It has a long flowering period—strictly for those with the patience to wait.
It's an interesting strain. I'd like to find a similar FF version. Growing it proved challenging in small spaces—judging by the thickness of the central stem, it didn't have time to reach its full potential.
Thanks to DutchPassion for a strong, fairly robust strain with an interesting effect!
Show more
Translate
Spent 121 days
Ger Veg Flo Har
825 g
Bud wet weight per plant
75 g
Bud dry weight per plant
2
Plants
0.36 m²
Grow Room size
Hard
Difficulty

Creative, Energetic, Talkative
Positive effects

Herbs
Taste
Height
Day air temperature
Air humidity
PPM
PH
Light schedule
Solution temperature
Night air temperature
Pot size
Lamp distance

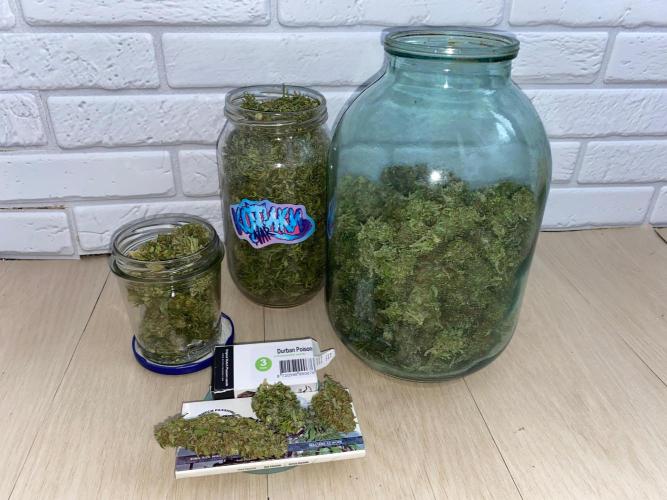
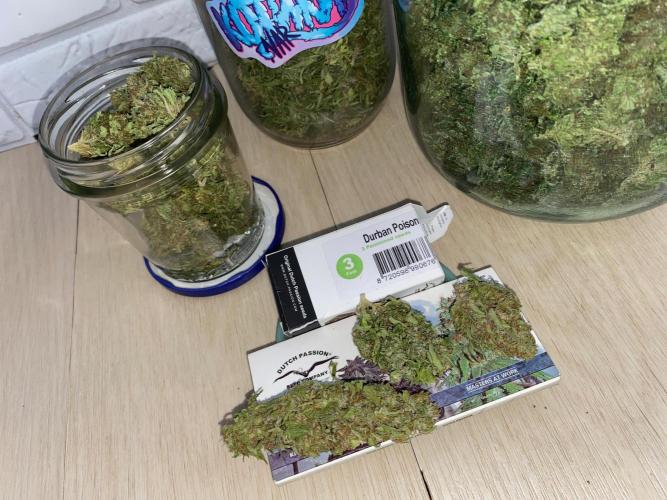
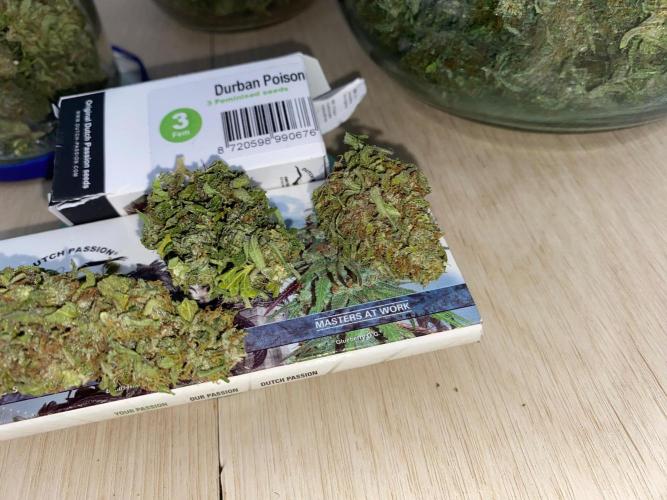
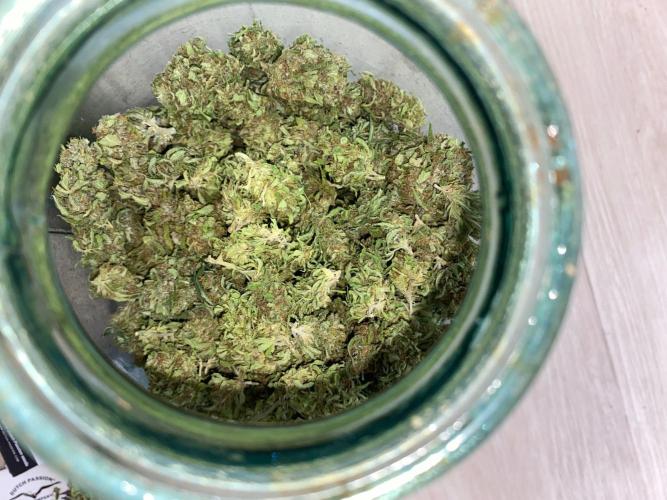

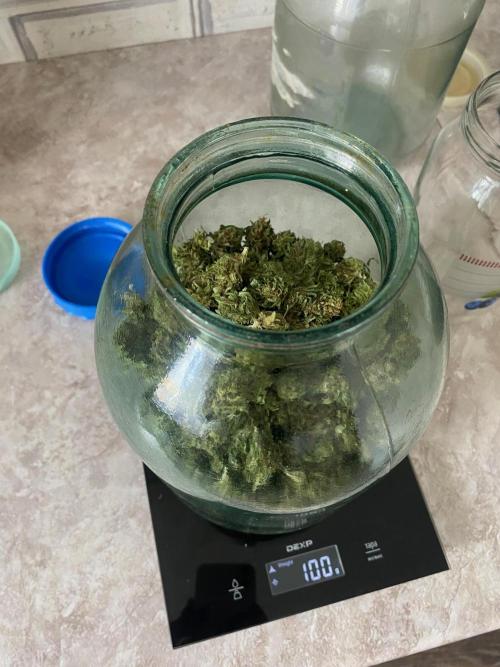
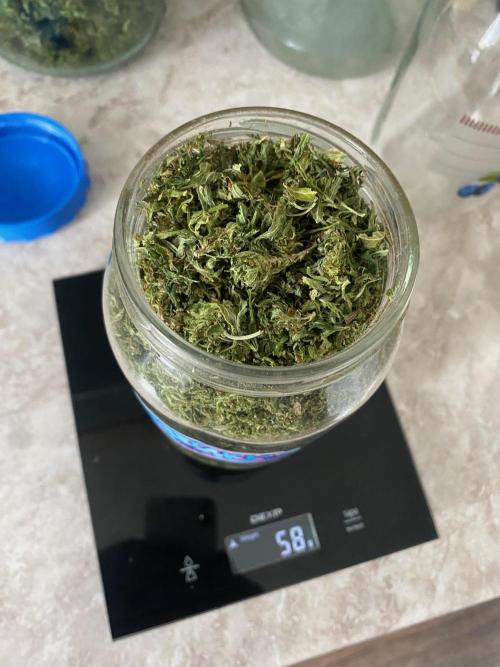
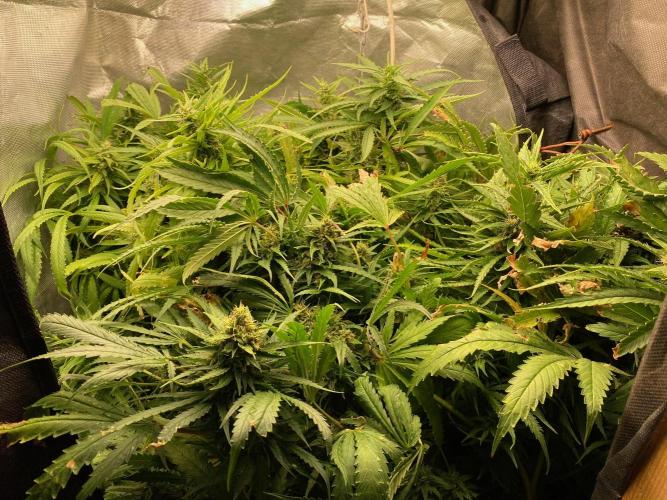
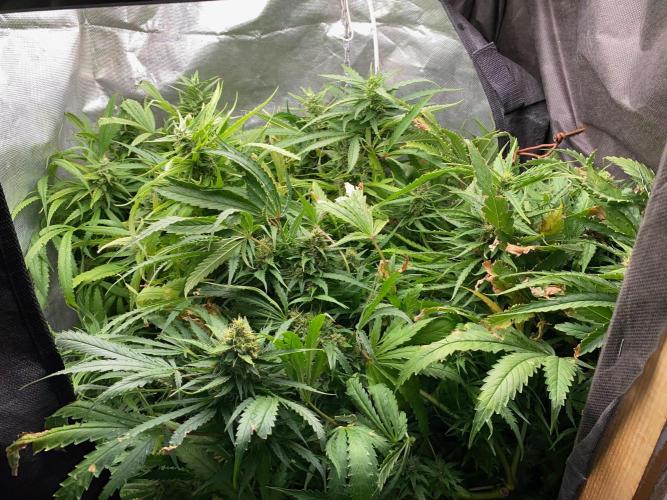
HoneyBlunt42 The harvest took about four hours; the buds are somewhat airy. The yield is pleasing.
I trimmed off the large and medium-sized leaves and hung the crop in a ventilated drying box for approximately seven days.
likes
comments
Share
Equipment Reviews


4 comments
Sort by
popularity
popularity
newest
oldest

GunnzGrowz commentedweek 153mo ago
Looking dank yo! Durban Poison is going outdoors next month. Growing her with some pure indica. Love your grow
like 1

HoneyBlunt42 commented3mo ago
@GunnzGrowz, thanks, bro. Good luck in your grow 🙌
like 1

DutchFarmer commentedweek 144mo ago
🌿💚 Amazing progress! Everything is dialed in perfectly 👌🔥 Respect! I also document my grows on YouTube—would really appreciate the support and love 💚📺🌱
likes

wolfvb commentedweek 124mo ago
She's developing nicely! Love the training approach. Healthy growth all around!
likes

the end.
Enjoying this diary? Follow for more updates!


Prefer the old Diary view?
Go back to the old Diary view