


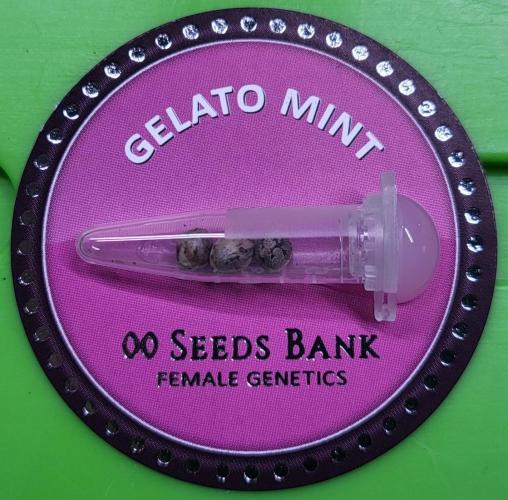
00seeds Gelato Mint - Couple of Plants



VEG
Ionframe Evo 4 Light Emitting Diodes/300W
FLO
Ionframe Evo 4 Light Emitting Diodes/300W


Fan
Cloudray S6

Contr
AI+

Mix
Living Soil von Couple of Plants


Indoor
Room Type
Transplantation
weeks 2
Topping
weeks 3-5
LST
weeks 4-6
ScrOG
weeks 6
Defoliation
weeks 8, 10
40 set_lilers
Pot Size
Start at Harvest
G
Germination9mo ago
Nutrients 1
Mykorrhiza
1 mll
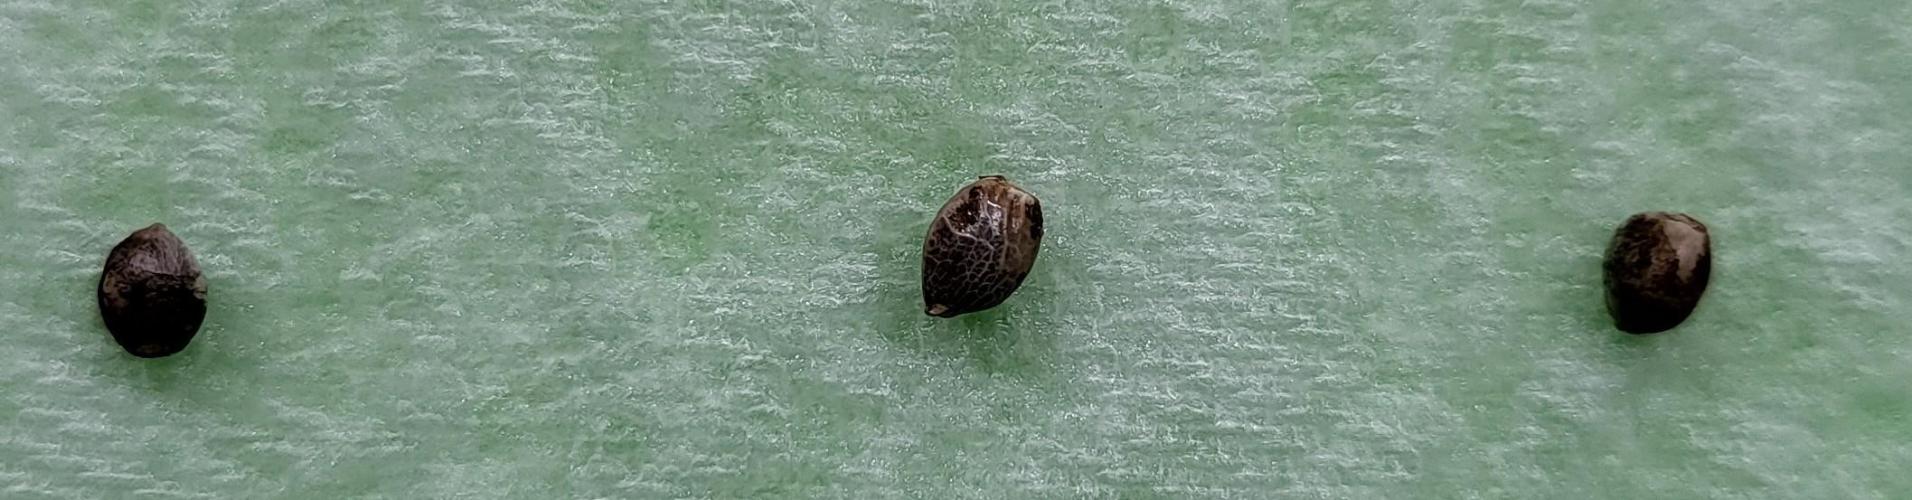
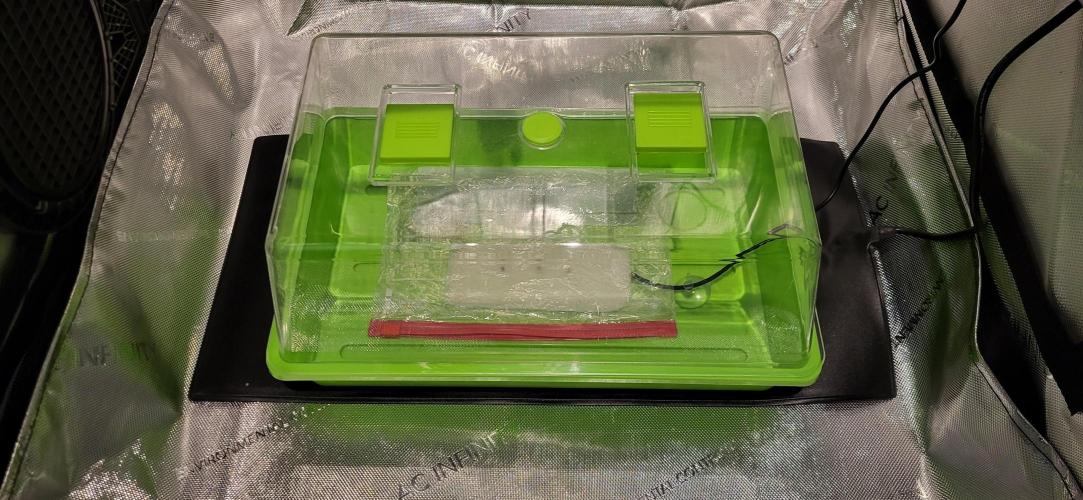
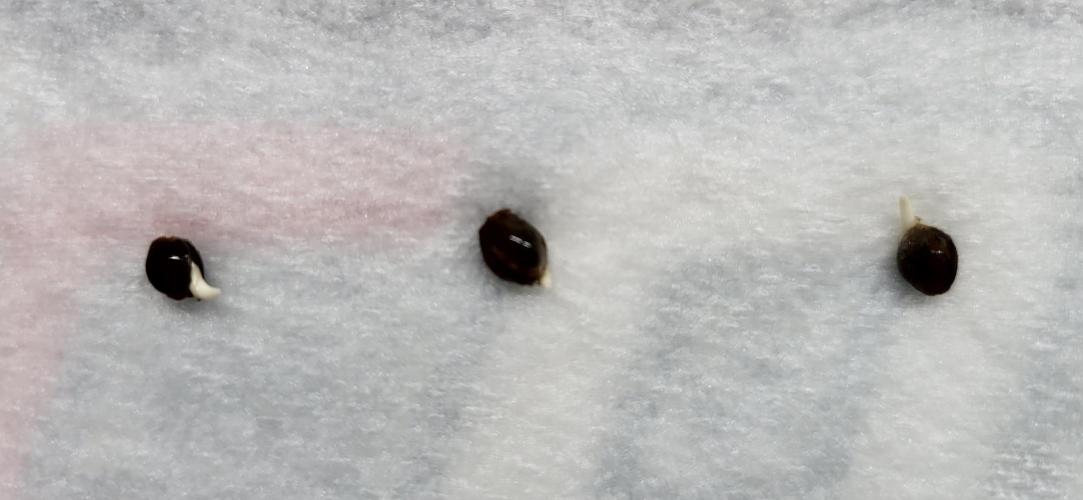
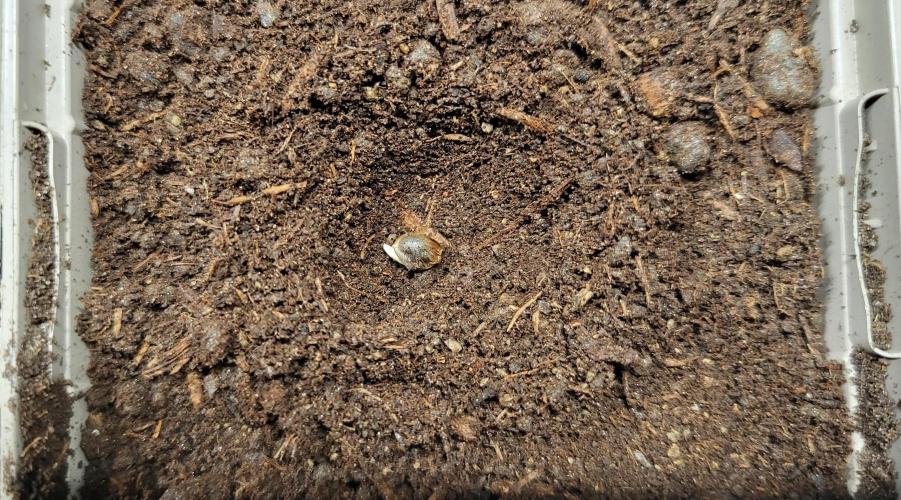
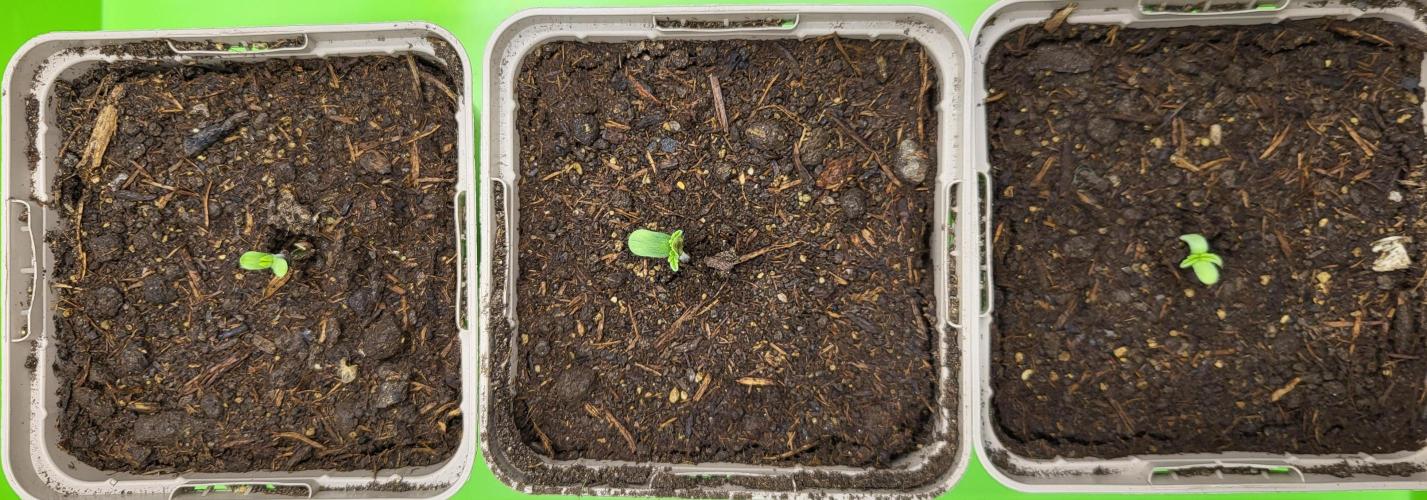
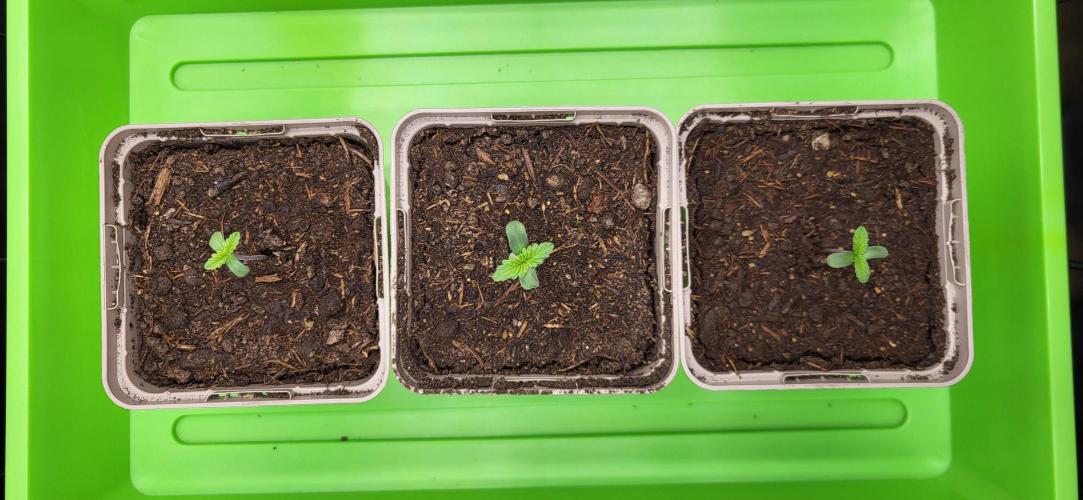
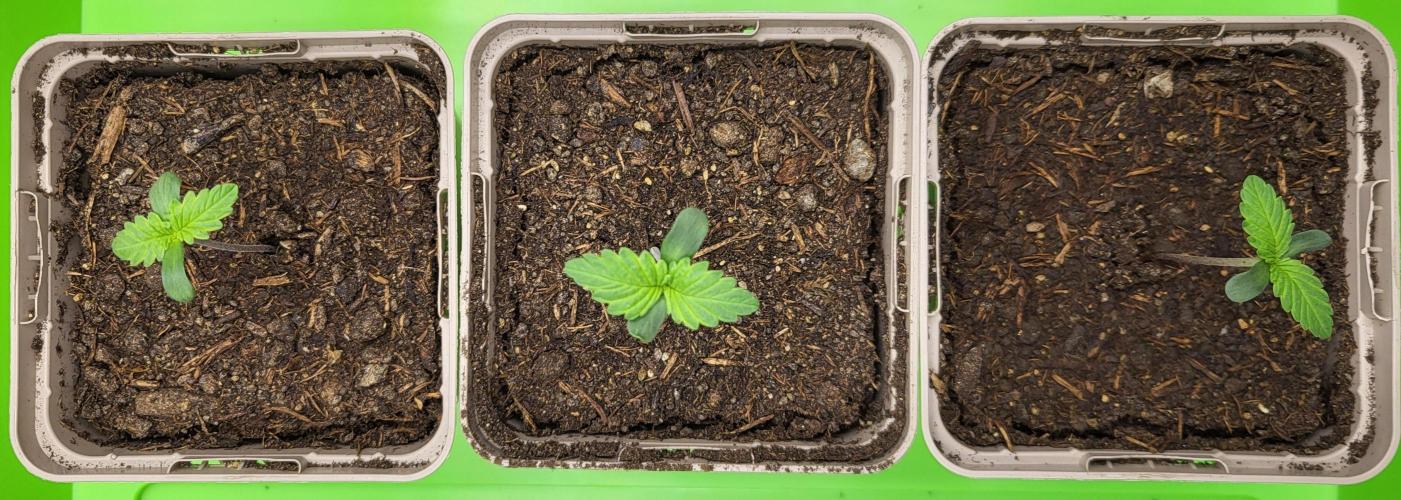
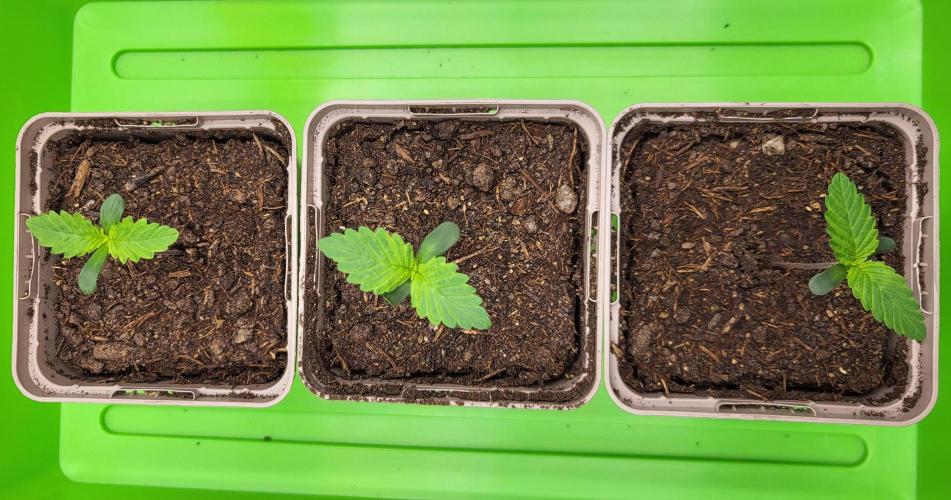
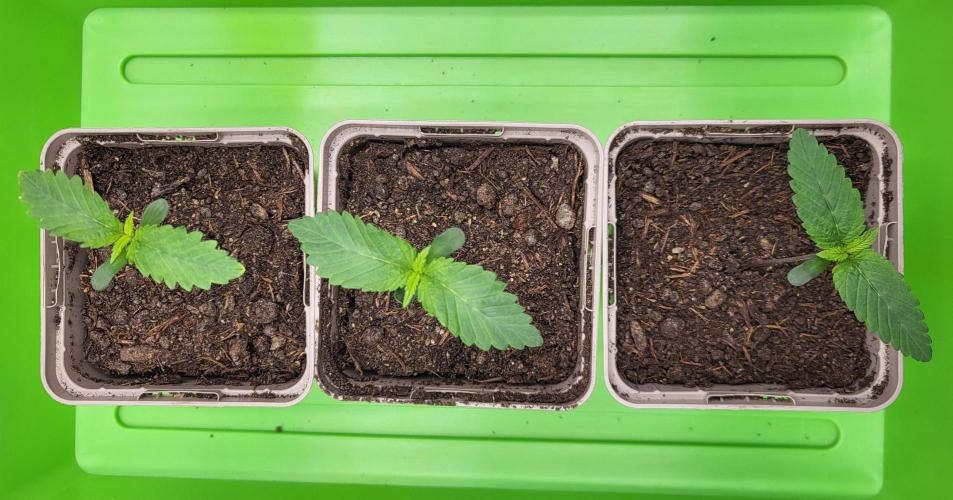
Alvareas On November 29th, I packed 3 seeds in a damp paper towel. I put the paper towel in a zip bag. The zip bag goes into a mini greenhouse, which I place on a heating mat at 25 degrees. By December 1st, the seeds were ready for the seedling soil. For seedling soil, I use the seedling soil from Sonnenerde. This goes into 0.5-liter seedling pots. The soil was previously inoculated with mycorrhiza and moistened. I make a small indentation in the soil, place the seeds in it, and lightly cover them with soil. After that, I lightly spray the soil again with a spray bottle to ensure the seeds have good contact with the soil. Then the seedling pots go back into the mini greenhouse, which remains on the heating mat at 25 degrees. From this point on, I let the LED run 24 hours and adjust the height so that I have about 100 PPFD. This way, the seedlings get direct light as soon as they poke their heads out. By December 3rd, it was time, and all 3 seedlings were visible. After that, the LED was switched to 18/6.
4 likes
comments
Share
Used method
Paper Towel
Germination Method
1
Week 1. Vegetation9mo ago
5 cm
Height
18 hrs
Light Schedule
26 °C
Day Air Temp
6.5
pH
No Smell
Smell
80 %
Air Humidity
24 °C
Night Air Temp
0.5 set_lilers
Pot Size
0.1 set_lilers
Watering Volume
40 cm
Lamp Distance
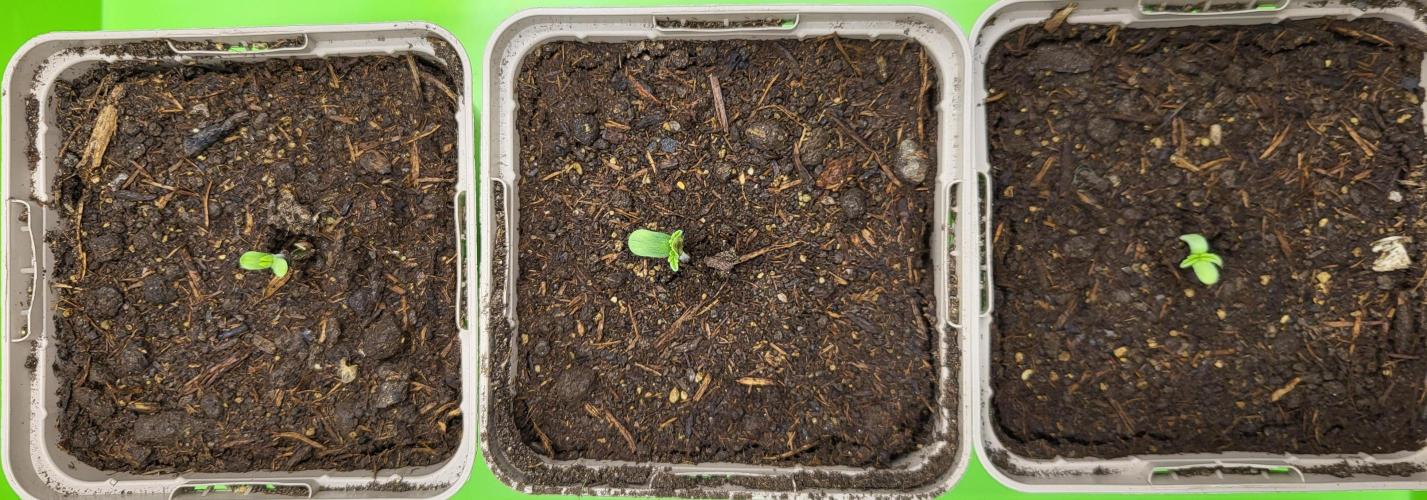
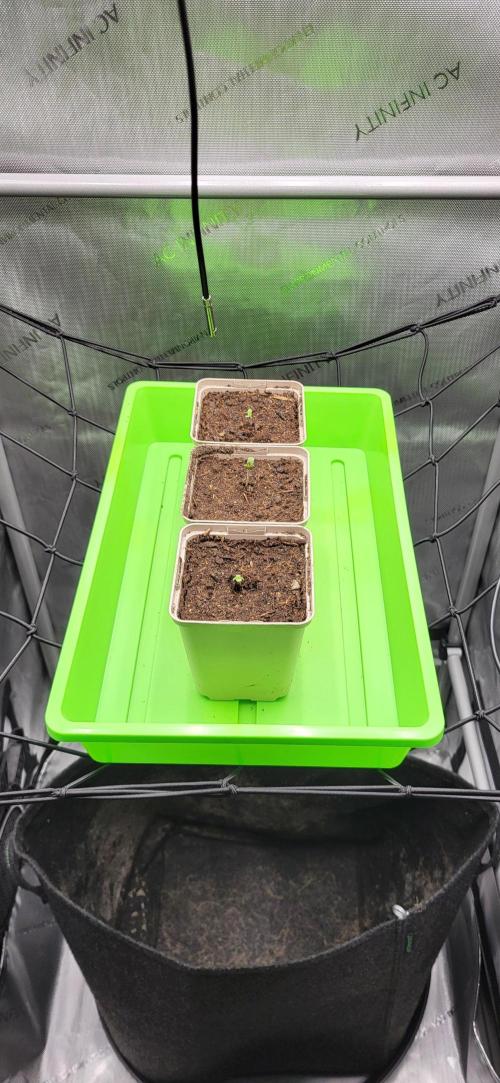
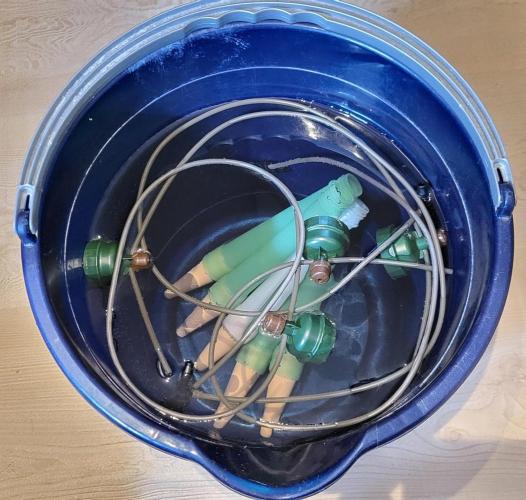
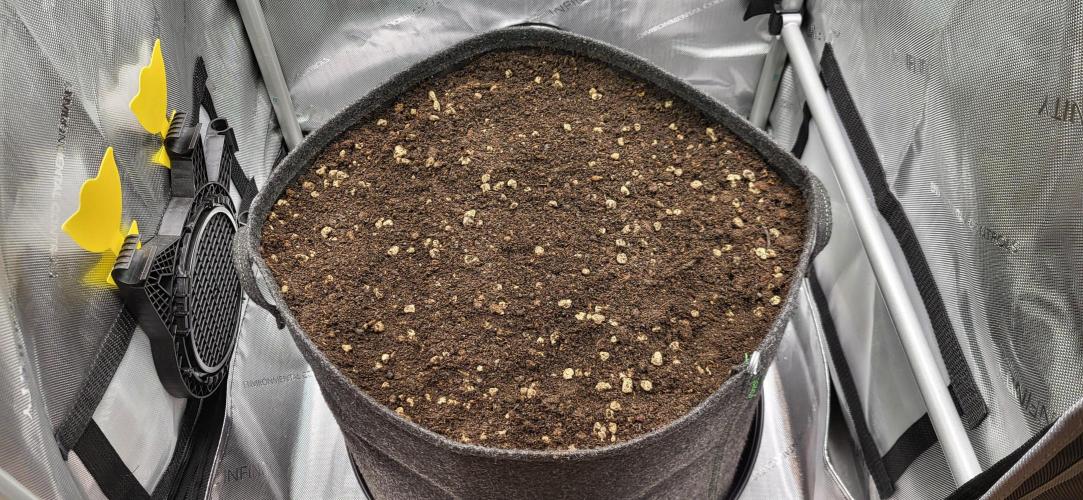
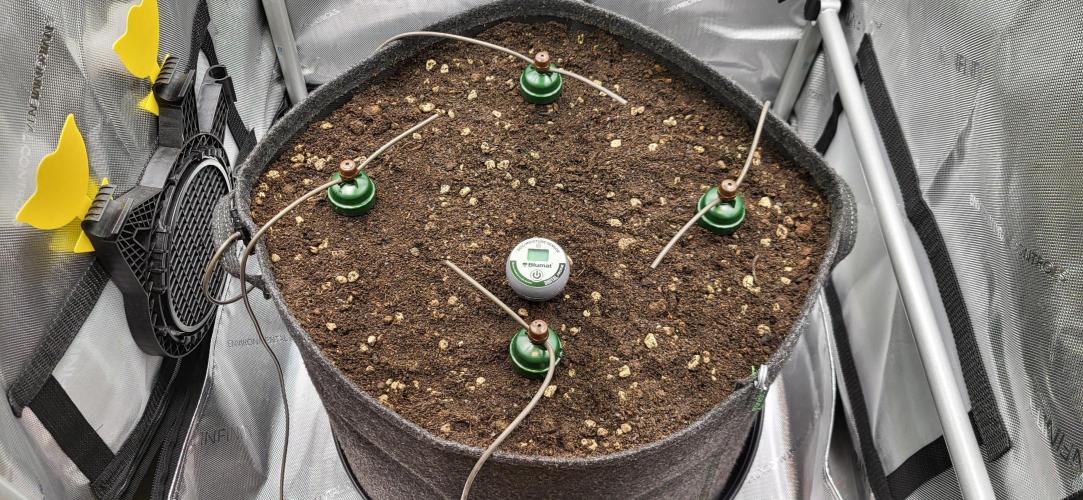
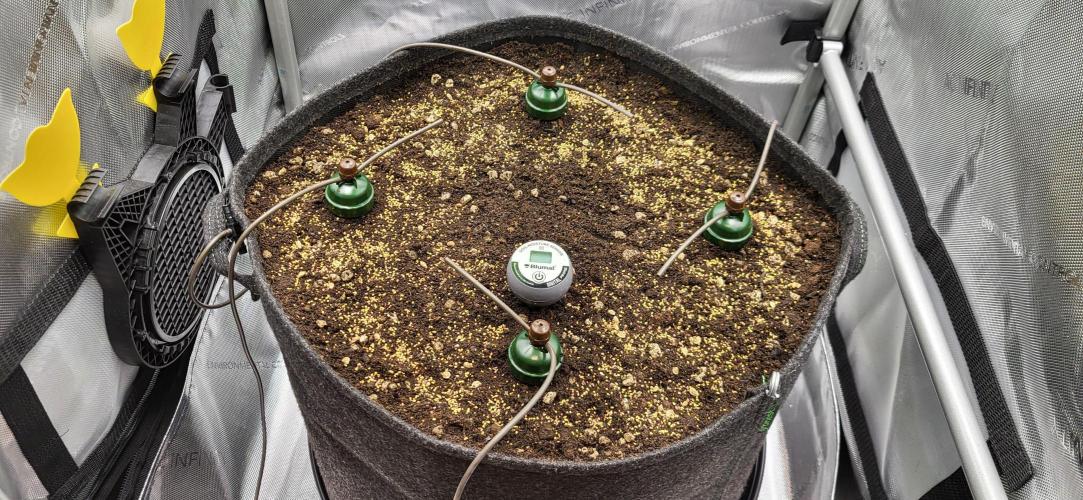
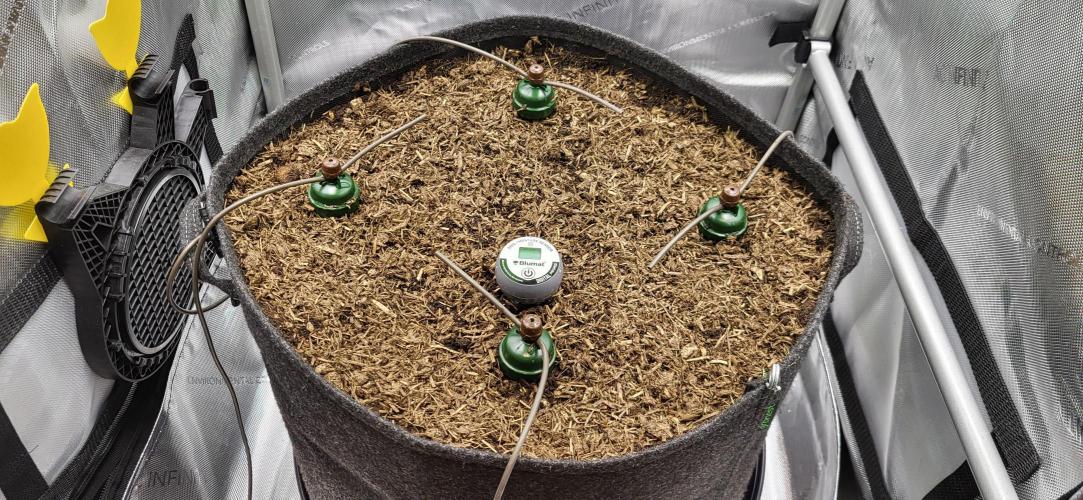
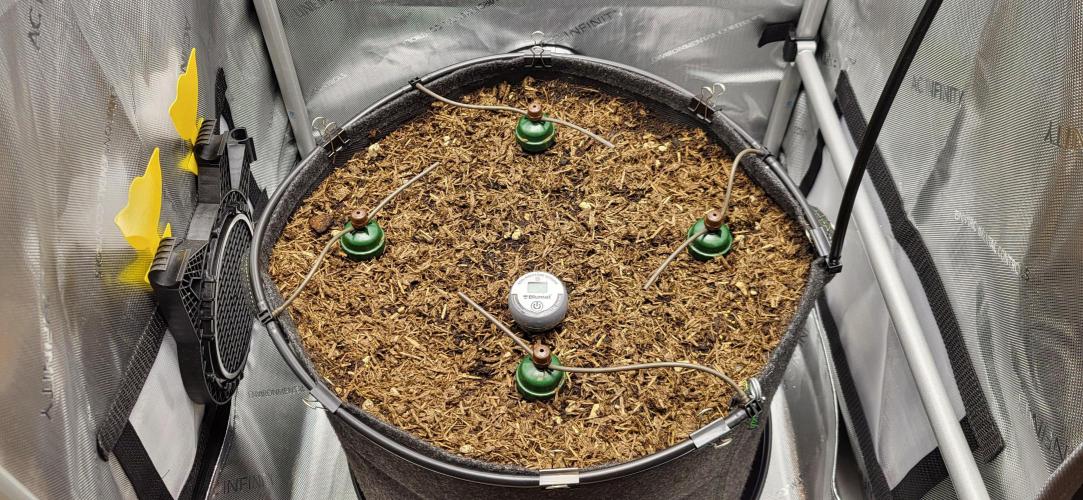
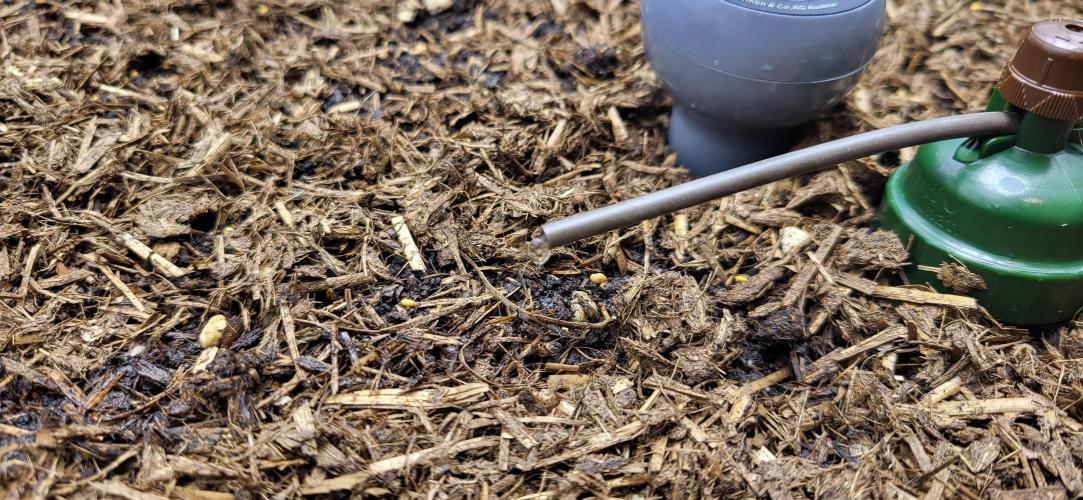
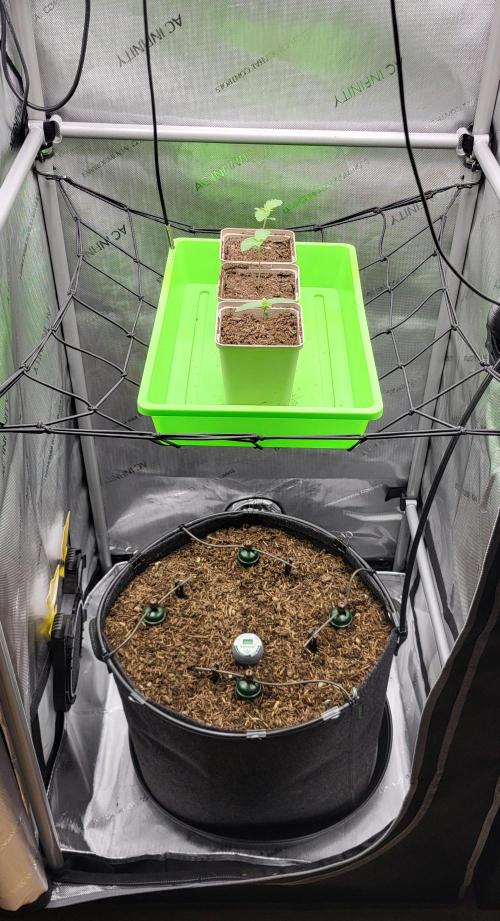
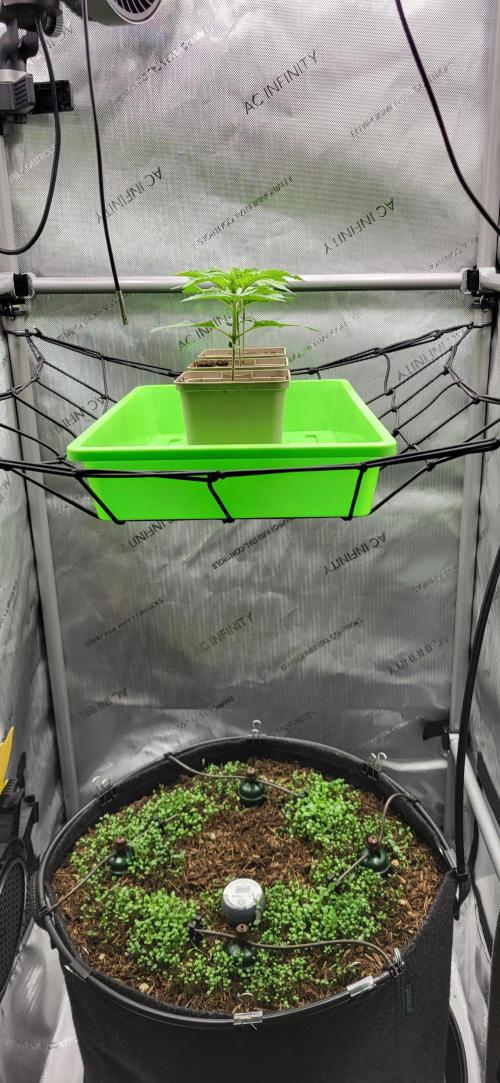
Alvareas Since I want to work with Living Soil and Cover Crop, I set up a SCROG net in the middle of the tent. I placed the bottom of the mini greenhouse with the seedling pots on the SCROG net. This way, I could prepare the 40-liter pot with the Living Soil on the floor of the tent. The pot was filled with Living Soil, which I felt already had optimal moisture, so it wasn't watered anymore. After that, I inserted 4 Blumat Maxi, which had been soaking in water for 24 hours, and also the Blumat Digital Tensiometer. After inserting them, I watered them with 100ml to ensure good contact with the soil. Then, I mixed in a clover blend, also from Couple of Plants, into the top layer of soil and lightly covered it with mulch from Sonnenerde. I then moistened the surface with 100ml from a spray bottle. I set the Blumat drippers a day later to give them time to adjust to the soil. The tensiometer showed 117 mbar. At the last dripper in the row, I vented the system and then, starting from the last dripper, adjusted one after the other so that I had a hanging drop and left the setting as is. Since my goal is a constant 100 mbar, the drippers were fine-tuned daily. After each adjustment, I waited a day to assess the effects of the adjustment. I filled the Airpot tank with 10 liters of water. Since my tap water has a rather high pH value, over 8, I adjust the water in the tank to 6.5 to not make it too hard on the soil life.
5 likes
2 comments
Share
2
Week 2. Vegetation9mo ago
11 cm
Height
18 hrs
Light Schedule
26 °C
Day Air Temp
6.5
pH
No Smell
Smell
75 %
Air Humidity
23 °C
Night Air Temp
0.5 set_lilers
Pot Size
40 cm
Lamp Distance
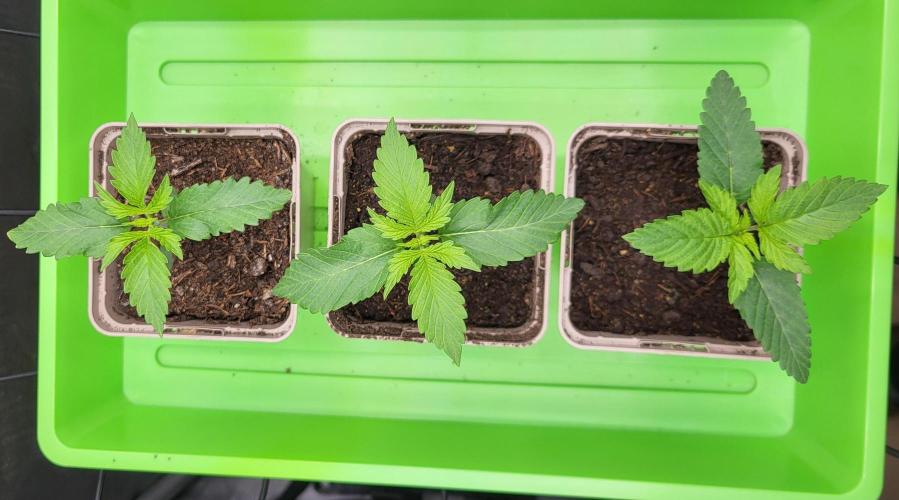
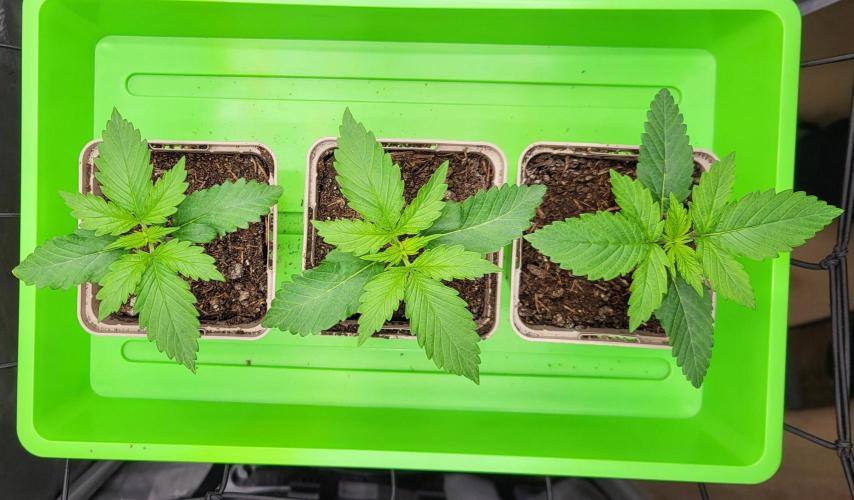
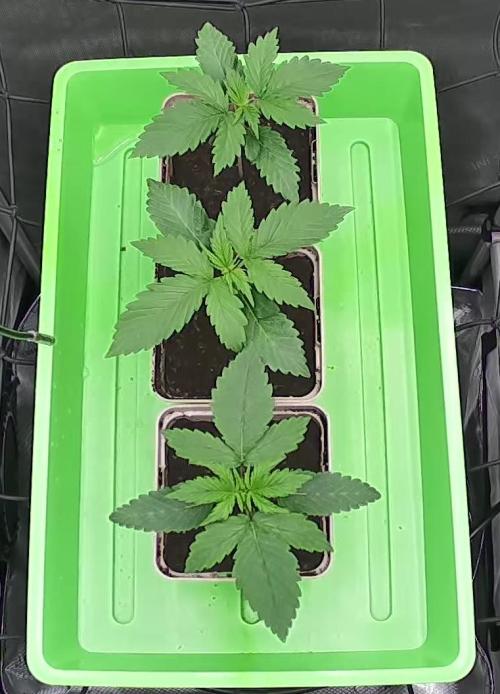
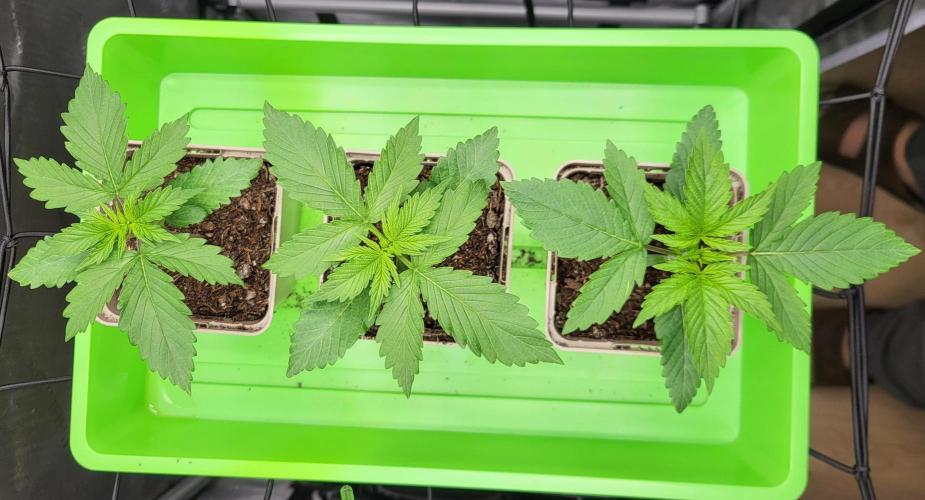
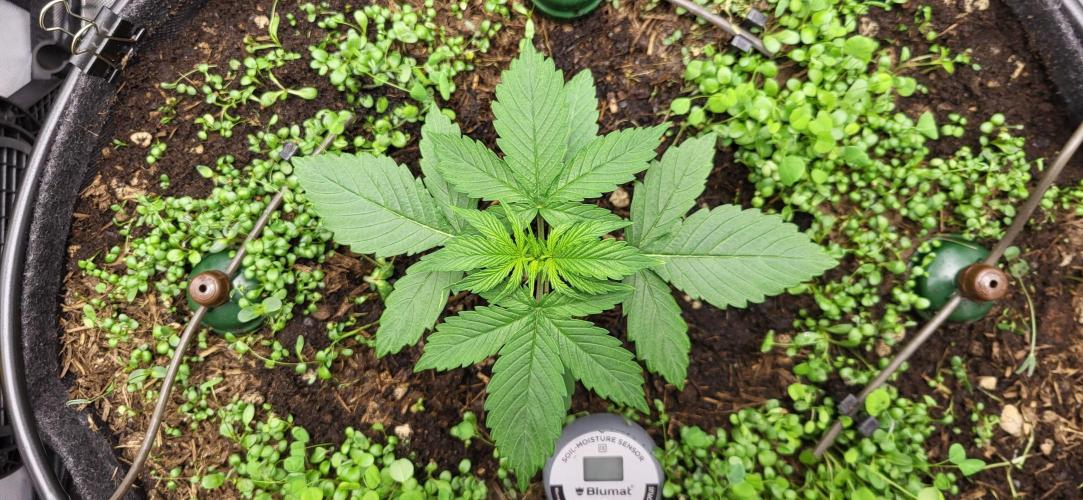
Alvareas The Grow:
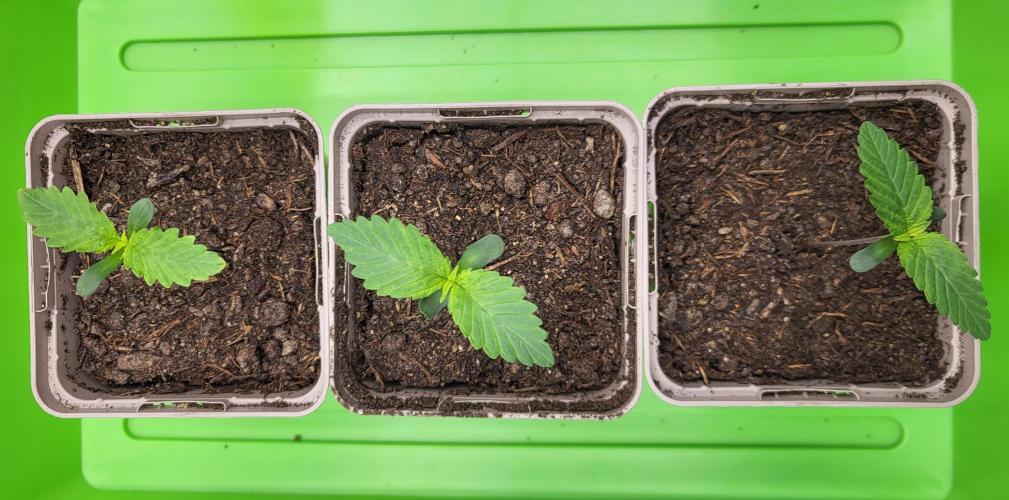
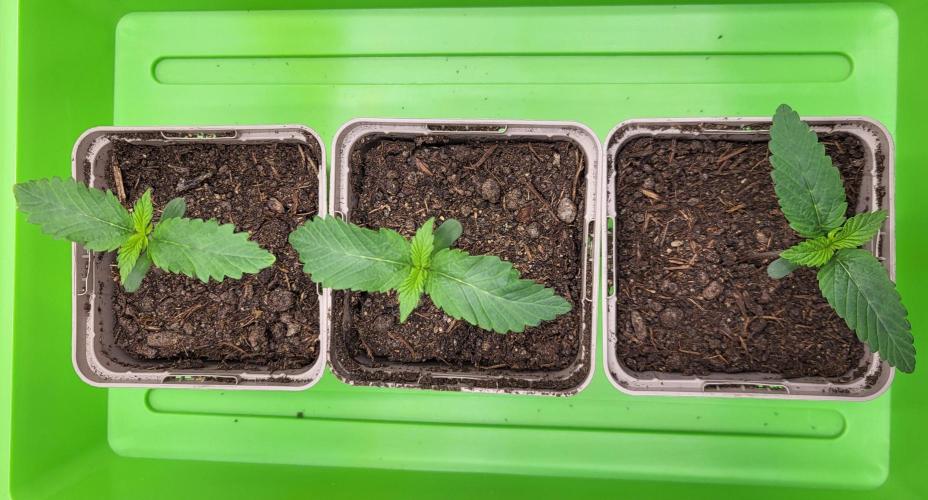
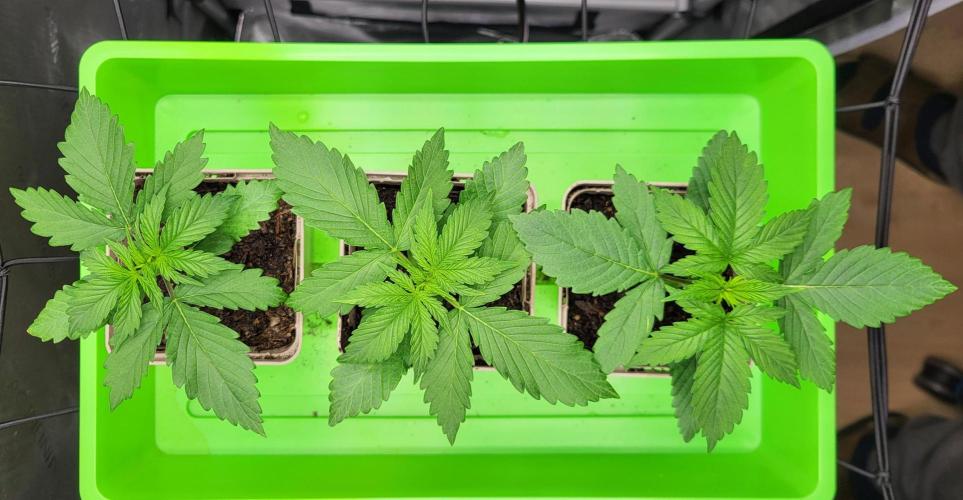
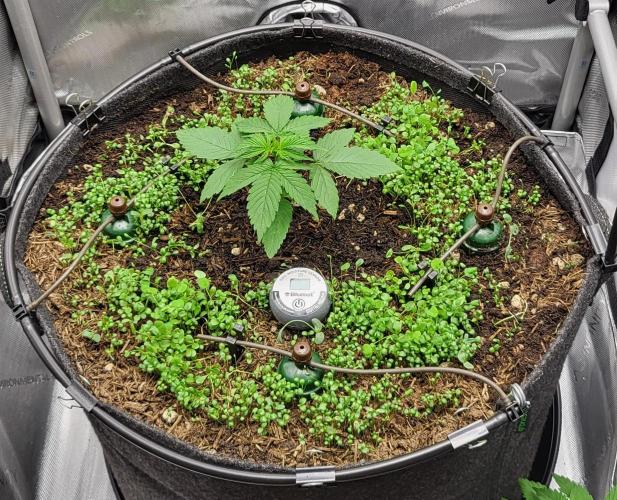
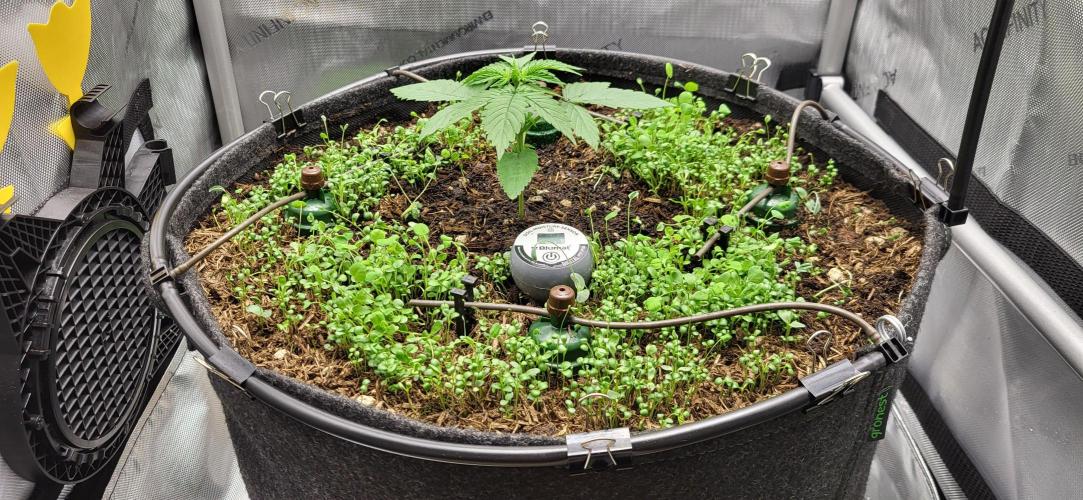
The seedlings have developed well, and the cover crop has also started to grow.
The Blumat system keeps the soil at about 100 mbar.
The LED was set at the beginning of the week to deliver around 200 PPFD to the plants.
I slightly lowered the humidity.
On the last day of the week, it was time to repot.
As always, I selected the plant with the best growth and repotted it.
The other two will stay for a few more days as a backup in case something goes wrong.
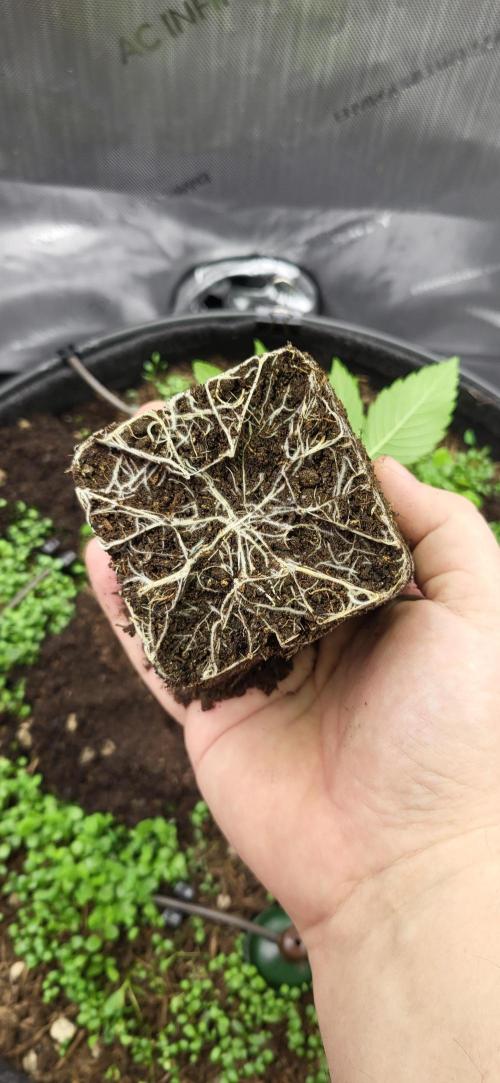
The selected plant had nicely rooted through the seedling pot.
I inoculated the roots with mycorrhiza once more before planting.
After planting, it was lightly watered, and the scrog net was removed.
I adjusted the LED so that about 350 PPFD reaches the plant.
The parameters in week 2:
Controller setting day: Advanced AI humidity 70% - 80%
Controller setting night: Advanced AI humidity 65% - 75%
Average daytime temperature: 26.1 degrees
Average nighttime temperature: 23.1 degrees
Average humidity day: 75.3%
Average humidity night: 70.5%
Average VPD day: 0.6
Average VPD night: 0.7
LED power: 10% = 70 watts
Lighting duration: 18 hours
Air circulation: Level 1 oscillating
5 likes
3 comments
Share
Used techniques
Transplantation
Technique
3
Week 3. Vegetation9mo ago
16 cm
Height
18 hrs
Light Schedule
26 °C
Day Air Temp
6.5
pH
No Smell
Smell
62 %
Air Humidity
23 °C
Night Air Temp
40 set_lilers
Pot Size
40 cm
Lamp Distance
Alvareas The Grow:
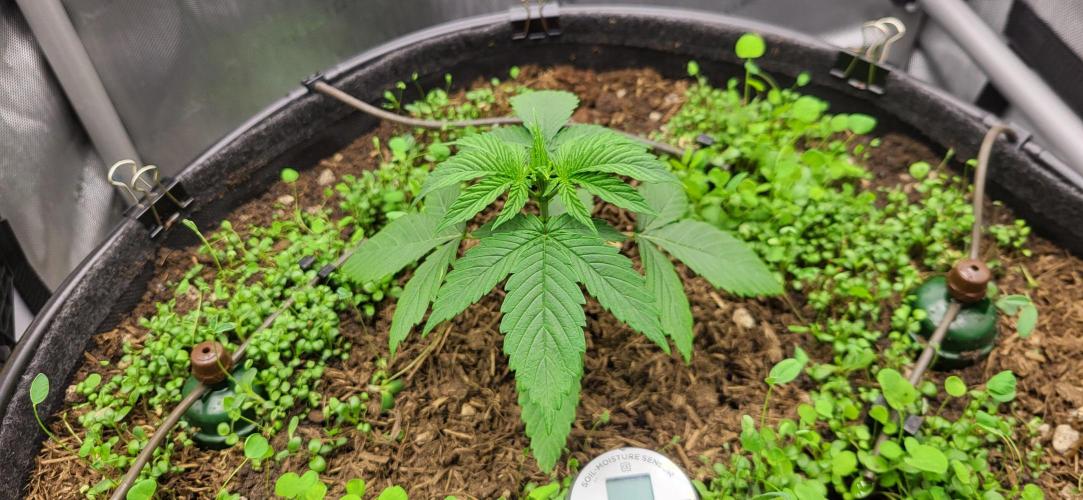
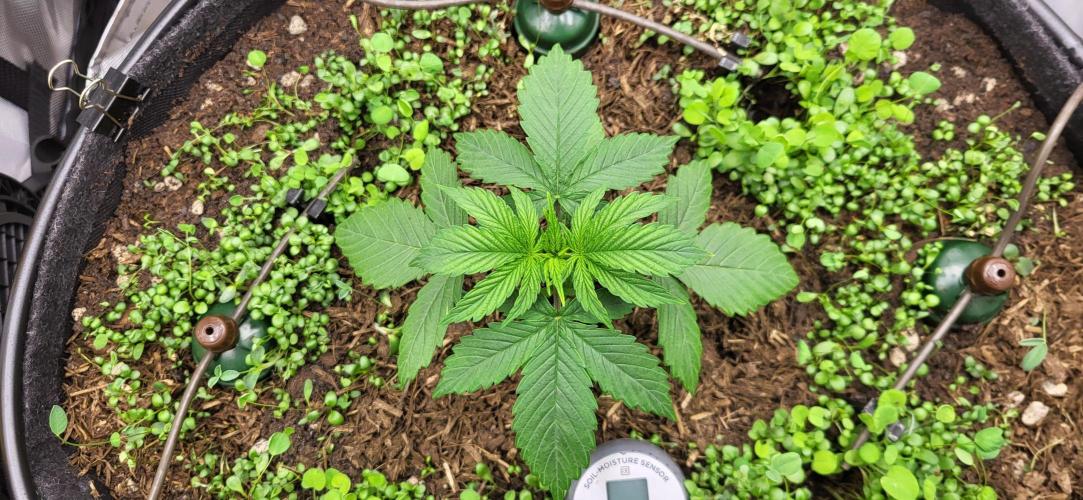
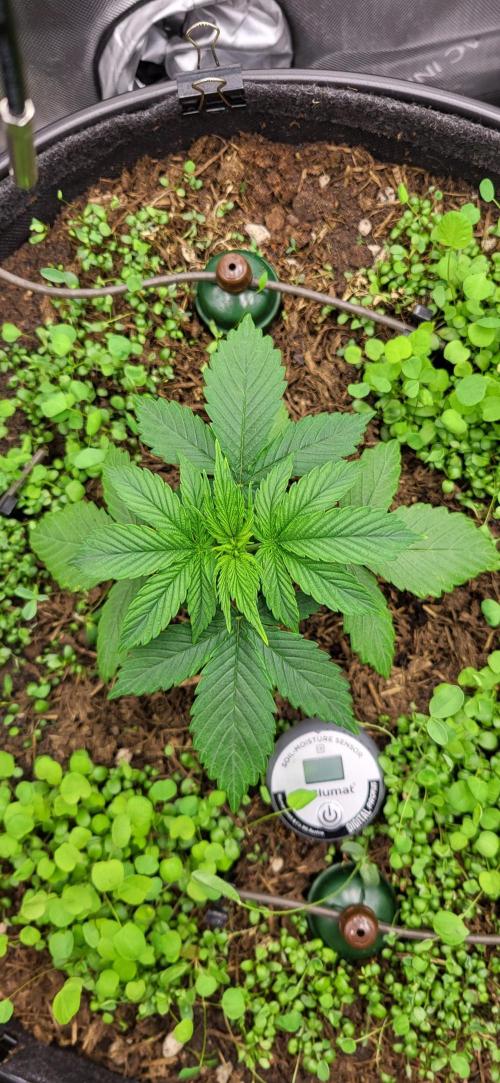
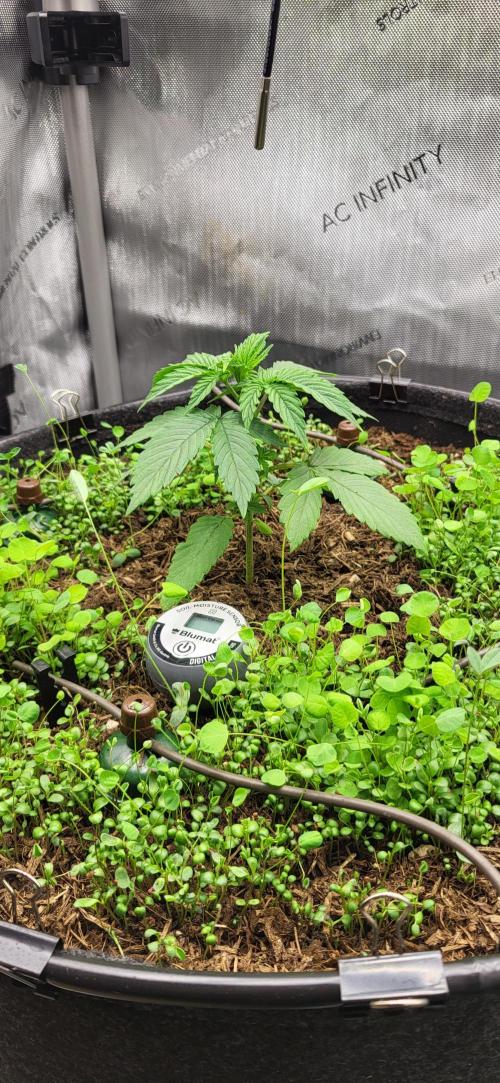
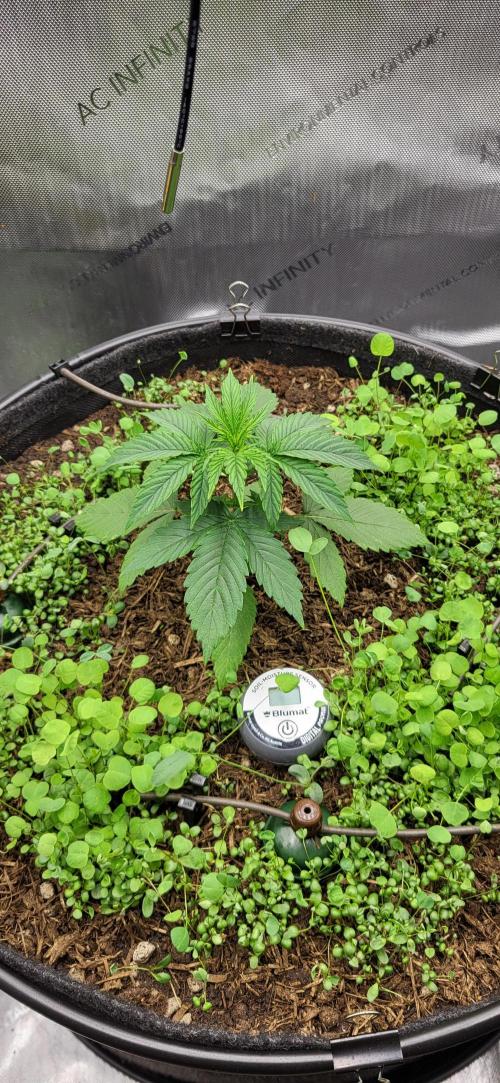
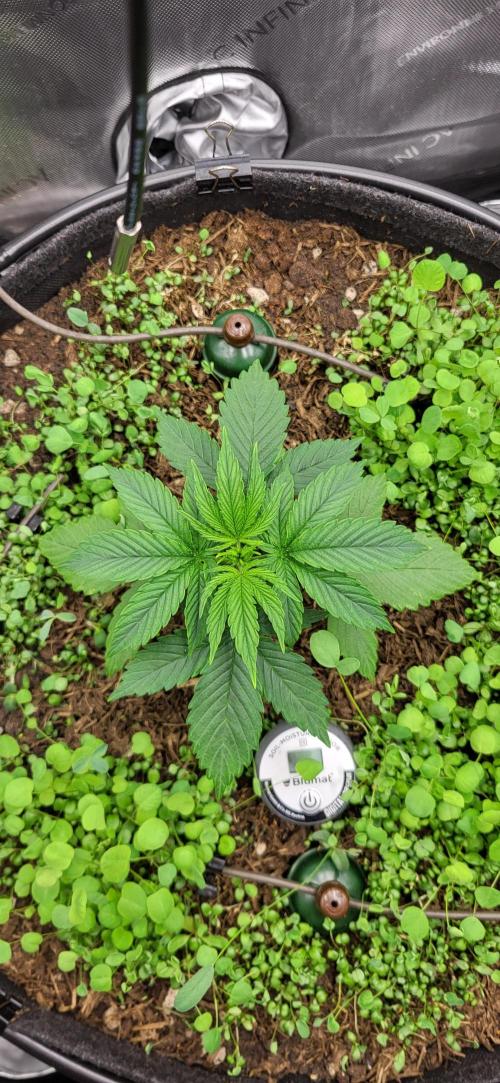
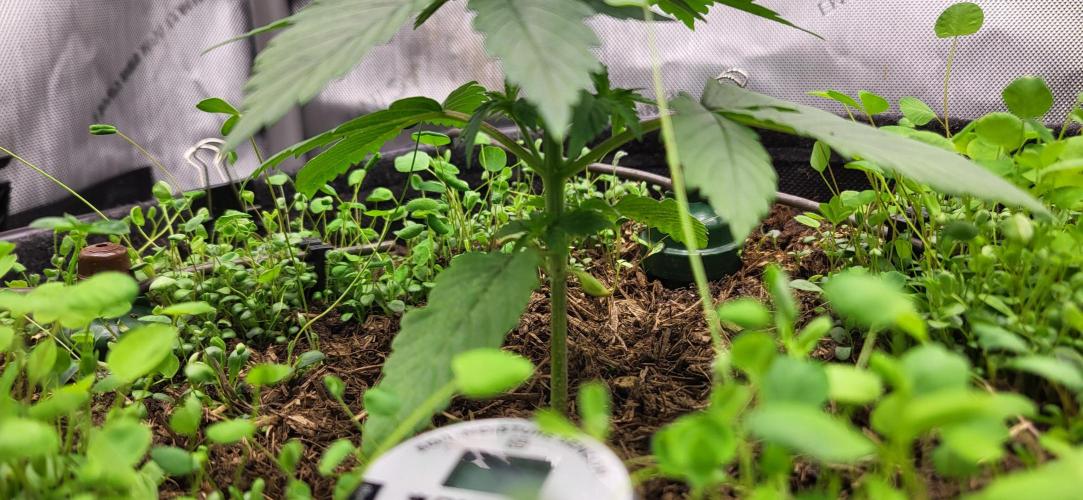
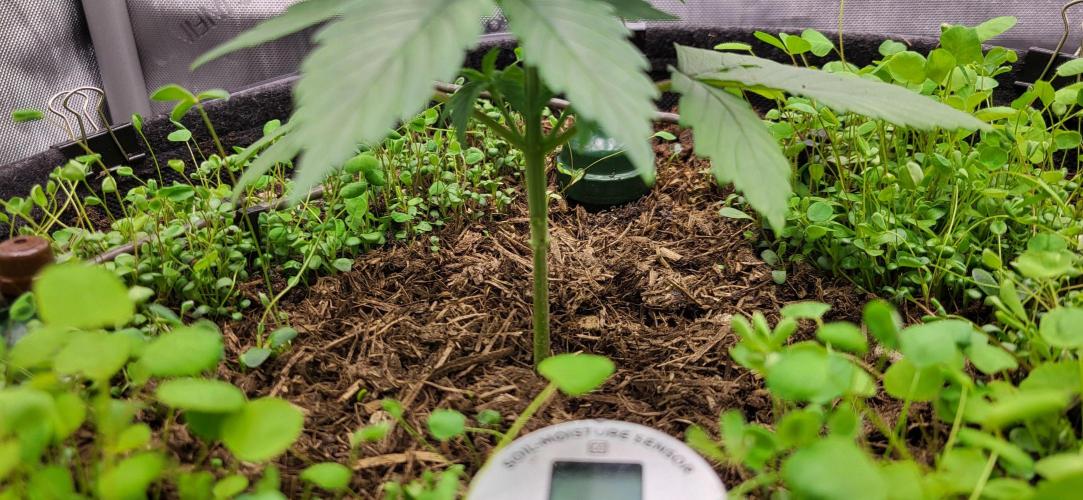
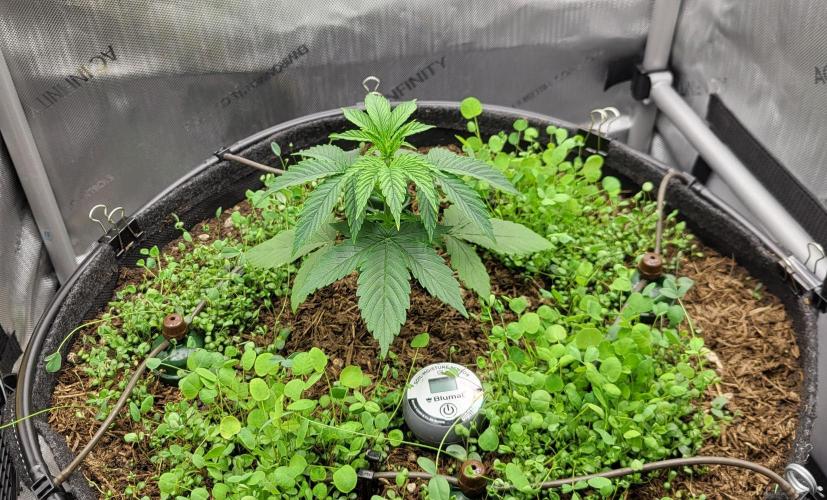
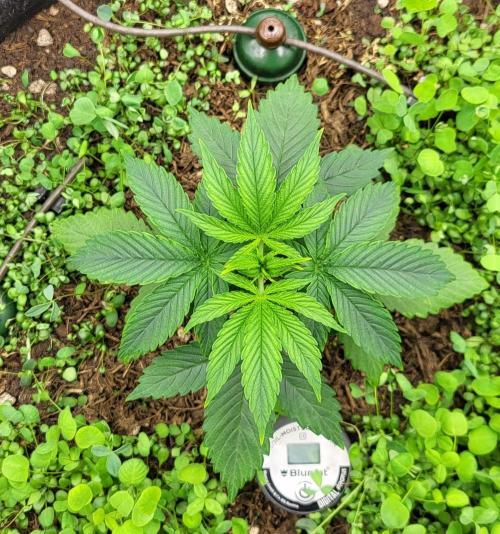
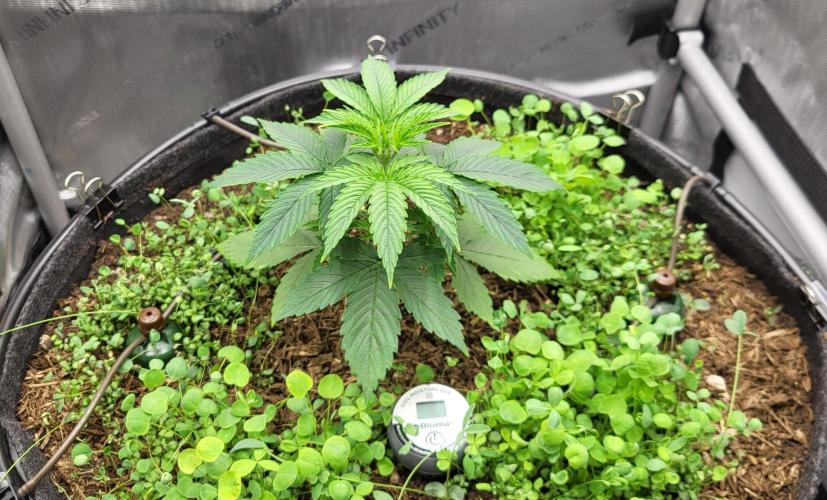
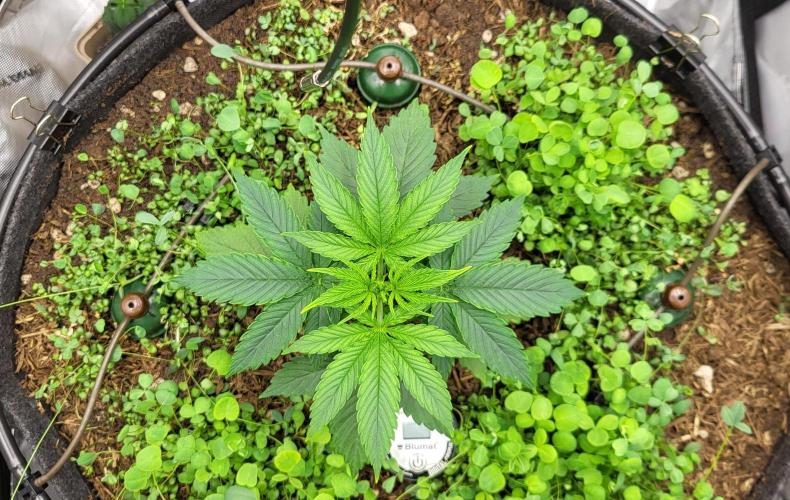
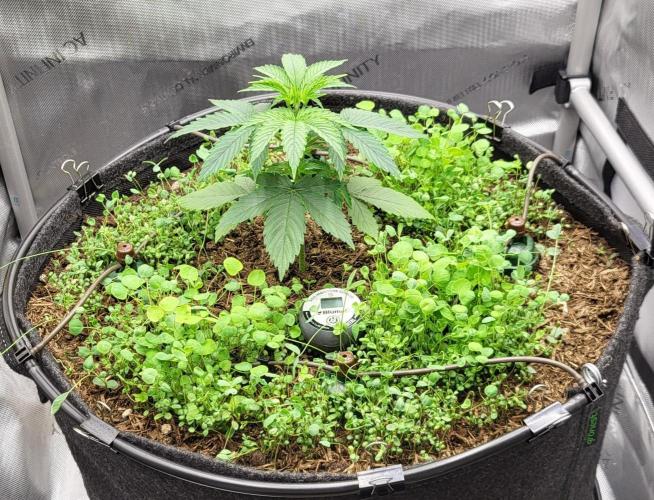
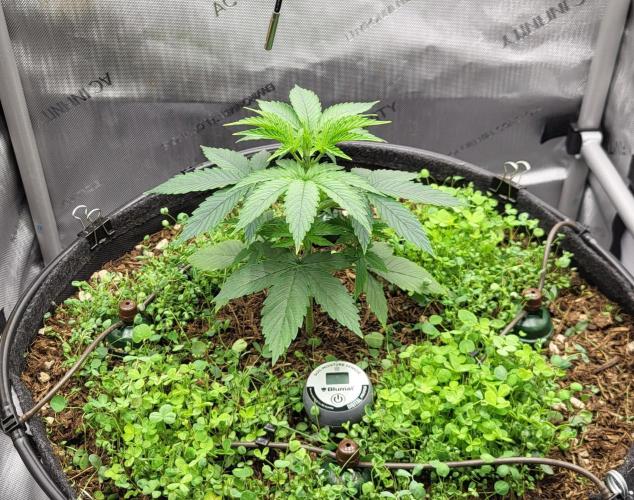
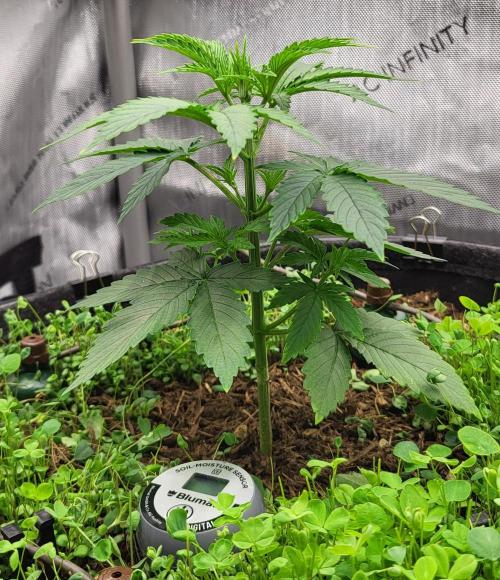
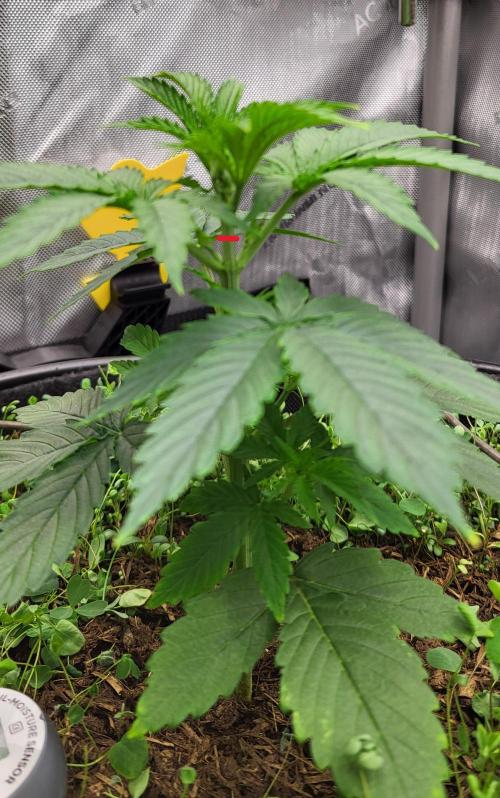
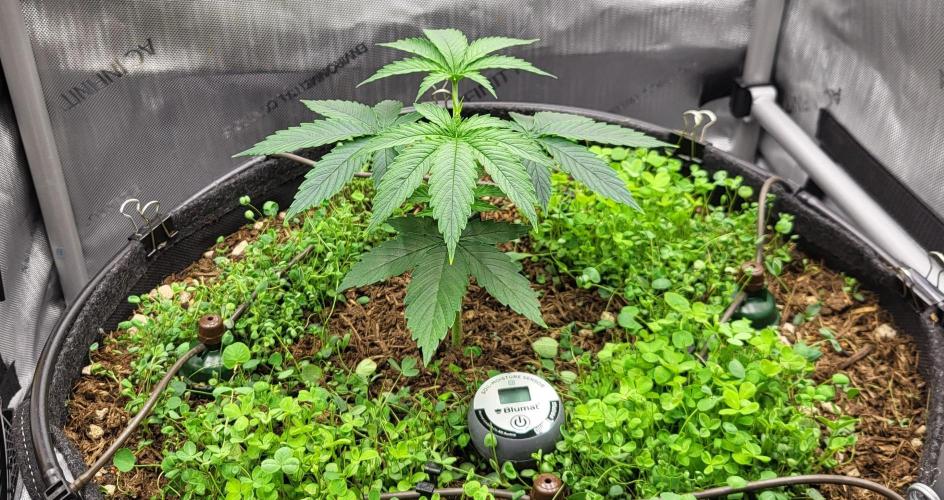
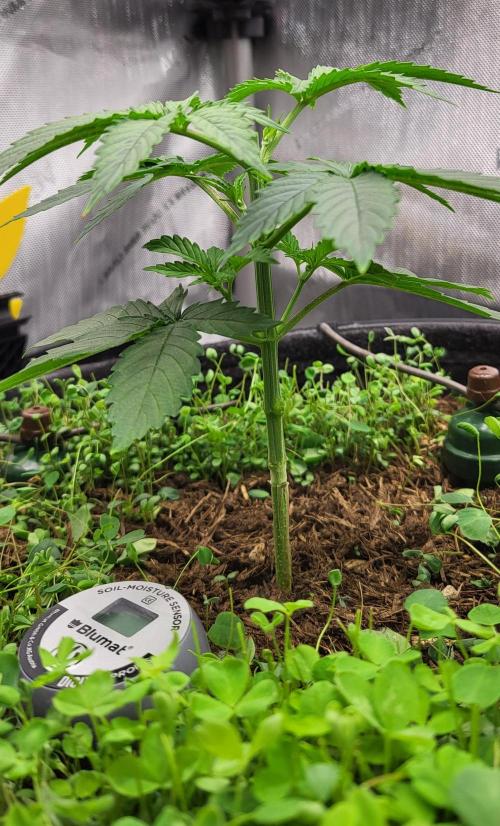
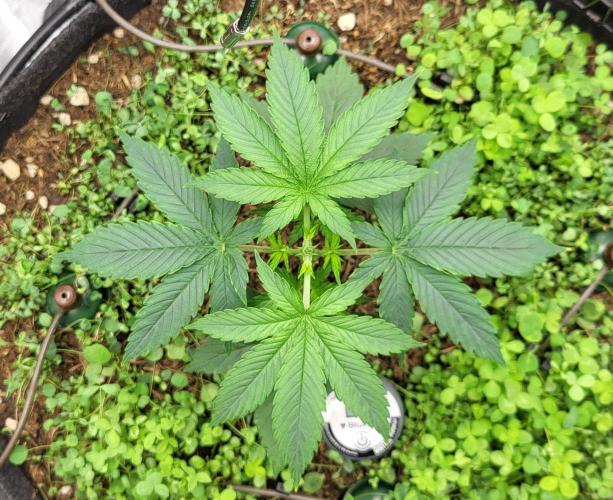
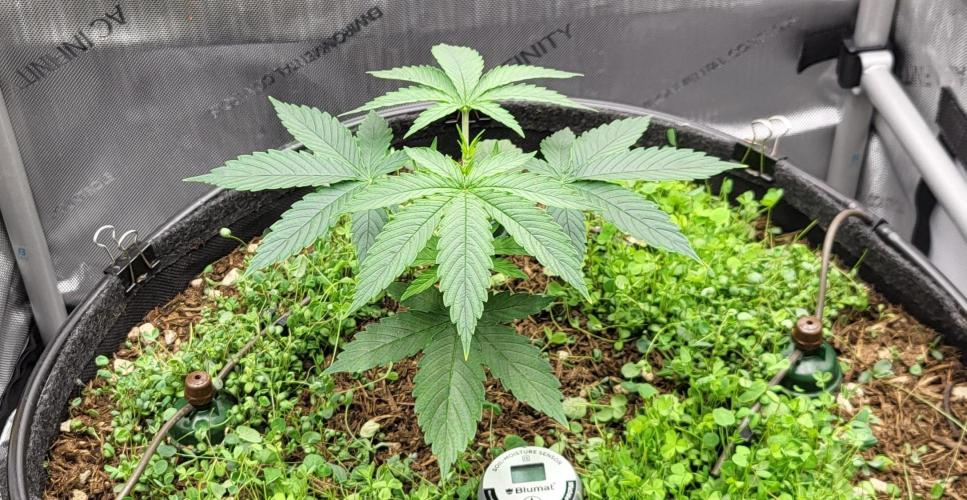
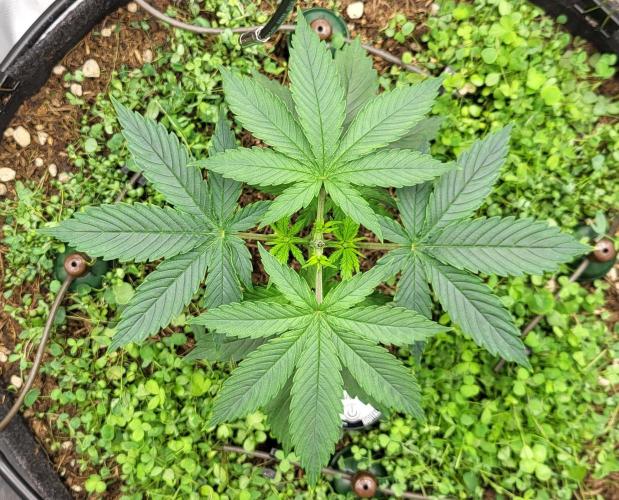
After transplanting, the plant initially let its leaves droop a bit. This state, where there was also no visible growth, lasted for 3 days. After that, the plant recovered from the transplanting. The leaves slowly stood up and took on a dull dark green color. On the 4th day after transplanting, the lowest shoots along with their leaves were removed. On the second-to-last day of the week, the plant was topped after the fourth nodes, and the lowest shoots, along with their leaves, were removed again. So in the end, 6 main shoots were left. I will probably top them again at a later time and then go into a SCROG net with 12 shoots. The topping was well tolerated by the plant. I couldn't notice any growth stop.
The cover crop is also thriving quite nicely now and needs to be trimmed back regularly.
The humidity was further lowered at the start of the week, and the LED was increased to 20% power. The LED is hanging 40cm away from the plant, so 350 PPFD is reaching the plant. I'm now letting the plant grow slowly towards the LED, so that the PPFD can gradually increase.
The parameters in week 3:
Controller setting day: Advanced AI humidity 60% - 70%
Controller setting night: Advanced AI humidity 55% - 65%
Average daytime temperature: 26.7 degrees
Average nighttime temperature: 23.3 degrees
Average humidity day: 65.2%
Average humidity night: 60.4%
Average VPD day: 1.0
Average VPD night: 1.0
LED power: 20% = 95 watts
Lighting duration: 18 hours
Air circulation: Level 1 oscillating
5 likes
2 comments
Share
Used techniques
Topping
Technique
4
Week 4. Vegetation9mo ago
20 cm
Height
18 hrs
Light Schedule
26 °C
Day Air Temp
6.5
pH
Weak
Smell
60 %
Air Humidity
23 °C
Night Air Temp
40 set_lilers
Pot Size
40 cm
Lamp Distance
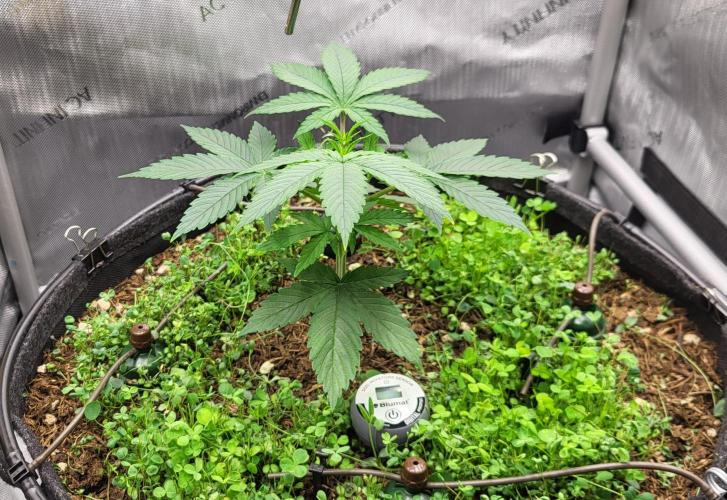
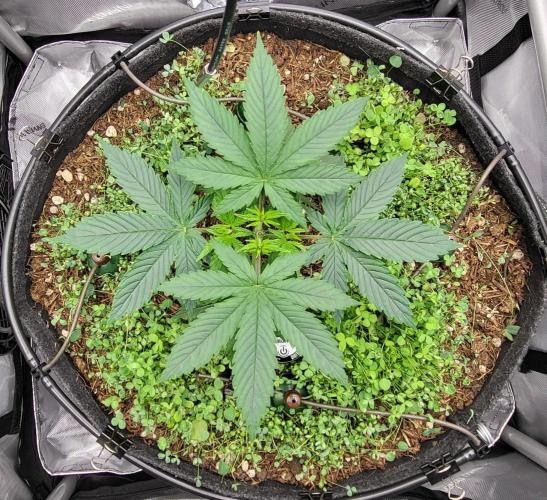
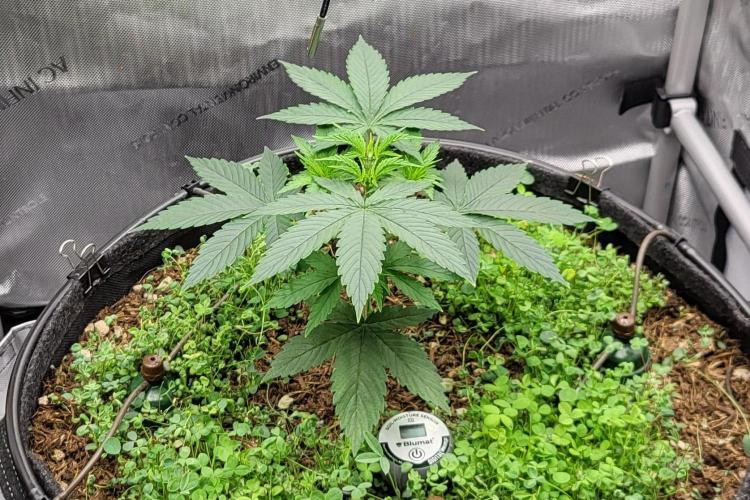
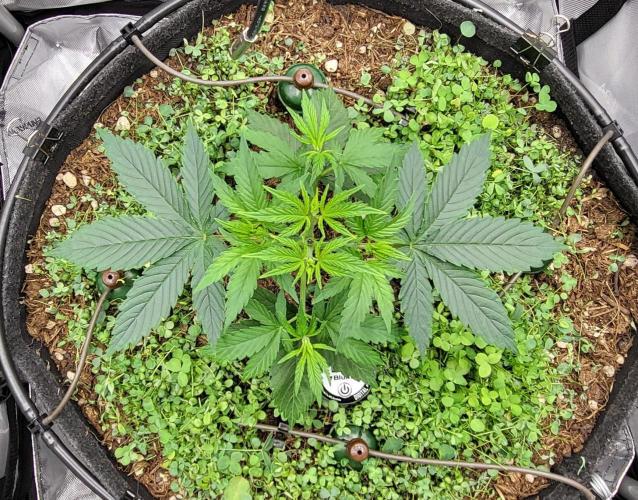
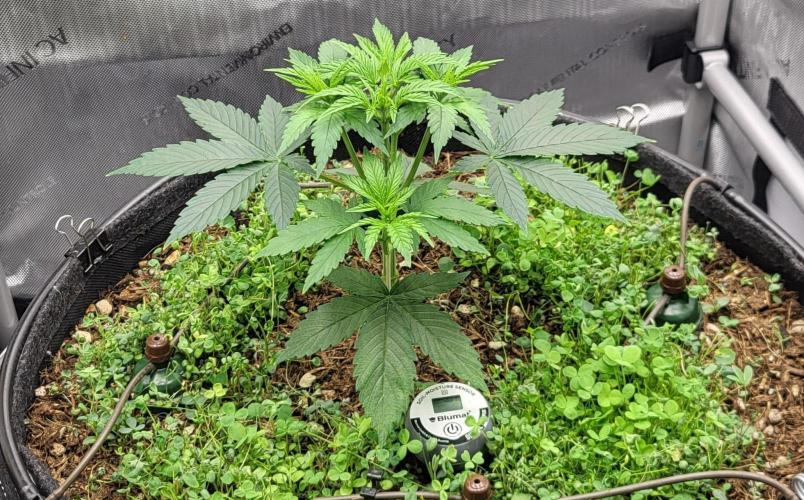
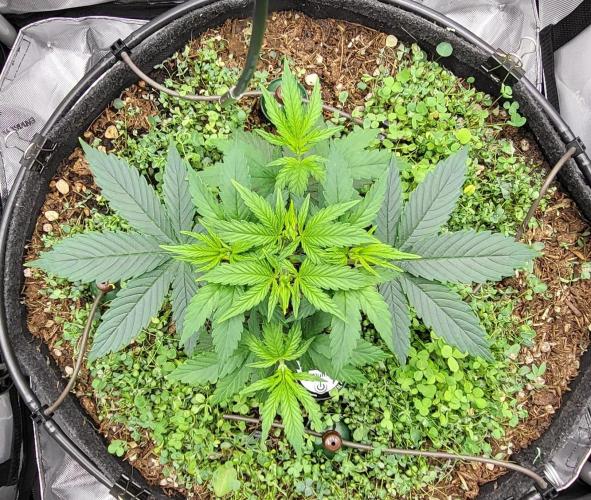
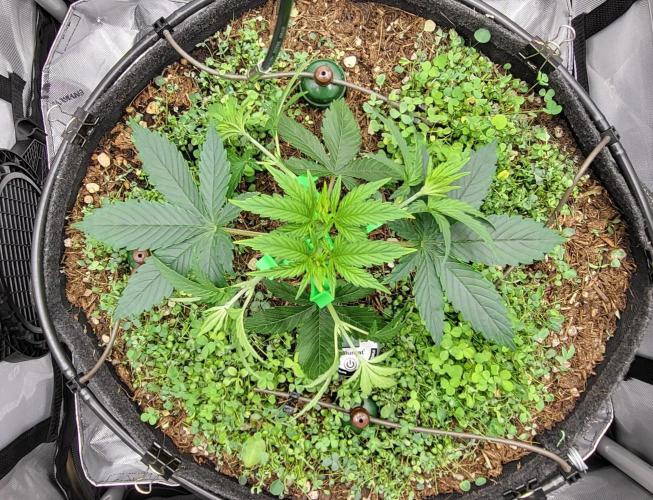
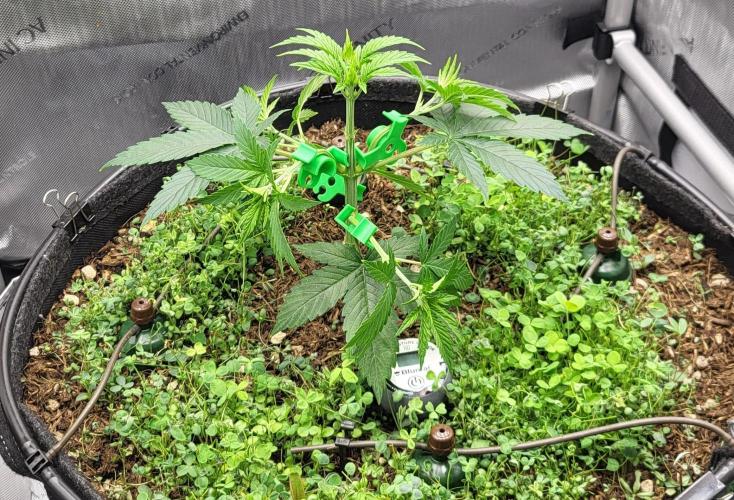
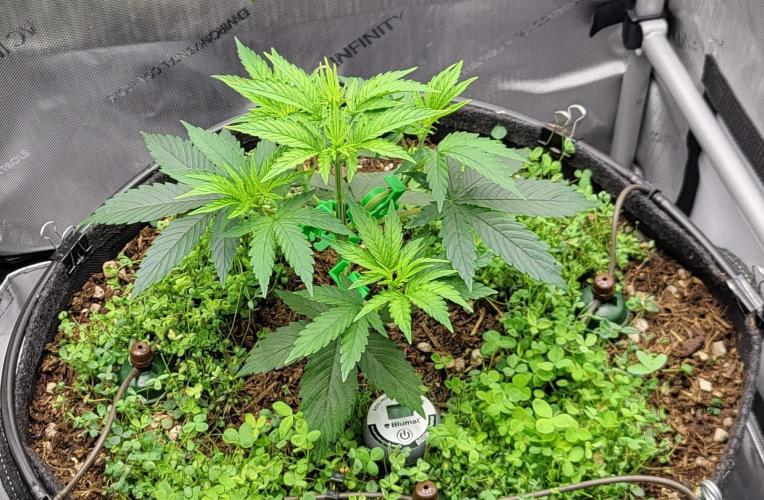
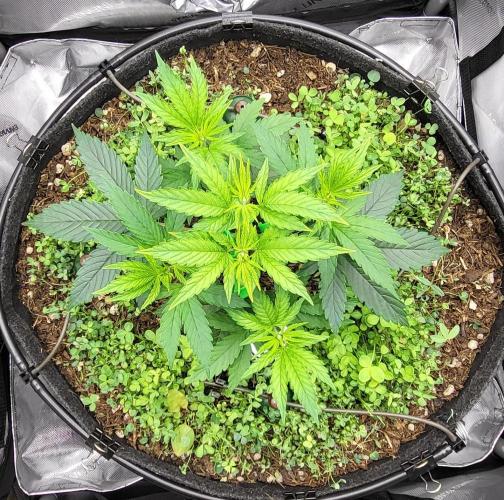
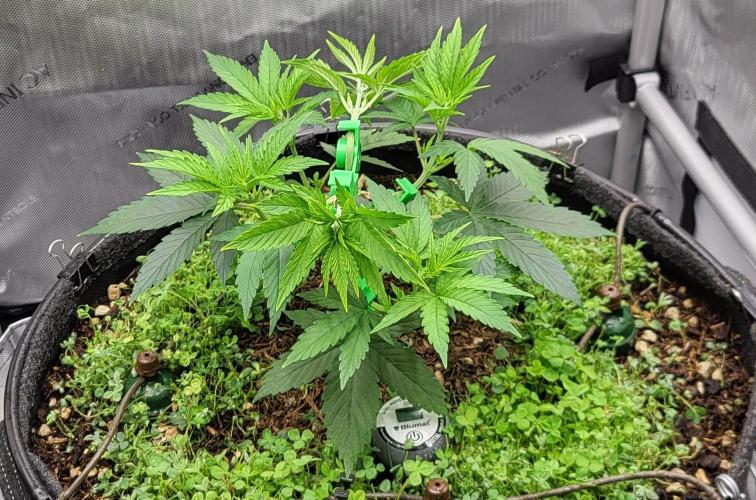
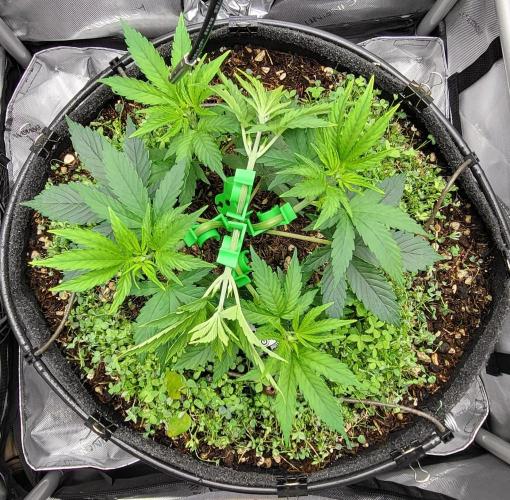
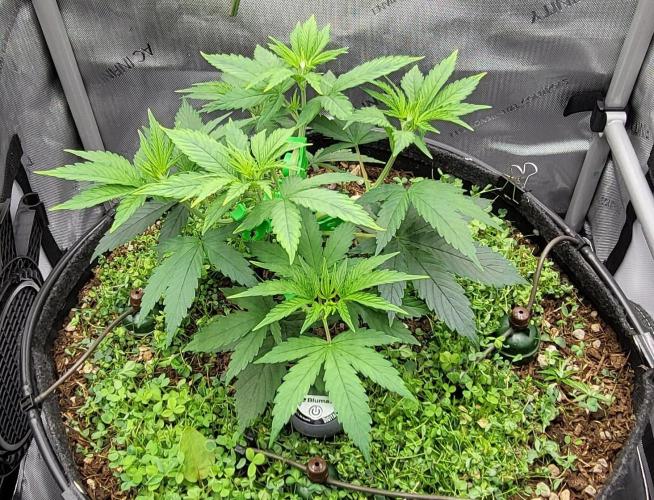
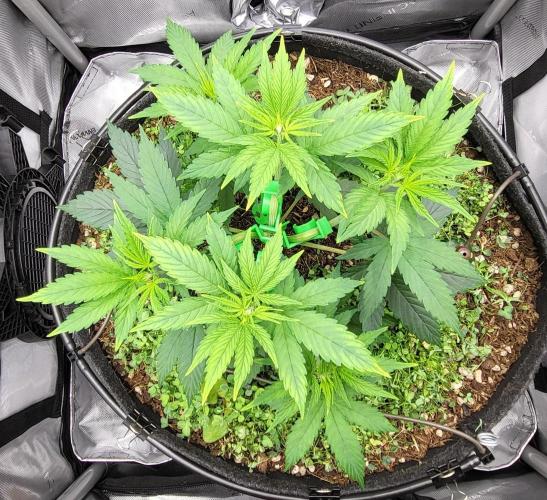
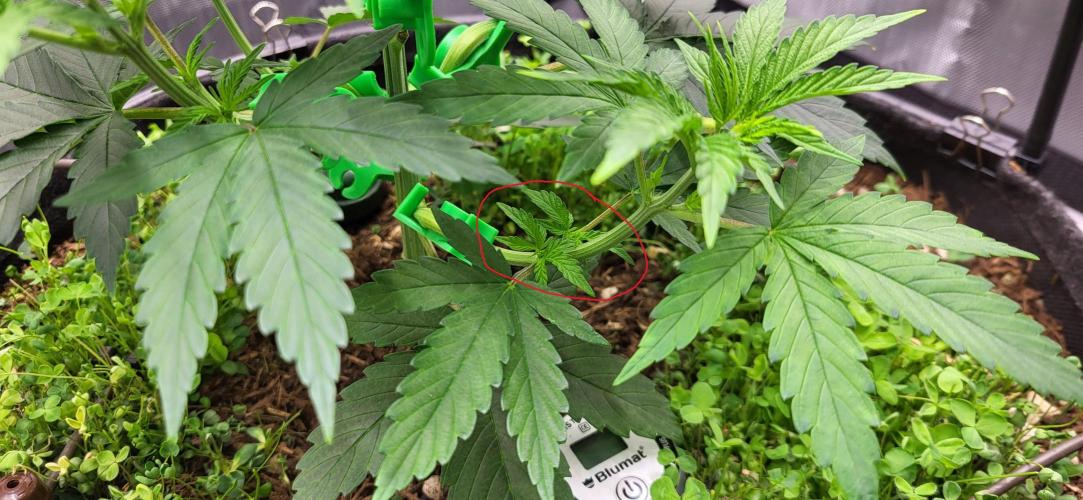
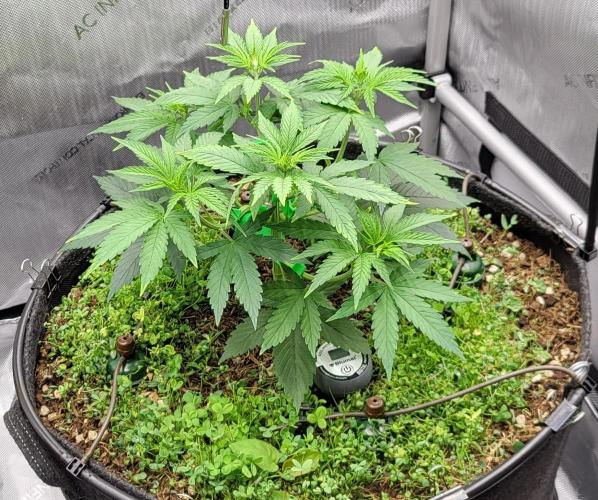
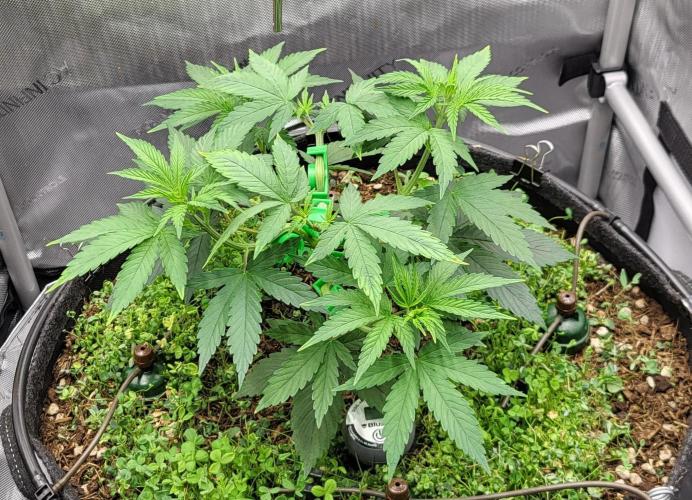
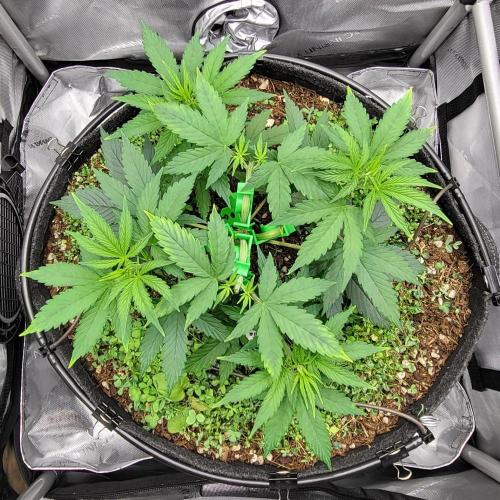
Alvareas The plant has developed beautifully.
3 days after topping, the top shoots were developed enough that I could remove the upper fan leaves, as they were covering the lower shoots.
4 days after topping, I started training the shoots outward and in the desired direction with LST clips.
On day 6 of the week, I began removing new shoots, but I left the fan leaves of the shoots intact.
Since I would remove the shoots later anyway, I do this right at the beginning, so the plant doesn't waste energy on these shoots.
On day 7, the two top shoots were topped again.
So far, the training has worked well.
The plant is spreading out, and the shoots are roughly at the same height.
I find it amazing how much the plant reacts to too much moisture in Living Soil.
Since I found a few fungus gnats in the tent and on the yellow traps, I wanted to counteract with nematodes.
That's why I watered 1 liter with nematodes at the beginning of the week.
The tensiometer showed 48 mbar and slowly rose to 91 mbar over the course of the week.
This was noticeable in the new growth throughout the week.
It took significantly longer for the leaves to change from light green to dark green.
Some leaves also developed light tips and edges.
I slightly lowered the humidity again this week.
The LED is far enough away that we had about 450 PPFD and a DLI of about 25.
The parameters:
Controller setting day: Advanced AI humidity 57% - 67%
Controller setting night: Advanced AI humidity 50% - 60%
Average daytime temperature: 26.2 degrees
Average nighttime temperature: 23.1 degrees
Average daytime humidity: 62.5%
Average nighttime humidity: 57.3%
Average VPD day: 1.1
Average VPD night: 1.0
LED power: 20% = 95 watts
Lighting duration: 18 hours
Air circulation: Level 1 oscillating
4 likes
comments
Share
Used techniques
LST
Technique
Topping
Technique
5
Week 5. Vegetation8mo ago
26 cm
Height
18 hrs
Light Schedule
26 °C
Day Air Temp
6.5
pH
Weak
Smell
58 %
Air Humidity
23 °C
Night Air Temp
40 set_lilers
Pot Size
40 cm
Lamp Distance
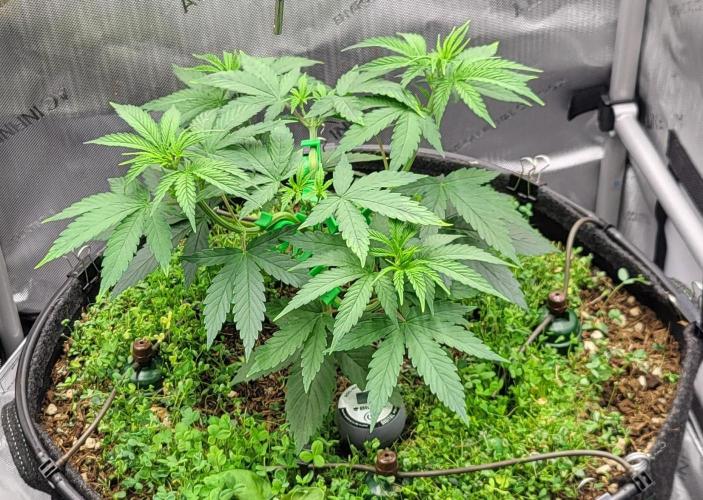
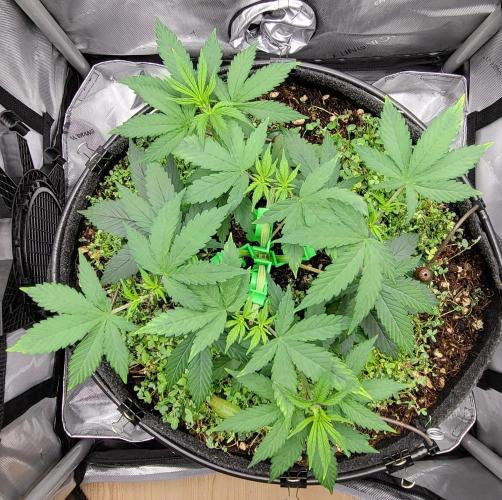
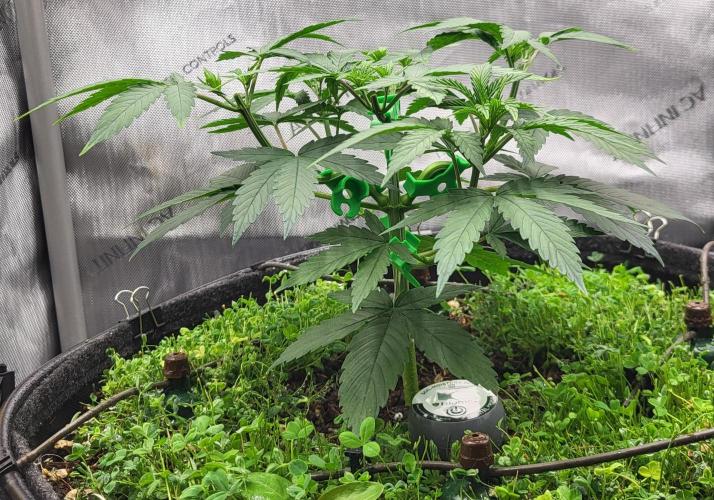
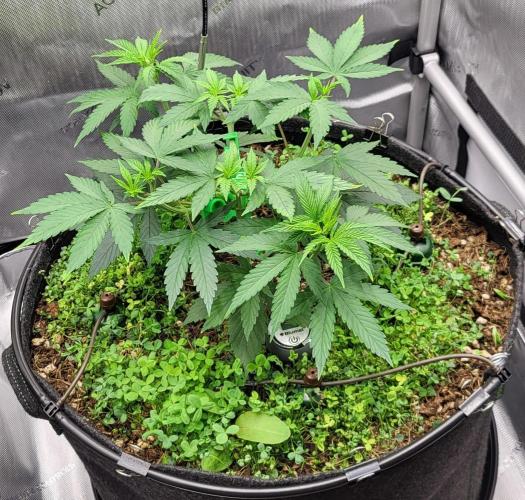
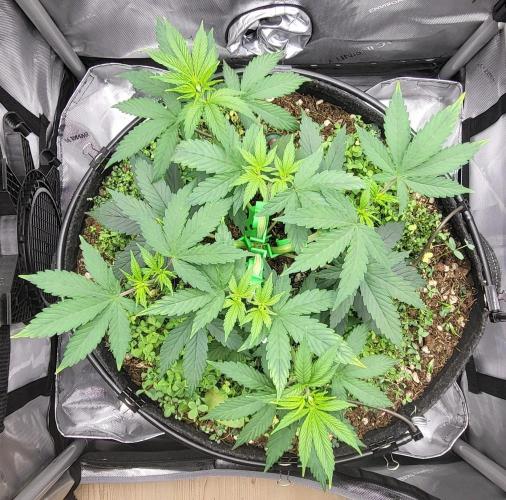
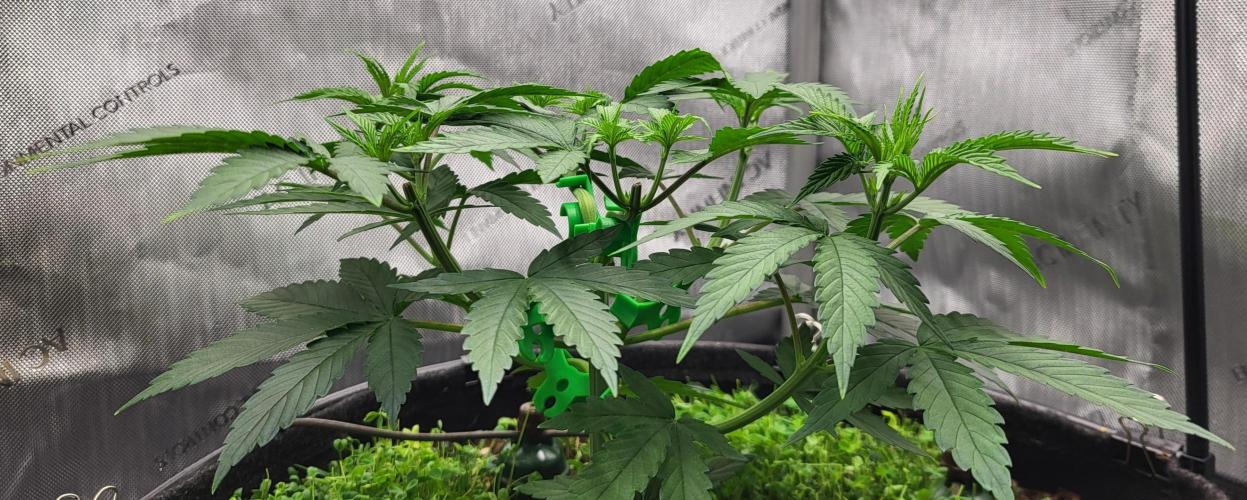
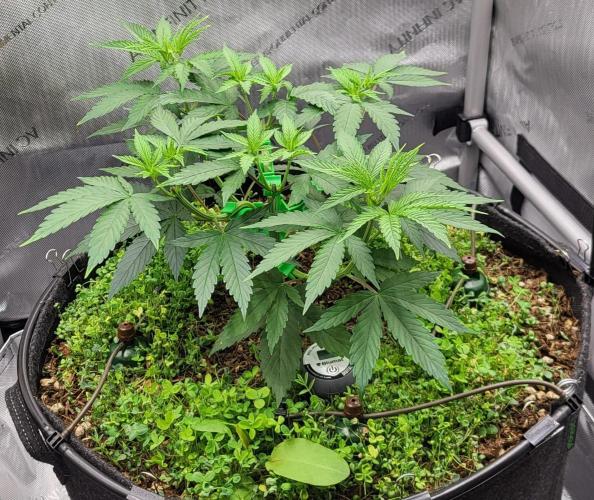
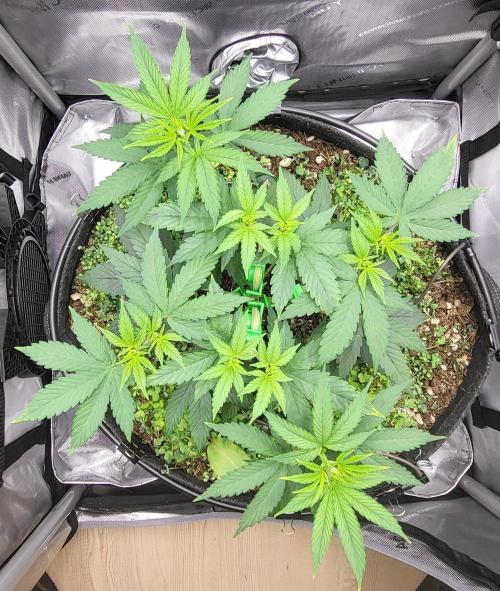
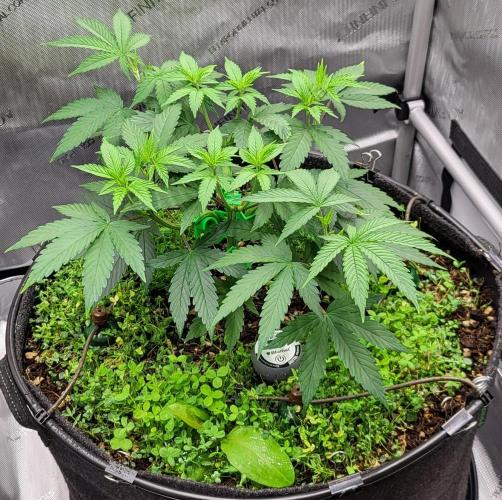
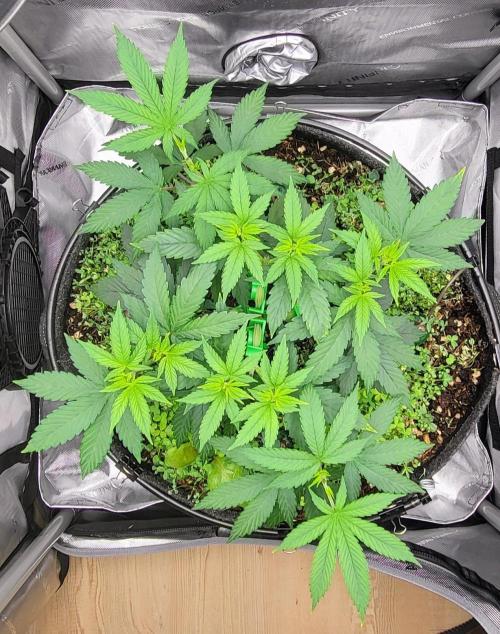
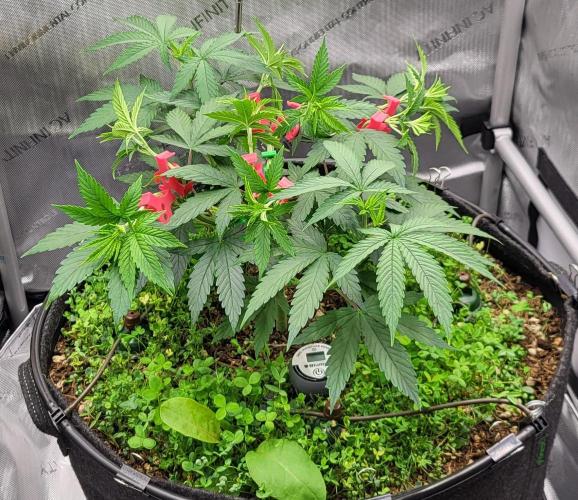
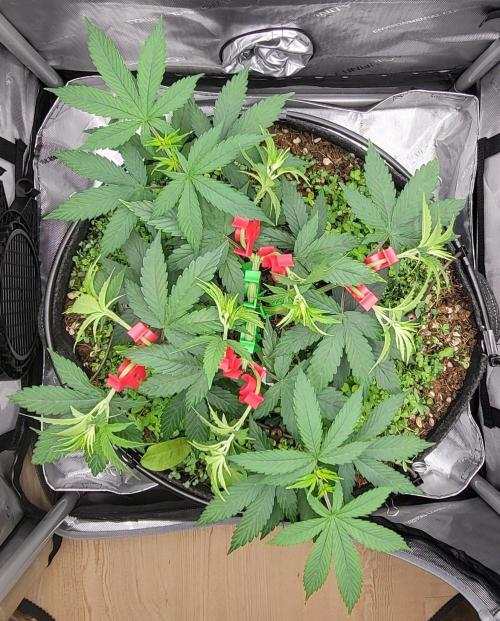
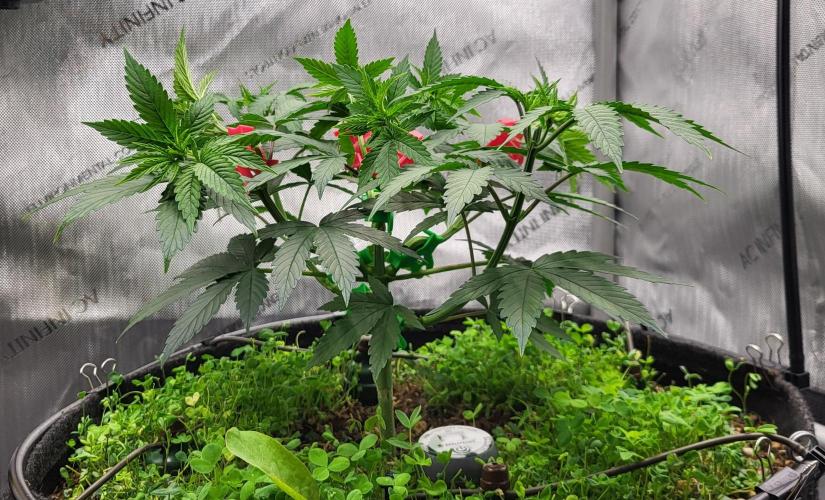
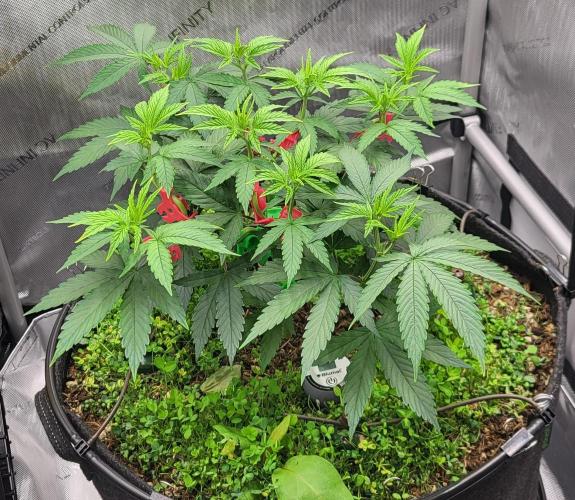
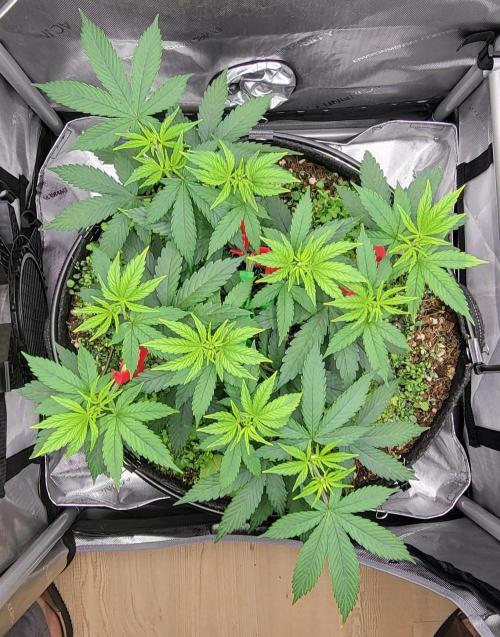
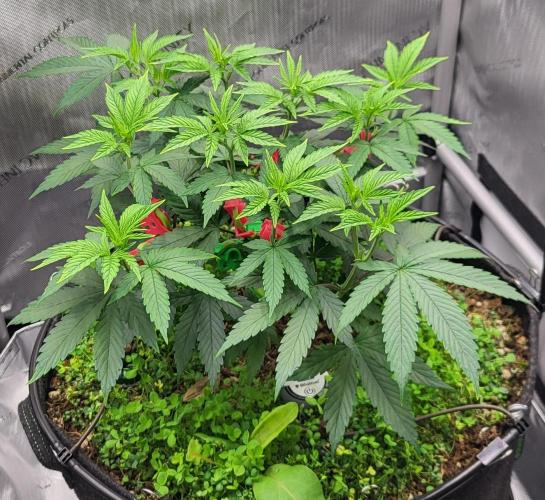
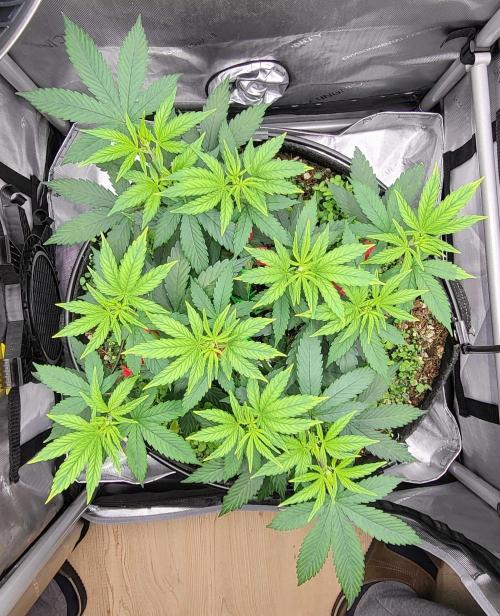
Alvareas The plant is growing and thriving. On the first day of the week, I was able to top the next shoots once again. The last remaining shoots were topped for the final time on day 4 of the week. So we are at 12 shoots, and these will also go into flowering. To keep the shoots as even as possible, I started training the shoots on the next level with LST clips on day 5. This worked very well again; the plant is getting wider and staying at the same height.
The humidity was lowered a bit again during the week, and the LED was increased to 30% starting on day 4. The distance of the LED was adjusted so that I reached about 500 PPFD and a DLI of 34. The distance of the LED was not adjusted to the plant's growth, so by the end of the week, the plant received about 550 PPFD and a DLI of 36.
Unless something significant comes up, I will let the plant grow a bit more and then switch to 12/12 during the next week to initiate flowering.
The parameters in week 5:
Controller setting day: Advanced AI humidity 55% - 65%
Controller setting night: Advanced AI humidity 50% - 60%
Average daytime temperature: 26.9 degrees
Average nighttime temperature: 23.2 degrees
Average humidity day: 60.3%
Average humidity night: 56.8%
Average VPD day: 1.2
Average VPD night: 1.1
LED power: 30% = 120 watts
Lighting duration: 18 hours
Air circulation: Level 1 oscillating
6 likes
2 comments
Share
Used techniques
LST
Technique
Topping
Technique
6
Week 6. Flowering8mo ago
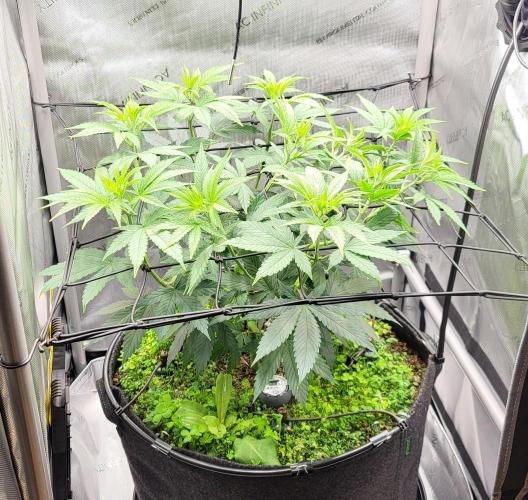
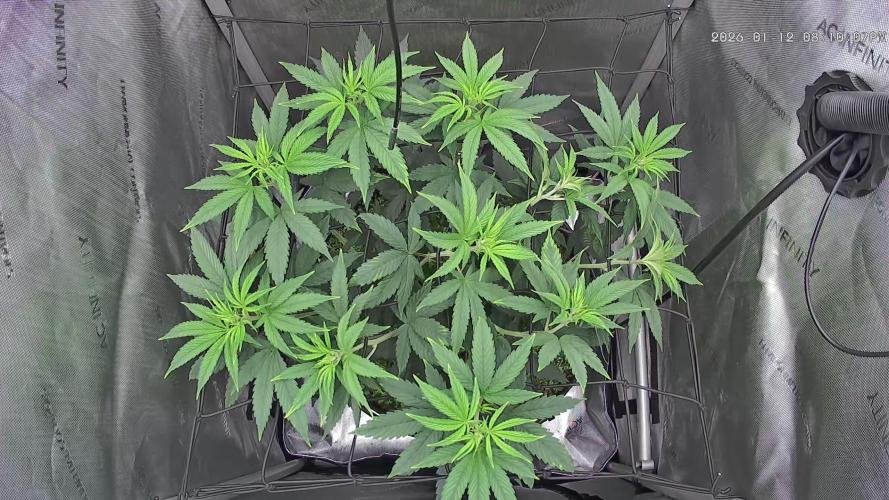
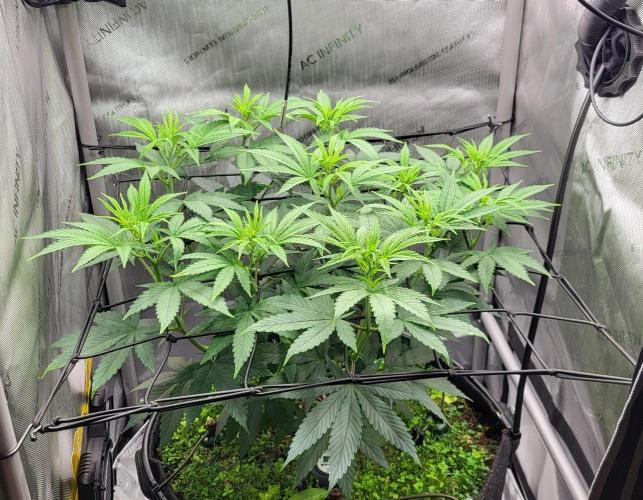
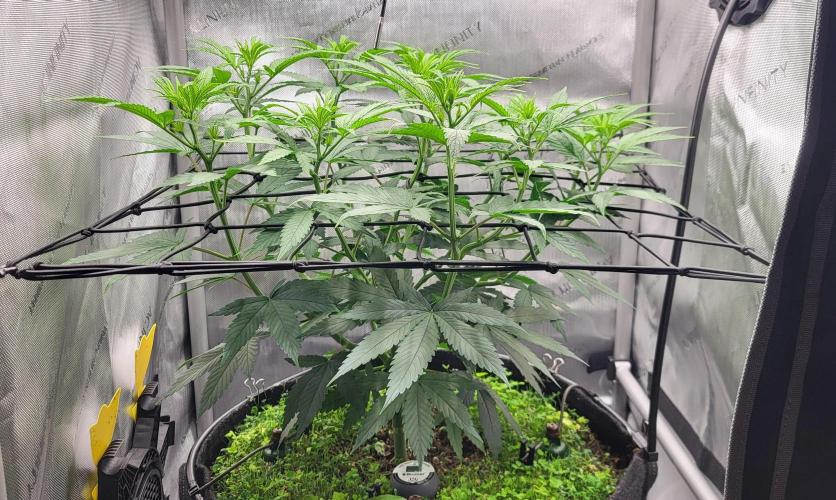
39 cm
Height
12 hrs
Light Schedule
26 °C
Day Air Temp
6.5
pH
Weak
Smell
56 %
Air Humidity
22 °C
Night Air Temp
40 set_lilers
Pot Size
40 cm
Lamp Distance
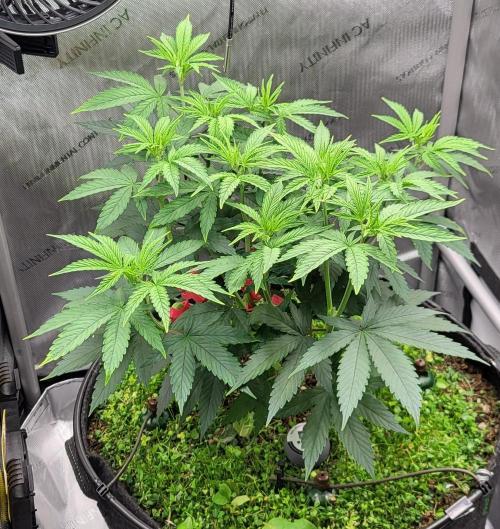
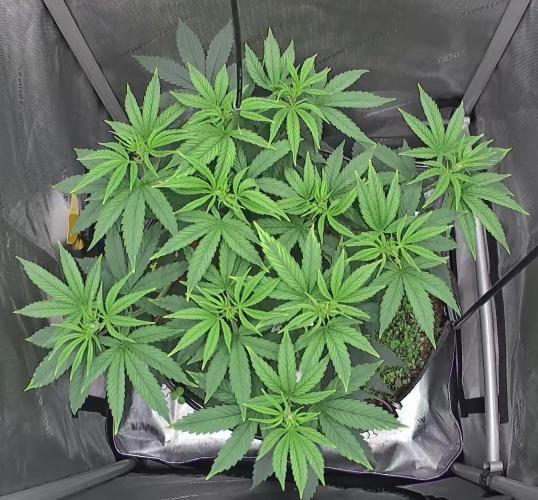
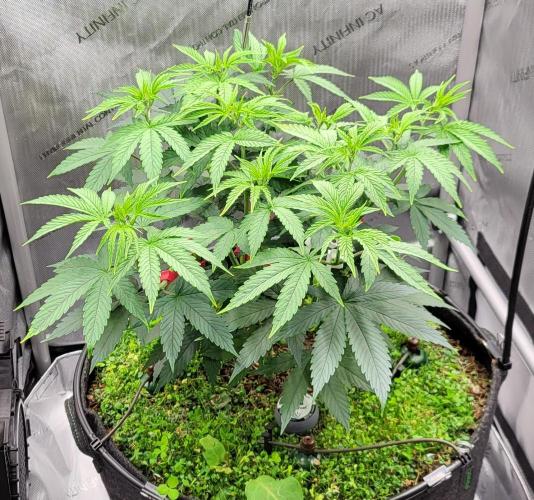
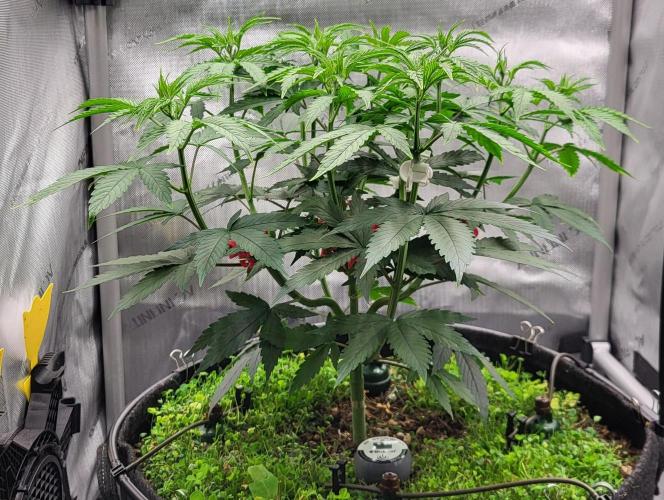
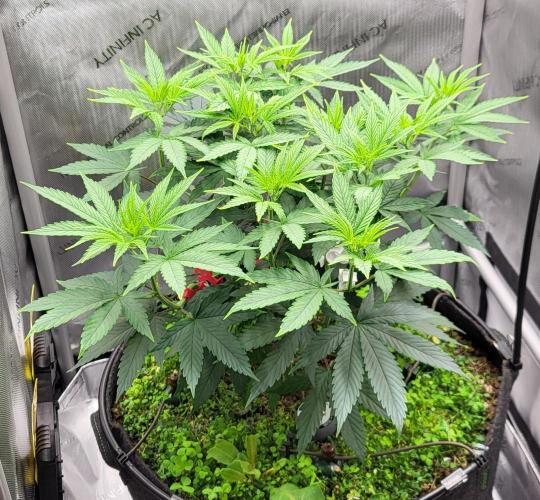
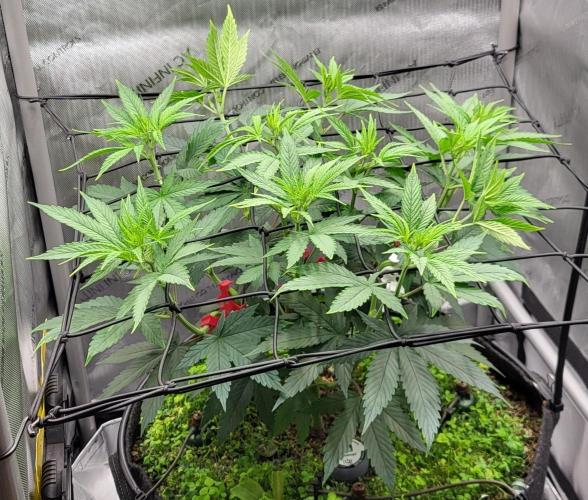
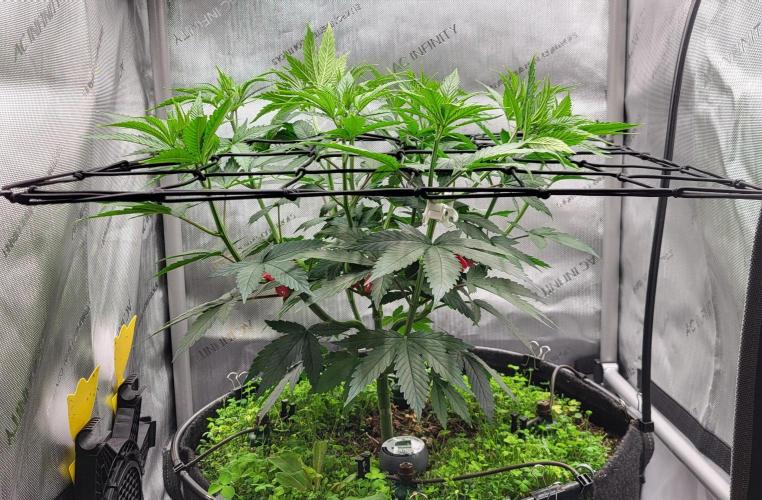
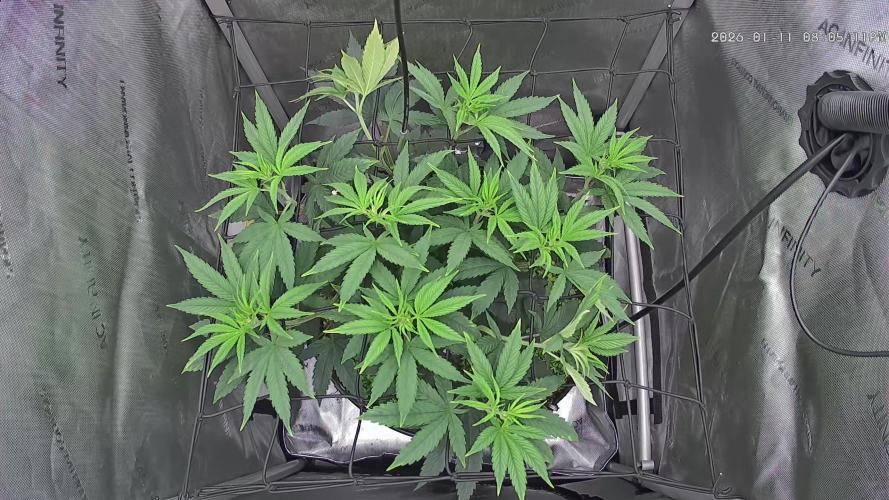
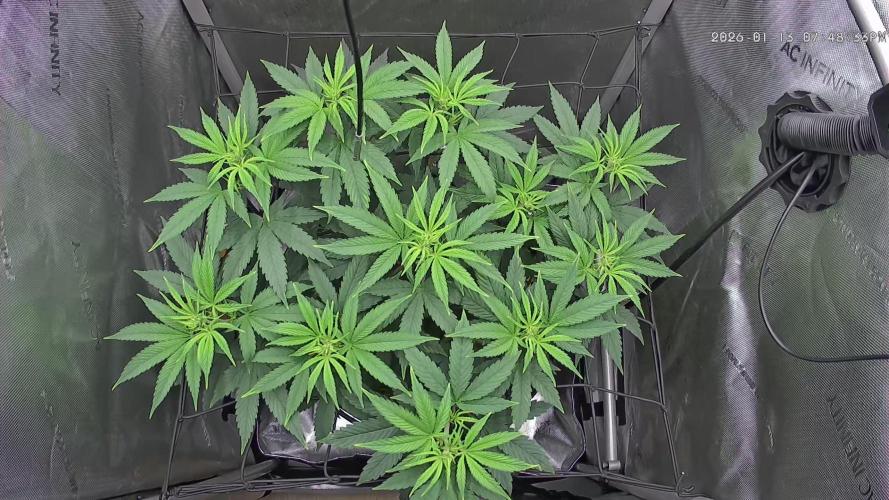
Alvareas The Grow:
This week I had a couple of problems with the Blumat.
I can't say exactly why, but one day the humidity rose to 40 mbar.
The Blumats watered for too long.
The plant reacted with light leaf edges.
I reduced the drip hoses on the Blumats from 8cm to 5cm.
This should make the Blumats close faster.
And it worked.
With a bit of fine-tuning, I'm now back between 90 – 110 mbar.
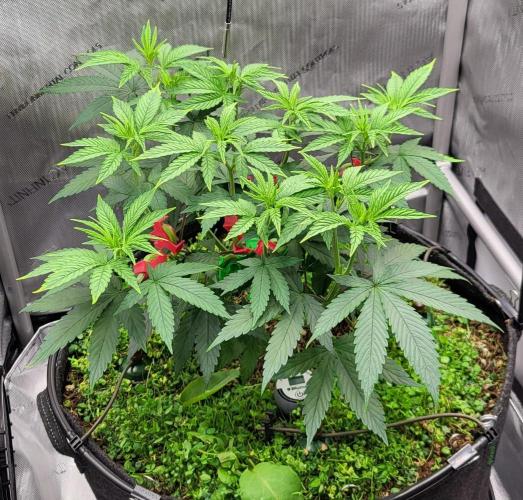
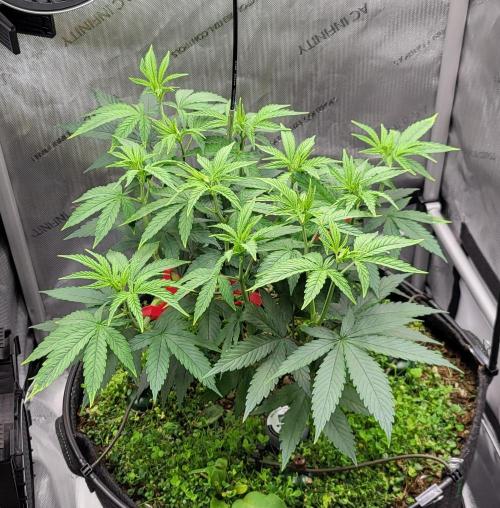
Otherwise, it was just about letting it grow and keeping the shoots at the same height with LST.
On the 4th day of the week, I liked the growth so much that I decided to switch to 12/12.
That meant the plant was exactly 32 days in veg.
For the switch, I installed the SCROG net to support the shoots later and to spread them a bit further apart.
The stretch started 2 days after the switch, let's see how much height it adds.
I still have plenty of room above.
I set the LED to 40% with the switch to 12/12.
This compensates for the 6 hours of low light.
I also lowered the humidity further.
Conclusion Veg:
I'm absolutely satisfied with the veg.
The plant has developed nicely.
The Living Soil from Couple of Plants has convinced me so far.
I didn't have to do anything except set the Blumat correctly and keep the tank filled.
Occasionally trimming the cover crop and otherwise just plant training, awesome 😊.
I'm now looking forward to the flowering.
But I think the soil will perform well here too.
It will be interesting to see if there will be Cal/Mag issues.
At least I won't be adding anything prophylactically, only if there are severe deficiencies.
The parameters in week 6:
Controller setting day: Advanced AI humidity 53% - 63%
Controller setting night: Advanced AI humidity 50% - 60%
Average daytime temperature: 26.7 degrees
Average nighttime temperature: 22.1 degrees
Average humidity day: 58.8%
Average humidity night: 54.7%
Average VPD day: 1.2
Average VPD night: 1.0
LED power: 40% = 145 watts
Lighting duration: 12 hours
Air circulation: Level 1 oscillating
7 likes
comments
Share
Used techniques
LST
Technique
ScrOG
Technique
7
Week 7. Flowering8mo ago
61 cm
Height
12 hrs
Light Schedule
25 °C
Day Air Temp
6.5
pH
Weak
Smell
55 %
Air Humidity
22 °C
Night Air Temp
40 set_lilers
Pot Size
40 cm
Lamp Distance
Alvareas The Grow:
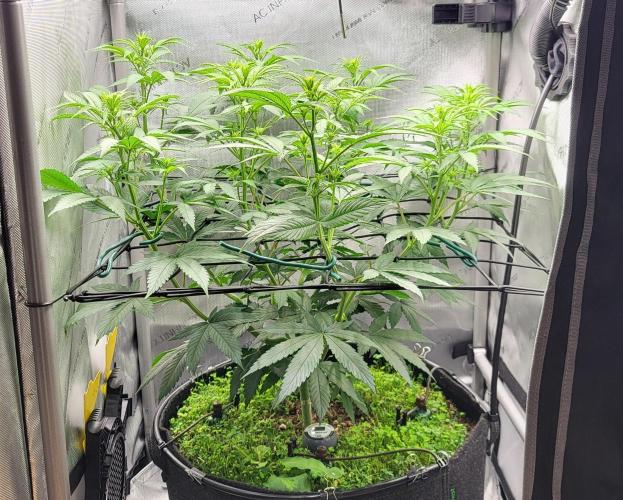
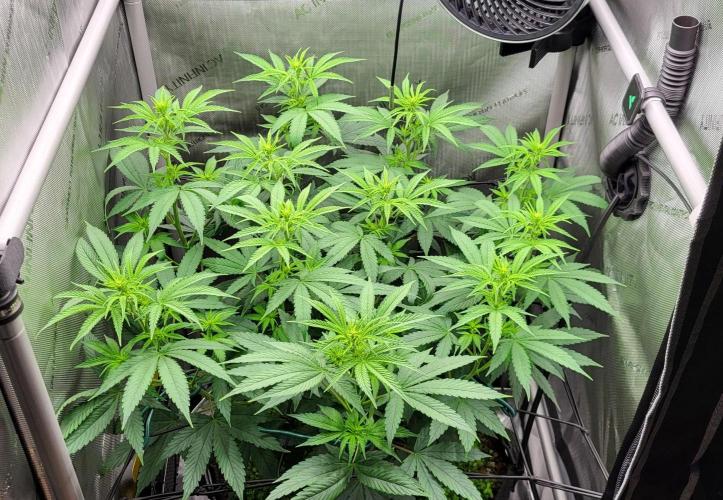
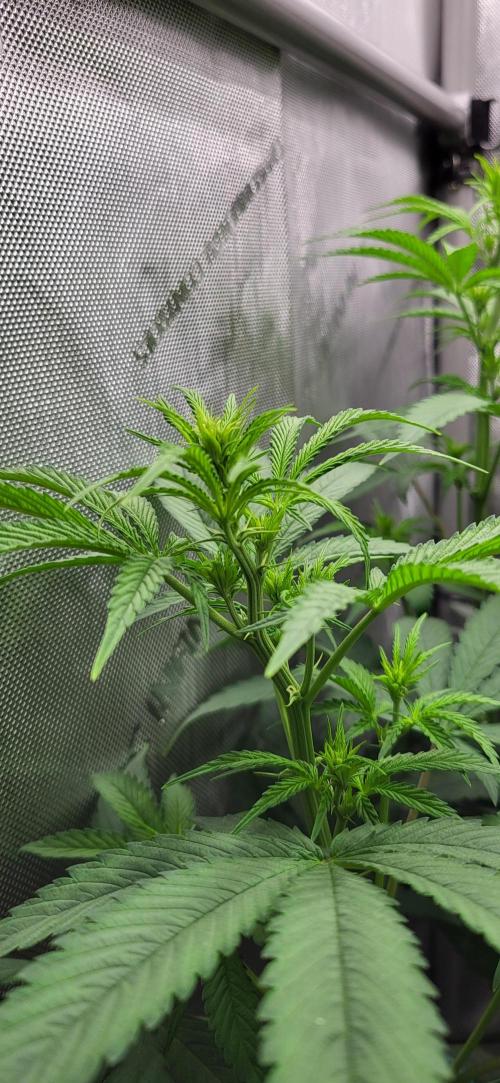
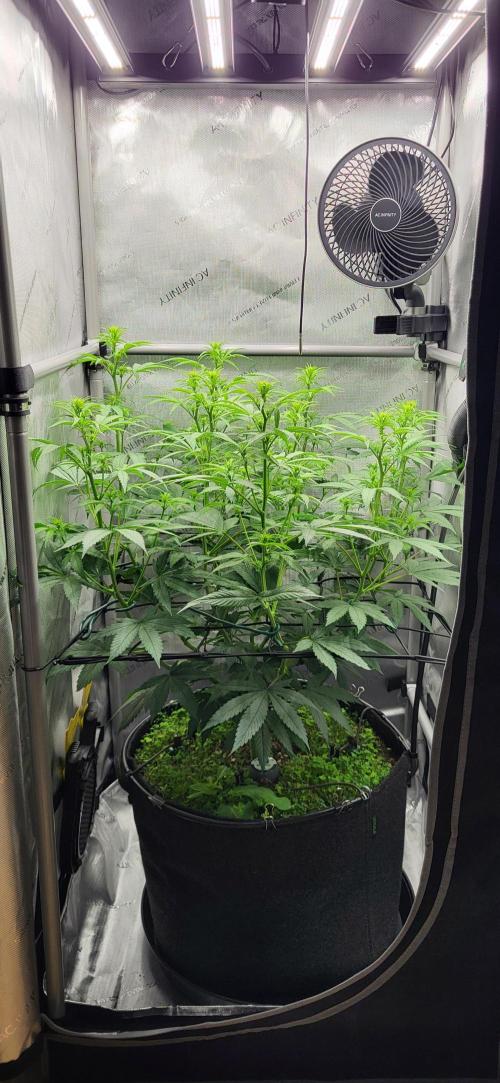
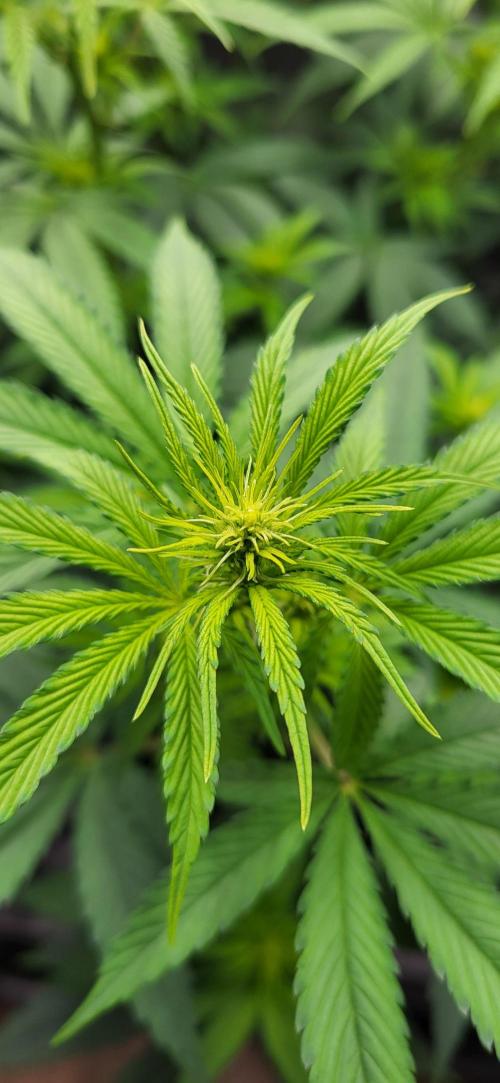
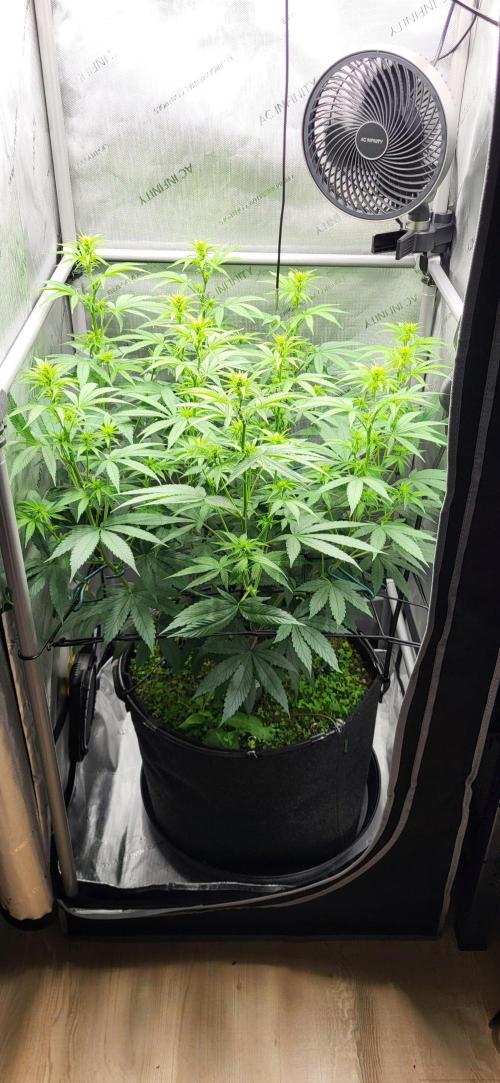
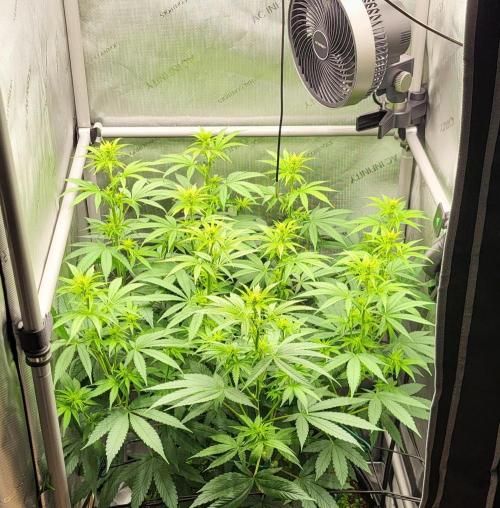
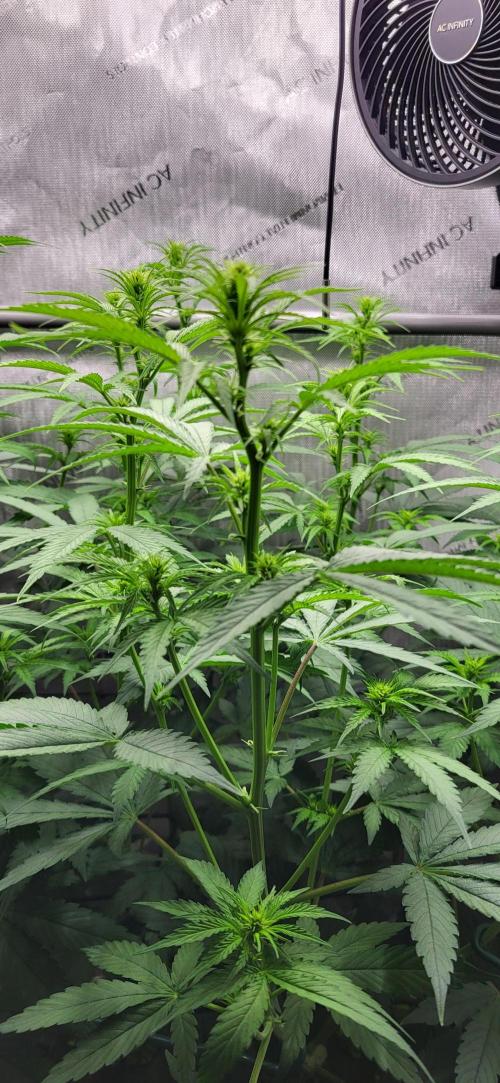
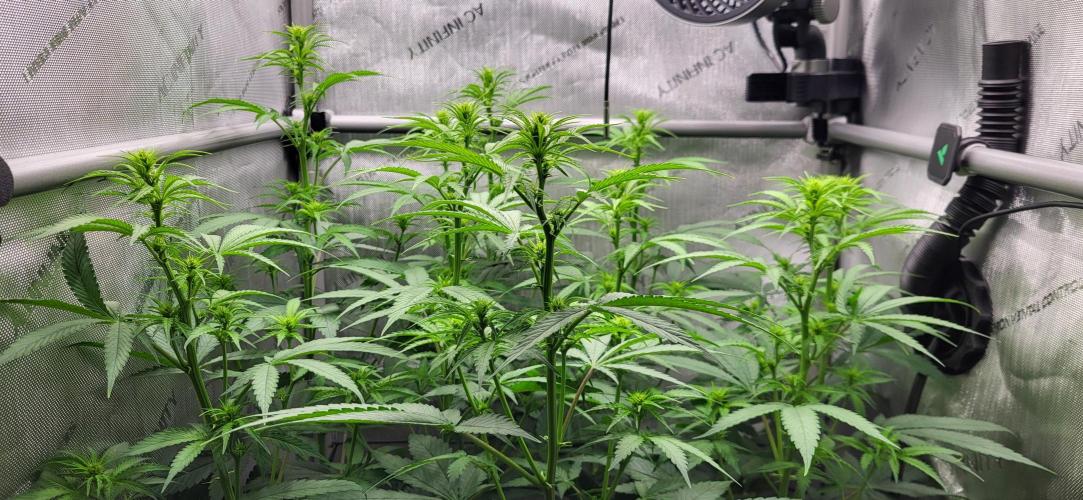
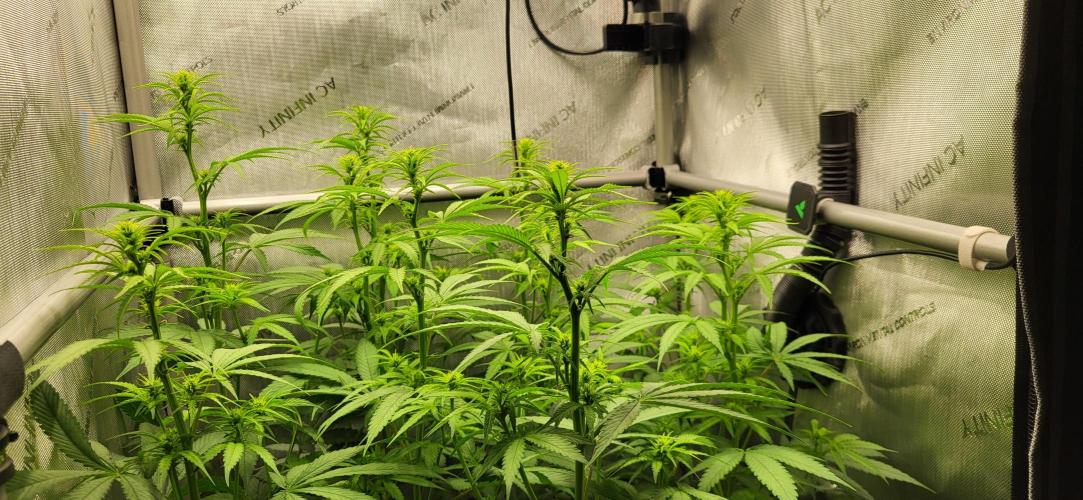
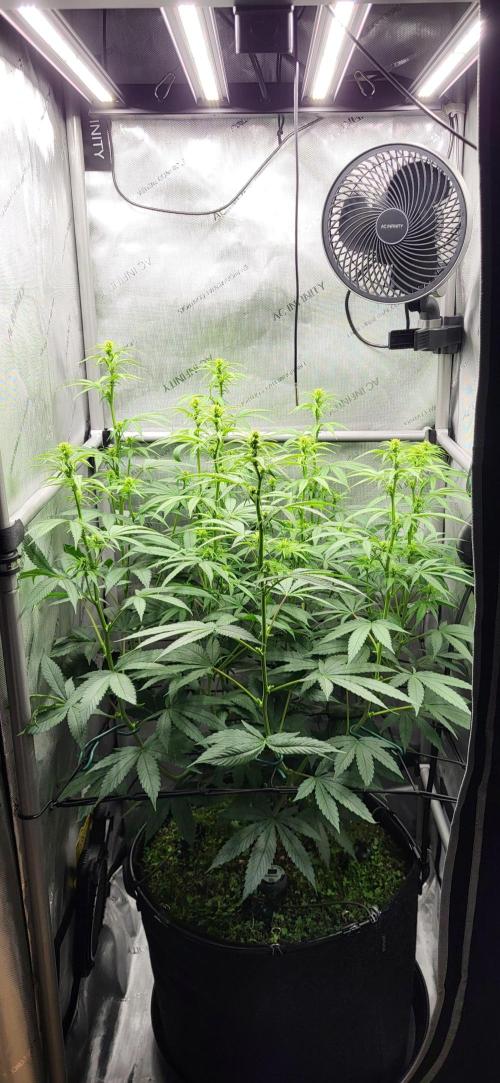
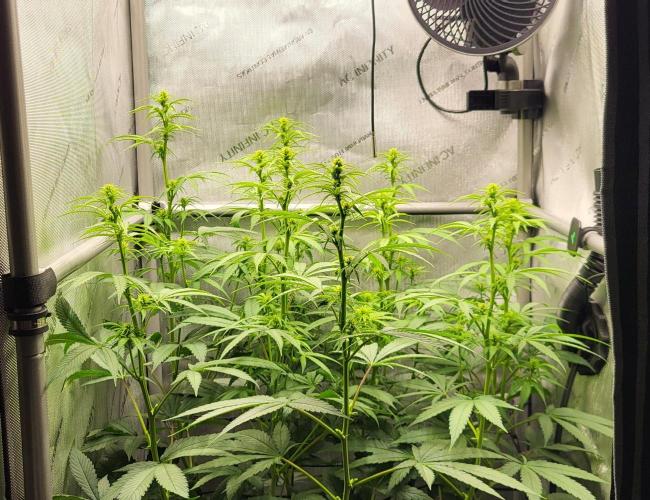
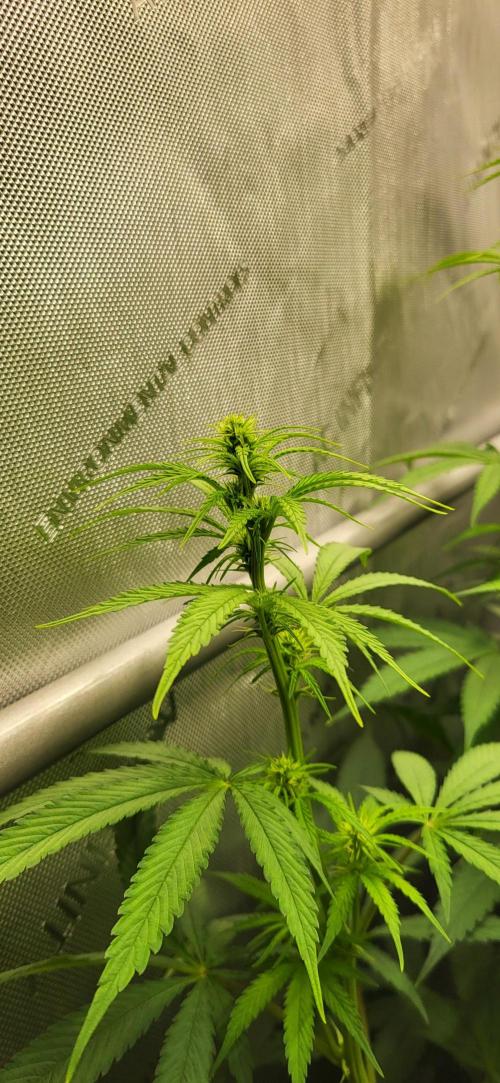
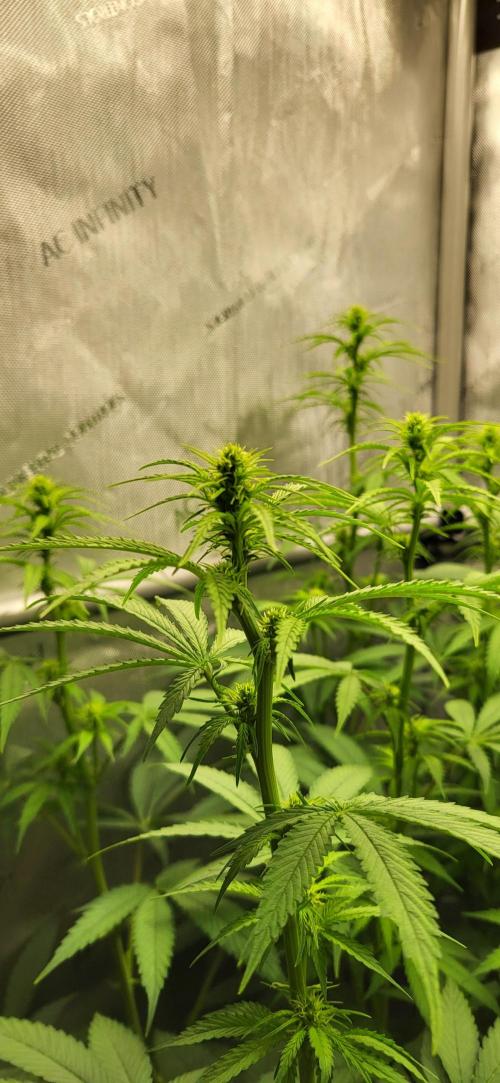
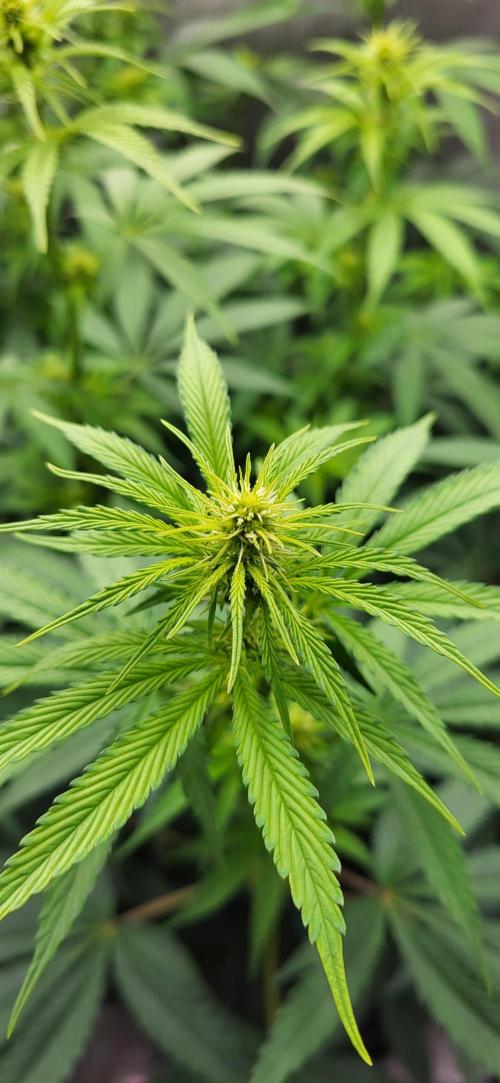
The plant has stretched quite a bit in the first week of flowering.
It has reached 22 cm.
Let's see how much more it will grow.
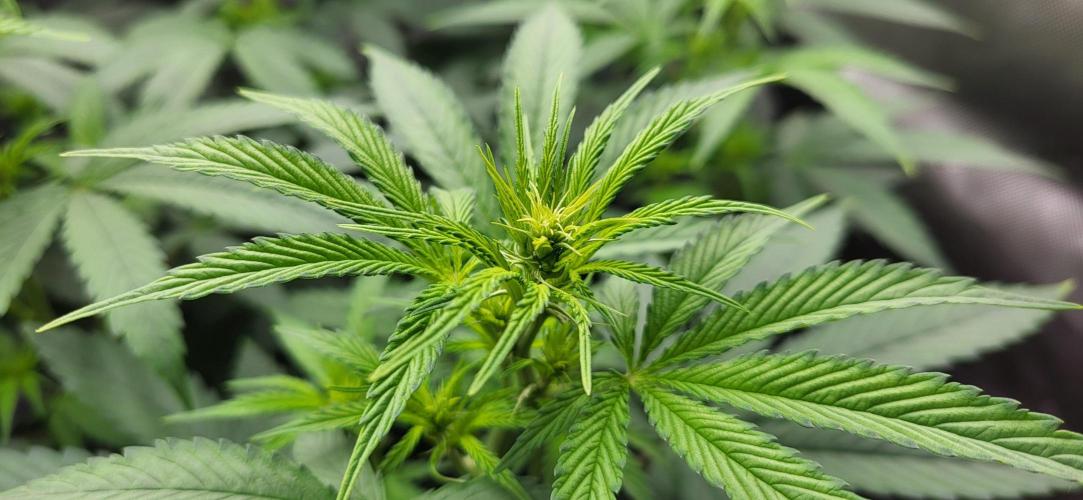
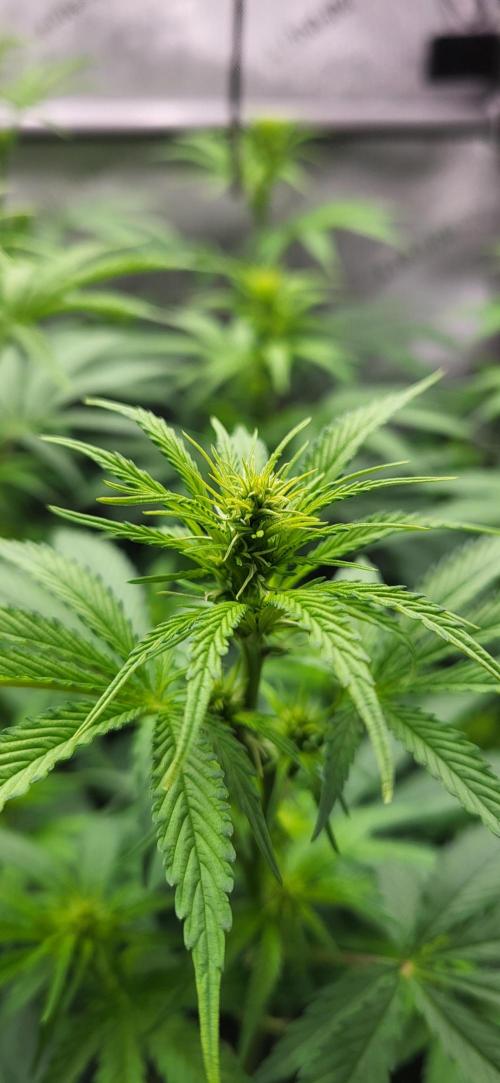
The flower sites have developed nicely.
I always remove new shoots immediately.
I want to stick with the shoots that I achieved through topping.
The parameters in week 6:
Controller setting day: Advanced AI humidity 50% - 60%
Controller setting night: Advanced AI humidity 50% - 60%
Average daytime temperature: 25 degrees
Average nighttime temperature: 22 degrees
Average humidity day: 55%
Average humidity night: 55%
Average VPD day: 1.3
Average VPD night: 1.1
LED power: 40% = 145 watts
Lighting duration: 12 hours
Air circulation: Level 1 oscillating
7 likes
comments
Share
8
Week 8. Flowering8mo ago
92 cm
Height
12 hrs
Light Schedule
25 °C
Day Air Temp
6.5
pH
Weak
Smell
55 %
Air Humidity
22 °C
Night Air Temp
40 set_lilers
Pot Size
40 cm
Lamp Distance
Alvareas The Grow:
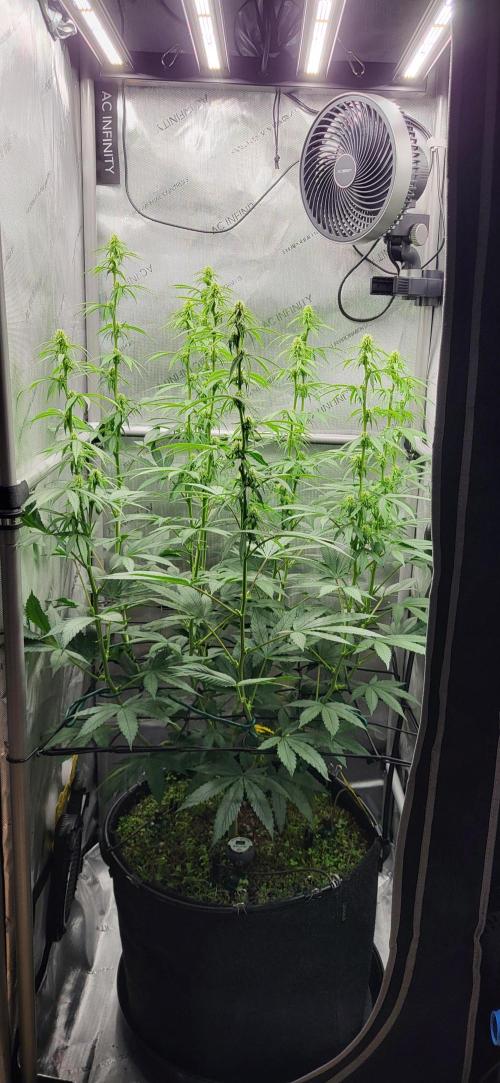
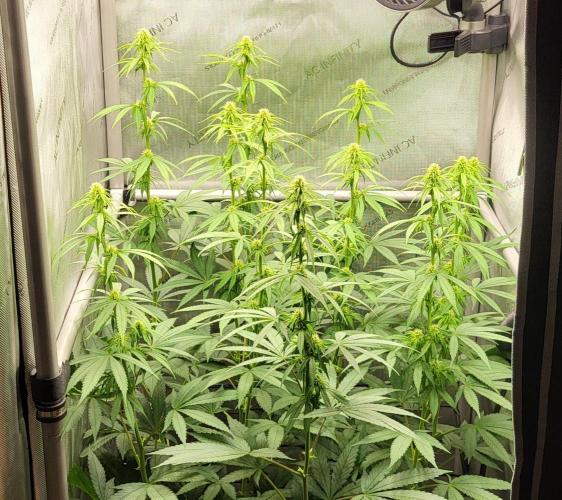
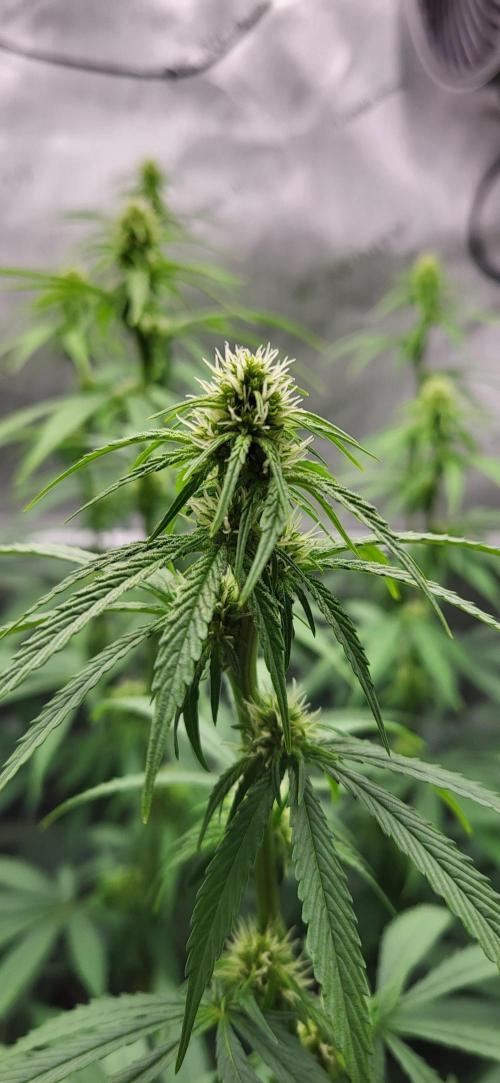
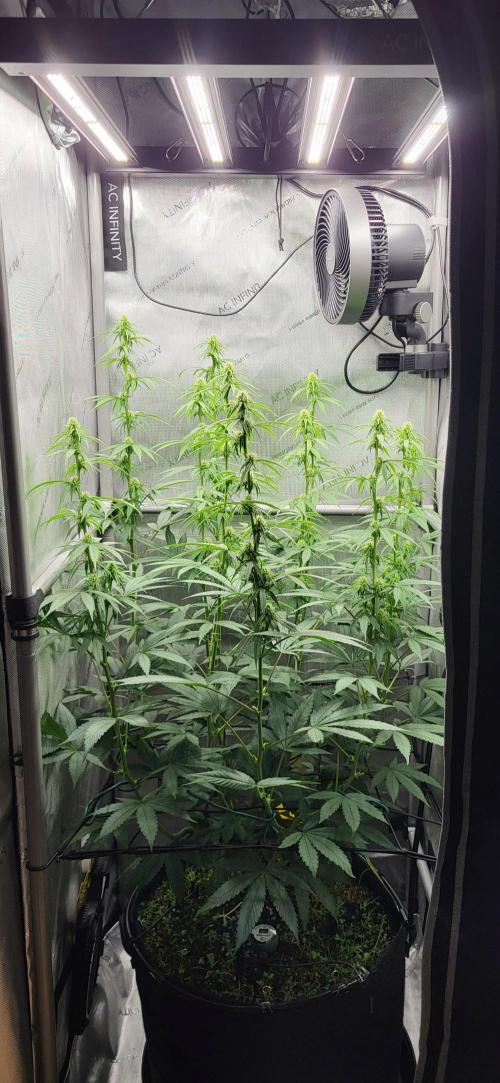
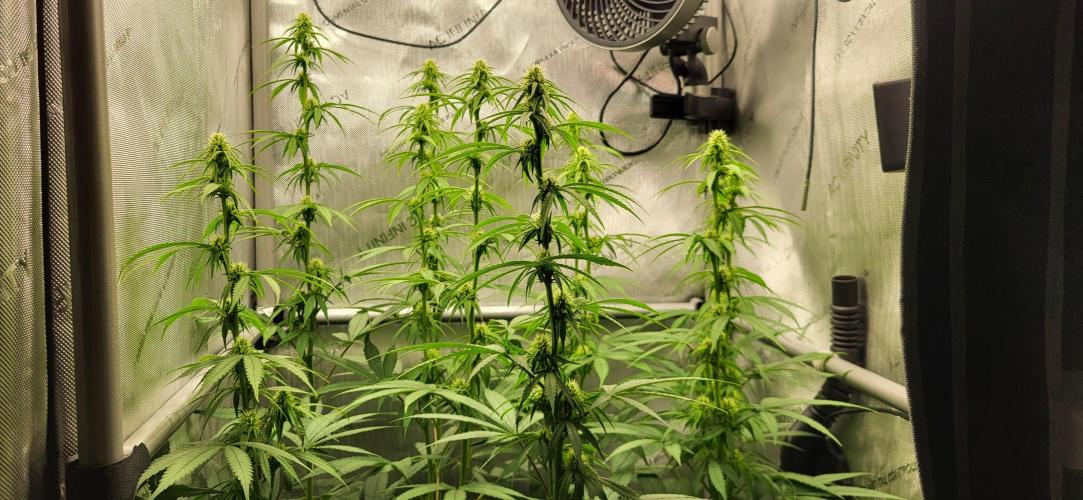
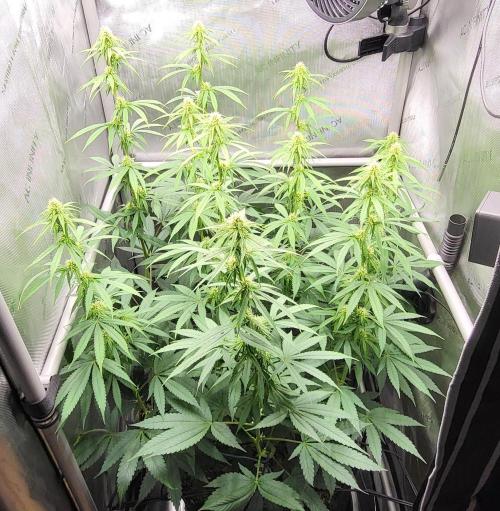
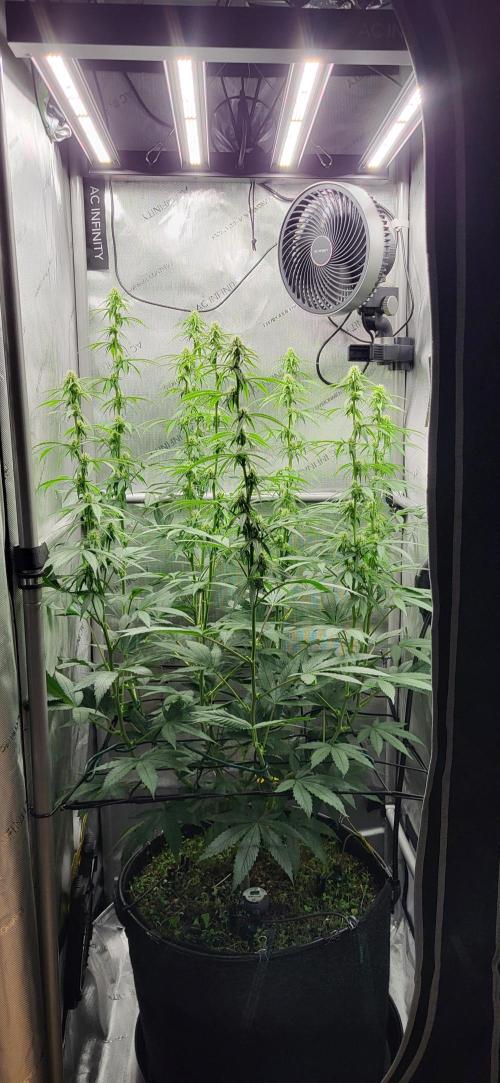
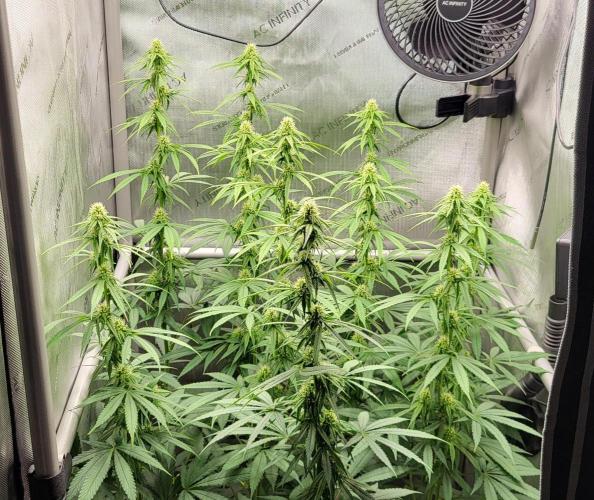
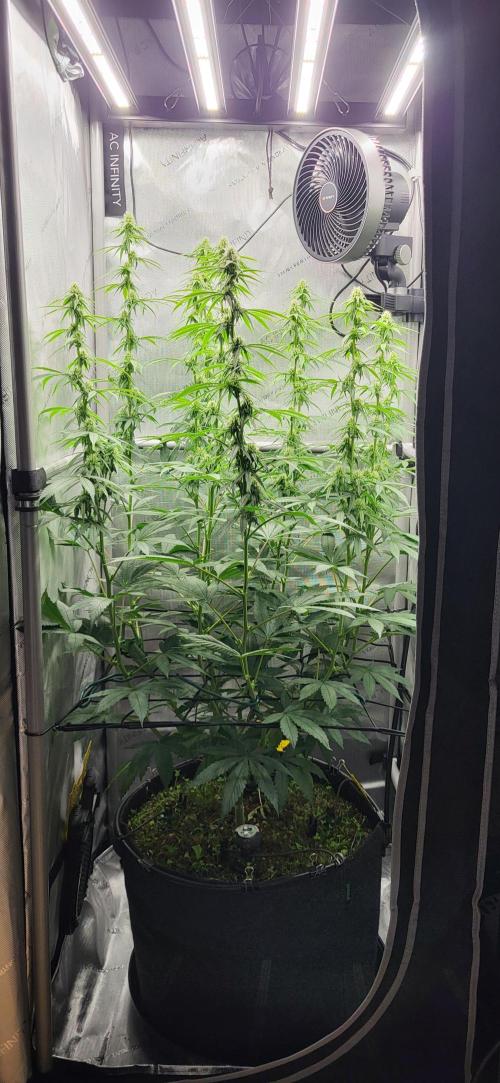
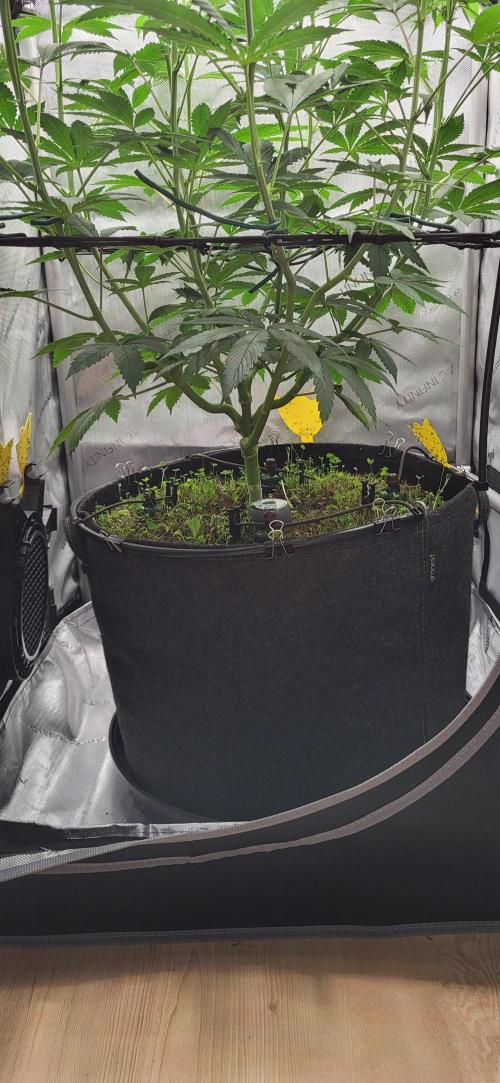
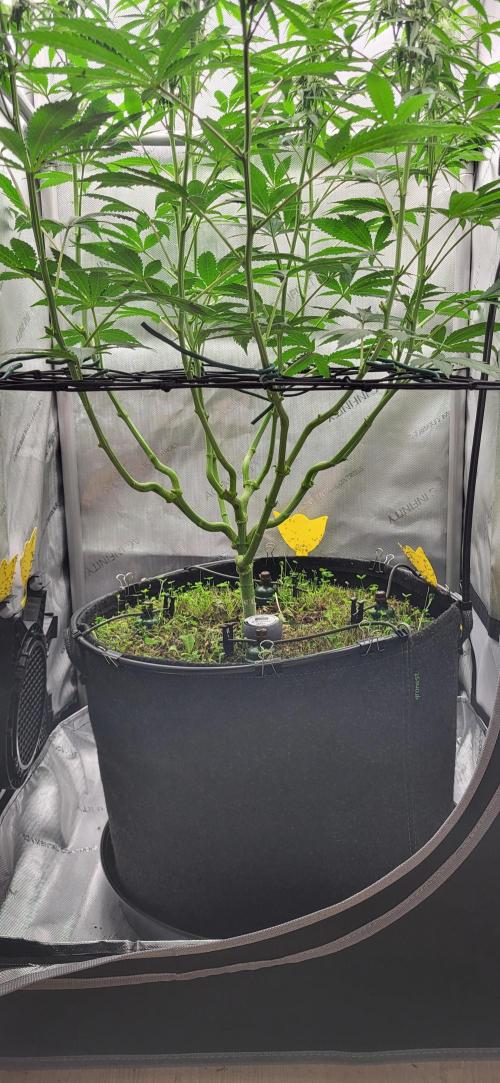
This week the plant exploded.
By the end of the week, it was 31 cm.
Luckily, I placed the exhaust outside the tent from the start this time, otherwise it would get tight.
I hope it doesn't grow another 30 cm in week 3, or I'll have problems with the LED.
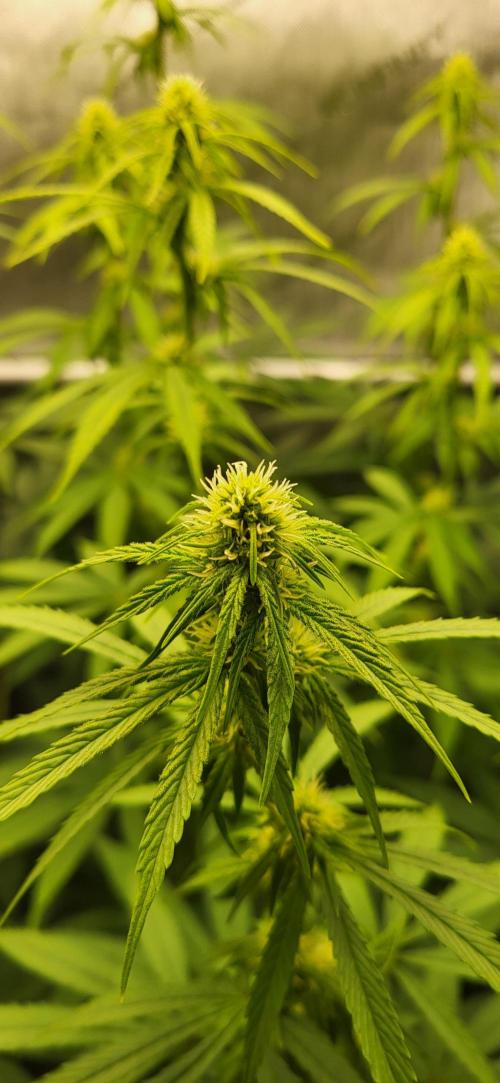
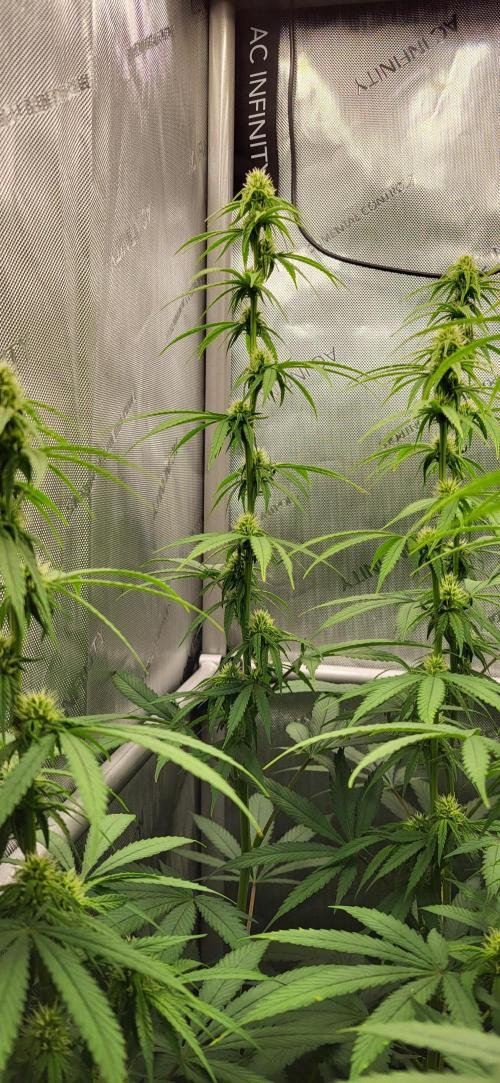
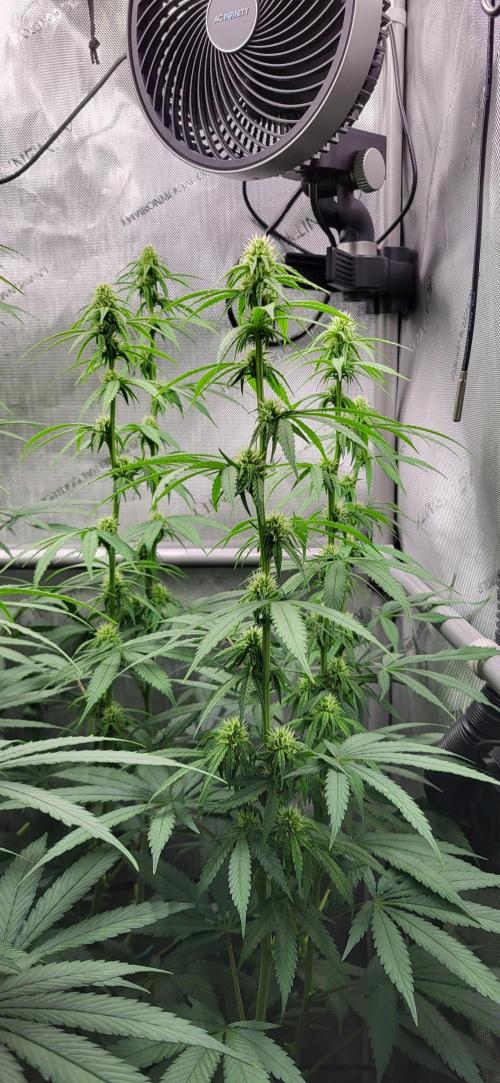
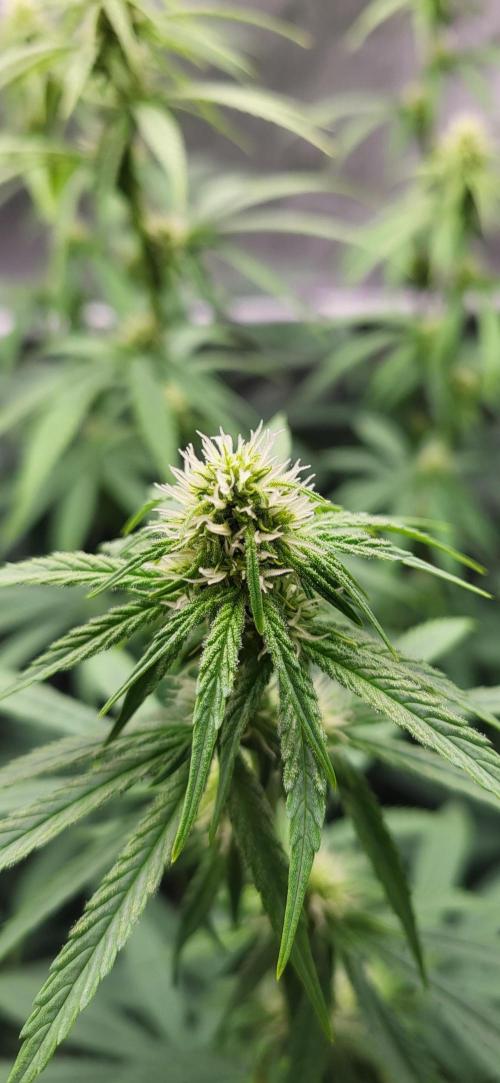
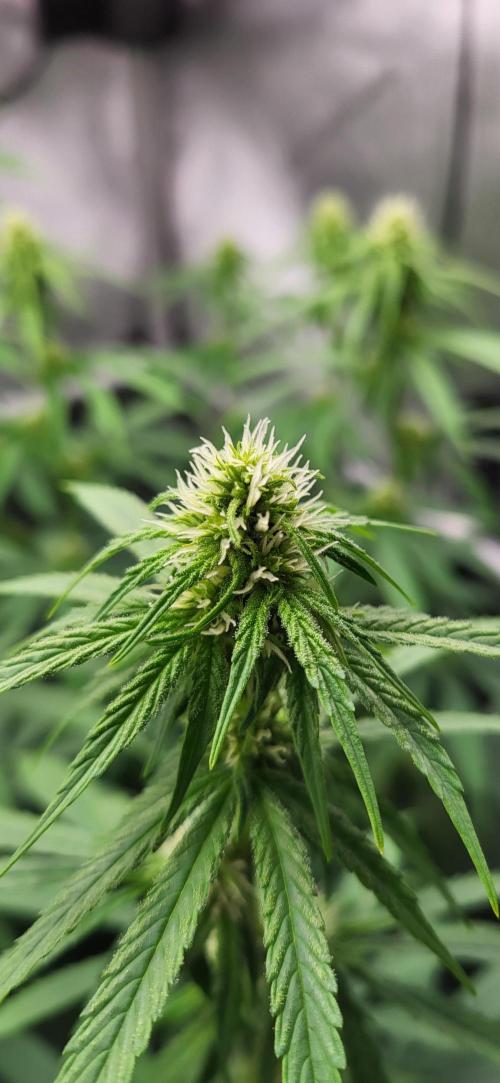
The buds are also developing very nicely.
Day by day, the plant is starting to smell more.
I can hardly describe the scent, but it somehow reminds me of a strong freshly ground coffee with slight skunk tendencies.
The soil is still performing flawlessly.
There are no deficiencies visible.
I didn't have to add any Cal/Mag either.
So far, I can clearly recommend it.
At the end of the week, I removed all the leaves up to the net.
The parameters in week 8:
Controller setting day: Advanced AI humidity 50% - 60%
Controller setting night: Advanced AI humidity 50% - 60%
Average daytime temperature: 25 degrees
Average nighttime temperature: 22 degrees
Average humidity day: 55%
Average humidity night: 55%
Average VPD day: 1.3
Average VPD night: 1.1
LED power: 40% = 145 watts
Lighting duration: 12 hours
Air circulation: Level 1 oscillating
6 likes
comments
Share
Used techniques
Defoliation
Technique
9
Week 9. Flowering7mo ago
106 cm
Height
12 hrs
Light Schedule
25 °C
Day Air Temp
6.5
pH
Normal
Smell
55 %
Air Humidity
22 °C
Night Air Temp
40 set_lilers
Pot Size
20 cm
Lamp Distance
Alvareas The Grow:
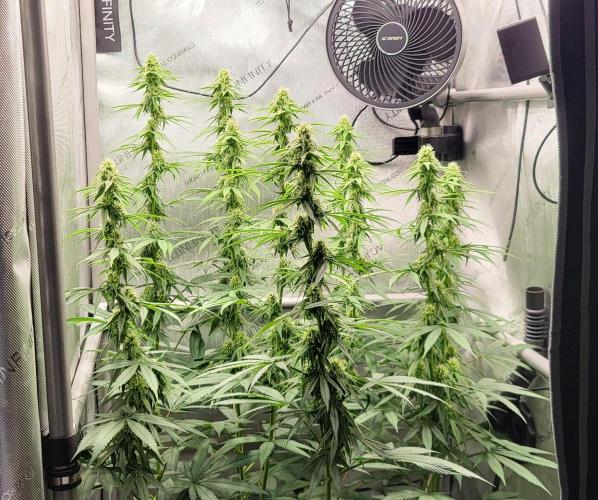
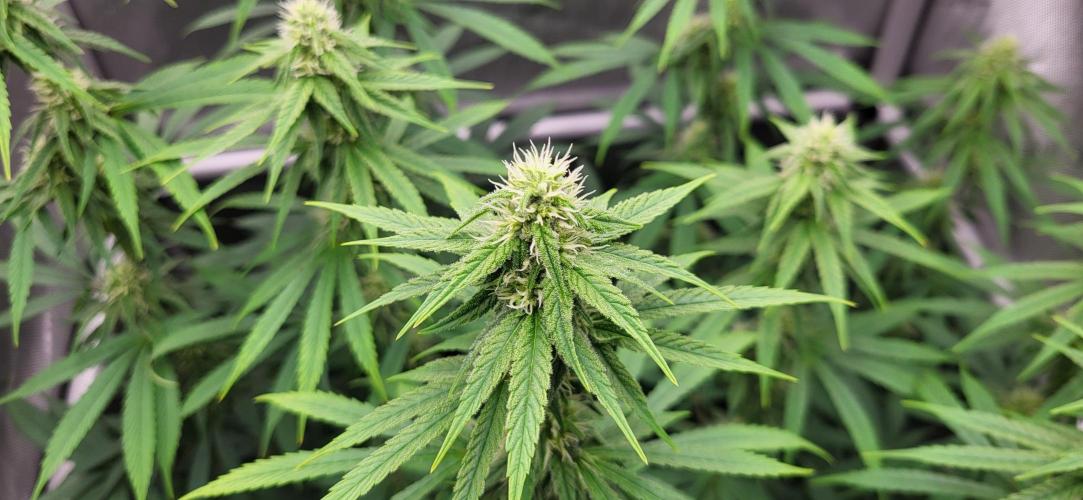
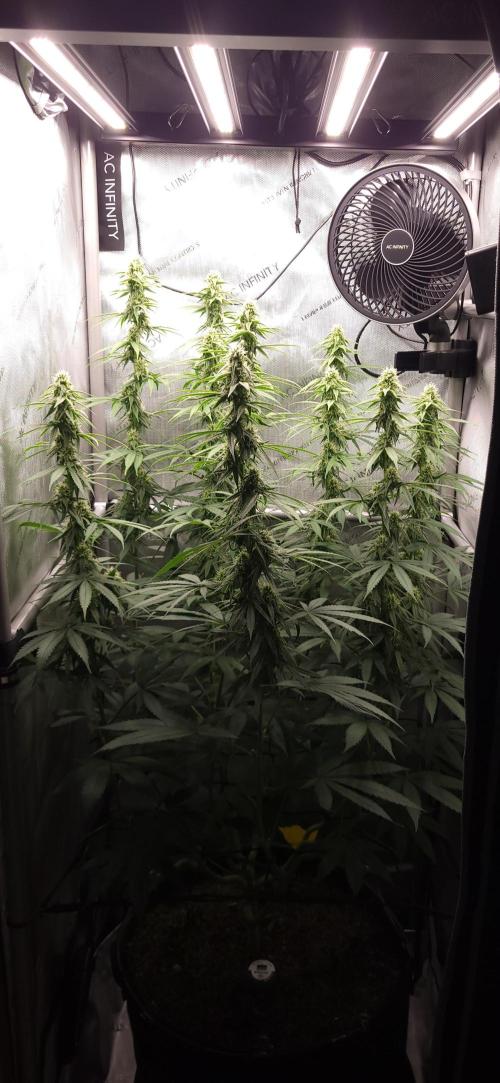
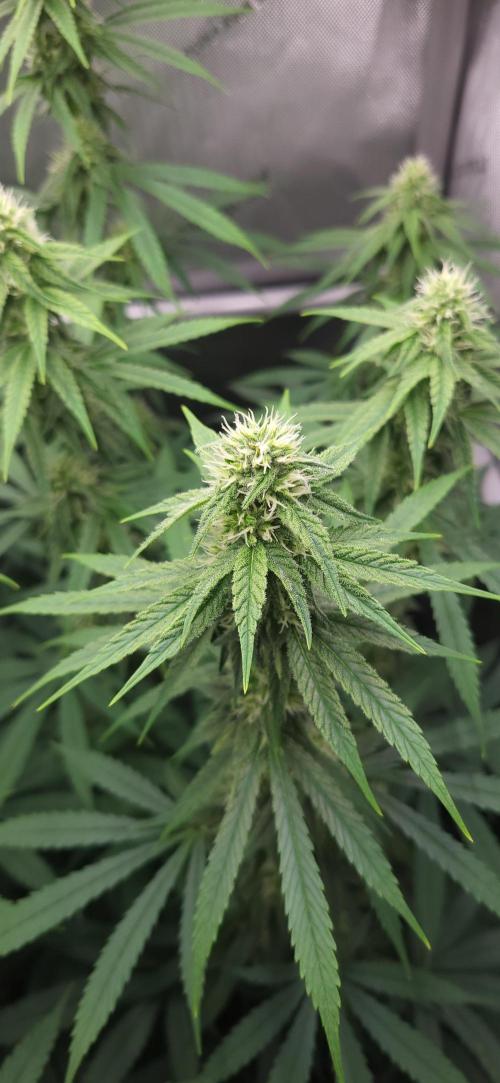
The plant has grown another 14cm this week and is now 106cm tall.
Fortunately, the stretch is over.
During the flowering stretch, the plant gained a total of 69cm in height.
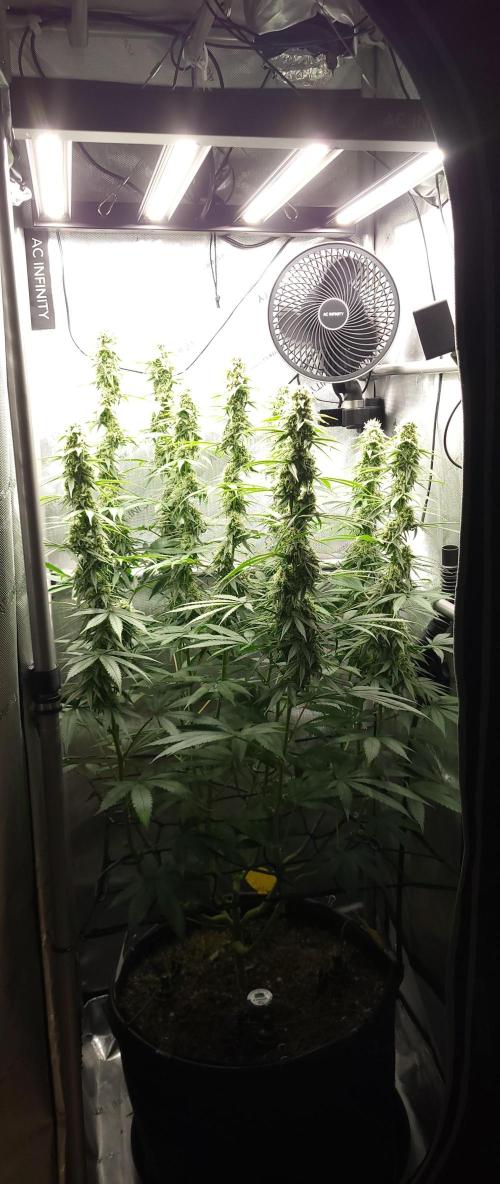
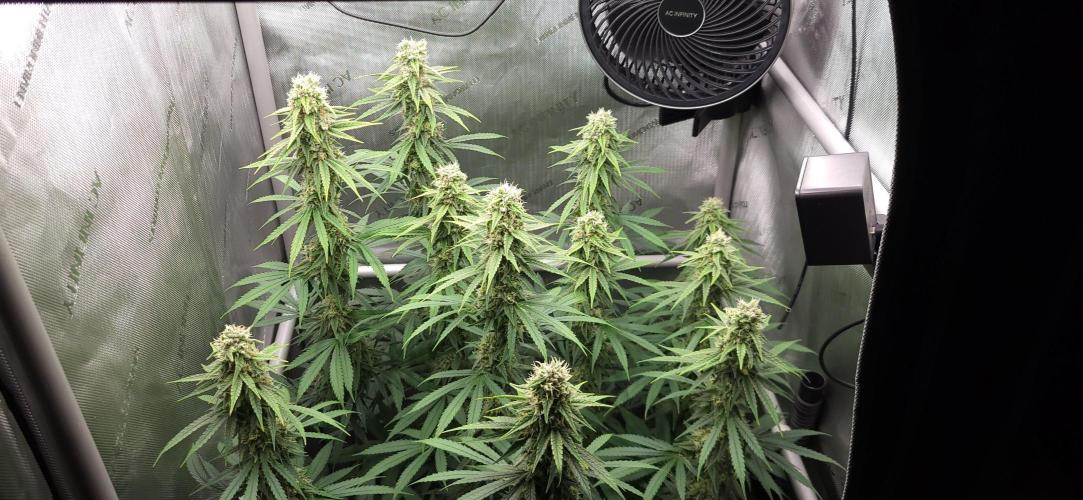
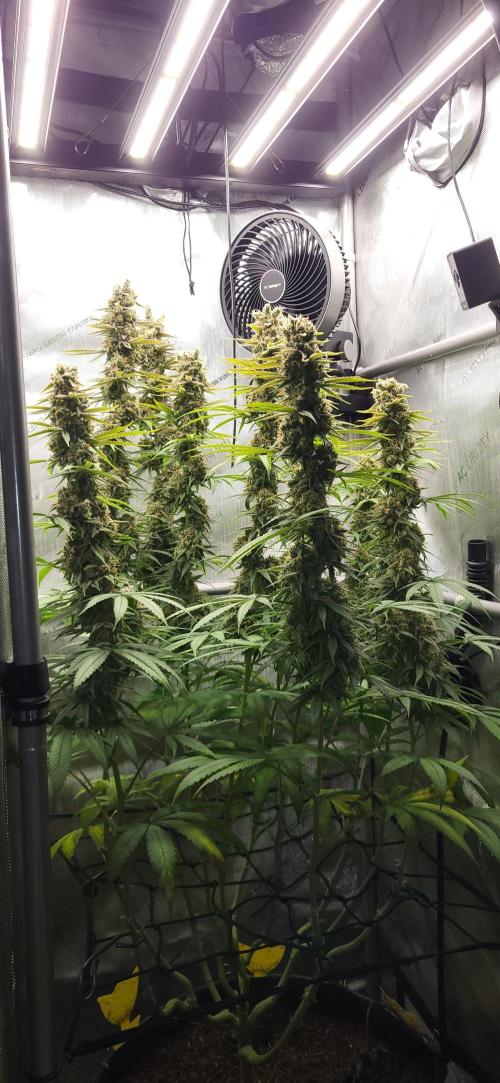
I don't have much space left to the LED, but I can't hang it any higher either.
But as long as there's no bleaching, everything is good.
I'm leaving the LED at 40% power for now.
That's about 1000 PPFD at the tip of the highest shoot.
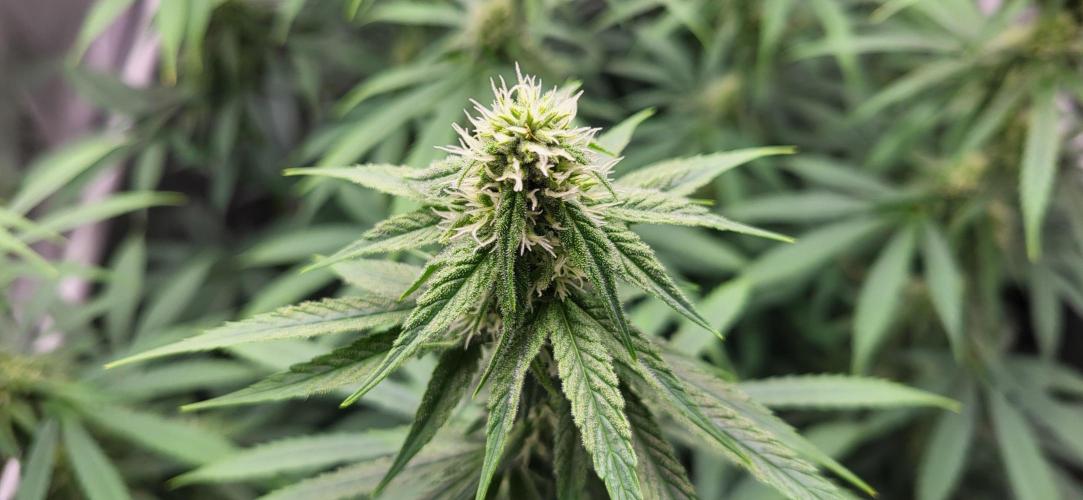
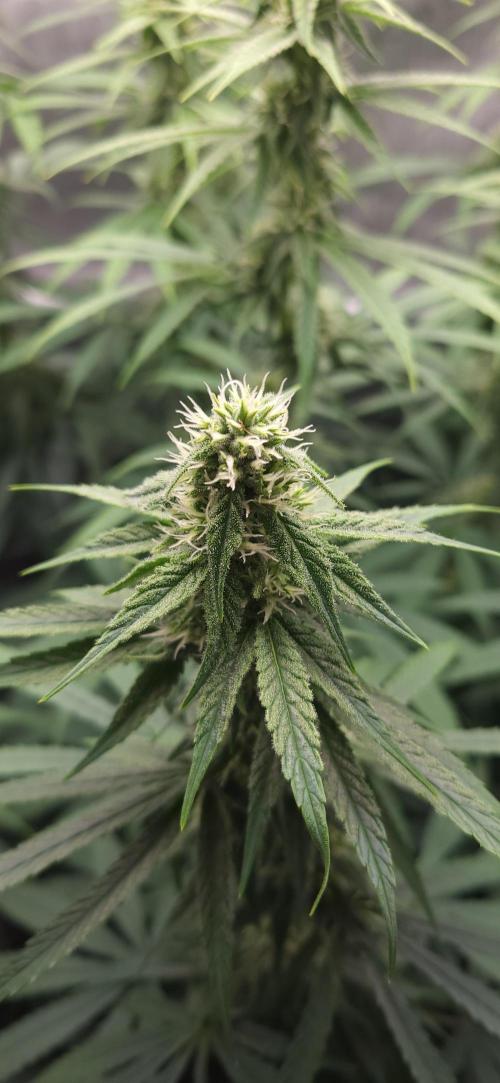
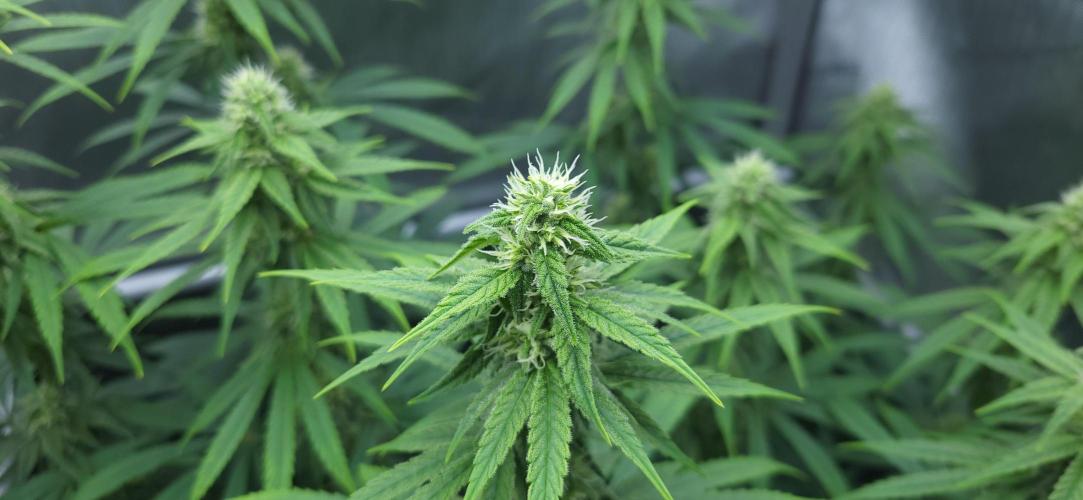
Otherwise, the buds are slowly swelling, and the first trichome formation is already visible.
The smell has noticeably increased again.
The parameters in week 9:
Controller setting day: Advanced AI humidity 50% - 60%
Controller setting night: Advanced AI humidity 50% - 60%
Average daytime temperature: 25 degrees
Average nighttime temperature: 22 degrees
Average humidity day: 55%
Average humidity night: 55%
Average VPD day: 1.3
Average VPD night: 1.1
LED power: 40% = 145 watts
Lighting duration: 12 hours
Air circulation: Level 1 oscillating
5 likes
2 comments
Share
10
Week 10. Flowering7mo ago
106 cm
Height
12 hrs
Light Schedule
25 °C
Day Air Temp
6.5
pH
Normal
Smell
55 %
Air Humidity
22 °C
Night Air Temp
40 set_lilers
Pot Size
20 cm
Lamp Distance
Alvareas The Grow:
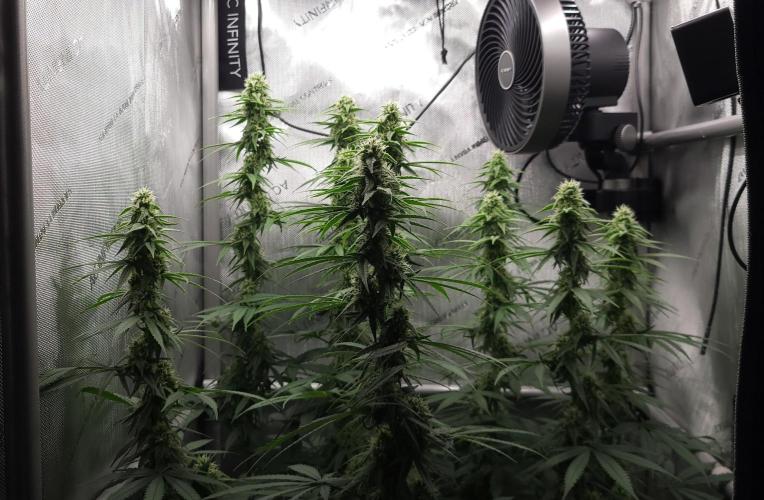
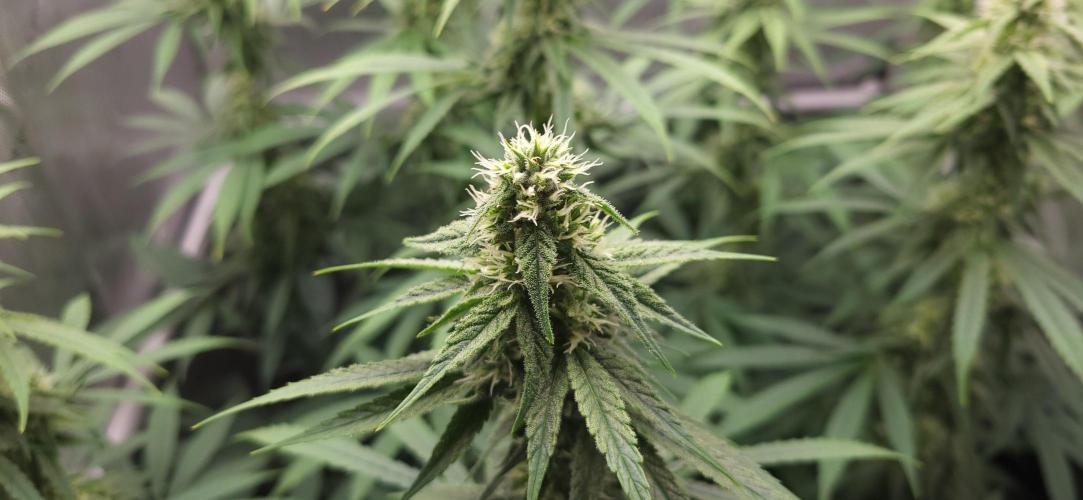
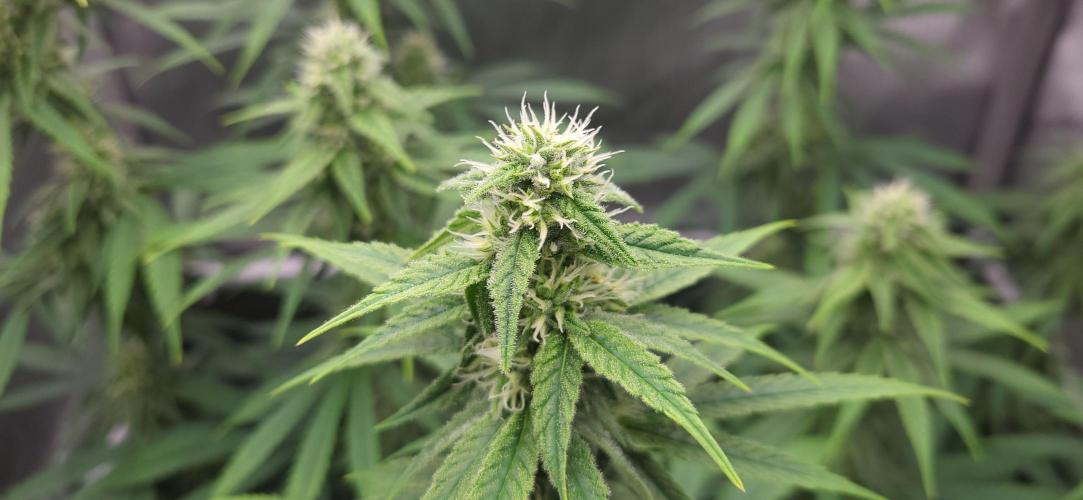
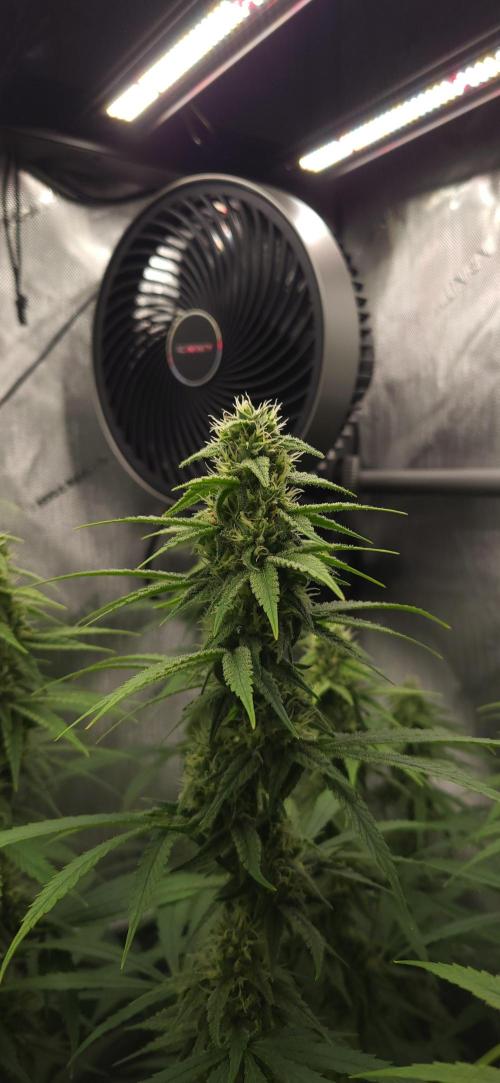
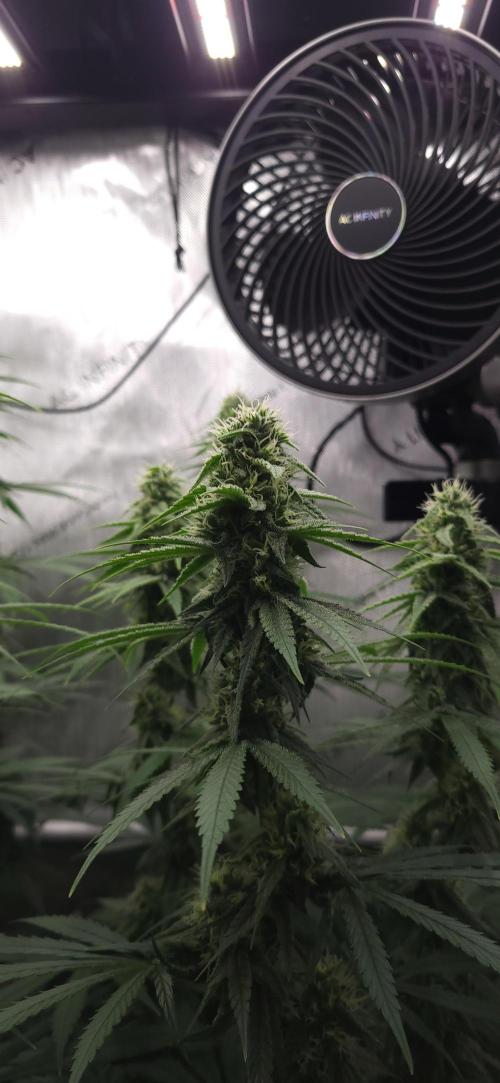
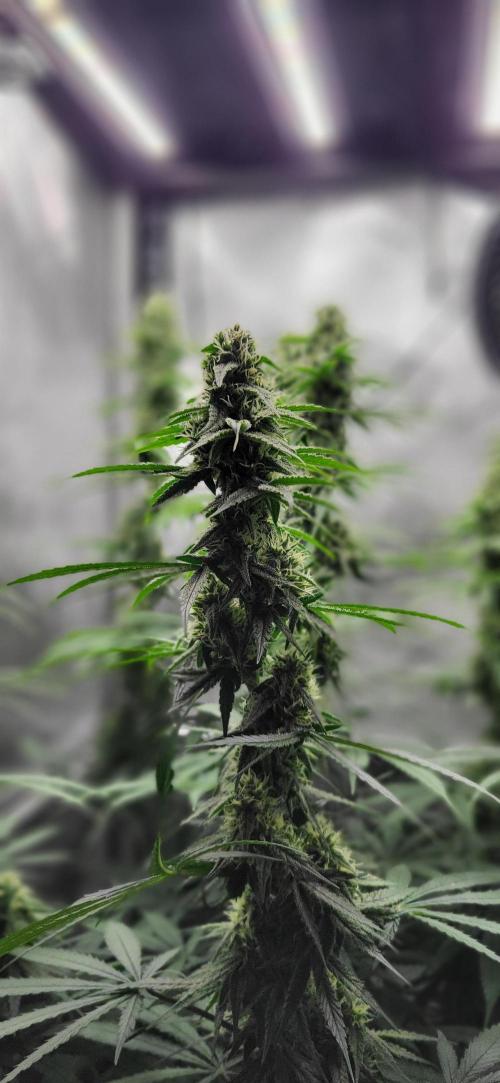
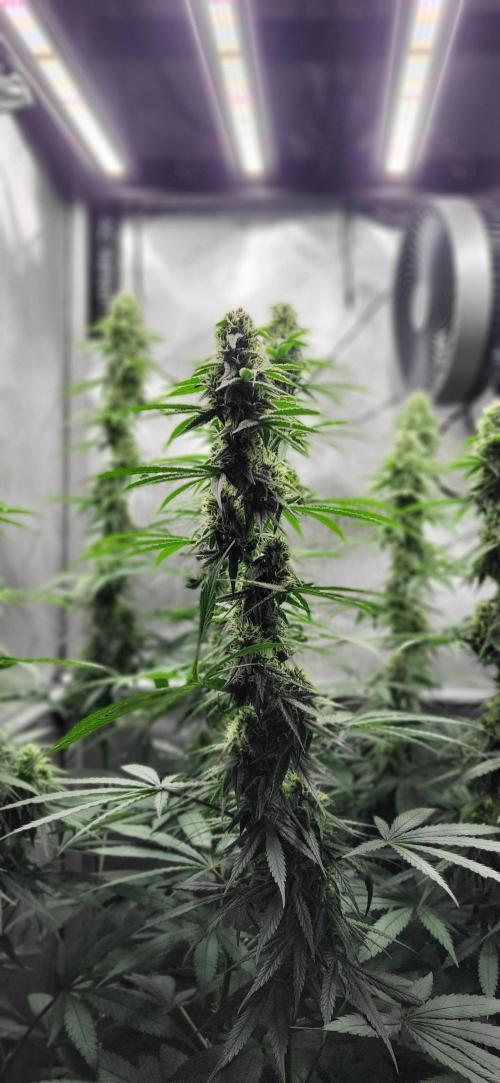
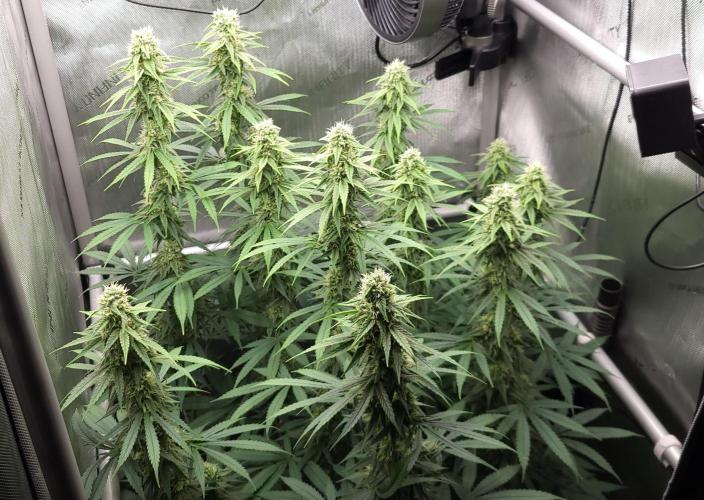
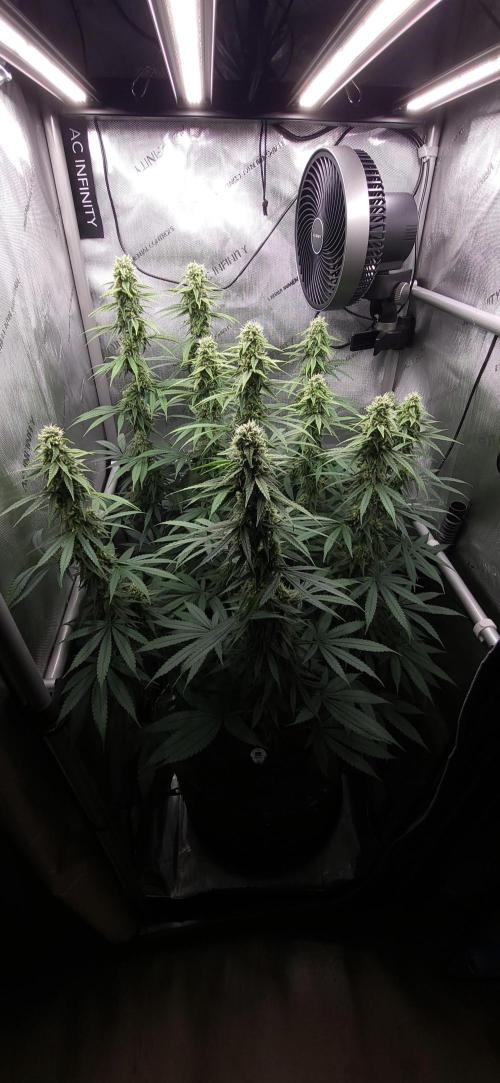
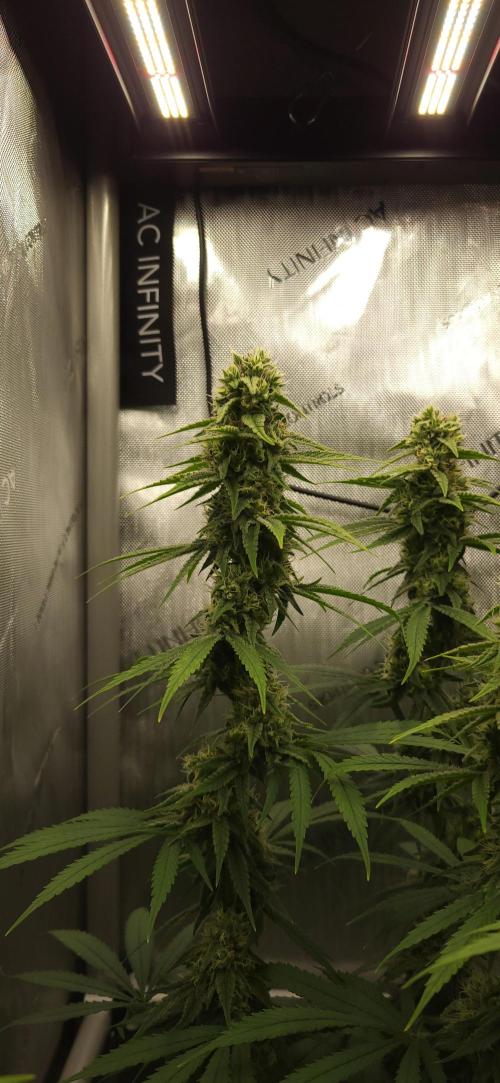
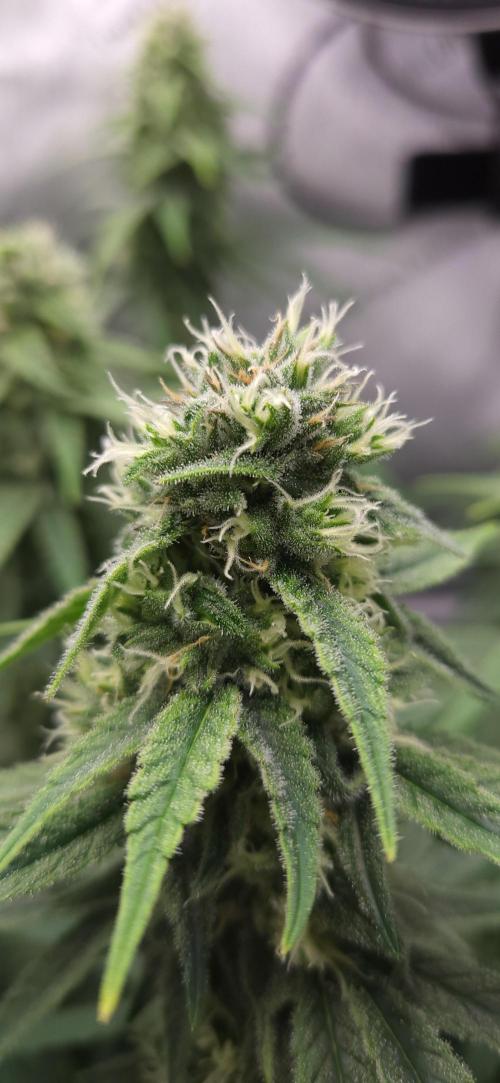
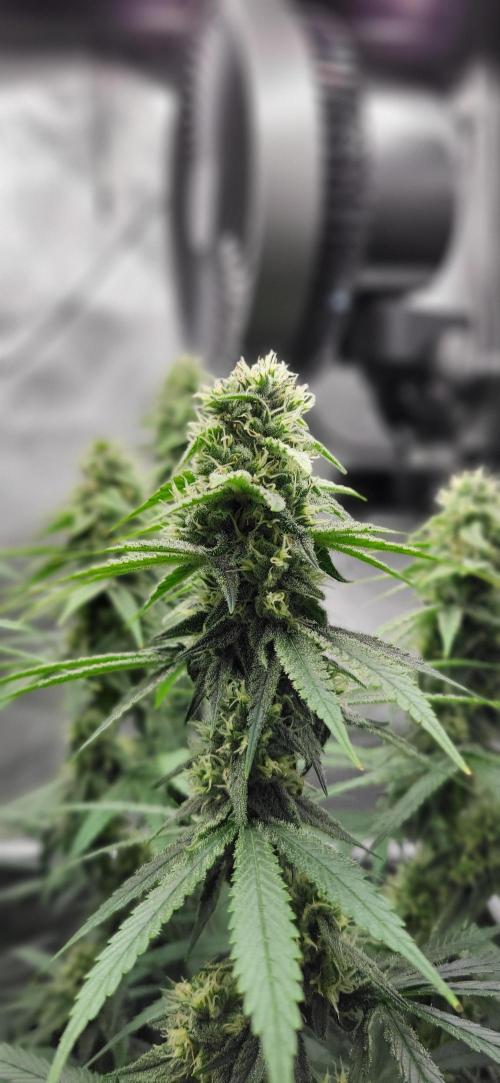
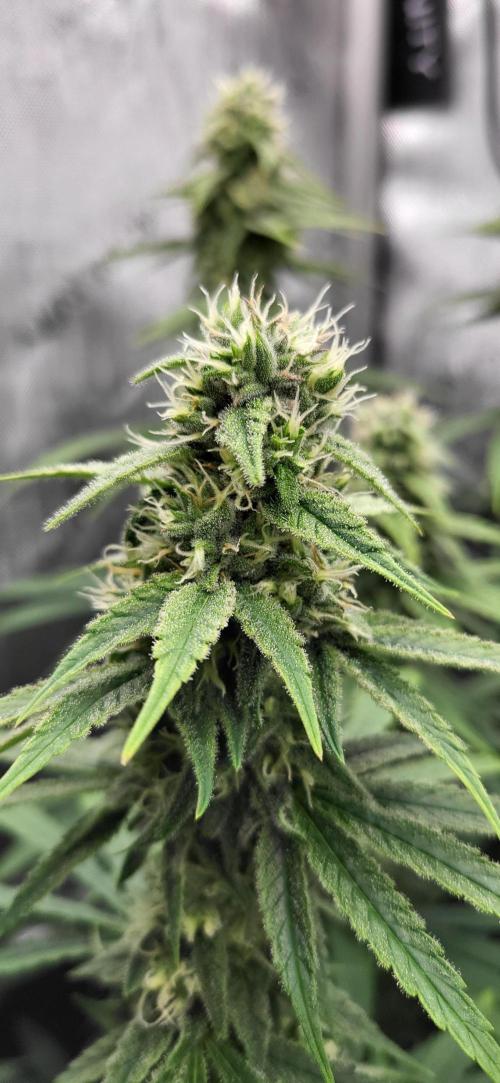
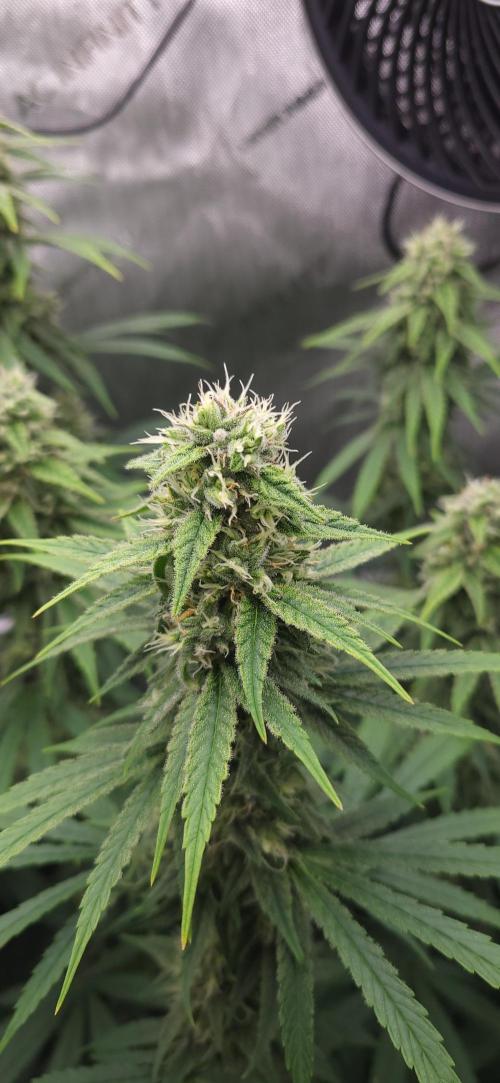
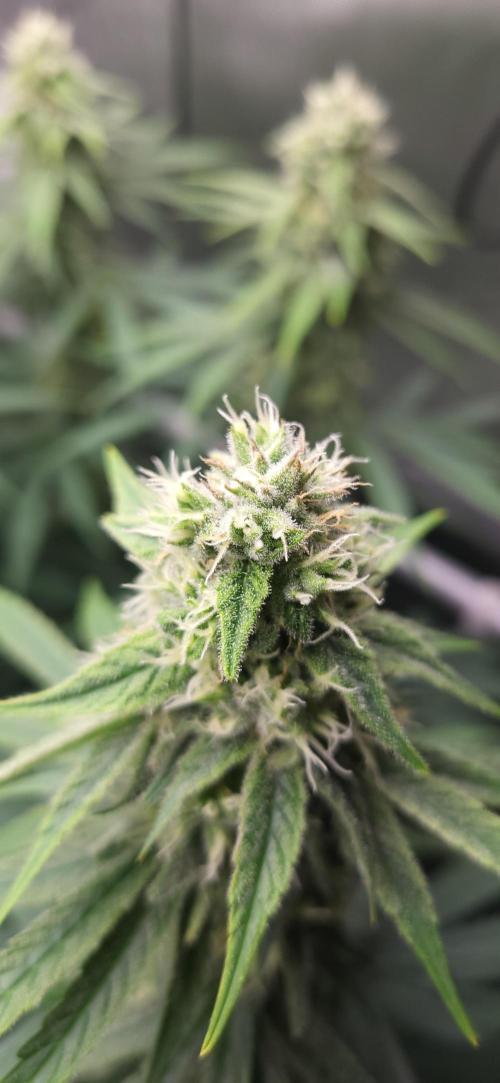
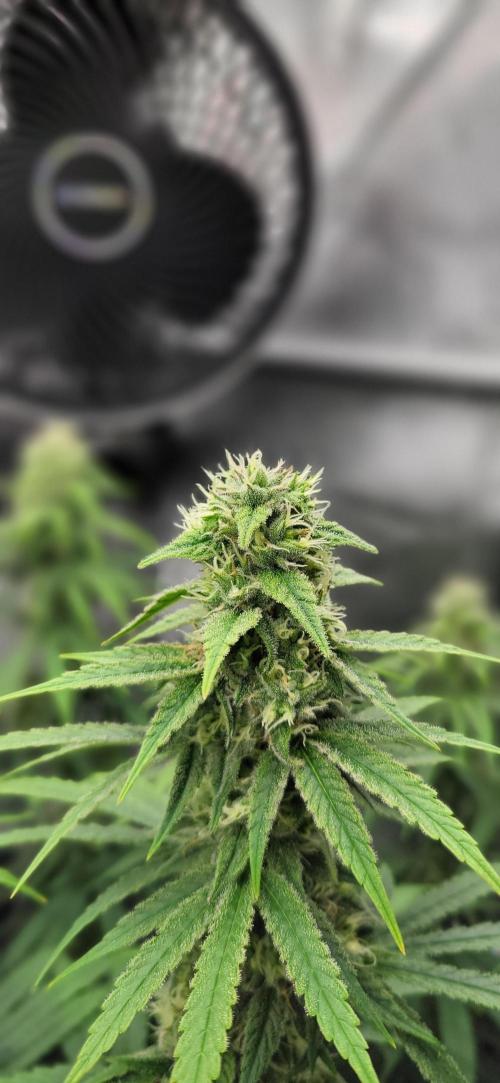
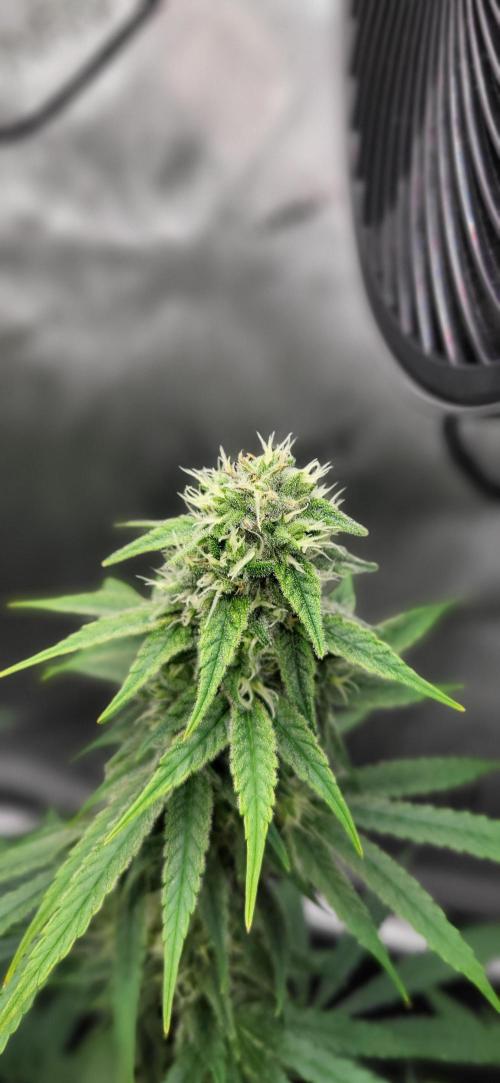
The buds are developing very nicely.
The smell is getting stronger too, somehow it has a hint of freshly ground coffee.
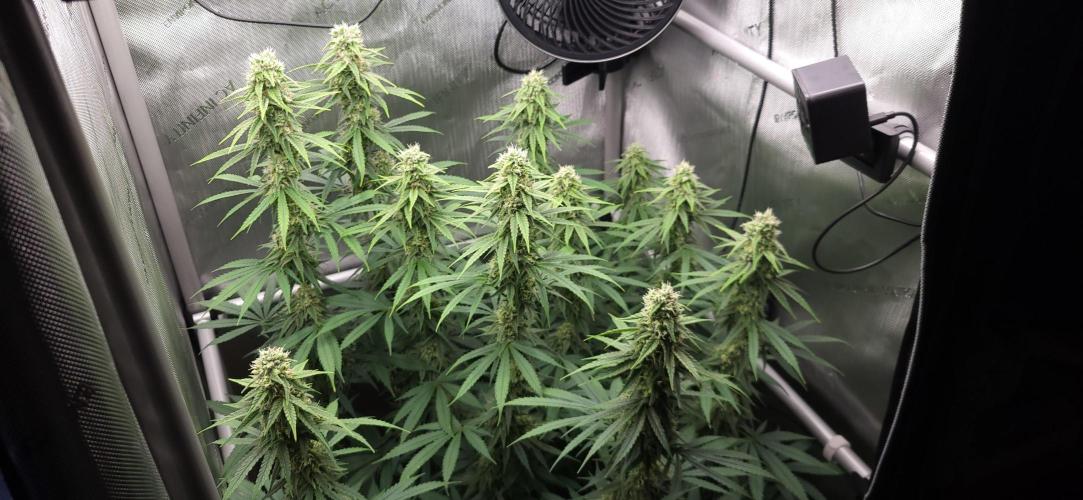
This week I removed all the leaves up to the net.
I didn't have to remove any more shoots since I had already done that whenever they developed.
Above the net, I only removed a couple of leaves.
The plant is already very open due to the net, and the bud-to-leaf ratio is also very good.
So, for my taste, there's enough light getting everywhere.
So far, the plant is handling the 1000 PPFD very well.
I'm also very satisfied with the Living Soil from Couple of Plants.
So far, there are no deficiencies at all.
No Cal/Mag issues either.
In my previous runs with organic liquid fertilizers, I always had the typical rust spots here.
This time, nothing.
The parameters in week 10:
Controller setting day: Advanced AI humidity 50% - 60%
Controller setting night: Advanced AI humidity 50% - 60%
Average daytime temperature: 25 degrees
Average nighttime temperature: 22 degrees
Average humidity day: 55%
Average humidity night: 55%
Average VPD day: 1.3
Average VPD night: 1.1
LED power: 40% = 145 watts
Lighting duration: 12 hours
Air circulation: Level 1 oscillating
4 likes
2 comments
Share
Used techniques
Defoliation
Technique
11
Week 11. Flowering7mo ago
106 cm
Height
12 hrs
Light Schedule
25 °C
Day Air Temp
6.5
pH
Strong
Smell
55 %
Air Humidity
22 °C
Night Air Temp
40 set_lilers
Pot Size
20 cm
Lamp Distance
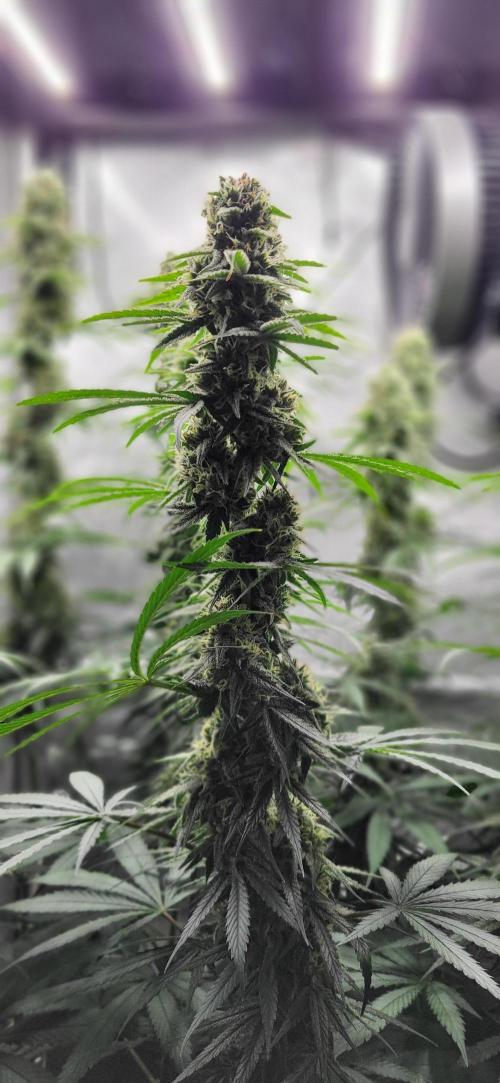
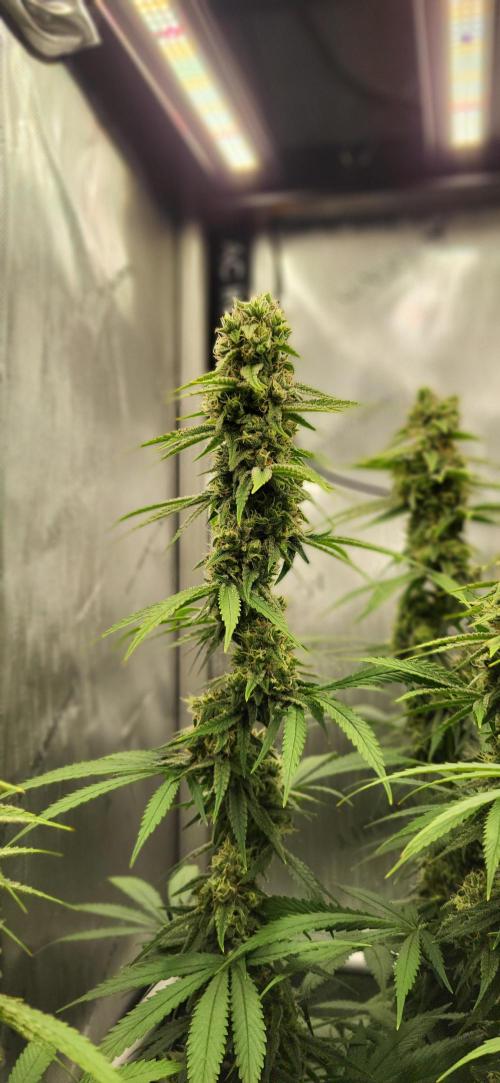
Alvareas The Grow:
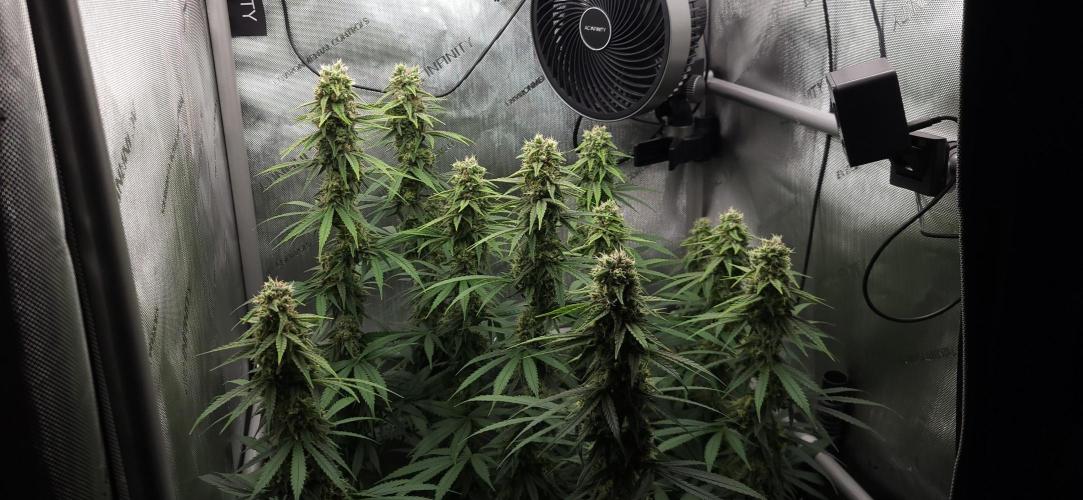
There's nothing more to do.
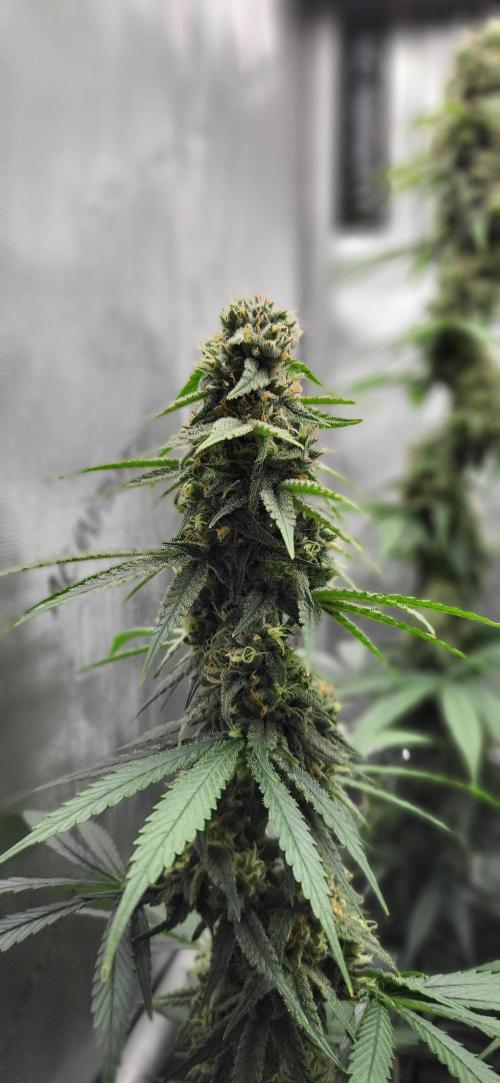
From now on, it's time to sit back and watch the buds grow.
And they are doing just that.
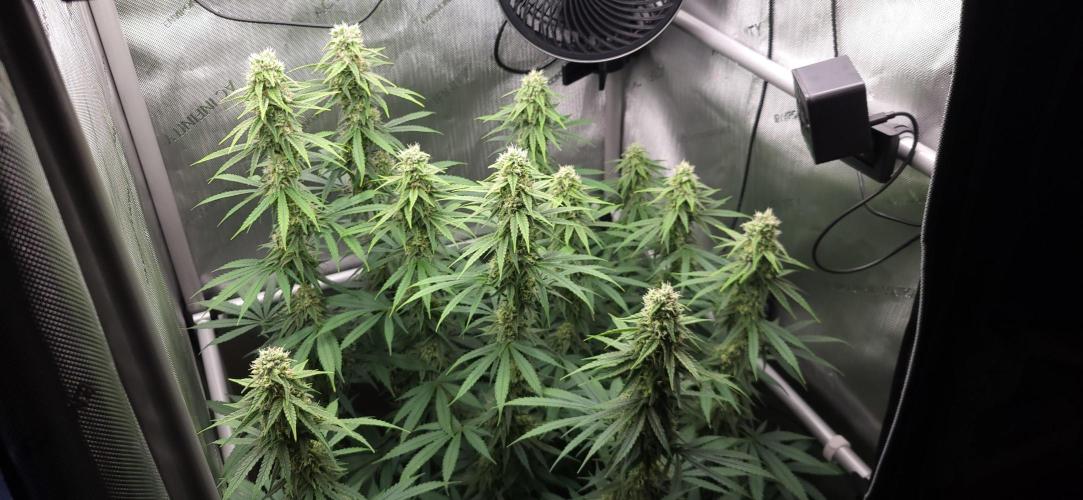
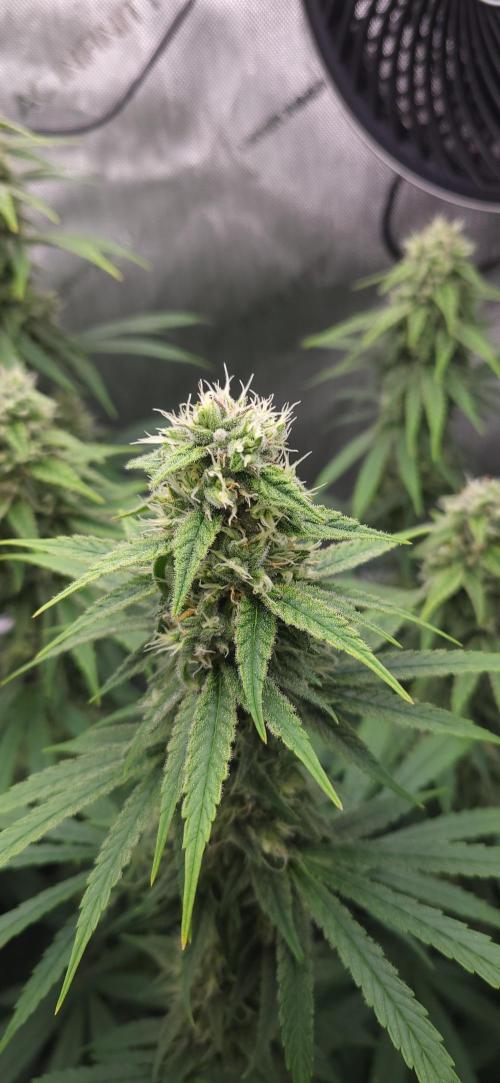
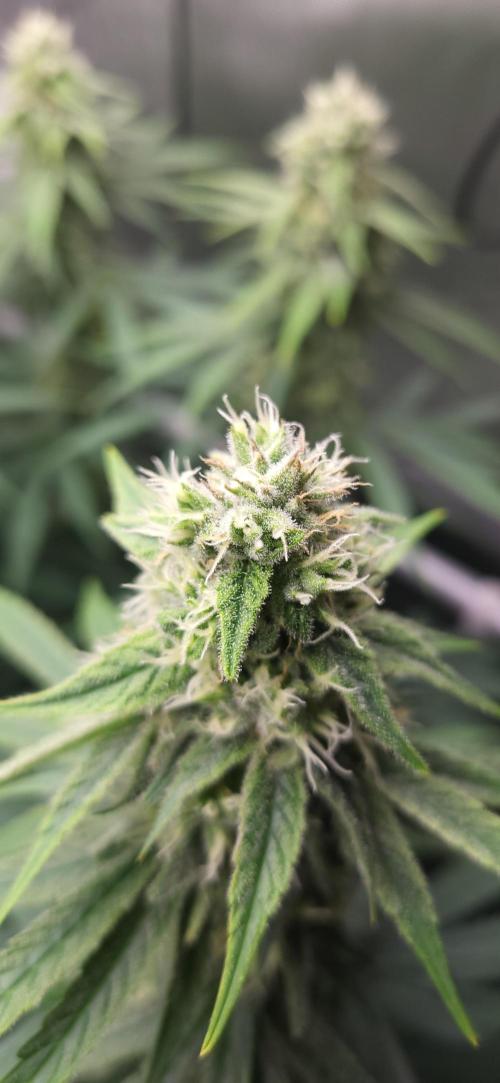
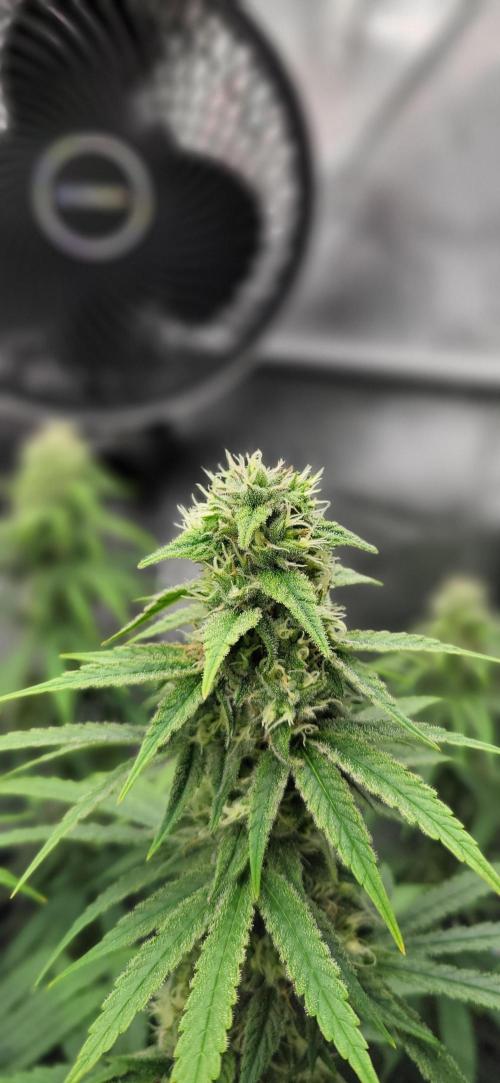
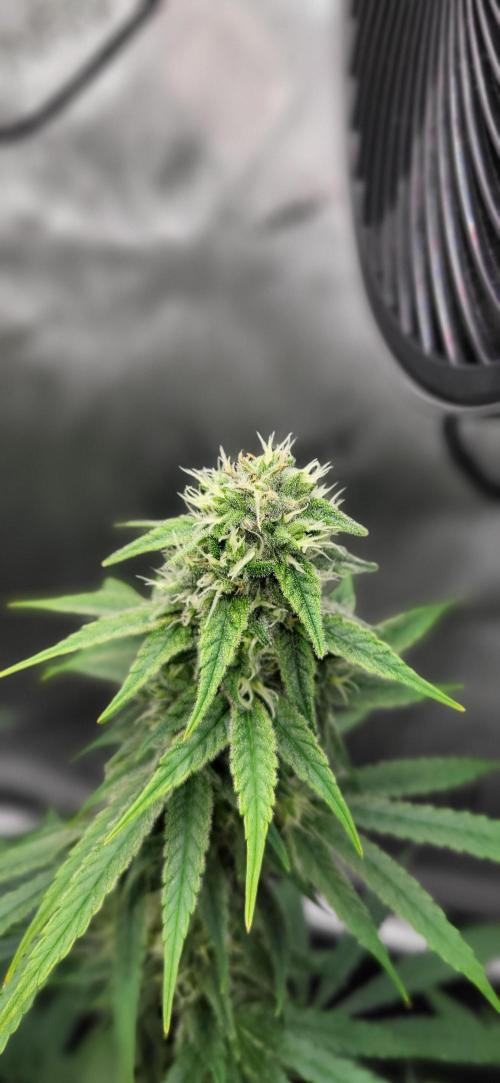
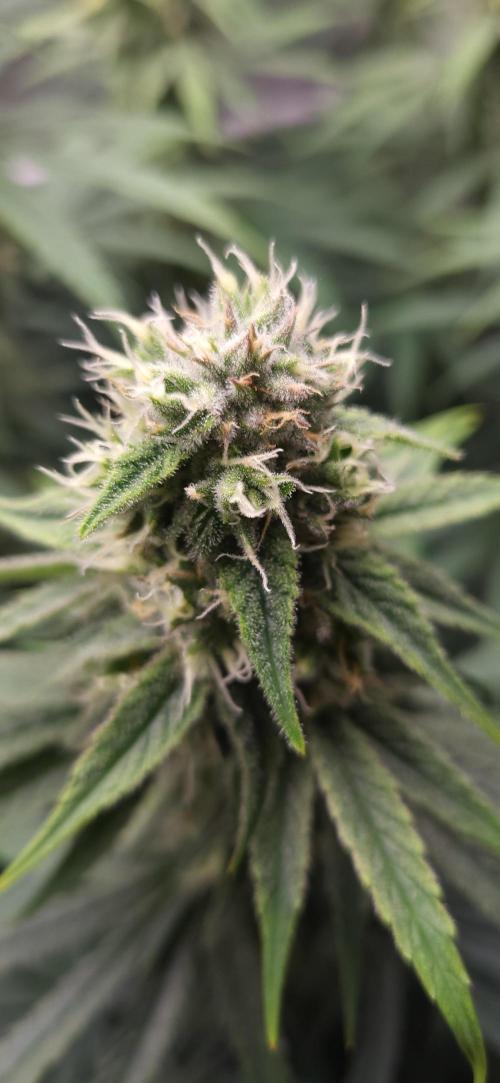
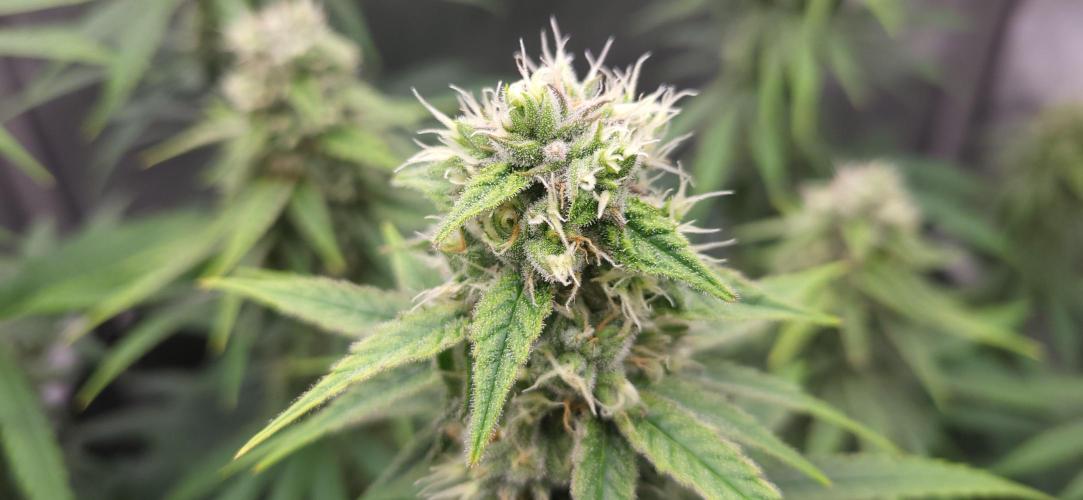
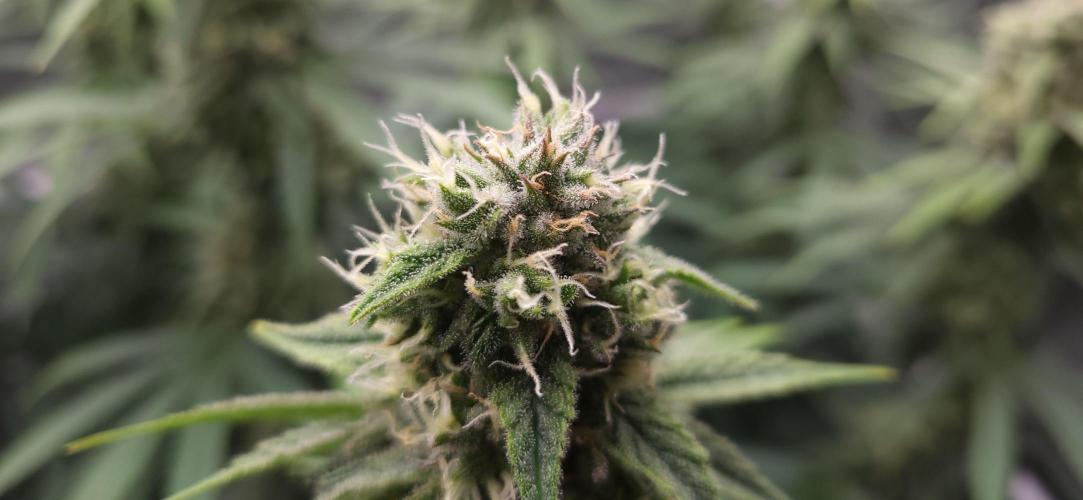
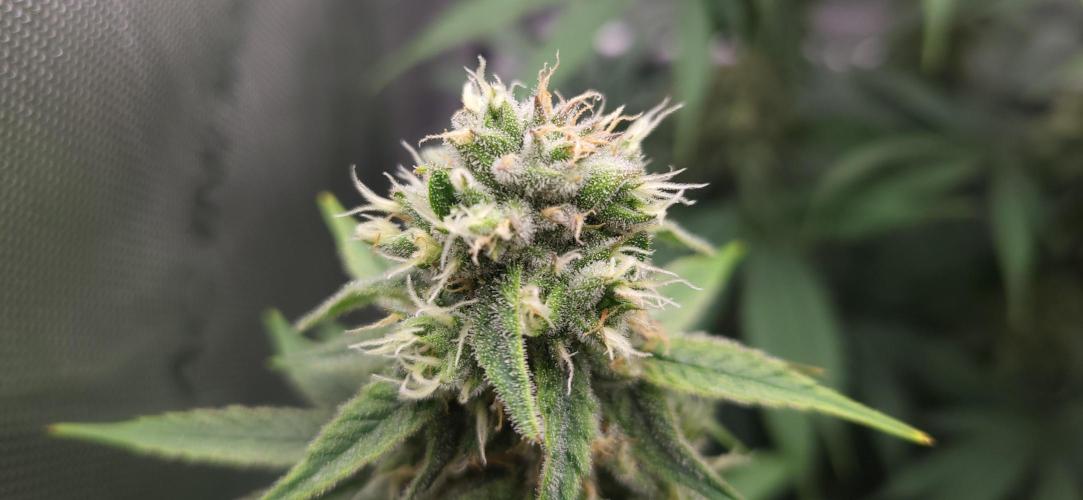
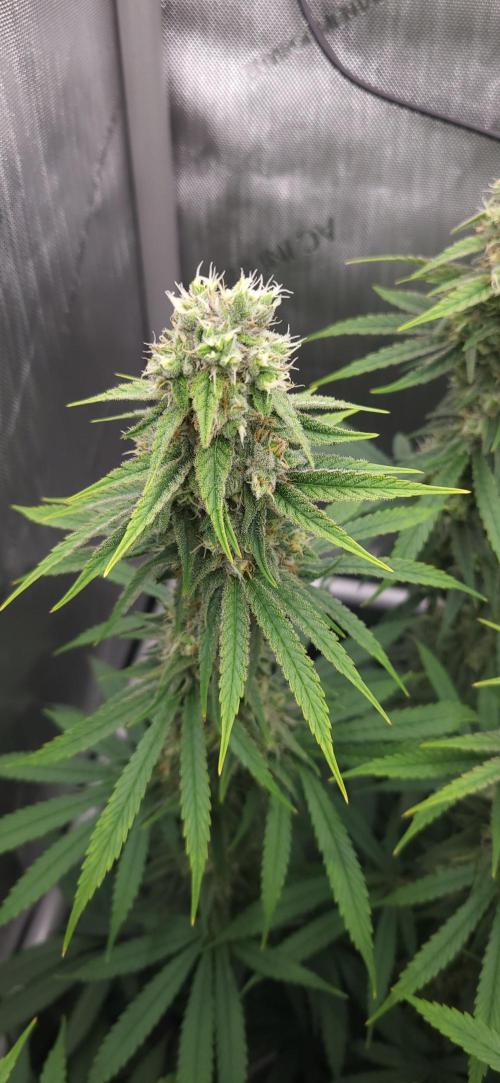
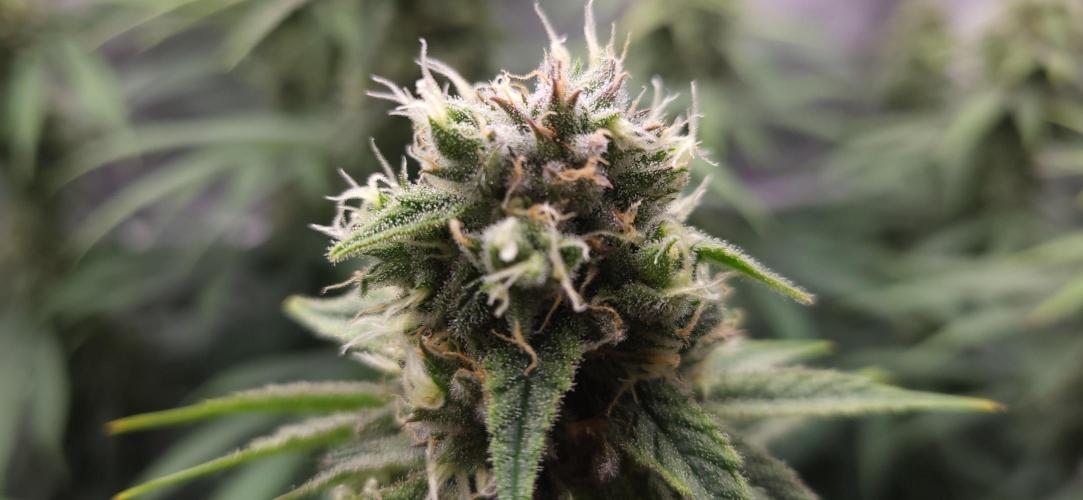
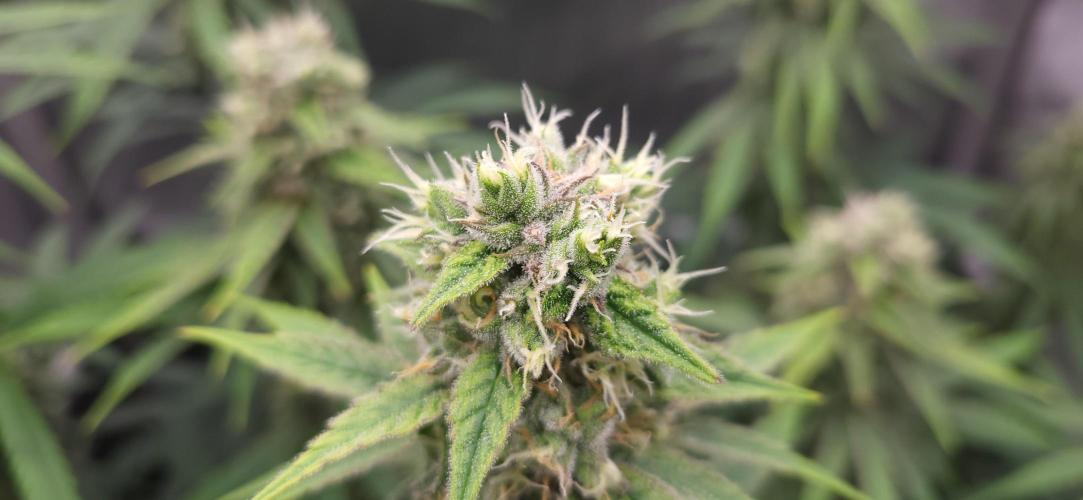
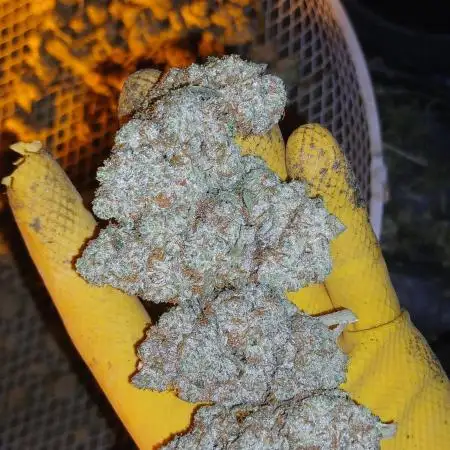
The highest shoots are starting to show a slight fox tailing.
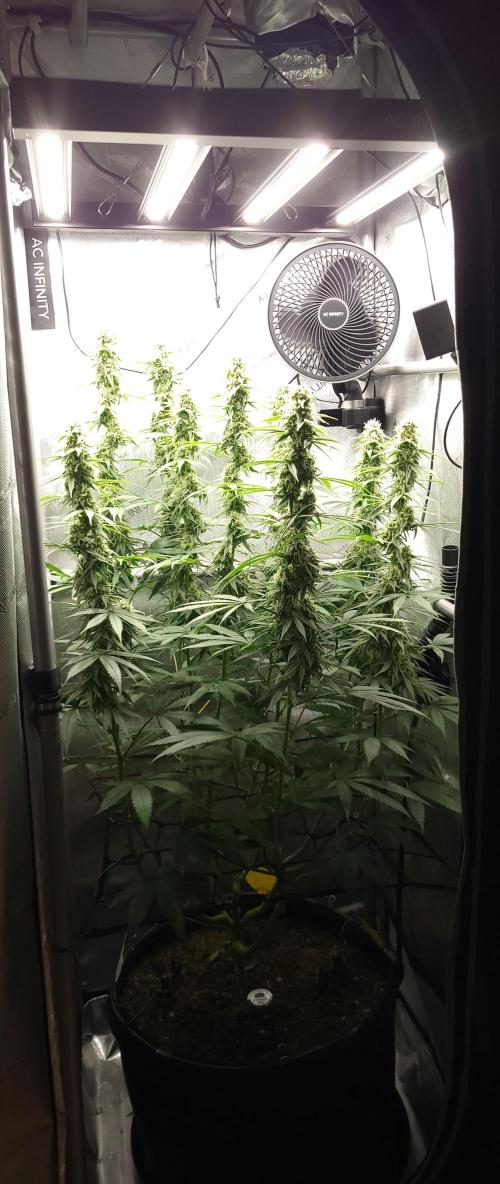
Either the 1000 PPFD is a bit too much, or it's genetics.
I won't dim the LED as long as there's no bud bleaching.
I find the fox tails not very visually appealing, but in my opinion, they don't harm the quality of the buds.
The flowers are now smelling very strong.
The smell hasn't changed.
I'm already curious about the taste, whether it matches the breeder's claims of mint and vanilla.
The smell doesn't, but it's still awesome 😁.
The parameters in week 11:
Controller setting day: Advanced AI humidity 50% - 60%
Controller setting night: Advanced AI humidity 50% - 60%
Average daytime temperature: 25 degrees
Average nighttime temperature: 22 degrees
Average humidity day: 55%
Average humidity night: 55%
Average VPD day: 1.3
Average VPD night: 1.1
LED power: 40% = 145 watts
Lighting duration: 12 hours
Air circulation: Level 1 oscillating
4 likes
comments
Share
12
Week 12. Flowering7mo ago
106 cm
Height
12 hrs
Light Schedule
25 °C
Day Air Temp
6.5
pH
Strong
Smell
55 %
Air Humidity
22 °C
Night Air Temp
40 set_lilers
Pot Size
20 cm
Lamp Distance
Alvareas The Grow:
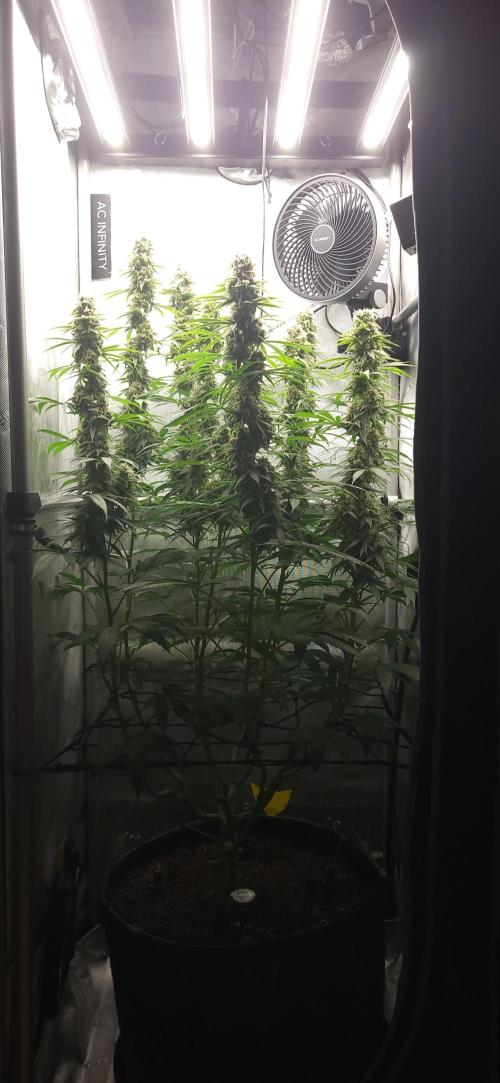
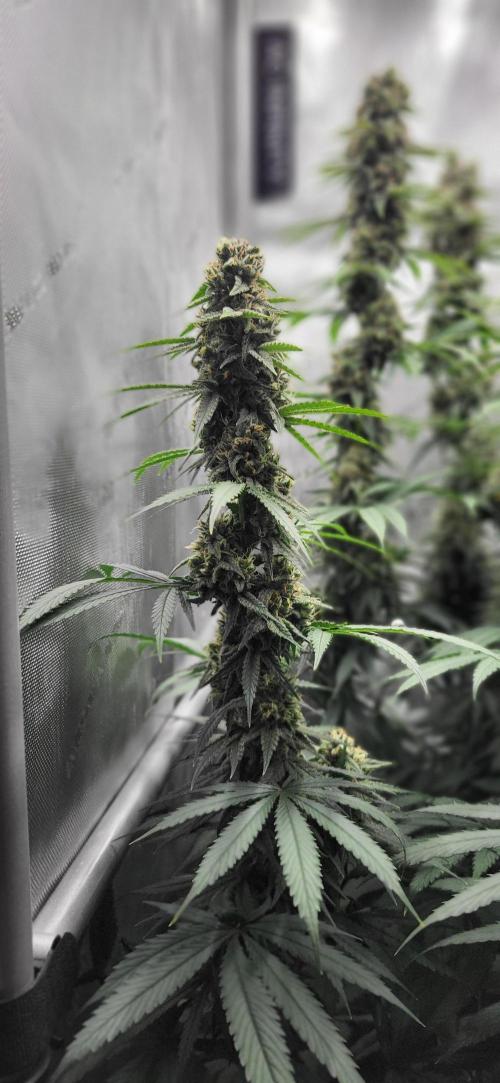
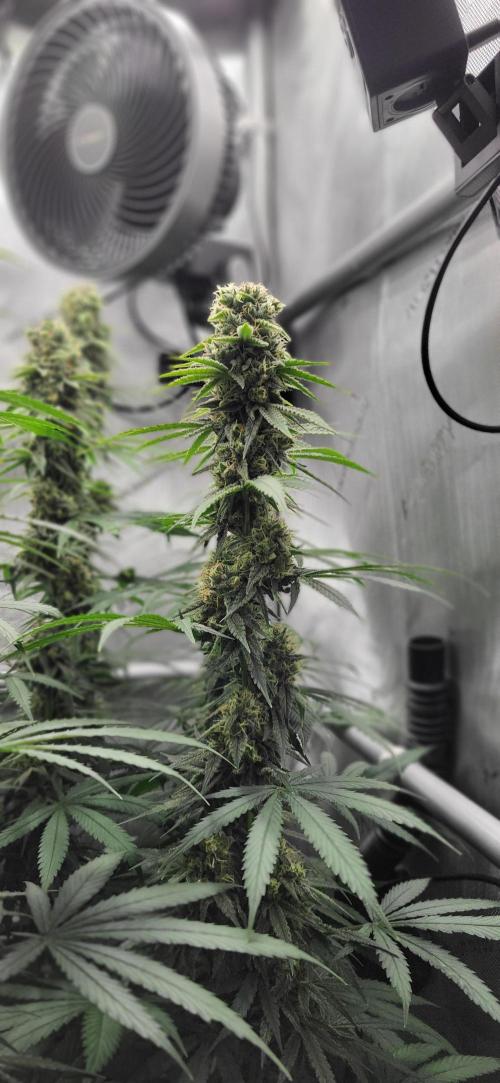
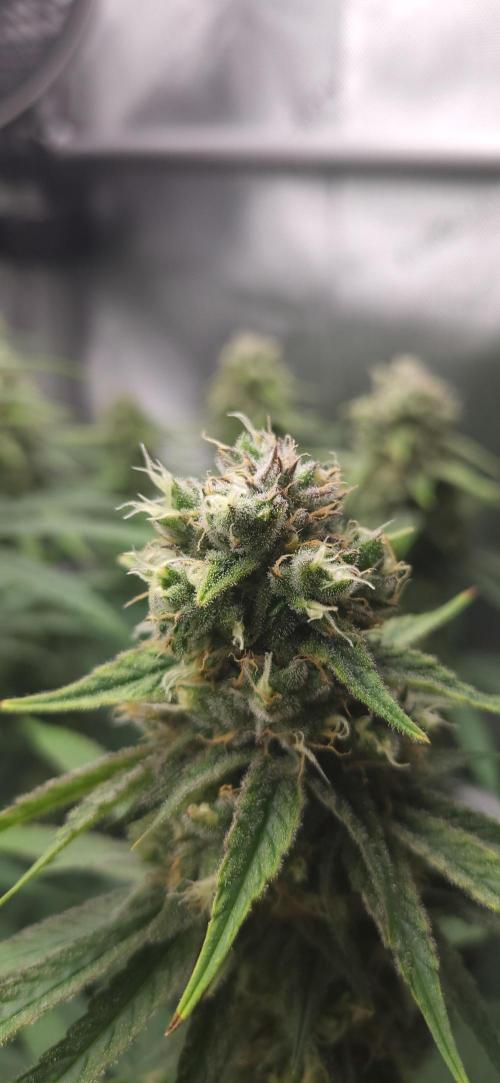
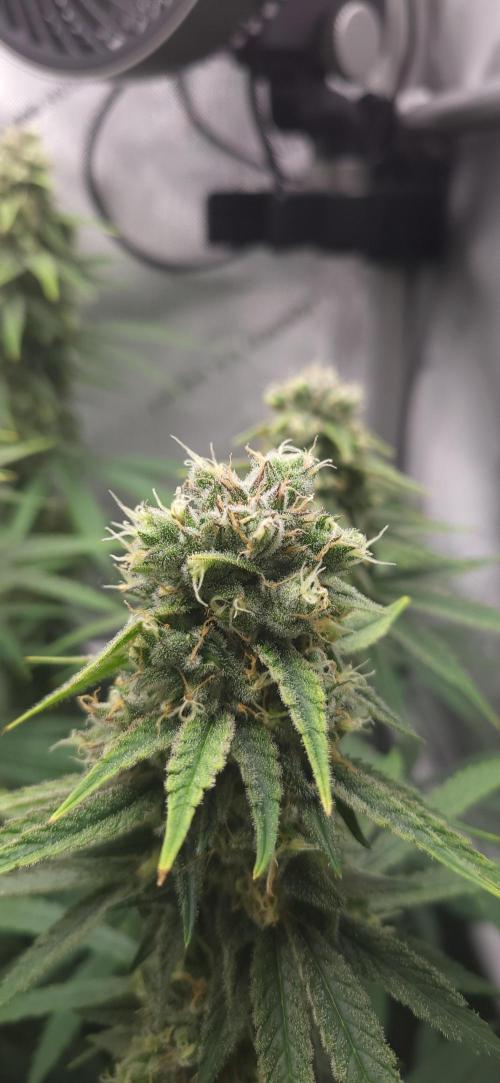
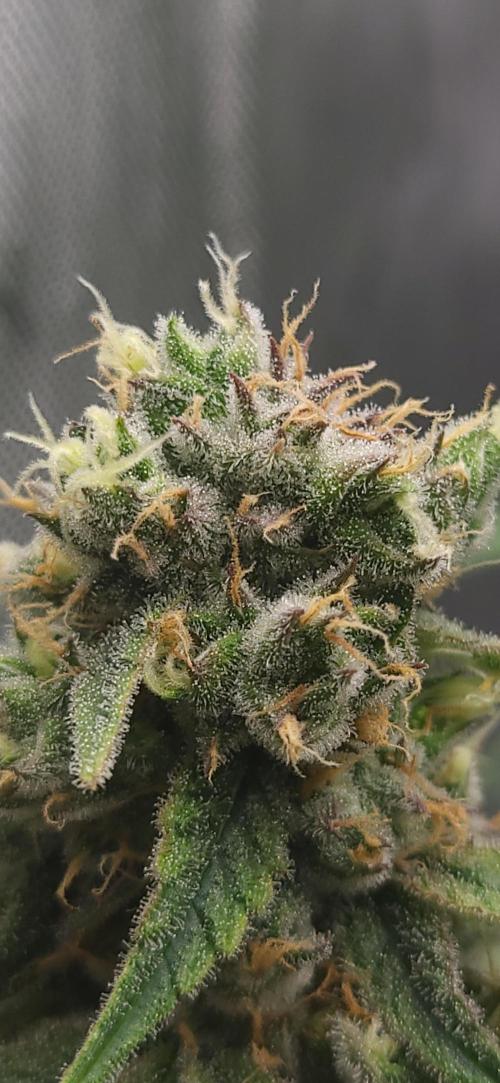
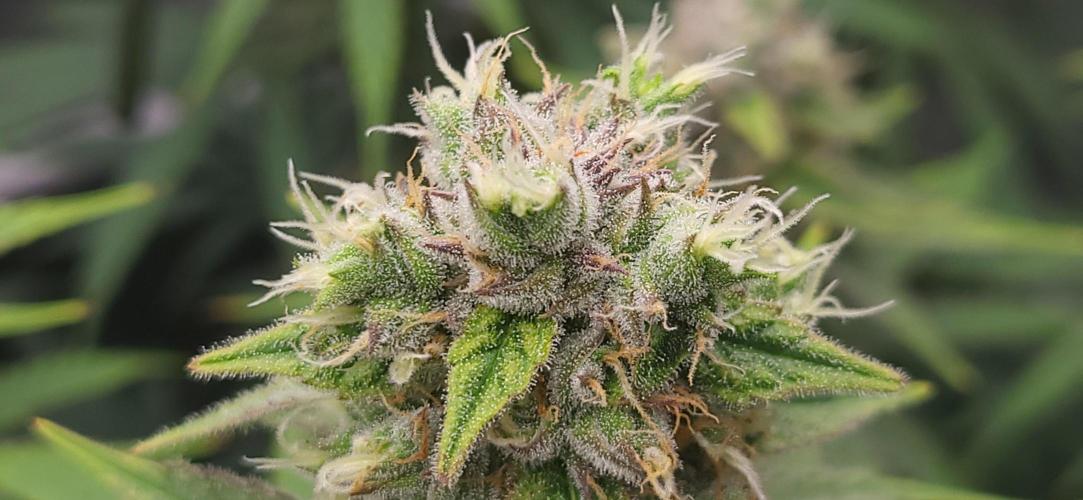
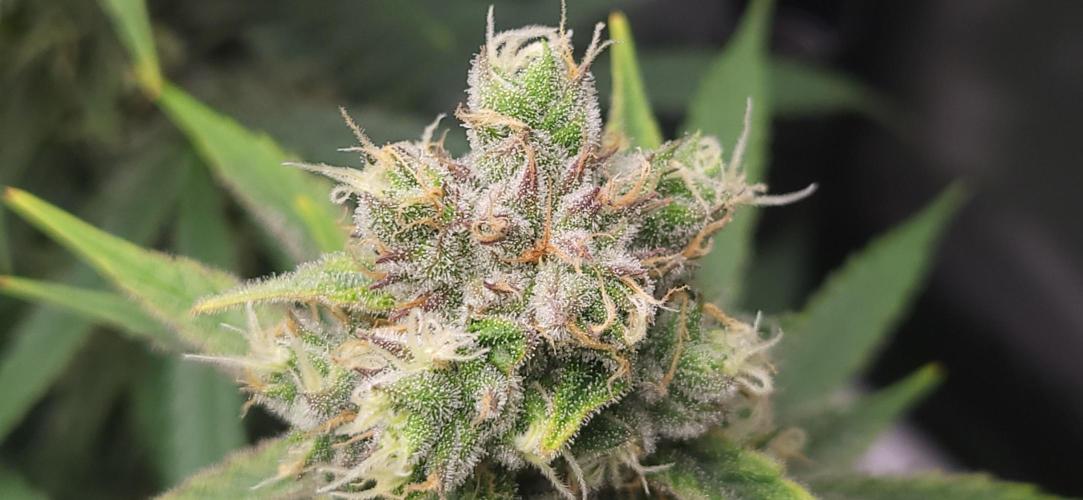
The buds are continuing to swell.
The fox tails have developed further.
Now at all top buds, even the ones that are a bit lower.
So I assume this is genetically determined.
The hairs are turning amber and the buds are getting frostier.
I really like the look.
Except for the fox tails.
The parameters in week 12:
Controller setting day: Advanced AI humidity 50% - 60%
Controller setting night: Advanced AI humidity 50% - 60%
Average daytime temperature: 25 degrees
Average nighttime temperature: 22 degrees
Average humidity day: 55%
Average humidity night: 55%
Average VPD day: 1.3
Average VPD night: 1.1
LED power: 40% = 145 watts
Lighting duration: 12 hours
Air circulation: Level 1 oscillating
4 likes
2 comments
Share
13
Week 13. Flowering6mo ago
106 cm
Height
12 hrs
Light Schedule
25 °C
Day Air Temp
6.5
pH
Strong
Smell
55 %
Air Humidity
22 °C
Night Air Temp
40 set_lilers
Pot Size
20 cm
Lamp Distance
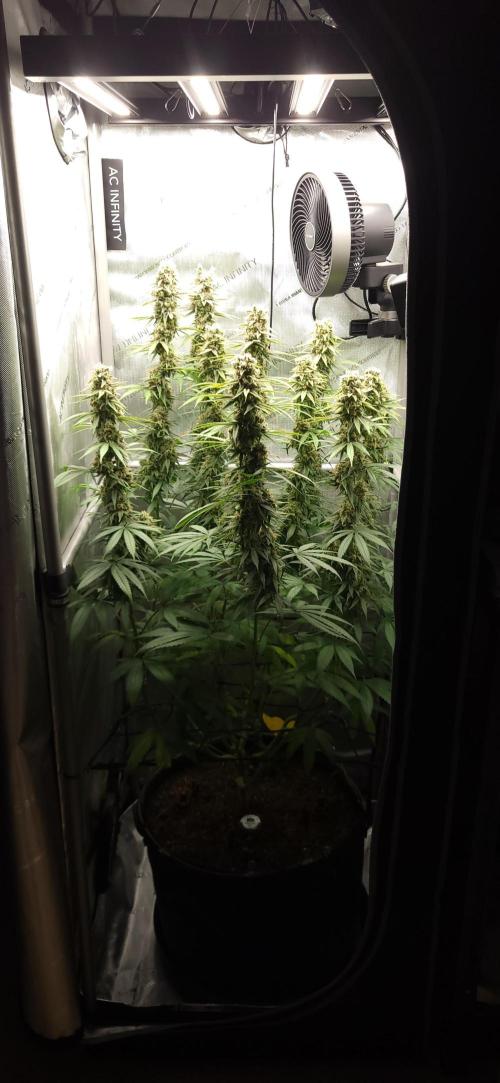
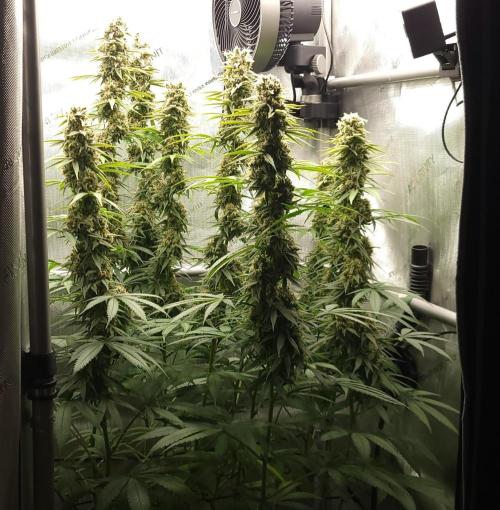
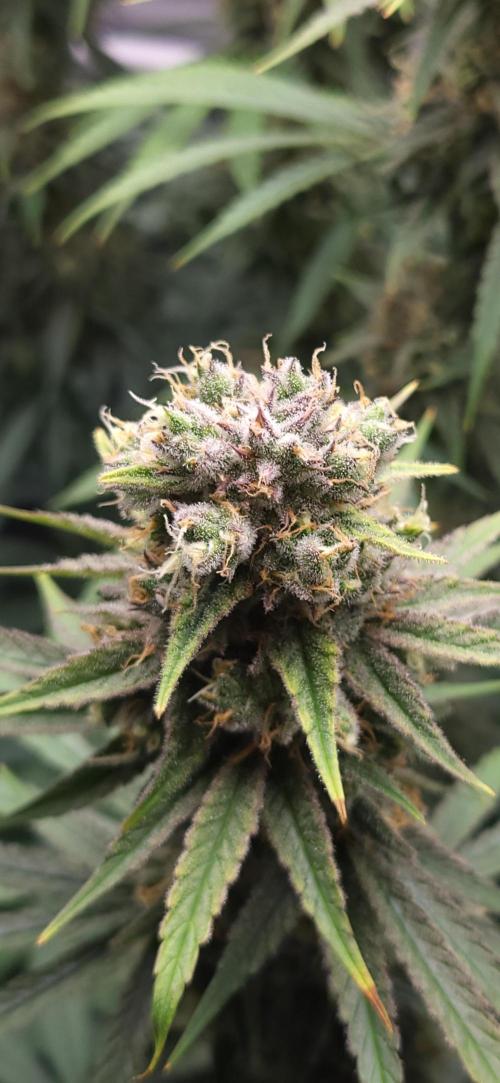
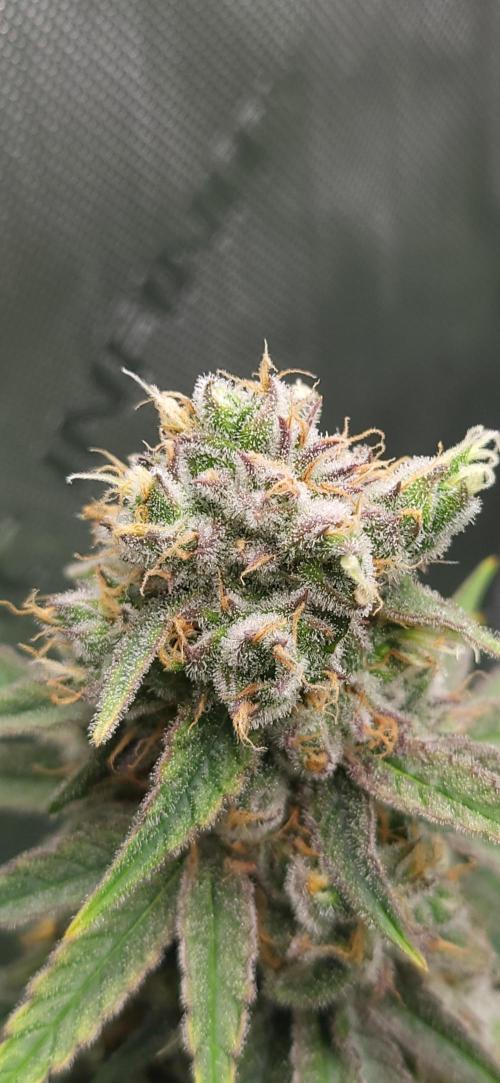
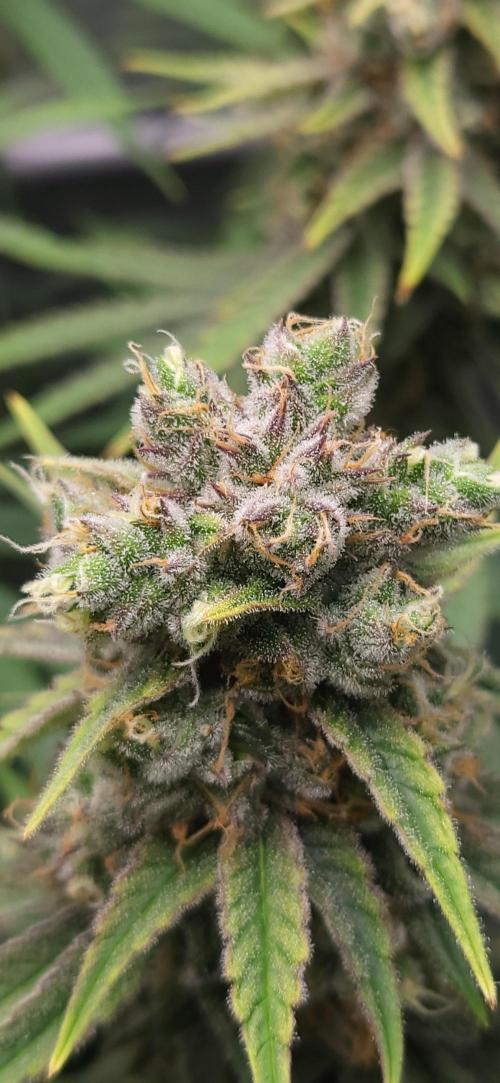
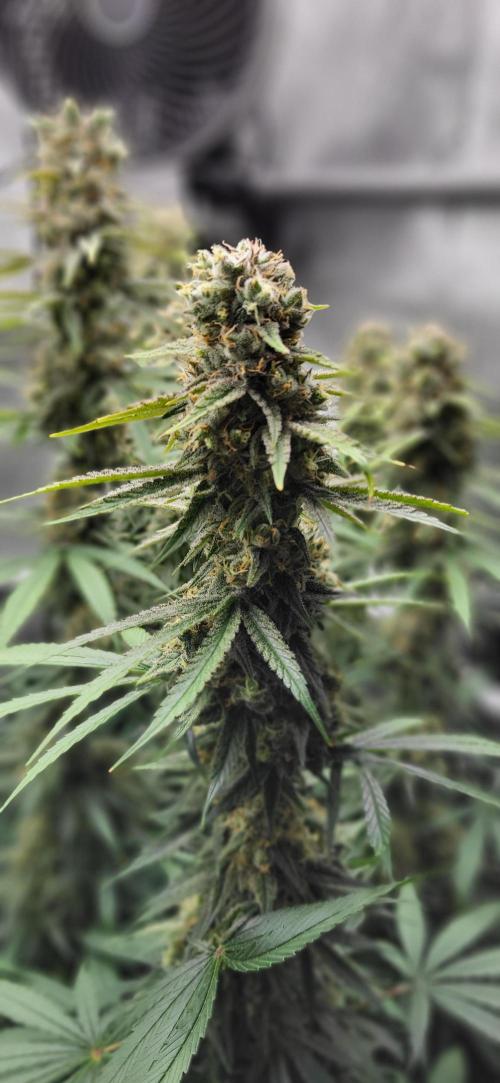
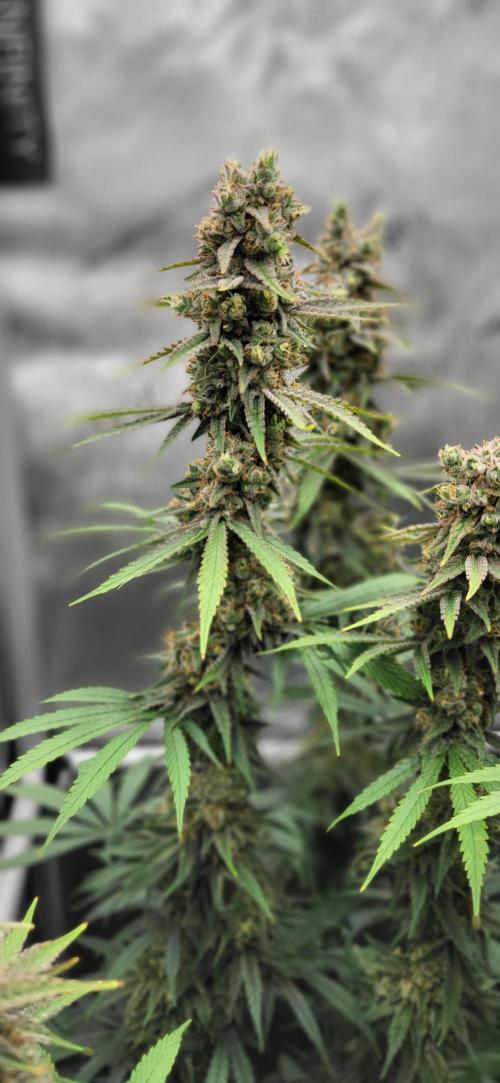
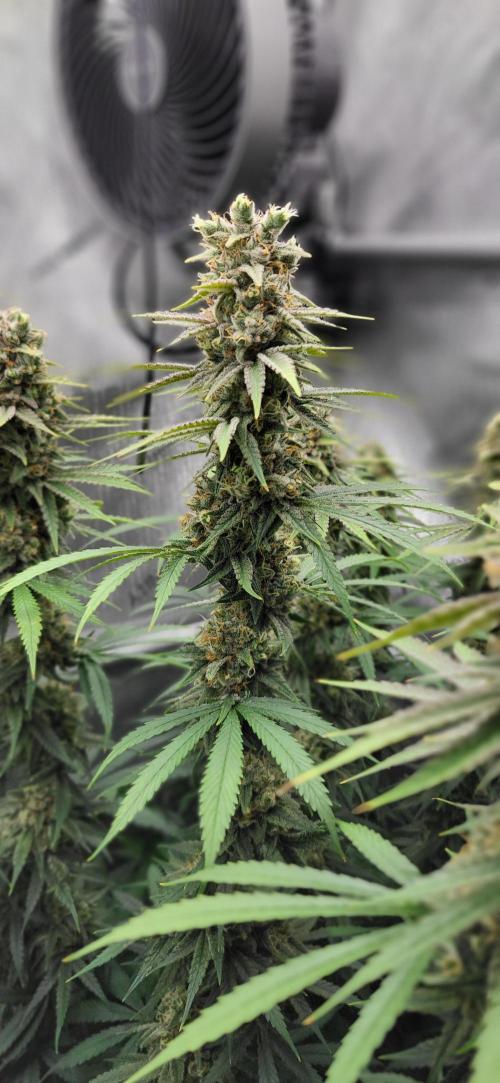
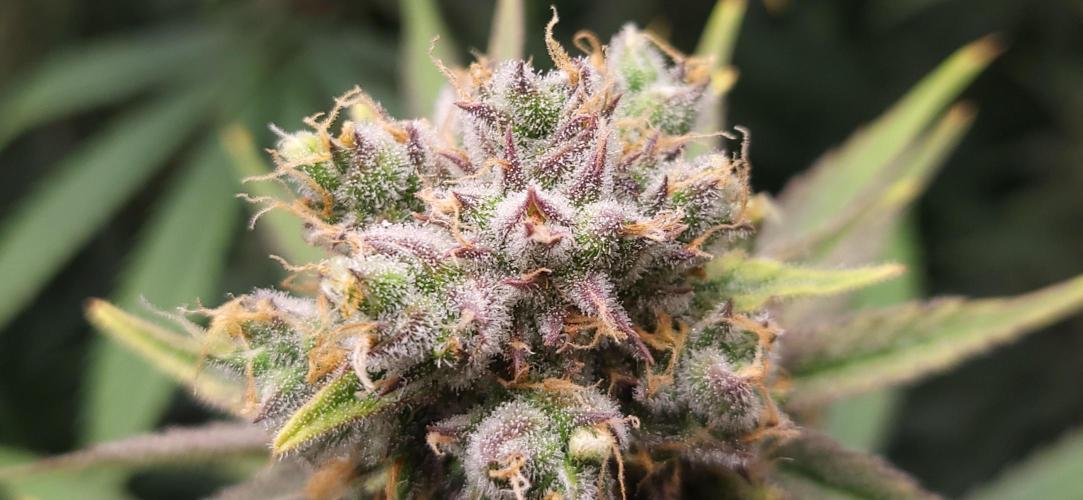
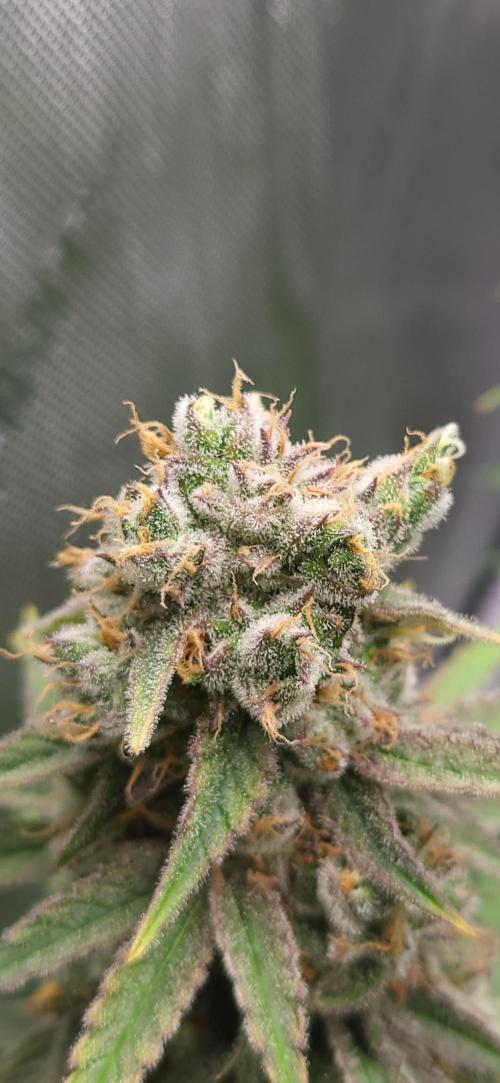
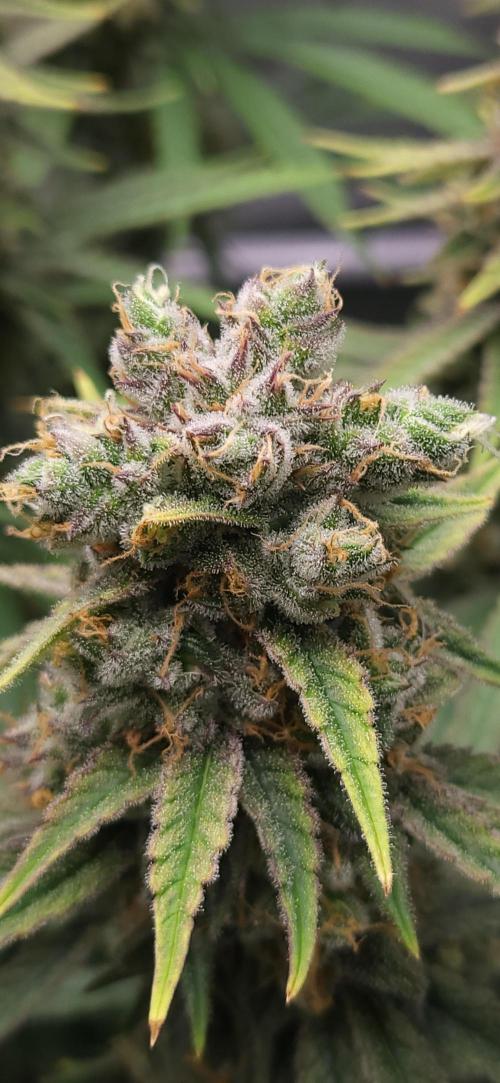
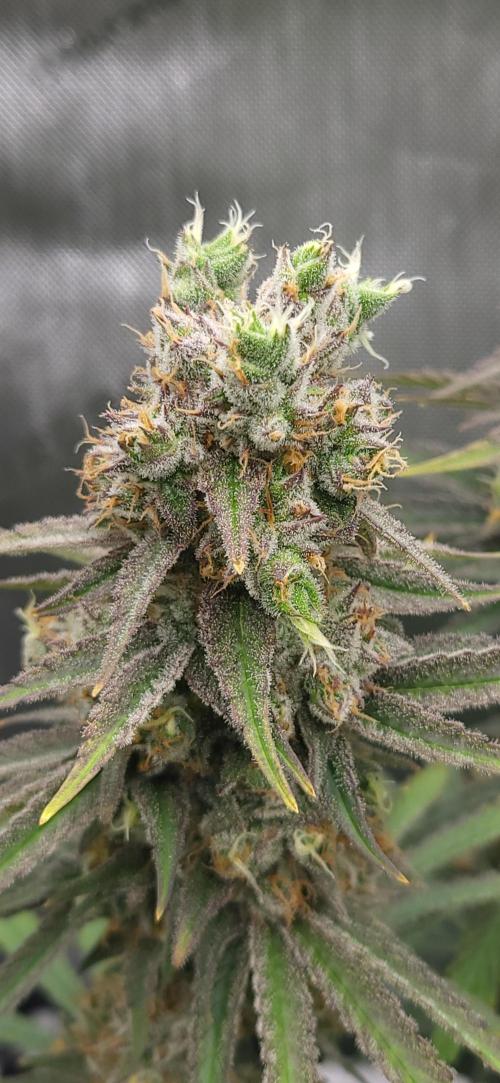
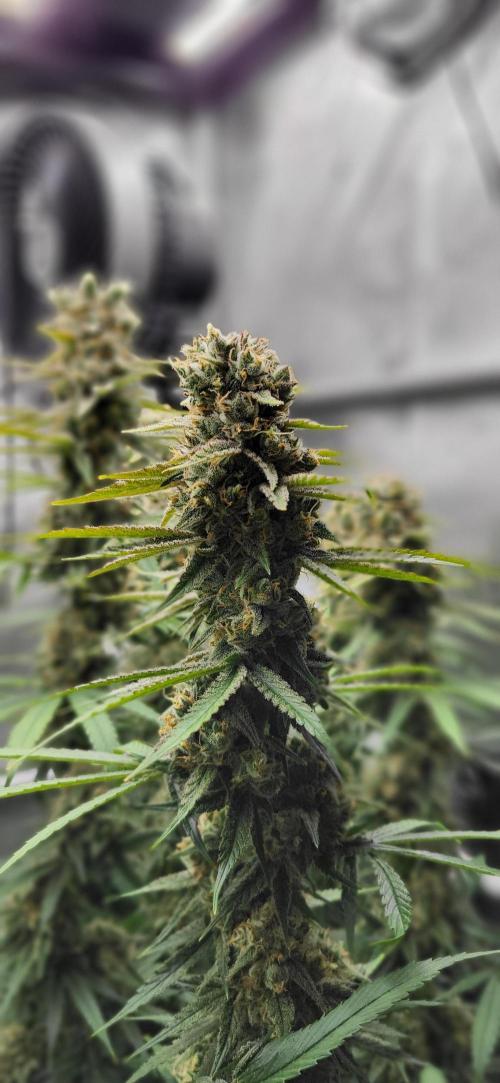
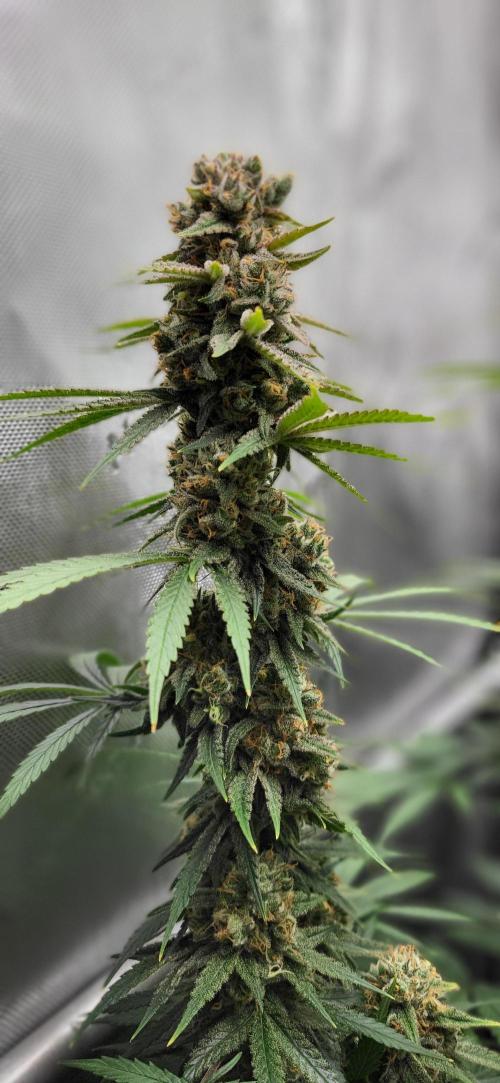
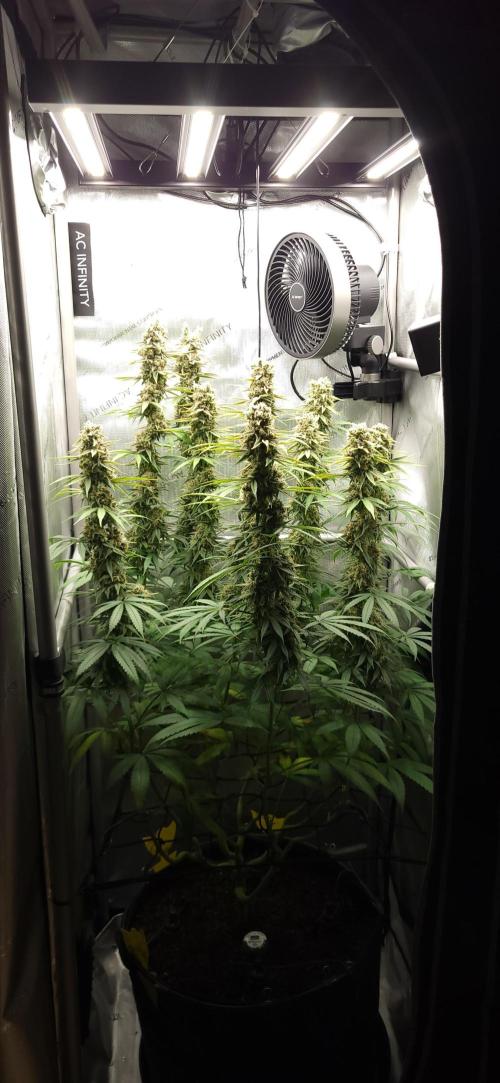
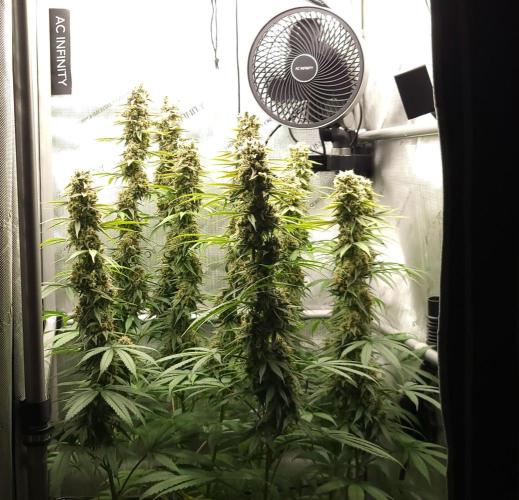
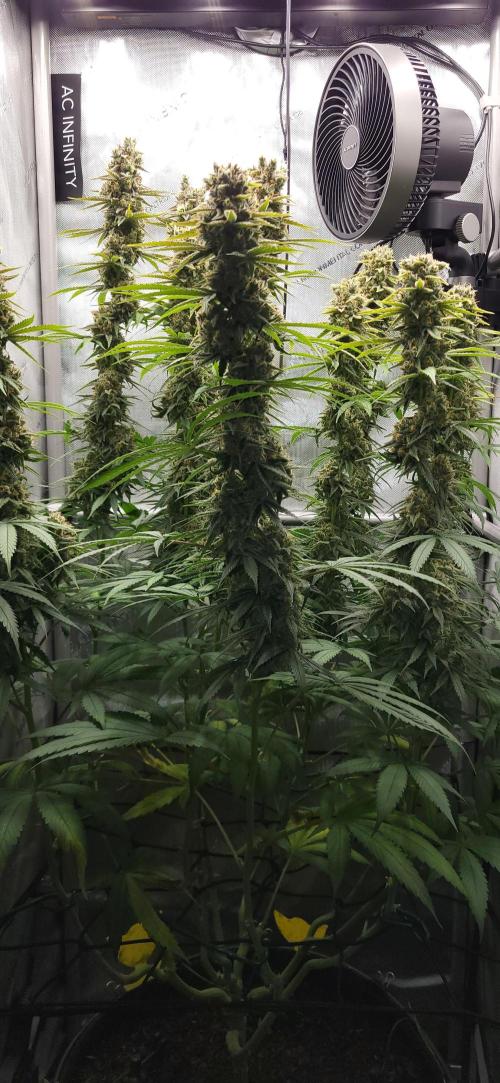
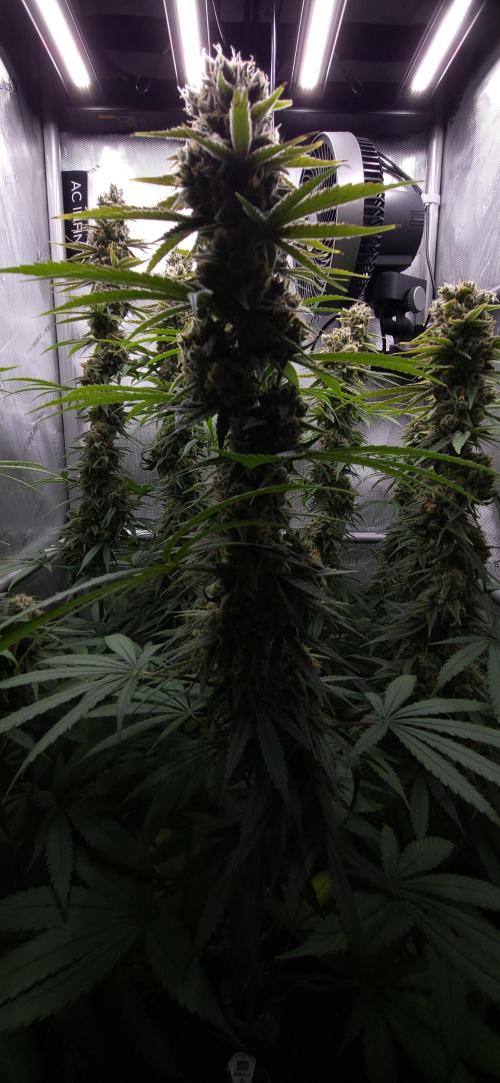
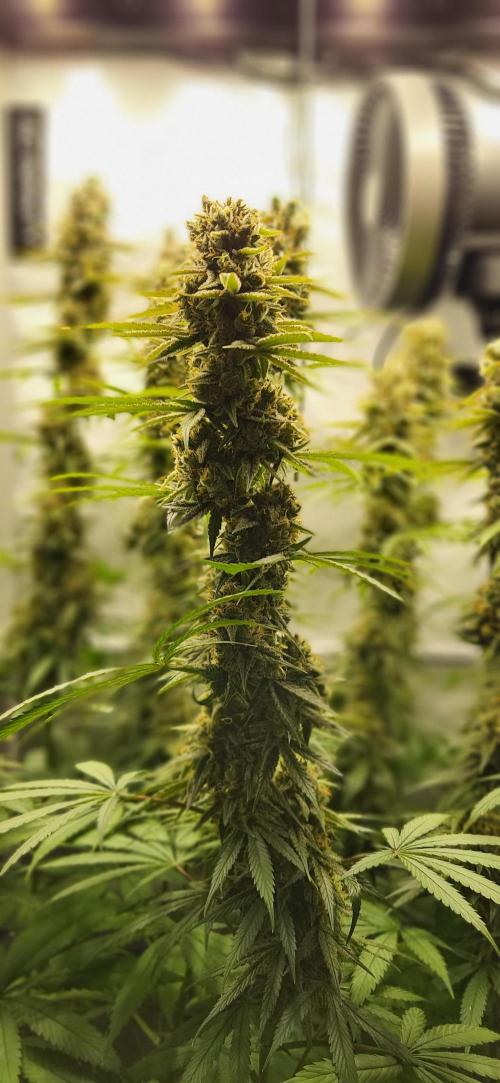
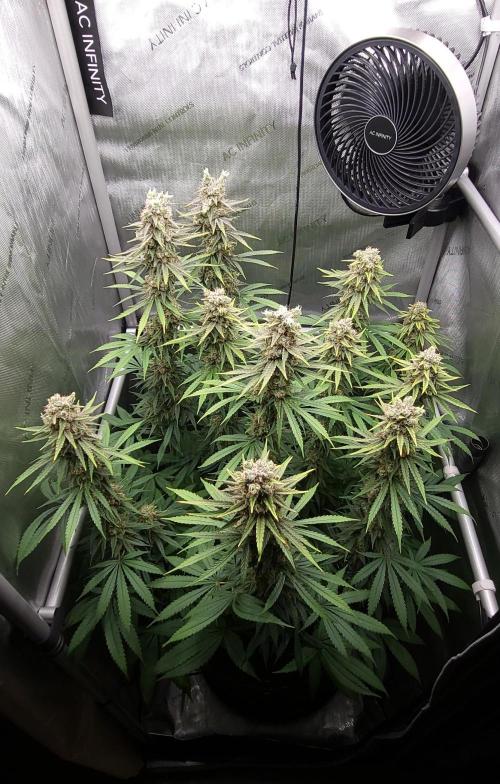
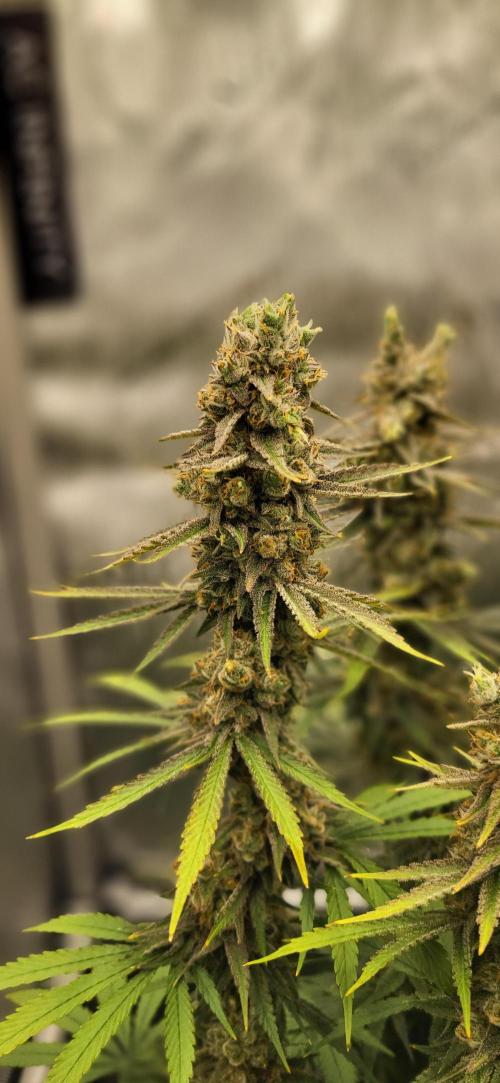
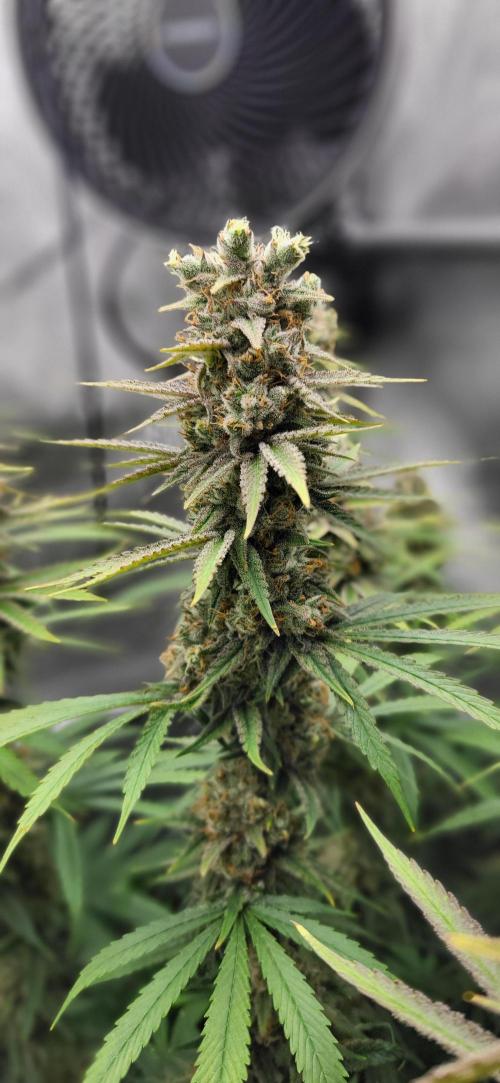
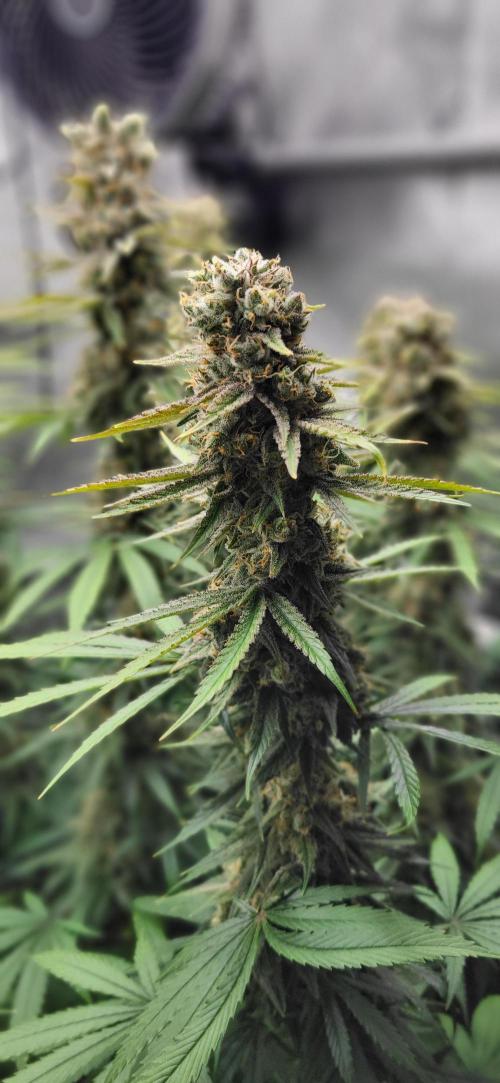
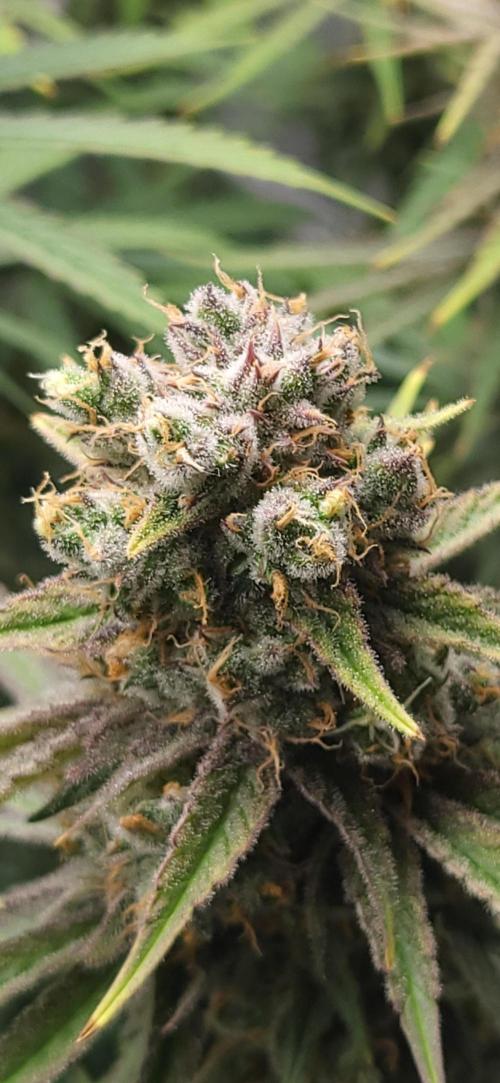
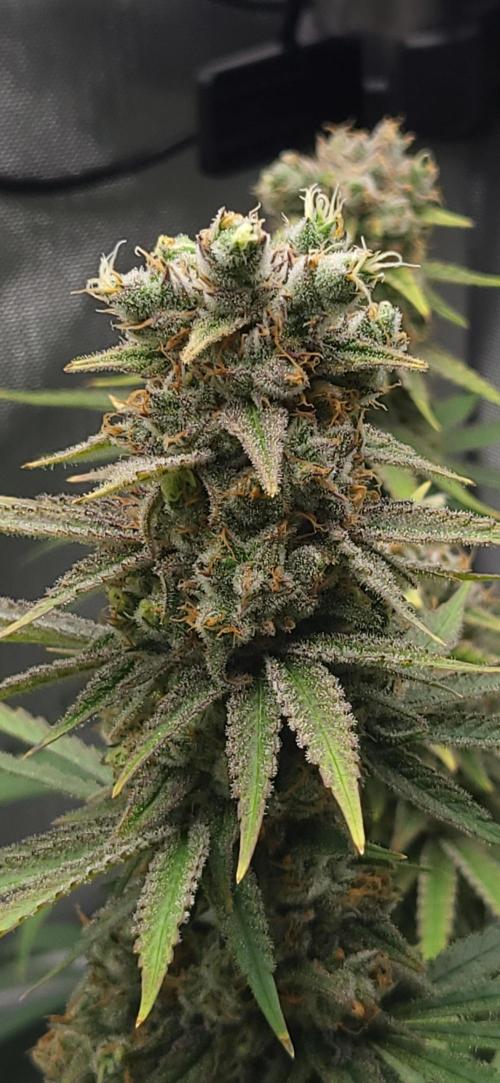
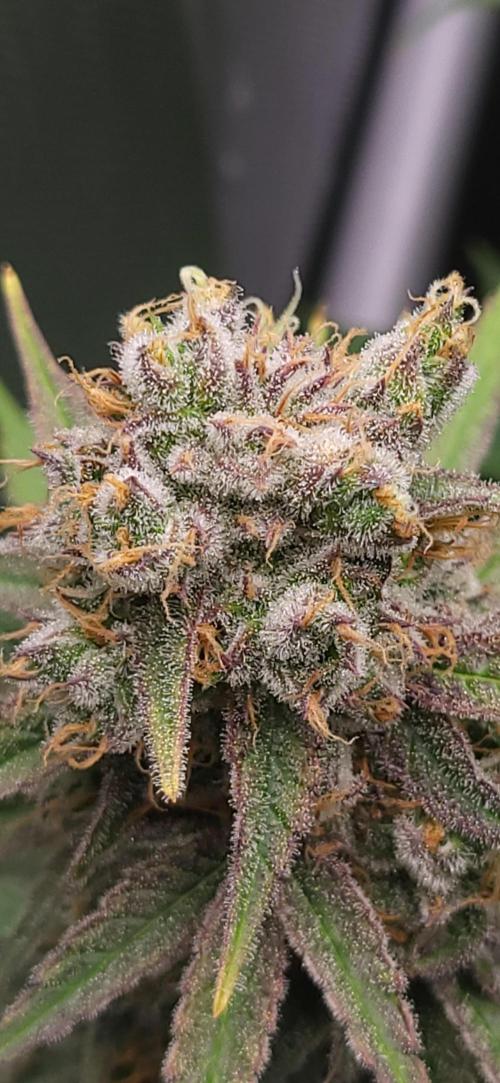
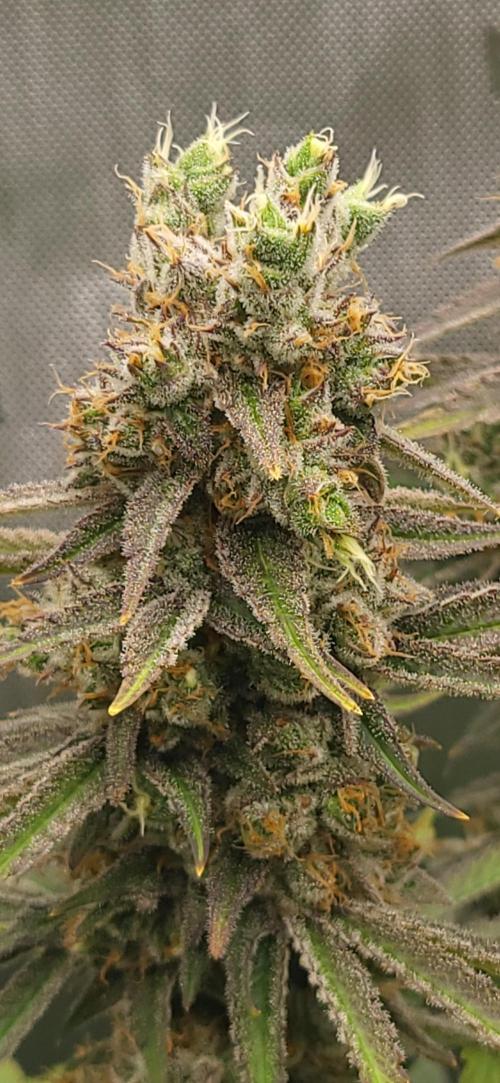
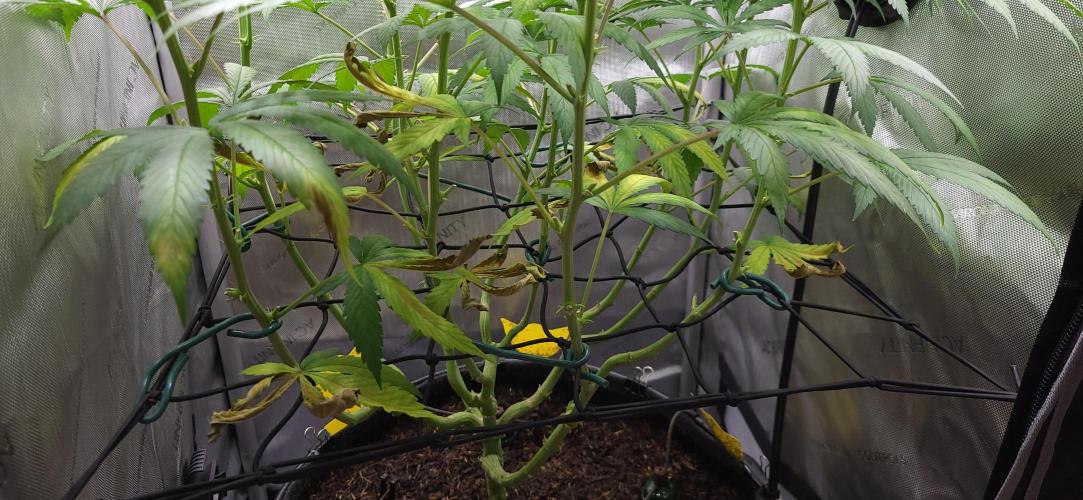
Alvareas The buds are getting plumper and the fox tailing is progressing. The smell is now extremely intense. In this run, I left out my carbon filter because I needed a new one and wanted to see if it would work without it. My grow room is on the 2nd floor and the exhaust goes out through a flange directly to the window. Our house is located in a village on a side street. I honestly didn't expect to smell anything. But I was wrong. 😂 Depending on how the wind was blowing, you could smell that weed was being grown somewhere on the entire street. The new carbon filter for the next run is already ordered. 😊 Otherwise, I think we are slowly heading towards the finish line. The leaves are starting to turn yellow from the bottom. Even the top leaves are slowly changing color. Therefore, I think the plant is going into autumn and reducing nitrogen uptake. It can't be a lack of soil, as there should still be more than enough power in there.
The parameters in week 13:
Controller setting day: Advanced AI humidity 50% - 60%
Controller setting night: Advanced AI humidity 50% - 60%
Average daytime temperature: 25 degrees
Average nighttime temperature: 22 degrees
Average daytime humidity: 55%
Average nighttime humidity: 55%
Average VPD day: 1.3
Average VPD night: 1.1
LED power: 40% = 145 watts
Lighting duration: 12 hours
Air circulation: Level 1 oscillating
3 likes
comments
Share
14
Week 14. Flowering6mo ago
106 cm
Height
12 hrs
Light Schedule
25 °C
Day Air Temp
6.5
pH
Strong
Smell
55 %
Air Humidity
22 °C
Night Air Temp
40 set_lilers
Pot Size
20 cm
Lamp Distance
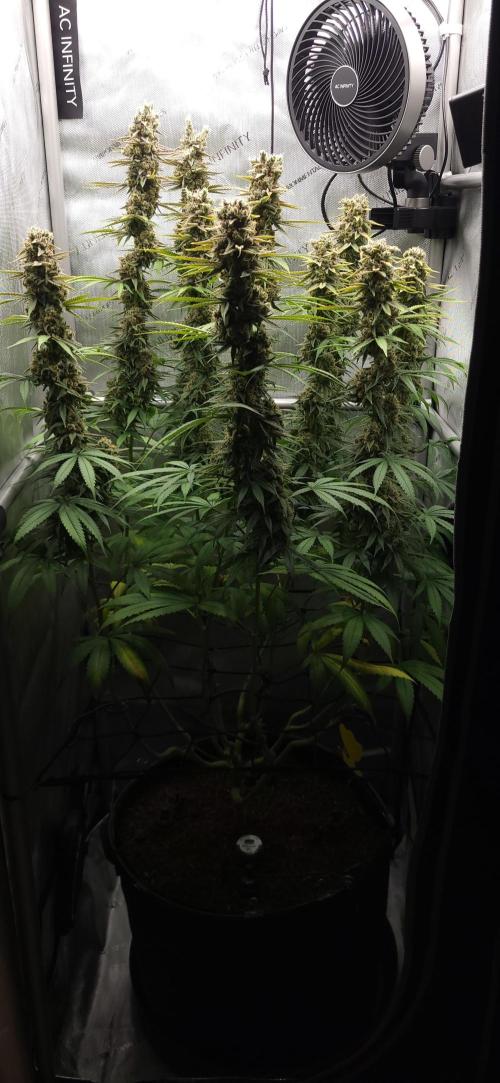
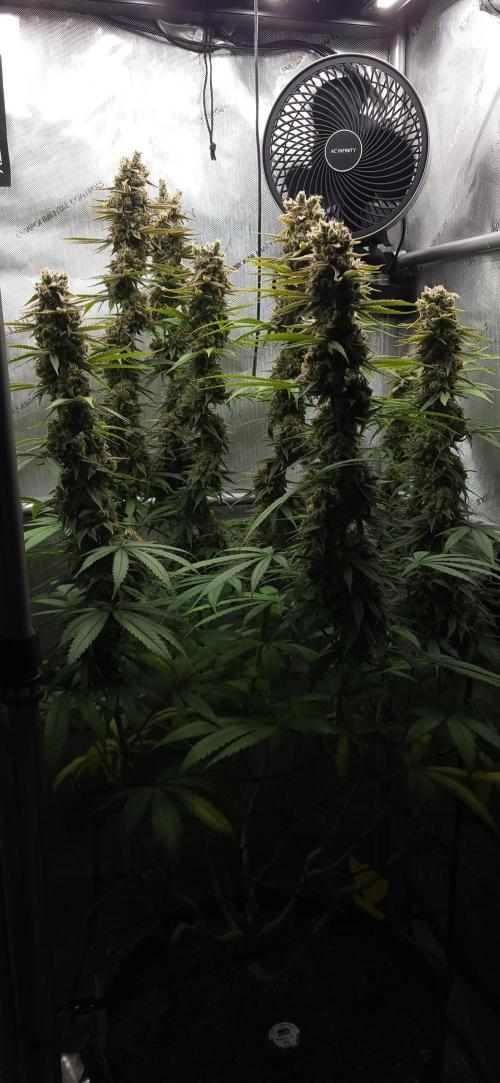
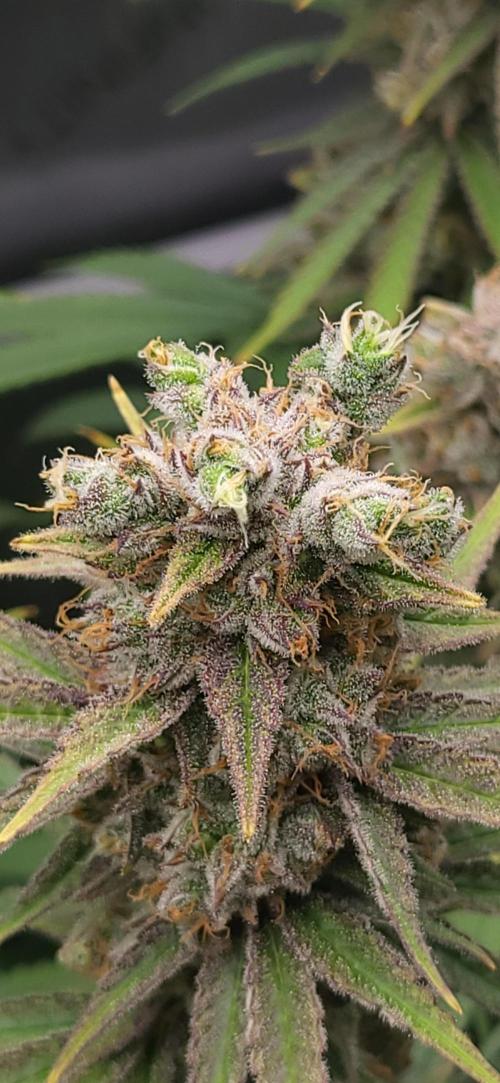
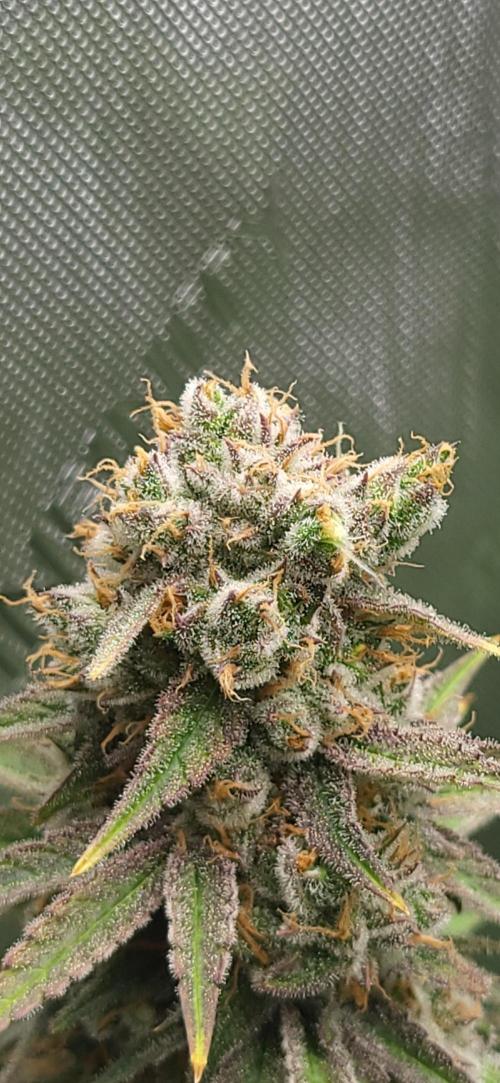
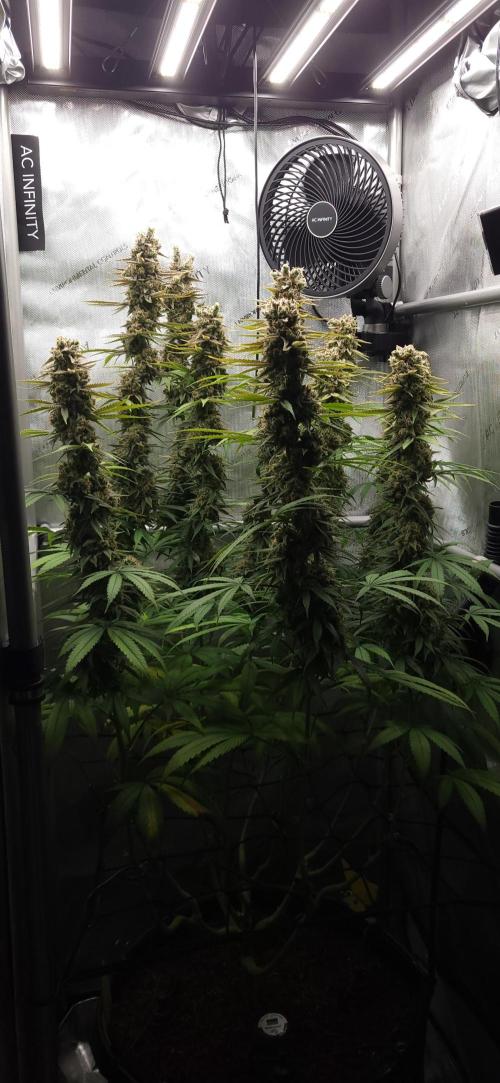
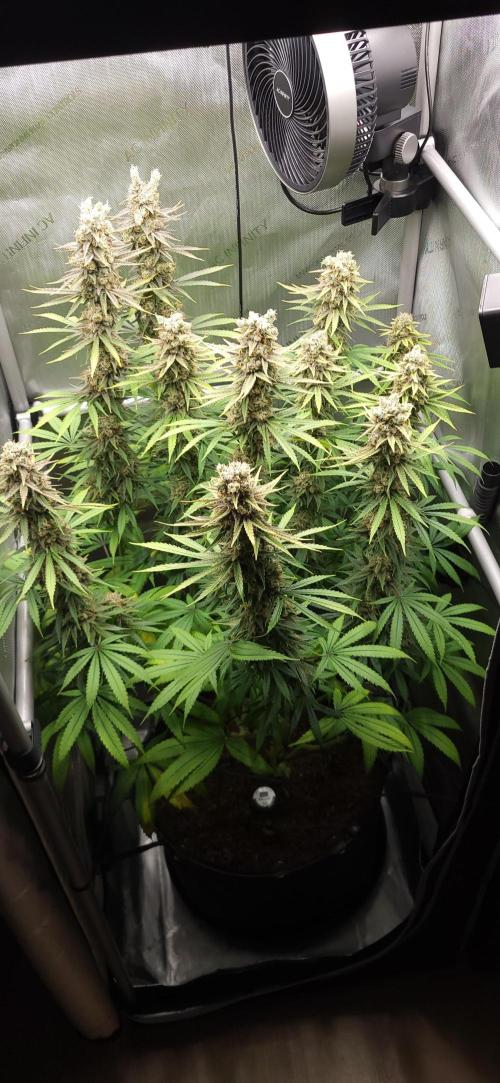
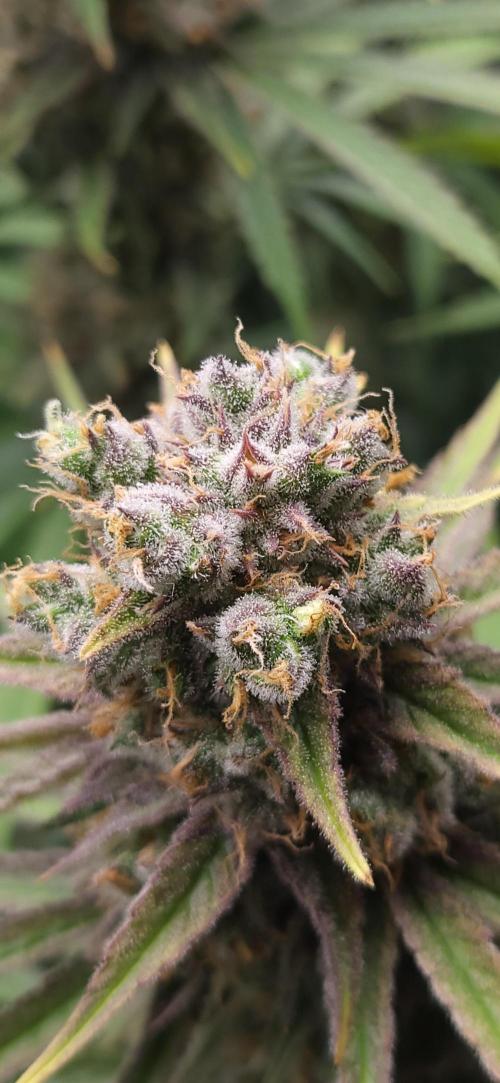
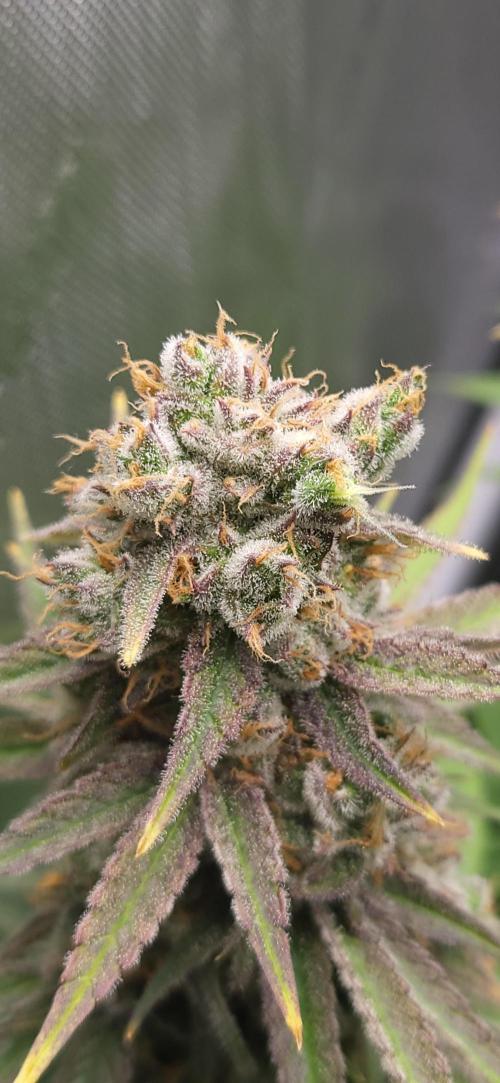
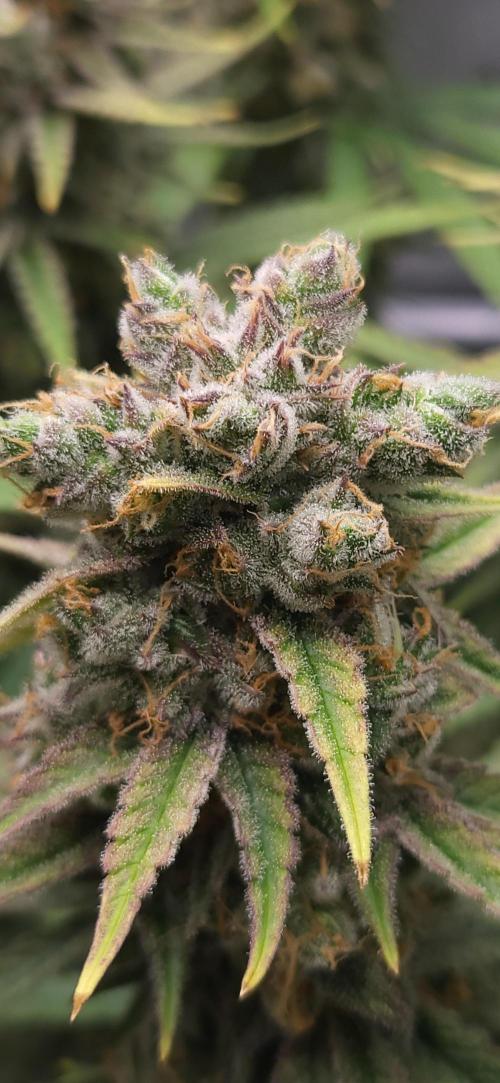
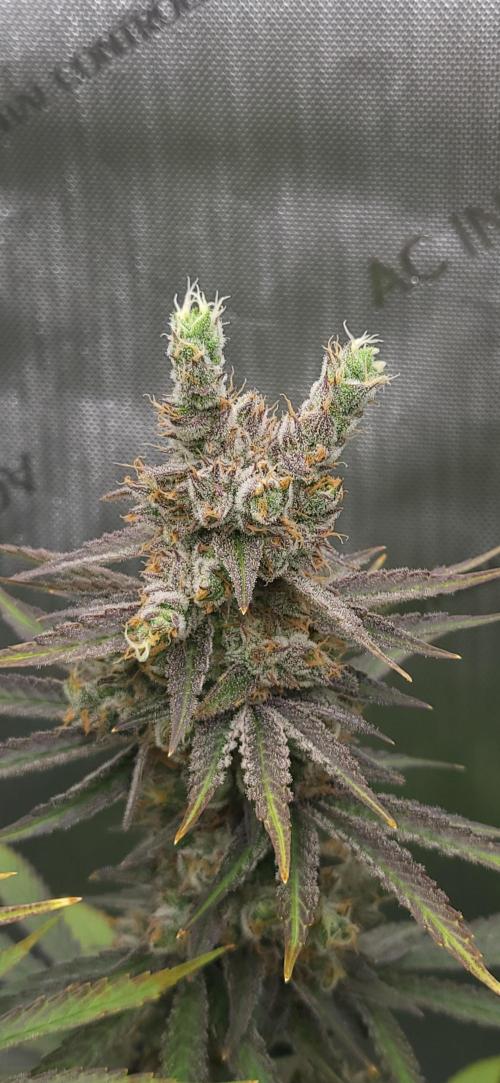
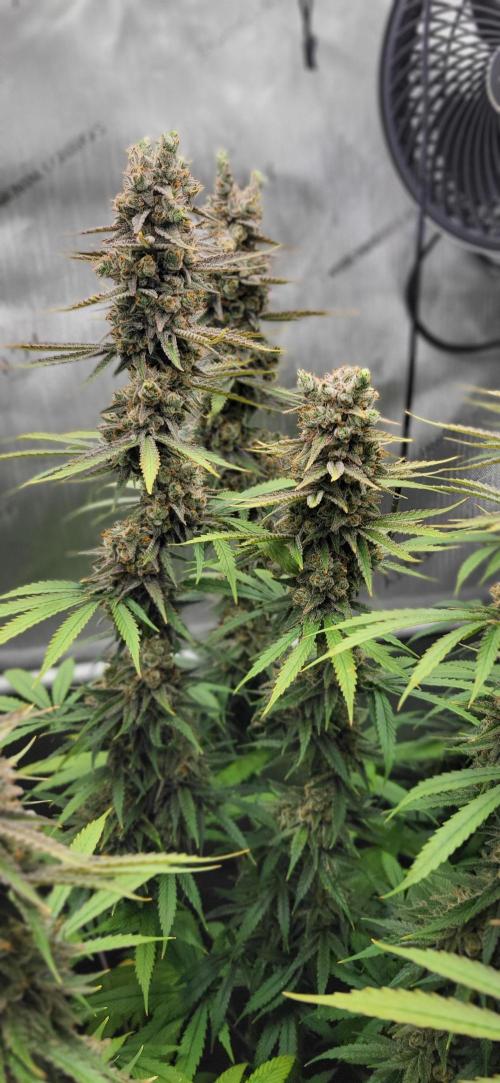
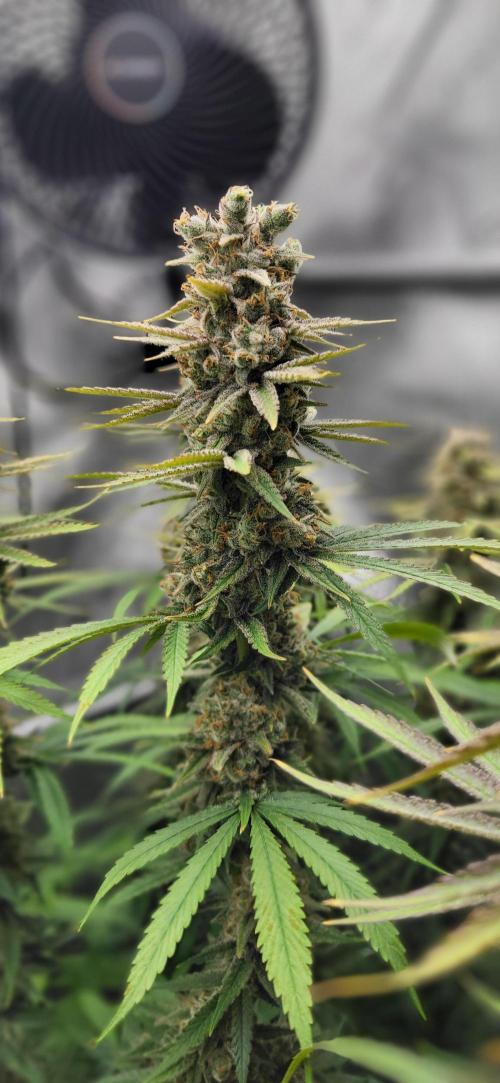
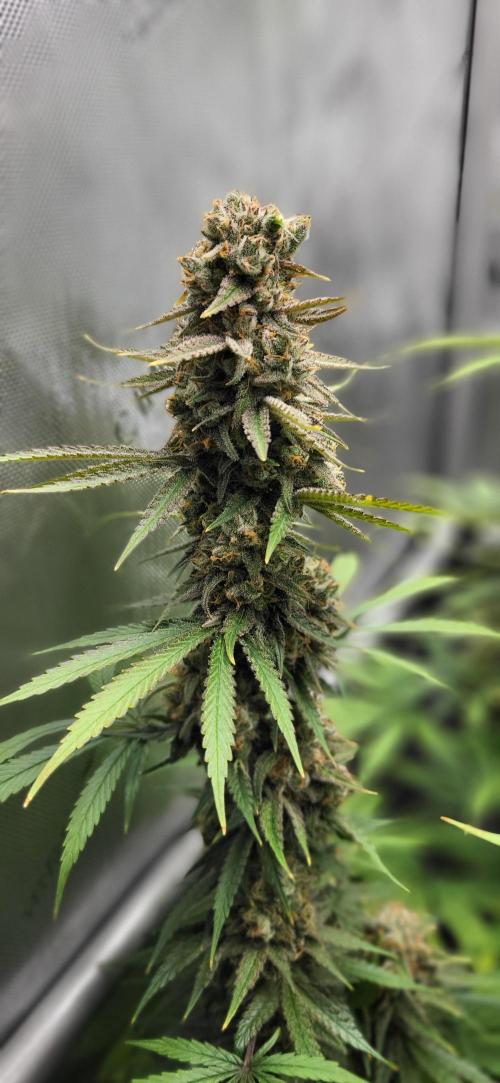
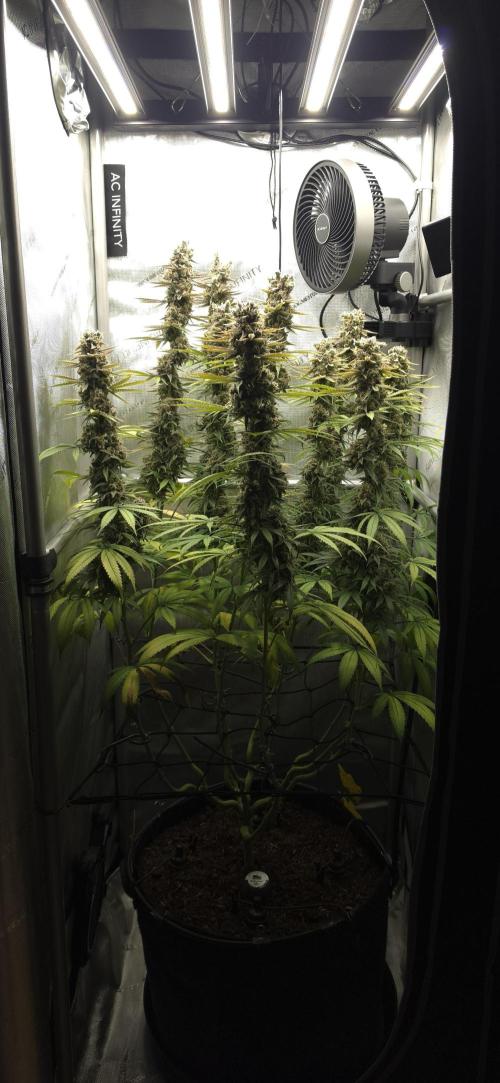
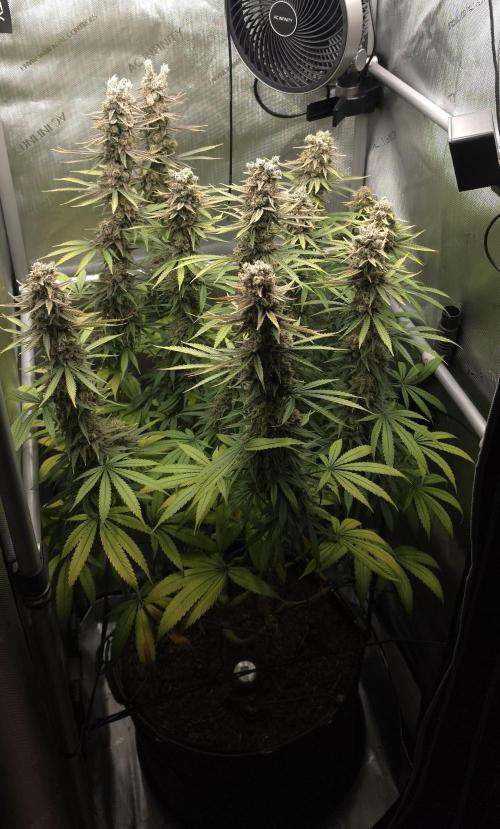
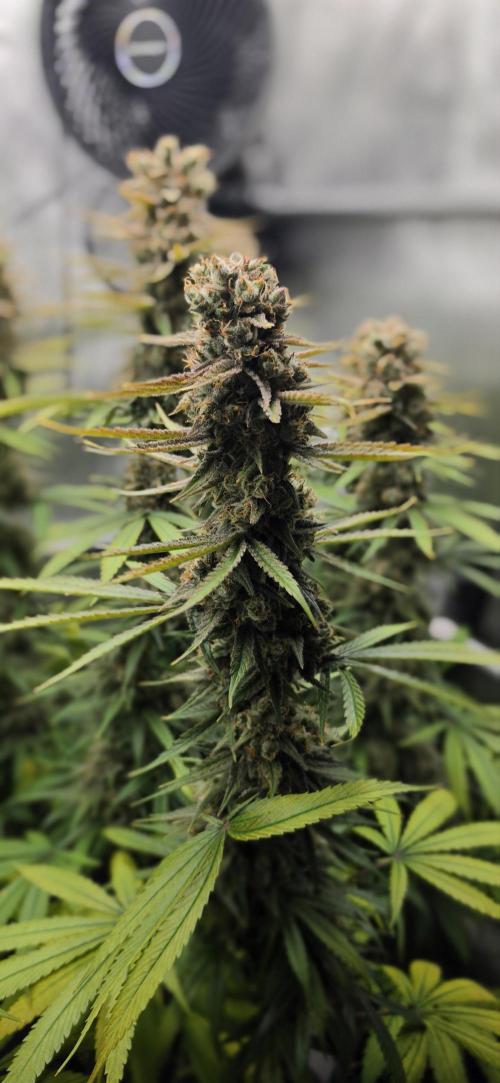
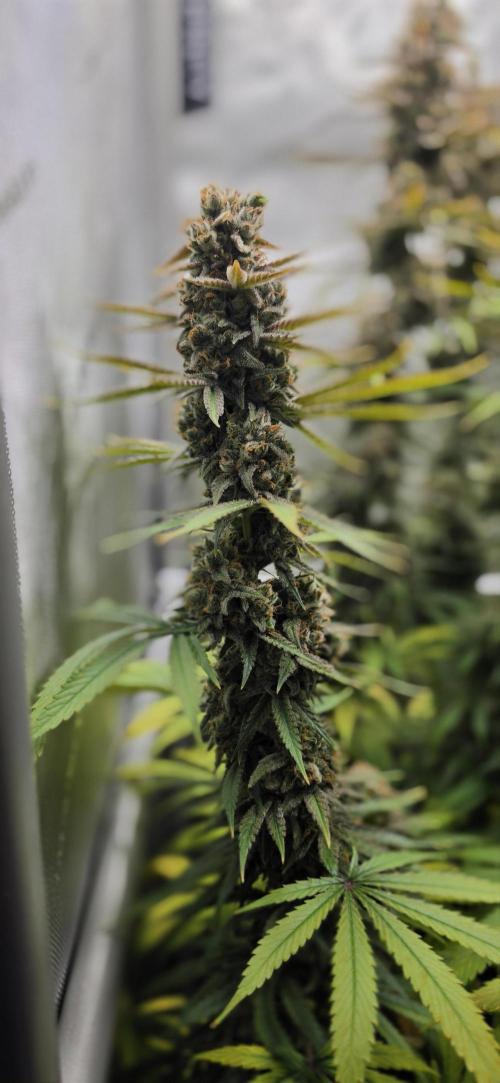
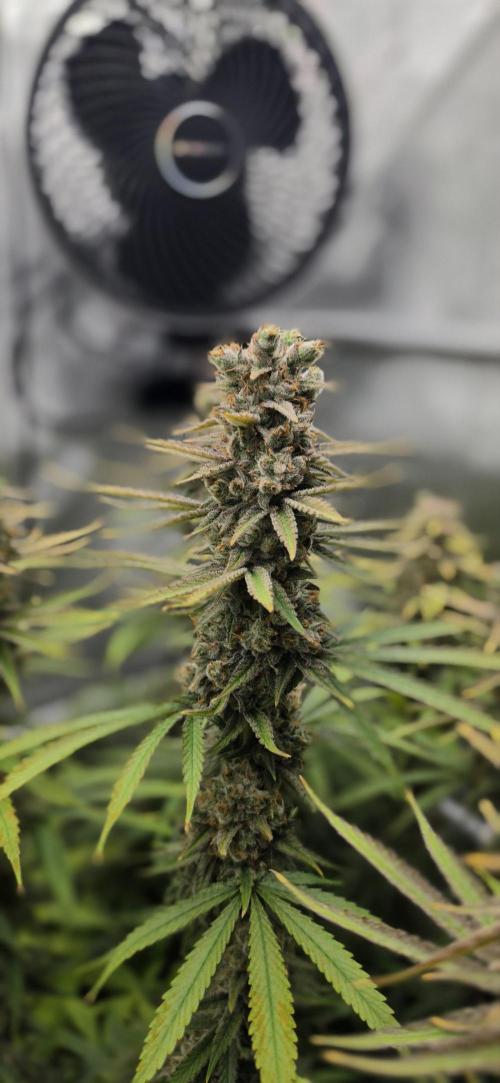
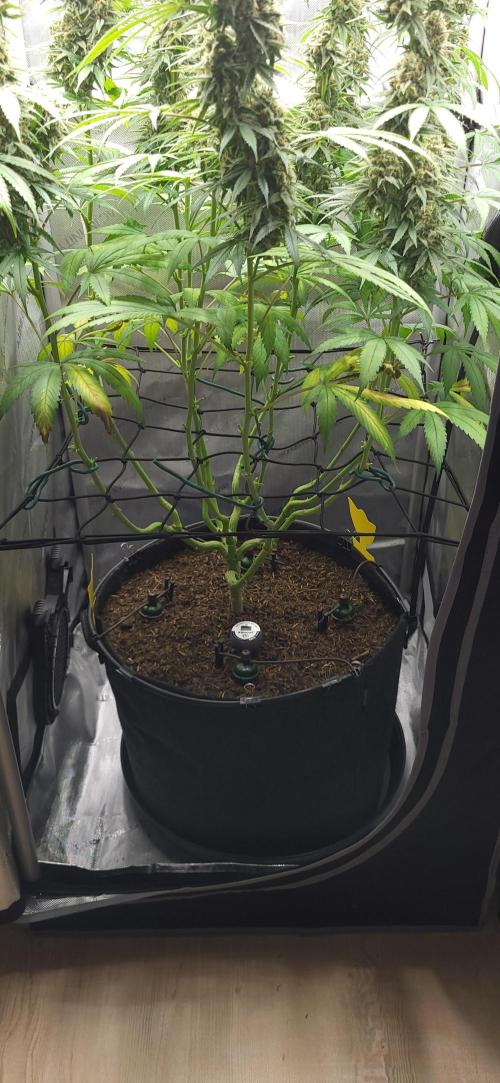
Alvareas We are definitely on the home stretch.
The plant is increasingly heading into autumn and is drawing from the bottom up.
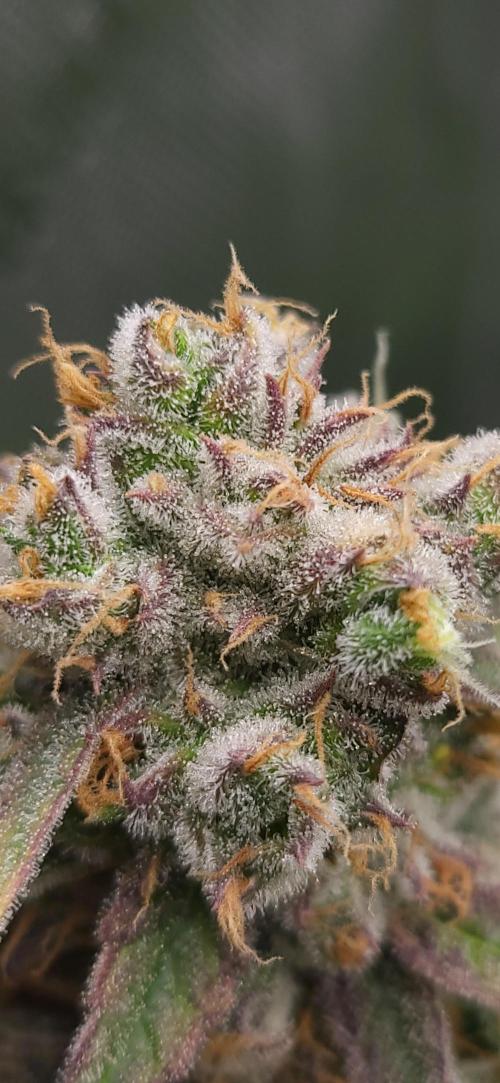
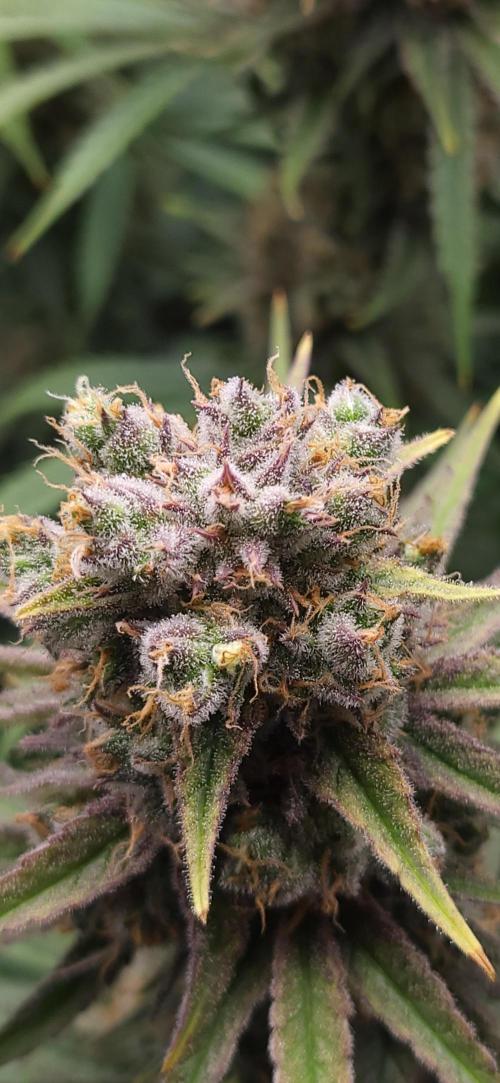
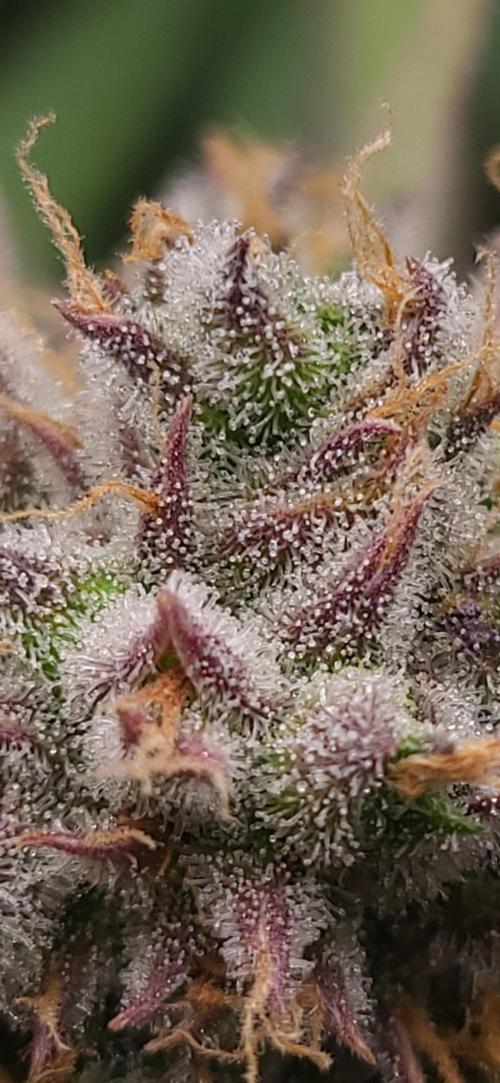
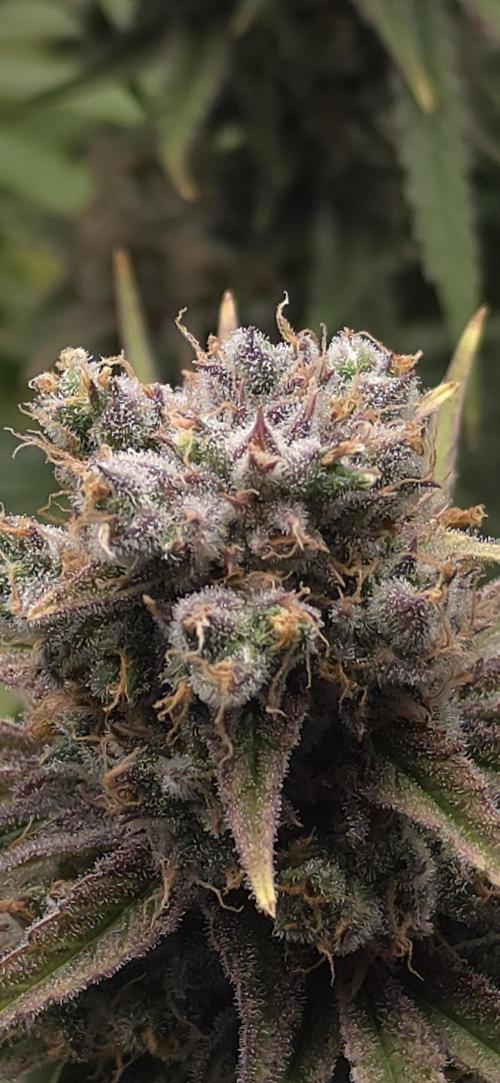
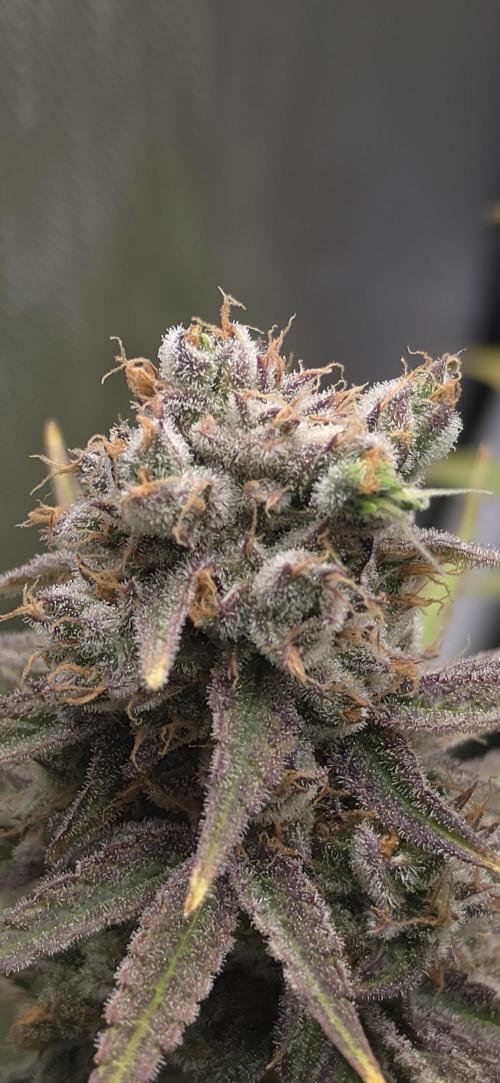
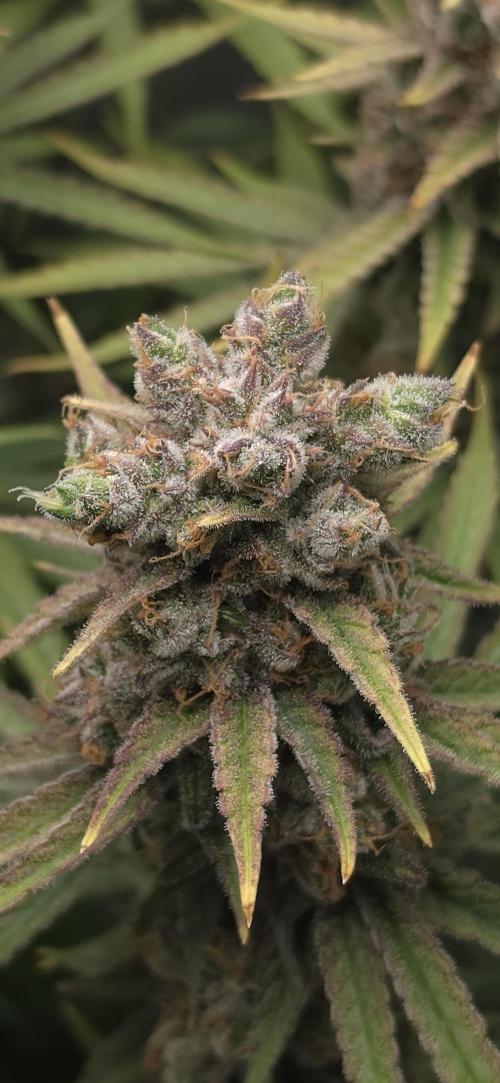
The trichomes are almost entirely milky.
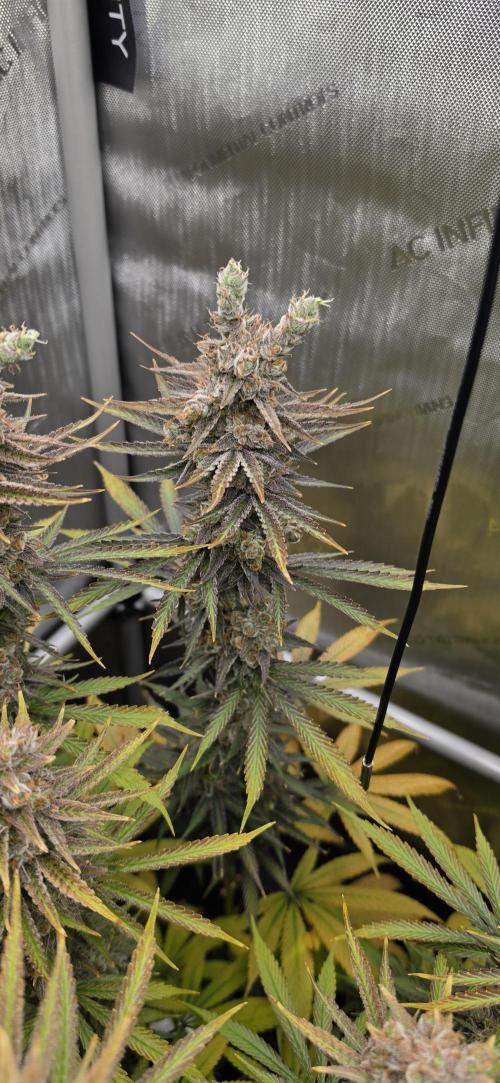
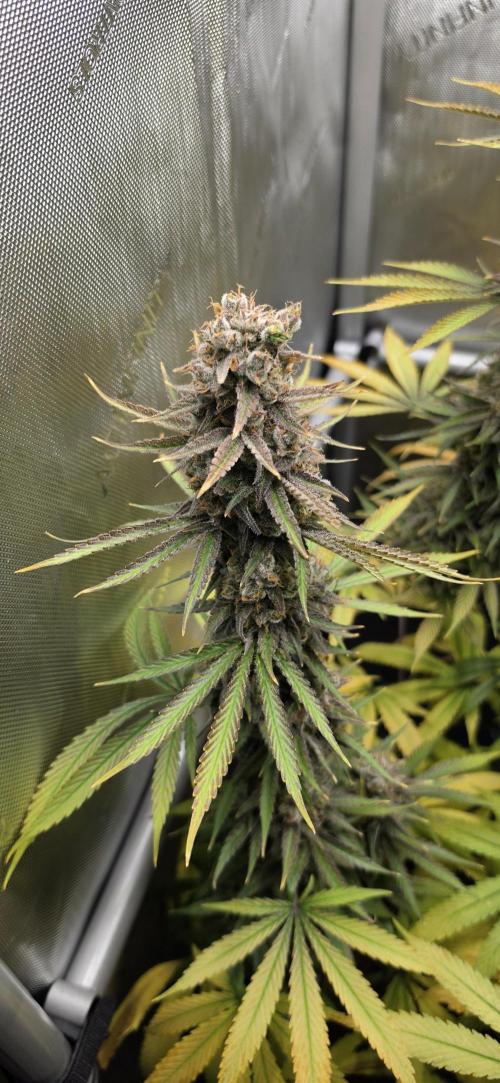
The buds are now maturing, and there are some really beautiful colas among them.
The fox tailing has taken on some bizarre shapes.
The parameters in week 14:
Controller setting day: Advanced AI humidity 50% - 60%
Controller setting night: Advanced AI humidity 50% - 60%
Average daytime temperature: 25 degrees
Average nighttime temperature: 22 degrees
Average humidity day: 55%
Average humidity night: 55%
Average VPD day: 1.3
Average VPD night: 1.1
LED power: 40% = 145 watts
Lighting duration: 12 hours
Air circulation: Level 1 oscillating
4 likes
comments
Share
15
Week 15. Flowering6mo ago
106 cm
Height
12 hrs
Light Schedule
25 °C
Day Air Temp
6.5
pH
Strong
Smell
55 %
Air Humidity
22 °C
Night Air Temp
40 set_lilers
Pot Size
20 cm
Lamp Distance
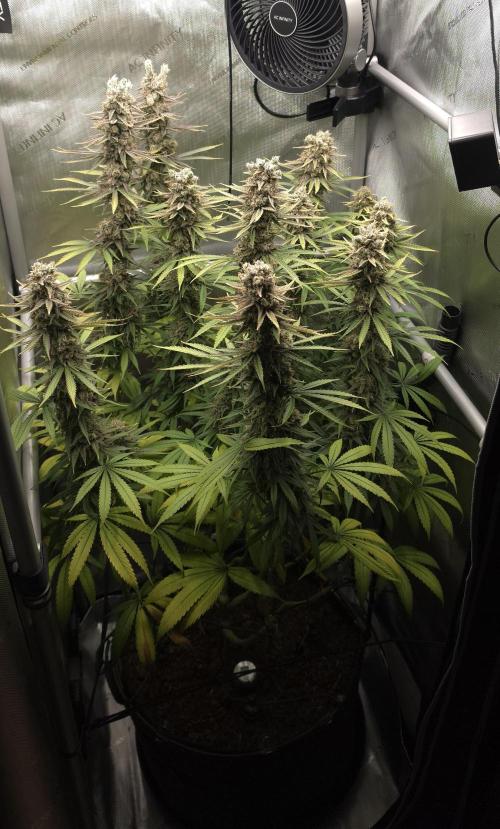
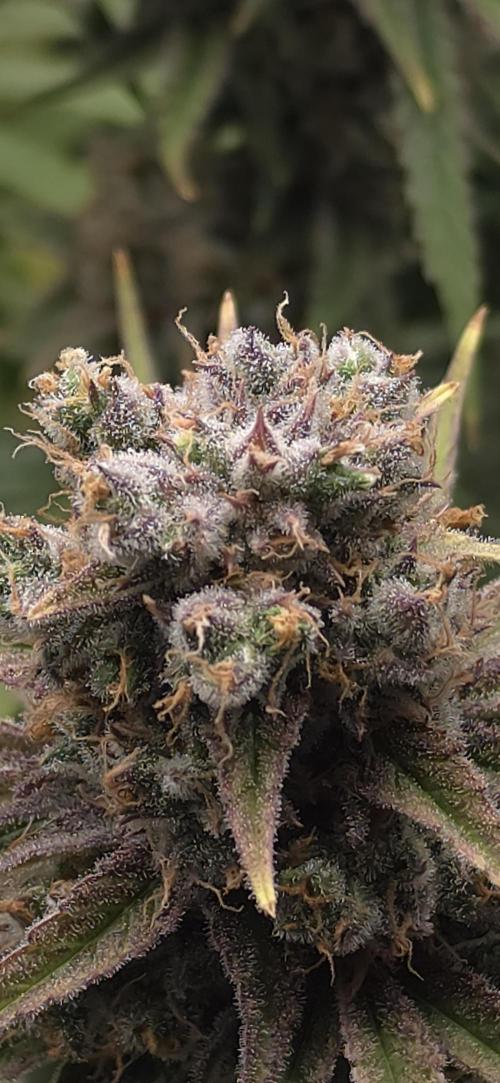
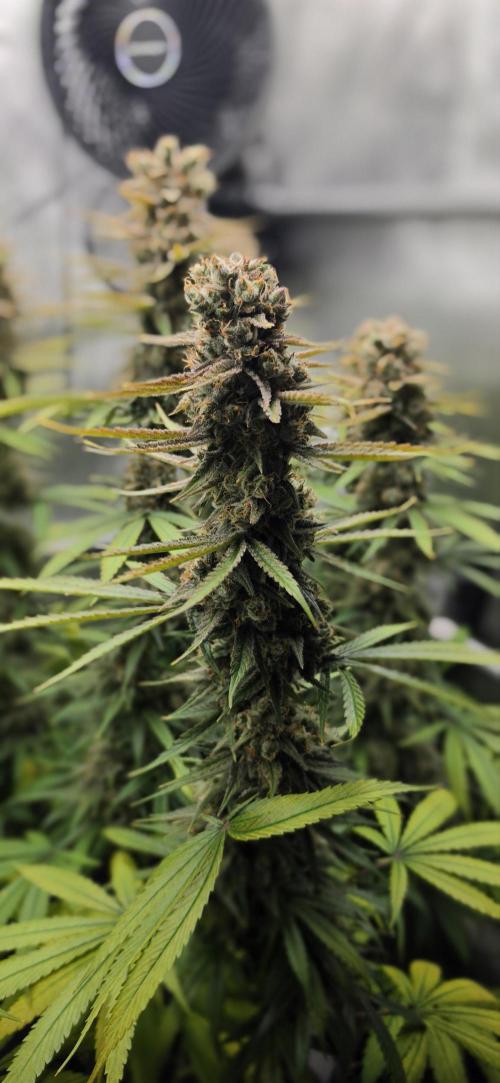
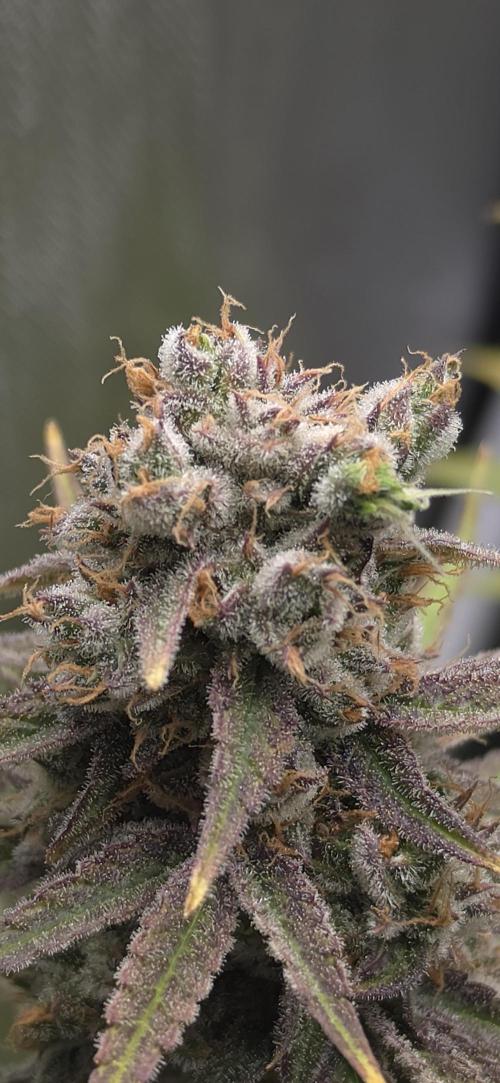
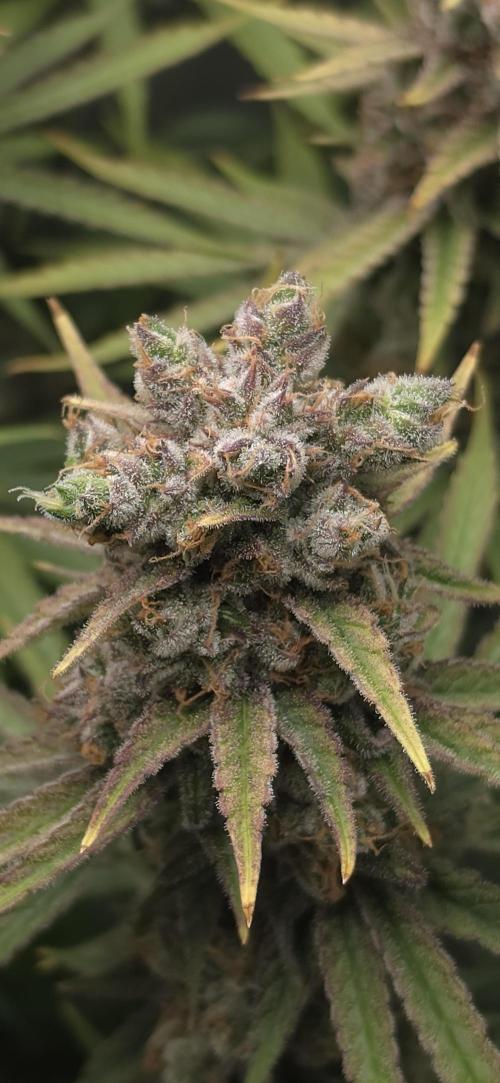
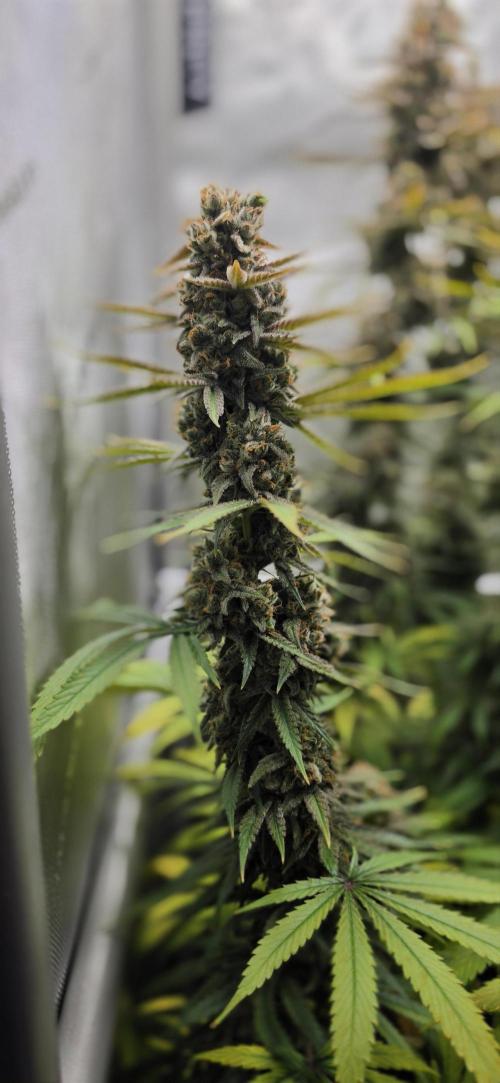
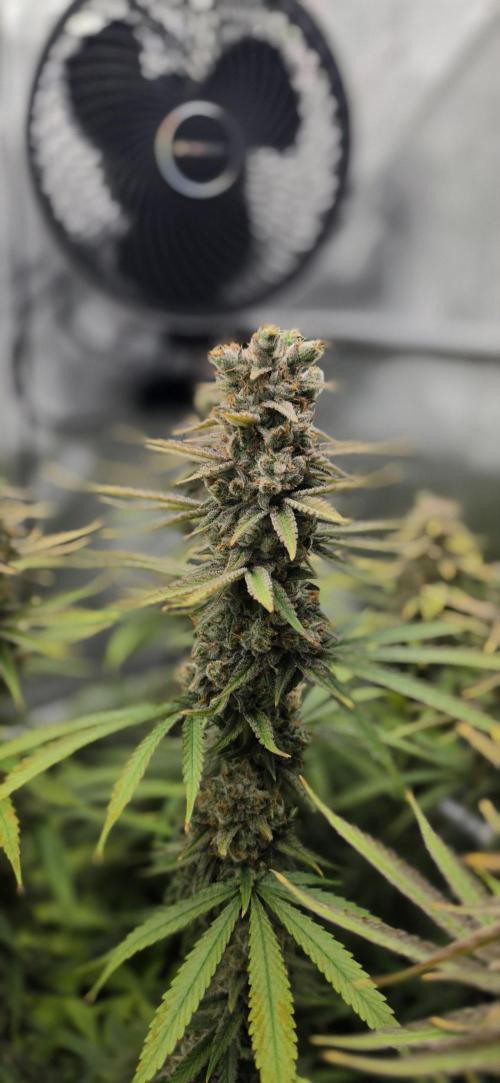
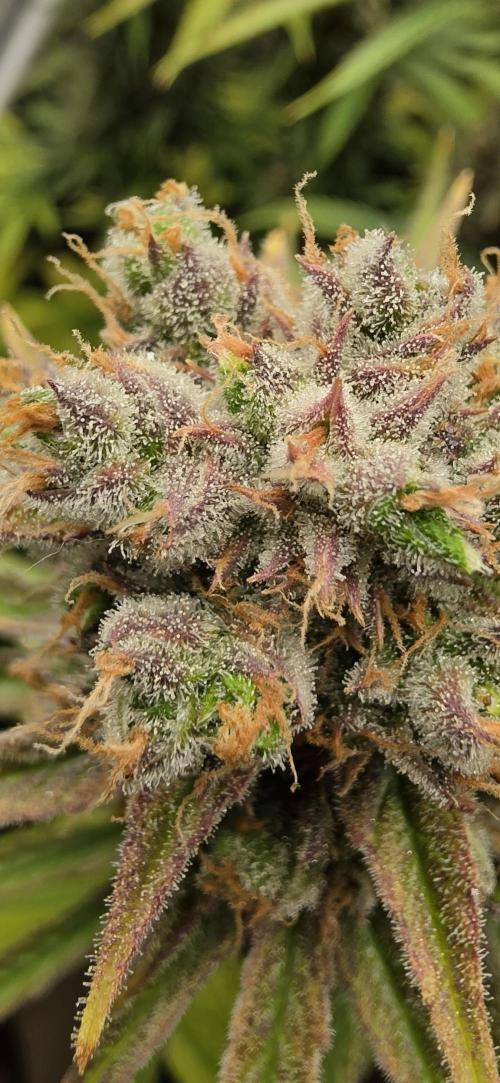
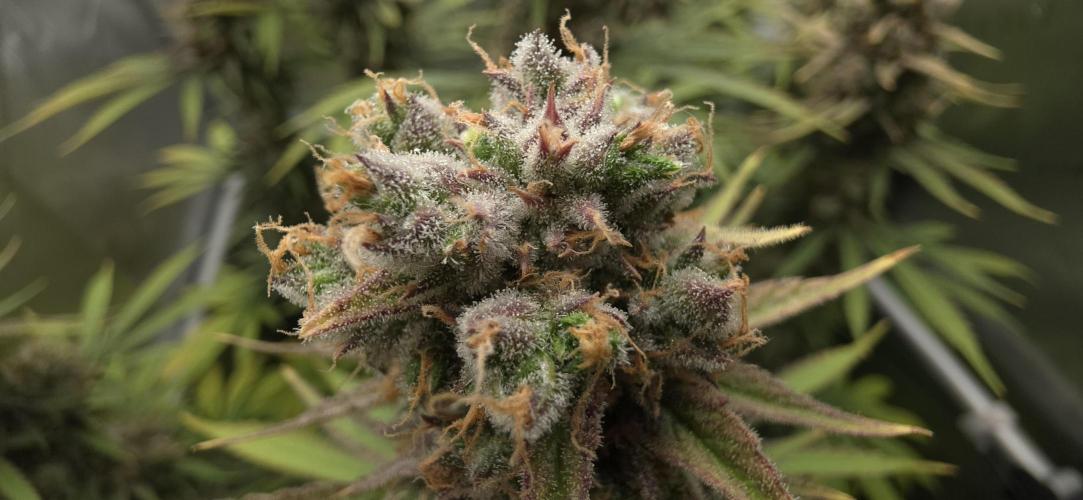
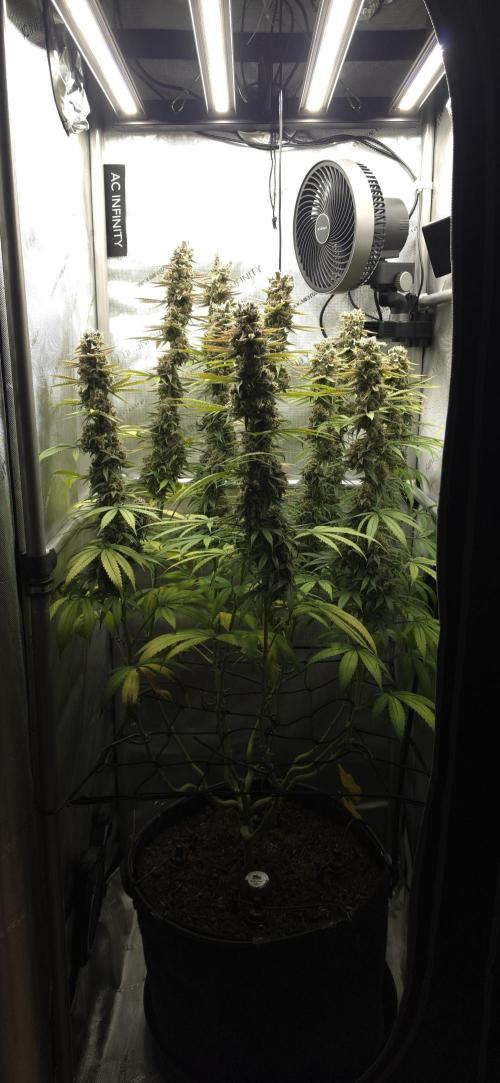
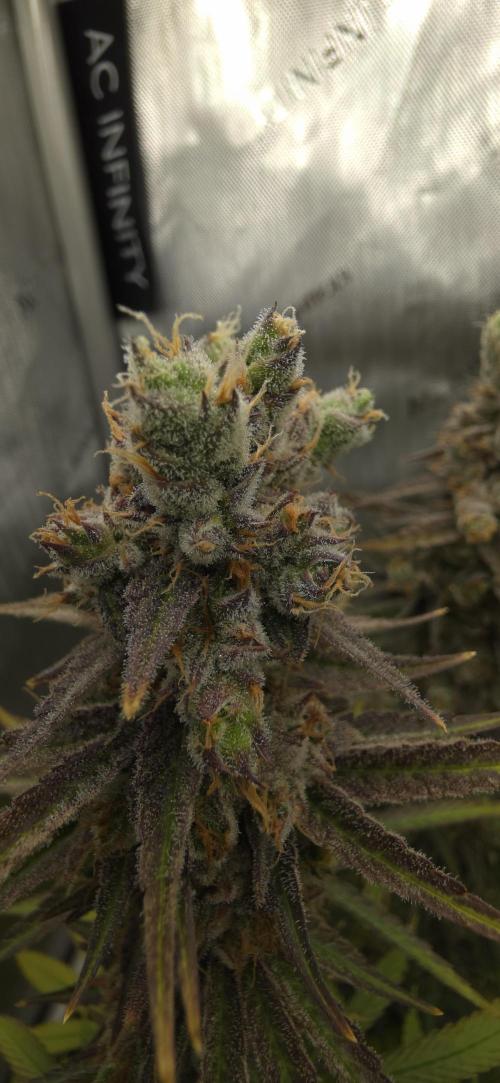
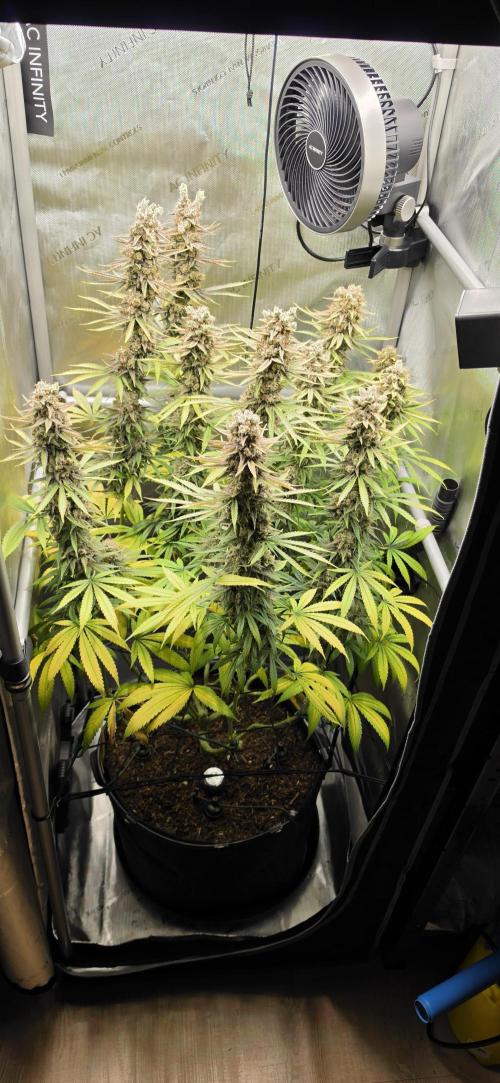
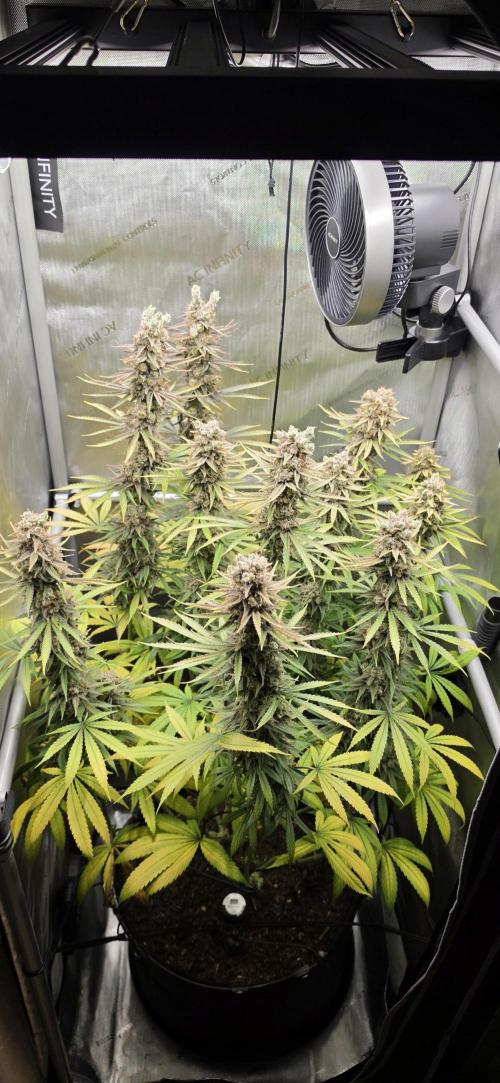
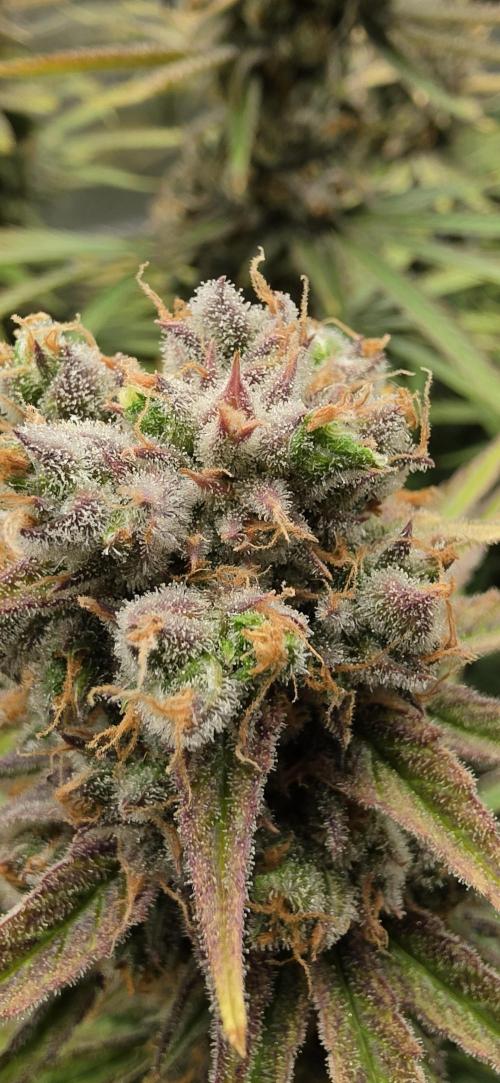
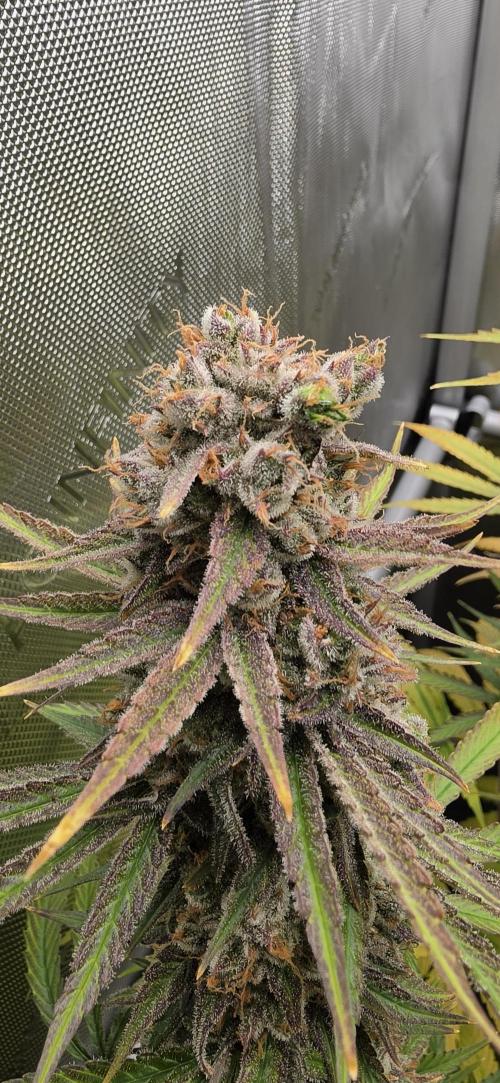
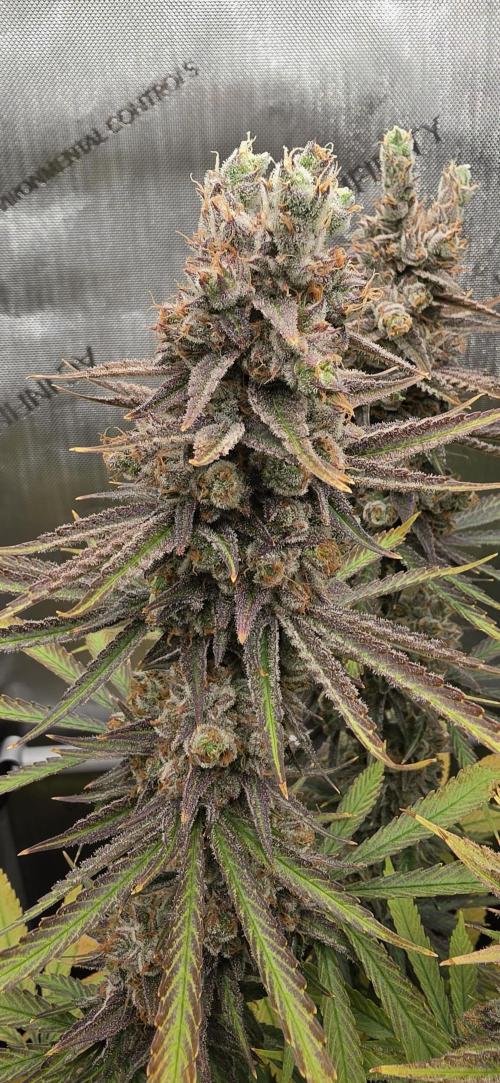
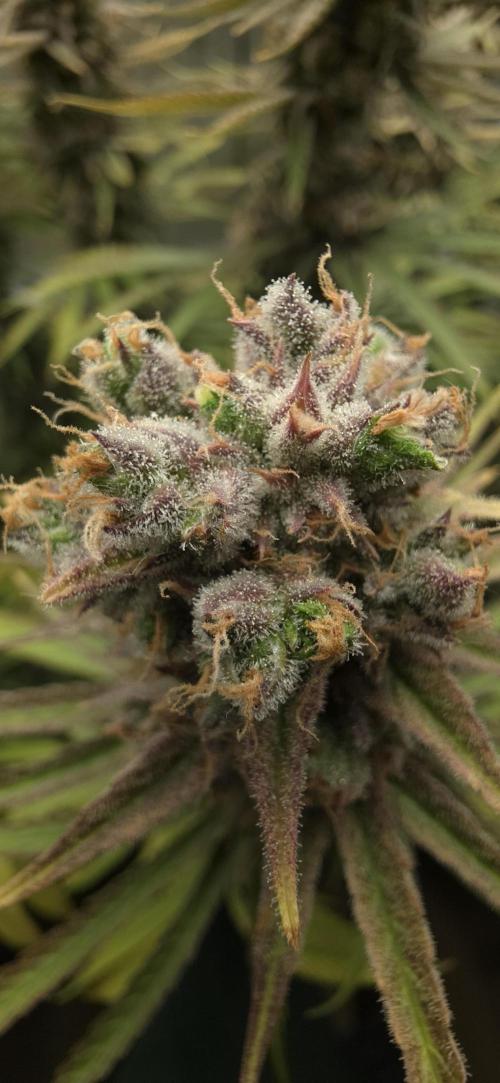
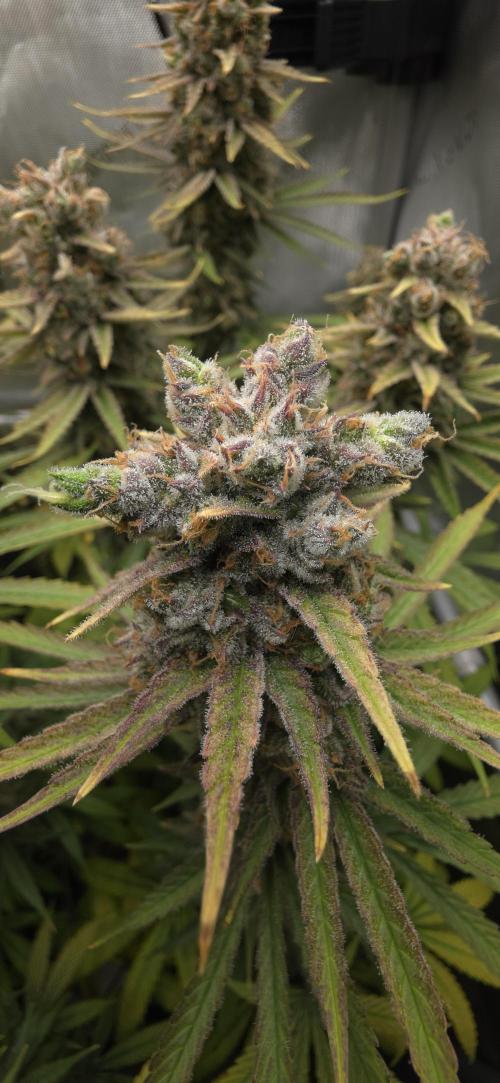
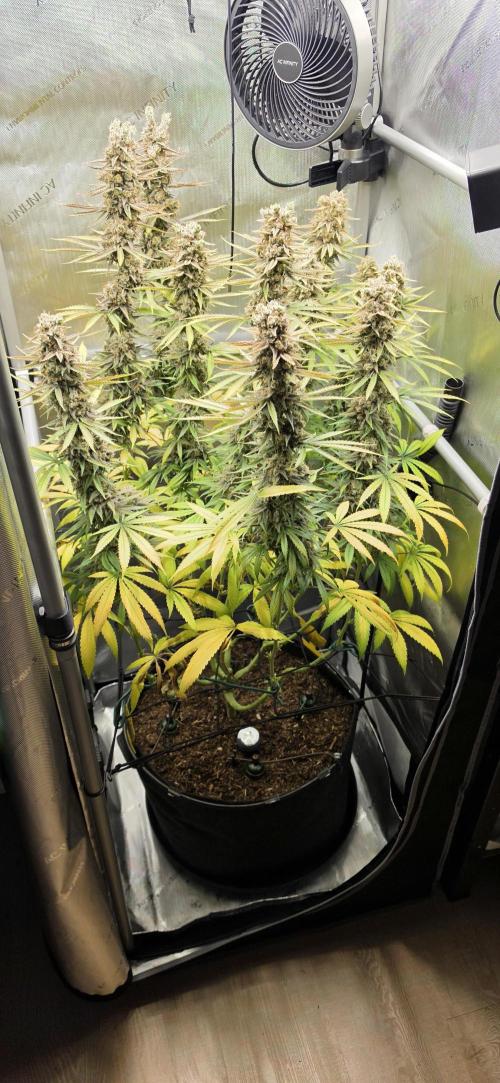
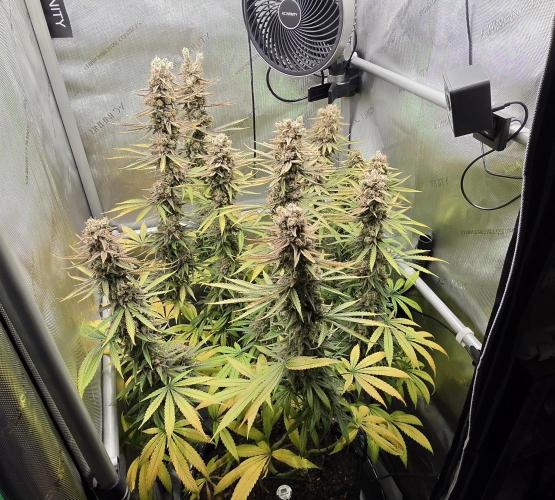
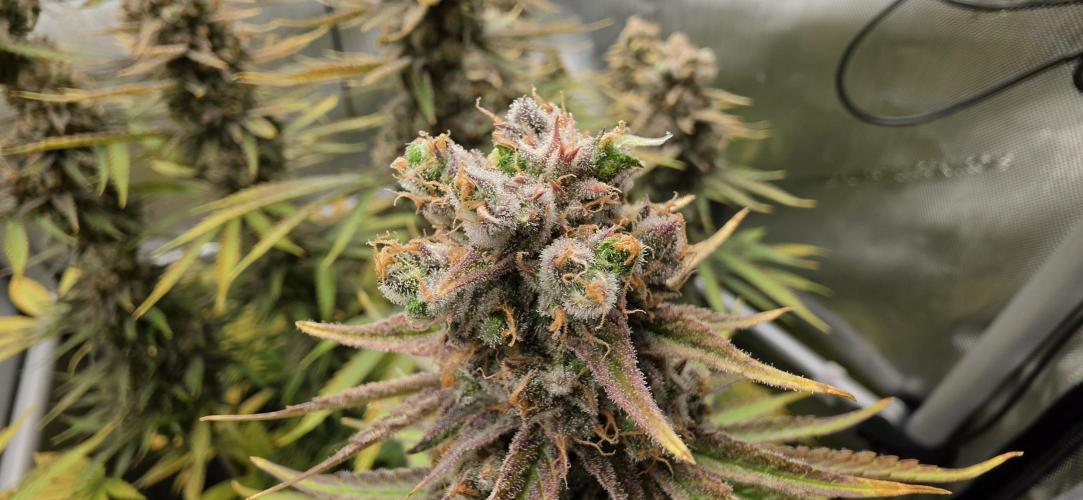
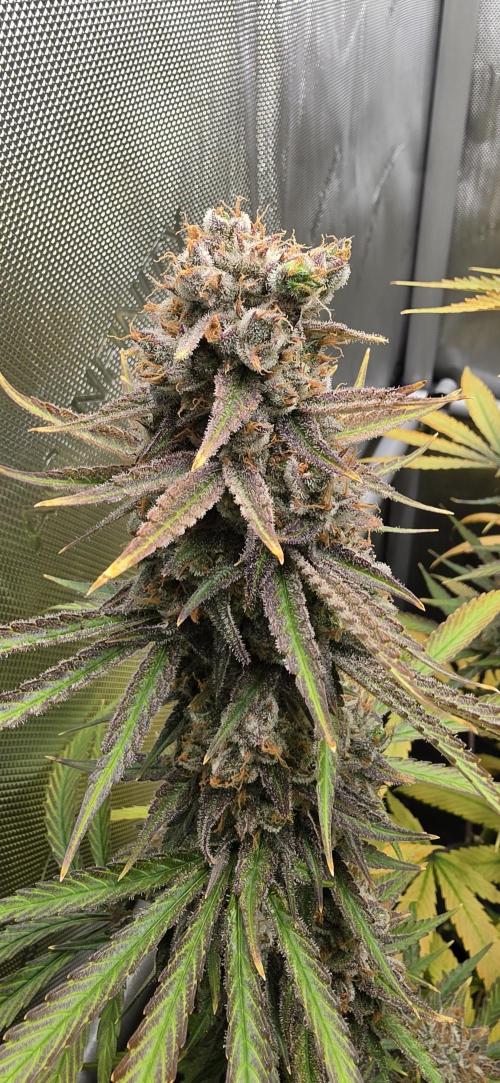
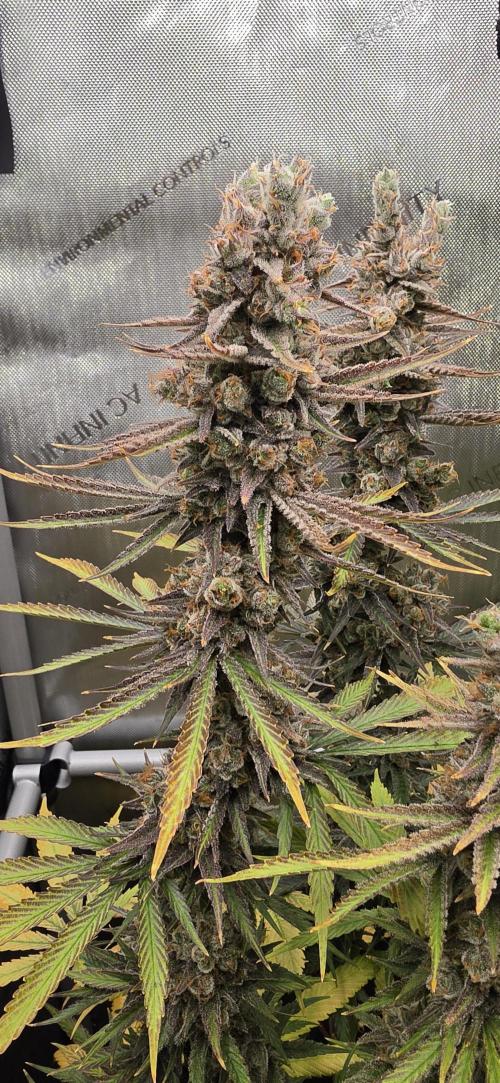
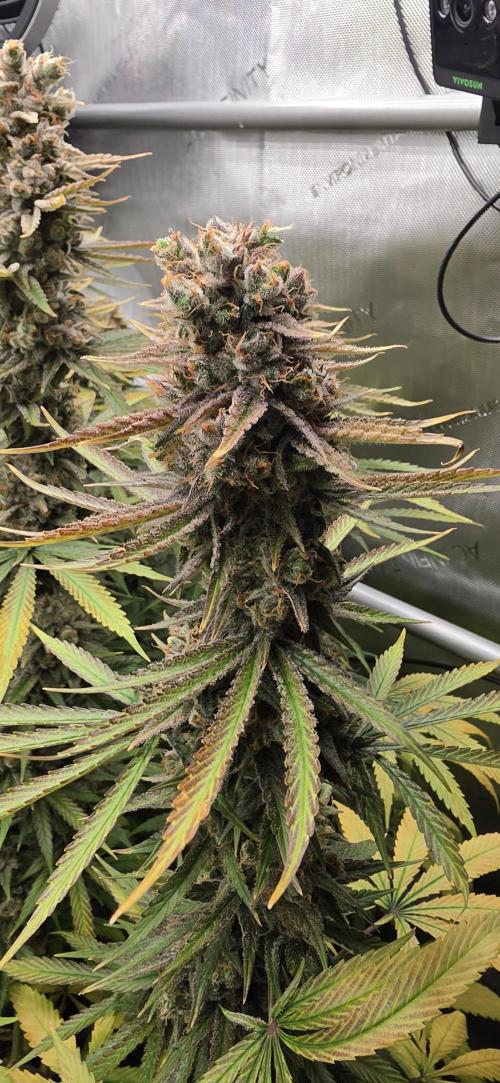
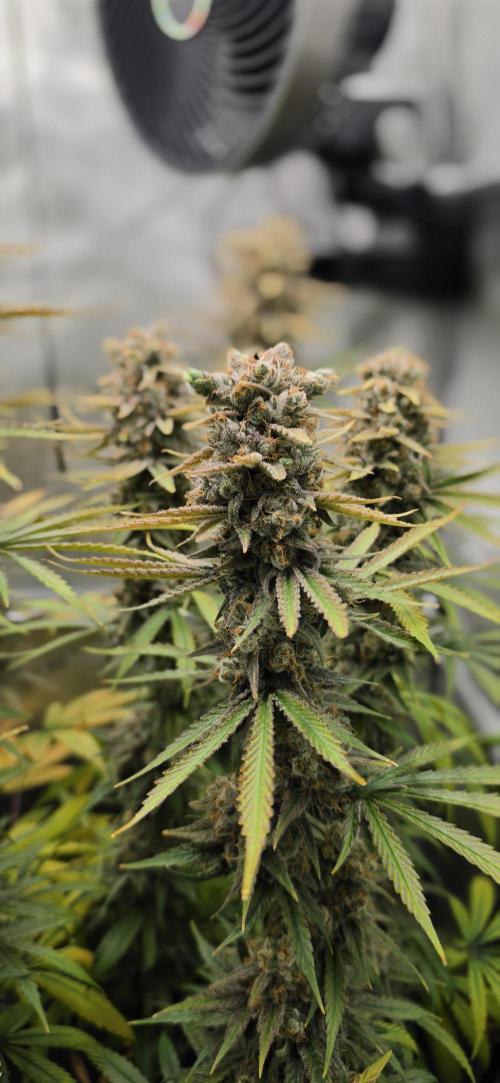
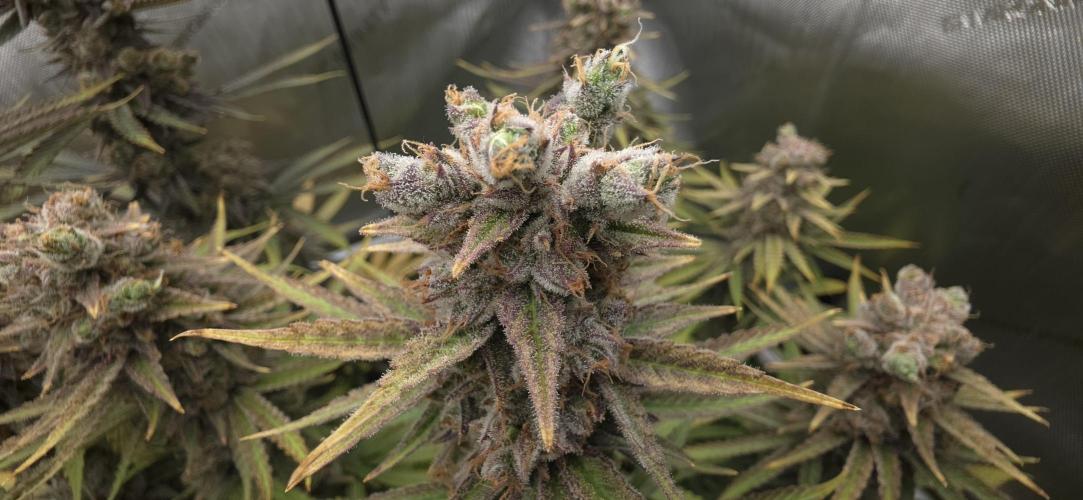
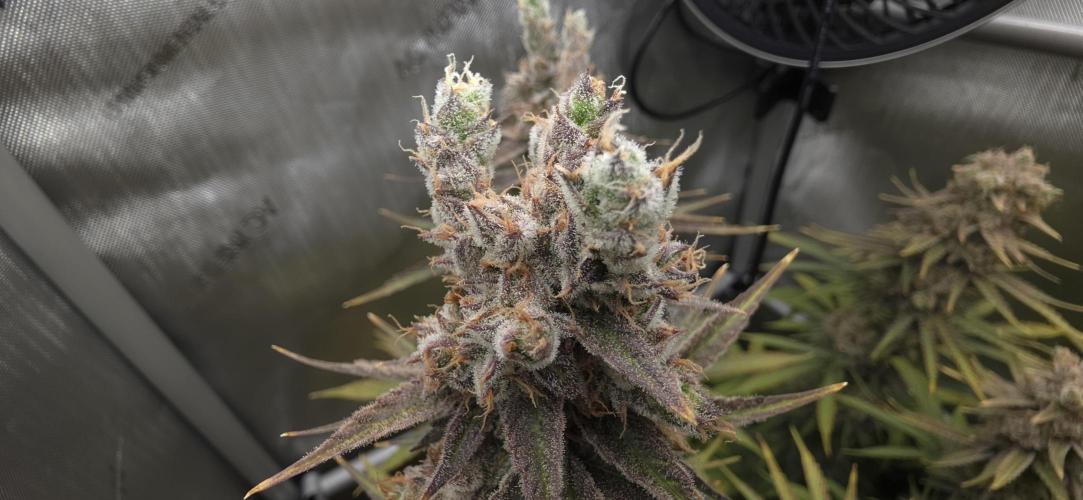
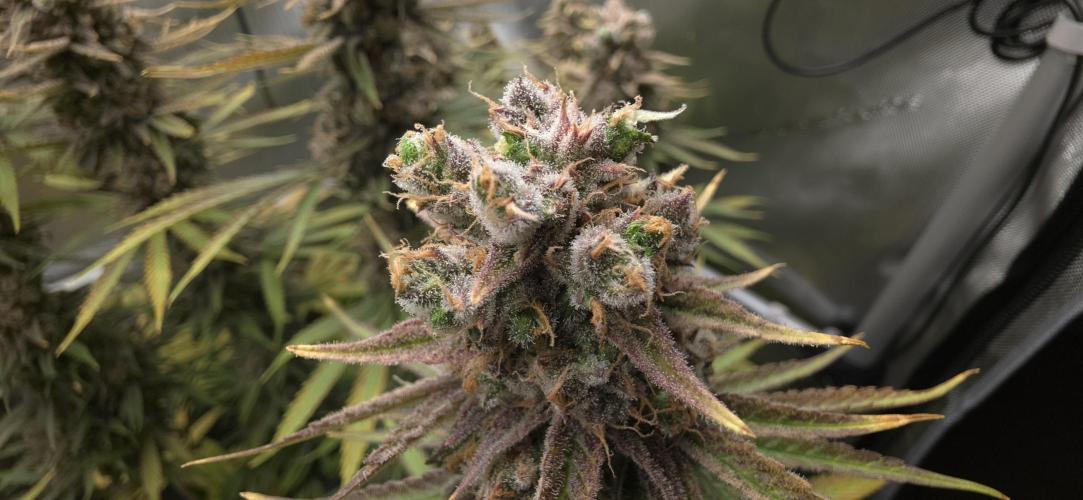
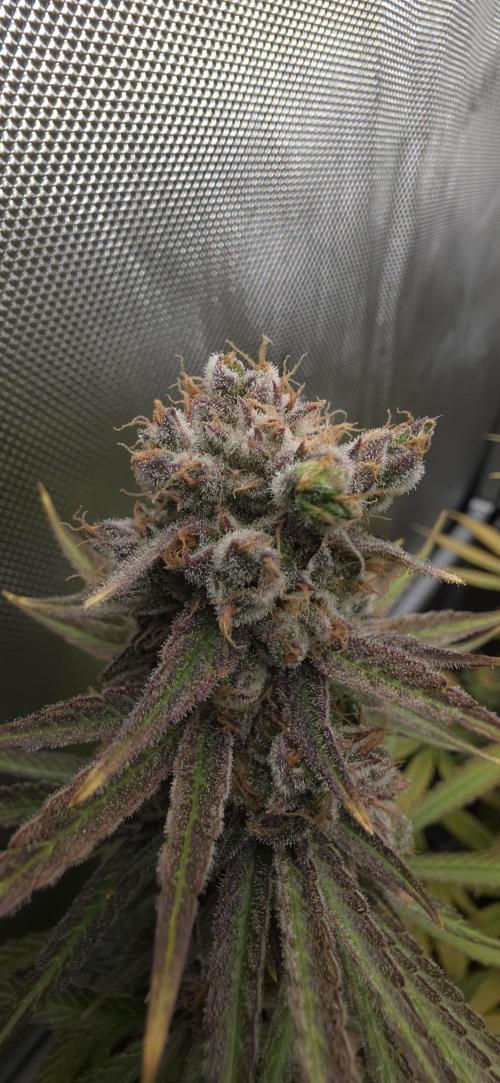
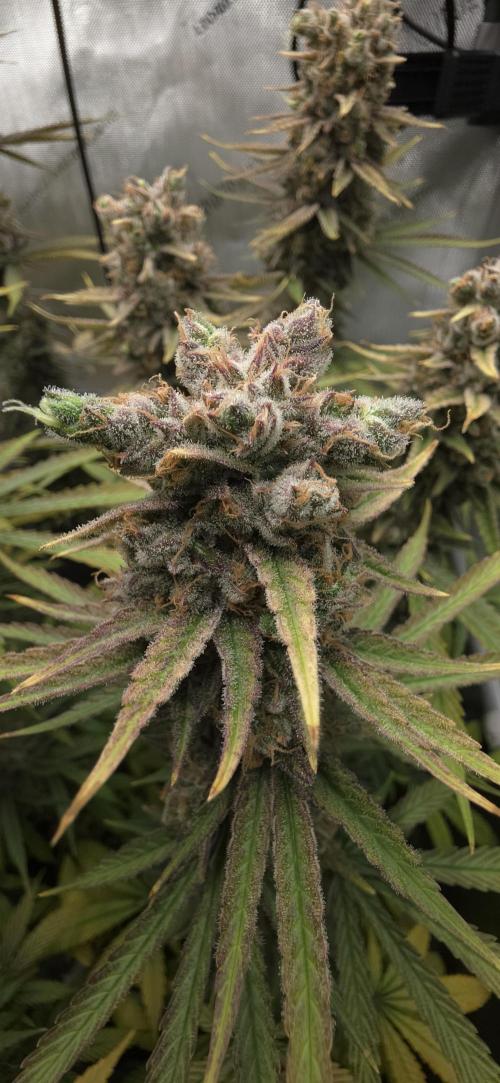
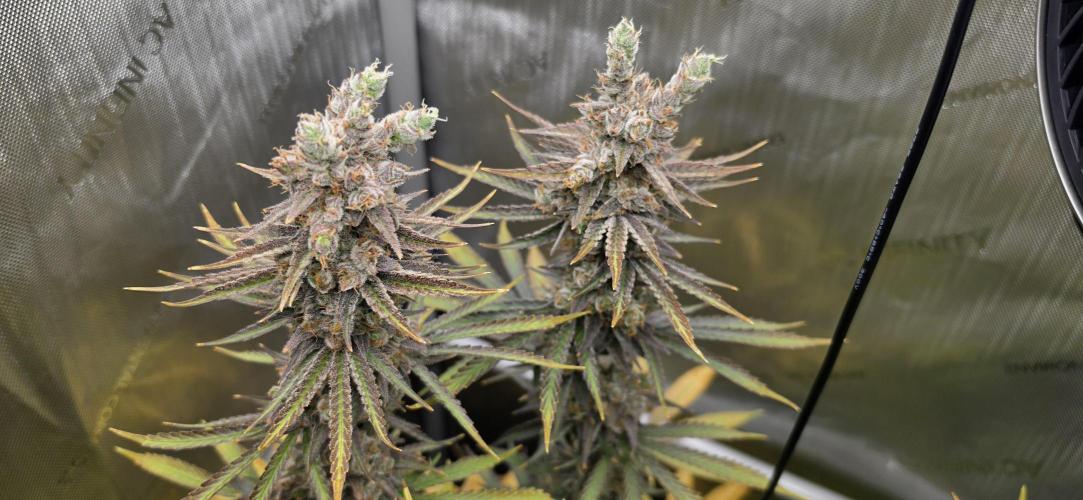
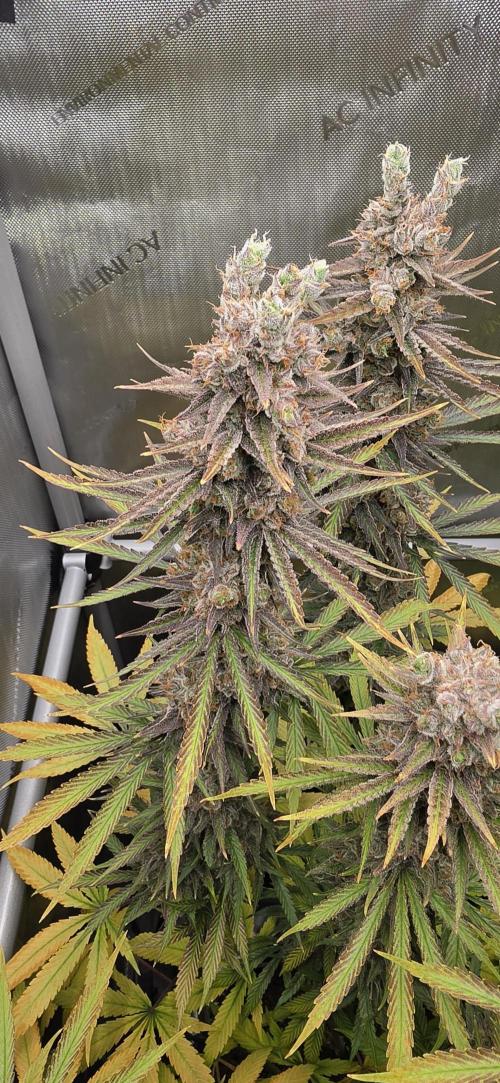
Alvareas The plant looks very good.
A beautiful autumn has set in.
The trichomes are mostly milky with a few amber ones, just the way I like it.
Harvest will take place at the end of the week.
The parameters in week 15:
Controller setting day: Advanced AI humidity 50% - 60%
Controller setting night: Advanced AI humidity 50% - 60%
Average daytime temperature: 25 degrees
Average nighttime temperature: 22 degrees
Average humidity day: 55%
Average humidity night: 55%
Average VPD day: 1.3
Average VPD night: 1.1
LED power: 40% = 145 watts
Lighting duration: 12 hours
Air circulation: Level 1 oscillating
5 likes
2 comments
Share
16
Week 16. Harvest6mo ago
Happy Harvest Day!


5/10
Rated
When you consider that you get 3 seeds for under 10 euros here, they delivered well. The grow went smoothly and the result is okay.
Show more
Original
Spent 107 days
Ger Veg Flo Har
550 g
Bud wet weight per plant
110 g
Bud dry weight per plant
1
Plants
0.36 m²
Grow Room size
Easy
Difficulty

Dry mouth
Negative effects

Flowery
Taste
Height
Day air temperature
Air humidity
PH
Light schedule
Night air temperature
Pot size
Lamp distance
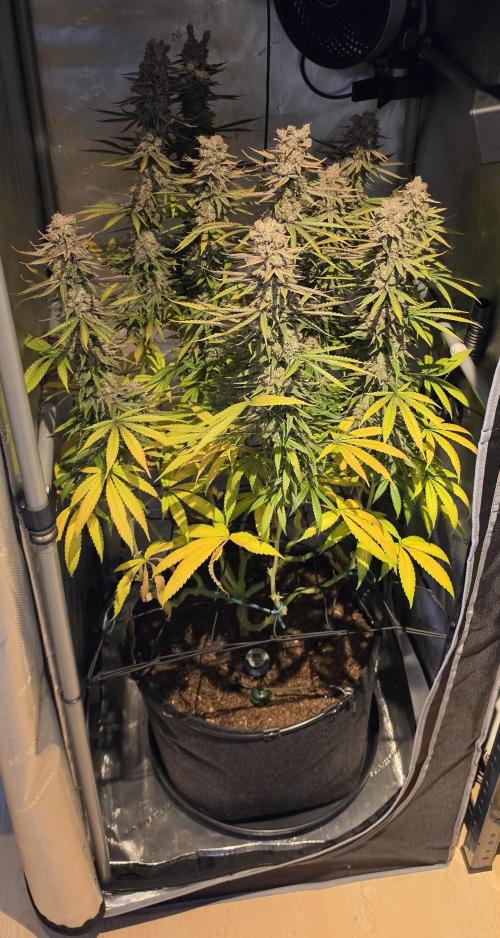
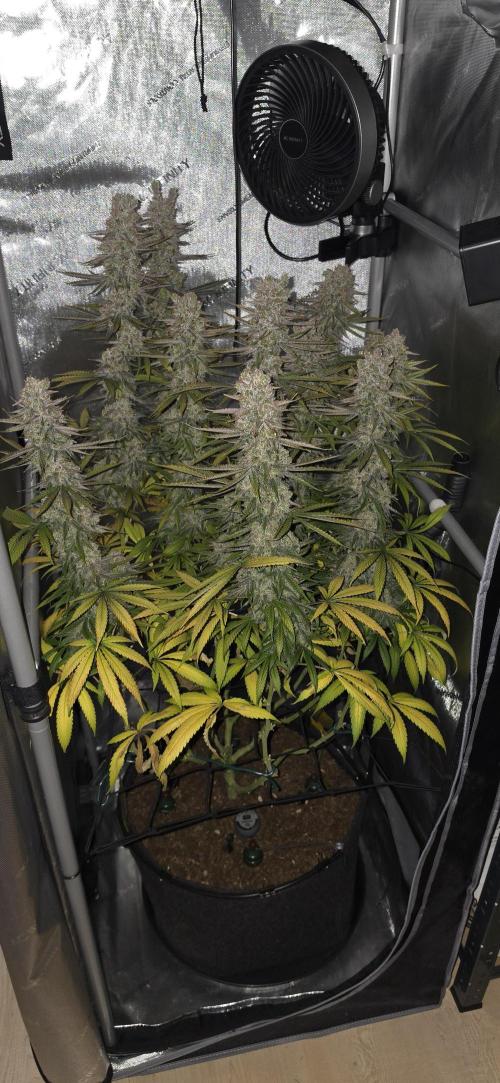
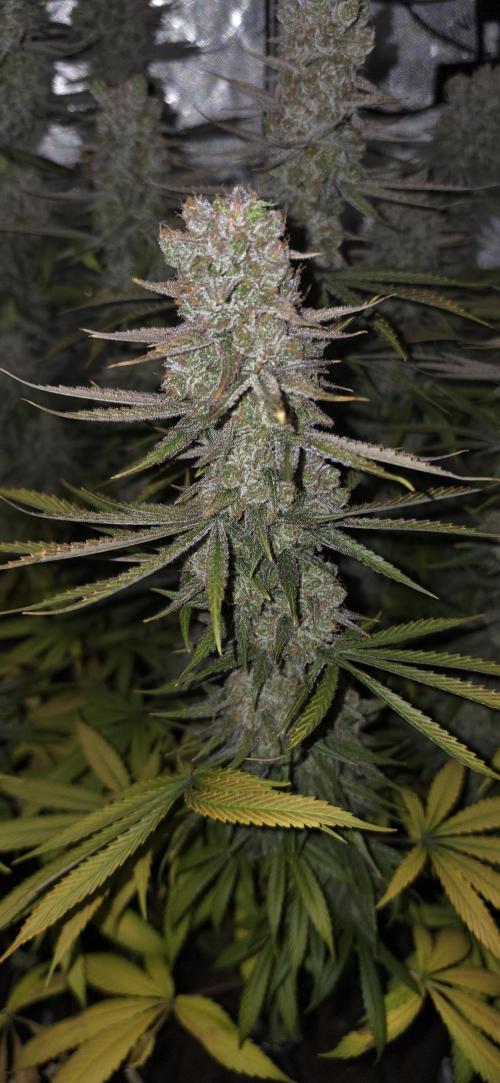
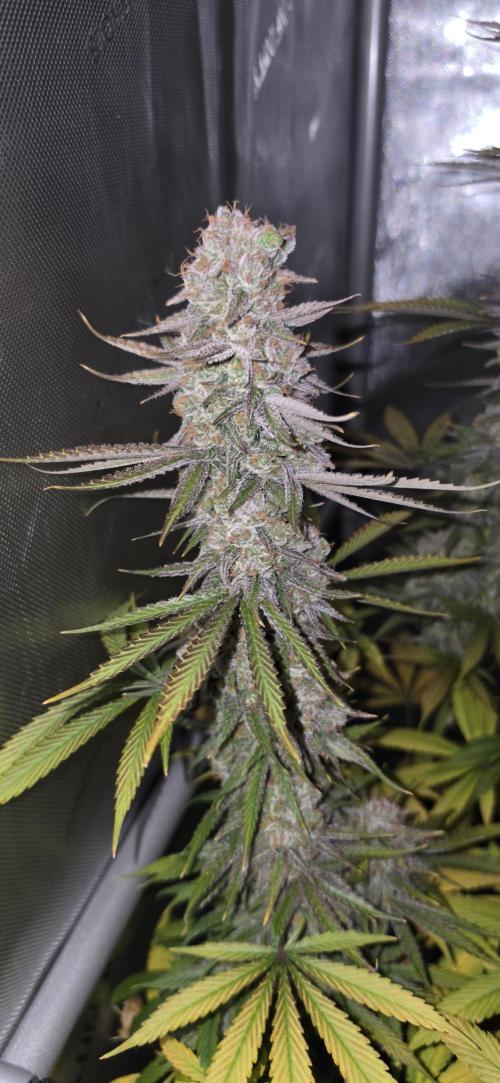
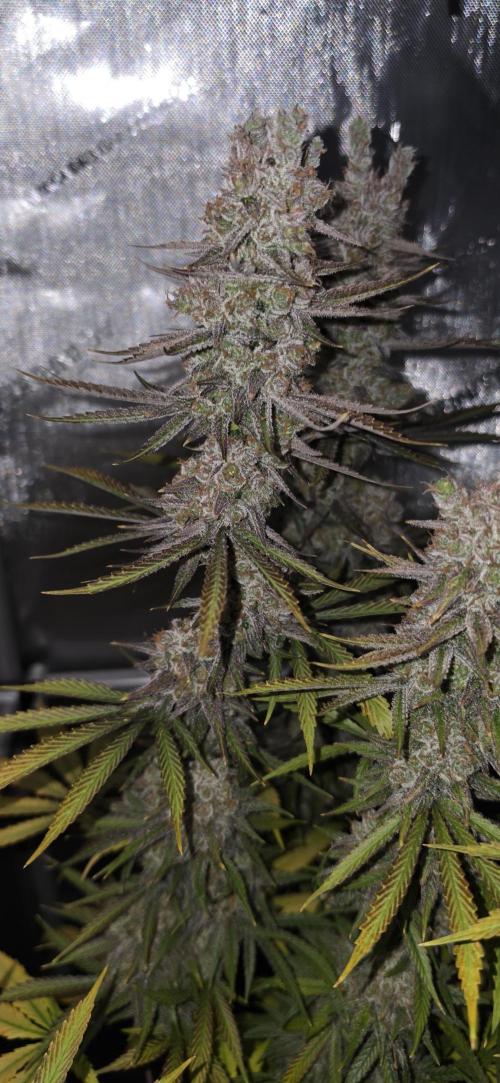
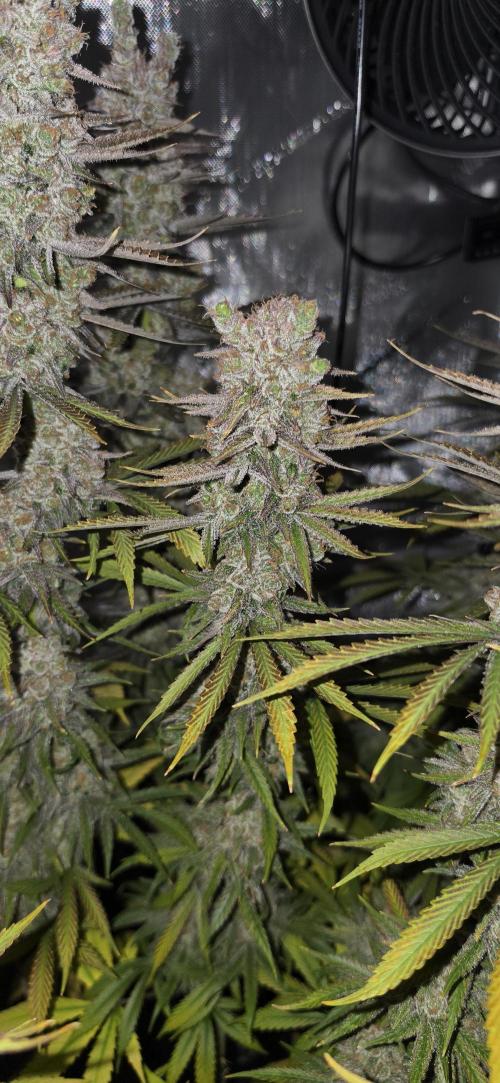
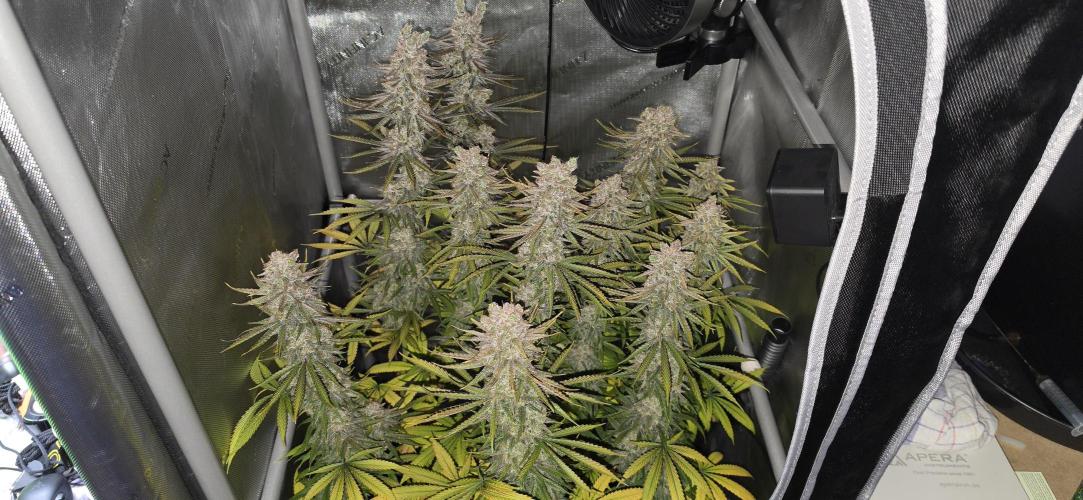
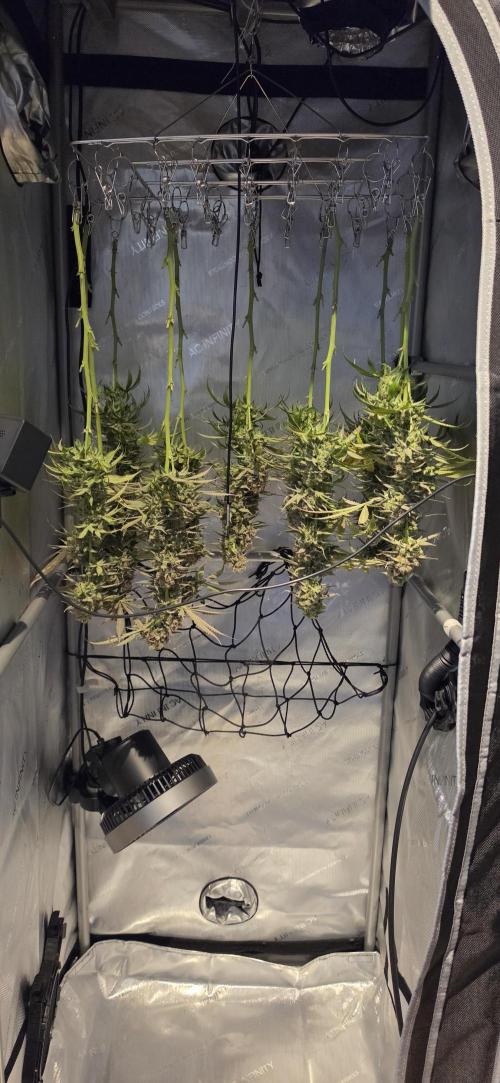
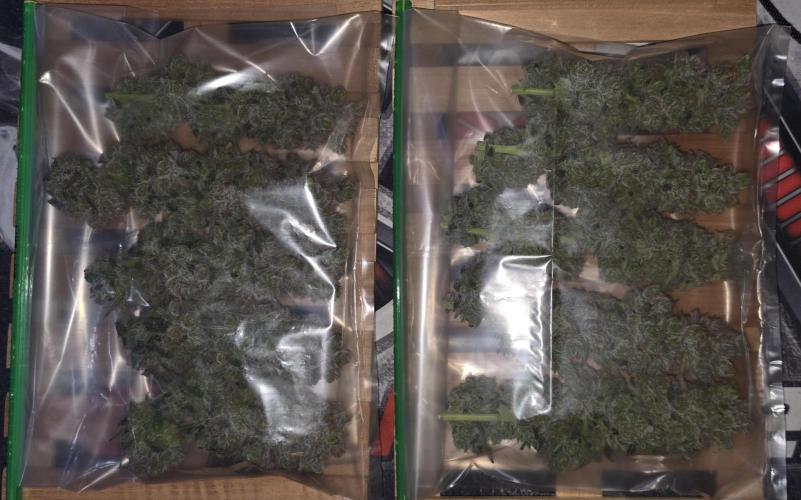
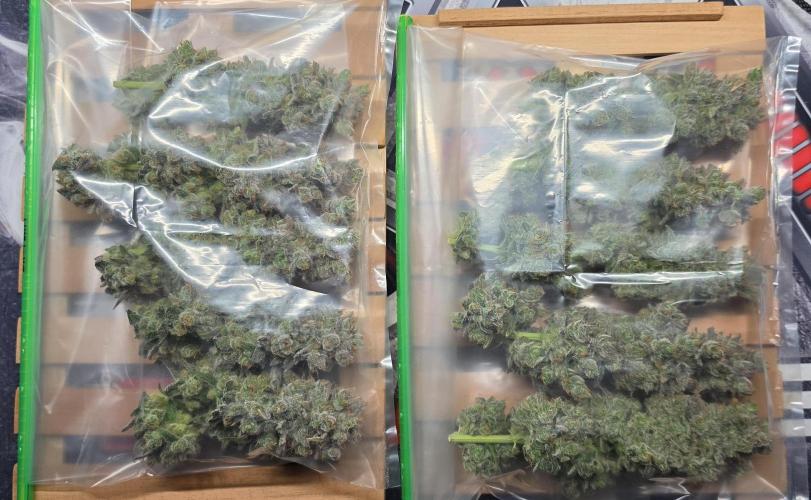
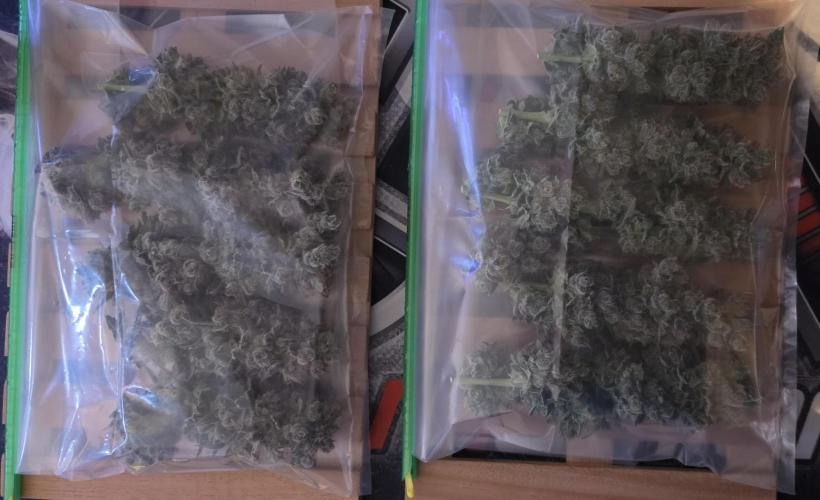
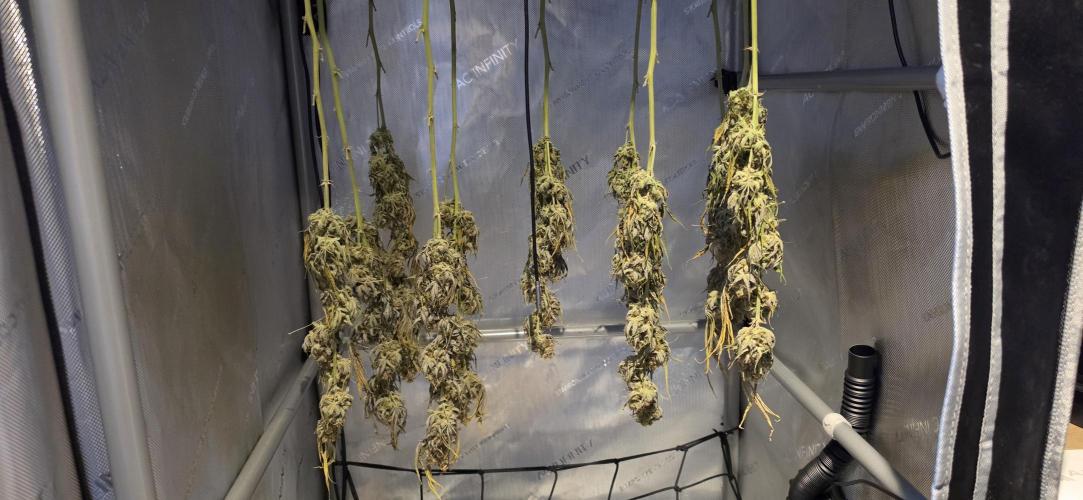
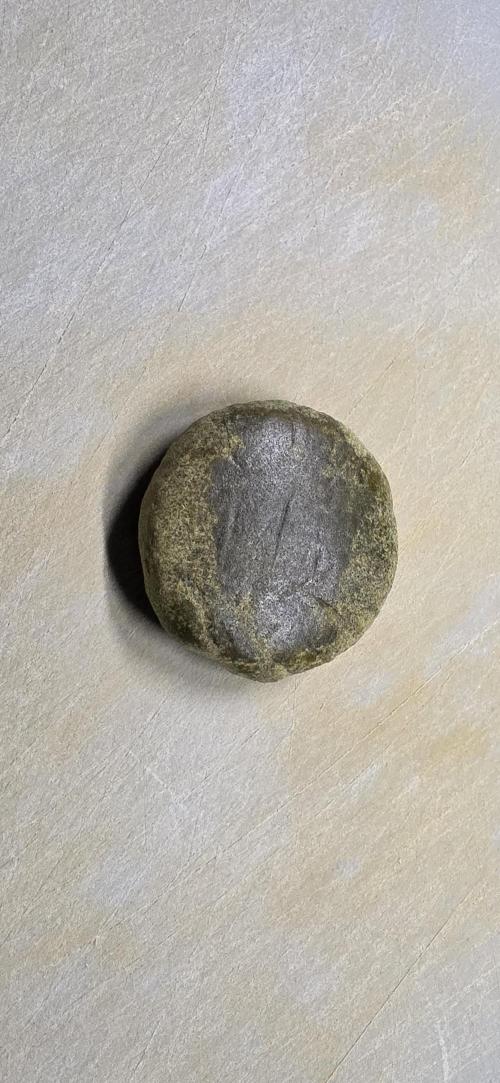
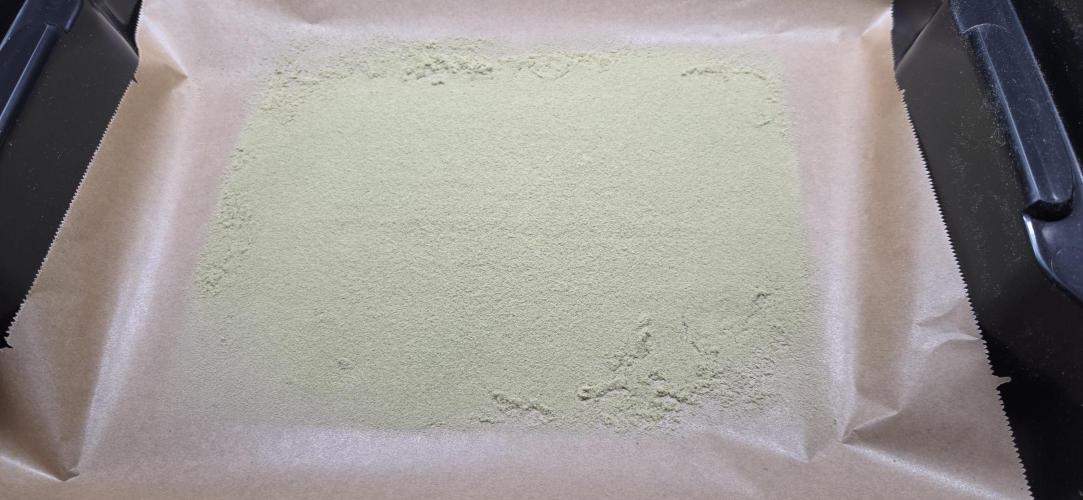
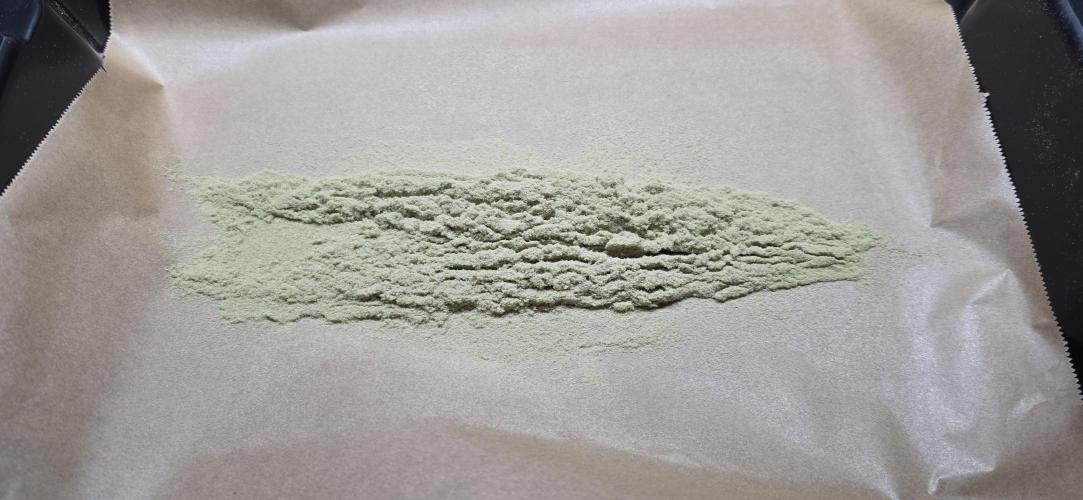
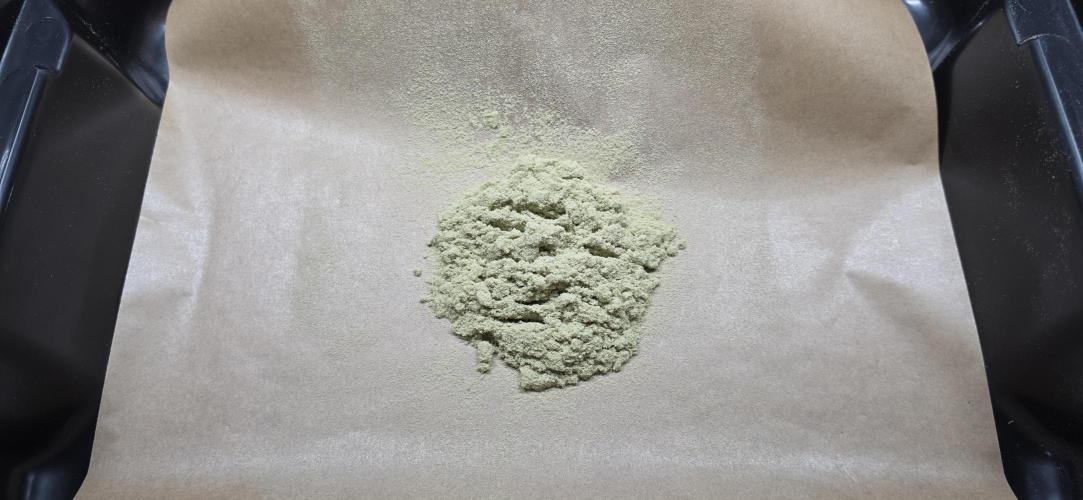
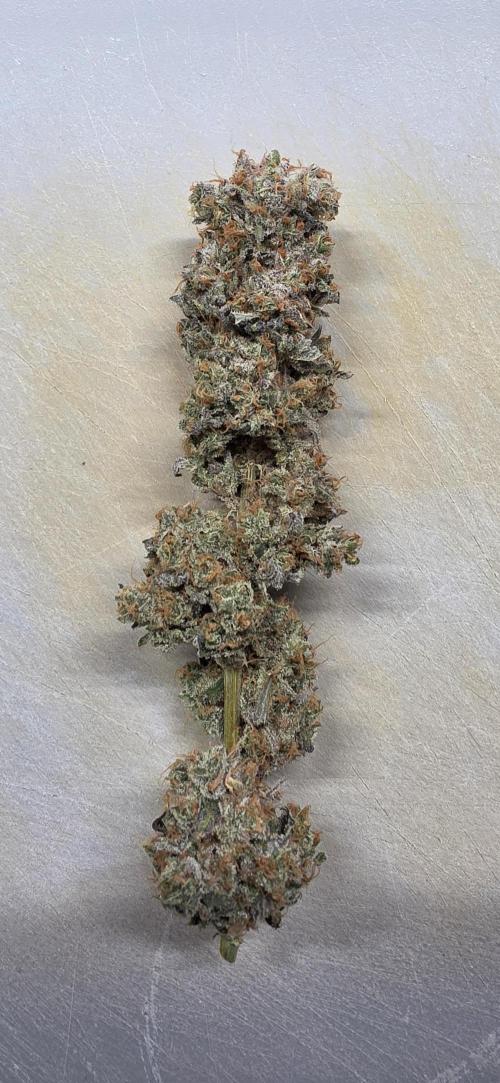
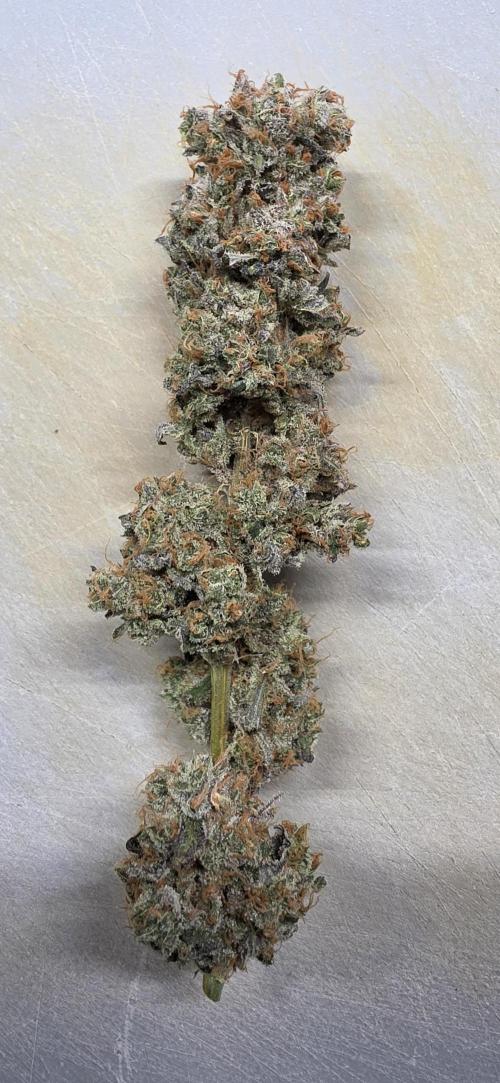
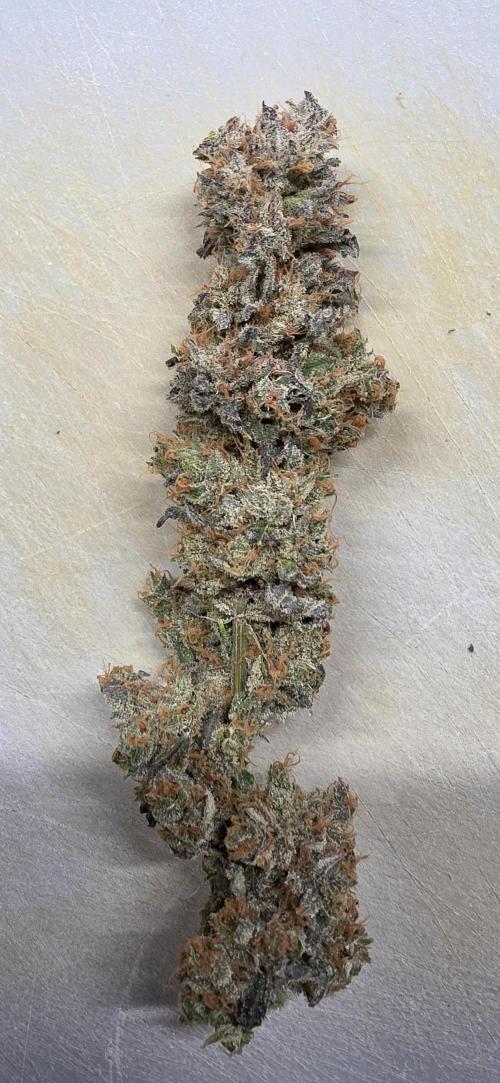
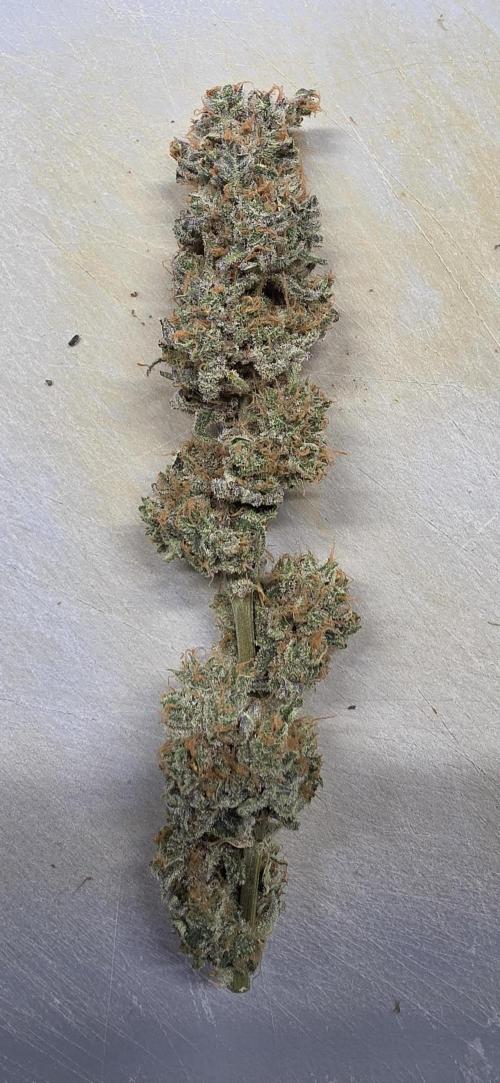
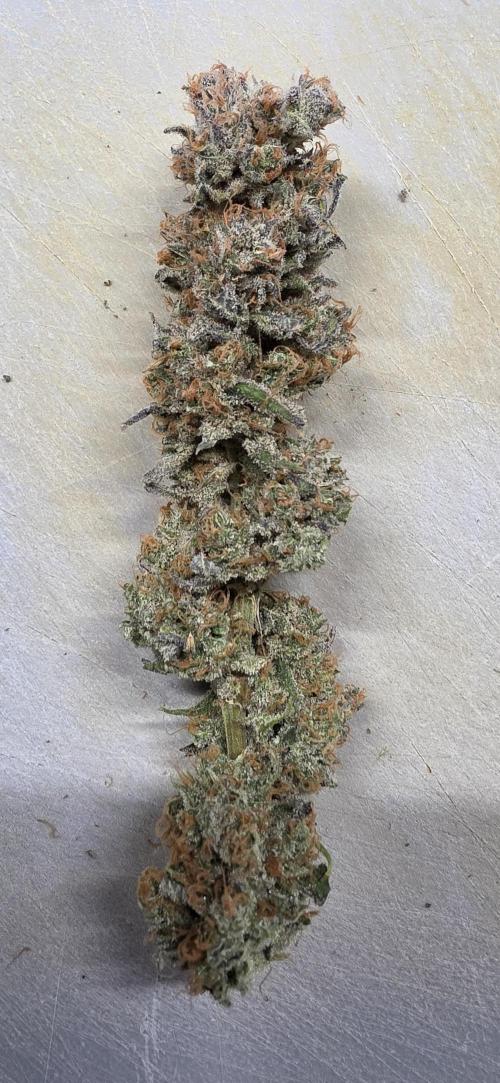
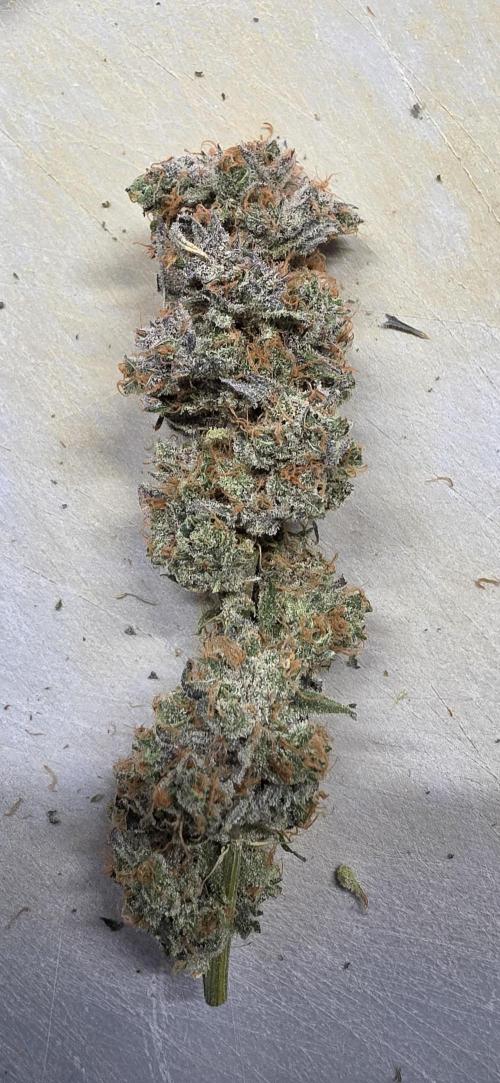
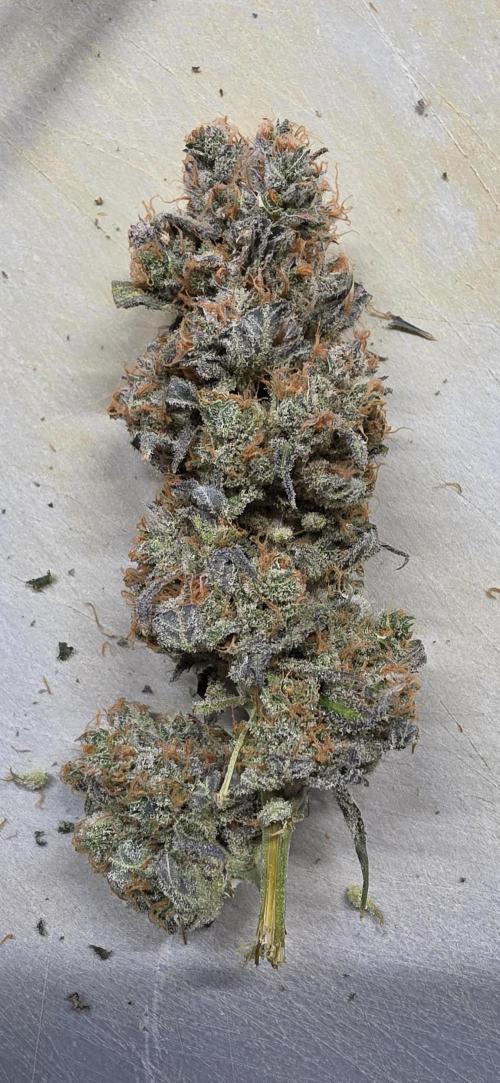
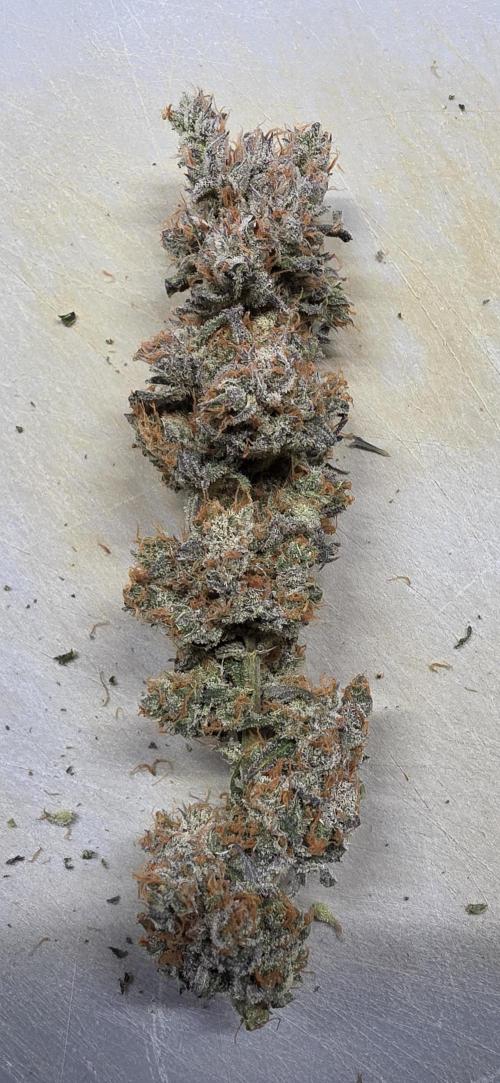
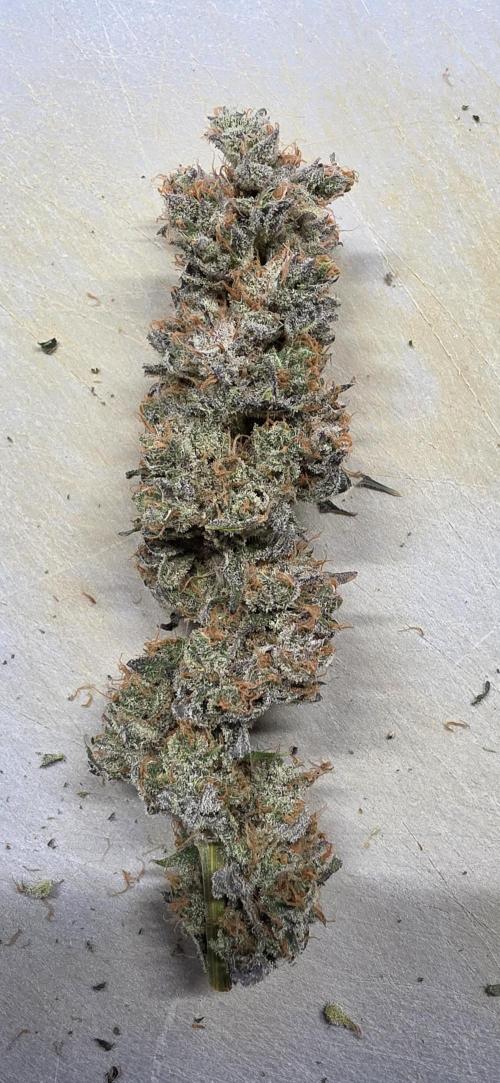
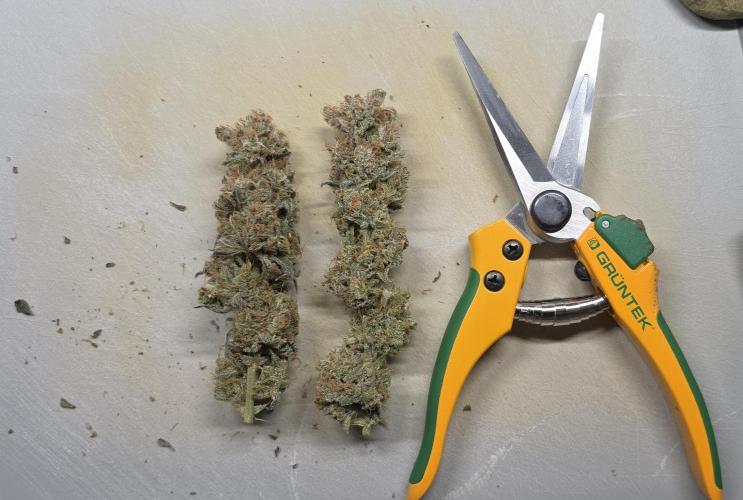
Alvareas That was my first Living Soil grow and I am absolutely satisfied. The soil performed great and showed no deficiencies until the end.
7 likes
comments
Share
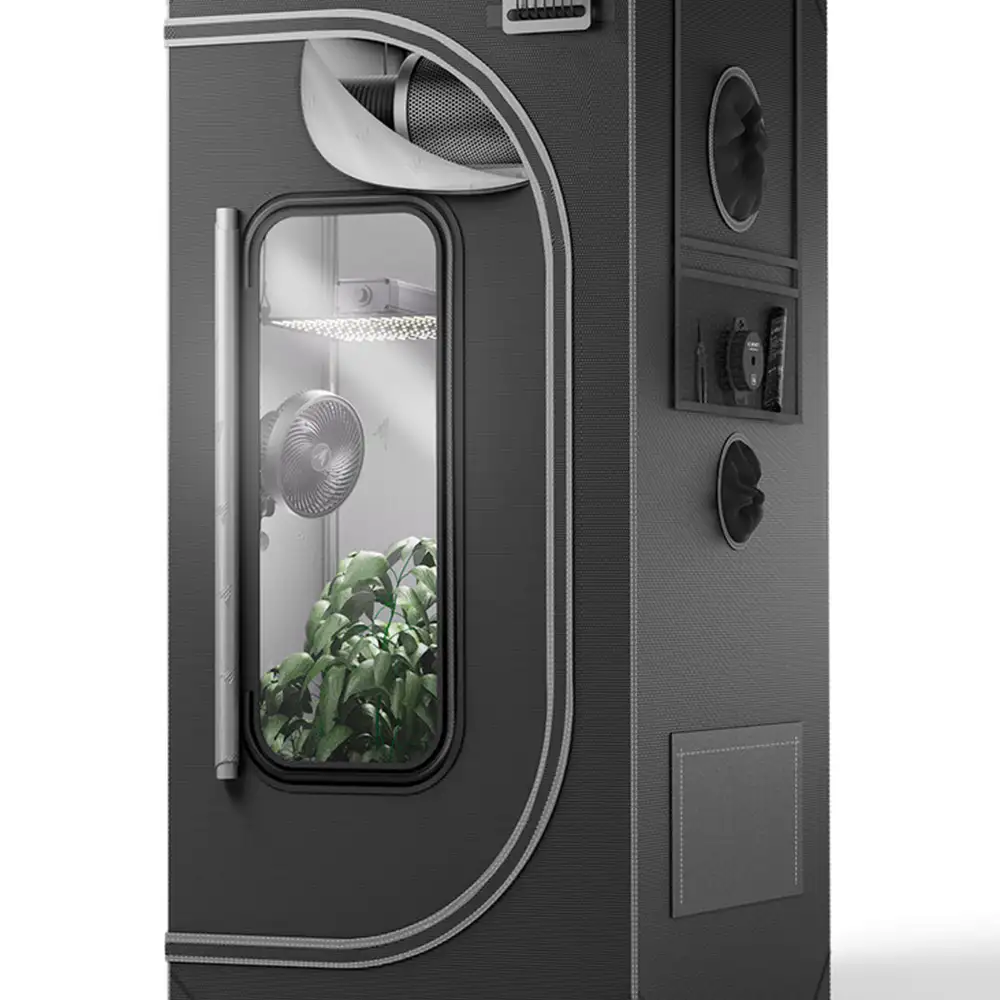
Equipment Reviews



17 comments
Sort by
popularity
popularity
newest
oldest

DrGruen commentedweek 19mo ago
Good luck, Growmie😎
likes 4

Alvareas commented9mo ago
@DrGruen, Thanks😊
likes 4
Nucleosynthesis commentedweek 29mo ago
I've got 2 of these going at the moment about 4 weeks veg, looking like some nice strong girls! Good luck with the grow!
likes 2
Alvareas commented9mo ago
@Nucleosynthesis, thanks, I wish you the same. Looks good on your end. Very similar to mine. I'll keep an eye on your grow.
likes 2

GhostTerpZ commentedweek 97mo ago
Looking really good ❗️ ❗️ ❗️
like 1
Alvareas commented7mo ago
@GhostTerpZ, thanks.
like 1

wolfvb commentedweek 29mo ago
Those seedlings are looking super healthy! The Blumat system seems to be working perfectly for them. I'm always nervous at this stage, do you have any tips on maintaining that perfect moisture level? I'd appreciate if you could take a look at my her on my diaries and let me know what you think!
like 1

GERGrowDesigns commentedweek 39mo ago
Good Luck and keep up Growing ⭐💚
likes
Alvareas commented9mo ago
@GERGrowDesigns, Thank you 😊
likes 2
GERGrowDesigns commented7mo ago
@Alvareas, very nice work 🤝🌱
likes
Alvareas commented7mo ago
@GERGrowDesigns, thanks
likes

AndroidElectricSheep commentedweek 156mo ago
Looks strong 👍 and is definitely tasty. How much PPFD are you working with right now? And why do you have the fan below the light? Doesn't it create shadows like that?
likes
Alvareas commented6mo ago
@AndroidElectricSheep,
the highest bud is 1000 PPFD.
Normally, I have the fan above the LED, but in this grow, I have no more space above the LED 😌.
like 1

DutchFarmer commentedweek 127mo ago
💚 Amazing progress! Everything is dialed in perfectly 👌🔥 Respect! I also document my grows on YouTube would really appreciate the support and love 💚📺🌱
likes
Alvareas commented7mo ago
@DutchFarmer, Thank you 😊
likes

cangrowz commentedweek 58mo ago
Happy Growing Growmie 🏻🌱
likes
Alvareas commented8mo ago
@cangrowz, thanks. 😊
like 1

the end.
Enjoying this diary? Follow for more updates!
Prefer the old Diary view?
Go back to the old Diary view