
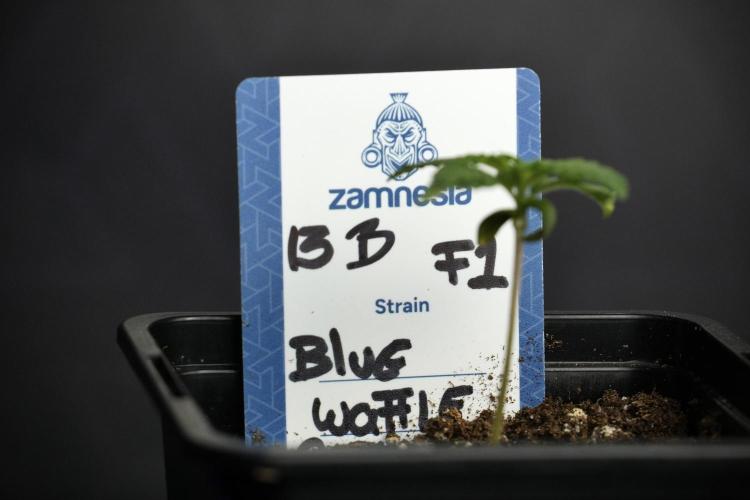
Pheo B Blue Waffle Haze F1 Zamnesia

Blue Waffle F1


VEG
Phytonaut LED Grow Light 320 W Light Emitting Diodes/320W
Zamnesia
FLO
Phytonaut LED Grow Light 320 W Light Emitting Diodes/320W
Zamnesia

Tent
100x100x200
Zamnesia

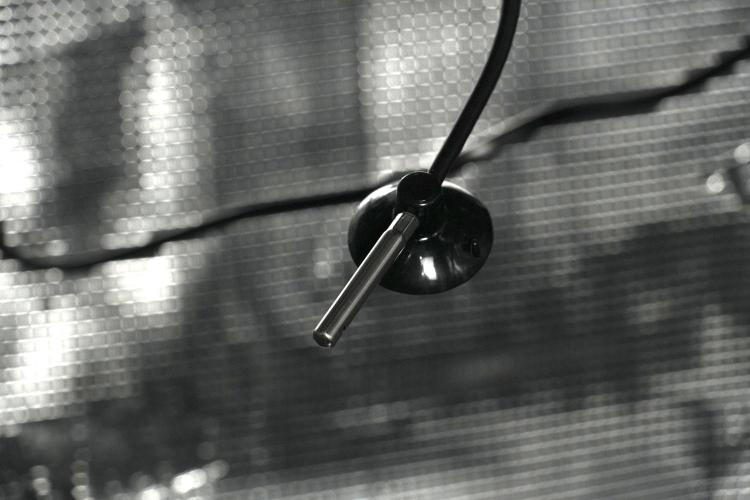
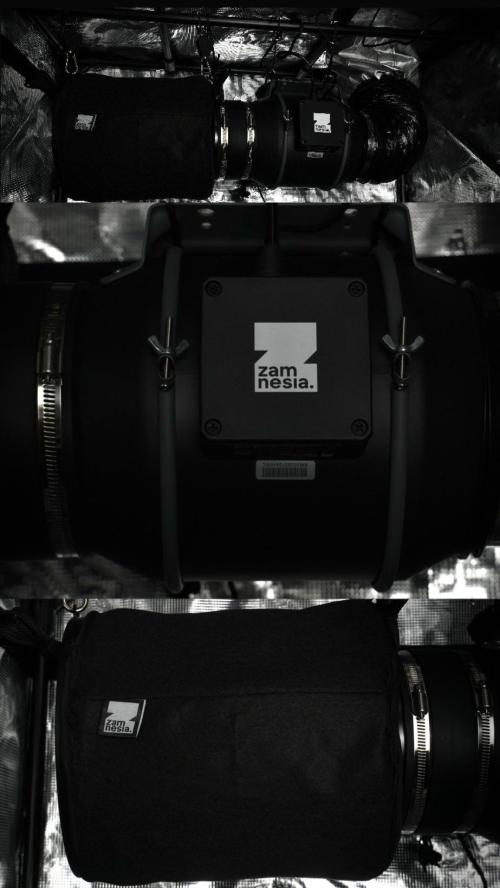
Fan
Grow Tent Clip Fan 152 mm
Zamnesia

Filt
Carbon Filter Air Purifier 150 mm
Zamnesia

Contr
Grow Environment Controller
Zamnesia

Indoor
Room Type
0.3 l
Watering
Start at 1 Week
G
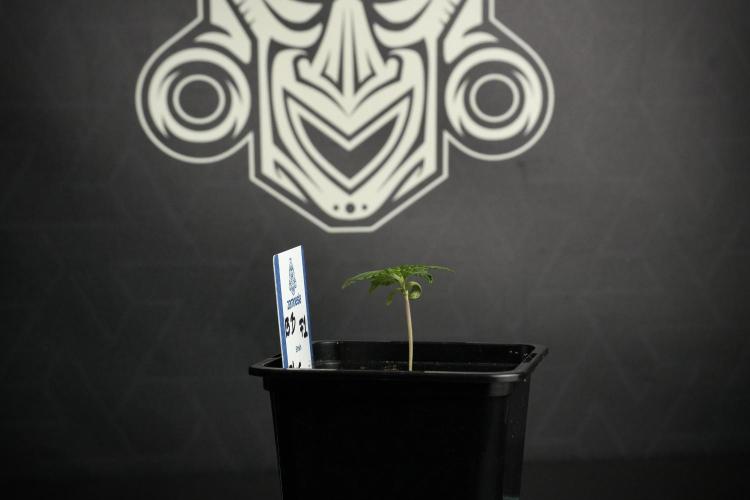
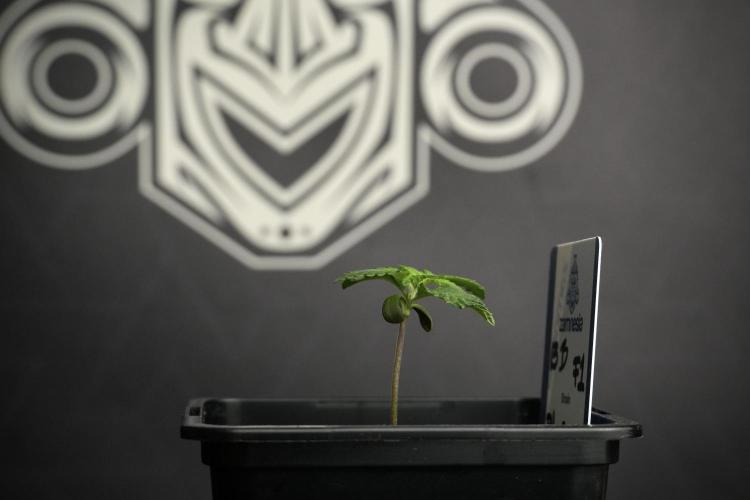
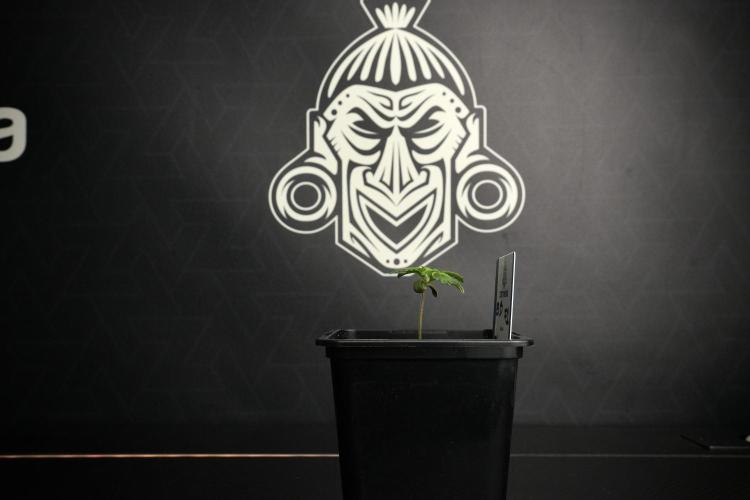
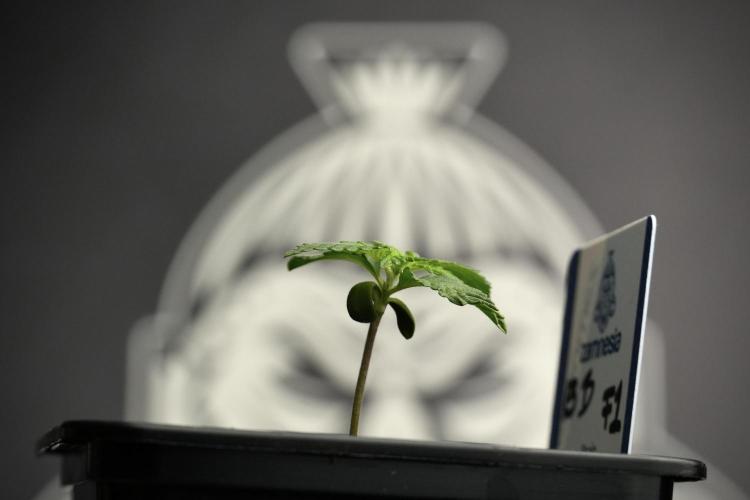
Germination15d ago

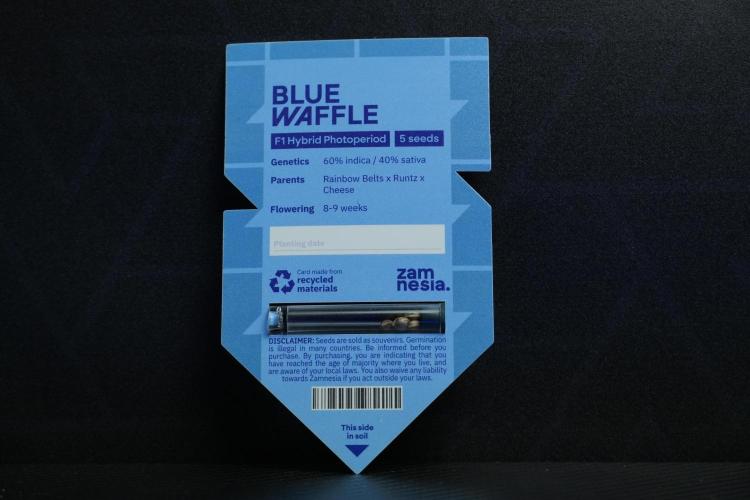
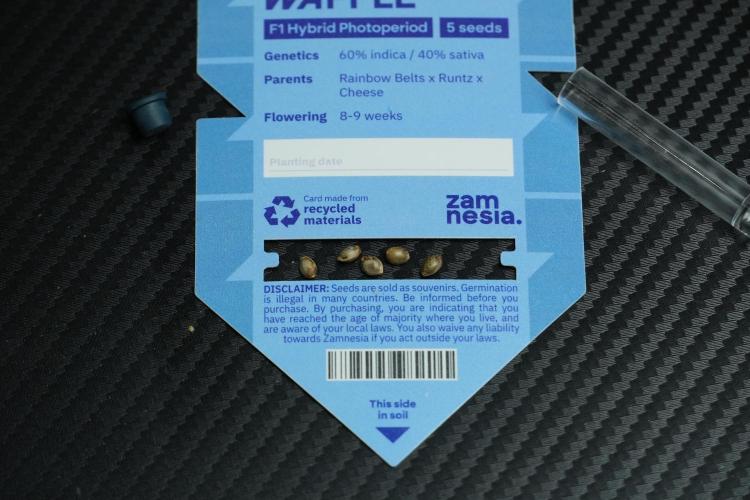


DogDoctorOfficial # ? Blue Waffle F1 — Pheno B
## Germination Week | Every Seed Finds Its Own Pace
Hello GrowDiaries family! 👋🌱
Welcome to the second diary of the Blue Waffle F1 project.
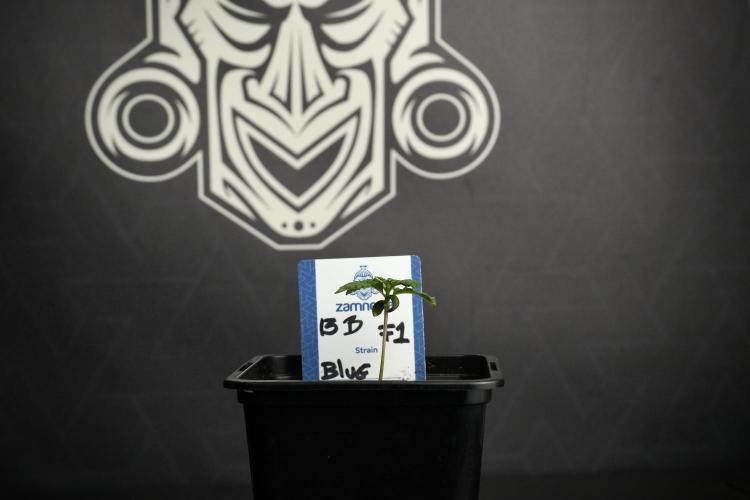
While Pheno A was the first seedling to emerge, today we focus on her sister, Blue Waffle F1 Pheno B.
One of the most fascinating aspects of growing cannabis is discovering that even when everything is identical, every seed still chooses its own path.
Same genetics.
Same environment.
Same grower.
Same soil.
Same equipment.
Yet every seed tells its own story.
And that's exactly why I decided to document each phenotype individually.
---
## A New Project Begins
This diary is part of a completely separate project from my ongoing 12/12-from-seed garden.
For this run, the objective is very different.
Rather than flowering from day one, these plants will be grown under a traditional vegetative schedule, allowing them to fully develop before any decisions are made regarding training or structure.
Current plans include:
- 18/6 light schedule
- Full vegetative development
- Potential Low Stress Training (LST)
- Potential topping
- Possible Scrog implementation
- Structural development observations
- Full seed-to-harvest documentation
At this stage, however, everything begins with germination.
---
## The Cannakan Germination Method
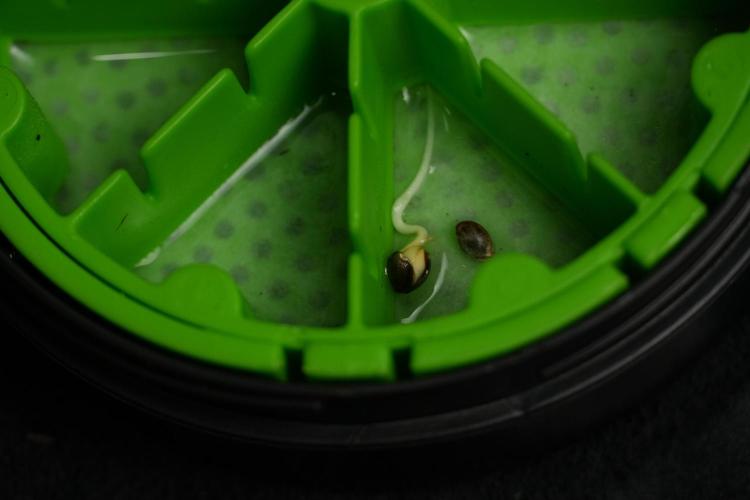
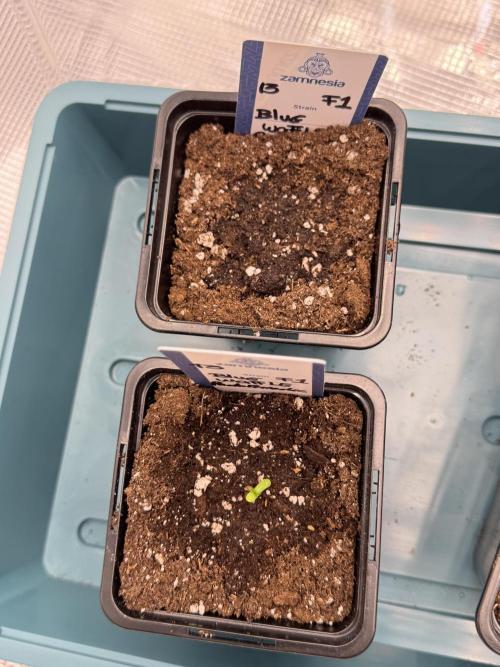
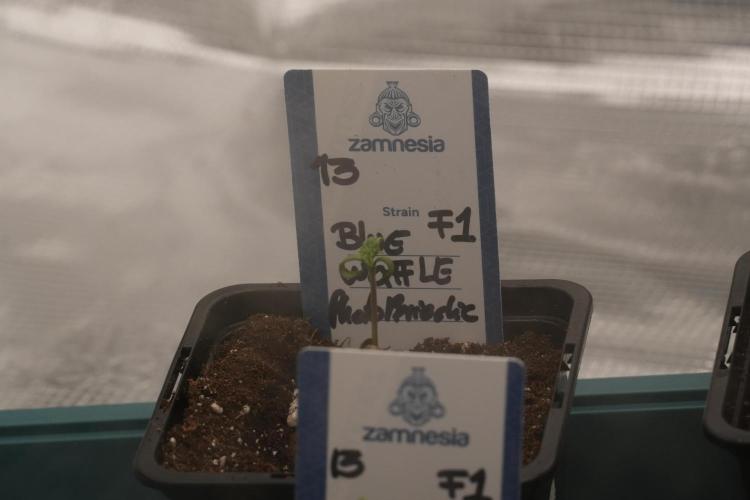
Like many of the plants in my garden, Blue Waffle F1 Pheno B began life inside the Cannakan germination system.
The process remains intentionally simple.
The seed was placed into the system using only plain water.
No nutrients.
No additives.
No stimulants.
Just water.
After approximately 24 hours of soaking, most of the water was removed, leaving only enough moisture to maintain ideal germination conditions.
The seed quickly responded.
A healthy taproot emerged and shortly afterward it was time to move into soil.
Simple.
Clean.
Effective.
Exactly how I like germination to be.
---
## Why Only Water?
One question that often appears during germination is:
"Why not feed the seed immediately?"
The answer is surprisingly simple.
The seed already contains everything required for the earliest stage of life.
Inside the shell are all the energy reserves needed to establish roots and begin early development.
At this stage I prefer allowing nature to do exactly what nature designed the seed to do.
The goal is not to feed the plant.
The goal is simply to wake it up.
Water is enough.
The rest is already stored inside.
---
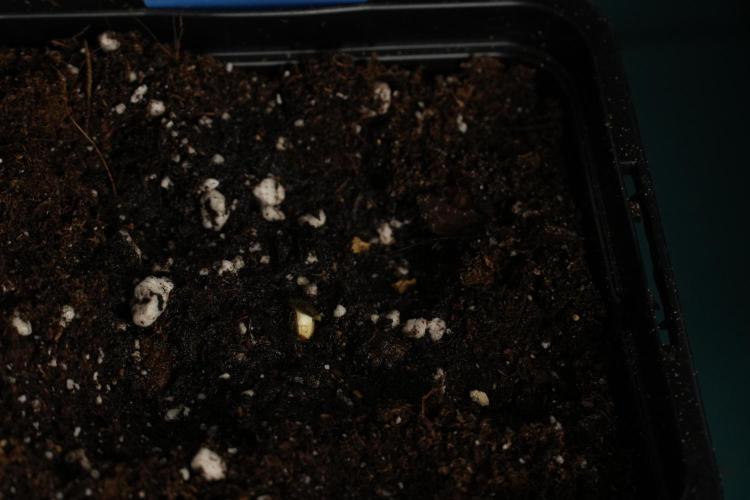
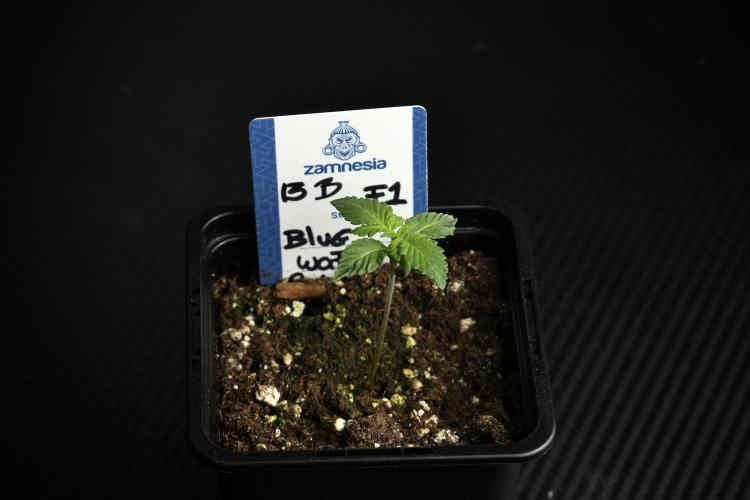
## From Germination To Soil
Once a healthy taproot appeared, Blue Waffle F1 Pheno B was transferred directly into Plagron Lightmix.
This substrate has become a favorite starting medium because of its light texture, excellent aeration, and forgiving nature during early development.
The seed settled into its new home and quickly began establishing roots.
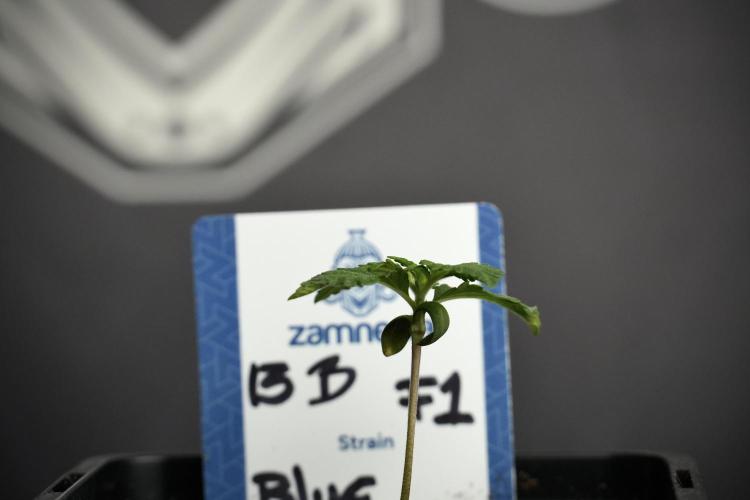
Although slightly slower than her sister, Pheno B emerged successfully and showed healthy early vigor from the very beginning.
Sometimes one seed simply likes to take an extra moment before introducing itself.
That doesn't make it weaker.
It simply means it's following its own schedule.
---
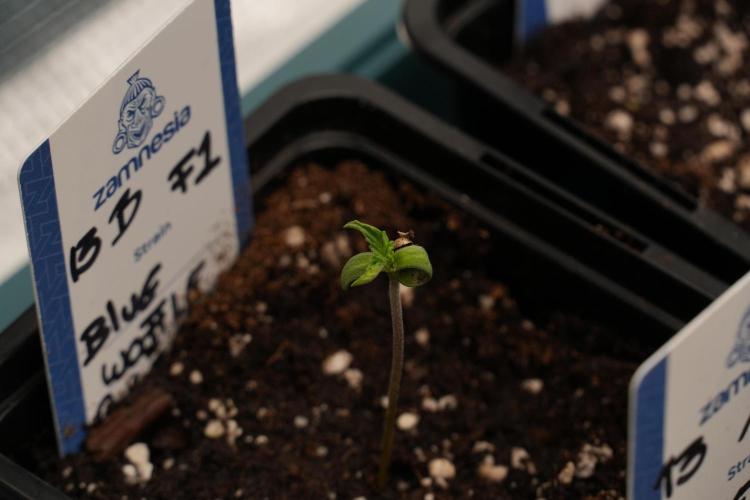
## Why Use A Humidity Dome?
During the first few days after emergence, both Blue Waffle seedlings spent time inside a humidity dome.
Young seedlings have extremely small root systems and therefore limited access to water.
Maintaining elevated humidity around the plant helps reduce moisture loss through the leaves while the root system develops below the surface.
The humidity dome is not intended as a permanent environment.
It is simply a temporary tool designed to support the plant during one of the most delicate stages of its life.
As root development improves, the dome is removed and the plant begins adapting to the environment it will experience throughout the remainder of the grow.
The goal is adaptation.
Not dependence.
---
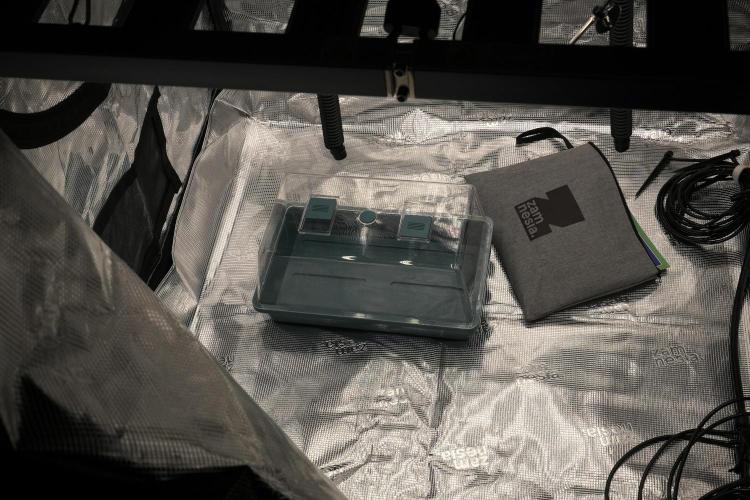
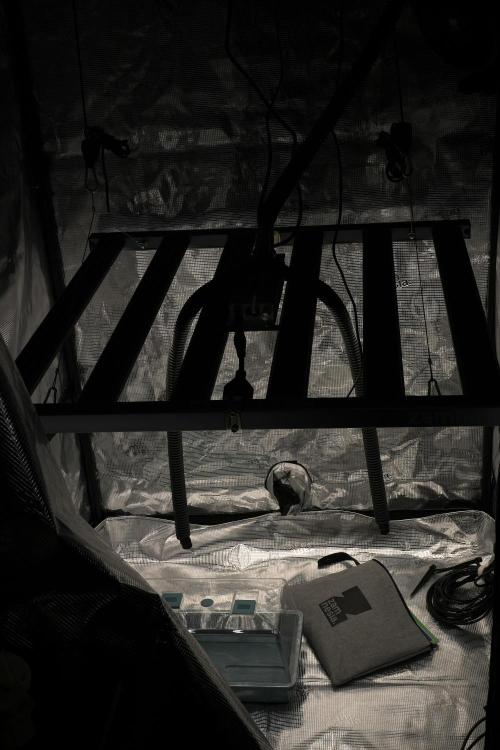
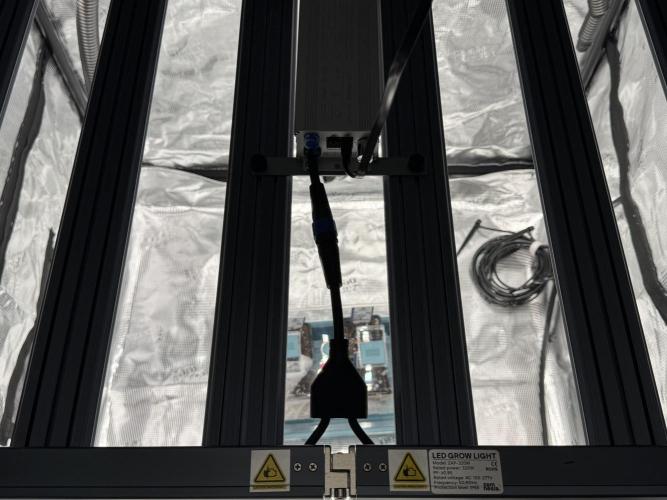
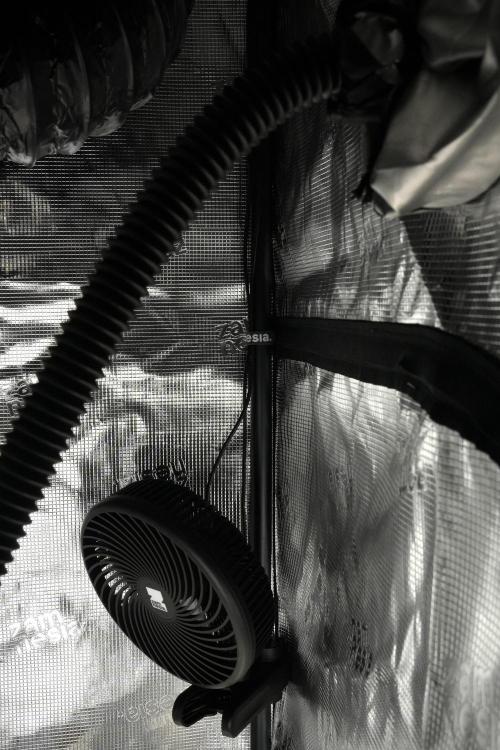
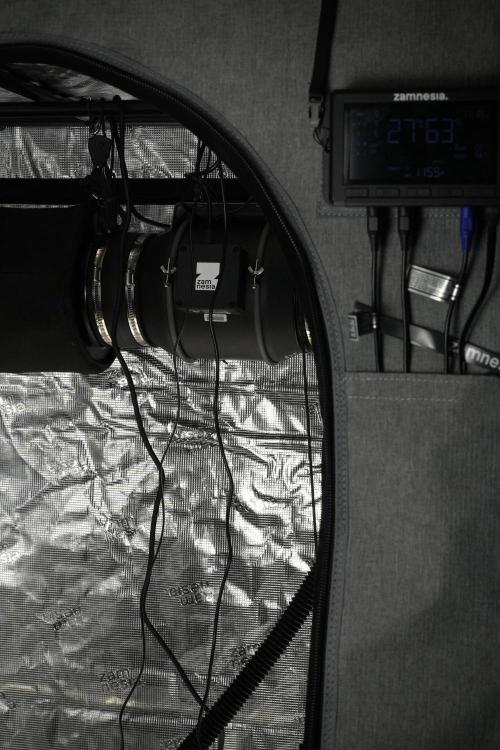
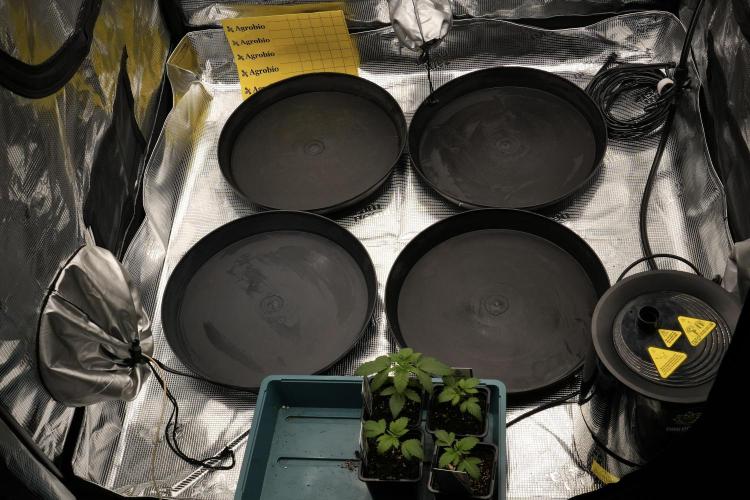
## Building The New Zamnesia Grow Tent Kit
One of the most exciting parts of this project was assembling the brand-new Zamnesia Grow Tent Kit that will be used throughout the entire grow cycle.
The entire system was assembled by one person without assistance.
Even including:
- Tent assembly
- LED installation
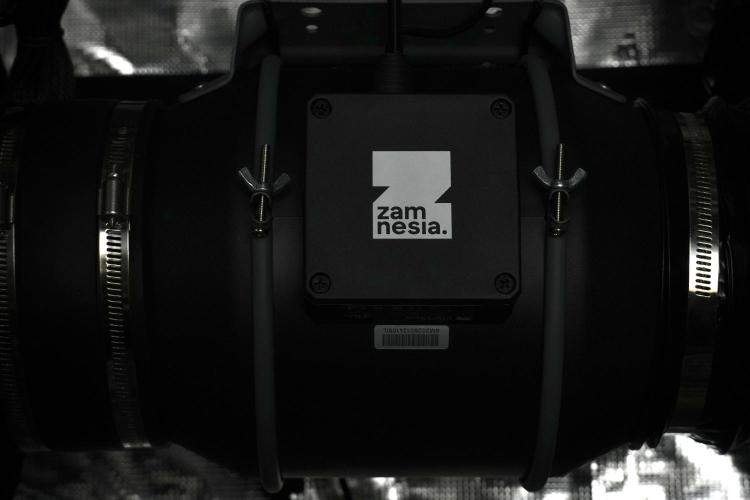
- Carbon filter setup
- Inline fan installation
- Ducting
- Controller setup
- Cable management
Everything was fully operational in less than an hour.
The instructions included with the kit are excellent and very beginner friendly.
In my particular grow space I needed to make a few adjustments and perform some creative positioning to fit everything exactly how I wanted, but the process remained straightforward.
The first impression was extremely positive.
Build quality feels excellent.
Materials feel solid.
Assembly was simple.
And now comes the fun part:
Putting everything to the test.
---
## What's Included In The Kit?
This project is being grown entirely using the Zamnesia Grow Tent Kit.
The package includes:
- Grow Tent 100×100×200 cm
- Phytonaut LED Grow Light 320W
- Inline Duct Fan 150 mm
- Carbon Filter Air Purifier 150 mm
- Grow Environment Controller
- Grow Tent Clip Fan
- Flexible Ducting
- 24-Hour Timer
- Rope Ratchet Hangers
- Velcro Cable Management Accessories
Everything currently operating inside the tent comes directly from this kit.
No substitutions.
No upgrades.
No modifications.
This allows a genuine evaluation of the complete system exactly as supplied.
---
## Environmental Conditions
For this first week, conditions remained intentionally gentle.
Using a PAR meter, light intensity was measured at approximately:
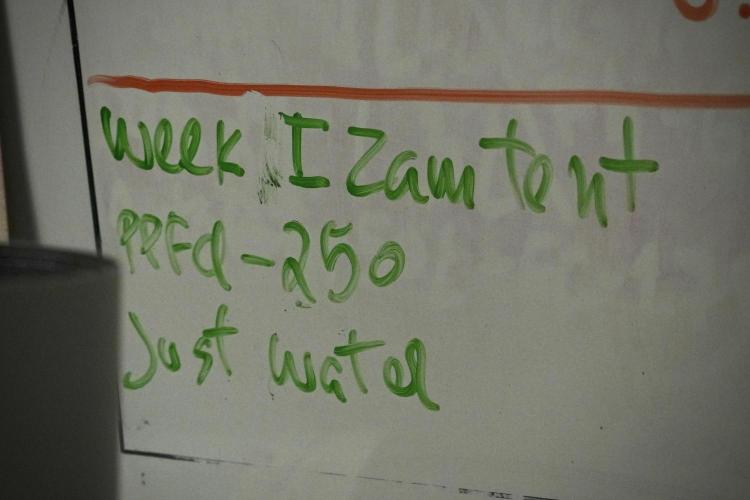
~200 PPFD
Young seedlings simply do not require intense lighting.
The objective during this stage is healthy establishment rather than rapid growth.
Environmental conditions remained stable throughout the week, allowing both seedlings to focus their energy on root development and early growth.
The response was exactly what I hoped to see.
Healthy posture.
Healthy color.
Steady progression.
And no signs of stress.
---
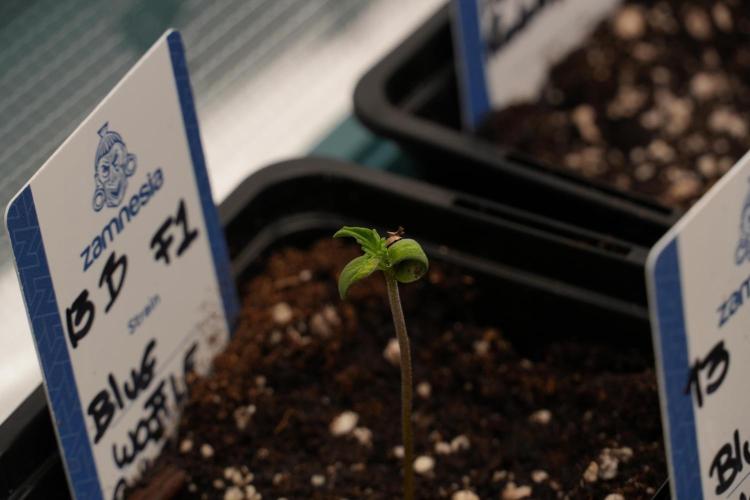
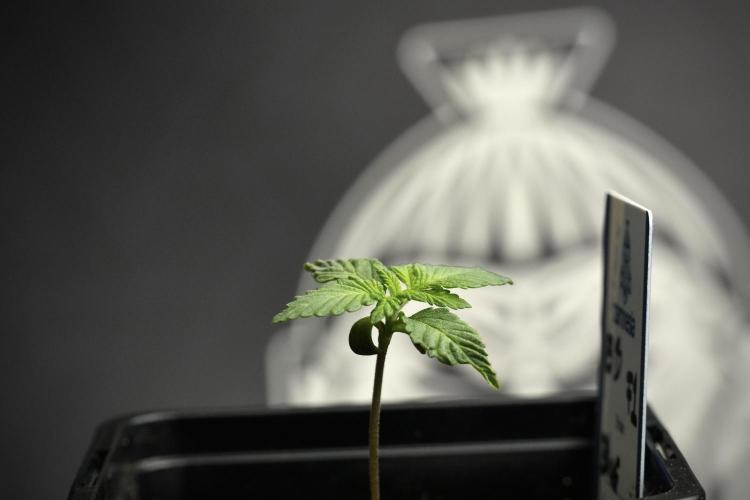
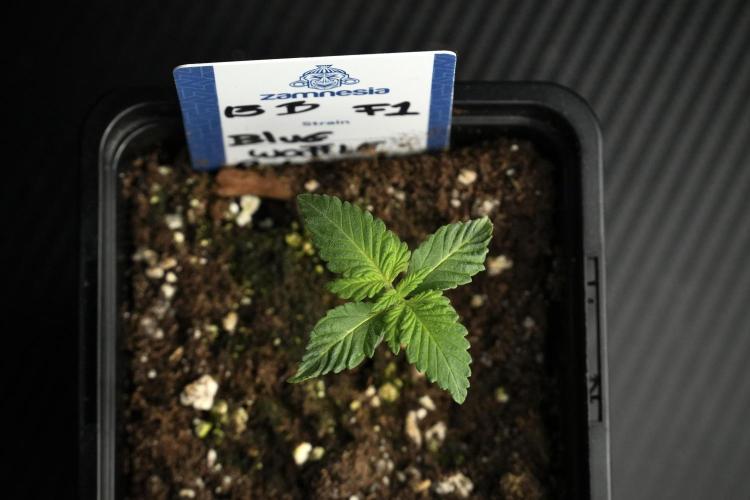
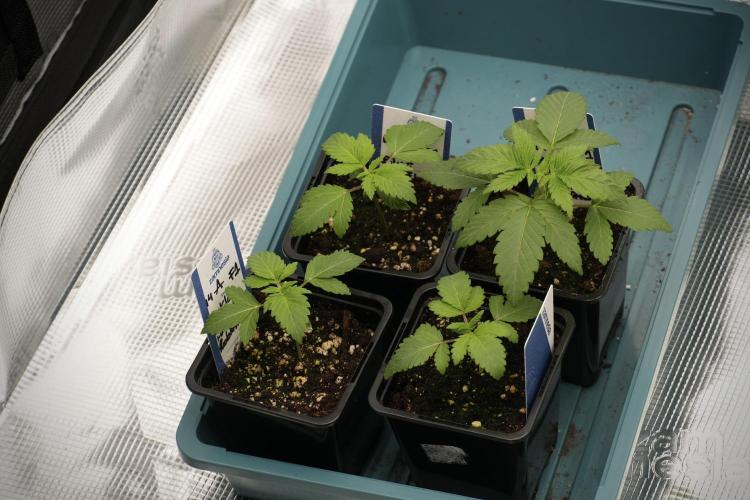
## First Impressions Of Blue Waffle F1 Pheno B
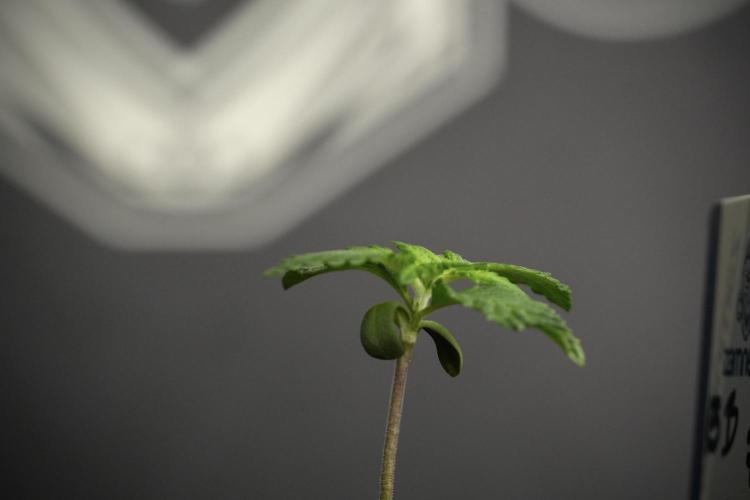
Although Pheno B emerged slightly later than her sister, she quickly demonstrated healthy vigor and strong development.
Color remains excellent.
Structure appears balanced.
Growth is steady and consistent.
And the differences between both phenotypes are already beginning to emerge.
That is exactly why these individual diaries exist.
Watching each plant reveal its personality is one of the most rewarding parts of growing.
At only one week old, this story is still just beginning.
---
## Looking Ahead
Over the coming weeks we'll continue documenting every stage of development.
We'll follow:
- Root establishment
- Vegetative growth
- Environmental management
- Structural development
- Training decisions
- Nutrient progression
- Genetic expression
- And whatever unique characteristics this phenotype decides to reveal
For now, Blue Waffle F1 Pheno B has completed a successful first week and has settled comfortably into her new home.
The roots are growing.
The leaves are reaching.
And the adventure has officially begun.
Grower's Love everyone. 💚🌱?
Sometimes the plant that takes an extra day to arrive ends up telling the most interesting story.
10 likes
comments
Share
Used method
Other
Germination Method
1
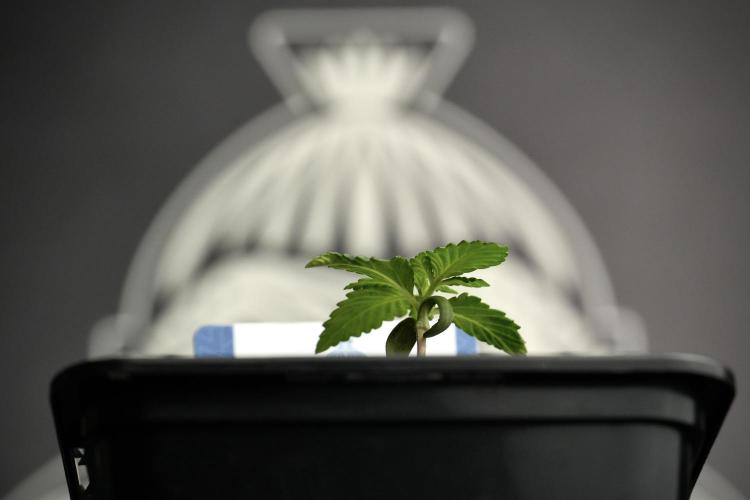
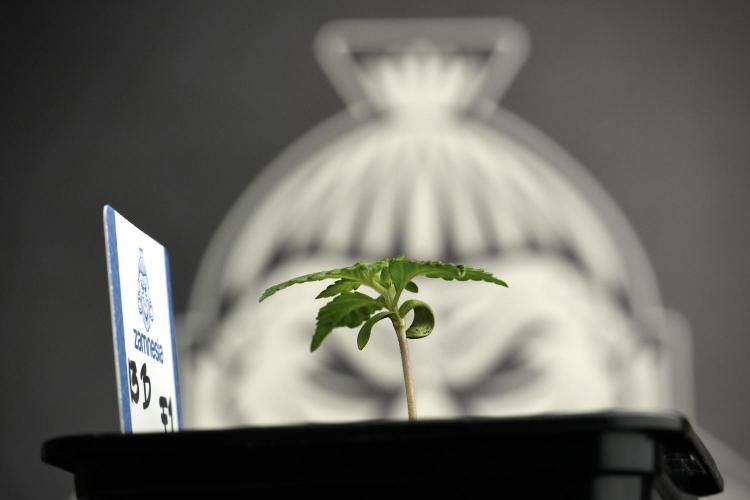
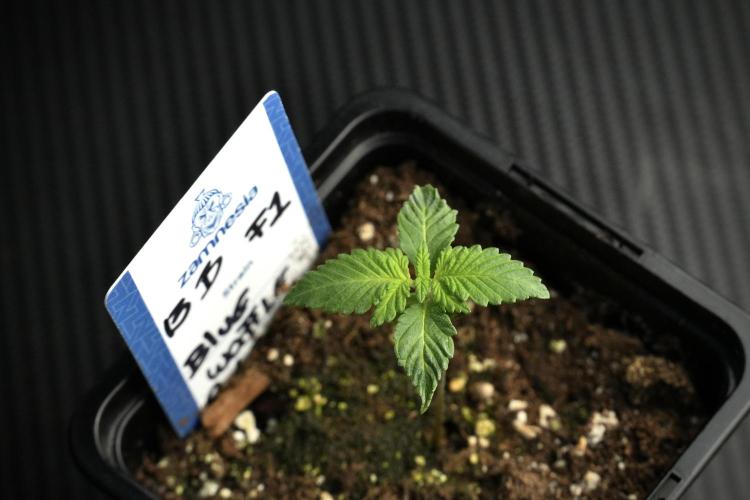
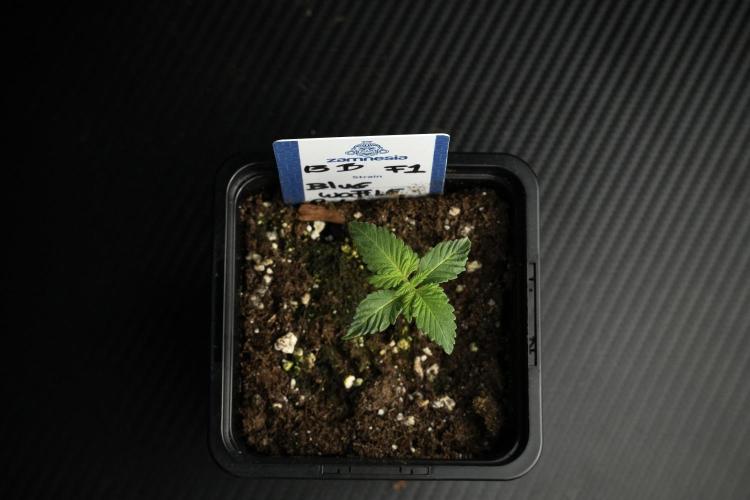
Week 1. Vegetation13h ago


6 cm
Height
18 hrs
Light Schedule
26 °C
Day Air Temp
6.0
pH
765 PPM
TDS
71 %
Air Humidity
24 °C
Solution Temp
24 °C
Substrate Temp
25 °C
Night Air Temp
0.3 l
Watering Volume
450 PPM
CO₂ Level
Nutrients 4

Hydro A
1.4 mll

Hydro B
1 mll

Hydro Roots
1 mll
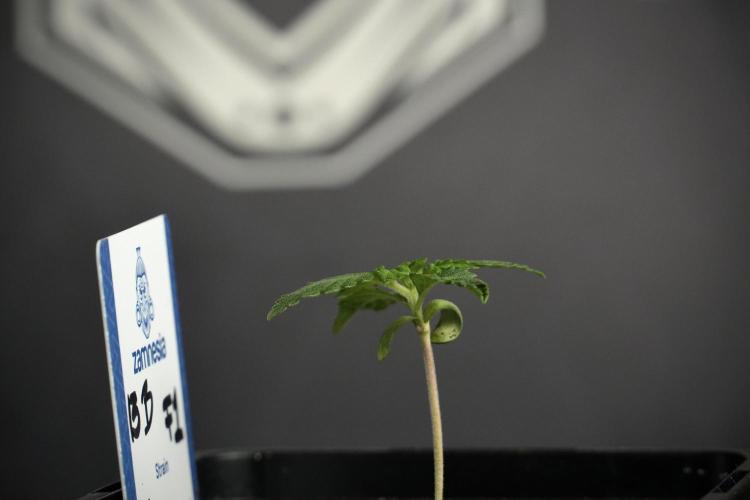
DogDoctorOfficial Folder 13 — Blue Waffle — Pheno B
Week 1 Vegetation — Building Foundations
Hello growers,
Welcome back to another update from the Zamnesia Tent project.
As mentioned in the previous entries, this grow is being documented slightly differently than my usual diaries. Rather than grouping plants together, each phenotype receives its own individual journal. This allows us to follow every plant from seed to harvest and observe how different expressions develop, even when they share the exact same environment, feeding schedule, and care.
Today we continue with Blue Waffle Pheno B, another young lady taking her first steps into vegetation.
At this stage, the story is not about explosive growth or massive plants. It is about building healthy roots, establishing structure, and creating the foundation that everything else will grow from later.
⸻
The Environment
Week 1 focused on consistency.
The Zamnesia ecosystem maintained stable conditions throughout the week, providing an ideal environment for young seedlings to establish themselves.
Environmental conditions averaged:
* Temperature: 26°C
* Relative Humidity: 71%
Lighting was intentionally introduced at a slightly higher intensity than many seedling schedules typically recommend.
The LED fixture was operated at 27% power, drawing approximately 86 watts from the wall and producing a measured PPFD of roughly 250 µmol/m²/s at canopy level.
Part of this project is observing how these genetics respond when provided with strong but controlled environmental conditions from the very beginning.
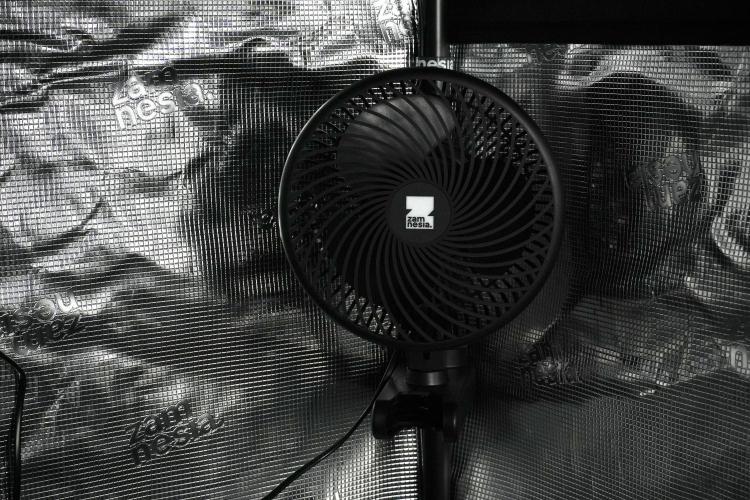
Airflow was supplied by:
* Zamnesia extraction fan: Level 5
* Circulation fan: Level 4
This provided gentle air movement throughout the tent while maintaining stable temperature and humidity levels.
⸻
Feeding Program
This week also marked the beginning of the feeding program.
While the seedlings initially received only rainwater during their earliest days, they have now started receiving their first nutrient solution consisting of:
* Plagron Hydro A
* Plagron Hydro B
* Plagron Hydro Roots
Mixed to:
* EC: 1.53 mS/cm
* pH: 5.96
* Water temperature: 24.2°C
The goal is not maximum growth at this stage, but rather creating a healthy root environment and preparing the plants for the transition into coco next week.
So far, Blue Waffle Pheno B appears to be responding very positively.
⸻
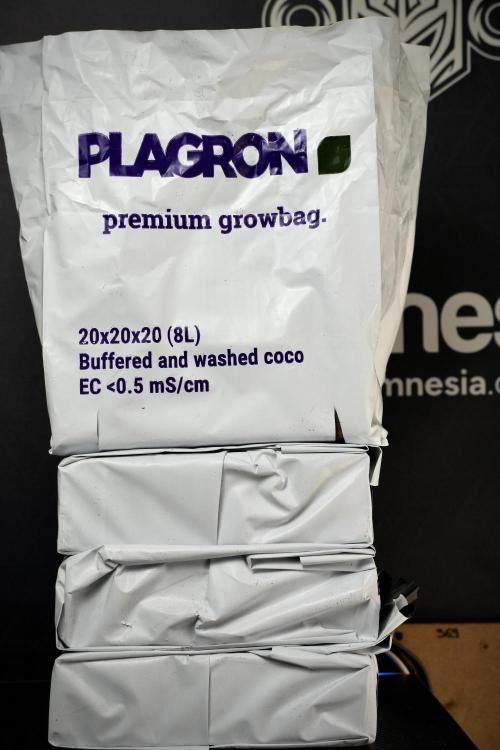
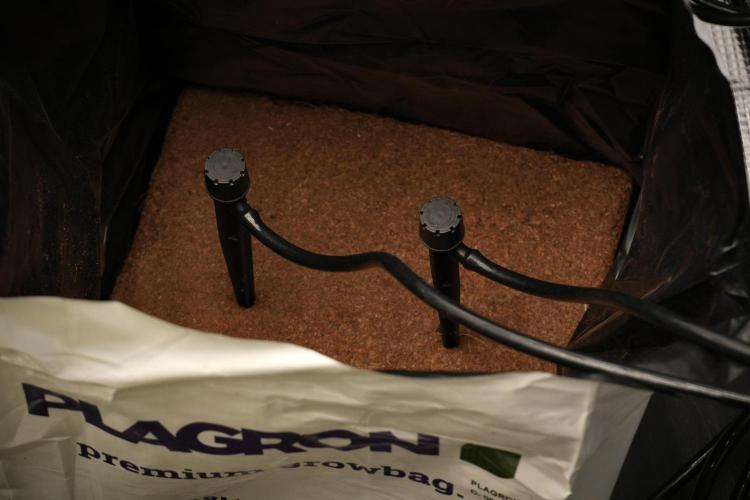
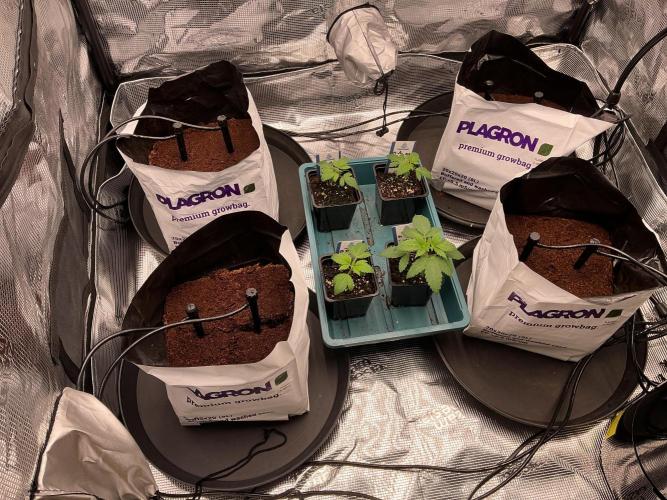
Preparing For Coco
A major part of this week’s work happened behind the scenes.
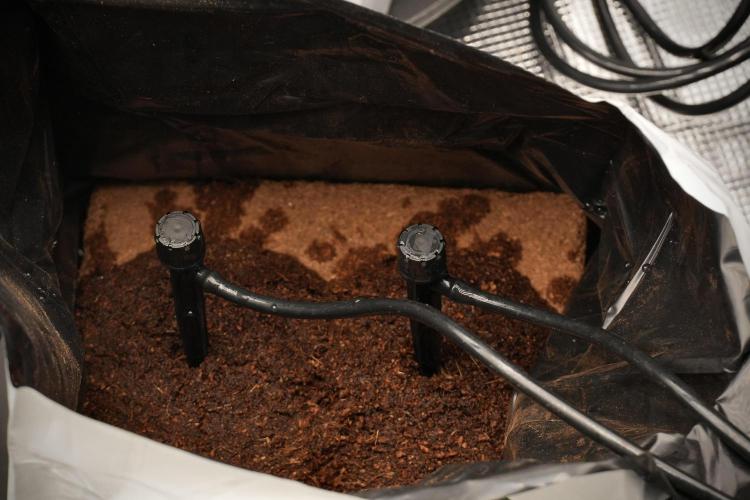
The Plagron Premium Grow Bags were filled and hydrated in preparation for transplanting.
Instead of saturating the coco all at once, hydration is being performed gradually using a reservoir-fed drip system. This slow approach allows the coco to absorb water evenly and expand naturally throughout the bag.
Only distilled water was used during this preparation process.
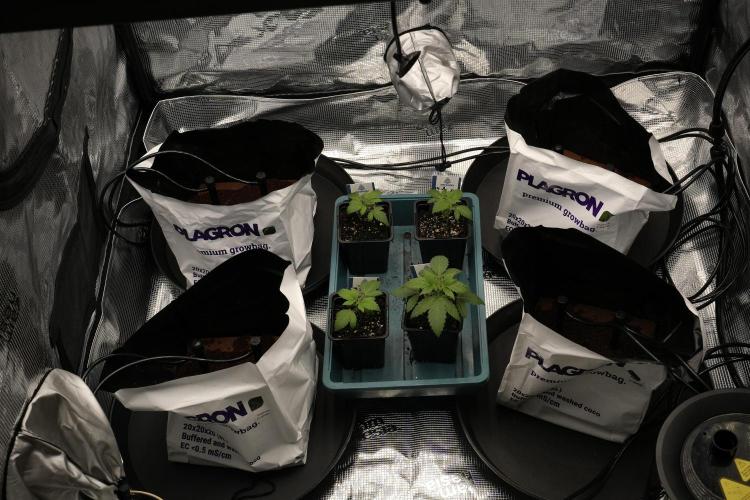
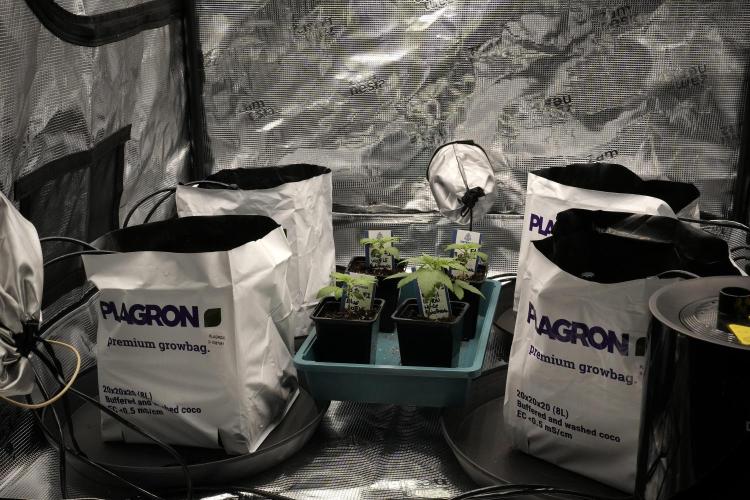
The seedlings remain in their starter containers for now, but next week they will move into their final coco homes and begin the next stage of development.
⸻
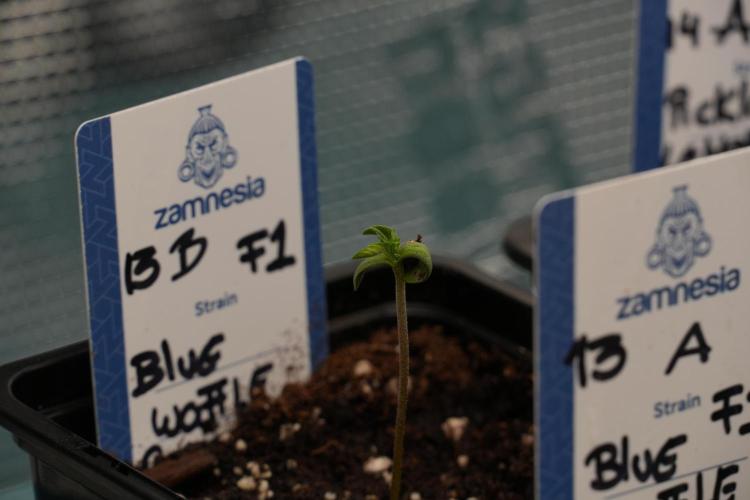
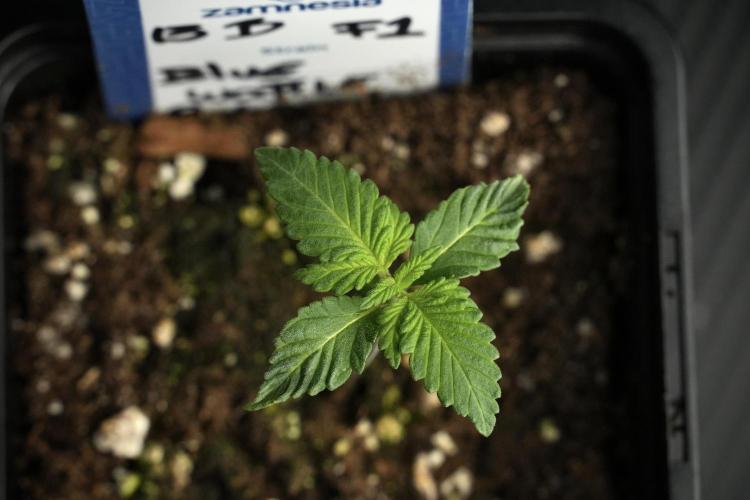
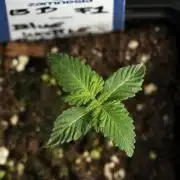
Blue Waffle Pheno B
If Pheno A gave the impression of a compact and balanced seedling, Pheno B is proving to be every bit as promising.
At this stage the similarities between the sisters are striking.
Growth remains compact with very tight internodal spacing, producing a low and sturdy structure. The plant is finishing the week progressing into its third set of true leaves, and overall development appears healthy and symmetrical.
Leaf coloration is vibrant and consistent throughout the plant, while new growth emerges clean and vigorous.
The stem remains strong relative to its size and is already supporting the developing canopy comfortably.
One thing that stands out is how confidently this phenotype is stacking growth despite its young age. Rather than stretching toward the light, the plant is focusing its energy on building a dense and compact structure.
For a first week seedling, there is very little to criticize.
The overall impression is simply one of health, stability, and potential.
Sometimes a plant catches your attention because it is unusual.
Sometimes it catches your attention because everything is simply going right.
At this stage, Blue Waffle Pheno B belongs firmly in the second category.
⸻
Looking Ahead
Next week should bring one of the most important milestones of the early grow.
The move into the hydrated Plagron coco grow bags will provide a dramatically larger root zone and mark the beginning of full development inside the new medium.
It will be interesting to see whether Pheno B continues to mirror her sister or begins revealing more of her own unique characteristics.
For now, everything is moving exactly as planned.
Healthy roots.
Healthy leaves.
Healthy growth.
A strong beginning.
⸻
Thank You
A huge thank you to everyone following along and supporting these diaries.
Special thanks to:
* Zamnesia for the genetics, equipment, and support that helped make this project possible.
* Plagron for providing the nutrients and growing media used throughout this run.
* The GrowDiaries team for offering a platform where growers can document, learn, and share their experiences.
* And of course, the incredible growing community whose knowledge, feedback, and encouragement continue to inspire growers around the world.
The journey has only just begun.
See you next week as Blue Waffle Pheno B takes her first step into coco and continues her adventure.
Growers Love and Happy growing 🌱💙🍁
4 likes
comments
Share
Enjoying this diary? Follow for more updates!

Prefer the old Diary view?
Go back to the old Diary view