


Gelato - Eigenbau-Growbox - Grow #3




Tent
AnOtterGrowBox
Eigenbau

Fan
Pure Wings 2, 80mm, Zuluft
be quiet!
Fan
Silent Wings 2, 140mm, Umluft
be quiet!
Fan
100mm EC-Rohrventilator (max. 221m³/h), Abluft
Aygrochy


Contr
Rasbperry Pi 5, ESP32
Eigenbau
Drip
5L Tank, 12V Pumpe, TopFeeder aus 3D-Drucker
Eigenbau


Indoor
Room Type
LST
weeks 4-9
Topping
weeks 4, 6
Defoliation
weeks 6
11 liters
Pot Size
0.25 liters
Watering
Start at 9 Week
G
Germination3mo ago
Lontra After a long break and some renovations to my grow box, a new grow is being started again.
The grow setup:
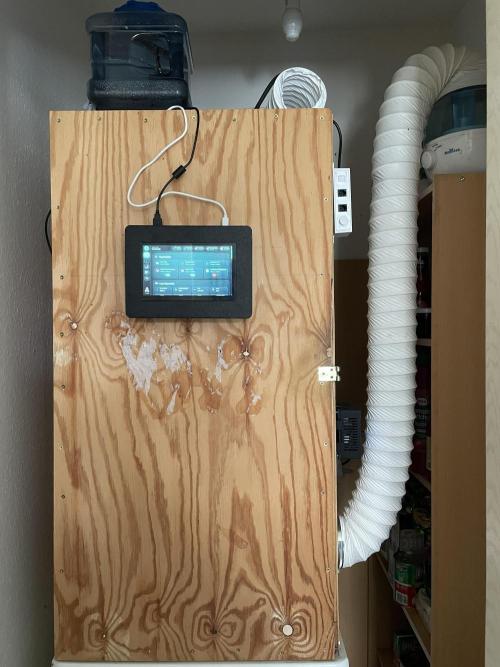
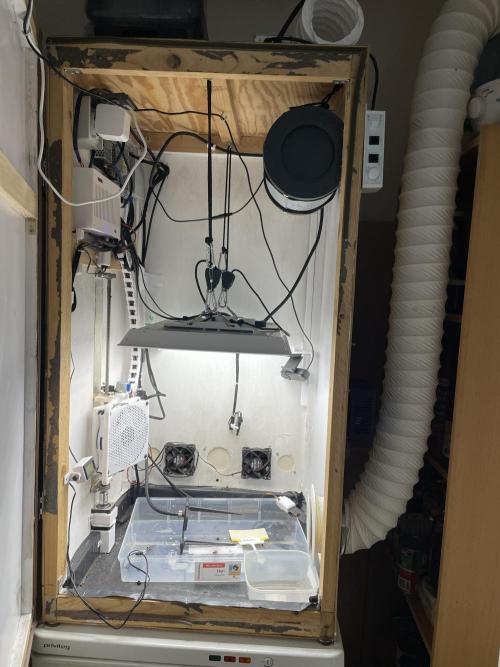
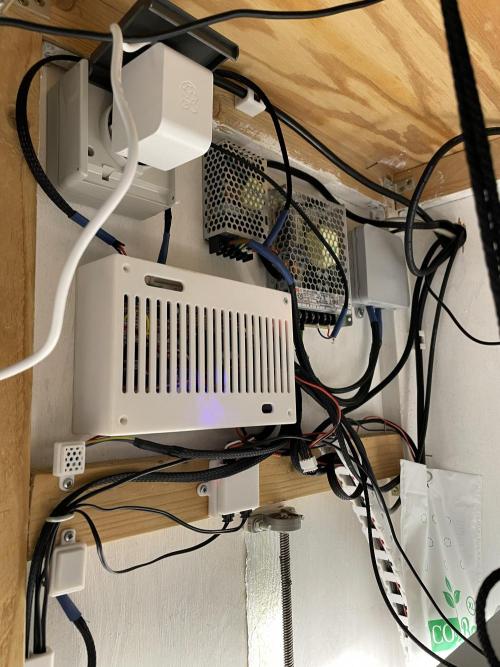
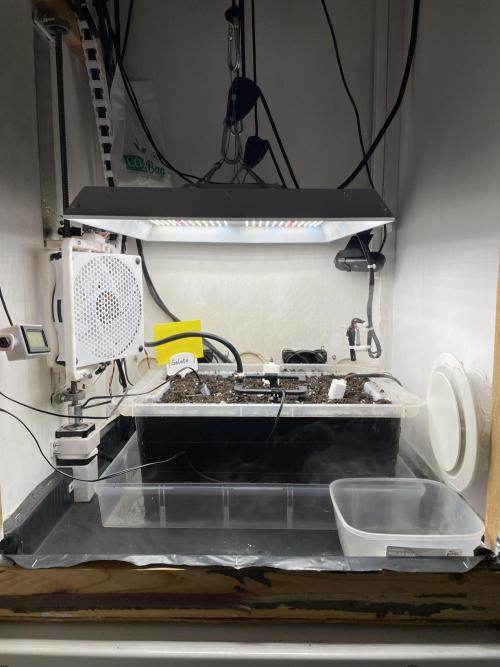
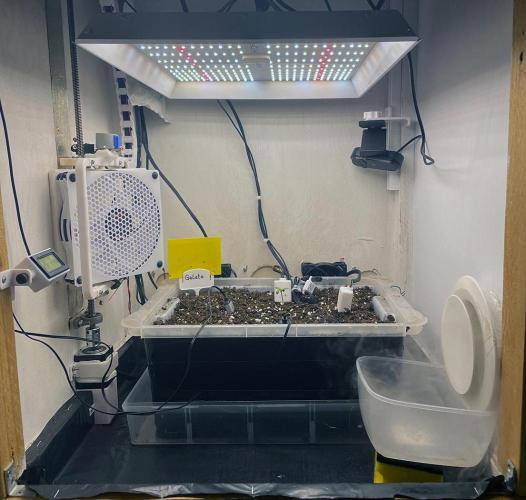
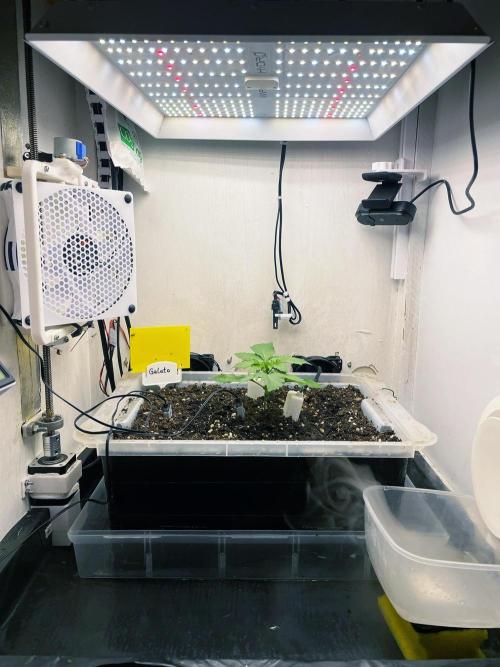
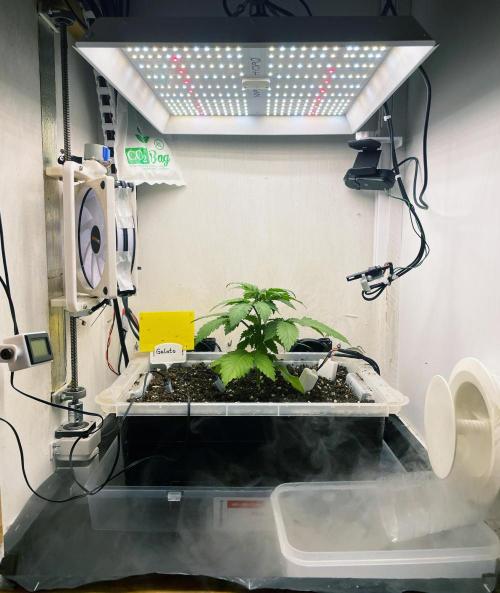
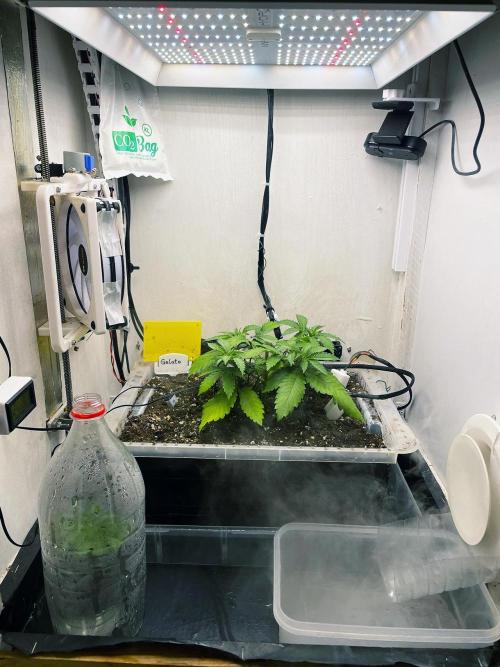
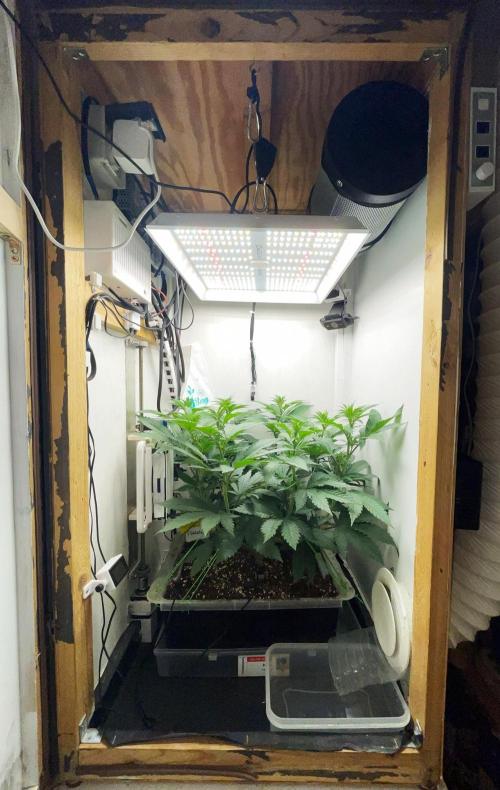
My DIY grow box (0.51m x 0.51m x 1m) has become quite cobbled together as a grown hobby project, but before it might someday be completely rebuilt cleanly, this grow serves as a test for the recent changes made to my setup. These include:
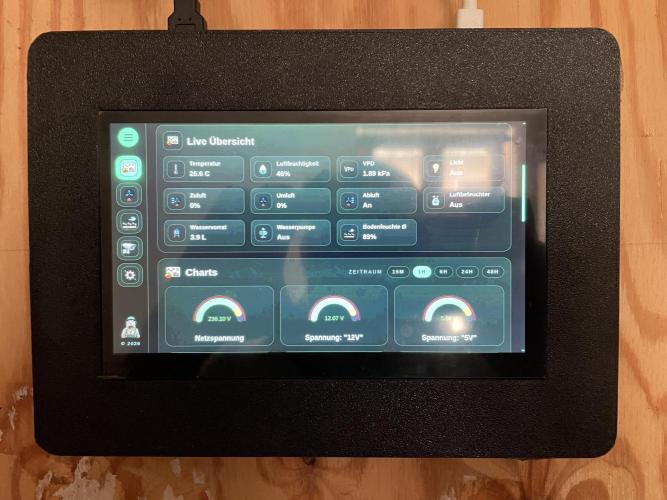
- new software for the HMI for overall control of the system
- new firmware for the microcontrollers used
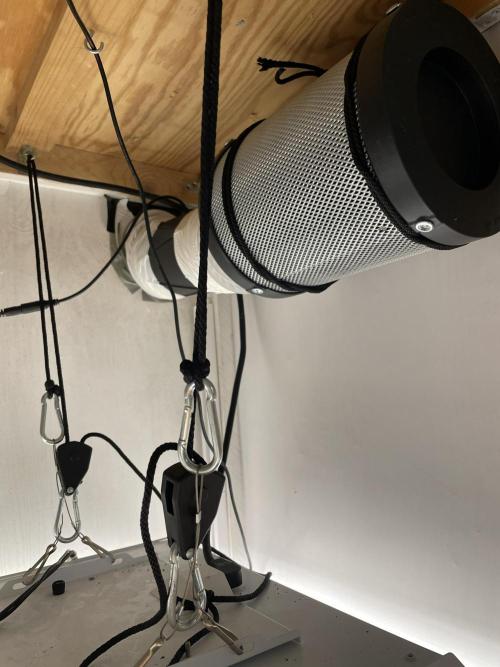
- new exhaust fan: Aygrochy, Ø 100mm duct fan adjustable, EC motor duct fan 221m³/h
- new activated carbon filters: Airontek, Ø100mm x 20cm, 240m³/h
- new automatic watering system, consisting of a 5L camping canister as a tank, 12V aquarium pump + 12V solenoid valve, top feeder unit (custom design, 3D printed)
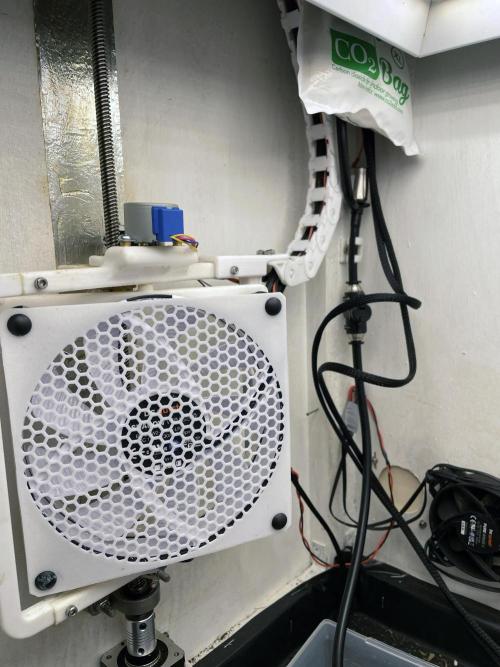
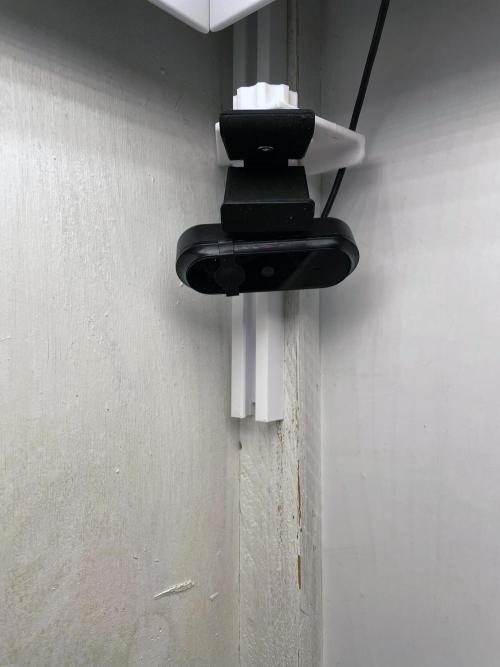
- smaller changes like drag chain, new grid for circulation fan, and webcam holder made from a 3D printer
Other features:
- 2x 80mm be quiet! fans for intake
- 1x 140mm be quiet! fan for circulation, oscillating, height adjustable
- Airontek ultrasonic mini humidifier 2.3 liters
- Mars Hydro TS1000, 150W, full spectrum LED plant light
The strain:
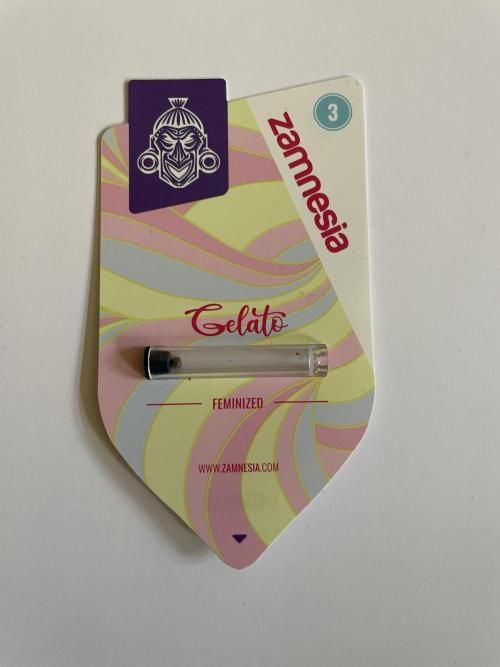
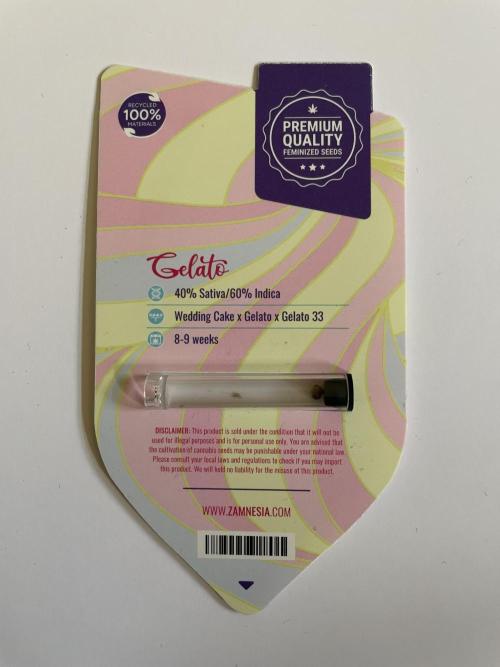
This time I opted for a photoperiod strain, as I plan to train the plant a bit more aggressively (keyword mainlining), allowing the plant more recovery time in between and hopefully also better control the height when I decide it's time for flowering and not the plant itself. The choice fell on the Gelato feminized from Zamnesia due to its THC content and the low height in indoor grow.
The germination:
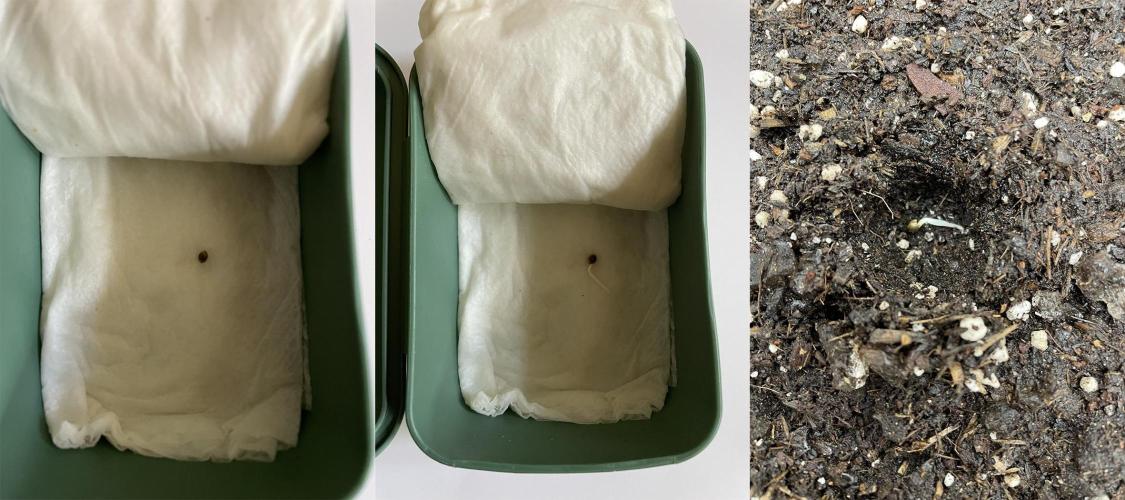
I placed the seed between 2 damp kitchen towels in a small Tupperware box on the evening of (09.07.26) for germination. Once the taproot is 1-2 cm long, the seed will go into the soil. Until then, I started with the other preparations today:
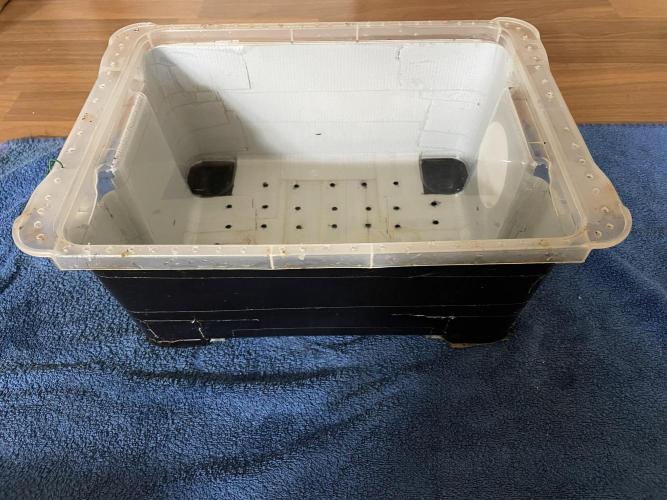
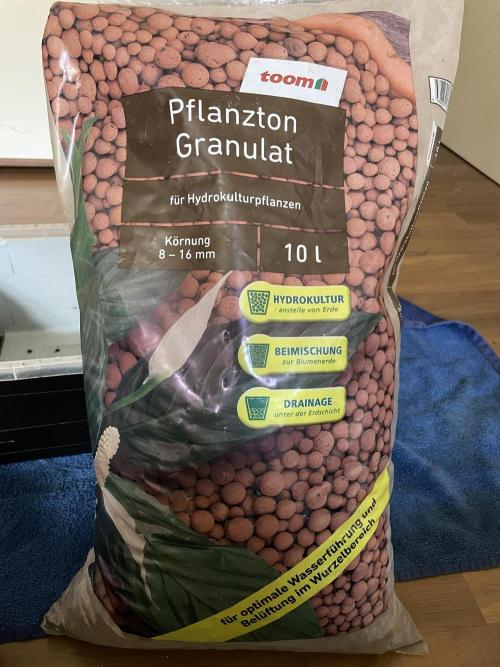
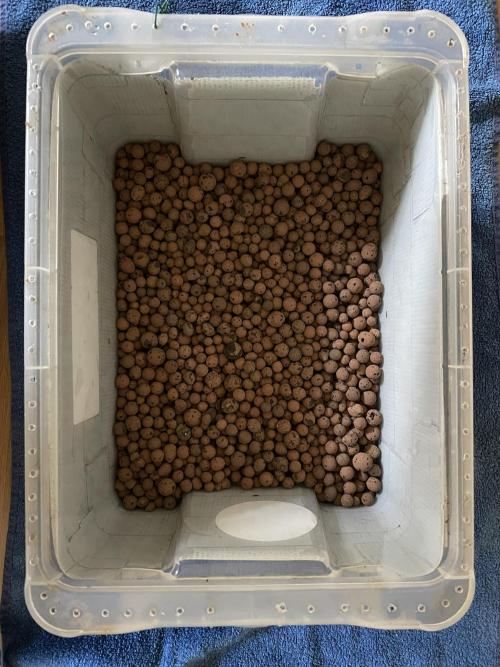
For the planting container, I am using my modified storage box again (about 11 liters). This was thoroughly cleaned and then filled with a drainage layer of clay pebbles (ground covering, about 2.5 cm).
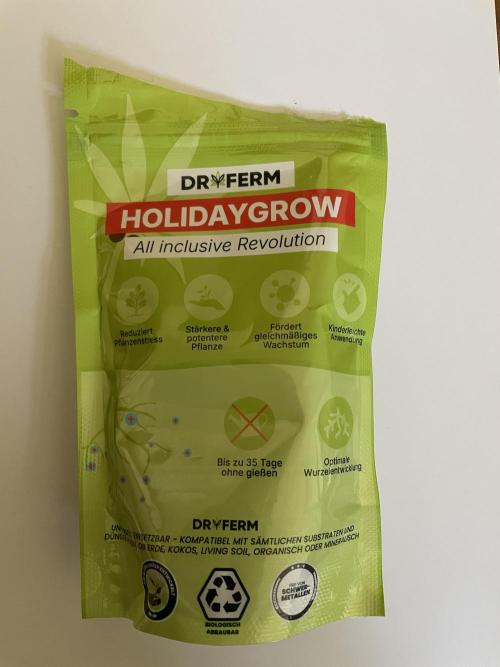
In the meantime, I started preparing the hydrogel, which I want to mix into the soil as a test in this run. The hydrogel is supposed to help the soil retain moisture and nutrients longer, thus allowing for less frequent watering. Since the package is designed for up to 30 liters of soil, I only used 1/3 and let it swell in a bucket with about 3.3 liters of water for about 24 hours.
For soil, I am using a mix of BioBizz All Mix and All Mix Peat free, as I have opened bags of both that I want to use up.
The seed was ready to be planted on the afternoon of 12.07.2026. First, the soil was mixed with the swollen hydrogel and filled into the planting container. Then, I watered it again with about 1 liter of water:
- Temp: 22.4°C
- EC: 0.74mS/cm
- pH: 6.35
- Nutrients: 0.4ml/L Root Juice + 0.2ml/L Acti-Vera + 0.134g/L Epsom salt
After that, the seed was placed with tweezers into a hole about 2cm deep in the soil and carefully covered with soil. The light was turned on so that the seedling gets light as soon as it breaks through the soil:
- Cycle: 18/6
- Distance: about 20cm
- Power: about 20% - DLI value ~12
The automatic humidifier was also activated right away to provide the seedling with a pleasant climate from the start:
- rel. humidity: min. 60%, max. 75%
- VPD target value: 0.4-0.8kPa
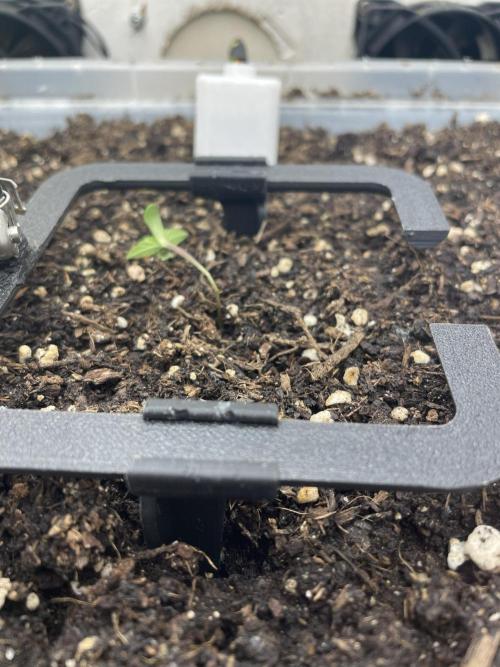
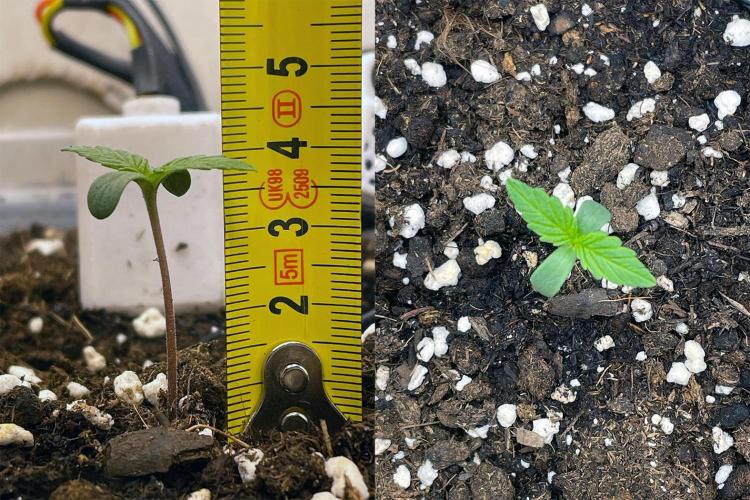
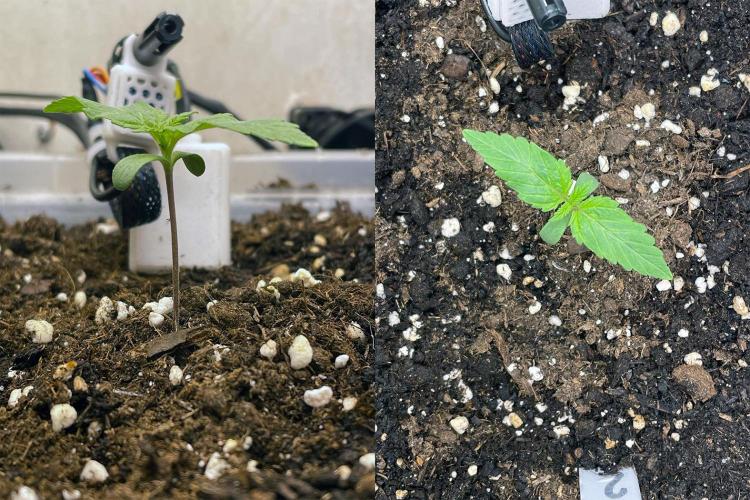
About 32 hours after planting the seed, the little lady stretched her head out of the soil. This marks the last day of the germination phase for me, and we move into the seedling phase, which I classify as part of the growth phase in this grow diary.
Update 1:
Since seedling number 1 simply fell over on day 3 and unfortunately did not recover from its fainting spell, the first attempt unfortunately failed after just a few days. I assume that I simply started watering way too early. The substrate was already dry on the surface, but probably still so moist underneath due to the hydrogel that my early watering was just too much. Also, the light may have been a bit too weak at the beginning, leading to a weak base of the stem. Together with the still quite rapid growth and perhaps a bit too strong circulation, this combination apparently proved fatal for the seedling. I chalk this up to: learned something new!
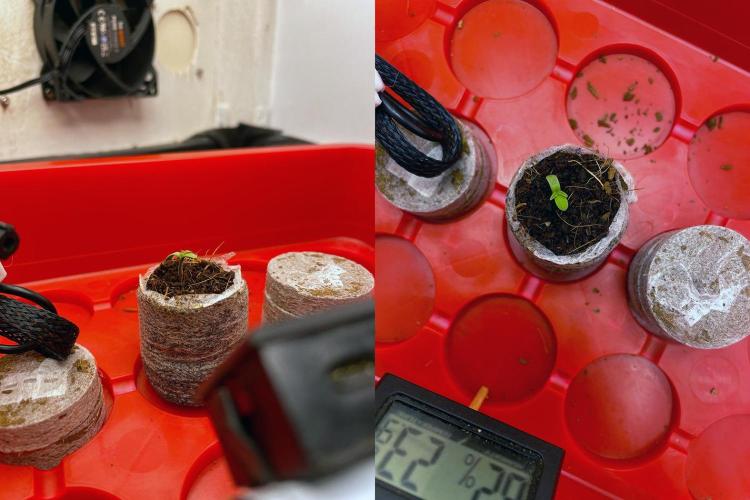
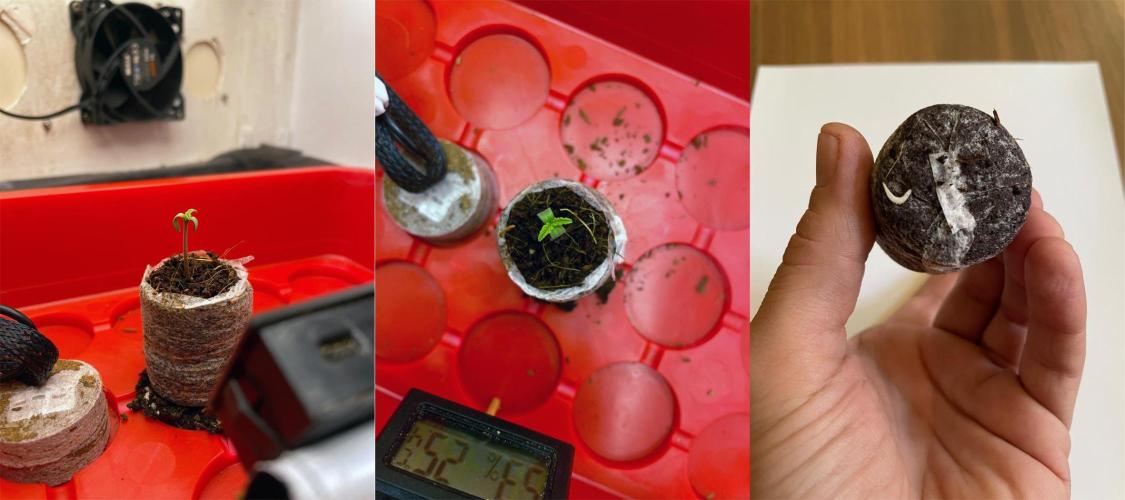
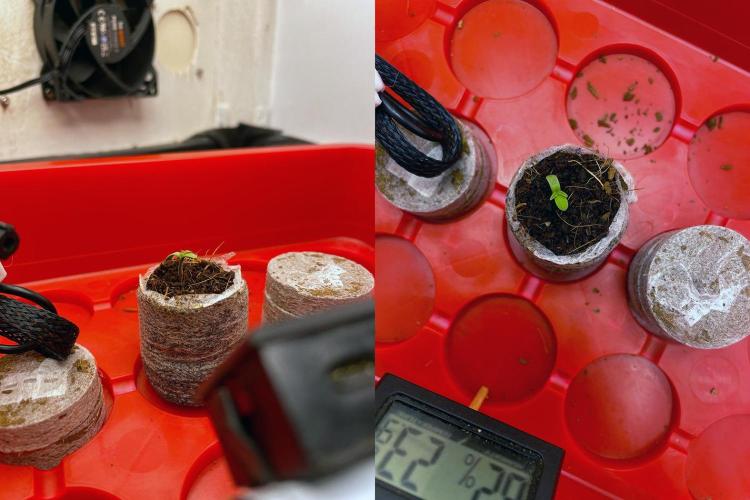
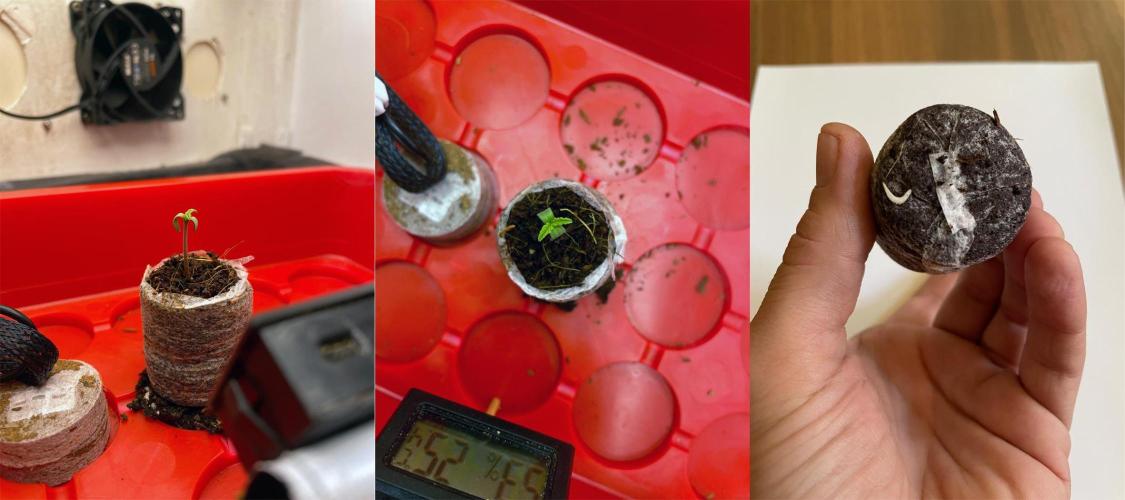
Fortunately, I still have one seed of the same strain left. I'm currently germinating it. For this, I gave it a little start boost by placing it in a glass of water for about 6 hours and then planted it in a coco pellet (17.07.26), which I let swell with pH-regulated tap water. As soon as the first green sees the light at the surface, the seedling tray will go into the grow box, and I will let the seedling root through the pellet for a few days. Afterwards, it will be placed back into the final planting container. However, I will free the local planting zone from the AllMix-hydrogel mix and refill it with some BioBizz Light Mix without hydrogel to minimize the risk of local waterlogging.
Update 2:
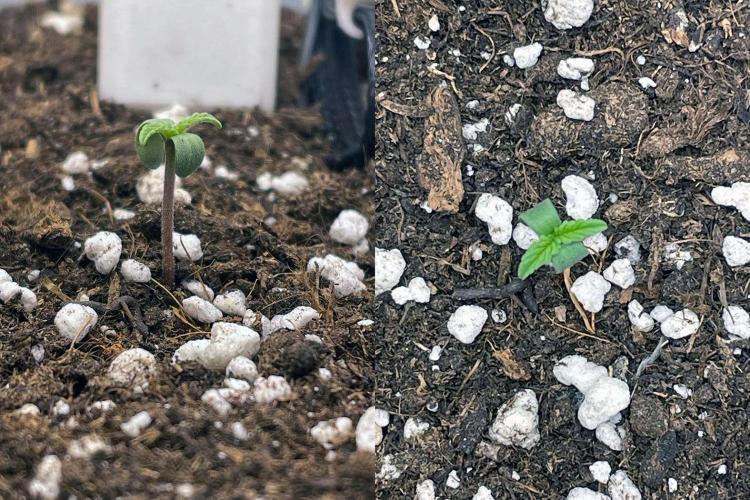
3 days later, on 20.07.26, the second seedling has seen the light of day (new day 1 for the growth phase in the diary). After the taproot grew out of the coco pellet on the second day, it was placed into the planting container.
2 likes
comments
Share
Used method
Other
Germination Method
1
Week 1. Vegetation2mo ago
5 cm
Height
18 hrs
Light Schedule
24 °C
Day Air Temp
6.4
pH
350 PPM
TDS
70 %
Air Humidity
23 °C
Solution Temp
22 °C
Night Air Temp
11 liters
Pot Size
0.25 liters
Watering Volume
30 cm
Lamp Distance
Nutrients 1

Root-Juice
4 mll
Lontra Tag 4:
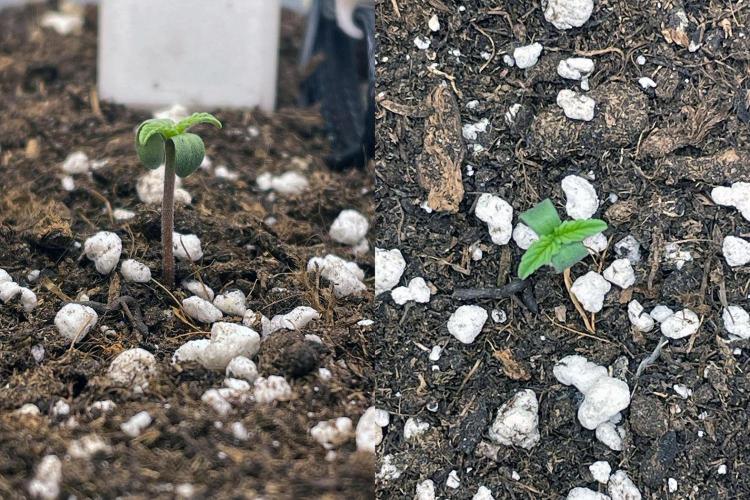
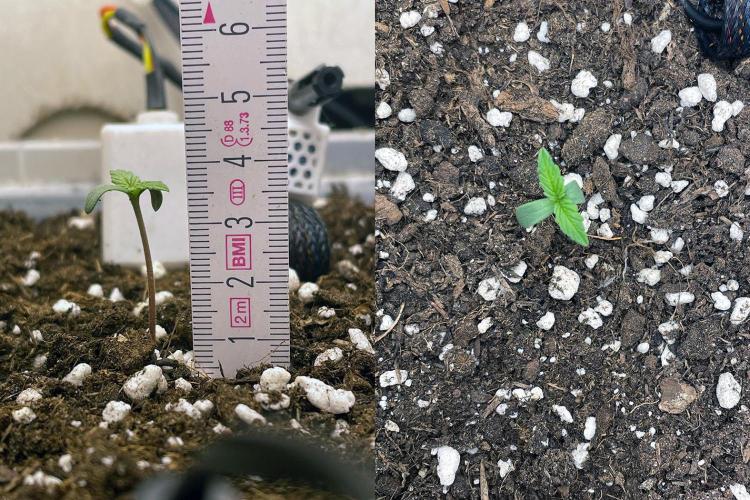
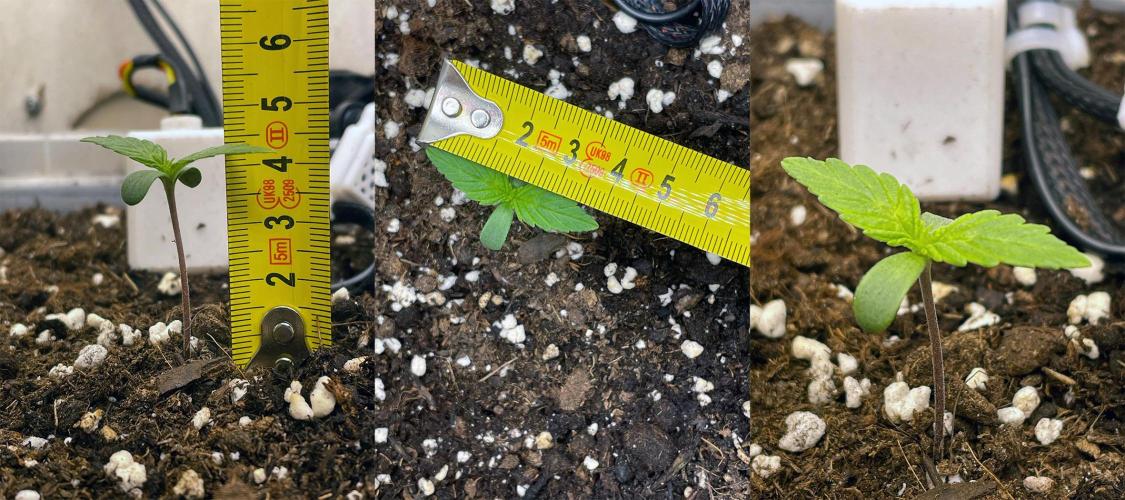
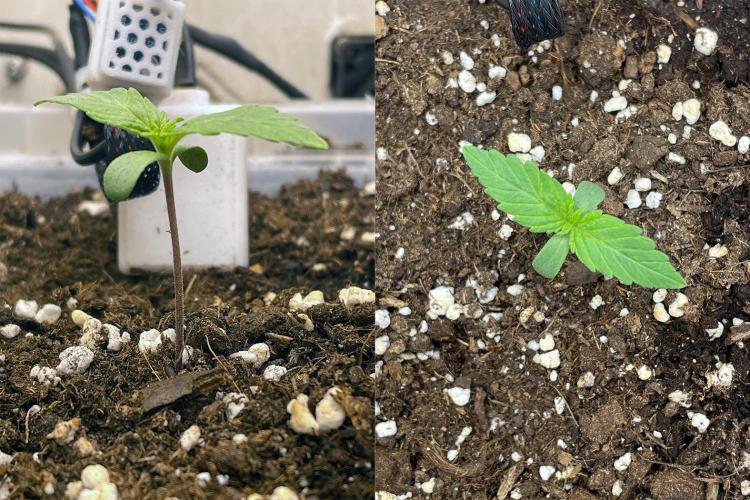
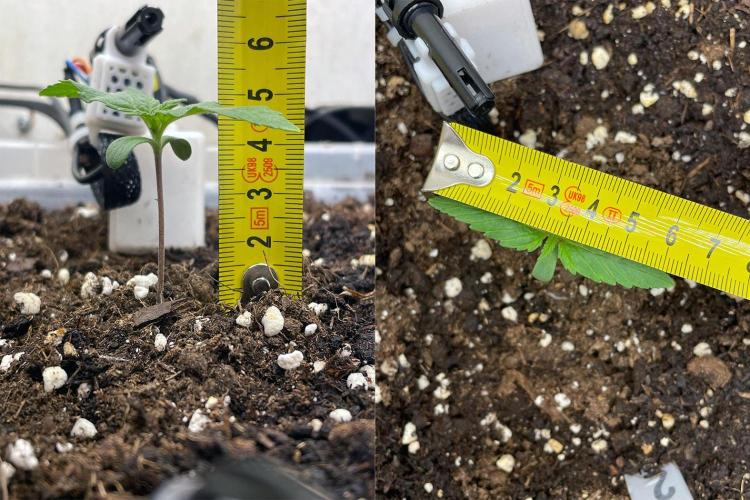
After the second attempt is running more stable than the first, here's a new update today. The first few days went well. Yesterday and today, I gave about 100ml each with the spray bottle. Yesterday with 1mL/L Root-Juice, today with 2mL/L, and otherwise just a bit of Epsom salt (0.13g/L) and pH- for the pH level (around 6.4), to avoid overwhelming the seedling with too much moisture or too many nutrients again. The height growth is slowing down, while the leaf growth is increasing. The light was set to about 250 ppfd at the tip of the shoot (after planting, it started at about 200 ppfd), at a distance of around 30cm. I'm trying to keep the VPD value around 1kPa.
Tag 7:
Today, there was a little water again (about 0.5L) with Root Juice (4mL/L), Epsom salt (0.134g/L), and pH- for a pH level of approximately 6.3.
The first week overall went well. Since the first leaves look somewhat oddly curled, I have temporarily reduced the airflow.
2 likes
comments
Share
2
Week 2. Vegetation2mo ago
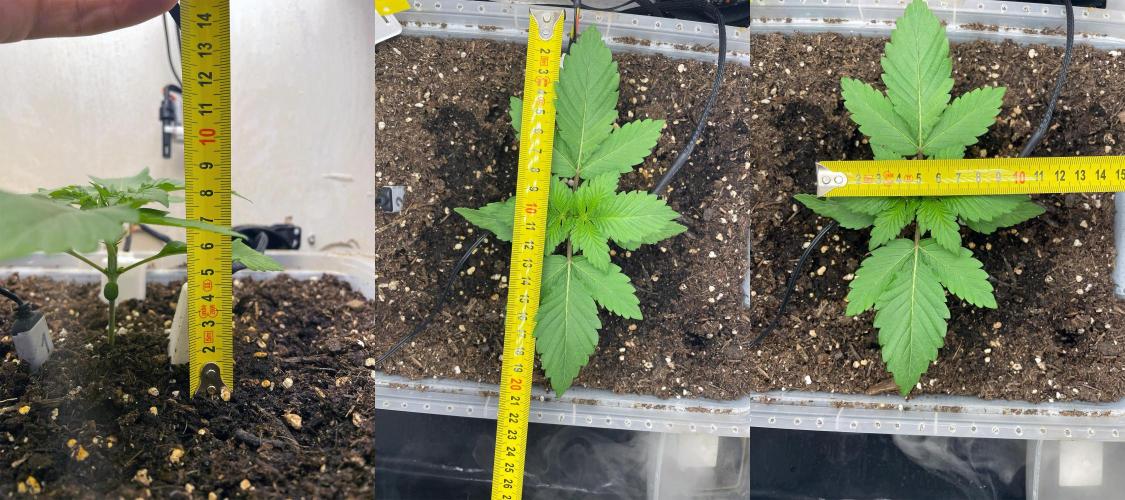
8 cm
Height
18 hrs
Light Schedule
27 °C
Day Air Temp
6.3
pH
470 PPM
TDS
60 %
Air Humidity
26 °C
Solution Temp
24 °C
Night Air Temp
11 liters
Pot Size
30 cm
Lamp Distance
Nutrients 2
Root-Juice
1 mll
Fish-Mix
1 mll
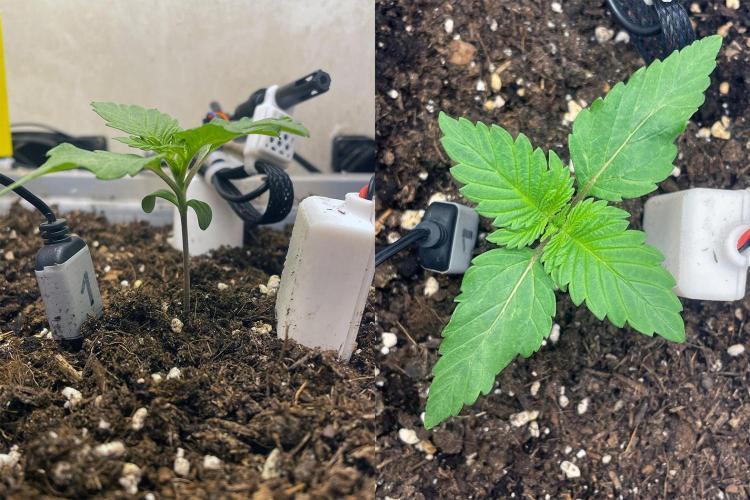
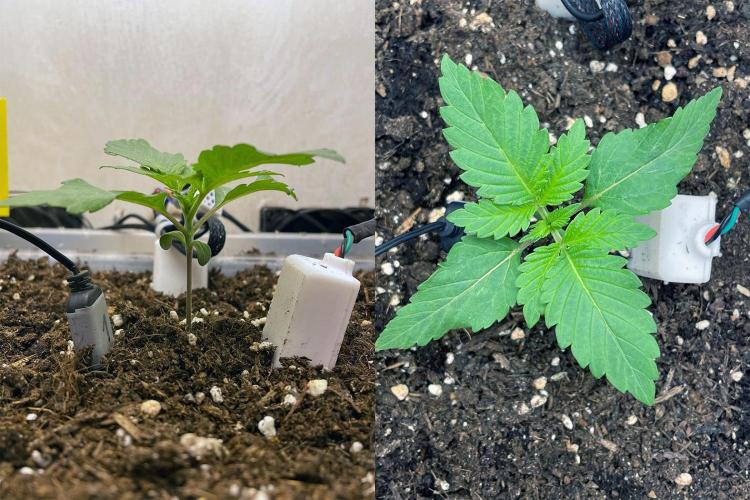
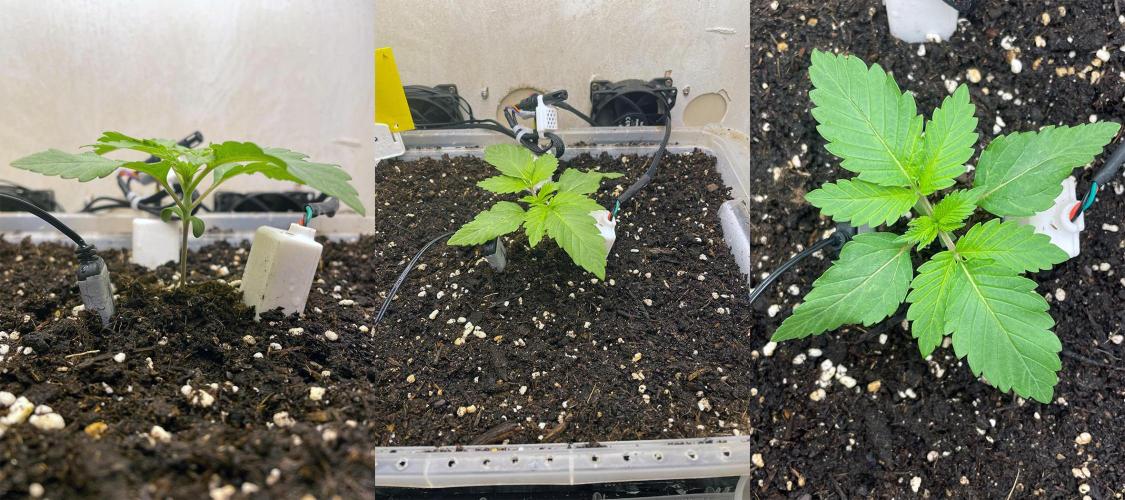
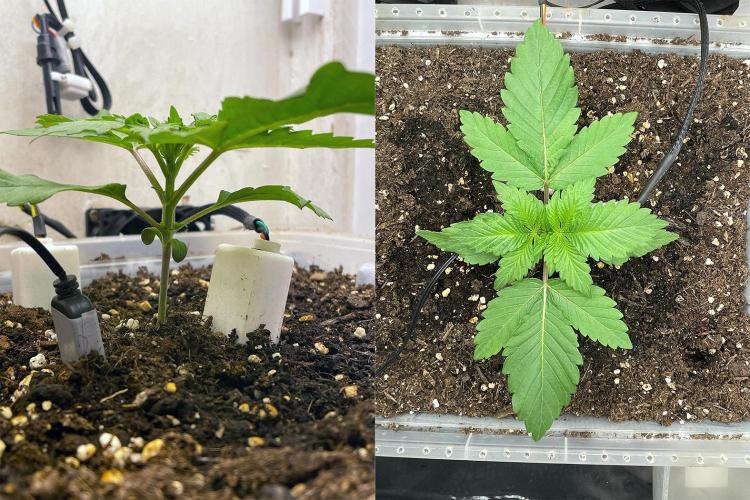
Lontra Tag 12:
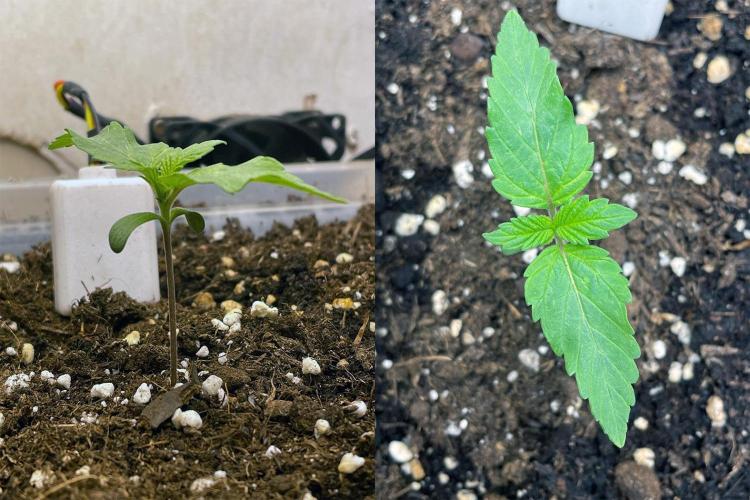
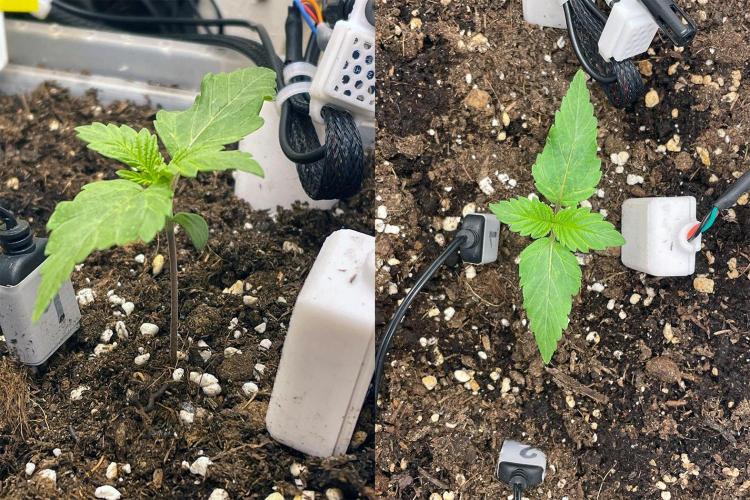
Today I gave about 0.5 L of water with only a little Root Juice to wean off and added some Fish Mix instead. The little bit of drain I had had a pH value of about 7.5. The small plant is apparently stressed, visible in the wavy leaves, but is still growing quite well so far. I suspect this has to do with the fact that I didn't let the hydrogel in the outer areas of the pot swell in pH-controlled water before the grow, but in plain tap water with a pH value of about 7.9. That was dumb, I know. Also, the hydrogel probably keeps the soil too moist for this stage of the plant. It's all going on the list of learnings.
Tag 14:
The soil is still moist. You can still tell the plant is under some stress, especially from the uneven growth of new leaf pairs (one side bigger than the other). Nevertheless, it’s actually growing quite well and, as hoped, very compact with short internodes. To further lower the pH in the soil, I’m going to let the soil dry out properly before I carefully flush it during the next necessary watering. If things continue to go well, it might be time for the first topping by the end of week 3.
3 likes
comments
Share
3
Week 3. Vegetation2mo ago
16 cm
Height
18 hrs
Light Schedule
27 °C
Day Air Temp
6.0
pH
475 PPM
TDS
60 %
Air Humidity
25 °C
Solution Temp
25 °C
Night Air Temp
11 liters
Pot Size
26 cm
Lamp Distance
Nutrients 3
Root-Juice
4 mll
Fish-Mix
1 mll

Acti-Vera
2 mll
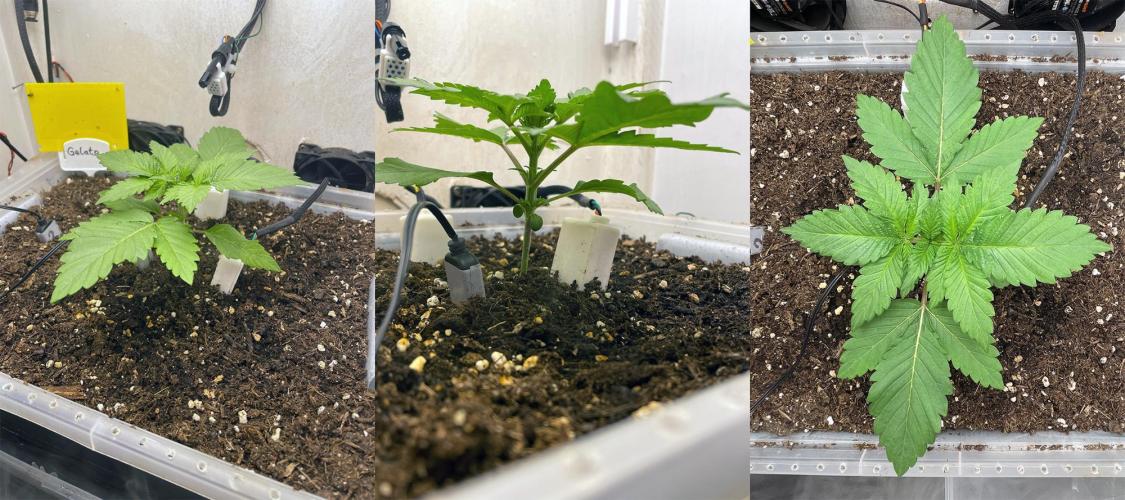
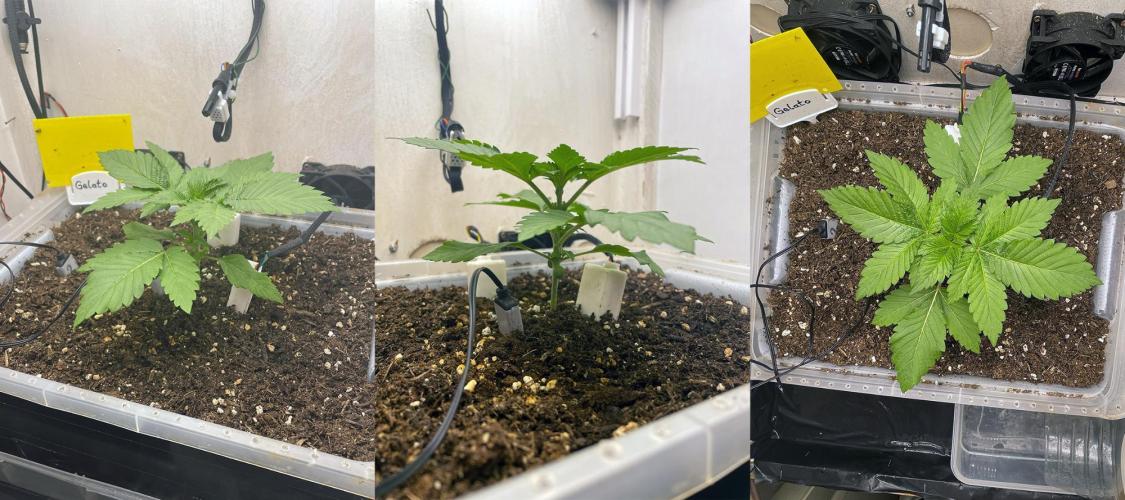
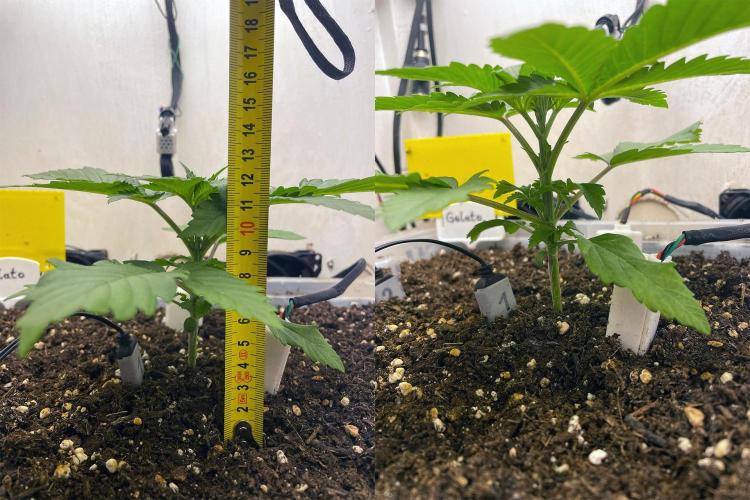
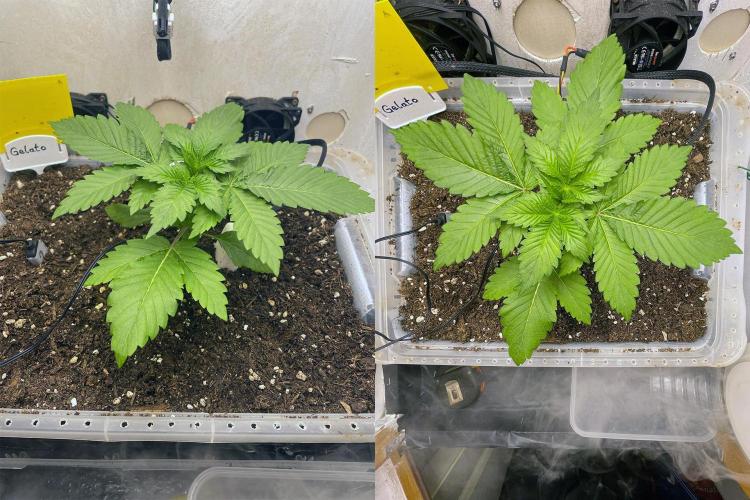
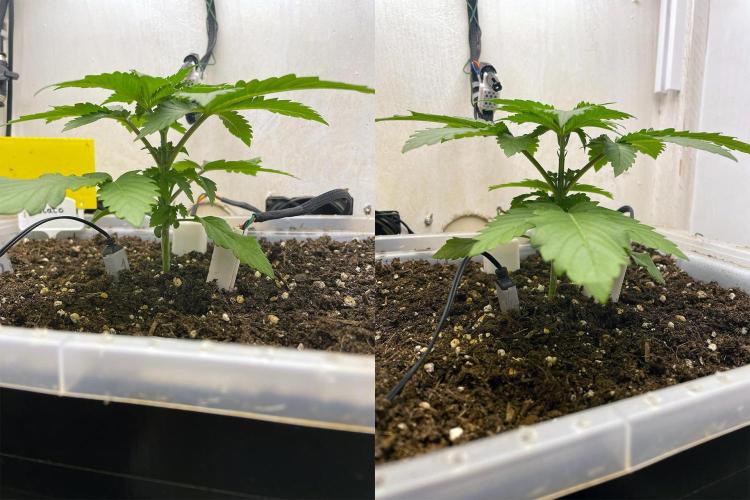
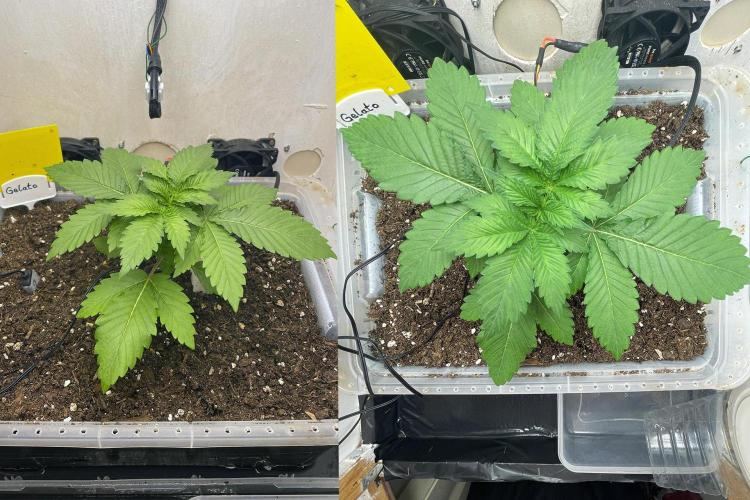
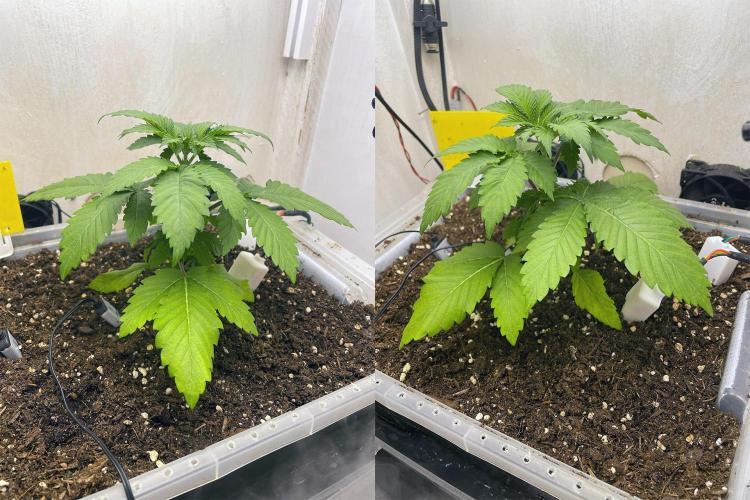
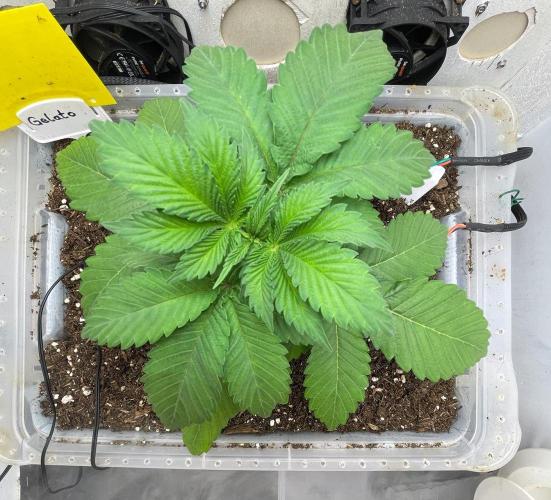
Lontra The week went by very relaxed overall, and I think I'm slowly getting used to the changed watering with the hydrogel. I watered 1L on day 19, with fertilizer according to the feeding schedule and additionally some Epsom salt. Since the little bit of drain already showed a pH of about 6.7 and not above 7, I decided not to flush but to continue watering normally.
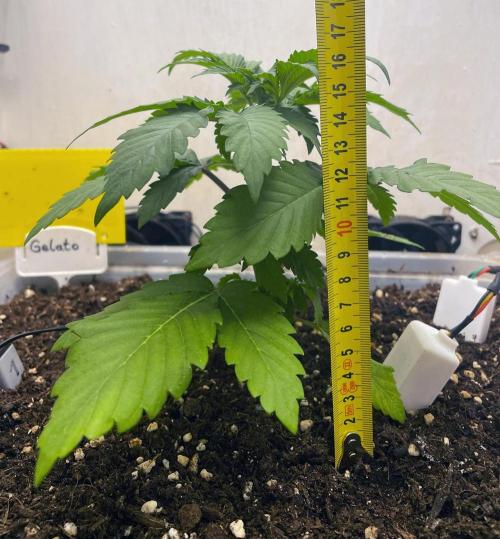
On day 21, we reached a height of 16 cm, and the plant has started to develop node number 6. The light is hanging about 24 cm above the top of the plant and is set to around 350 PPFD. The lowest leaves started to turn a bit light/yellowish and drier today, although I'm not exactly sure if this is due to a nitrogen deficiency or waterlogging, or if it was just a bit too warm and dry in the last few days. This will definitely be monitored further.
On day 22, another watering will probably take place, and if the plant takes it well, the first topping.
7 likes
comments
Share
4
Week 4. Vegetation1mo ago
11 cm
Height
18 hrs
Light Schedule
27 °C
Day Air Temp
6.4
pH
590 PPM
TDS
60 %
Air Humidity
25 °C
Solution Temp
24 °C
Night Air Temp
11 liters
Pot Size
35 cm
Lamp Distance
Nutrients 4
Bittersalz
0.25 mll
Fish-Mix
1.5 mll
Acti-Vera
1 mll
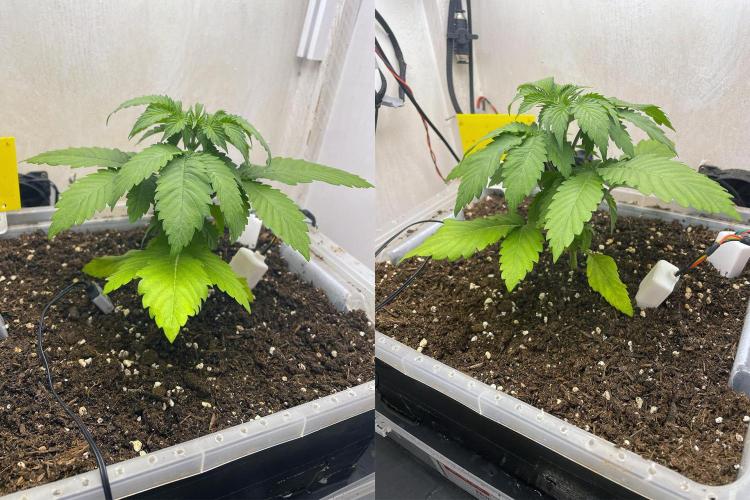
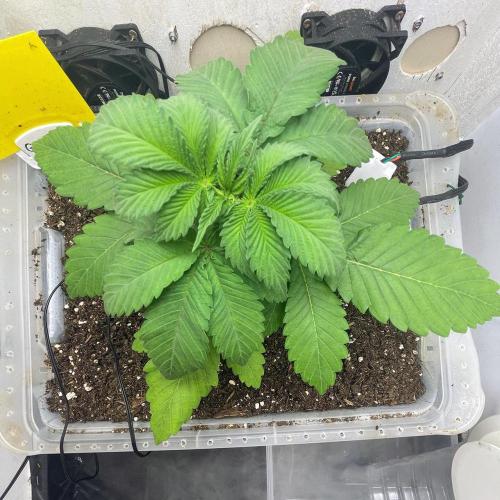
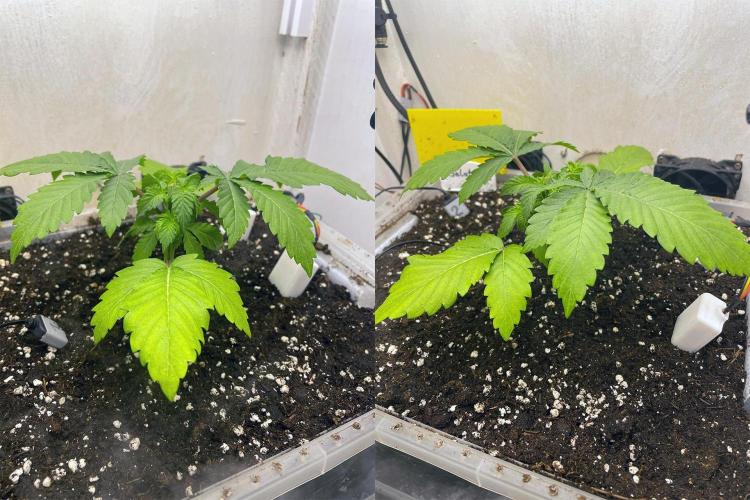
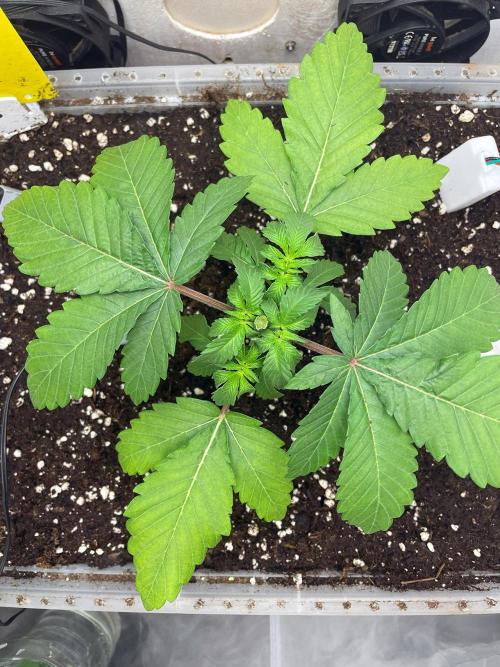
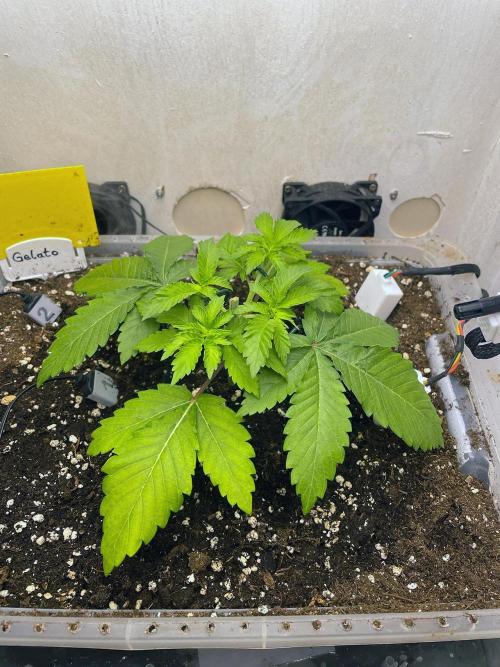
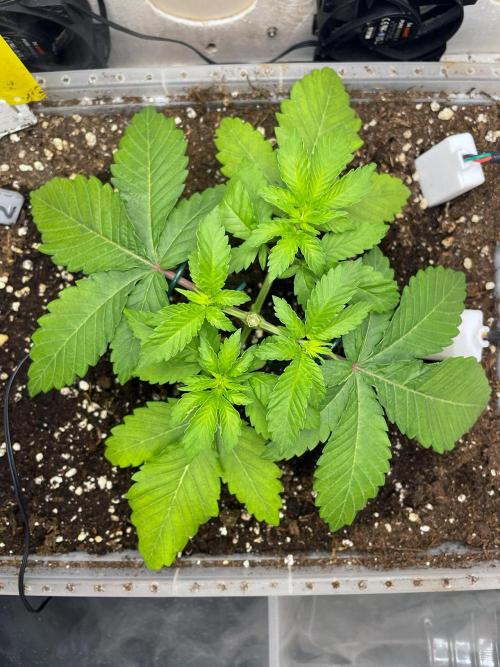
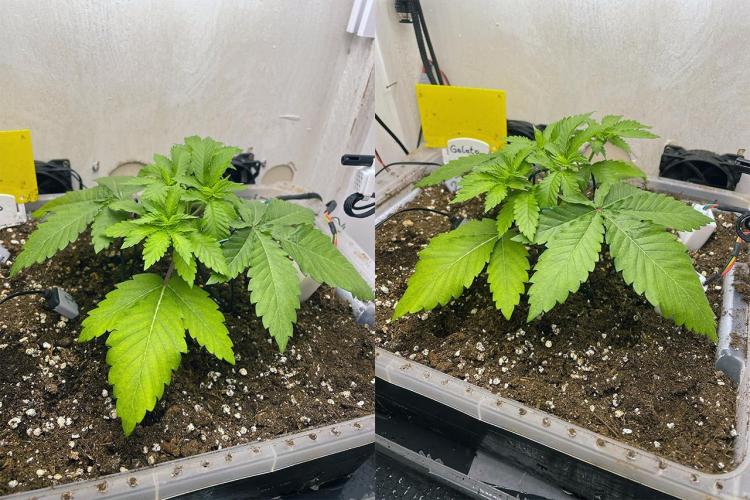
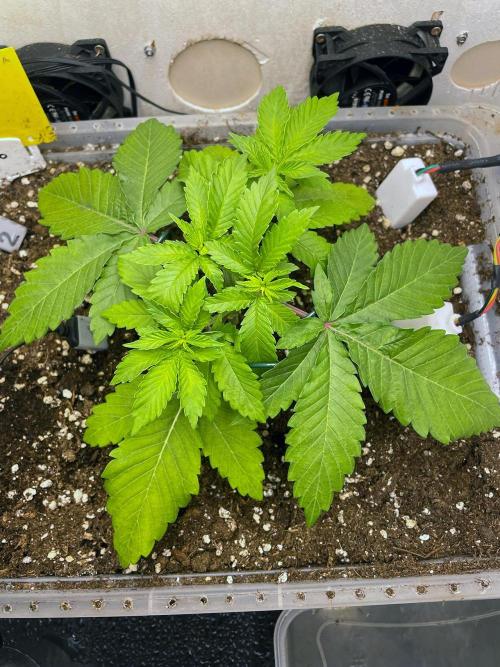
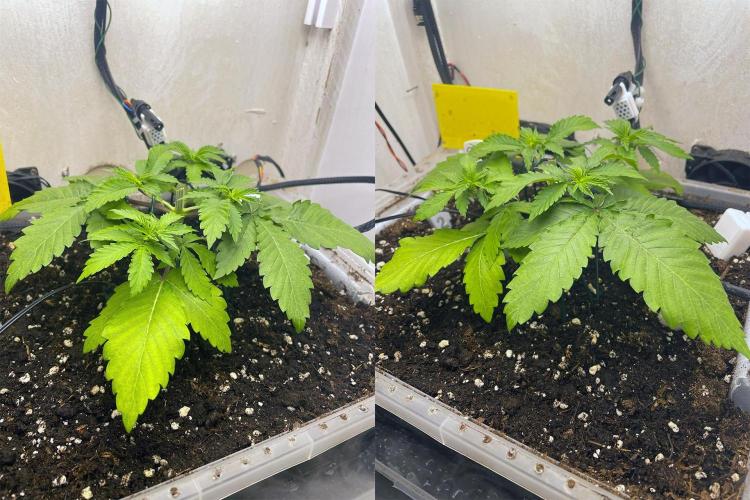
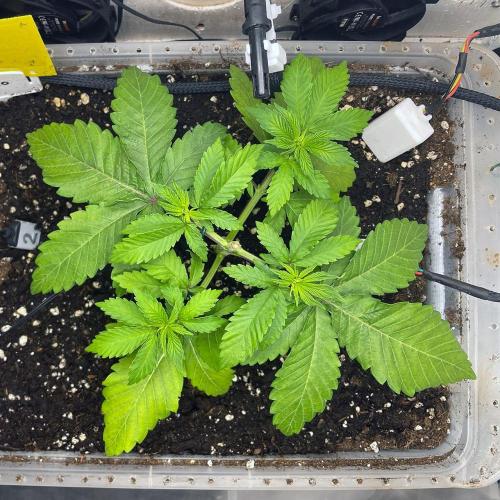
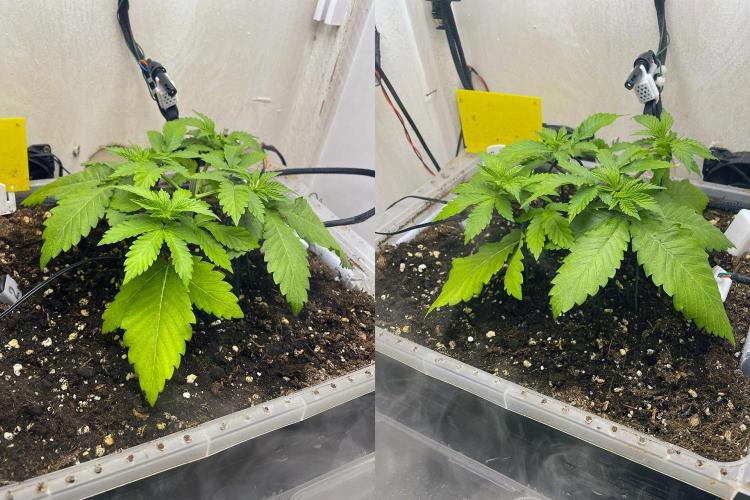
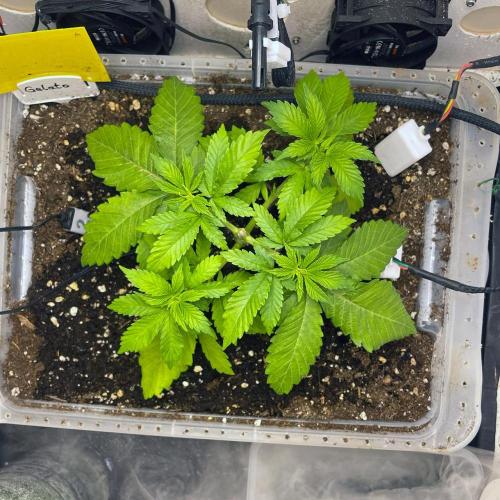
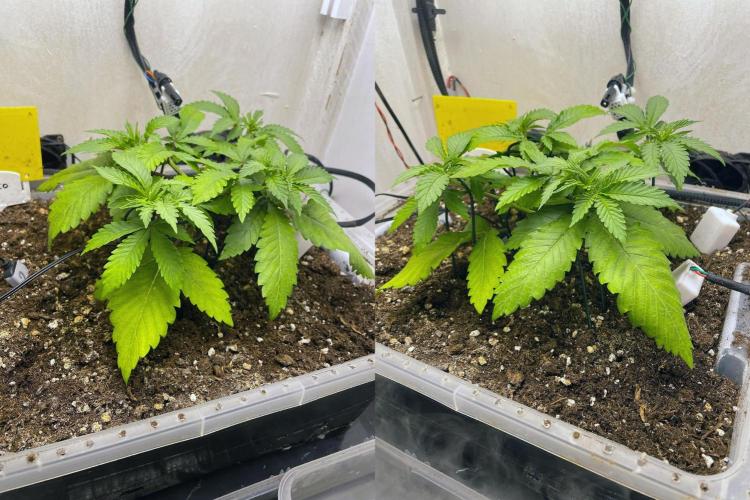
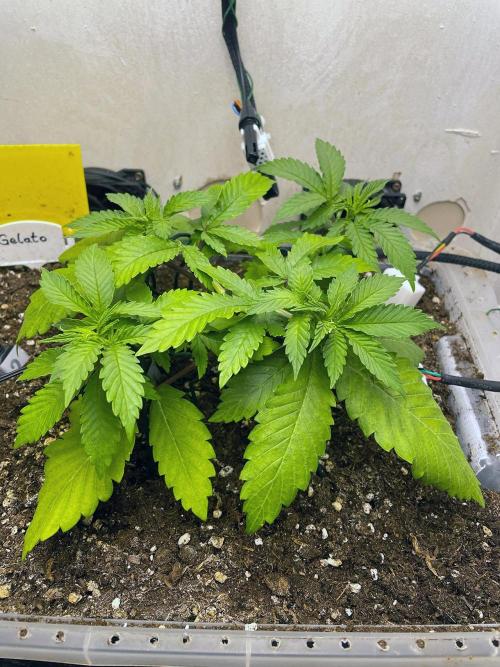
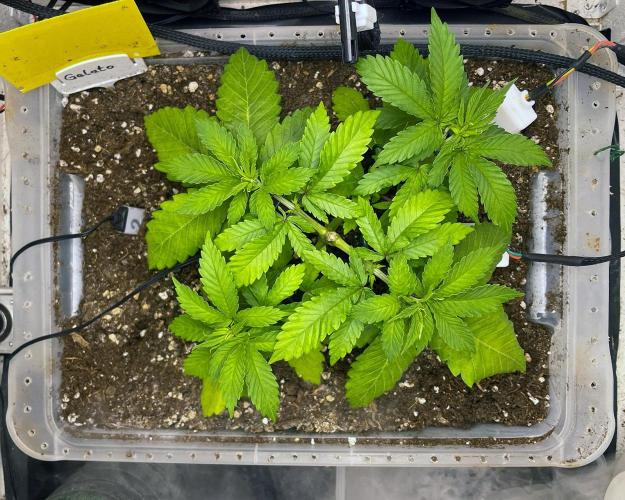
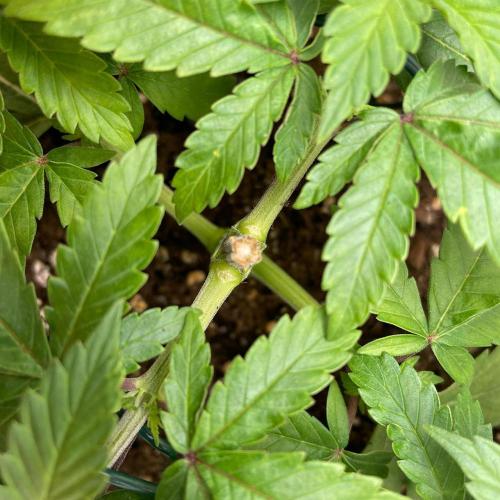
Lontra The week went pretty well overall. It was topped at the beginning of the week on day 22, a few hours after watering. On days 22 and 23, I lightly separated the 4 shoots I kept with some wire, and the actual LST started slowly from day 24. On day 28, I noticed that especially the 2 upper shoots at the stem junctions had slight cracks. After that, I revised the LST a bit and supported the 4 shoots again from the bottom to about half their length.
According to a pH soil test with an optical scale on day 22, the soil pH was more towards 6 than 7, so I decided not to flush at the beginning of the week. Instead, the soil, and especially the hydrogel, should gradually shift into an optimal range through my scheduled watering. The little bit of drain I got on day 25 while watering had a pH of ~6.7. So that seems to be working.
Since day 22, I have increased the amount of Epsom salt to about 0.25g/l to better adjust the Ca:Mg ratio of my tap water for the growth phase. I probably should have done that earlier. For the second watering, I used a bit more Fish-Mix to counteract potential nitrogen deficiency and also added some Alg-A-Mic to support the plant against the hot temperatures this week (partly just over 30°C for a few hours).
I watered twice this week, each time with 1 liter.
1. Watering: Day 22, 1ml/l Fish-Mix, 1ml/l Acti-Vera, about 0.24g Epsom salt, pH ~6.4, EC ~0.95mS/cm
2. Watering: Day 25 (probably a bit too early), 1.5ml/l Fish-Mix, 1ml/l Acti-Vera, 1ml/l Alg-A-Mic, about 0.24g Epsom salt, pH ~6.4, EC ~1.18mS/cm
Additionally, on day 28, there was a light foliar feeding for the undersides of the leaves, with: 0.5ml/l Fish-Mix, 0.8ml/l Alg-A-Mic, and about 0.3g/l Epsom salt.
Yesterday, the soil was still moist enough to delay the next watering by 1-2 days. The light was initially dimmed a bit after topping (~220 PPFD), then slowly increased over the week and is now at about 460 PPFD, which is roughly a DLI value of 30. The plant continues to grow well but still doesn’t seem completely happy. The new growth is showing a bit more symmetry now, but there is still slight asymmetry. The oldest fan leaves still look chlorotic but haven’t dramatically worsened. I'm a bit worried about the newer, already larger fan leaves in the middle, as they also seem to be lightening from the tips and look somewhat chlorotic. The new growth, on the other hand, looks pretty okay.
4 likes
comments
Share
Used techniques
Topping
Technique
LST
Technique
5
Week 5. Vegetation1mo ago
12 cm
Height
18 hrs
Light Schedule
25 °C
Day Air Temp
6.4
pH
Weak
Smell
590 PPM
TDS
60 %
Air Humidity
23 °C
Solution Temp
22 °C
Night Air Temp
11 liters
Pot Size
35 cm
Lamp Distance
Nutrients 4
Bittersalz
0.25 mll
Fish-Mix
2.5 mll

Alg-A-Mic
1 mll
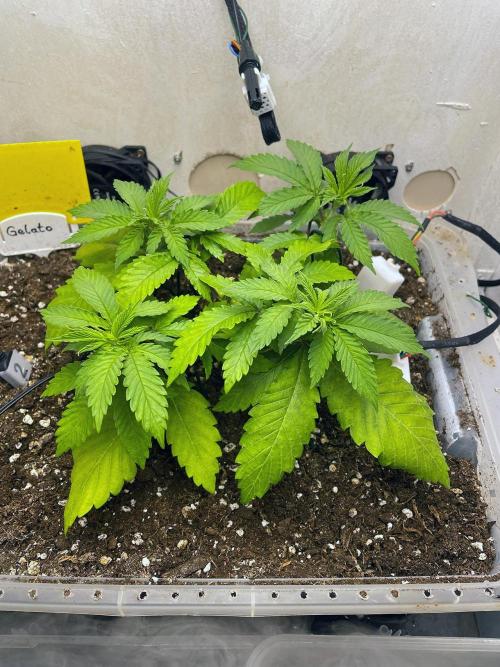
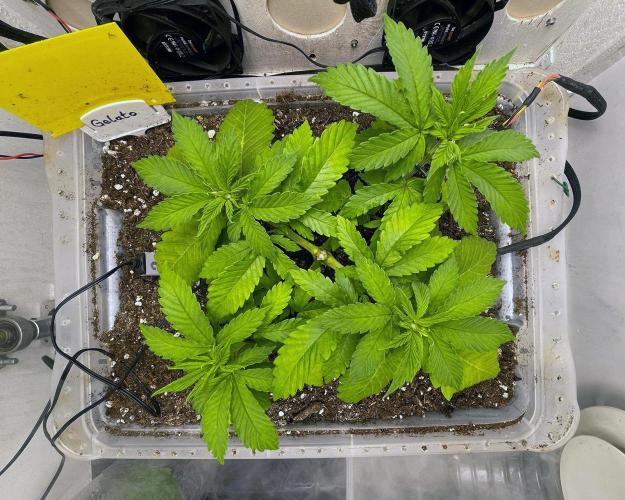
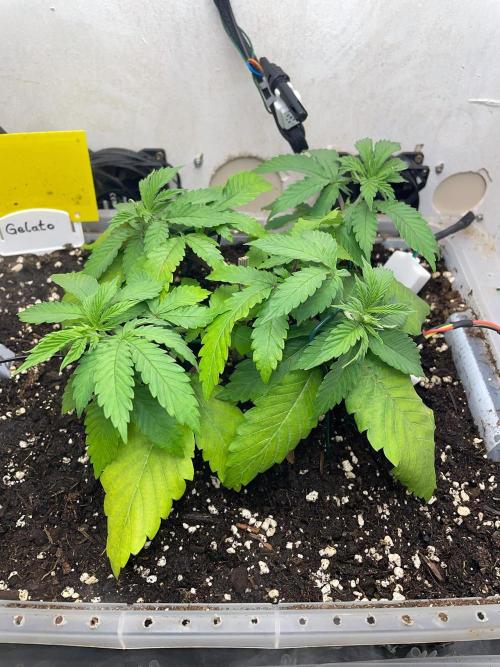
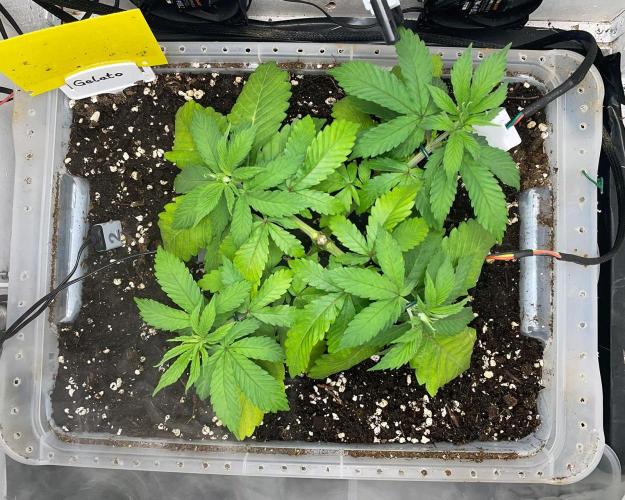
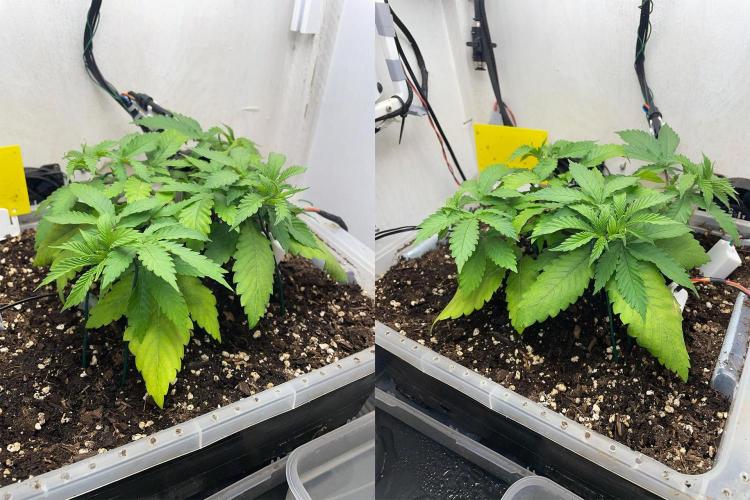
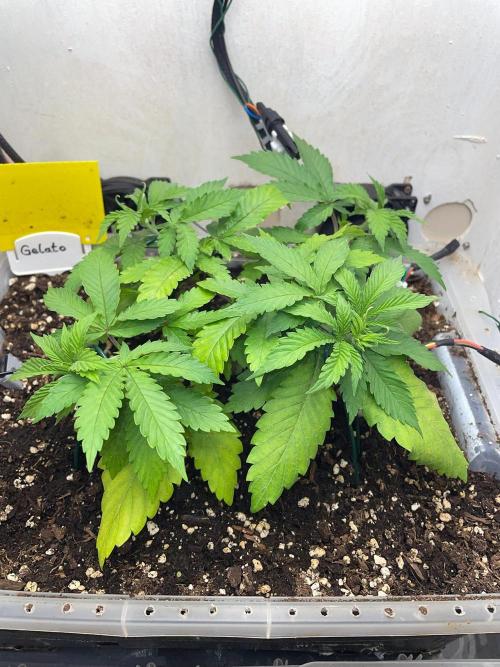
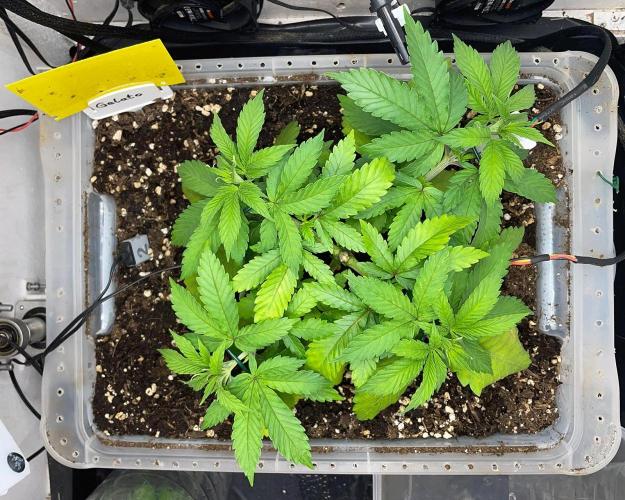
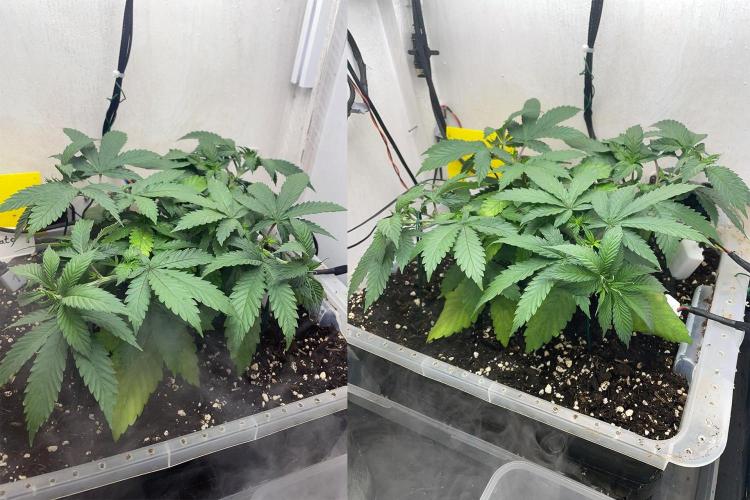
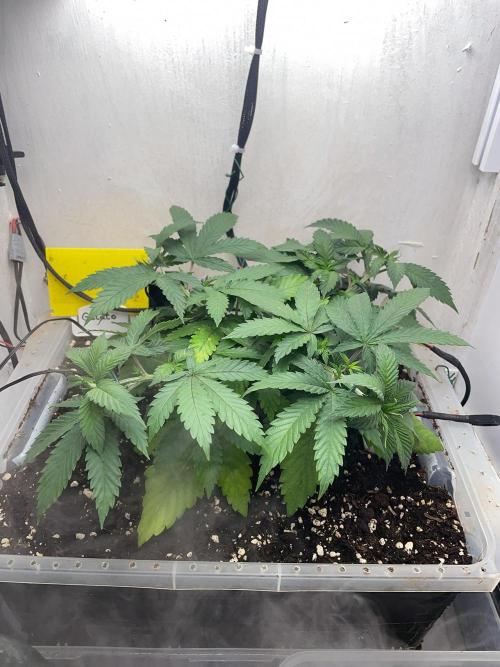
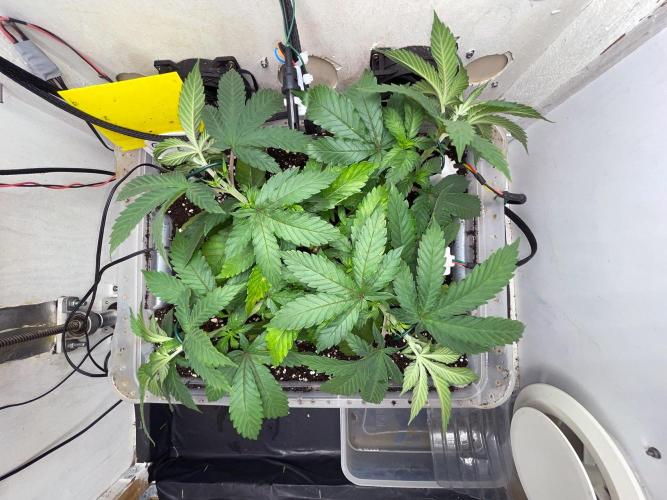
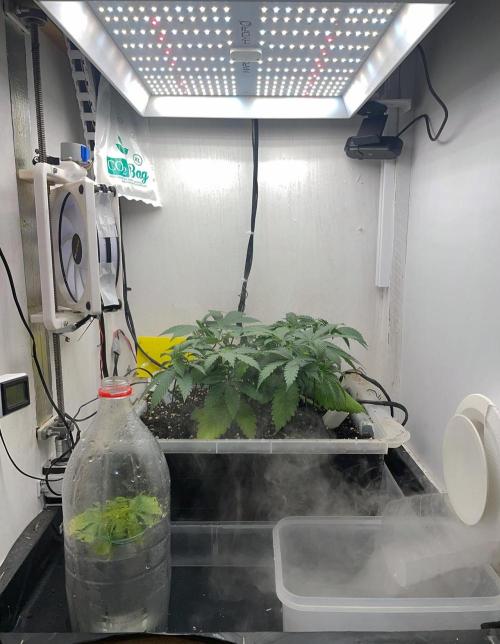
Lontra Week 5 went pretty well, even though I was away from home for a few days in between. After the nitrogen deficiency progressed further (albeit a bit slower), I decided to grab some new Fish-Mix from the hardware store before the first watering of the week and also renew the other bottles of my BioBizz supply. I think the over 2-year-old products on my shelf probably weren't as "potent" anymore.
I watered twice this week:
1. Watering: Day 30, total of 3 liters (2.5ml/l Fish-Mix, 1ml/l Alg-A-Mic, 2ml/l Bio-Heaven, about 0.24g/l Epsom salt, pH ~6.4, EC ~1.8mS/cm, pot weight before about 5.8kg, after about 7.5kg)
2. Watering: Day 35, total of 3.5 liters (2.5ml/l Fish-Mix, 1ml/l Alg-A-Mic, 2ml/l Bio-Heaven, about 0.24g/l Epsom salt, pH ~6.4, EC ~1.8mS/cm, pot weight before about 5.1kg, after about 7.4kg)
Additionally, before my departure on Day 31, I did a little foliar feeding with 1ml/l Fish-Mix.
The light remained unchanged throughout the week.
After my return on Day 35, the plant looked significantly fitter and healthier than at the beginning of the week. The leaves that grew in between had a rich, healthy green, and the lightening from the bottom up doesn't seem to be continuing for now. The drain had a relatively stable pH of ~6.4 during both waterings this week. With a bit of luck, the pH issues and nutrient deficiencies should slowly be under control. The second topping is planned for the start of week 6.
5 likes
comments
Share
Used techniques
LST
Technique
6
Week 6. Vegetation1mo ago


13 cm
Height
18 hrs
Light Schedule
27 °C
Day Air Temp
6.4
pH
Weak
Smell
900 PPM
TDS
65 %
Air Humidity
23 °C
Solution Temp
24 °C
Night Air Temp
11 liters
Pot Size
40 cm
Lamp Distance
Nutrients 4
Bittersalz
0.25 mll
Fish-Mix
2.5 mll
Alg-A-Mic
1 mll
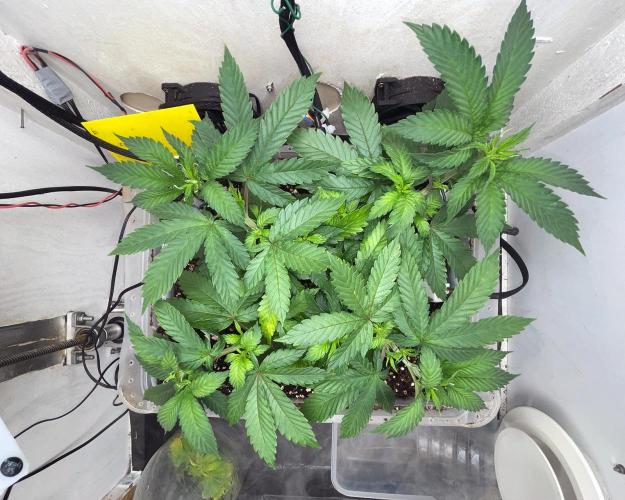
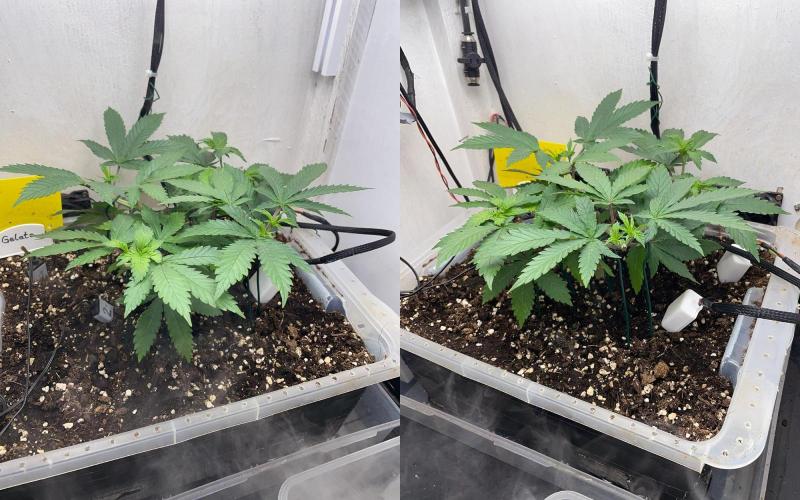
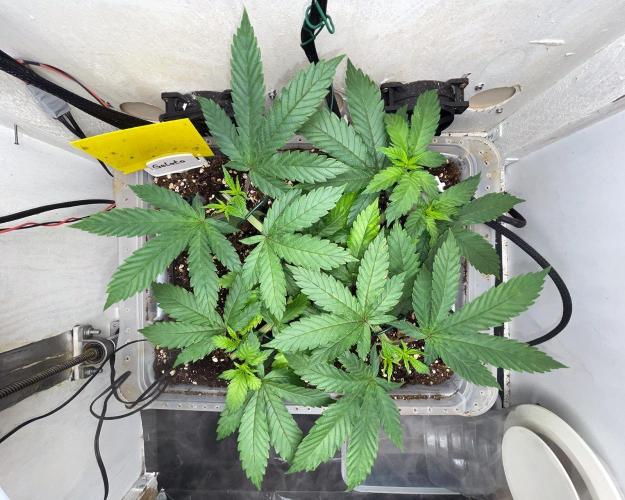
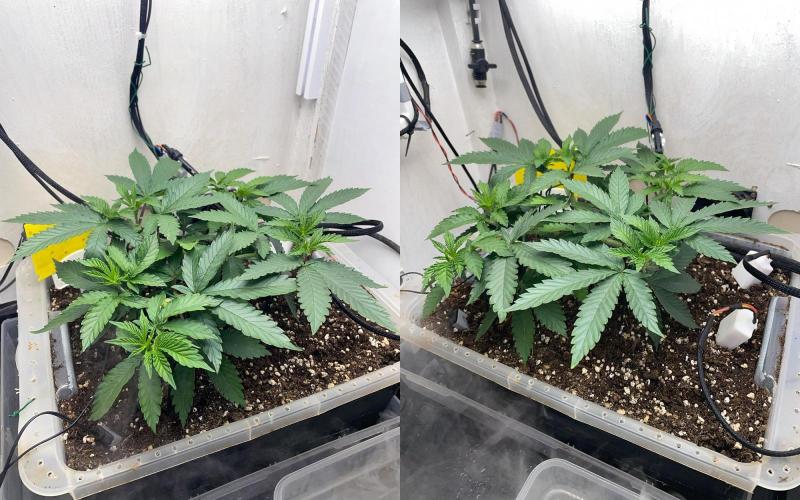
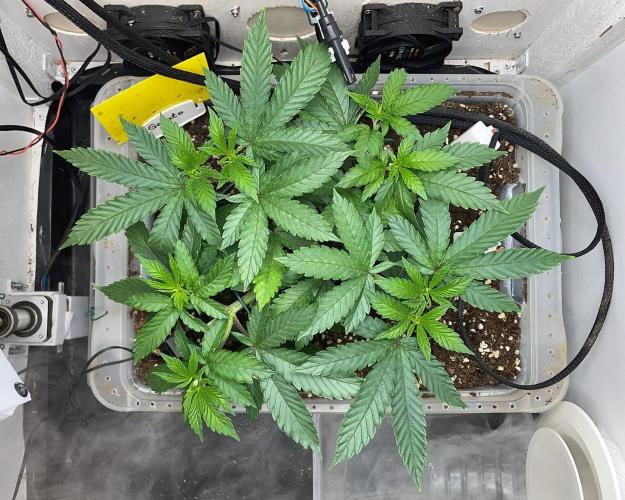
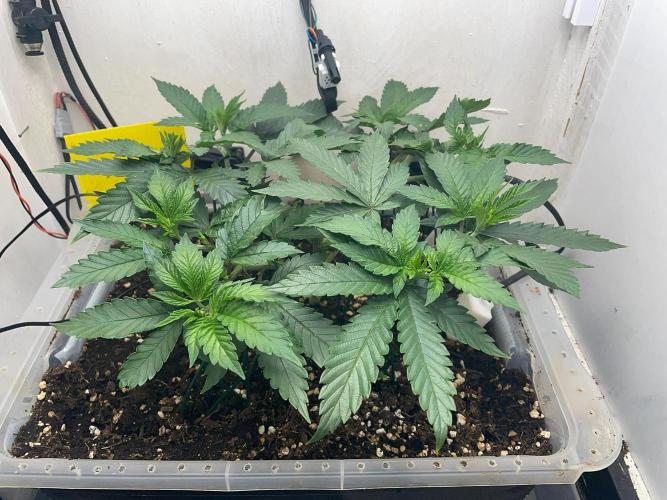
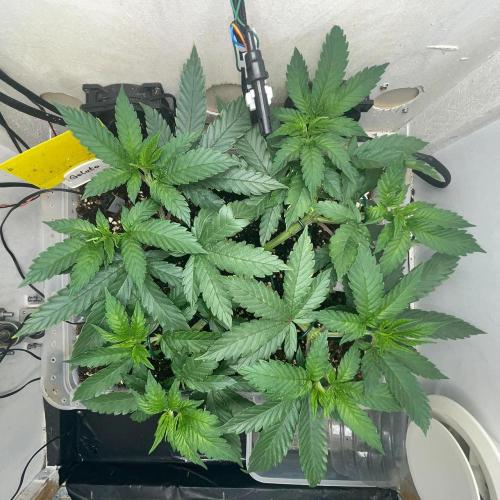
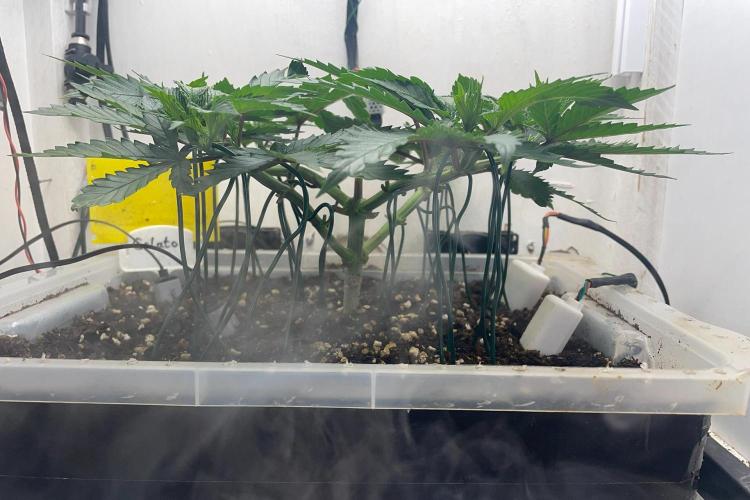
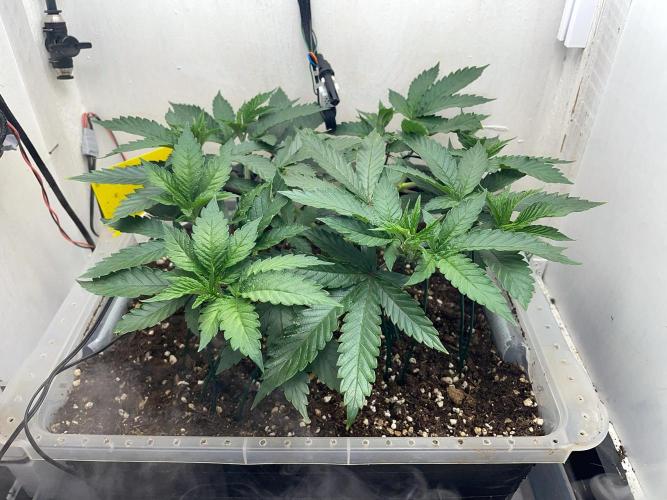
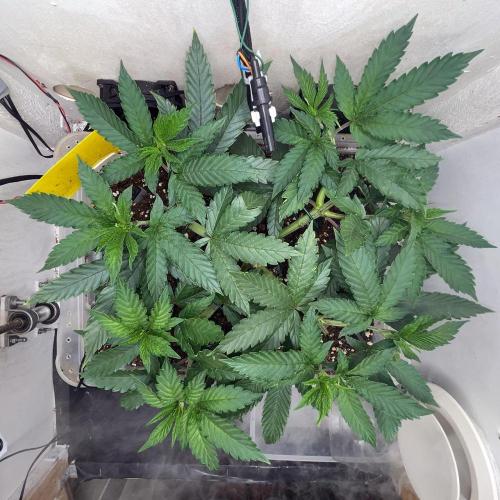
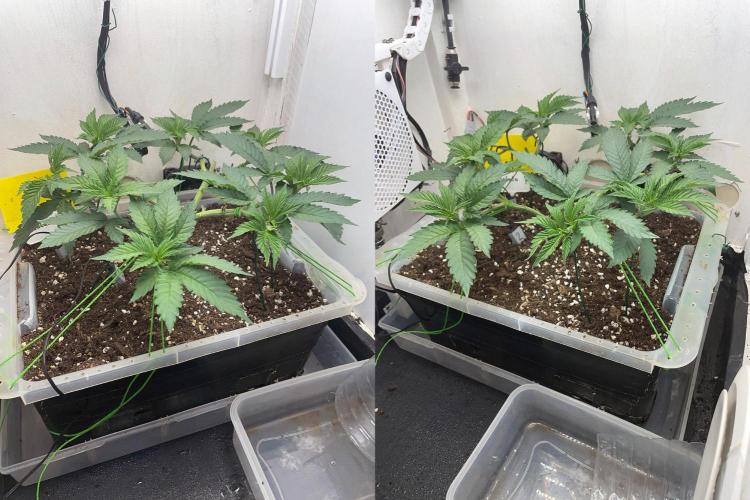
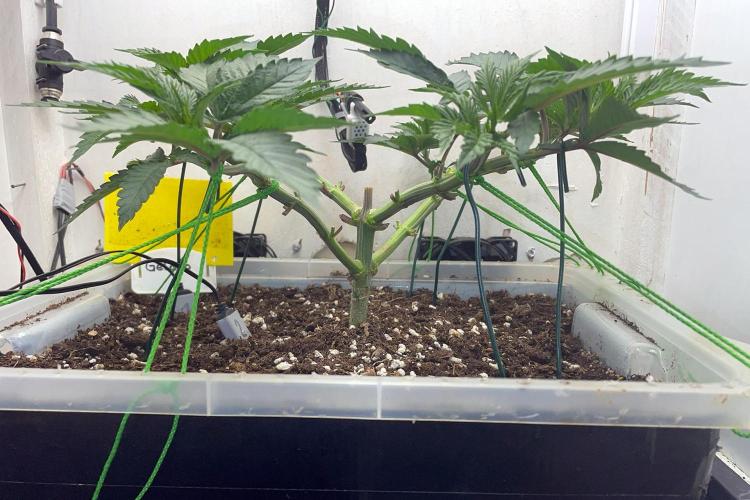
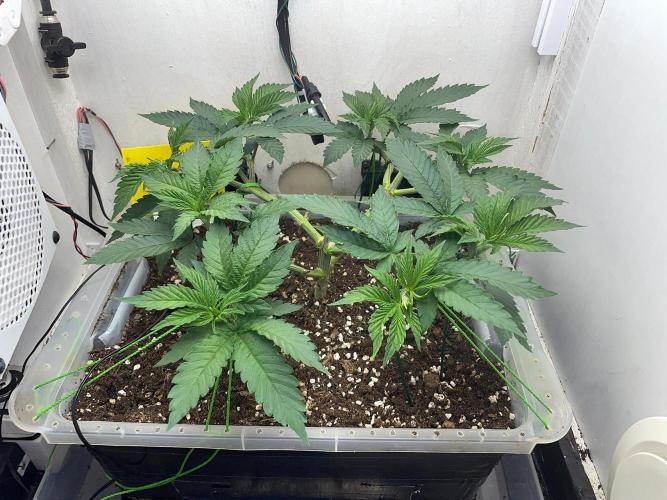
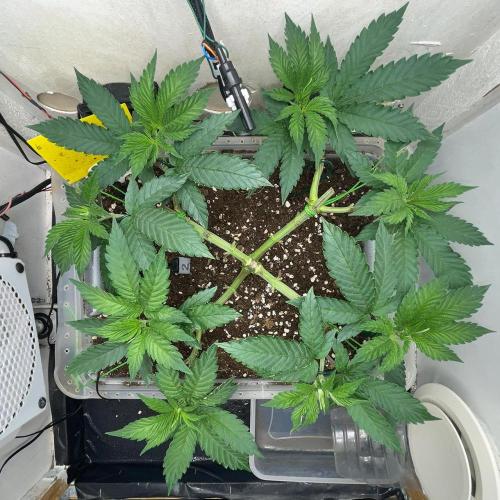
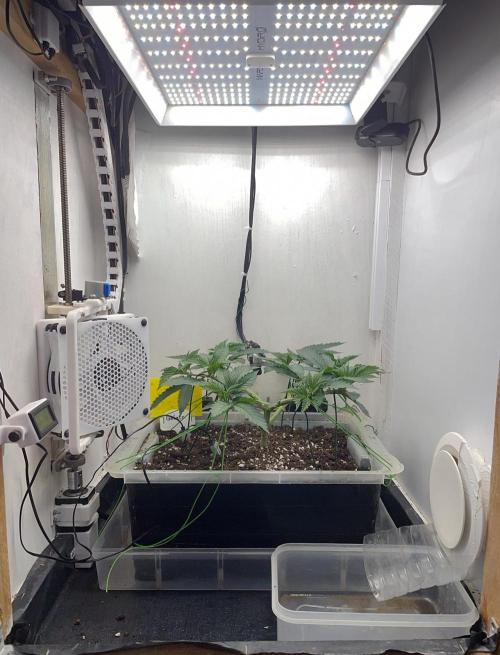
Lontra Die Woche verlief gut. Mittlerweile scheint es der Pflanze wirklich gut zu gehen, daher wurde auch wie zuvor geplant an Tag 36 das zweite mal getoppt.
Zusätzlich zum Toppen an Tag 36 gab es an den Tagen 40 und 42 noch 2 Entlaubungsrunden. Da ich festgestellt habe, das ich aufgrund der aktuell bereits erreichten Größe der Pflanze nicht mehr viel Zeit habe bis ich die Blüte einleiten muss, wollte ich in dieser Woche noch möglichst nah an meine gewünschte Mainlining-Struktur herankommen. Ich denke das ist mir auch ganz gut gelungen, auch wenn das teilweise asymmetrische Wachstum das etwas erschwert hat. Nach der zweiten Entlaubung an Tag 42 wurde hierzu auch das LST noch mal runderneuert.
Gewässert wurde diese Woche nur 1 Mal an Tag 39, insgesamt ~3 Liter nach dem bereits zuletzt genutzten Schema (2.5ml/l Fish-Mix, 1ml/l Alg-A-Mic, 2ml/l Bio-Heaven, ca. 0.24g/l Bittersalz, pH-Wert ~6.4). Der Drain liegt mittlerweile sehr stabil bei ~6.4
Der Abstand zur Lampe wurde zwischendurch etwas vergrößert (jetzt ca. 40cm) und die Leistung so eingestellt, dass an den Triebspitzen ein DLI von ~30-33 erreicht wird.
Zu Beginn der nächsten Woche erfolgt eine erneute Bewässerung, wobei ich damit beginnen werde so langsam das Düngeschema in Richtung Blüte anzupassen. Ansonsten gönne ich ihr jetzt erst mal 2-3 Tage Erholung, mit nur leichtem nachjustieren des LST. Vermutlich lasse ich die 8 Triebe dann noch ein paar cm einfach vertikal wachsen und werde dann im Lauf der nächsten Woche das Licht auf 12/12 umstellen.
3 likes
comments
Share
Used techniques
LST
Technique
Topping
Technique
Defoliation
Technique
7
Week 7. Vegetation20d ago






22 cm
Height
12 hrs
Light Schedule
27 °C
Day Air Temp
6.4
pH
Weak
Smell
850 PPM
TDS
65 %
Air Humidity
23 °C
Solution Temp
22 °C
Night Air Temp
11 liters
Pot Size
40 cm
Lamp Distance
Nutrients 7
Bittersalz
0.24 mll
Fish-Mix
1 mll

Bio-Heaven
2 mll
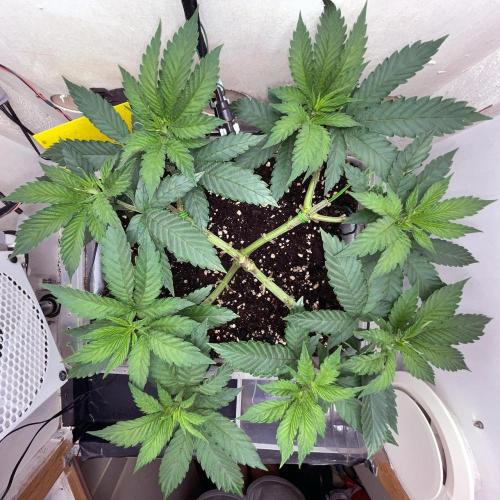
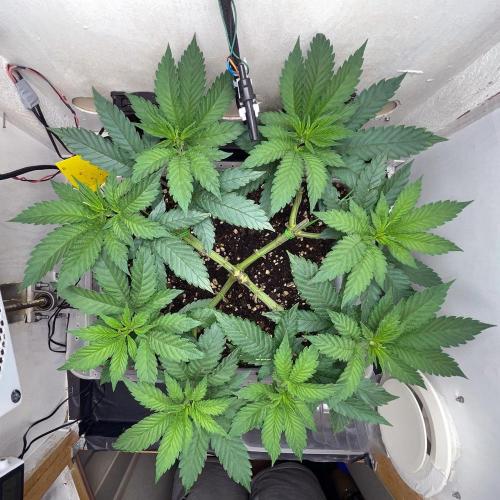
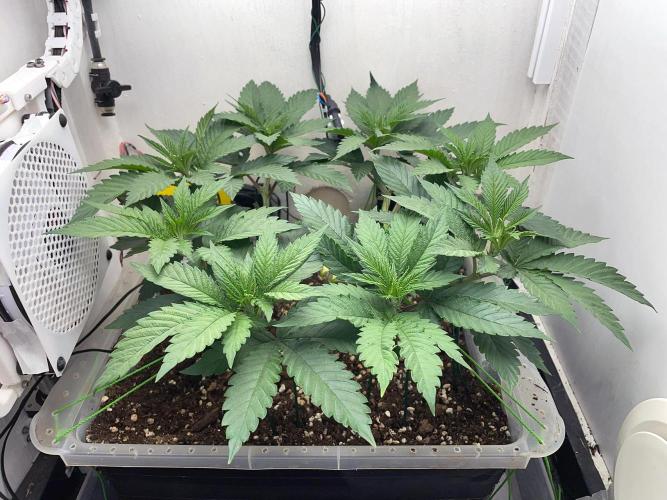
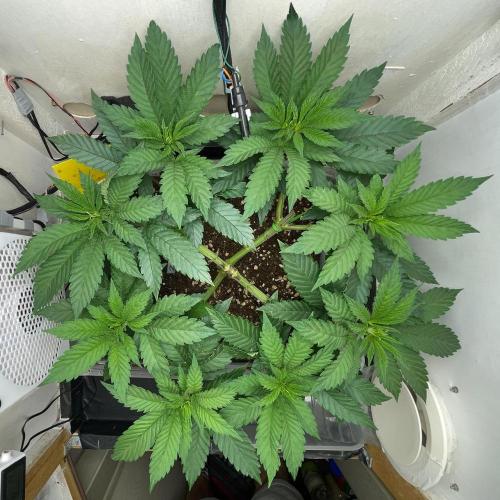
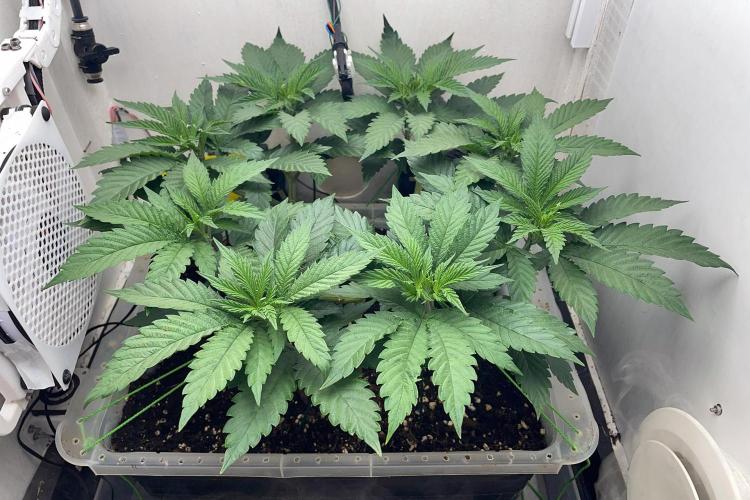
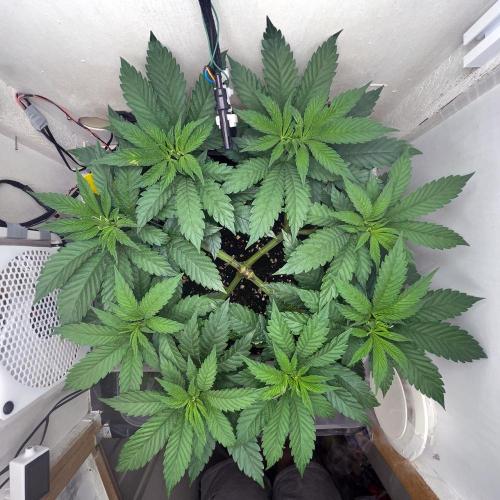
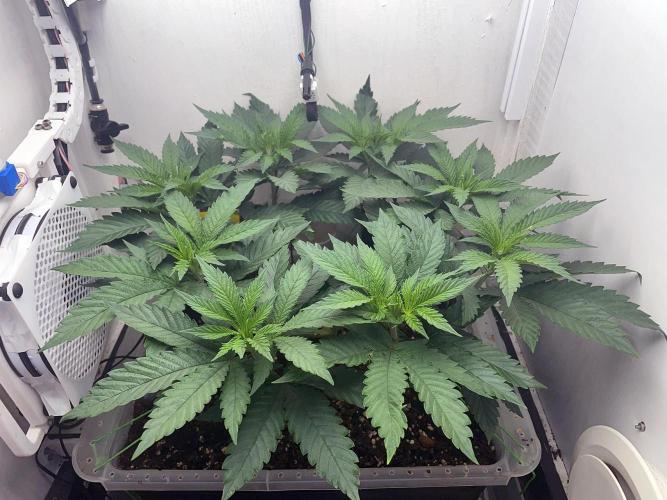
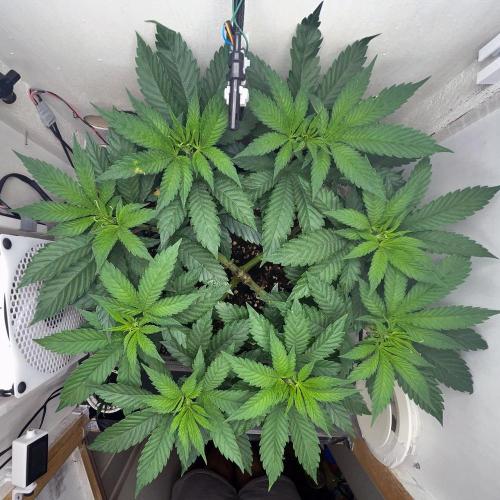
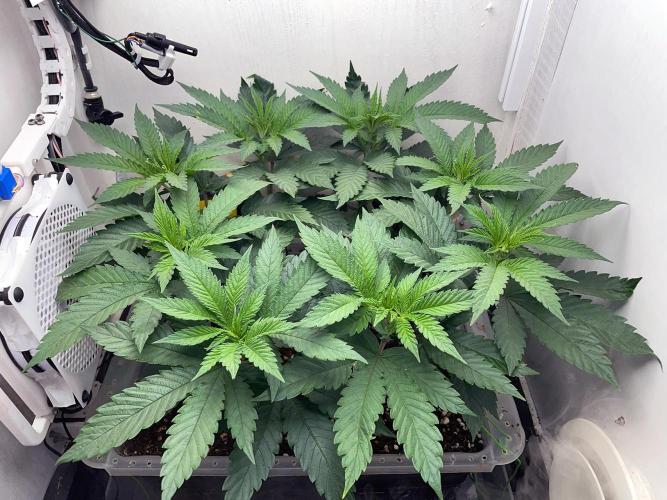
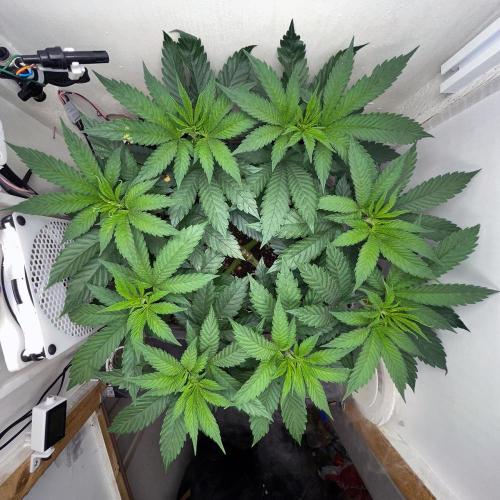
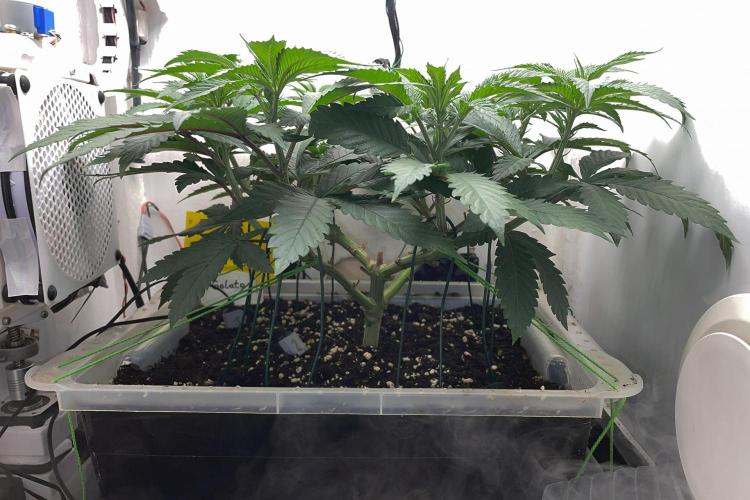
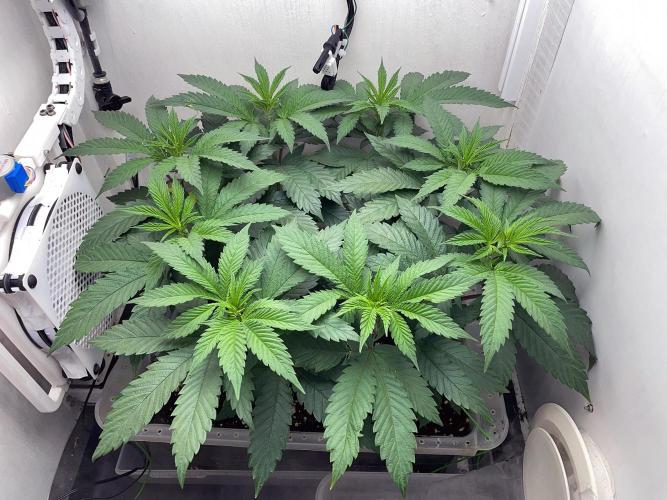
Lontra This week was pretty relaxed again. The plant currently shows no signs of deficiencies or stress. In the first days of the week, it was able to recover from the previous defoliations and the new LST. On day 46, the shoot tips were uniformly at a height of 19-20cm, and the lighting was switched to 12/12. Day 47 was the first full day with the new light cycle, and for simplicity, I’m counting it as BT1, even though I’m still recording this week as a growth week. This is my first grow with this genetics, but I’m hoping for a stretch of about 150%. By the end of the week, the eight main shoots were relatively even at about 22 cm after only slight LST corrections. The stretch seems to be slowly kicking in, but the structure is still very homogeneous so far.
Since it started to get quite thirsty with the change in the light cycle, I watered three times this week. I began to gradually shift the nutrient schedule towards the flowering phase. For this, the Fish-Mix is being replaced by Bio Grow, and additionally, CalMag, Bio-Bloom, and Top-Max are being added.
1. Watering: Day 43, total ~3.2 liters (1.5ml/l Fish-Mix, 1ml/l Bio-Grow, 1ml/l Bio-Bloom, 1ml/l Top-Max, 2ml/l Bio-Heaven, 0.4ml/l CalMag, about 0.29g/l Epsom salt, pH ~6.3, EC ~1.7mS/cm, pot weight before about 5.1kg, after about 7.4kg)
2. Watering: Day 46, total ~3.3 liters (1ml/l Fish-Mix, 1.5ml/l Bio-Grow, 1ml/l Bio-Bloom, 1ml/l Top-Max, 2ml/l Bio-Heaven, 0.81ml/l CalMag, about 0.24g/l Epsom salt, pH ~6.5, EC ~1.7mS/cm, pot weight before about 5kg, after about 7.4kg)
3. Watering: Day 49, total ~4 liters (1ml/l Fish-Mix, 1.5ml/l Bio-Grow, 1ml/l Bio-Bloom, 1ml/l Top-Max, 2ml/l Bio-Heaven, 0.81ml/l CalMag, about 0.24g/l Epsom salt, pH ~6.3, EC ~1.75mS/cm, pot weight before about 4.7kg, after about 7.2kg)
The distance to the lamp was kept at about 40cm this week, and the light intensity at about 600PPFD.
I’m increasingly dissatisfied with the quality of the webcam recordings and may replace it with a slightly newer model in the next few days.
5 likes
2 comments
Share
Used techniques
LST
Technique
8
Week 8. Flowering13d ago
36 cm
Height
12 hrs
Light Schedule
28 °C
Day Air Temp
6.4
pH
Weak
Smell
850 PPM
TDS
60 %
Air Humidity
22 °C
Solution Temp
22 °C
Night Air Temp
11 liters
Pot Size
30 cm
Lamp Distance
Nutrients 7
Bittersalz
0.24 mll
Fish-Mix
0.5 mll
Bio-Heaven
2 mll
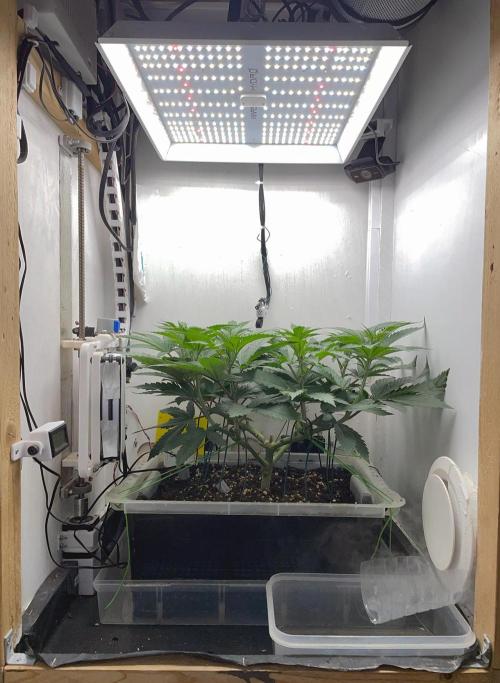
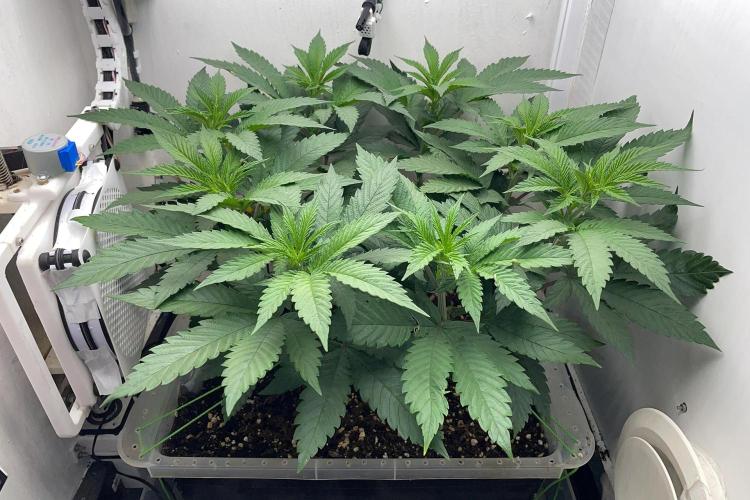
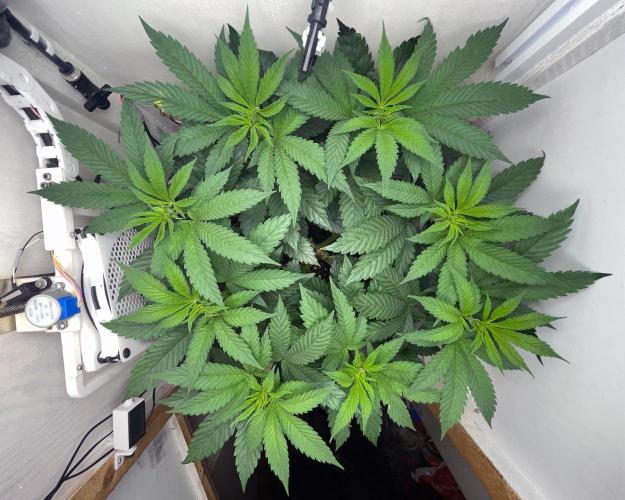
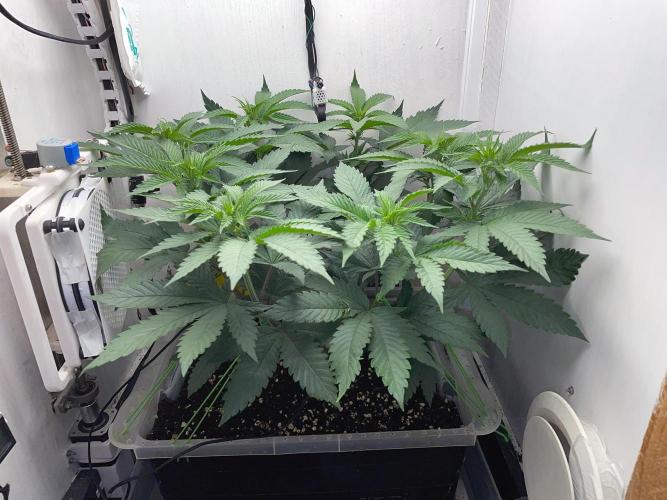
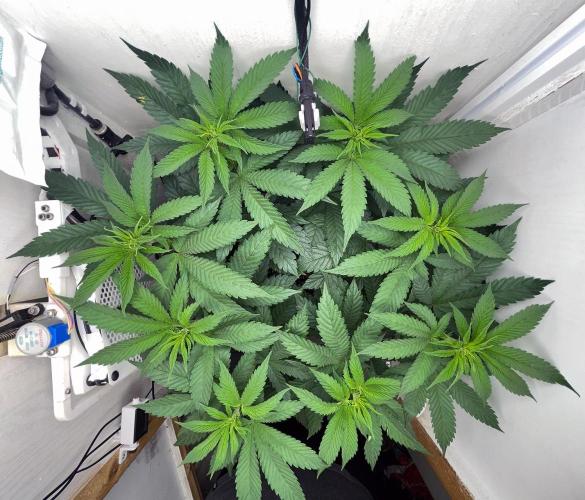
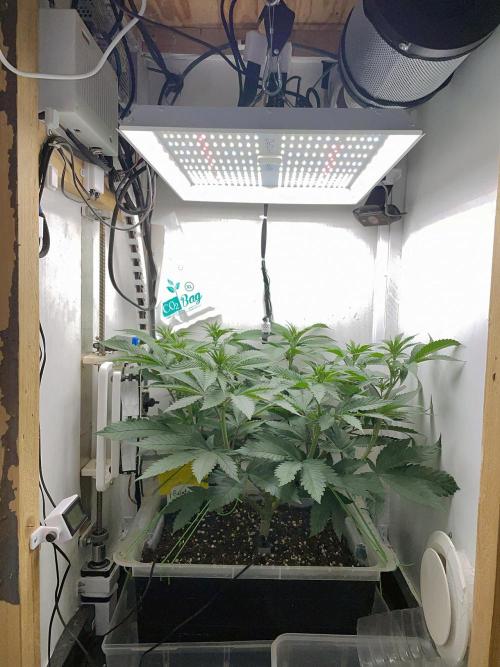
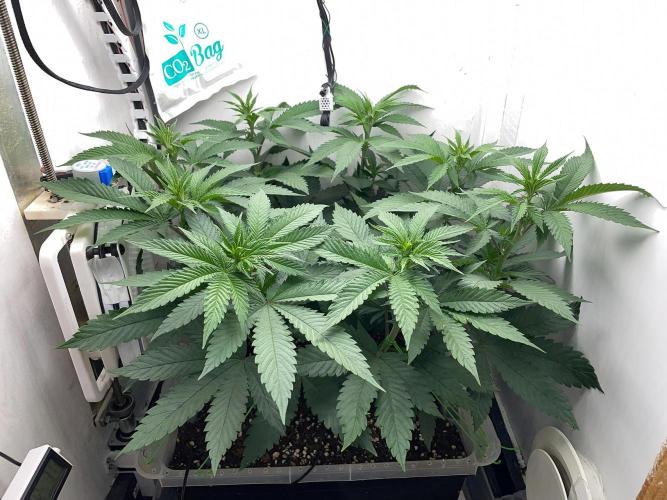
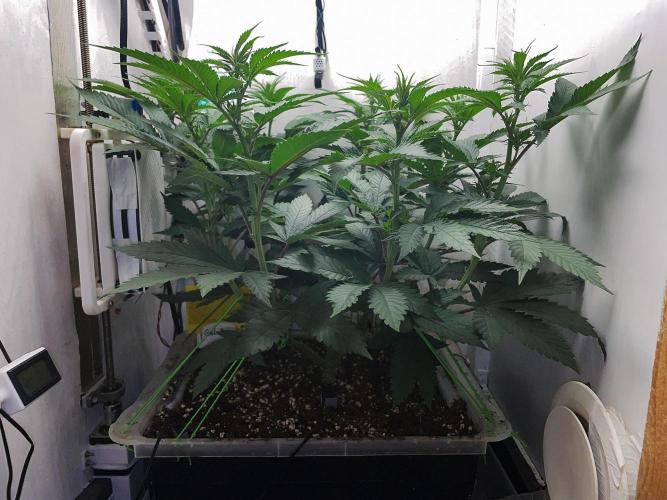
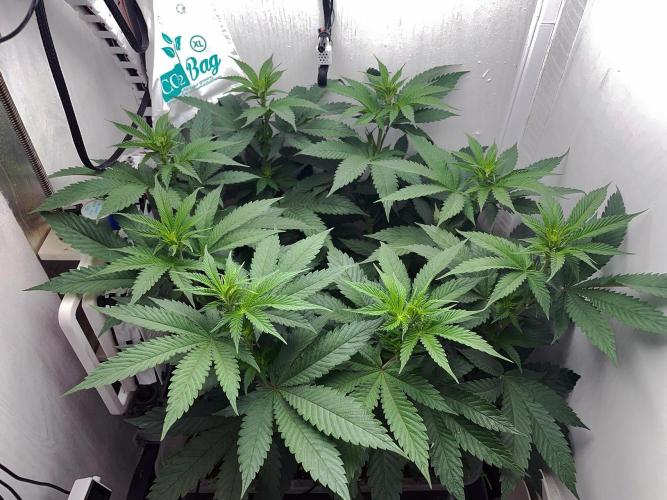
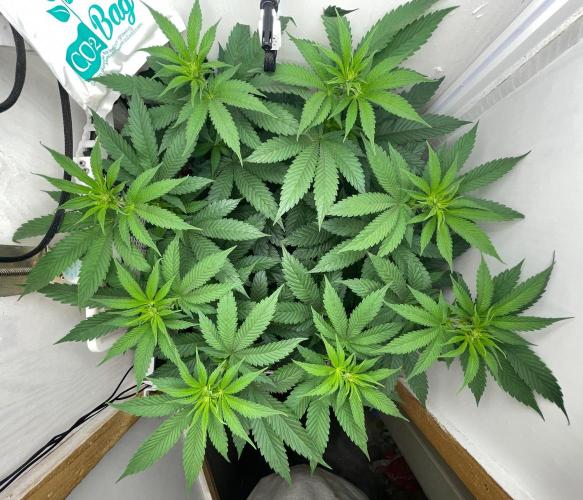
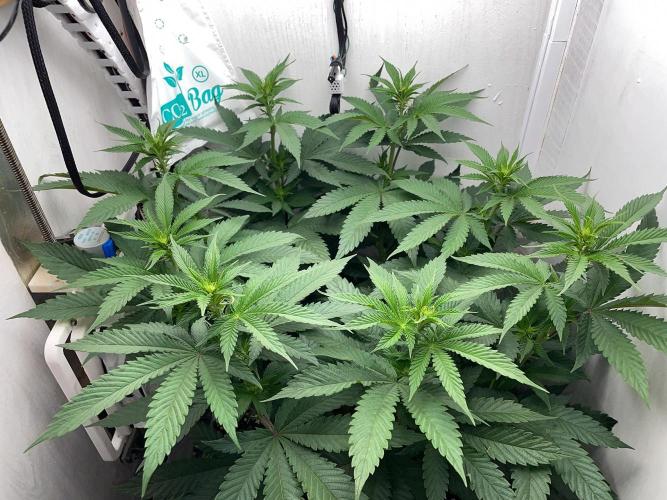
Lontra This week, the stretch has definitely kicked in noticeably. Overall, the plant currently looks very healthy and robust. The 8 main stems are continuing to develop relatively evenly, even though two of them are lagging a bit behind at the moment. More and more pistils are slowly showing up, and the flower sites are starting to form.
The LST was revised again on day 51. I've completely removed the old ground anchors and am now only using strings to guide the 8 main stems a bit outward and keep them at a uniform height. I had a few small moisture traps in the now quite dense center, but luckily they mostly resolved themselves with the stretch. Only a total of 3 fan leaves were removed in between, as they were growing directly in front of the fan and blocking the airflow. Otherwise, I'm trying to leave the plant as undisturbed as possible until the lollipopping after the stretch.
The water requirement has increased a bit. Watering was done twice this week:
1. Watering session: Day 52, total ~4 liters (1.5ml/l Fish-Mix, 1ml/l Bio-Grow, 1ml/l Bio-Bloom, 1ml/l Top-Max, 2ml/l Bio-Heaven, 0.81ml/l CalMag, about 0.24g/l Epsom salt, pH ~6.4, EC ~1.7mS/cm, pot weight before about 4.4kg, after about 6.9kg)
2. Watering session: Day 55, total ~5 liters (0.5ml/l Fish-Mix, 2ml/l Bio-Grow, 2ml/l Bio-Bloom, 1ml/l Top-Max, 2ml/l Bio-Heaven, 0.81ml/l CalMag, about 0.24g/l Epsom salt, pH ~6.2, EC ~1.7mS/cm, pot weight before about 4.1kg, after about 7.1kg)
Shortly before the second watering session, the pot was also topped up with some fresh All Mix.
The lamp has now reached its temporarily maximum height to improve light distribution a bit. Additionally, it has been set to 100% power and currently delivers about 700-750 PPFD at the tips of the stems.
I've set the controls for the humidifier as follows:
rH: min. 55% | max. 63%;
VPD: min. 1kPa | max 1.5kPa
In the first night phase after watering, the humidity rises too much in between. The exhaust and intake have therefore been set to full power, but if the problem persists, I will have to think more about how to better manage it as flowering progresses.
At the beginning of the week, as previously decided, the webcam was replaced with a newer model with better image quality. Unfortunately, I no longer have the option to position the webcam further away from the plant in the box, which means it no longer fits entirely in the frame.
4 likes
1 comment
Share
Used techniques
LST
Technique
9
Week 9. Flowering6d ago
55 cm
Height
12 hrs
Light Schedule
27 °C
Day Air Temp
6.4
pH
Weak
Smell
850 PPM
TDS
60 %
Air Humidity
22 °C
Solution Temp
21 °C
Night Air Temp
11 liters
Pot Size
19 cm
Lamp Distance
Nutrients 7
Bittersalz
0.24 mll
Bio-Heaven
3 mll
Bio-Bloom
2 mll
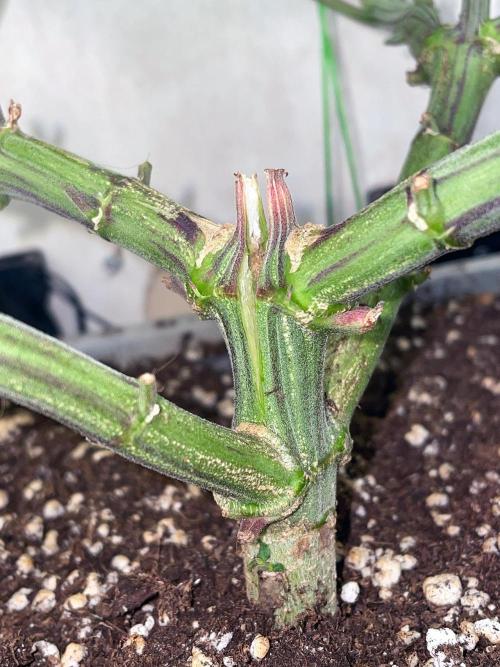
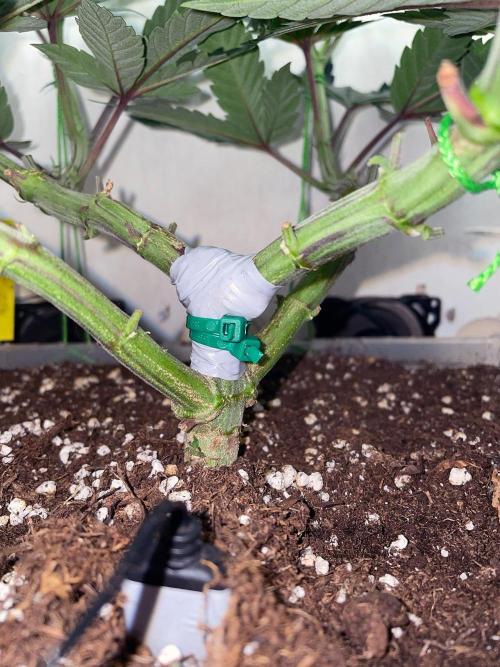
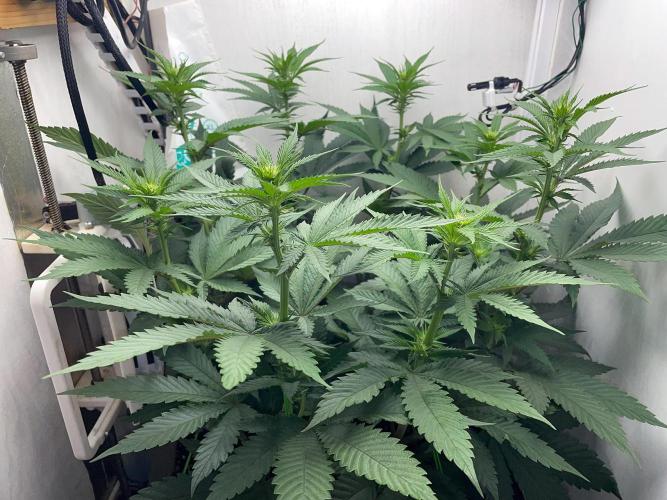
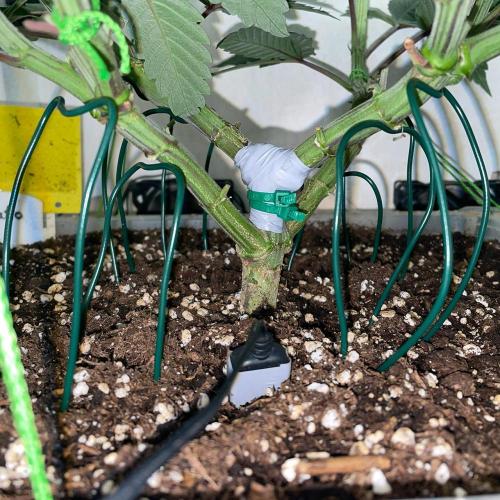
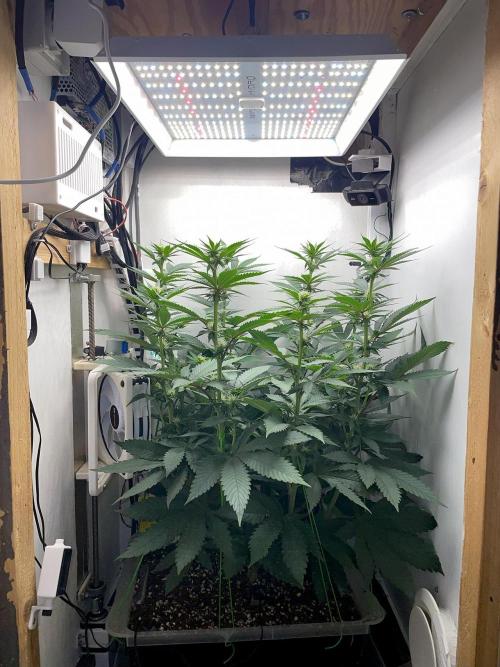
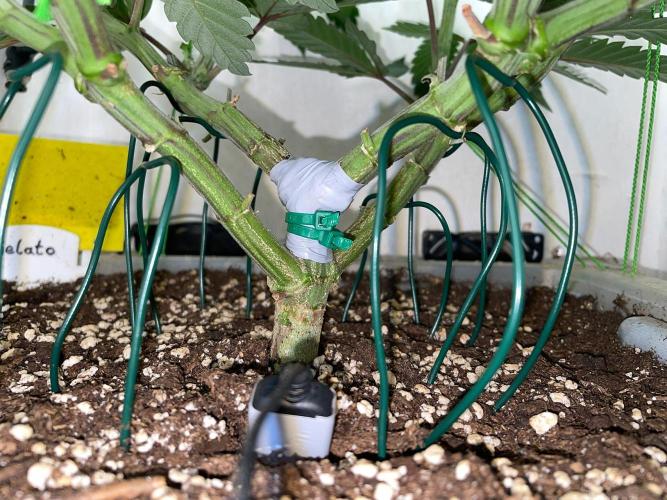
Lontra This week was probably the most stressful one yet. Right at the beginning of the week, on day 57, while trying to readjust the lower main branches with LST, I had an accident: I accidentally split the stem of the plant. I immediately wrapped the affected area with some elastic insulating tape and then secured the crack with cable ties to hold the split together. The LST was then completely removed for the time being.
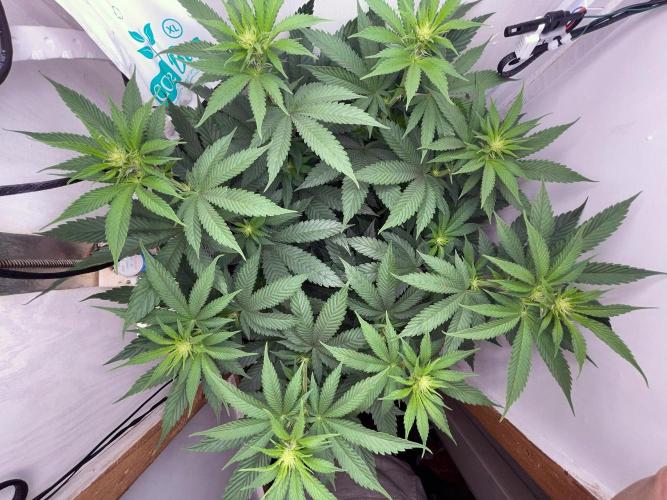
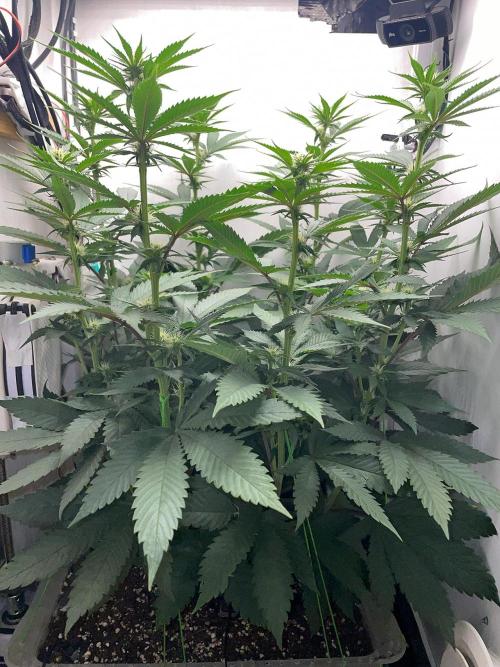
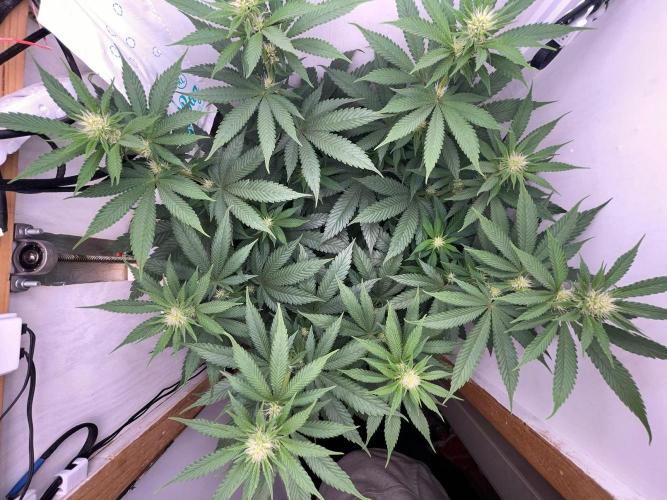
Fortunately, it quickly became apparent that the plant was handling this damage surprisingly well. On day 59, I supported the lower 4 main branches with ground anchors from below and carefully rebuilt the LST to improve the distribution of the shoots and open up the center of the plant a bit more. Other than that, I didn’t change the LST any further this week to avoid putting more stress on the torn stem. The fixation still looks stable. So far, there are no signs that individual shoots are being supplied poorly. The plant seems to be coping with the damage surprisingly well.
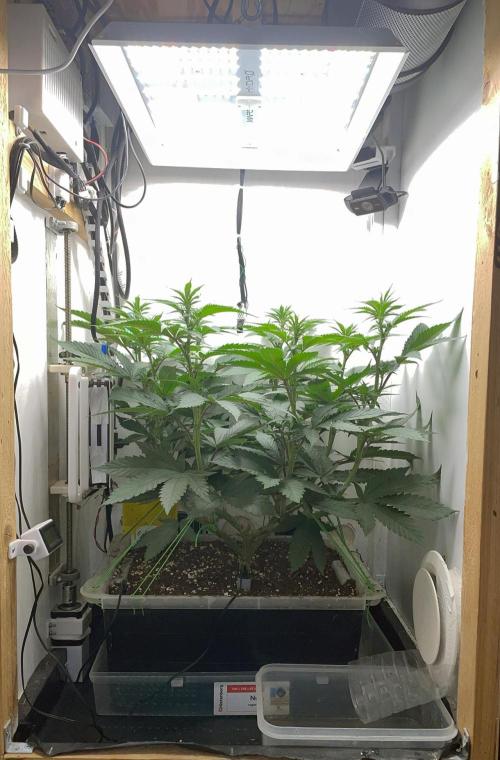
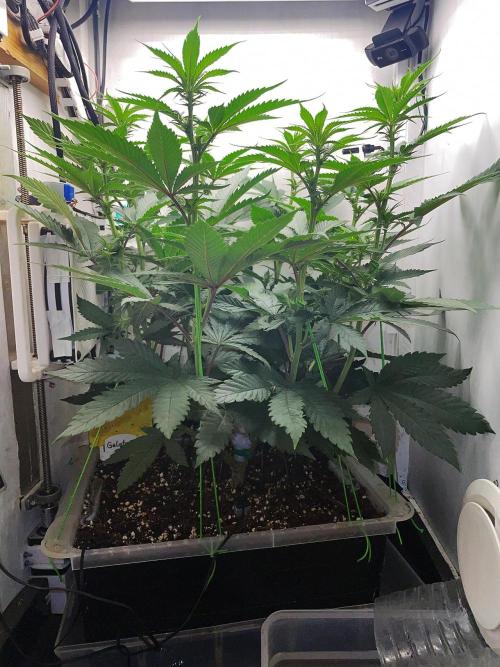
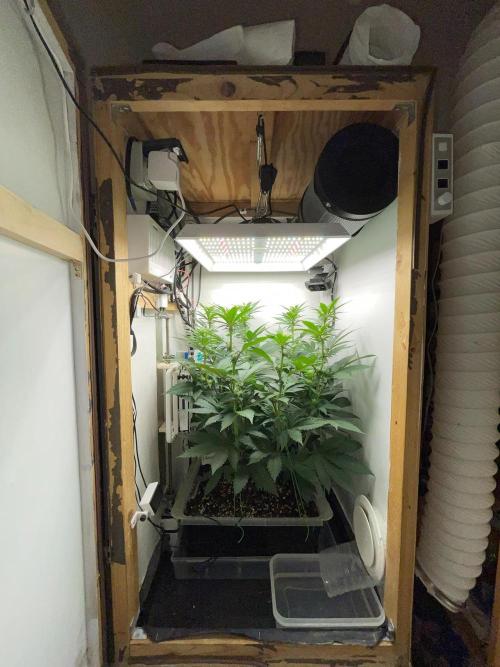
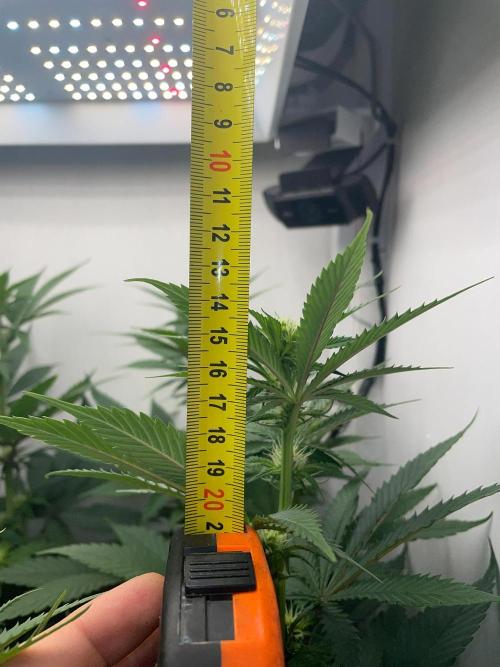
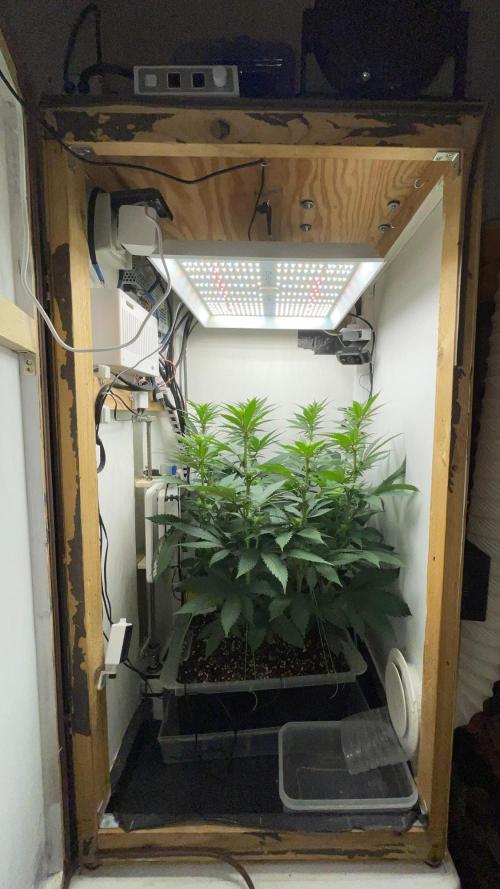
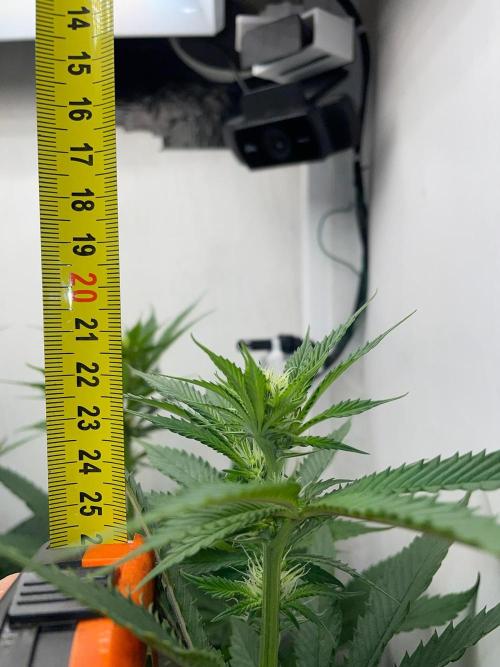
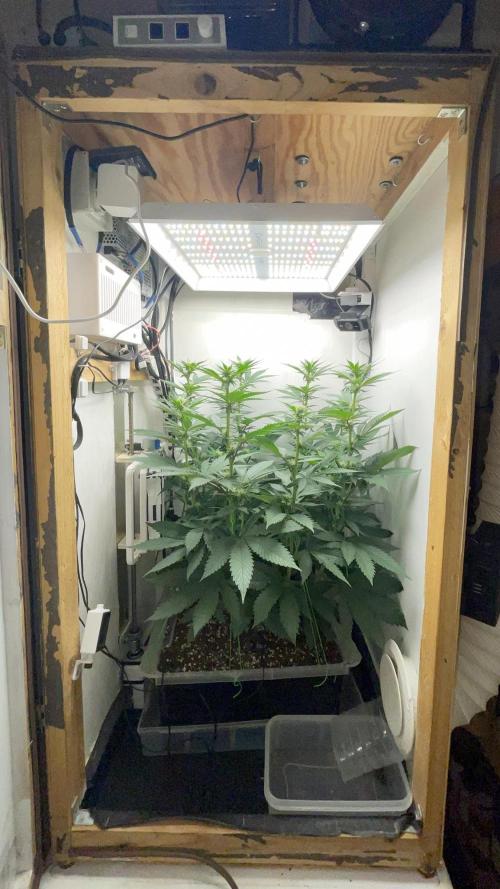
Meanwhile, the stretch continued. The plant noticeably gained height this week, and the distance to the lamp became increasingly critical. On day 62 (BT16), there were only about 14cm left between the highest shoots and the lamp, which is why I decided to make a small modification to the box and move the exhaust system out of the box and onto the roof. For this, I constructed my own mounts for the fan and the carbon filter and printed them in PETG. The mounts were decoupled slightly from the grow box with foam rubber to reduce vibrations and body noise as much as possible. This gave me a few more centimeters and allowed me to hang the lamp a bit higher, bringing the distance back to about 21.5cm.
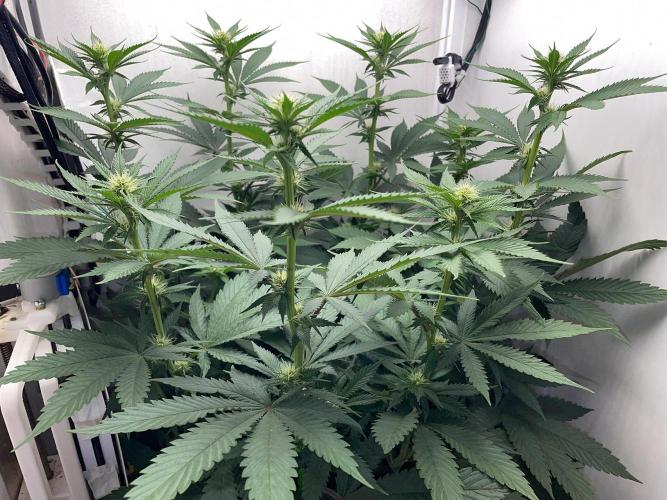
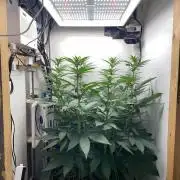
At the end of the week (BT17), the 5 higher main shoots are at about 55cm and the 3 shorter main shoots at about 47.5cm. This leaves about 19cm of distance to the lamp. I hope that the stretch will slowly end in the next few days, as there’s no more room to hang the lamp any higher. Despite the very small distance to the lamp at times, I’ve fortunately not noticed any significant signs of light or heat stress, even though the lamp continued to run at 100% power.
Otherwise, there were 2 waterings this week:
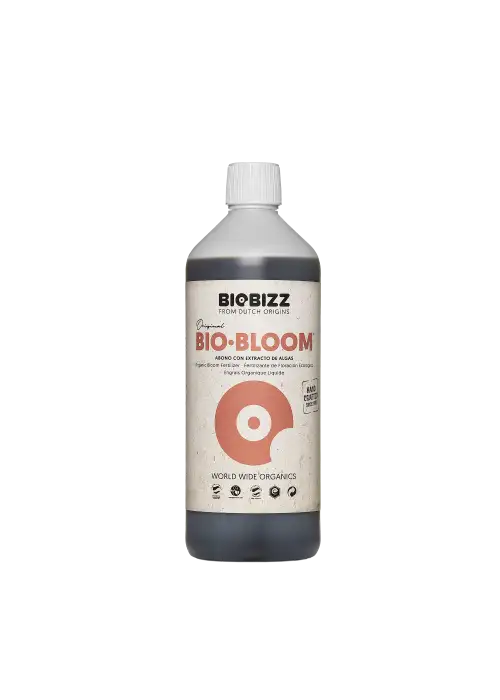
1. Watering: Day 58, a total of about 4.5 liters (0.5ml/l Fish-Mix, 2ml/l Bio-Grow, 2ml/l Bio-Bloom, 1ml/l Top-Max, 2ml/l Bio-Heaven, 1ml/l Alg-A-Mic, 0.81ml/l CalMag, about 0.24g/l Epsom salt, pH ~6.5, EC ~1.8mS/cm, pot weight before about 4.4kg, after about 7.6kg)
2. Watering: Day 61, a total of about 5 liters (2ml/l Bio-Grow, 2ml/l Bio-Bloom, 1ml/l Top-Max, 3ml/l Bio-Heaven, 1ml/l Alg-A-Mic, 0.81ml/l CalMag, about 0.24g/l Epsom salt, pH ~6.4, EC ~1.9mS/cm, pot weight before about 4.2kg, after about 7.7kg)
The flowering became significantly more visible over the week, and all the main shoots are now showing well-defined flower sites. For next week, after hopefully leveling off the stretch, lollipopping is on the agenda to bring a bit more air and light into the plant, especially the full center, and maybe give a chance to one or two side shoots. Additionally, I will probably remove the cable ties and insulating tape from the stem during the week to inspect the area better. If everything looks good, I will then secure the area again with grafting tape and new cable ties for safety.
4 likes
comments
Share
Used techniques
LST
Technique
Enjoying this diary? Follow for more updates!
Prefer the old Diary view?
Go back to the old Diary view