


First GG fastbuds



VEG
Fission 300W Light Emitting Diodes/600W
Custom
FLO
Fission 300W Light Emitting Diodes/600W
Custom

Soil
Custom


Indoor
Room Type
LST
weeks 5
11 liters
Pot Size
Start at Harvest
1
Week 1. Vegetation7y ago


1 cm
Height
24 hrs
Light Schedule
27 °C
Day Air Temp
75 %
Air Humidity
25 °C
Solution Temp
11 liters
Pot Size
0.1 liters
Watering Volume
100 cm
Lamp Distance
Master_weeda Hello to all padawans and masters jedis
It's part for fastbuds GG
Good germination of the seed in 48 hours and to get there here is how I made to germinate my seeds safely, soak your seeds a few hours beforehand, and in a tupper, place a base of absorbent kitchen paper wet, without them soaking, spread the seeds over them and cover them with another layer of paper in the same way. Close the tupper and place it on a heat source that is not very high, such as an electronic device, which does not receive much light or not at all. After a day or two, when you see that the root begins to emerge, you can pass them very carefully into a small pot.
Or as for me, for example, who cultivates only autoflowering seeds, put the germinated seed in its final pot (11 liters for me)
The seedling is quickly out of the pot and growth rather good overall
A very light daily watering to ensure that the substrate is just moist around the seedling throughout its first week
May the force be with you 💪
18 likes
comments
Share
2
Week 2. Vegetation7y ago

2 cm
Height
24 hrs
Light Schedule
26 °C
Day Air Temp
6.3
pH
75 %
Air Humidity
25 °C
Solution Temp
23 °C
Night Air Temp
11 liters
Pot Size
0.2 liters
Watering Volume
90 cm
Lamp Distance
Master_weeda Hello to all the padawans and Jedi masters
The growth is good, light watering with clear water. I will start fertilizing at the next watering, every other time with biogrow at a rate of 1 ml per liter. Fertilizing can start when the second pair of leaves appears.
I try to maintain humidity at around 70% until flowering.
Humidity is an important factor; it allows for better plant growth.😉
1. Seedling Phase
Seeds and clones like high humidity of 65-70%.
Reason: the root system is not developed.
High humidity allows water absorption through the leaves.
Temperatures with lights on: 20-25°C (lights off: 4-5°C lower).👍
2. Vegetative Period
Humidity levels can be lowered by 5% per week (acceptable range: 40-70%).
Temperatures can be increased a bit (not mandatory).
Reason: roots absorb more water, evaporation through the leaves cools the plants.
Temperatures with lights on: 22-28°C (lights off: 4-5°C lower).👍
3. Flowering Period
Humidity levels should be lowered to 40-50% (extremely important).
You can get away with 55% (above 60%, it's very bad).
It's better to slightly lower temperatures during flowering.
Temperatures with lights on: 20-26°C (avoid high temperatures).👍
4. End of Flowering (1-2 weeks before harvest)
The following steps are not necessary but can improve yield, flavors, and appearance.
Lower humidity as much as possible: 30-40%.
Lower daytime temperatures and increase the temperature difference (day/night).
Temperatures with lights on: 18-24°C (lights off: 5-10°C lower).👍
May the force be with you.💪
19 likes
comments
Share
3
Week 3. Vegetation7y ago


5 cm
Height
20 hrs
Light Schedule
26 °C
Day Air Temp
6.3
pH
No Smell
Smell
70 %
Air Humidity
25 °C
Solution Temp
23 °C
Night Air Temp
11 liters
Pot Size
0.3 liters
Watering Volume
60 cm
Lamp Distance
Nutrients 1

Bio-Grow
1 mll
Master_weeda Hello to all padawans and masters jedis
Nothing abnormal, fastbuds does its job very well... as usual!
I let mother nature do her thing; I just help with biogrizz biogrow up to 1ml, not liter. I specify that the fertilizer must be scrupulously dosed; it's better to put less than too much!
Whether in indoor or outdoor cultivation of cannabis, over-fertilization or excess fertilizer in cannabis will have a detrimental influence on the quality of the harvest, in terms of aroma, taste, effect, and productivity. This results in yellowish burns on the leaves and more particularly on the extremities.
What to do when this happens?
First, you must not panic and be patient because it will not be solved within the hour... Let the soil or your substrate dry a little so as not to add over-watering to over-fertilization (yes, I know it's hard to see these plants suffer and we want to treat them immediately).
Once the substrate is dry, you can water your potting soil just with pH water to suit your substrate. Basically, you are rinsing so that the earth removes the salts. You can also use Flora Keen GHE flushing solutions. Within 10 days, the stains on the leaves should stop showing up.
In absolute terms, if you are paranoid, get an EC tester before starting your crop and especially respect the dosages recommended by fertilizer brands. It's still a rather complicated subject because it can be an excess of nitrogen (which is most often the case) but also magnesium, iron, zinc...
May the strength be with you 💪
19 likes
2 comments
Share
4
Week 4. Vegetation7y ago


13 cm
Height
20 hrs
Light Schedule
26 °C
Day Air Temp
6.3
pH
No Smell
Smell
70 %
Air Humidity
25 °C
Solution Temp
23 °C
Night Air Temp
11 liters
Pot Size
0.4 liters
Watering Volume
60 cm
Lamp Distance
Nutrients 2
Bio-Grow
2 mll
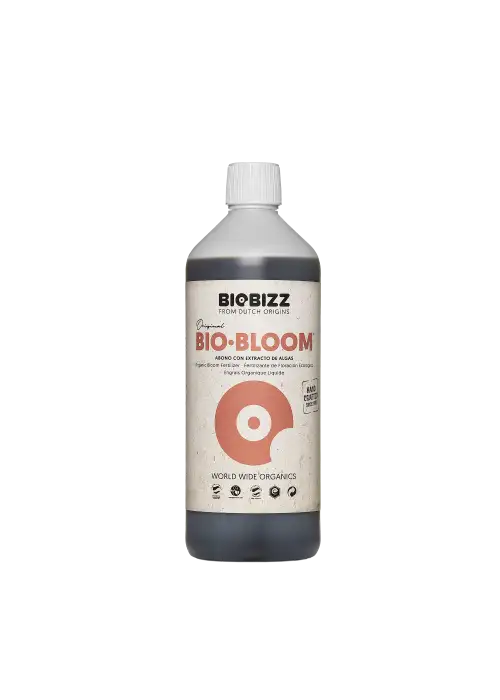
Bio-Bloom
1 mll
Master_weeda Hello to all padawans and master jedis, the plant continues its growth phase, it is in good health without apparent deficiency. I will increase the feeding with 2ml of biogrow, 1ml of top max, and 1ml of biobloom from biobizz. I maintain 70% humidity in the box. I spray as a preventive measure a solution consisting of a teaspoon of briochin soft black soap in a liter of lukewarm water so that the soap can dilute. I then add 3 or 4 drops of neem oil and mix vigorously.
There is no negative effect on plants if used properly. Neem oil is very effective against most pests attacking cannabis. It works particularly well against soft-bodied insects such as red spiders, aphids, and whiteflies.
Once the mixture is at room temperature, I mix vigorously again and spray all of my leaves above and below. I repeat the operation once a week just before the lamps go off until flowering. You should know that neem oil is not authorized for sale in France for phytosanitary use. In fact, azadirachtin was included in Annex I of Directive 91/414/EEC refused by the European Commission in 2008. This molecule cannot therefore be incorporated as an active ingredient in an insecticide or acaricide marketed to be used on vegetable crops (agriculture, market gardening, horticulture, maintenance of green spaces, gardening...).
If however you wish to use it, nothing prevents you from buying neem oil sold for cosmetic or domestic use, or as fertilizer. Note that in the United States, its use is authorized as a phytosanitary treatment in organic farming.
What about the effect of neem oil on bees? Another question raised by the use of neem oil: is it dangerous for bees? The answer is unfortunately yes, but it is however much better than other chemical insecticides. It appears to have no effect on adult bees (e.g., foraging for treated plants), but causes malformations in larvae (atrophied wings) that may lead to the death of the insect. May the force be with you 💪
21 likes
1 comment
Share
5
Week 5. Vegetation7y ago


14 cm
Height
20 hrs
Light Schedule
27 °C
Day Air Temp
6.2
pH
No Smell
Smell
55 %
Air Humidity
25 °C
Solution Temp
23 °C
Night Air Temp
11 liters
Pot Size
0.6 liters
Watering Volume
30 cm
Lamp Distance
Nutrients 3
Bio-Grow
2 mll
Bio-Bloom
2 mll

Top-Max
1 mll
Master_weeda Hello to all padawans and masters jedis everything goes for the best I wonder if I will not let it grow as is to see what it gives. Day 30 she is too beautiful not to be trellised Trellising (LST) is For me the most simple technique for beginners and especially the most appropriate for autoflowering that I recall to a predefined life cycle, so do not stress. Little reminder. Trellising is the action of driving a plant on a flat support by attaching its stems and branches with links (wicker, string, raffia, plastic, etc.). This technique makes it possible to lay a plant in its environment so that the branches below that have the least amount of light can have enough to develop properly. This technique can be applied as the trunk begins to become a trunk and a twig, ie around the 3rd / 4th floor of leaves. The plant will continue to grow at the nodes of low leaves ... inside, the main advantage is to cover a maximum of surface in the cupboard without having to cut (which slows the growth) Trellising is a very good alternative to use when you can have female plants in a closet to optimize the production of flowers. May the strength be with you 💪
21 likes
2 comments
Share
Used techniques
LST
Technique
6
Week 6. Flowering7y ago



31 cm
Height
20 hrs
Light Schedule
27 °C
Day Air Temp
6.3
pH
No Smell
Smell
55 %
Air Humidity
25 °C
Solution Temp
23 °C
Night Air Temp
11 liters
Pot Size
0.6 liters
Watering Volume
45 cm
Lamp Distance
Nutrients 3
Bio-Grow
2 mll
Bio-Bloom
2 mll
Top-Max
1 mll
Master_weeda Hello to all the padawans and Jedi masters
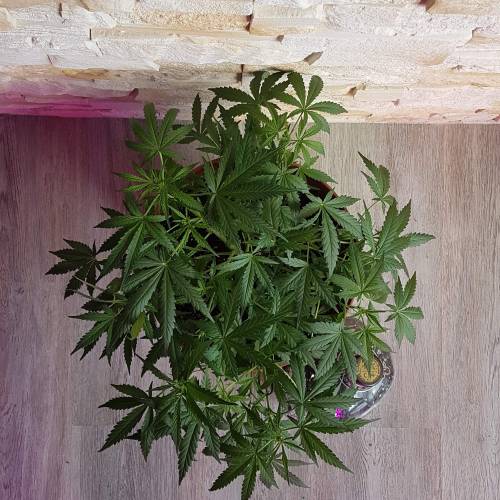
The vegetative phase was longer than expected
The plant is entering the flowering phase smoothly, and I'm satisfied with its growth, which currently shows no apparent deficiencies. I'm gradually increasing the dose of nutrients, still using Biobizz, and I water with clear water once every four times to avoid saturating the substrate with nutrients and consequently burning the plant's roots.
It's ready for the stretch and flowering.
The flowering time of cannabis depends on the strain you are growing. An Indica will flower faster than a Sativa. The Indica flowers in 60 days. Sativa cannabis often needs 80 days. When you start flowering, the plant will enter the Stretch phase. Cannabis prepares for flowering, will stretch its nodes, and double or even triple its size. This stretch period is crucial as it will determine the final size and structure of your plant.
May the force be with you 💪
15 likes
1 comment
Share
7
Week 7. Flowering7y ago


34 cm
Height
20 hrs
Light Schedule
27 °C
Day Air Temp
6.3
pH
Weak
Smell
60 %
Air Humidity
25 °C
Solution Temp
23 °C
Night Air Temp
11 liters
Pot Size
0.6 liters
Watering Volume
45 cm
Lamp Distance
Nutrients 3
Bio-Grow
3 mll
Bio-Bloom
3 mll
Top-Max
2 mll
Master_weeda Hello to all the padawans and Jedi masters
For now, it's going relatively well. I will be feeding the plant less because I don't want to stress it, and for that, I will do a watering on 2 with clear water. I think that autoflowering strains tolerate less feeding than feminized ones. I find it a bit behind if I compare it to the Gorilla Glue that I planted a week earlier. It's still a plant that I highly recommend because it is clearly very solid and easy to grow. Thank you @fastbuds for this fabulous genetics!
19 likes
2 comments
Share
8
Week 8. Flowering7y ago


34 cm
Height
20 hrs
Light Schedule
27 °C
Day Air Temp
Weak
Smell
55 %
Air Humidity
25 °C
Solution Temp
23 °C
Night Air Temp
11 liters
Pot Size
0.6 liters
Watering Volume
30 cm
Lamp Distance
Nutrients 3
Bio-Grow
4 mll
Bio-Bloom
3 mll
Top-Max
3 mll
Master_weeda Hello to all padawans and Jedi masters!
The stretch is going well, the leaves are beautiful with a nice green color.
The plant reacted well to the LST during its growth phase because it wasn't stressed.
I'm gradually increasing the dose of fertilizer, always with Biobizz, and I water with clear water once every 4 times.
The plant shows no particular deficiencies and has no pests (preventive spraying).
The temperature fluctuates between 22 degrees at night and 29 degrees during the day.
I practice a slight defoliation on the bottom of the plant.
Defoliation is a generic term that describes the removal of leaves from plants. The technique can be applied in different ways to achieve many different effects. Many plant species respond well to defoliation, such as cotton, chia, and clover.
Defoliation involves strategically removing leaves from growing cannabis plants to locate resin production and improve yields at harvest time. Topping, mainlining, lollipopping, and schwazzing are well-known applications of defoliation. Even cleaning by removing yellowing or damaged leaves is a form of defoliation.
It's a magical art to manage the ratio of defoliation to the need for transpiration. Doing too much can over-fertilize your plants, exposing them to nutrient stress. When too many leaves are removed and the effectiveness of transpiration is interrupted, nutrients can accumulate in the root zone, causing a burn or blockage of nutrient absorption. The nutrient dosage should be adjusted to match the less demanding plants until they have recovered. Experience will eventually give you the right measure of the volume of greenery in the growing space.
May the force be with you! 💪
28 likes
8 comments
Share
9
Week 9. Flowering7y ago


37 cm
Height
22 hrs
Light Schedule
25 °C
Day Air Temp
6.6
pH
Strong
Smell
55 %
Air Humidity
25 °C
Solution Temp
21 °C
Night Air Temp
11 liters
Pot Size
1 liters
Watering Volume
30 cm
Lamp Distance
Nutrients 2
Bio-Bloom
4 mll
Top-Max
4 mll
Master_weeda Hello to all padawans and masters jedis
Fastbuds did its job well
If you do not stress the gorilla glue it pushes vigorously
My plant is small but it is a personal choice because I grow 8 plants simultaneously in a box of 80 × 80 which is very difficult during the stretching of plants
I do not necessarily aim for the quantity but an irreproachable quality without red spider or other harmful
I decided to stop the fertilization at 58 days during 2 or 3 watering to avoid any risk of nutrient saturation in my substrate
She smells very good and the colas are monstrously beautiful
Since this week it passes calmly without any particular work on the small plant rapel material that I have for this crop.
I say that the goal is not to have the top horticultural equipment but the best value for money to grow a culture at a lower cost while remaining serious and have a product of first quality with a good return.
And for this I use:
A box 80x80x160
2 300w led lights
An oscillating fan with clamp 20w
8 pots 11 liters
A humidifier capacity 5 liters
An air extractor without carbon filter (It is better to have one) passive air interaction
Wire and cutting pliers (for LST)
A sprayer
A pocket microscope
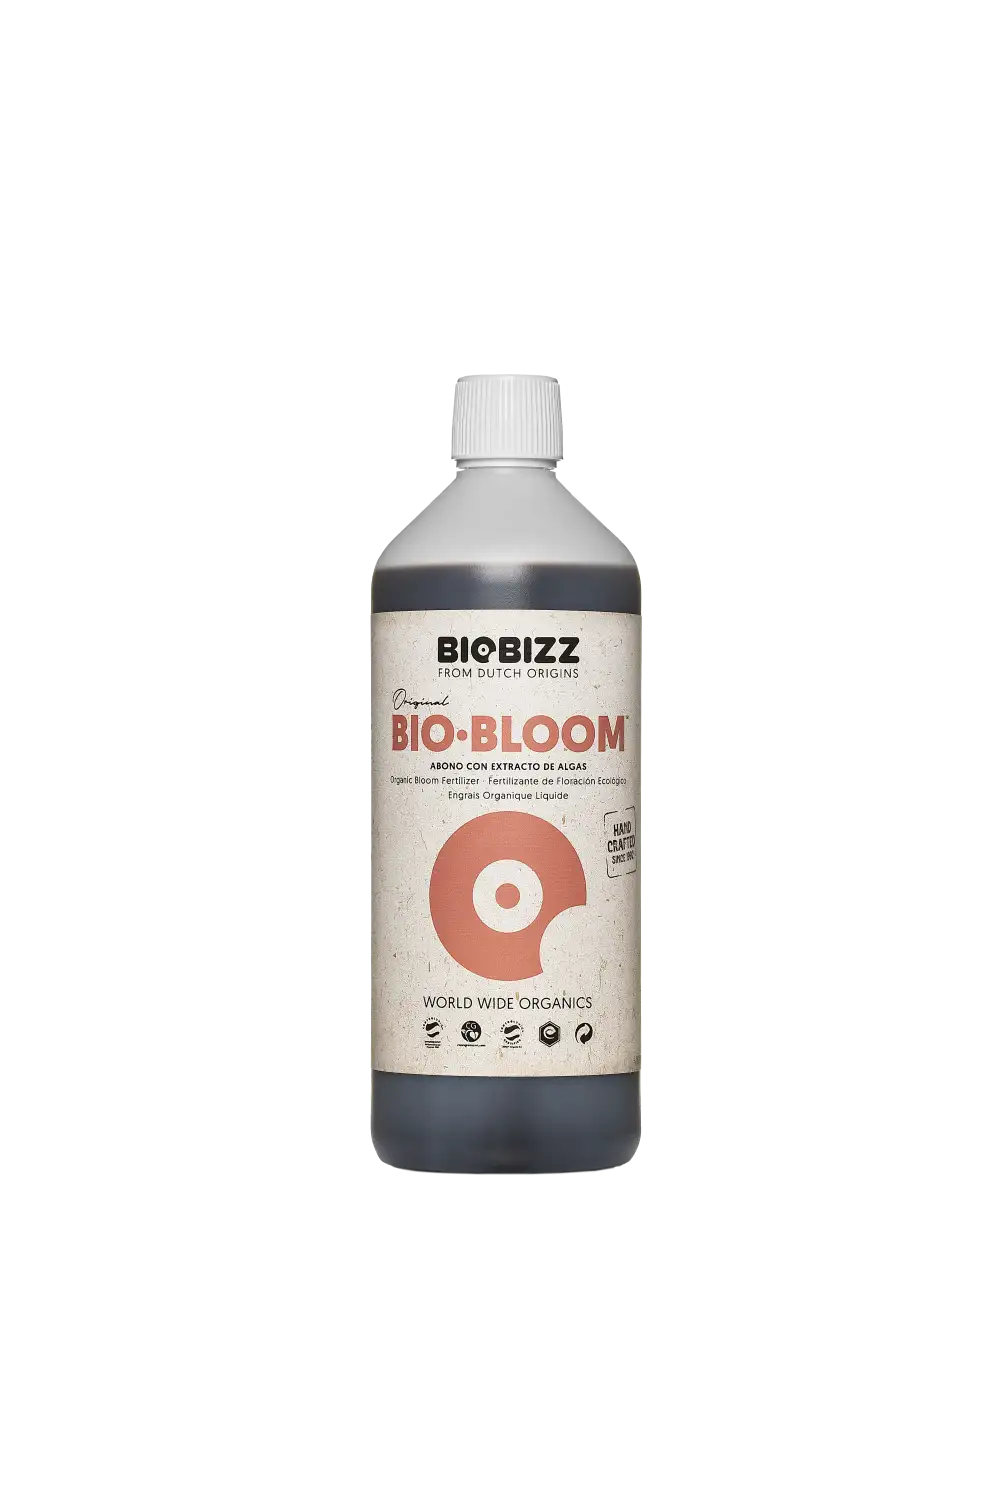
100 liters substrate biobizz lightmix
Fertilizer Trypack biobizz
Why do I use 2x300w and not 600w once? Because I think 2 lamps better distribute the light in the culture chamber which allows a much more homogeneous light, a better light penetration.
20 likes
4 comments
Share
9
Week 9. Flowering7y ago

55 cm
Height
17 hrs
Light Schedule
25 °C
Day Air Temp
6.3
pH
Strong
Smell
55 %
Air Humidity
25 °C
Solution Temp
20 °C
Night Air Temp
11 liters
Pot Size
0.8 liters
Watering Volume
30 cm
Lamp Distance
12 likes
comments
Share
10
Week 10. Flowering7y ago


34 cm
Height
20 hrs
Light Schedule
25 °C
Day Air Temp
6.3
pH
Strong
Smell
55 %
Air Humidity
25 °C
Solution Temp
21 °C
Night Air Temp
11 liters
Pot Size
0.7 liters
Watering Volume
30 cm
Lamp Distance
Nutrients 2
Top-Max
4 mll
Bio-Bloom
4 mll
Master_weeda Hello to all the padawans and Jedi masters
Just a chill week with some watering and light defoliation
May the force be with you 💪
29 likes
4 comments
Share
11
Week 11. Flowering7y ago


55 cm
Height
20 hrs
Light Schedule
25 °C
Day Air Temp
6.3
pH
Strong
Smell
55 %
Air Humidity
25 °C
Solution Temp
20 °C
Night Air Temp
11 liters
Pot Size
0.8 liters
Watering Volume
30 cm
Lamp Distance
Nutrients 4
Bio-Bloom
4 mll
Top-Max
4 mll
Bio-Bloom
4 mll
Master_weeda Hello to all padawans and master jedis
Last straight before the harvest
Nothing to report and no particular technique to practice except for serious watering because it would be a pity to spoil everything by watering too much or too little for the plant
So I’m starting the flushing of the plant early next week.
It will be her last week of fertilizer
She smells good and her health is good
I estimate the harvest in about a fortnight
I could continue to fatten pk1314 but I remind you that the yield is by no means the priority of my crops because I grow eight plants simultaneously in a box of 80x80x160
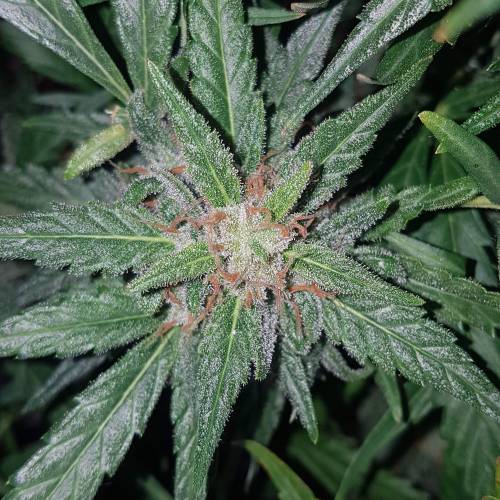
I like a well-rinsed plant and barely amber trichomes.
Except for this one because I want to draw the quintessence of its narcotic power
As with almost everything in life, it’s a matter of taste; I love it like that, free to follow one’s instinct and to develop one’s own methods over time 😉
May the force be with you 💪
27 likes
9 comments
Share
12
Week 12. Flowering7y ago


55 cm
Height
20 hrs
Light Schedule
25 °C
Day Air Temp
6.3
pH
Strong
Smell
55 %
Air Humidity
25 °C
Solution Temp
20 °C
Night Air Temp
11 liters
Pot Size
0.8 liters
Watering Volume
30 cm
Lamp Distance
Master_weeda Hello to all the padawans and Jedi masters!
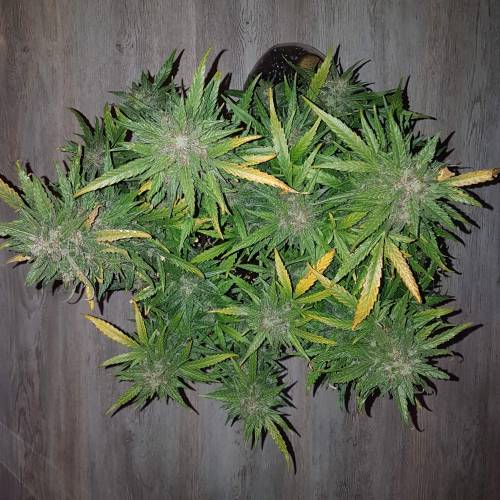
Day 77, nothing to report except for the insane smell coming from those huge buds! I'm starting the flush on day 77. I haven't really done much except water it with clear water at pH 6.3.
The plant is small but very beautiful and well-loaded; I'm letting it mature longer than the others because I'm looking for a more narcotic high, so I'm leaving the amber trichomes at over 30%.
I think the harvest is fast approaching; it's just a matter of days, maybe a little week.
The act of flushing a plant involves using water to remove any nutrients present in the soil. A large amount of water is passed through the soil and drained regularly. All the minerals and nutrients present in the soil are flushed out over time with the water, leaving clean soil.
But why would you want to eliminate all the minerals from the soil? Isn't that bad for the harvest? In fact, it helps the harvest significantly. When the nutrients are removed from the soil, it forces the cannabis plant to use all the nutrients still present in the plant. It's like the human body. When we consume a lot of food, what we don't use gets turned into fat. In extreme situations where food is scarce, the body relies on that stored fat for energy.
How and When to Flush Cannabis Plants
Flushing cannabis plants before harvest can make the difference between the best buds or the harshest throat hit. This little task is simple and easy to do. Just add water! Be careful because the timing of the flush plays a critical role.
The basics of flushing your cannabis plants
You've finally finished your grow and find yourself with a beautiful plant covered in amazing buds, now dried, you've done the curing, and you're ready to smoke – and yet something is off. The weed seems like it doesn't want to burn, and when you take a puff, it's like someone punched you in the lungs, and you're coughing for your life! The taste is harsh and disappointing. If this is a situation you've experienced, chances are your plants weren't flushed properly before harvest.
This smoke, far from being pleasant, is caused by the presence of nutrients and minerals in the plant used during cultivation, which alters how the plant burns. Flushing the plant removes these remaining nutrients, improving the quality of the experience. Fortunately, flushing cannabis plants is done easily and effortlessly, allowing you to produce smooth and delicious buds in no time.
How to Use Nutrients for Cannabis
WHAT IS FLUSHING?
The act of flushing a plant involves using water to eliminate any nutrients present in the soil. A large amount of water is passed through the soil and drained regularly. All the minerals and nutrients present in the soil are flushed out over time with the water, leaving clean soil.
But why would you want to eliminate all the minerals from the soil? Isn't that bad for the harvest? In fact, it helps the harvest significantly. When the nutrients are removed from the soil, it forces the cannabis plant to use all the nutrients still present in the plant. It's like the human body. When we consume a lot of food, what we don't use gets turned into fat. In extreme situations where food is scarce, the body relies on that stored fat for energy.
Since flushing forces the cannabis to use all the remaining nutrients in the plant, none should remain to alter the harvested buds. However, if you do it too early, it can harm the plant's health, so timing is key.
THE BEST TIME TO FLUSH YOUR CANNABIS
Flushing generally starts two weeks before harvest. If the plant has an eight-week flowering period, flushing should begin six weeks after the start of the flowering period. It's best to closely observe the trichomes on the plant to determine when your cannabis is ready to be harvested. If the small trichomes are just starting to change from a clear color to a milky white hue, it's a good indication that the plants can start being flushed. You should aim for the majority of the trichomes to have changed to the desired color for harvest after two weeks – it gets easier with experience, so hang in there!
23 likes
9 comments
Share
13
Week 13. Flowering7y ago


55 cm
Height
20 hrs
Light Schedule
25 °C
Day Air Temp
6.3
pH
Strong
Smell
50 %
Air Humidity
25 °C
Solution Temp
20 °C
Night Air Temp
11 liters
Pot Size
0.8 liters
Watering Volume
30 cm
Lamp Distance
Master_weeda Hello to all the padawans and Jedi masters
Nothing to report, the plant is healthy and has an exceptional smell
I think I’ll harvest it this week
Because the trichomes are starting to turn amber at over 30%
How do you know when to harvest?
The cannabis harvest window is one of the aspects of growing that is unfortunately too rarely taken into account, or the grower simply doesn’t have the patience to wait a few more days to ensure maximum THC content.
Some strains are better if harvested before their peak THC production, while others are better if harvested afterward.
There will always be some variations, but you can use the rules below to help you assess the best harvest window for your plants, based on the trichomes:
1) Perfectly formed trichome heads that are still clear will give you a cleaner, more uplifting high with less sedative effect; this is the best harvest window for heavy Indica strains.
2) Perfectly formed trichome heads that are starting to become slightly cloudy or milky; this is probably the best time to harvest most of the hybrids currently available.
3) Perfectly formed trichome heads that are completely cloudy or milky, with at least 30% turning amber; this is generally the best harvest window for late-maturing Sativas like Haze. It’s also the right time to harvest when you’re using the plant to make hash.
The mistake to try to avoid is harvesting before the trichomes are perfectly formed; most growers who follow the previous rules will harvest when the majority of the resin heads are milky.
Harvesting before this window will produce buds that are less potent, that contain fewer essential oils and terpenes, and your harvest will have a grassy or hay-like taste, even if it is dried and cured properly.
May the force be with you 💪
27 likes
13 comments
Share
14
Week 14. Flowering7y ago


55 cm
Height
20 hrs
Light Schedule
25 °C
Day Air Temp
6.3
pH
Strong
Smell
45 %
Air Humidity
25 °C
Solution Temp
20 °C
Night Air Temp
11 liters
Pot Size
0.8 liters
Watering Volume
30 cm
Lamp Distance
Master_weeda Hello to all padawans and masters jedis
What a run my friends!
The harvest will be for tomorrow because as you can see the plant is sumptuously beautiful and its colors are beautiful the senescence is visible you can see its progression in photo between day 83 and day 92.
But first of all, what about senescence?
The senescence
Late stage in the development of multicellular organisms, during which irreversible loss of function and degradation of biological components take place. Physiological aging process in which cells and tissues deteriorate and eventually die.
The senescence is the result of the translocation of the resources, once this phase ended, it is the abscission (fall of the sheet)
The most common causes of early senescence are:
a substrate too poor in fixed elements. a pot too small to support the need for a complete cycle of life.
Unadapted pH which induces a nutrition problem. Age simply.
To overcome this, intake of fixed elements, and cytokinin (reverse the process).
May the strength be with you 💪
23 likes
13 comments
Share
14
Week 14. Harvest7y ago
Happy Harvest Day!


9/10
Rated
Bonjour à tous les padawans et maîtres jedis
La gorilla glue est une plante magnifique avec une odeur et un aspect général très plaisant facile à cultiver car très résistante
Petite idéale pour l'indoor et le LST elle offre un très bon rendement pour une autofloraison . Les 2 que j'ai eu le plaisir de cultiver m'ont offert un rendement moyen d'environ 50 grammes !
Je le répète ! Il ne faut pas la stréssée pendant sa croissance et le LST et la magie opère.
Ses têtes sont recouvertes de trichomes sa fumée est épaisse et enivrante et offre un High puissant qui scotche au canapé.
Je la recommande vivement aux cultivateurs novices
Merci à @Fast_Buds pour leur remarquable travail
Que la force soit avec vous !
Show more
Translate
Spent 106 days
Ger Veg Flo Har
274 g
Bud wet weight per plant
56 g
Bud dry weight per plant
1
Plants
0.8 m²
Grow Room size
Easy
Difficulty

Relaxed, Sleepy
Positive effects

Dry eyes, Dry mouth
Negative effects

Earthy, Pine, Woody
Taste
Height
Day air temperature
Air humidity
PH
Light schedule
Solution temperature
Night air temperature
Pot size
Lamp distance


Master_weeda Hello to all the padawans and Jedi masters
Thanks to all the growers who helped me
To @laBOSSANOVA @Jésus @belzebut @vvince @Castafunk @bidou
I HAD A BLAST!
41 likes
29 comments
Share
Equipment Reviews



97 comments
Sort by
popularity
popularity
newest
oldest

Master_weeda commentedweek 37y ago
thank you very much
likes 9

CRiSPrGrow commentedweek 77y ago
just go two or three times a day with a razor blade to remove them one by one, then see if it spreads... once in a while you manage to save the plant if you catch it early enough 🚀
likes 9
Master_weeda commented7y ago
Rpllabossanova, basically do I cut his balls off? 😐 🤣
And watch if he gets out of it? Thanks bulbi el monster! Even if the dark side of the force is in you I feel an immeasurable force no doubt that you are a Jedi master not let you invade by the dark side
Let the force be with you Jedi master 💪
likes 10

Scribs commented7y ago
@weedawan, @LaBOSSANOVA Couic!
like 1

WisdomCulture420 commentedweek 147y ago
Congratulations my brother very beautiful harvest, beautiful head.
Very nice work my brother I wish you a good tasting now.
All work deserves a good big firecracker. 👋 👋 👋
likes 8
Master_weeda commented7y ago
@Djesus, djesus my friend
Thank you for your compliments ! Coming from you it's a consecration 😊
May the strength be with you 💪
likes 8

Bouleuss commented7y ago
@Master_weeda, Nice work 😊🙏🏻
likes 2

Grey_Wolf commentedweek 147y ago
Very Nice
likes 6
Master_weeda commented7y ago
@Grey_Wolf,thanks bro
likes 9

Castafunk commentedweek 147y ago
The buds are magnificent, very beautiful plant. I wish I could be there to smell the aromas.
likes 5
Master_weeda commented7y ago
@Castafunk, And you would be welcome amigo!
likes 7
Bouleuss commented7y ago
@Master_weeda, 🙏 🏻 🙏 🏻 👍
likes 2

ROM101 commentedweek 147y ago
The force is strong with this one 💪
likes 5
Master_weeda commented7y ago
@ROM101, Thanks you bro iam happy 😁
May the force be with you 💪
likes 10

dianne commentedweek 137y ago
Concentrated goodness! :)
likes 5
Master_weeda commented7y ago
@dianne,thanks you sister
likes 9

Bohemian_Grow commentedweek 117y ago
Looking good man 👊 Force is strong with this one.
I’m the same quality or quantity any day!
likes 5
Master_weeda commented7y ago
@Bohemian_Grow, 😋
May the force be with you 💪
likes 10
Castafunk commentedweek 57y ago
Hi, beautiful plants. I'm totally a beginner, so I'm going to follow you a bit, I also use biobizz.
likes 5
Master_weeda commented7y ago
thanks, you're welcome, and don't worry, I'm just starting too! Everyone has to start somewhere. All I can tell you is that training with autos is essential.
likes 7

wawasgarden commentedweek 127y ago
Looks awesome man can't wait to see the finished product
likes 4
Master_weeda commented7y ago
@wawasgarden,LST it's Perfect for the autoflower 😉 👍
likes 7
wawasgarden commented7y ago
@weedawan, I'm glad I asked and listened to your advice before I cut her. I love the way it's coming out and the added control it gives you. Thank you for your pointers
likes 4
Master_weeda commented7y ago
@wawasgarden, it's really a pleasure if I can help you my friend 🙏🙏
May the force be with you 💪
likes 6
Show More (3)

Fast_Buds  commentedweek 147y ago
What a beautiful diary of our Gorilla Glue Auto!
Very well done =)
Happy Harvest, Growmie!
likes 4
Master_weeda commented7y ago
@Fast_Buds,it was a real pleasure to cultivate this beautiful strain 😍 thank you for your work
May the strength be with you 💪
likes 7
wawasgarden commentedweek 147y ago
That looks so good I can't wait to see it cured 🤤 🤤
likes 4
Master_weeda commented7y ago
@wawasgarden,I want so much that you can feel it 😜
May the force be with you 💪
likes 9
Castafunk commentedweek 127y ago
ah ah you want the couch lock high I see 😀👌
likes 4
Master_weeda commented7y ago
@Castafunk, lol casta yes yes
likes 6
Castafunk commentedweek 117y ago
It looks good, very beautiful plant. I think I'd do a GG in my next session. May the strength be with you 💪
likes 4
Master_weeda commented7y ago
@Castafunk, Yeah, you gotta try Fastbuds, it's worth it 😋 May the force be with you 💪
likes 6

Cheezy commentedweek 137y ago
The buds are strong with you, young Weedawan! Hahaha I just wanted an excuse to say that really, but gee you've had a great grow! Can't wait to see the final results!! 🤙 🤙
likes 3
Master_weeda commented7y ago
@Cheezy, thanks bro I can't wait to taste it 😉
likes 6
Cheezy commented7y ago
@weedawan, I bet you can't! You will have to keep us posted on how she tastes!
Cheers to some fine smoke! 🤙 🤙
likes 3
Master_weeda commented7y ago
@Cheezy, lol thanks bro
likes 8

MrRaid commentedweek 147y ago
I'm using advanced nutrients full line if I dont see a drastically big difference come harvest time theres no way I'm buying there full line again lol I was yeilding around 75g a plant with a basic feed of sensibloom and carbo plus overdrive now I'm adding so much more beneficial sources of food and a higher wattage light that claims to yeild 2.2g per w 😂 SF 4000 so yeild should be very good there full line is like €250 per month for 10 plants 😳
likes 3
Master_weeda commented7y ago
@MrRaid, this run I did with the biobizz tripack 250ml at 16 euros 😊 may the force be with you 💪
likes 6

MovingOn commentedweek 147y ago
Congrats, buddy! That's quite a plump little monster you have there. Reminds me of Yoda! 😉
likes 3
Master_weeda commented7y ago
@DoctorPhilGood, Thanks my buddy let the strength be with you 💪
likes 7

JP148 commentedweek 147y ago
Gorgeous little plump plant. That’s exactly how I try to keep my plants. Pretty and manageable. Nice job
likes 3
Master_weeda commented7y ago
@JP148,Thank you very much the space of culture that I have available does not allow me to do my plants differently 😉
likes 7

SoopaNoobie commentedweek 147y ago
Sweet nugs o plenty! 🤯 thanks for the recommendation, will look into the Biobizz.
Thanks for your awesome help!
likes 3
Master_weeda commented7y ago
@SoopaNoobie, with pleasure ! If you need advice do not hesitate 😉 if my answer suits you can you validate it Please? It will earn me one point for the competition 😉
May the strength be with you 💪
likes 7

Seedaholic commentedweek 147y ago
Bad ass plant love the color
likes 3
Master_weeda commented7y ago
@Seedaholic, thx my friend
likes 6

the end.
Enjoying this diary? Follow for more updates!

Prefer the old Diary view?
Go back to the old Diary view