


Zkittlez auto OSS



VEG
Lampwin Light Emitting Diodes/300W
Lampwin
FLO
Lampwin Light Emitting Diodes/300W
Lampwin

Soil
Custom

Indoor
Room Type
LST
weeks 3-5
Defoliation
weeks 5-8, 12, 15
11 liters
Pot Size
Start at Harvest
1
Week 1. Vegetation7y ago


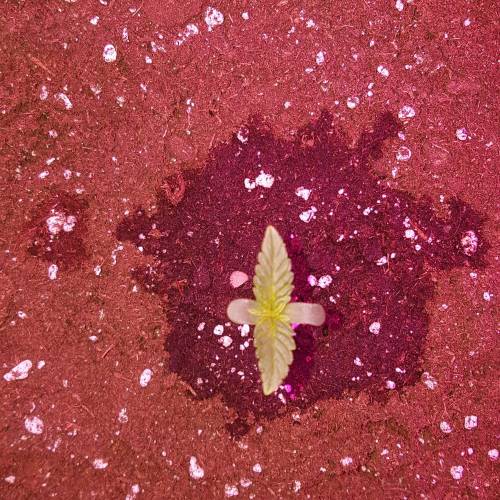


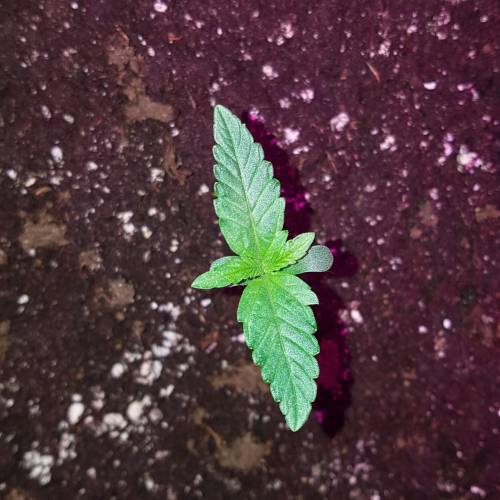


4 cm
Height
24 hrs
Light Schedule
26 °C
Day Air Temp
6.3
pH
70 %
Air Humidity
22 °C
Solution Temp
23 °C
Night Air Temp
11 liters
Pot Size
0.1 liters
Watering Volume
90 cm
Lamp Distance
Nutrients 3

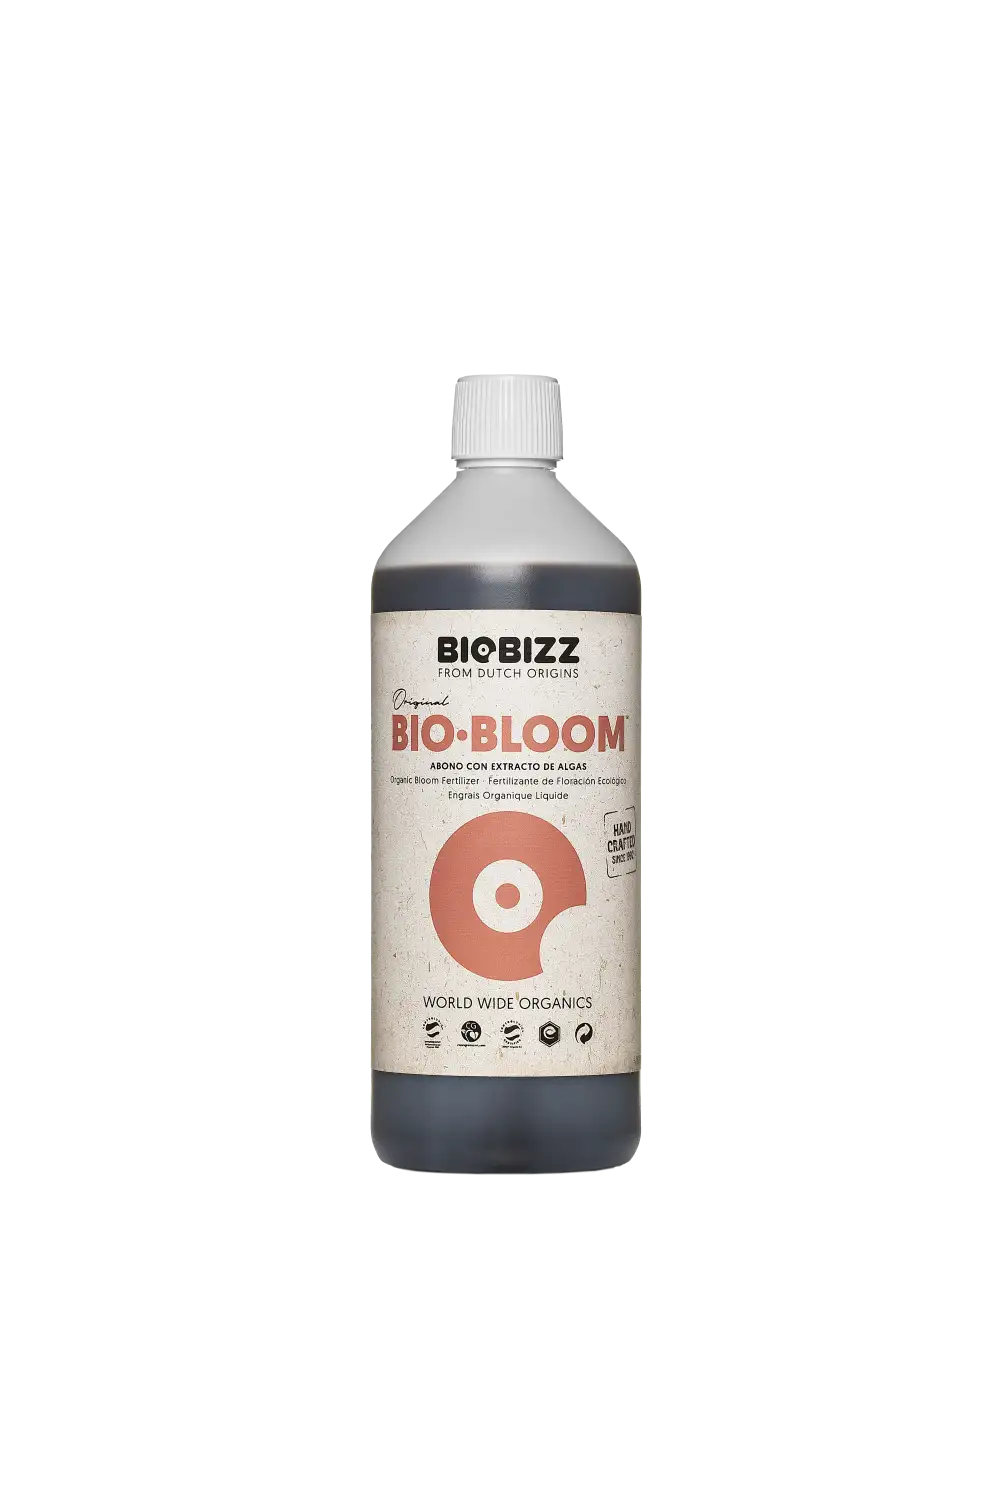
BioBloom
3 mll

BioGrow
3 mll

BioEnhancer
0.6 mll
Master_weeda Bonjour à tous les padawans et maîtres jedis
Tout d'abord merci à jardin à de original sensible seeds mais aussi greenhouse de me permettre de faire cette culture en m'offrant le feeding greenhouse.
Je rappelle que cultive simultanément 9 pots de 10 et 11 litres dans une box prévu pour 4 et que je n'utilise que le strict minimum du matériel nécessaire à une culture correcte au prix le plus bas possible
MATÉRIEL CONFIGURATION
Box 80×80×160
Lampe led Lampwin 300 watts ×2
Ventilateur à pince 15 watts
Xiaomi Deerma humidificateurs 5L
Hygrometre thermomètre
Extracteur PROFAN 107 m3/h - 100
Prise programmable électronique ×2
1 pot rond marron 11 litres
Green house feeding enhancer
Green house feeding biobloom
Green house feeding biogrow
Substrat biobizz ligthmix
Fil de fer et pince coupante
Microscope
Petite balance de précision
CULTURE ÉTAPE PAR ÉTAPE
J'ai tout dabord fais germé ma graine avec le easy start de Royal queen seed et je suis agréablement surpris car franchement le taux de réussite est très élevé (17 graines sur 19) simple d'utilisation et très efficace.
Une fois la plantule sortie et d'une hauteur de 2 ou 3 centimètres je la prend délicatement et la place directement dans son pot définitif. Je préconise des pots allant entre 10 litres et 15 litres pour des autofloraisons cultivées en intérieur.
Le pot aura été préalablement préparé (video dans diarie) avec 30 grammes d'engrais greenhouse feeding biobloom et 30 grammes de greenhouse feeding biogrow, soit l'équivalent de 3 grammes par litre de substrat.
Je dépose donc la plantule dans son pot définitif je recouvre un peu de avec de la terre je tasse légèrement et j'arrose pour garder le substrat humide pas plus
Je place ma lampe led 300watts à environ 90 centimètres de la plantule avec un cycle de lumière de 24/24 pendant une semaine. Au début de la semaine 2 le cycle de lumière passera en 20/4 grace a un programmateur car c'est pour moi le cycle de lumière qui offre le meilleur rendement pour une autofloraison.
Jour1: léger arrosage
Jour2: léger arrosage
Jour3: la plantule commence à être plus vigoureuse mise en place de la ventilation pour augmenter sa masse racinaire et léger arrosage
Jour4: arrosage avec un litre et demi d'eau ph6.3 à laquelle j'ai ajouté 0.9 gramme de greenhouse feeding enhancer (soit 0.6 gramme par litre d'eau)
Jour5: aucune technique spéciale
Jour6: aucune technique spéciale
Semaine agréablement calme sans problème ni carence apparente
Que la force soit avec vous !
18 likes
5 comments
Share
2
Week 2. Vegetation7y ago


8 cm
Height
20 hrs
Light Schedule
24 °C
Day Air Temp
6.3
pH
70 %
Air Humidity
22 °C
Solution Temp
23 °C
Night Air Temp
11 liters
Pot Size
0.1 liters
Watering Volume
90 cm
Lamp Distance
Nutrients 3
BioBloom
3 mll
BioGrow
3 mll
BioEnhancer
0.6 mll
Master_weeda Bonjour à tous les padawans et maîtres jedis
Pour cette semaine 2 aucune technique pratiqué, j'ai juste surveillé que l'hygrométrie reste à un taux de 70%. J'ai effectué un léger arrosage jusqu'au jour 10 car le fait que les autofloraisons soient transplantés dans leur pot définitifs augmentent le risque de trop arrosé le substrat. 🤐
Pour palier à ce risque il est préférable d'arroser avec 10 ou 20 centilitres d'eau PH 6.3 durant les 10 premiers jours de la plantule. Au jour 11 j'arrose mon pot normalement avec un quart de son volume en eau (pour un pot de 10 litres 2,5 litres) toujours avec un PH de 6.3, j'ajoute à cette eau 0,6 gramme de greenhouse feeding enhancer par litre d'eau.👍
Enhancer est un mélange d’acides humiques, d’extraits d’algues,
de souches de Trichoderma harzianum et de Bacillus subtilis.
Il augmente la vitalité de la plante, améliore l’absorption des nutriments et améliore la qualité du sol.👍
J'effecturais un arrosage similaire dans 2 semaines
Que la force soit avec vous 💪
15 likes
comments
Share
3
Week 3. Vegetation7y ago




12 cm
Height
20 hrs
Light Schedule
24 °C
Day Air Temp
6.3
pH
70 %
Air Humidity
22 °C
Solution Temp
23 °C
Night Air Temp
11 liters
Pot Size
0.1 liters
Watering Volume
90 cm
Lamp Distance
Nutrients 3
BioBloom
3 mll
BioGrow
3 mll
BioEnhancer
0.6 mll
Master_weeda Bonjour à tous les padawans et les maîtres jedis
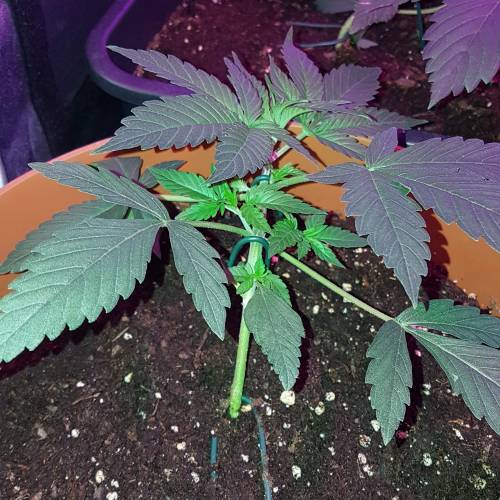
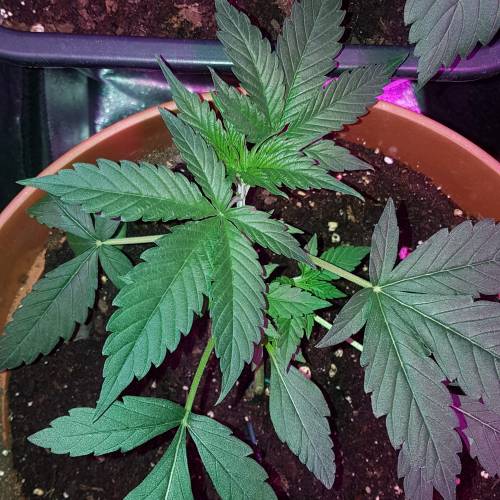
Pour cette semaine 3 au seizième jour ma plante fais 15 centimètres et son sixième noeud apparaît je décide donc de pratiquer un LST sur ma plante.
Pour ce j'utilise du fil de fer galvanisé que je plante directement dans le substrat en faisant attention de ne pas endommagé les racines car n'oublions pas que ce qui pousse dessus pousse aussi dessous.
Jour 17 je pulvérise (dessus et dessous les feuille) une solution composé d'une cuillère à café de savon noir mou dilué dans un litre d'eau en prévention d'éventuels nuisibles. Je répète l'opération une fois par semaine jusqu'à la floraison.
Je corrige mon LST suivant la pousse de ma plante ...
Pour ma par c'est la manière dont je procède mais petit rappel de la technique du LST:
Quand commencer à appliquer la technique LST
De nombreux cultivateurs commencent la manipulation dés que les plantes possèdent entre 3 et 6 nœuds ou une paire de feuilles. Durant cette première étape de la croissance, le tronc encore flexible est pliable sans risque qu’il ne se casse, même si au fur et à mesure du développement de la plante il sera de plus en plus difficile de le plier. Nous pouvons continuer à guider la croissance des branches durant toute la culture, même durant la floraison, ce qui pour cette étape représente un grand avantage face à la taille, qui n’est pas du tout recommandé une fois que la formation des têtes commence, cela stressera en effet la plante, ce qui aura pour effet de retarder la récolte.
Comment appliquer la technique de guidage LST
Si nous sommes prudents, la flexibilité naturelle des fibres du cannabis permet de plier leur tronc et branches avec une relative facilitée, même durant la floraison des plantes.
En utilisant une corde fine, nous pouvons accrocher la pointe de la plante à la base du pot par exemple ou à un tuteur que nous aurons planté dans le substrat. Nous plierons le tronc avec précaution et nous le fixerons avec la corde, à partir de là, nous pouvons augmenter progressivement la tension de la corde, chaque jour un peu plus, jusqu’à obtenir la position souhaitée. Soyez attentif à la réaction de la plante, essayez de ne pas appliquer trop de pression sur la corde et rappelez-vous que la flexibilité des branches peut varier d’une plante à l’autre.
Pour obtenir de meilleurs résultats, il suffit de suivre quelques règles simples. Pour commencer, nous devons choisir une corde fine mais pas trop pour ne pas blesser les troncs au fur et à mesure qu’ils grandissent et qu’ils deviennent plus gros.
Nous pouvons utiliser des crochets en plastique souple ou de n’importe quelle autre matière flexible pour éviter d’endommager les plantes. Spécialement en intérieur, utiliser des cordons en plastique de couleur (voir les diaries de @Silky) est très pratique pour voir facilement les accroches et faciliter le travail au milieu du réseau formés par les cordes, les tuteurs, les mailles ou les supports que nous aurons dans la culture. Bien entendu, en culture extérieure et surtout en guerilla nous ferons juste le contraire et nous utiliserons des matériaux de couleur qui n’attirent pas l’attention pour que notre jardin reste discret.
Pour stresser les plantes au minimum, la mieux est de réaliser ces manipulations le soir ou juste après que les lampes en intérieur s’éteignent, ce qui leur permettra de se remettre durant la nuit. Normalement, le jour suivant nous pourrons observer comme les pointes des branches que nous avons pliées se dressent de nouveau vers le haut à la recherche d’une source de lumière.
Que la force soit avec vous💪
Que la force soit avec vous
15 likes
comments
Share
Used techniques
LST
Technique
4
Week 4. Vegetation7y ago


12 cm
Height
20 hrs
Light Schedule
24 °C
Day Air Temp
6.3
pH
70 %
Air Humidity
22 °C
Solution Temp
23 °C
Night Air Temp
11 liters
Pot Size
0.1 liters
Watering Volume
90 cm
Lamp Distance
Nutrients 3
BioBloom
3 mll
BioGrow
3 mll
BioEnhancer
0.6 mll
Master_weeda Bonjour a tous les padawans et les maîtres jedis
Pour cette semaine 4 je surveille comme à mon habitude hygrométrie et arrosage. Je peaufine mon LST en stressant ma plante le moins possible. Je combine mon LST avec un pincage d'Apex cela me permettra d'avoir une canopé plus homogène donc une meilleure pénétration lumineuse et par conséquent un meilleur rendement.
Petit rappel sur le pincage d'Apex:
Le pinçage des plantes de cannabis
Proche de la taille d’apex sur le principe, cette technique possède cependant plusieurs avantages, le principal étant de conserver le gros bud central de la plante, d’une production et qualité maximale.
Pinçage des plantes de cannabis
Le pinçage d’apex (tête de la plante) consiste simplement à pincer délicatement la tige du dernier étage de la plante, entre le pouce et l’index, jusqu’à sentir la fibre s’écraser sous les doigts avec un petit bruit critch caractéristique. Si l’espace disponible sur la tige du dernier étage ne permet pas d’y placer confortablement ses doigts, il faudra plutôt pincer l’étage du dessous.
Le pinçage ralentira fortement la croissance verticale de la plante, tout en stimulant le développement des branches secondaires, donnant ainsi à la plante une forme de buisson.
La plante mettra quelques jours à réparer ce pinçage, formant un nœud à cet endroit, et poursuivra ensuite sa croissance de façon normale. Le pinçage peut alors être répété si nécessaire, sur l’étage suivant nouvellement formé, ainsi que sur les éventuelles branches secondaires qui pourraient dépasser l’apex.
Le pinçage est donc une excellente technique pour avoir une belle canopée uniforme de type marée verte. En pinçant régulièrement l’apex des plus grandes plantes de votre espace, durant la croissance et en début de floraison (stretch), vous obtiendrez ainsi facilement des plantes de hauteur homogène en pleine floraison, ce qui facilitera la culture et augmentera la production finale, surtout si vous cultivez simultanément de multiples variétés de marijuana.
Avec un peu d’habitude le pinçage pourra être réalisé aussi rapidement qu’efficacement. En cas de pinçage trop violent qui se traduirait par un apex arraché, cela produira simplement les mêmes résultats qu’une taille classique de l’apex, ce qui ne sera donc pas dramatique.
Que la force soit avec vous💪
13 likes
comments
Share
Used techniques
LST
Technique
5
Week 5. Vegetation7y ago


12 cm
Height
20 hrs
Light Schedule
24 °C
Day Air Temp
6.3
pH
70 %
Air Humidity
22 °C
Solution Temp
23 °C
Night Air Temp
11 liters
Pot Size
0.1 liters
Watering Volume
90 cm
Lamp Distance
Nutrients 3
BioBloom
3 mll
BioGrow
3 mll
BioEnhancer
0.6 mll
Master_weeda Bonjour à tous les padawans et les maîtres jedis
Pincage apex .
Finalisation palissage
Jour34 légère defolliation
Jour33 arrosage avec 2 litres d'eau ph6 à laquelle j'ajoute 0.5ml de topmax biobizz (dosage très léger pour ne pas provoquer un lock-out) cela favorisera son entrée en floraison.
J'effectue une légère defolliation pour permettre une meilleure pénétration lumineuse aux apexs du bas.
Quesque la defolliation ?
LES CULTIVATEURS AMATEURS, PRENEZ GARDE, MAIS NE PRENEZ PAS PEUR
La défoliation consiste à retirer les feuilles des plants de cannabis en intérieur afin d'accroître le rendementfinal. Le cultivateur amateur doit faire preuve de vigilance lorsqu'il commence à appliquer cette technique de taille. Malgré le débat sans fin entre ceux qui prônent cette technique et ceux qui la dénigre, il n'y aucune raison pour qu'un amateur ne s'y essaie pas afin de voir si ça lui convient ou non.
COMMENT DÉFOLIER
Que vous tailliez les feuilles ou les branches des plants de cannabis, il vaut mieux utiliser un sécateur stérile qui est confortable en main. Arracher des feuilles à la main manque de finesse et engendre souvent par accident, l'arrachement des couches d'une tige en plus de la feuille. L'objectif principal de la défoliation est de permettre une meilleure pénétration de la lumière et de promouvoir la production de plus grosses têtes. Les feuilles éventails qui font de l'ombre doivent être retirées. Tailler la tige principale et/ou les pousses secondaires n'est pas de la défoliation.
La règle d'or lorsque vous donnez à vos plantes un rafraîchissement est de commencer avec les feuilles nourricières les plus grandes et les plus larges, en taillant du bas vers le haut. Il est important de retirer les feuilles stratégiquement et non pas au hasard. Pensez également qu'il vous faut limiter votre rafraîchissement à approximativement 10 à 20 % des feuilles totales de votre pied. Il est très facile de s'emporter durant la taille et de se retrouver avec des plantes chauves. Un excès de taille de feuilles empêchera la photosynthèse et paralysera vos plants.
QUAND FAUT-IL DÉFOLIER
Il est assez rare d'appliquer la défoliation comme seule technique pour obtenir un fort rendement. La taille des feuilles est généralement associée à d'autres méthodes de tailles et de palissage pour un meilleur rendement telles que le topping ou étêtage, le FIMming, le LST, le manifolding, le supercropping et le ScrOG. Les cultivateurs utilisant la méthode ScrOG auront besoin de retirer toutes les croissances inférieures ainsi que les feuilles et les tiges se trouvant sous le filet.
Les plants de cannabis peuvent être défoliés dès lors qu'ils sont passés de la phase de plantule vers la phase de croissance végétative. Cependant, il est recommandé aux cultivateurs amateurs de laisser aux plantes 1 à 2 semaines de croissance végétative avant de s'attaquer à la défoliation de celles-ci. De plus, certaines variétés sont plus sensibles à la taille que d'autres et de ce fait, seront plus stressées par la taille des feuilles. Surveillez minutieusement le comportement de vos plants après la taille. Une période de convalescence de minimum 3 à 7 jours avant de recommencer la défoliation est fortement recommandée pour éviter trop de stress aux plants. Les cultivateurs peuvent également défolier pendant la phase de floraison, ce qui permettra à l'énergie de la plante d'être concentrée vers la production de têtes tout en limitant l'ombre et l'excès d'humidité. Néanmoins, il est important de ne pas défolier trop tard sous peine de simplement blesser ses plants inutilement.
LES AVANTAGES DE LA DÉFOLIATION
Évidemment, l'avantage numéro un de la défoliation, c'est l'augmentation du potentiel de rendement de cette technique de taille pour tous types de cannabis allant de la photopériode aux variétés autofloraison. Ce n'est pas un secret que les fleurs qui reçoivent plus de lumières deviennent plus grandes et larges que celles dissimulées dans l'ombre des feuilles. De plus, retirer les feuilles intérieures des plants touffus aide à prévenir toutes menaces de moisissure. Les plants très feuillus avec un feuillage intérieur dense produiront une quantité importante de têtes pop-corn. Dans le pire des cas, les branches de têtes et les têtes qui sont denses succomberont au pourrissement.
Si vous observez des gouttes d'eau se former sur la surface des feuilles, il est grand temps de penser à faire de la défoliation. Libérer la zone inférieure et médiane des feuilles est un excellent moyen d'améliorer la circulation de l'air.
LES DÉSAVANTAGES DE LA DÉFOLIATION
Les plants de cannabis en intérieur bénéficient de la défoliation pour deux raisons. La première est parce qu'ils reçoivent la lumière d'une source stationnaire au-dessus d'eux, et la deuxième est parce que les conditions environnementales sont contrôlées par le cultivateur et non Mère Nature. Les plants d'extérieurs eux, n'y gagnent pas beaucoup, car les cas échéants se vérifient pour eux. Le soleil traverse le ciel, illuminant sur sa route, différentes portions de la plante de son lever à son coucher.
Les cultivateurs en extérieur n'ont pas besoin de manipuler les plantes afin qu'elles se développent en adoptant une structure plate puisque le soleil est infiniment plus puissant que n'importe quelle lampe de culture et qui plus est, il est toujours en mouvement. Tailler les feuilles des plants extérieurs les rend également plus vulnérables aux conditions humides et brise leurs barrières naturelles contres les nuisibles.
De nombreux cultivateurs d'intérieur peuvent, et malheureusement, c'est souvent le cas, réduire le rendement final à cause d'une défoliation faite au mauvais moment et/ou excessive. Tailler les plantules n'est pas conseillé et engendre souvent des plants nains. Scalper les plants matures est encore pire, et au lieu d'obtenir de longues branches de têtes, vous obtiendrez probablement encore moins de fleurs. De même, tailler des plants malades ou en mauvaise santé à n'importe quelle période de la croissance risque de paralyser la croissance plutôt que d'encourager la formation de fleurs denses.
Que la force soit avec vous 💪
16 likes
comments
Share
Used techniques
LST
Technique
Defoliation
Technique
6
Week 6. Flowering7y ago


18 cm
Height
20 hrs
Light Schedule
24 °C
Day Air Temp
6.3
pH
70 %
Air Humidity
22 °C
Solution Temp
23 °C
Night Air Temp
11 liters
Pot Size
0.1 liters
Watering Volume
60 cm
Lamp Distance
Nutrients 4

Bio-Bloom
1 mll
BioBloom
3 mll
BioGrow
3 mll
Master_weeda Jour39 biobloom
15 likes
comments
Share
Used techniques
Defoliation
Technique
7
Week 7. Flowering7y ago


28 cm
Height
20 hrs
Light Schedule
24 °C
Day Air Temp
6.3
pH
55 %
Air Humidity
22 °C
Solution Temp
23 °C
Night Air Temp
11 liters
Pot Size
0.1 liters
Watering Volume
60 cm
Lamp Distance
Nutrients 4
Bio-Bloom
1 mll
BioBloom
3 mll
BioGrow
3 mll
Master_weeda Jour42 defolliation
Stretch 10 centimètres
Jour47 arrosage avec de l'eau ph6.3 à laquelle j'ajoute 1ml par litre d'eau de topmax biobizz
16 likes
comments
Share
Used techniques
Defoliation
Technique
8
Week 8. Flowering7y ago


40 cm
Height
20 hrs
Light Schedule
24 °C
Day Air Temp
6.3
pH
50 %
Air Humidity
22 °C
Solution Temp
23 °C
Night Air Temp
11 liters
Pot Size
0.1 liters
Watering Volume
60 cm
Lamp Distance
Nutrients 4
Bio-Bloom
1 mll
BioBloom
3 mll
BioGrow
3 mll
Master_weeda Stretch 12 centimètres
Jour52 légère defolliation et arrosage avec deux litres d'eau PH 6.3
17 likes
comments
Share
Used techniques
Defoliation
Technique
9
Week 9. Flowering7y ago


53 cm
Height
20 hrs
Light Schedule
24 °C
Day Air Temp
6.3
pH
Weak
Smell
50 %
Air Humidity
22 °C
Solution Temp
23 °C
Night Air Temp
11 liters
Pot Size
0.1 liters
Watering Volume
60 cm
Lamp Distance
Nutrients 4
Bio-Bloom
4 mll
BioBloom
3 mll
BioGrow
3 mll
Master_weeda Bonjour à tous les padawans et les maîtres jedis
Stretch +13 centimètres
Jour56 arrosage avec deux litres d'eau ph6.3 ajout de 5 grammes de greenhouse feeding biobloom en griffant la terre
Jour59 arrosage avec deux litres d'eau ph6.3 à laquelle j'ajoute 4ml par litre d'eau de topmax biobizz
Jour61 arrosage avec deux litres d'eau ph6.3
20 likes
comments
Share
10
Week 10. Flowering7y ago


67 cm
Height
24 hrs
Light Schedule
24 °C
Day Air Temp
6.3
pH
Weak
Smell
50 %
Air Humidity
22 °C
Solution Temp
23 °C
Night Air Temp
11 liters
Pot Size
0.1 liters
Watering Volume
60 cm
Lamp Distance
Nutrients 4
Bio-Bloom
4 mll
BioBloom
3 mll
BioGrow
3 mll
Master_weeda Stretch 14centimètres
Day63 arrosage avec deux litres d'eau ph6.3
Jour66 defolliation et arrosage avec deux litres d'eau ph6.3 à laquelle j'ajoute un gramme par litre d'eau de feeding enhancer greenhouse
13 likes
2 comments
Share
11
Week 11. Flowering7y ago


67 cm
Height
24 hrs
Light Schedule
24 °C
Day Air Temp
6.3
pH
Weak
Smell
50 %
Air Humidity
22 °C
Solution Temp
23 °C
Night Air Temp
11 liters
Pot Size
0.1 liters
Watering Volume
60 cm
Lamp Distance
Nutrients 4
Bio-Bloom
4 mll
BioBloom
3 mll
BioGrow
3 mll
Master_weeda Jour70 suppression des branches inférieures (premier nœud) et arrosage avec 2 litres d'eau ph6. 3
Jour72 arrosage avec 2 litres d'eau ph6. 3
Jour75 arrosage avec 2 litres d'eau ph6.3
17 likes
4 comments
Share
12
Week 12. Flowering7y ago


85 cm
Height
2 hrs
Light Schedule
24 °C
Day Air Temp
6.3
pH
Weak
Smell
50 %
Air Humidity
22 °C
Solution Temp
23 °C
Night Air Temp
11 liters
Pot Size
0.1 liters
Watering Volume
60 cm
Lamp Distance
Nutrients 4
Bio-Bloom
4 mll
BioBloom
3 mll
BioGrow
3 mll
Master_weeda Bonjour à tous les padawans et maîtres jedis
Stretch 18cm!!!!!!
Jour77 arrosage avec 2 litres d'eau ph6.3
Jour80 defoliation pour que les buds puissent prendre la lumière, j'ajoute 3 grammes de feeding biobloom greenhouse en griffant la terre et j'arrose avec 2 litres d'eau ph6.3
Jour82 j'ajoute 3 grammes de feeding biobloom greenhouse en griffant la terre et j'arrose avec 2 litres d'eau ph6.3
20 likes
1 comment
Share
Used techniques
Defoliation
Technique
13
Week 13. Flowering7y ago


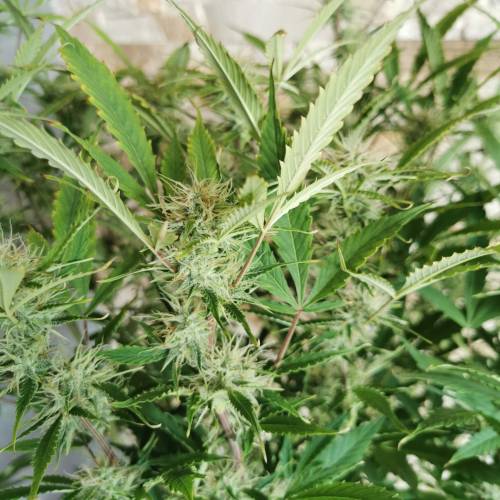


85 cm
Height
2 hrs
Light Schedule
24 °C
Day Air Temp
6.3
pH
Normal
Smell
50 %
Air Humidity
22 °C
Solution Temp
23 °C
Night Air Temp
11 liters
Pot Size
0.1 liters
Watering Volume
60 cm
Lamp Distance
Nutrients 4
Bio-Bloom
4 mll
BioBloom
3 mll
BioGrow
3 mll
Master_weeda Bonjour à tous les padawans et maîtres jedis
Jour84 arrosage avec 2 litres d'eau ph6.3
Jour87 arrosage avec 2, 5 litres d'eau ph6.3
Jour89 arrosage avec 2,5 litres d'eau ph6.3
14 likes
1 comment
Share
14
Week 14. Flowering7y ago


85 cm
Height
2 hrs
Light Schedule
24 °C
Day Air Temp
6.3
pH
Normal
Smell
50 %
Air Humidity
22 °C
Solution Temp
23 °C
Night Air Temp
11 liters
Pot Size
0.1 liters
Watering Volume
60 cm
Lamp Distance
Nutrients 4
Bio-Bloom
4 mll
BioBloom
3 mll
BioGrow
3 mll
Master_weeda Bonjour à tous les padawans et maîtres jedis
Jour92 arrosage avec 2 litres d'eau ph6.3
10 likes
4 comments
Share
15
Week 15. Flowering7y ago


85 cm
Height
2 hrs
Light Schedule
24 °C
Day Air Temp
6.3
pH
Normal
Smell
50 %
Air Humidity
22 °C
Solution Temp
23 °C
Night Air Temp
11 liters
Pot Size
0.1 liters
Watering Volume
60 cm
Lamp Distance
Nutrients 4
Bio-Bloom
4 mll
BioBloom
3 mll
BioGrow
3 mll
Master_weeda Bonjour à tous les padawans et maîtres jedis
Jour98 grosse defoliation et léger arrosage
Jour101 arrosage avec 2, 5 litres d'eau ph6.3
16 likes
4 comments
Share
Used techniques
Defoliation
Technique
16
Week 16. Flowering7y ago


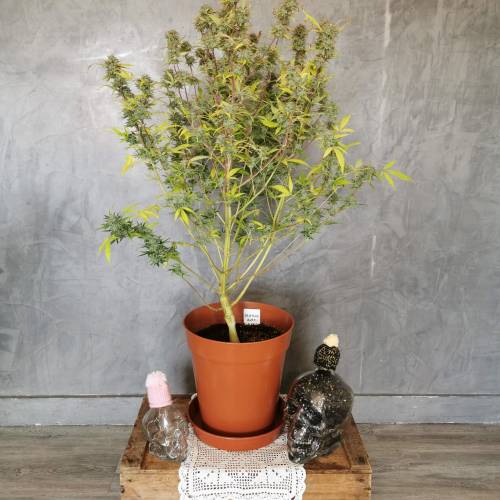


85 cm
Height
20 hrs
Light Schedule
24 °C
Day Air Temp
6.3
pH
Normal
Smell
50 %
Air Humidity
22 °C
Solution Temp
23 °C
Night Air Temp
11 liters
Pot Size
1 liters
Watering Volume
60 cm
Lamp Distance
Nutrients 4
Bio-Bloom
4 mll
BioBloom
3 mll
BioGrow
3 mll
Master_weeda Bonjour à tous les padawans et maîtres jedis
Jour106 arrosage avec 2 litres d'eau ph6.3.
Jour108 arrosage avec 2 litres d'eau ph6.3
12 likes
1 comment
Share
17
Week 17. Flowering7y ago


85 cm
Height
20 hrs
Light Schedule
24 °C
Day Air Temp
6.3
pH
Normal
Smell
50 %
Air Humidity
22 °C
Solution Temp
23 °C
Night Air Temp
11 liters
Pot Size
1 liters
Watering Volume
60 cm
Lamp Distance
Nutrients 4
Bio-Bloom
4 mll
BioBloom
3 mll
BioGrow
3 mll
Master_weeda Bonjour à tous les padawans et maîtres jedis
Jour 112 arrosage avec 4 litres d'eau ph6.3
Jour 115 arrosage avec 2 litres d'eau ph6.3
Jour 117 arrosage avec 2 litres d'eau ph6.3
15 likes
9 comments
Share
18
Week 18. Flowering7y ago


85 cm
Height
20 hrs
Light Schedule
24 °C
Day Air Temp
6.3
pH
Normal
Smell
50 %
Air Humidity
22 °C
Solution Temp
23 °C
Night Air Temp
11 liters
Pot Size
1 liters
Watering Volume
60 cm
Lamp Distance
Nutrients 4
Bio-Bloom
4 mll
BioBloom
3 mll
BioGrow
3 mll
Master_weeda Bonjour à tous les padawans et maîtres jedis
15 likes
4 comments
Share
19
Week 19. Flowering7y ago


85 cm
Height
20 hrs
Light Schedule
24 °C
Day Air Temp
6.3
pH
Normal
Smell
50 %
Air Humidity
22 °C
Solution Temp
23 °C
Night Air Temp
11 liters
Pot Size
1 liters
Watering Volume
60 cm
Lamp Distance
Nutrients 4
Bio-Bloom
4 mll
BioBloom
3 mll
BioGrow
3 mll
Master_weeda Bonjour à tous les padawans et maîtres jedis
Rien à signaler la plante est saine et dégage une odeur exceptionnelle
Je pense la récolter cette semaine
Car les trichomes commence à être ambrés à plus de 30%
Comment savoir quand récolter ?
La fenêtre de récolte du cannabis est l’un des aspects de la culture qui est malheureusement trop rarement pris en compte, ou bien le cultivateur n’a simplement pas la patience d’attendre encore quelques jours supplémentaires pour assurer un maximum de teneur en THC.
Certaines variétés sont meilleures si elles sont récoltées avant leur pic de production de THC, alors que d’autres sont meilleures si elles sont récoltées après.
Il y aura toujours certaines variations mais vous pouvez utiliser les règles ci-dessous pour vous aider à évaluer la meilleure fenêtre de récolte pour vos plantes, en vous basant sur les trichomes:
1) Des têtes de trichomes parfaitement formées mais encore claires vous apporteront un effet high plus propre et plus stimulant avec moins d’effet sédatif ; c’est la meilleure fenêtre de récolte pour les lourdes variétés Indica.
2) Des têtes de trichomes parfaitement formées et devenant légèrement voilées ou laiteuses ; c’est probablement le meilleur moment pour récolter la plupart des hybrides disponibles actuellement.
3) Des têtes de trichomes parfaitement formées et complètement voilées ou laiteuses, avec au moins 30% qui tournent ambrées ; voici généralement la meilleure fenêtre de récolte pour les Sativa à maturation tardive telles que la Haze. C’est aussi le bon moment de récolter lorsque vous utilisez la plante pour faire du hash.
L’erreur qu’il faut essayer d’éviter est de récolter avant que les trichomes ne soient parfaitement formés ; la plupart des cultivateurs qui suivent les règles précédentes, récolteront lorsque la majorité des têtes de résine sera laiteuse.
Récolter avant cette fenêtre produira des buds qui seront moins puissants, qui contiendront moins d’huiles essentielles et de terpènes, et votre récolte prendra un goût de verdure ou de foin, même si elle est séchée et affinée (curing) correctement.
Que la force soit avec vous 💪
16 likes
2 comments
Share
20
Week 20. Flowering7y ago


85 cm
Height
20 hrs
Light Schedule
24 °C
Day Air Temp
6.3
pH
Normal
Smell
50 %
Air Humidity
22 °C
Solution Temp
23 °C
Night Air Temp
11 liters
Pot Size
1 liters
Watering Volume
60 cm
Lamp Distance
Nutrients 4
Bio-Bloom
4 mll
BioBloom
3 mll
BioGrow
3 mll
11 likes
2 comments
Share
20
Week 20. Harvest6y ago
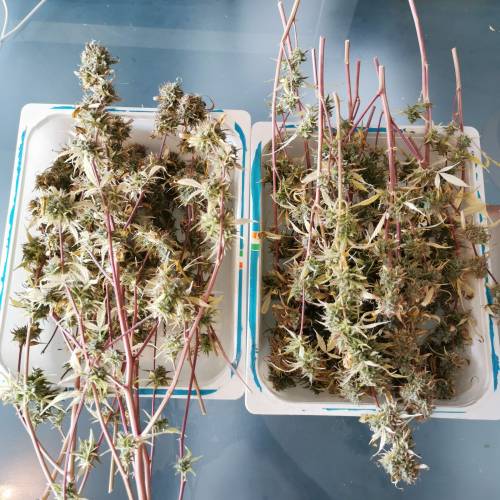
Happy Harvest Day!


7/10
Rated
Bonjour à tous les padawans et maîtres jedis
Que ce fut difficile mes amis... Mais quel résultat !
La saveur de cette weed est un mélange parfait entre les fruits tropicaux avec quelques notes douces-amères et un fond Kush très marqué, qui fera trembler vos papilles gustatives avec plaisir.
Quel est l'effet de Zkittlez Auto ?
Son effet est assez équilibré, une ascension mentale très active et se réveille avec une descente vers une agréable détente corporelle. Il ne vous fera pas vous allonger dans votre lit, mais il est parfait pour lire un bon livre.
Show more
Translate
Spent 141 days
Ger Veg Flo Har
453 g
Bud wet weight per plant
85.6 g
Bud dry weight per plant
1
Plants
0.8 m²
Grow Room size
Hard
Difficulty

Creative, Giggly, Talkative
Positive effects

Insomnia
Negative effects

Berries, Tropical
Taste
Height
Day air temperature
Air humidity
PH
Light schedule
Solution temperature
Night air temperature
Pot size
Lamp distance




26 likes
4 comments
Share
Equipment Reviews




43 comments
Sort by
popularity
popularity
newest
oldest

Crazyweedpt commentedweek 17y ago
mind tricks 😅 it was a seed and now it was a plant!
likes 4

Master_weeda commented7y ago
@Crazyweedpt, et après un gros joint ! 😉
Que la force soit avec toi 💪
likes 10

Njanne commented7y ago
@Master_weeda, bien fait :) c'est une belle racine.
likes 5
Master_weeda commented7y ago
@Njanne,Merci beaucoup 😉 Que la force soit avec toi 💪
likes 8
Show More (1)

ccthefarmer commentedweek 197y ago
Amazing tree you have here! May the force be with you
likes 4
Master_weeda commented7y ago
@ccthefarmer,thx you bro 🙏
likes 5

PrairieFrostGrow commentedweek 187y ago
She is still going!!😀 Looks like she took her time filling in those buds but you are pretty close now👌
Nice work.
likes 4
Master_weeda commented7y ago
@PrairieFrostGrow,oui une grosse carence à ralenti sa croissance... Mais je l'ai laisser lutter 👍 je suis satisfait de ce qu'elle m'apporte ❤️merci pour ton commentaire 👍
May the force be with you 💪
likes 5

Tom_Jay commentedweek 147y ago
🙏
likes 4
Master_weeda commented7y ago
@Tom_Jay,😉👌💪
likes 5

AcidTundra commentedweek 117y ago
cant wait for mine.will follow Your diary so this weedawan can lear from the forcemaster
likes 4
Master_weeda commented7y ago
@AcidTundra,welcome bro 👍 thx 🙏🙏
likes 7

JinksyGrows commentedweek 107y ago
What a beauty! Keep it up Weeda. All your girls are looking great (even the runt!!)
Keep it up brother and happy grows this week. Hope it all goes well for you👍😉
likes 4
Master_weeda commented7y ago
@JinksyGrows, everything is fine, the girls will be beautiful for the end of the year ball 🤣🤞👍👍👍
Thank you my friend see you soon
likes 7

smoker420 commentedweek 187y ago
shes looking nice dude
likes 3
Master_weeda commented7y ago
@smoker420,iam here 👍
likes 6
AcidTundra commentedweek 157y ago
Is it The Sativa geneticks that makes the plant grow those long sidebranches?
likes 3
Master_weeda commented7y ago
@AcidTundra,hello buddy Zkkitlez Auto is a dominant Indica hybrid 👍👊
likes 6

MrRaid commentedweek 157y ago
Nice work
likes 3
Master_weeda commented7y ago
@@MrRaid,hey bro! Thx 🙏
likes 5

Castafunk commentedweek 137y ago
T'es un monstre 🙏
likes 3

Bouleuss commented6y ago
@Castafunk,👍👍🙏🏻
like 1

Resin_Randy commentedweek 117y ago
🍀👌🏼👌🏼
likes 3
Master_weeda commented7y ago
@@Resin_Randy,🙏😁🙏
likes 7

Warzouz_grass commentedweek 167y ago
Elle ressemble un peu a la Royal Bluematic que j'ai faite poussé aussi.
En tout cas le goût que j'ai eu en la fumant, je dirais que c'est du Zkittlez aussi ^^
Belle plante en tout cas :)
likes 3
PrairieFrostGrow commentedweek 127y ago
Looking nice!!
likes 3

northernMike commentedweek 177y ago
Plant looks great👍
Just curious, is it normal for some autos to grow
that long,or is it just certain strains?
My first grow was 11weeks for the Lambs Breath and 13 weeks for the Northern Lights.
My second grow, I have one L.B. that I started to flush at eight weeks, the other three plants still growing and drinking like crazy.
Have a great day and Grow BIg!!
likes 2
northernMike commented7y ago
@Master_weeda,Hey thanks for the reply
I have 2 Lambs Breath autos, they look totally different, but they both look really good😛
The L.B. from my first grow turned out really good,pretty intense then giggles then munchies😎
thanks again
Grow Big!!
likes 2
Master_weeda commented7y ago
@northernMike, if you need advice does not hesitate brother
likes 5
northernMike commented7y ago
@Master_weeda,Thanks much🙏
like 1
Show More (1)

FriendlyNeighbor commentedweek 177y ago
Wish you the best for the final weeks!
may the yield and terps be with you =)
likes 2
Master_weeda commented7y ago
@FriendlyNeighbor,thank you bro 🙏 performance is not my priority 😉 that strength is with you 💪
likes 6
FriendlyNeighbor commented7y ago
@Master_weeda, if you have enaught space awsome =)
but atm I have to go for half yield / half strength/taste
I wish I could just grow the most beautfull low yielders and get through...
one day 😁
likes 3
Master_weeda commented7y ago
@FriendlyNeighbor,😁
likes 6

HazeyBobby commentedweek 206y ago
Very nice photography work :) and a nice harvest too 👌
likes 2
Master_weeda commented6y ago
@HazeyBobby,thank you bro 🙏
likes 3
AcidTundra commentedweek 147y ago
So how long till u expect harvest?.Noticed pistils going Nice and amber on her.Reading up on when to harvest and im torn between looking at the thrichomes under x100microscope or if that change is dependent on terpene profile and where to find this info.
Starting to feel its more of something u learn by experience than a exact science😺
likes 2
Master_weeda commented7y ago
@AcidTundra, I harvest between 20 and 50% amber but it's a matter of taste there only science that must be followed is that of trichomes the minimum required is 10% amber but after c really a matter of preference 👍
likes 6
Bouleuss commentedweek 206y ago
In a hurry to see the result of your pretty work
likes 2
PrairieFrostGrow commentedweek 206y ago
Hey Man........I prefer the red bag skittles next time😀😀😀
Good amount of frost on those nugs👍👊
Nice run, yet again!!
like 1

OrganicNature420 commentedweek 205y ago
Insane 🌱💚🔥
likes

the end.
Enjoying this diary? Follow for more updates!

Prefer the old Diary view?
Go back to the old Diary view