multiphenotal [Feel free to use any text and images in this growdiary on your website. Everything is by me]
Weed !is just a plant! and it !will! grow like any other plant. This grow diary and guide is directed at the individual providing for himself and its friends and aims to show you firsthand that a harvest of a few dozen grams per plant every 2-3 months with a sub $6 budget per plant (including quality seeds) and the bare minimum care, knowledge and capacity is a guarantee(not exaggerating here). So think a windowsill, guerrilla grow or lowest possible budget indoor grow. There is little reason not to try this kind of grow. Everything you need to know will be covered in this very post - stick around to see it play out.
First things first. You need a spot. Here is how you can go about it:
You will need at least 6-8 hours of DIRECT light a day. Forget about light cycles, we are doing automatics here. More about that type of genetic later. If you are growing outdoors these genetics can be started April to August.
My rules of growing:
Don't tell anyone. Not even your friends. Just let it be a surprise "Look, I got this glass full and Im going to share, wanna break it in?". Otherwise, word will travel insanely fast.
If you post pictures online, delete your exif (screenshot the image, paste into paint, save as jpg), black out any identifiable information (bar codes, your popular computer setup, fingerprints) and dont have the pictures link to otherwise used usernames.
Order seeds right away, think about the rest later. Guide to choosing seeds/genetics is further down.
Don't over water
If you are going to use it, read the damn fertilizer instructions and use 25% that and ONLY if they've been growing for a few weeks already.
------OUTDOOR GUERILLA-----
Hopefully you know your local forests and would know where to look for a spot that is undisturbed for ~3 months. Make sure there is something growing there already. The type of plant that's growing there and their respective heights will show you the type of soil you are dealing with (f.e. waterlogged, dry, nutrient rich) and if there is enough light (knee high no bark greens are a very good sign; Dead coniferous forest floor is a very bad sign).
Use a combination google, google maps and a hiking map (f.e. 4umaps) to first find a few promising candidates and then scout them out on foot with some good music. Optimal are either nature reserves or that spot 25 meters from the nearest road nobody ever goes to for some reason - and there a lot of those spaces.
Don't visit your spot time and time again - youll create a trampled path inviting others (also automatics do not like being pampered), make sure nobody sees you go into the spot, wear natural colors and put everything in a backpack, make sure other weeds are growing right around yours to camouflage the silhouette, dont plant in orderly rows or pattern, dont plant too many in one spot.
We are going to replace or enhance the soil, this will increase yield and success rate dramatically. Dig out a 30x40cm hole. Here are the most common type of soils that need some extra knowledge:
-Waterlogged Soil: Mix in a lot coco coir or wood chips. About 50%. Maybe more.
-Clayey Soil: Mix with normal discounter potting soil. 70% potting soil will be good. If it is very Clayey (water forms puddles which stay for more than 20 seconds) replace. Coco Coir will always help your root system grow faster while also improving drainage, at the cost of having to water more often.
-Acidic (Conifer forest) Soil: Replace with normal discounter potting soil.
-Hard Ground: Replace with normal discounter potting soil
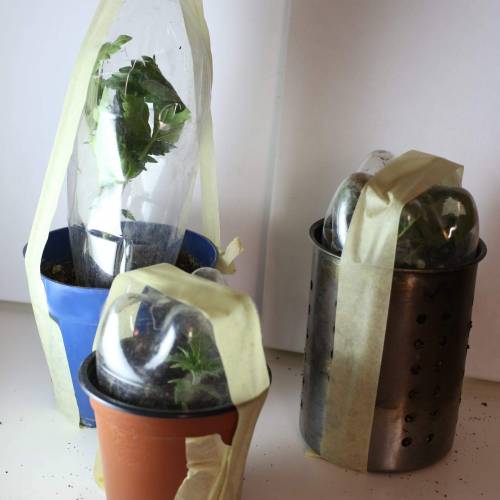
You must always germinate your seed indoors for reasonable success rate. Then, two weeks after germination put the small pot in a cut-in-half plastic bottle, tape it together and safely transport that contraption to your spot. You can cover the freshly replanted seedling with a split in two plastic bottle during the first week too. Poke some holes in it. This mini grow dome will help it acclimate.
------WINDOWSILL------
>You'd be surprised how well hidden a 40 cm high, quick yielding dwarf genetic is among other plants on a windowshill. 1. People expect these plants to be obvious 1-2 meter high bushy trees 2. They will not pass judgement/take action(aka use their phone to open an inter dimensional combine super portal to summon the overwatch invasion force) if they cannot get close enough to actually confirm that bonsai is what they somehow suspect it is 3. I cannot promise this one but I feel anyone with a say discovering this up close will at most think it's some kind of curious experiment and could you please stop doing that here. 4. Many people, especially students, just won't even care. 5. Example: My parents once had five 2 meter high hemplings growing in their garden that ended up there by accident, it was about 10 meters from a well traveled bicicle/Foot traffic road in a rural side and really poorly "camouflaged" by a single tree stump. NOT ONE ever seemed to be noticing in the ~5 months it was growing there. Just dont be blatant and obnoxious about it.
Good carefree small genetics for this are Monster Dwarf Automatic (Zamnesia Seeds), Quick One (Royal Queen Seeds) and Purple Bud Automatic (White Label) [yes it really is purple]
-remember, if you are growing behind glass your plants will grow substantially slower. You might think Im insane but I have tried the difference and I'd say you loose 30% of grow speed. A fan simulating the wind outside will mitigate this somewhat.
-If you cannot put a plant outside, because you have neighbors from hell which double check your windowsill with a binocular regularly or you are just scared about it, there are privacy films which you can apply to your window, which will make everything behind it a blurry mess. This will reduce your light intensity even further, but you will still get a dozen grams or so.
------INDOOR ARTIFICIAL LIGHT------
>Wanna go indoor but have near zero or even a zero budget?
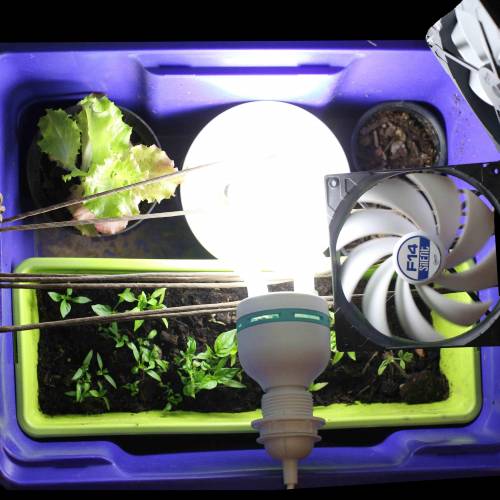
I'd recommend you get a 135W 5500K CFL or something similar, they are about €20 for a pair and screw in like any other light bulb. Make sure it is 100W -ACTUAL- (and !NOT! "Effective Wattage"). One such light per Plant is optimal, but you can go as low as 50W per plant.
-Distance is EVERYTHING. Light falloff is quadratic, NOT linear. So double the distance means 25% the light intensity. You can keep your plants within centimeters of your CFL with just the most basic ventilation going on, and you should do just that.
-If you are growing indoors ventilation is as important as light and soil. Plants cannot photosynthesize without air circulation and the leaves will clog up, plant will get sick, bug infestation will happen and your crop is done for. A $4 120mm Computer fan per 100W CFL will serve you very well. The windier the better. Make sure to have at least one fan blowing directly on your plants.
-I have seen one friend, despite my repeated protests, grow bag-seed under a regular halogen desk lamp with an additional ~2 hours of direct sunlight a day. We got a bit over 20g dry out of it. So even though this isnt recommended any light will work if you keep it close; Except
-Don't grow grow under these super bright and HOT traditional 400W/600W Floodlights. Don't try it. Also you shouldn't be attempting a Grow with a regular incandescent light bulb.
Two or Three Dwarfs will not smell enough to attract attention - but some other genetics do smell strongly. Luckily most automatics do not.
------GENETICS------
Look into nature. Most of what you are seeing is plants that just grow there all by themselves with no outside help.
These wild plants haven't been overbred for potency, they've survived.
Automatic Cannabis has the best of both worlds. The cannabis ruderalis genetics used in breeding these strains (which have the autoflowering trait that makes it finish in two to three months regardless of any circumstances like light), have been discovered after a lot of stray hemp seeds landed in ditches. After enough lost seeds some started to show an autoflowering trait and were propagating on their own. They learned to survive, prioritizing survival over any other trait. They are so hardy in fact that they are "pest" (like f.e. the stinging nettle is here) in many parts of Russia. Look it up.
But at the same time they still pack the punch you expect.
So now the claim "it will grow like any other plant" isn't so far-fetched anymore is it.
If you are looking for a genetic don't obsess over potency, strain name or if it is a "haze".
Also Strain is not = Strain. There exist the same strains from different breeders under the same name with a huge differences. Find and select a reliable breeder (Zamnesia Seeds has really sold me over with their uniform Northern Lights Automatic, so Ill stick with them for now). Here are a few suggestions for genetics you might wanna try if you live in Europe.
>Northern Lights Automatic by Zamnesia
(My few week old seedlings so far have endured a few frosty nights without complaining, even though it was so severe it even frost burned my potatoes and pretty much killed my beans)
>Purple Bud by Whitelabel
Looks amazing, DWARF ,takes a little over three months from seed to harvest, small yield. ( I think they took this one out of their store though, probably working on a 2.0 version)
>Sticky Beast from Zamnesia Seeds
Placed 1. in Highlife cup 2018, bred for strength, apparently packs quite a punch, ~60 cm height, 2 months from seed to harvest, yields a lot
If you are unsure there is always seedfinder.eu . The older genetics tend to be reliably documented there. Please focus on growth hardyness and not whenever the vendor claims it is 18% or 22% thc. You will love them even more when they just do their thing without intervention. Also there are cannabis competitions.
-----FERTILIZER, ADDITIONAL CARE, HOW TO HANDLE POTTED PLANTS, AND MORE-----
In the following entrys, keep reading.
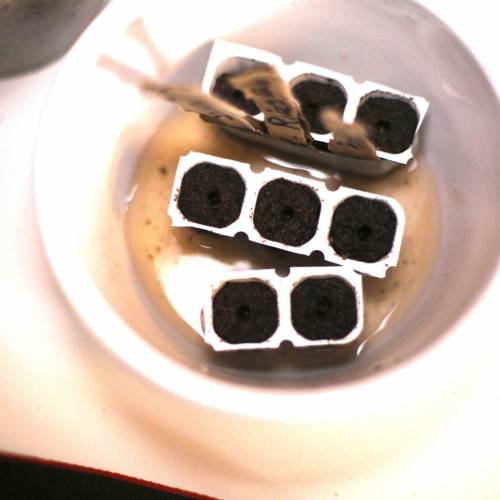
In todays grow diary I've started the germination process of five Blue Monster Automatics from Zamnesia seeds as part of the Spring Cup by Zamnesia. They have provided me with the selected Blue Monster Automatic Seeds, a Quick Start germination Kit, Monster Bud Mix fertilizer and some Markers.
Make sure they are moist at all times during their first week, but not drowning in water or mud. Never should they dry out during germination and the temperatures should be kept between 20°C and 25°C. Always use potting soil and not random dirt. 20 Litres can be had for €/$1. Enhancing your soil will increase growth speed but isnt a requirement unless you are growing in waterlogged ground.
The pictures are commented.
2 likes
1 comment
Share
2
Week 2. Vegetation
6y ago
1/6
4 cm
Height
24 hrs
Light Schedule
23 °C
Day Air Temp
22 °C
Substrate Temp
23 °C
Night Air Temp
1 liters
Pot Size
0.1 liters
Watering Volume
3 cm
Lamp Distance
multiphenotal This week more tips and also a shameful misstake that happened to me. Of course it would happen, I'm writing a guide. I almost abandoned writing this guide, since this leaves me with 3 viable plants which really dimishes my premise, but I eventually prevailed and decided to make this the most perfect grow I have ever done with the resources I still have.
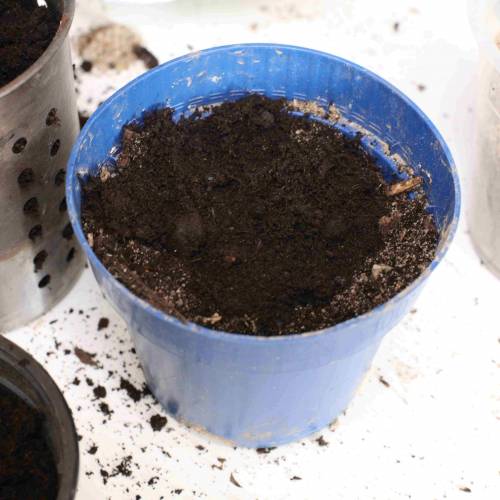
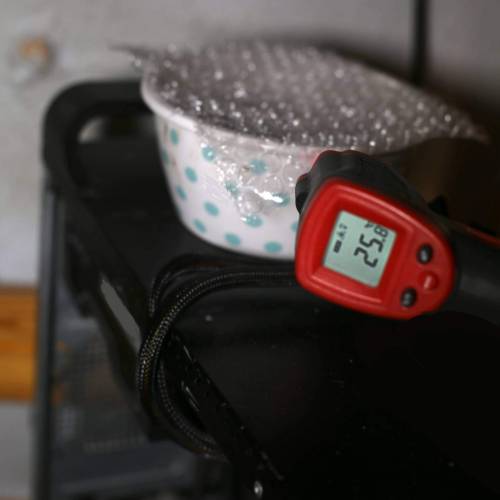
The two misstakes, which I really should have known better to avoid, were firstly: I pushed the seeds a little too far into the Smart Start germination pots. (a good planting depth for any seed is the diameter of the seed) Second: Even though the ambient temperature in my makeshift growbox was ~23C°, the computer fan blowing onto the small pots generated constant evaporation, dropping the soil temperature to 18C° and forcing me to overwater them regulary or they would have dried out dangerously every 12 hours. Since (cannabis) seeds don't need light to germinate UNTIL they pop above the soil, they shouldn't have been in the growbox in the first place. I really am to blame for the consequences of this. Anyway, when they didn't germinate I moved the tiny pots into a bowl, covered that loosely with bubble wrap and put it onto my computer, where the soil is now at a constant ~25C°. There they don‘t need waterings and three peeked out in the days after that, at which point I -immediatly- transplanted them into their bigger pots and put them back in the growbox under light and fan. The soil tempereature in the bigger pots in there is now a very comfy 22.6C°. I doubt the other two seeds survived - but I will give them another week to germinate anyway. It is to be expected and perfectly normal that about 1 out of 5 Seeds are not able to germinate. It's just natures exciting lottery. After enough tickets though, you might win a super special trait or a random curiosity, like a trileaf or an unusual coloration.
If you now start to worry about 'the best' germination practises, there will be nothing more valuable than trying them all out yourself with hemp seeds – if you have the time. These are readily avaiable as horsefeed or an addition to cereal across the internet, taste amazing with chocolate and are cheap enough that you could literally start a whole plantage for 30€. Common quantitys, for example 1kg, should cost you about 5€ and it's how I developed my understanding for grow behaivour. You can also use them to test out the viabilty of a potential growspot. This won't just show you if a spot itself get's enough water and sunlight, but also if it is ever discovered and recognised.
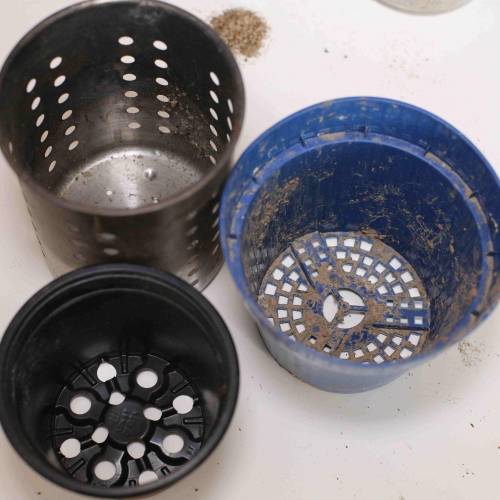
Among other things I used hemp seeds to test out how root depth affects plant height, whenever a wide but shallow container is viable and what improvised containers are ok. Improvising pots isn‘t nessecary, even with a non existent budget. Apparently cemeterys have big dumps where old pots are discarded into, and boy are there a lot of pots. The pictured container got emptied a few weeks ago and still has enough pots to start a garden centre. As a bonus for recycling what would otherwise be waste, there are oftentimes many freshly discarded plants, which you can also take. I took a couple of flowers and gave them to my mom <3 . Just like nature, she just wants your love.
There are also makeshift pots, you most likely have lying around already, pictured alongside the cemetery haul. Any pot you use must however stop light from reaching the roots, since that would stunt any plants root growth, promote rapid bacteria replication, algae would grow and the soil would dry out quicker than it should while also beeing hotter than it should be. Glasses win the „worst container award“, since ontop of letting light reach the roots, you cannot put drainage holes in them, which is not an optional feature. The most unexperienced might think that "Since plants need water, more water = good. Why would plants want the water to run out of their pots". If roots or seeds sit in water or overly soaked soil for days, they will rot and turn mushy fast. It also dillutes the avaiable nutrients and on top of that the lack of a 'dry'/wet cycle prevents the roots from growing at a decent speed. Waste salts will also accumulate in the soil and sooner or later soil gnats and other insects will be buzzing in and out of your pots. More on the most common problem Indicators + pests next week.
Last week I mentioned the importance of genetics and why hardiness is desireable over maximum theoretical potency or name for this kind of grow and mentioned Nothern Lights Automatics as a good example for this. My Nothern Lights automatics, from a different - but also currently active grow, survived multiple unusually harsh frosts during the last weeks. Even though my potatoes lost some foliage and some beans died the northern light automatics weren't harmed by the freezing nights and I can thank their genetics for it. Like any other plant under these conditions, they are growing slower during these cold snaps, which is just a limitation of chemistry itself, but reality still is: That grow will be harvested and dried outdoors in the fresh summer heat when others are starting to germinate.
As always in this growdiary, everything written has a related picture and the images are commented.
2 likes
comments
Share
3
Week 3. Vegetation
6y ago
1/12
4 cm
Height
24 hrs
Light Schedule
20 °C
Day Air Temp
20 °C
Substrate Temp
12 °C
Night Air Temp
21 liters
Pot Size
1 liters
Watering Volume
3 cm
Lamp Distance
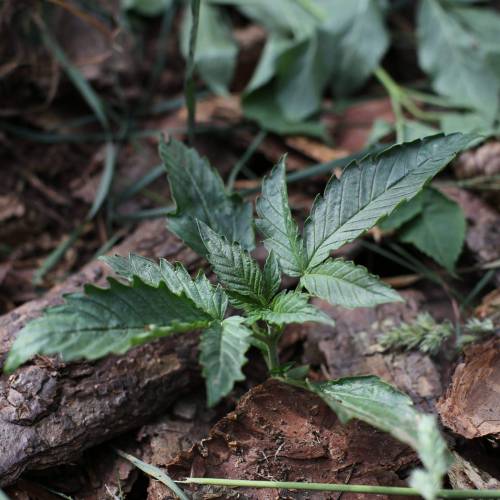
multiphenotal They were getting overly bushy and kinda big for their pots this week, so it was time to transplant them. I never saw a seedling grow this fast before. The other two did not make it, as expected. Note, one plant is very small, this might be a runt – or it might just be because the first set of leaves after the embryo leaves came out warped, causing a snowball effect. I don‘ t know for sure yet.
You can see the sides of some leaves are pointing up and curling inwards, this is a sign of minor heat stress and nitrogen burn in the unimproved soil. I did not fertilize them, the potting soil must have been pre-fertilized.
The minor heat stress was caused since plants grew so fast they were touching the light after a days worth of growth, so I had to readjust them every day, which i didn‘t - So they were touching the CFL-Lightbulb for hours. Thanks to proper ventilation this was a non-issue. The benefit of keeping them within centimetres of the light far outweighs the ‚damage‘ with this type of lightbulb.
Packaged into cut plastic bottles for transport and put into a backpack, they made their way towards their would be growspot. But some stoner-aged people were lounging around in observation distance, so I took a detour and decided to plant in an alternate spot first.
There I dug a 30cm x 30cm cylindrical hole which comes in at
PI x (diameter/2)² x depth = 3.141 x (30cm/2)² x 30cm = ~21.000 cm³ = 21L
which should be just fine for an automatic.
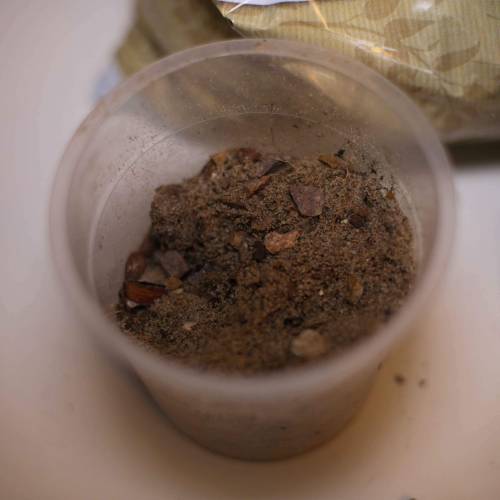
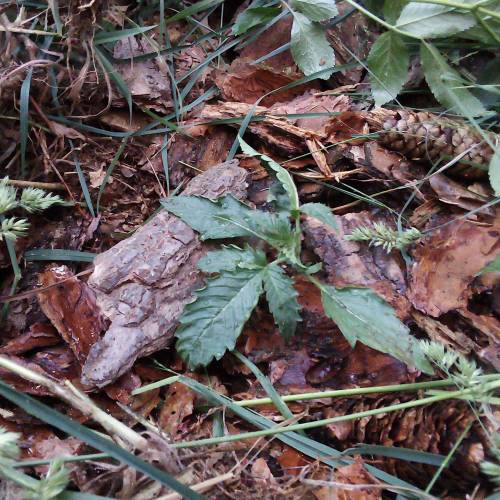
The soil here was more akin to sandstone on top of being acidic due to the surrounding trees shedding needle, so definitely not suitable for mixing – it had to be replaced. The perfect soil would be light, dark brown and fluffy. Available there was dried dead bark, pine cones and a dug up fine 2nd soil layer of very loose decomposed root and plant material. It was mixed into decently loose soil from under a small part of the forest that‘ s covered by leafy bushes and trees. Zamnesia provided me with „Monster Bud Mix“ slow release fertilizer to mix into the soil. I used about 50-75% of the recommended dosage since automatics don‘ t like too much fertilizer. I still recommend you work your way up to 25% the recommended dosage if you just buy random non-cannabis-specific fertilizer.
Also I dug a little deeper and put chipped apart pine cones and mulch in there so the roots can grow a little bit deeper, giving this plant a bigger potential to grow tall. Root depth directly dictates plant height and is a deciding factor for yield.
The mix was dumped in and mixed at 200C° for 2 minutes in the kitchen master 400. I did not use any bark that had insects crawling around under it, since the soil doesn‘ t need souls to be suitable for this strain of cannabis. (Also, don‘ t rip bark off live trees)
The (not freshly watered) plant should be gently shaken out of its pot and, without fumbling with the roots, planted. Then water it liberally, make sure to get some on the leaves if the sun is not currently directly shining on them – that could cause burns.
It‘ s important to note that transplanting any plant outside into the sun like this can give them severe sunburns, but since they are so small and there's still stuff partly shadowing since it‘ s growing right around it I can get away with this in this case.
If your plant is getting more than 2-4 hours of direct full sunlight during it‘ s first days outside and you can‘ t partially shade it you can acclimate by putting them on your windowsill for a few hours more every day in the days leading up to the transplanting. Also you can put them under a bush outside.
You also have to put a „mini greenhouse“/ cut off plastic jug over them if it‘ s slug season or still a bit cold. This will also block UV rays and prevent sunburn. Just make sure it‘ s not getting heat-stressed in the mini greenhouse and don‘ t leave it on too long
Back to the plant, the top layer was covered with bark mulch to prevent the spot from drying out and to camouflage the freshly dug up soil there. Some loose dead greens sprinkled over that served to camouflage it further. It was watered with around 5L and I moved on to plant the other two plants. It was getting dark already and the only camera available at the time was a phone, so the picture quality is abysmal at this stage. Since the other two specimen are growing in waterlogged conditions the soil was improved with about 70% coco coir and mulch and the rest is local soil. The remaining half, or about 75g of Monster Bud Mix was added into the bigger plants soil, the small plant will have to do without it. Additionally a sort of a „ventilation shaft“ of only bark mulch was added to a side of each hole. This mostly helps bugs in and out of the soil. Again the hole had also been dug a little deeper and the additional depth was filled in with what is basically loose debris – just so the roots can grow a little bit deeper with ease.
I came back 3 days later to improve the spot, to check on them and water (they didn‘t need it), just to find out I was too late for what I had planned. They acclimated very well but one plant was so kind to show us the benefits of a training technique called „FIMming“. I call it SNAILing – it was done expertly in this case with an additional layer of mucus sealing the exposed stems off from any potential harm. Also it made the slug happy, which is as we know priceless. Training Automatics is a controversial subject, but if you want small bushy inconspicuous dwarfs on your windowsill or think their genetics are good for it you can try it out. You might even increase yields. Or you just get lots of popcorn buds. Mileage may wary. Most breeders have documented training techniques very well on their websites, so I will not explain them in detail. Basically what FIMming and Topping does to your plant is make it produce more „main stems“ or „colas“ as they are ultimately called. Let‘ s just see how they do.
I liberally put a bed of dried pine needles around my plant to deter any slugs from trying other experimental techniques on them.
Now to todays promised subject, the most common problems plants run into and what are its symptoms:
Overwatering/drainage – First smelly soil then droopy leaves finally mushrooms and dead roots will cause an avalanche of syndromes which will permanently stun your plant. Don‘ t overwater. Never have standing water. Always make sure your soil drains well. Don't be 'extra' nice to your plants at any stage and then start to give them 'a bit more' water. This is THE most common mistake beginners make.
Nutrient Toxicity – most often in the form of very dark, olive skinned leaves with pointy elongated ends curled upwards– indicating a nitrogen burn. Put pot into a shower and rinse the soil to wash out excess nutrients. There are many types of Nutrient Toxicity, look up a picture showcasing all of them. Also know that with Nutrient Toxicity come other Nutrient Deficiencys. More on that next week
Too little light during seedling phase – Seedlings are getting leggy and thing instead of developing new sets of leaves just a couple cm above the soil. Give them more light and wind.
Sunburn – white spots on your leaves which will become dead dry material.
Root bound – Plant stops growing upwards at a measurable rate, roots peeking out of drainage holes
lice, aphids, bugs, slugs and even deer and boar. – Make sure you never overwater and have good drainage, use a bed of needles and coffee grounds to deter slugs and, yes, pee around your site to make it smell dangerous to prey animals. Exposure to the elements should take care of most lice and such but if it gets excessive you can use a spraybottle with soap water...
Next week will touch on more advanced subjects.