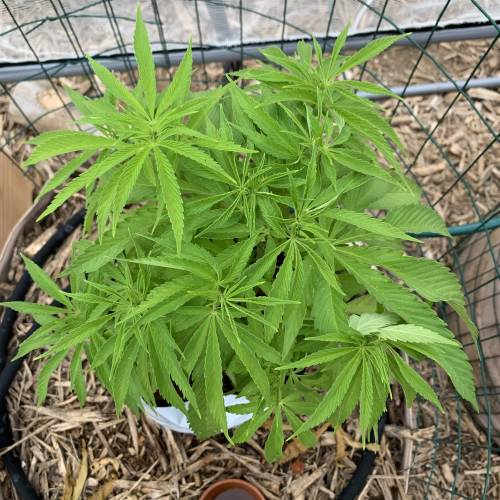
Vote Now 🏆 for the Grow Awards 2025!
Chat
Recommended

Shade-grown 2020

4
13
13
350
5 years ago
Follow
Greenhouse
Room Type
Defoliation
weeks 3-4, 6, 10
Topping
weeks 6
Soil
Grow medium
8 L
Pot Size
1
Week 1. Vegetation
5 years ago
10 cm
14 hrs
28 °C
25 %
20 °C
25 °C
14 °C
8 L
1 L
407 PPM
Nutrients 6
Barley SST 0.01 mll
Corn SST 0.01 mll
Dry Malt Extract 0.01 mll
Here we go again! This year I’m happy to say that I’ve learned from last years grow quite a lot and have really re-worked my methods to a hopefully easier method. That said this year I am taking a nose dive into the world of Korean Natural Farming with hopes that this will become a long term sustainable project. I will Also he expanding upon my use of the Terp Teas from Aurora innovations and will be using their full line of Terp Teas along with their Uprising dry nutrients as a baseline nutrient addition to my soils. I will also be continuing my use of Seed Sprouted Teas (SST) of Barley and Corn, I assume I will also be adding in Alfalfa this yeast. And last but not least I know how to propagate bacteria better than most of my other skill sets so expect Actively Aerated Teas and bacterial/myco propagation to be very prevalent...I’ve got a special side project that will be dedicated to producing these on a much bigger scale that my 6 plants I hope to share in the coming months. All in all I think I managed to take a complicated program from last year, strip it down to its essentials, and re-complicate it for another year haha this seems to be my pattern so I may as well embrace it. If I had to boil down this years growing techniques I would have to say it is first and foremost, all about the microbes and mycorrhizae. After the micro/myco it is about creating a sustainable, recyclable soil; unlike last years trash soil that really just scraped by. Last but definitely not least is the use of Terp Tea. I want terps lots and lots of terps, I want the best tasting buds I’ve ever grown and it is my belief that between the microbial life I will cultivate and the sulphur rich ingredients in the Terp Teas that I will achieve some great flavors. I hope to see you all along for the ride! P.S. the strain, Angel’s Share, is actually my own first custom breeding project. It is a result of my Male Sundae’s Best (Sundae Driver x unknown male) and Wedding Cake. I expect nothing but greatness from this strain but honestly, who knows!
likes
1 comment
Share
2
Week 2. Vegetation
5 years ago
15 cm
14 hrs
29 °C
Weak
25 %
20 °C
25 °C
16 °C
8 L
1 L
407 PPM
Nutrients 6
Barley SST 0.05 mll
Corn SST 0.05 mll
Dry Malt Extract 5 mll
Well here we go! The big pots 45gal/170L) are filled with my custom mix. My custom mix this year wasn’t exactly what I wanted but in the day and age of Covid-19 you get what you get. If I had a chance to change it the one and only change I would make is to use Roots Organic Greenfields or even FF Ocean Forest, but neither were available so I went with a mix of two soils the guy at the store was very ready to tell me where every bit as good...well they aren't bad by any means but not a true substitute but together I think they will do great. ~Push by Earth Juice~ This is a soilless medium of Coco, perlite, and Biochar. I think this is some pretty good media for an indoor soil(less) with Liquid-nutrient program. It is a nice blank slate, although too heavy for multiple daily feedings. ~Terracraft by Mother Earth~ Definitely not as refined as I had expected for the price. It has a decent, slightly overly spoungy texture but not bad. I think what throws me off is how much undigested forest compost and peat moss I can see in the media, granted this may be of benefit for my mycorrhizae. This stuff is surprisingly light for a more outdoor type grow but would work just like most soils. After the soils I added plenty of amendments in the form of Worm Castings, Alaska Humus, perlite, composted mulch, and brewers spent grain. This was then complimented by the Uprising 3-part dry nutrients at a rate of Grow 15ml, Bloom 30ml, and Foundation 90ml per 45gal(170L) pot. This what then watered in with liberal amounts of HMO2 from my local area, commercial mycorrhizae, Humic Acid, and Flow by NPK nutrients which is Malt Extract and Yucca extract, a great foliar surfactant and feed. Once all of that was mixed in 3 layers I topped each pot with more spent grain, a layer of 1.5 year old mycorrhizae rich mulch compost, and finally with 1 year old citrus mulch. It was finished with 2 gallons of Fish Amino acids in water. The goal is to allow that system to get started and ready as a “super-soil” and then use a small concentration of the Terp Teas once per week as a mild booster along with my SSTs. Also due to the fact that it will be attached to the same fertigation tank as my entire garden it will also receive some Fish Amino Acids, Micro Nutrients, and Humic Acid on a rotational basis. For the next few weeks the plants will stay in their 2gal(8L) homes as they are exception happy right now I see no reason to rush them into the new home until it is properly “cooked”. One other thing I will be doing this year is not Pruining, I’m going with Masanobu Fukuoka and the do nothing approach this year(unless I feel the need to change this at some point).
3 likes
2 comments
Share
3
Week 3. Vegetation
5 years ago
35 cm
14 hrs
30 °C
Weak
25 %
18 °C
24 °C
15 °C
8 L
1 L
407 PPM
Nutrients 5
SST - Barley (2g/L or 40g/5gal) 26.417 mll
RAW Yucca - NPK Industries
RAW Yucca 0.528 mll
Essential Earth - Aurora Innovations (Roots Organics)
Essential Earth 1.585 mll
It's been a good week! My set of Aurora Innovations nutrients is now complete, I have everything I need to finish my tea bubbler re-build, and the plants couldn't look healthier. I am actually rather shocked about how fast they are growing, I definitely did not experience this fast of growth with my last greenhouse grow so I am pretty happy with my soil mix for the year. ~Transplanting~ I was planning on giving my plants 6-8 weeks in the 2 gallon pots before transplanting into the soil as I wanted the soil to "cook" a little longer but I don't think that will be an option, these plants have doubled in size in one week so at this rate they will be pretty massive by the 5-6 week mark in this journal which is now the planned time range for transplanting these into their final home. ~Sexing~ I don't yet know the sex of the plants, so I am planning on just winging it for now and planting everything, when I determine the sex of each plant I will, very similar to last year, take some cuttings off all of my Pheno's and seed them in a semi-controlled manor, probably in a grow tent indoors this time to prevent seeding any of my crop. With any luck I only have one or two males, after that I will plant something in the soil to help keep it alive for next years soil, a huge goal for me is to learn to recycle my soils, more about that later. ~Phenotypes~ This year I have 6 of the same strain, as opposed to last year I have 6 of 6 strains to start. One thing that sticks out to me is the lack of variability I'm seeing in these seeds, they are all pretty uniform in their smell and growth, some are faster than others but not by much. This is a big difference from last year where the seeds I had purchased from a local source had 6 unique plants for 6 seeds, not so with my Angle's Share seeds. The minor variations I have seen are growth rate, smell intensity, and heat tolerance. Overall though they generally look and smell alike, all have a sweet musty and mildly fruity funk to them which is very reminiscent of both parents in equal proportions. One plant sprouted with lopsided leaves and a mildly defective but strong structure, and another seems to cup its leaves a bit more on hot days, but for variation that is as far as it goes.
3 likes
comments
Share
Used techniques
Defoliation
Technique
4
Week 4. Vegetation
5 years ago
38 cm
14 hrs
36 °C
15 %
16 °C
24 °C
16 °C
8 L
1 L
407 PPM
Week 4! I Can’t believe how fast this is going! I have barely had time to catch up to the new schedule so my timing for feedings is off. As this “week” is a bit in the late side I’ll be posting week 5 in a couple days and talking about some things I’ve done in this two week period on each week. ~Starting liquid nutrients~ I was a week late getting additional nutrients to my plants after transplant, I meant to go 2 weeks with no nutrients but instead went 3 1/2 weeks of no nutrients in my 2gal(8L) pots and this week I saw a slow-down from what was some pretty extreme growth, it could also be that I skipped a foliar feed at the same time, but last week I got back on the nutrient and foliar train again so I expect to see improvement again. ~Males?~ I have begun watching for the first signs of flower sex right now and have spotted two potential males. I could be wrong but I noticed during last years grow which was my first male grow, that the males flowered much earlier so these plants have an accelerated growth and stretch far earlier, this and they develop their first flowers much earlier. I have two plant showing this sign and with any luck they are, I have my eyes on one in particular that has great growth characteristics, a purple flush on the petioles and main stem, and a slightly funky cheesy smell that is unique to it among my phenos; this one would make an ideal male. ~Biological Propagation~ Last year I began really digging into biological propagation and how to best apply it and I suspect this year I will really hone it in. Last year I ran several tests with an actively aerated tea set up in a homebrew conical fermentor, this worked super well to produce bacteria of any aerobic sort; however, it did not work well to produce Mycorrhizae and Anaerobic Bacteria such as Lactobacillus(EM-1) was not a viable option either. So this year I have expanded my list of biological propagation techniques and can now include these others very easily. First on the list of new techniques is anaerobic fermenters! This is a pretty simple addition as I’m just adding new tanks, these can seal air-tight and have heat/cooling controls So my temps can be at their optimal 110dF(43dC) for the EM-1 propagation, pictures to come soon. Second is Korean Natural Farming‘s IMO or Indigenous MicroOrganisms, I used the IMO technique of using rice to grow Myco but with a twist. I used a glass jar with a paper towel lid and a commercially available Myco blend sold for Cannabis and grew 1ml of powdered Myco spores into 200ml of a thickly matted Myco colonies. To this I added equal weight of brown sugar and mixed, this is supposed to cause an osmotic shock in the fungus and cause it to create spores, I can’t test this personally so I’m going to believe it. What I do know is when this sugar mix is added to water and mixed into my soil it grows the most abundant Mycorrhizae I have ever grown. ~Blackstrap Molasses vs. Dry Malt Extract~ Last season I was a big fan of Dry Malt Extract (DME) as a sugar source because of its magnesium and nitrogen content, this year I’m going with Blackstrap Molasses (BM) for three reasons. First they both have significant micronutrients that benefit and BM probably has a greater diversity and density of nutrients vs sugar. Second I am using spent brewers grain in the soil now so most of the benefits of the malt extract is now in slow release form in my soil, it’s almost a stacking effect with the BM and spent grain. Third and probably most influential, DME is a pain in the ass to work with like this, DME is very hydroscopic so keeping it in a container filled with rice is almost required, it cakes up really easily, and just makes a mess. Molasses is clean in comparison, if you make a mess just clean with water without fear of bricking your DME, it goes into solution easily, and doesn’t get everywhere...Save the DME for your next Homebrew, but save your spent grains as they make an excellent soil amendment. ~Heat Wave and Shade~ Let’s talk heat and my shade real quick, cause it was a hot one this week! 36dC(96dF) is a bit much even for cannabis plants and couple that with some very dry winds I could see the damage through my garden. My peas almost died, my corn wrapped it’s leaves up and even got some heat damage and my Zucchini Looked like it had wilted to death, granted all came back healthy. But on the other hand my cannabis under just 20% shade didn’t even wince. Granted the leaves began to get the slightest curl on the edges but as a whole they barely noticed the abusive conditions. I am going to consider this a win for my shade concept but I still don’t think my 20% will be enough when temps reach even higher over the summer. We will see!
2 likes
2 comments
Share
Used techniques
Defoliation
Technique
5
Week 5. Vegetation
5 years ago
40 cm
14 hrs
30 °C
Weak
15 %
16 °C
24 °C
16 °C
8 L
1 L
407 PPM
Nutrients 5
Bio-Force - Aurora Innovations (Roots Organics)
Bio-Force 0.528 mll
Essential Earth - Aurora Innovations (Roots Organics)
Essential Earth 1.585 mll
Terp Tea Grow - Aurora Innovations (Roots Organics)
Terp Tea Grow 0.793 mll
Week 5 and the plants are nice and healthy and thriving, most of the “sadness” from the late nutrients and heat stress is fading away with only a few sad yellowing leaves at the base to show for it so I am happy. Now to jump into some pointers for this week. ~Topping vs all-natural~ I am now debating with myself weather to continue to allow the plants to go with their natural form or to top. My decision To not top has been based on the “do-nothing” farming principles from the one straw revolution, for those who do not know what about this concept it’s basically stating that a plant in its natural form needs no work, where as a plant that has been topped or trained will always require work. We all know this work very well when we are gently bending branches out of the cage to get more light or prevent them from developing mold or setting up a nice flat SoG. That said there will always be a yield benefit when done properly. For now I think the plants will continue on there more natural journey of growth, I am honestly curious to see a fully grown cannabis plant that has never been topped, I have actually never seen this in person before. ~Leaf Miners~ This is a new one this year. True last year I had a couple leaves affected, but this year I have already had to remove almost 10 leaves, in otherwords I have already had the same amount of Leaf Miner damage as I saw last year, this has me concerned. For now the plants are small and picking off leaves is easy as I only have a handful to search through. But if I continue to see this problem I think I will apply some Spinosad and that should knock them right out. ~Slugs~ This is an interesting observation I have made, Slugs appear to love white plastic. It makes sense that white plastic staying relatively cool even in the morning sun and being a nice smooth surface for them would make for a perfect environment for them. Every morning I am out in the garden I see them both on my white grow bags and my white woven nylon greenhouse ends, they usually stay out until a little passed sunrise which for such a hot and dry environment it is unusual. For now they are not damaging the plants so a few beer traps have been put out to regulate the population. ~end of week thoughts~ I must apologize as it appears the week has ended on me before I even took any pictures. Week 6 should address this issue. But in reality the plant has not changed much, by the end of this week though I had not seen much growth, I appear to be Nitrogen deficient so I have adjusted my feeding schedule to 2x per week but sticking with my dry nutrients in an AAT set up I am surprised it still takes 3-5 days for the plant to respond, but some positive response has been noted. I will pick this back up at the beginning of week 6...with more pictures.
2 likes
1 comment
Share
6
Week 6. Vegetation
5 years ago
40 cm
14 hrs
26 °C
Weak
15 %
16 °C
24 °C
16 °C
8 L
1 L
407 PPM
Nutrients 6
Bio-Force - Aurora Innovations (Roots Organics)
Bio-Force 0.528 mll
Essential Earth - Aurora Innovations (Roots Organics)
Essential Earth 1.585 mll
Terp Tea Grow - Aurora Innovations (Roots Organics)
Terp Tea Grow 1.585 mll
Week 6, the plants have been topped, transplanted, and are doing well. Once again a bit late on this update, I could actually be well into week 7 if I went back and checked my dates so if dates are a bit off then that is why. I have to admit this last week was a struggle, I entered it still with a decent nitrogen deficiency and subsequently increased my water with nutrients to 3x this week and used a watered down solution of nutrients the other 4 days, this helped quite a bit but I made an important observation that may help explain why I’m not having good results. These damn grow bags leak nutrient solution faster than it can get absorbed, it seems to me that what ever color solution I put in wether clear water, cloudy(fish fert), or brown Terp tea I get near instant run-off of the same color. This has led me to believe that something about the bags, likely it’s how non-rigid they are, allows my nutrient solution to leak out before fully absorbing or filtering through the media. I’m not sure if there is a fix for this but oh well, they are out of those bags anyways! ~Topping~ Yea I know, I said I wasn’t going to, I lied... But I couldn’t stand the thought of not topping them, they just get so much bushier and filled out so I topped them with 6-8 internodes left and today will cut some clones to go into my clone tent. I went with a Secret Jardin something-90, its the 3 compartment tent, but more details on that in an upcoming separate journal. ~De-Foliation~ De-foliation, here I have some specific ways that I work, first is at this stage I never defoliate a leaf that the plant is not already attempting to shed. This means I allow the lower fan leaves to yellow while the plant is re-absorbing any of the Mobile nutrients in the leaf. I help this process along by tucking the fan leaves behind the auxiliary branches, this tells the plant that that fan leaf isn’t getting enough light and it helps terminate them more rapidly while at the same time, growing my auxiliaries in direct light. Once the leaf is very pale green/yellow to yellow and maybe with red petiole I pull it. My belief is that this is the best way to keep that leaf at maximum production and feeding nutrients that would otherwise be lost to the plant while the plant refocuses attention(Growth Hormones) to the auxiliary branches I want for budding/cloning. I used to remove my fan leaves while green to achieve similar results but noticed a slight slow down for a week or two each time. ~Transplanting~ This was probably a week over due by the time I got to them as the plants were definitely in the early stages of being root-bound, I will have to hand it to the grow bags in this case though, although they were rootbound it felt looser than a rootbound pot would have been so a small improvement there. My transplant prep went something like this. I dug a hole, shorter but wider than my grow bags, shorter because I wanted to do something referred to as a “Volcano-Tech” by the Greenshock and Mendo Dope guys on YouTube, by the way if you’ve never heard of them now is a great time to get on YouTube and learn. But the “Volcano-Tech” method is simple you mound up to your plant so that water runs off to the lower areas and roots and does not hang out around the stem and thus avoids stem rot, also more of your roots surface is exposed to higher oxygen levels so that will probably also be a benefit. Now to the hole preparation, to the hole I added my Uprising Foundation and Bloom at 5ml each, 180ml of work castings, and 30ml of Nitro Guano, mixed and watered than put the plant in the ground. Once it was in the ground I used the excess soil from the hole to help shape the mound. Simple, easy, and done. ~Humic Acid Concentrate~ So here is the first “special project” I hinted at earlier in this journal. This was my way of making a stable Humic acid concentrate that can be put through a drip system. Now I know I can just buy this, but I need it in large amounts for my non-cannabis crops, this means it needs to be both high quality and cheap. For this I turned towards two of my favorite companies, BioAg and Ss Brewtech, BioAg having in my option some of the best Humic Acids on the market and also a dry soluble one that can be turned into concentrate; while Ss Brewtech has the perfect solution for a near medical grade cleanable and conical mixing tank that also has a full spout at the bottom for easy bottling. The addition of the Cold Brew Coffee Kit to the BrewBucket allowed me to both filter and mix at the same time. The process went like this, I filled my BrewBucket with 20L of RO water, which took a while. Meanwhile I got my air pump and air stone ready, I added (1) 1kg package of BioAg Ful-Humix to the coffee filters, also from Ss. I dropped the air stone into the bag with the ful-humix and zip tied it shut, then I took the bag and dropped it into the metal hopper in the lid of the cold brew coffee kit and turned the air pump on. It worked great, after 72 hours, although it probably didn’t need to take that long, I had a very concentrated dilution if Humic acid, I bottled it up, labeled it and put it on my racks. I now have 20L of liquid Humix acid for $38.
3 likes
7 comments
Share
Used techniques
Topping
Technique
Defoliation
Technique
10
Week 10. Vegetation
5 years ago
70 cm
14 hrs
28 °C
7.4
Weak
300 PPM
20 %
24 °C
28 °C
20 °C
8 L
1 L
407 PPM
Nutrients 5
Bio-Force - Aurora Innovations (Roots Organics)
Bio-Force 0.528 mll
Essential Earth - Aurora Innovations (Roots Organics)
Essential Earth 0.132 mll
Terp Tea Grow - Aurora Innovations (Roots Organics)
Terp Tea Grow 0.264 mll
Well week 10 is here! And boy did I fall behind, but I’ve managed to streamline the process. Now that the plants are in the main pots with plenty of good rich soil I have moved away from my Active Aerated teas as they were taking up a lot of time and I had no temp control so my oxygen levels were always pretty depleted during the day time. My current method is simply top dressing and watering in, this saves me hours of work each week and has given me enough time to get my indoor tent back up. ~culling the herd~ I now have confirmation on all plants on sex so I will be culling the 3 males soon enough, in the meantime I would like to grow a short term cover crop to keep the soil healthy and alive, I wonder if anyone has any recommendations? ~dry nutrient, top dressing~ Although this method is fairly self explanatory I am still giving My technique some thought and doing it in a very specific way. As of now I am giving each plant 4Tbsp(60ml) of Roots Organic Nitro Guano, 4Tbsp(60ml) of Worm Castings every other week. These are being dispersed evenly around the plants inside of the soaker hose ring, this is done along with my little volcano mounds so that as I water the nutrients in with the hose the nutrients run down hill and are slowly incorporated into the soil each day by the drip irrigation, also every other day I am rinsing more down to the irrigation zone with my hose manually. I feel like this helps to moderate how much is going into the soil and also getting it deep into the soil with the slow drip irrigation running through it. Regardless the plants are very happy about it and I intend to continue this with the addition of Terp tea for bloom boosting.
likes
comments
Share
Used techniques
Defoliation
Technique

Login

13 comments
Sort by
popularity
popularity
newest
oldest
deFharo
deFharocommentedweek 15 years ago
Buenas técnicas de cultivo, felicidades. 
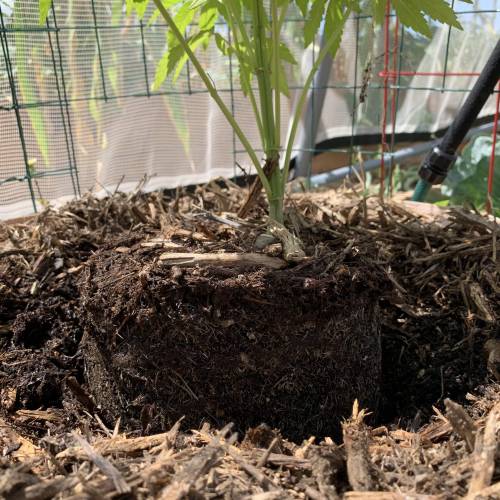
¿No necesitan las micorrizas raíces para prosperar? Yo hago semilleros de micorrizas con arroz o coco fresco, una vez que he conseguido el crecimiento del hongo en este medio, lo deshidrato y guardo para futuros cultivos.
deFharo
deFharocommented5 years ago
@TC_Connoisseur, sí es posible lo que tu comentas. He conocido últimamente un método tradicional africano para la inoculación de micorrizas en el sustrato de la maceta o en pequeñas huertas. Y creo que tiene que ver con tu explicación, el concepto es dejar secar el material original (raíces y mantillo adyacente) con las micorrizas para que estas lancen sus esporas, las micorrizas permanecerán así hasta que la humedad y un sistema de raíces hagan revivir y prosperar a las micorrizas. Los africanos seleccionan una planta herbácea salvaje que destaque por su vigor, la arrancan del suelo con su sistema de raíces, envuelven en un paño o malla fina todo el cepellón de raíces, lo dejan secar completamente a la sombra, después como si se tratara de un salero, espolvorean a través del paño o malla encima del sustrato, por lo que dicen da muy buenos resultados. Intentaré probar este método en próximos cultivos. Saludos!!
TC_Connoisseur
TC_Connoisseurcommented5 years ago
@deFharo, Now I understand the question. To answer if mycorrhizae can grow in mulch I would say yes, it can grow in mulch in certain conditions. This is all anecdotal from my experience and at least one source, Chris Trump who seems to be very knowledgeable in Korean Natural Farming, KNF is where I took my ideas from and applied them to my projects. To start, Chris Trump’s way of collecting mycorrhizae or IMO from the forests included sifting through the top layer of natural leaf mulch around the base of mostly old growth trees, he would collect this and use it to boost his collection of Mycorrhizae. I took this idea to a mulch pile from last year when we ripped out lots of bushes and ground up roots, leaves, stems, trees, and basically all manor of plants; one possibly important note there is we literally ripped the plants from the ground so roots and all where mixed when the material was shredded. As this material composted I noticed a layer about 4”(10cm) into the mulch that extended some 4”-6” (10-15cm) into the pile that was rich in what appeared to be mycorrhizae. I grew this mycorrhizae into IMO 1 then IMO 2 I watered the IMO 2 in with seedling transplants and I noticed a significant amount of nice fuzzy roots and fuzzy mycorrhizae when I re-planted these. Although there was nothing scientific about the method I would say the Results were good and I would do it again. For the Spent Brewers grain this I nearly observed after using it as a mulch layer it was quickly taken over my fungus and made a good growth media for it, from there I did a larger batch with IMO 2 and was fairly happy with the growth on it. I believe Chris Trump uses Hazelnut shells in his video from his IMO 3
deFharo
deFharocommented5 years ago
@TC_Connoisseur, sí, las técnicas de semillero de micorrizas con arroz y coco o la captura de MM, etc. vienen de Japón y Korea, su uso en agricultura orgánica es conocido hace tiempo. Mi pregunta iba dirigida a saber si en un compost la micorriza sobrevive, porque para la proliferación en los cultivos de este hongo, él necesita estar en contacto con las raíces de la planta. Lo cierto, es que tampoco tengo claro si el tiempo medio de un cultivo de cannabis en maceta es suficiente para el establecimiento del hongo. Yo lo aplico desde el primer trasplante, para dar tiempo al hongo a reproducirse, pero hasta ahora no he conseguido distinguir el hongo en mis sistemas radiculares, a diferencia de los Microorganismos de Montaña (MM) que si los veo proliferar y trabajar debajo del Mulch. Yo actualmente vivo en un apartamento y cultivo en macetas, con lo que estoy limitado en el uso de algunas técnicas para la multiplicación de las micorrizas, pero lo más interesante es crear un sistema de inoculación en plantas huésped y de esta manera tener un semillero vivo y constante del hongo micorriza. No he probado la multiplicación con restos de levadura de cerveza, la levadura inactiva de cerveza la uso en ocasiones para riego es una buena fuente de potasio, también la uso como materia seca para la elaboración de Bocashi.
Show More (1)
deFharo
deFharocommentedweek 65 years ago
Para la extracción de ácido húmico, fulvico e himatomelanico, yo uso como materia prima leonardita, las extracciones las realizo por hidrólisis alcalina, también lo hago con bio fermentados. Un saco de 25kg de leonardita tiene un costo de aprox. de $25. y puedo sacar producto para nutrir 4 hectareas, para la fórmula básica sólo necesito: Un barril, Leonardita, Agua pura y KOH. Tengo varias formulaciones donde además de la leonardita como elemento principal, añado otros minerales y componentes orgánicos, el producto resultante es excelente, yo lo uso en diferentes fases de mis cultivos. Sigue mis diarios orgánicos, tengo tips sobre como hacer toda clase de preparados orgánicos. Saludos
deFharo
deFharocommented5 years ago
@TC_Connoisseur, Hoy he hecho una actualización en mi diario 3M • Diesel donde muestro la creación de Humato potásico enriquecido con minerales. La semana que viene hablaré sobre la deshidratación y uso de este preparado. Saludos.
TC_Connoisseur
TC_Connoisseurcommented5 years ago
@deFharo, Very good information and after quickly looking at your diaries they are very detailed, I have some studying to do! Hope to see you around and I’ll be looking forward to reading your grows!
Mrs_Larimar
Mrs_Larimarcommentedweek 45 years ago
You have been putting in here some great Informations. Back to your Plants and Heat......Its the Roots who dont like it to get warm. So your goal is like cooling the Roots. That menas , diggin her into the garden, giving her bigass growpot. or you can take the pot you have and out it into another bigger pot around and put in here claypebbles that you water,,, The water that condensates from the claypebbles cools the growpot ( roots) I hope you understand my writings,,, because english is not my language. Weed can grow under nearly every condition... htat the fun fact. As long the roots are nicely cool and she gets enough water to transpirate your Plant will be fine Iam doing alot of Outdoors, with different growinpots or without. In summer iam watering them twice a day to make sure they are ok and toots stay cool In very hot Summers, Iam digging holes to put the pot into.. so the ground cools down my growingpot// the roots
TC_Connoisseur
TC_Connoisseurcommented5 years ago
@Mrs_Larimar, That is a very interesting point! I like the idea of burying them in the soil a lot. Right now they are only in the plastic pots(bags) because I am waiting on Male vs Female before planting, but no reason they can’t “beat the heat” semi while buried in their final home. I also use White pots for the reason of keeping the roots cool, black pots under my sun get very, very hot and would probably kill all of my beneficial bacteria/myco. I wish I could also water them during the day but my greenhouse is set up temporarily so that I can move it, hopefully this winter, to it’s final location. This means my water is all run in above ground hoses that get extremely hot and the water coming from the hose could have easily wilted a plant on-contact last week. Watering mornings and late nights was the best I could do to pump them full of water...speaking of that, time to water! And don’t worry about your English! I can’t even speak a second language so you have me beat there. Your input and experience is always valuable and appreciated!
Mrs_Larimar
Mrs_Larimarcommentedweek 25 years ago
Interesting... always good to see new mixes of substrate------ its not easy to change growmedias,,, and go with a new mix or a new one... crossing fingers it works
TC_Connoisseur
TC_Connoisseurcommented5 years ago
@Mrs_Larimar, Thanks you! I am curious as to how they will due, I have only ever strayed from Roots Organic or Nectar for the Gods twice before (an indoor grow and last years greenhouse) and the results were only ok. With any luck next year I’ll be back to my Roots and hopefully their Greenfields.
Mrs_Larimar
Mrs_Larimarcommentedweek 55 years ago
Nice to share your Thoughts about the Grow. I got to smile when you described the slugs on your soilbags^^.....happy growing
Enjoying this diary? Follow for more updates!
TC_ConnoisseurTC_Connoisseur
Follow Author
OR
Shade-grown 2020 Shade-grown 2020
Follow Diary
Prefer the old Diary view?
Go back to the old Diary view