The Grow Awards 2026 🏆 


Likes
Comments
Share
@Lordshiva83
Follow
Olá amigos, fiz bubble hash da purple Punch 😎 utilizei 400g de flores muito pequenas que restaram da colheita e deu muito 🤩 fiz 5 repetições de 4 sacos com medidas de microns diferentes, correu muito bem, mais tarde partilho a fumaça 😎😁


Likes
11
Share
@StickyFingah420
Follow
Es el resultado del cruce de 2 variedades me gustan bastante, por lo que se imaginarán lo expectante que estaba por este nuevo ciclo. Me gustó y disfruté mucho viendo el desarrollo de esta planta, esta vez no quise entrenarla (LST, topping) para ver como se desarrollaba y la verdad no me decepcionó, quizás hubiera esperado más producción pero sin duda que la calidad de las flores vale totalmente la pena en desmedro del rendimiento. Flores compactas y poco aireadas completamente repleta de resina dulce y muy frutal.
Totalmente recomendable para los que disfrutan de humos dulces, frutales, cremosos y con notas a frutos secos, ¡un lujo!
Gracias a Sweet Seeds por darme la oportunidad de cultivar estas 3 novedades que la verdad son unas maravillas que sin duda volveré a cultivar.
Será hasta la próxima, buenos humos!

Likes
8
Share
@PatriciaGant
Follow
and here we go another week in her life the bug larva in the soil seems not stress her too mutch(cockchafer). her leafes are realy huge. have fun groing everyone.

Processing
Likes
1
Share
@Esebees
Follow
4 de 4 semillas germinaron empiezan a salir los cotiledones y las primeras hojas
Likes
9
Share
@Wiebechillin
Follow
- Switch from a MH Bulb to an HPS Bulb
- Discover "Fimming" a form of LST were you bend the stem to maintain its height. Not ideal for autos but seemed to work based on a small sample size.
- First week were I trimmed leaves from the plant. From research I found that most people suggest not to trim the autos as they have less time to recover. I found that if you have very healthy plants it can be done but to a point
- Had some brown spots forming on the leaves. From what I could figure out it is called Leaf Septoria and is caused by to much humidity and not enough air circulation. Trimmed all leaves with brown spots which was only a few
- Last feeding for the big 3 at 1/4 strength

Likes
12
Share
@Ieiogrow94
Follow
Eccoci qui...
Per problemi di lavoro ho tardato un pò la pubblicazione delle foto, la piccola è molto vigorosa ed emana un forte odore.. Già si può vedere la resina che si inizia a formare sulle cime in alto...
La più alta del box anche se, credo non faccia cime giganti, sono molto contento che ha questo colore viola intenso nelle foglie, spero in un fenotipo più violaceo...
Grazie a tutti per il supporto, NON VEDO L'ORA DI RACCOGLIERLA 🔥🌲❤️

Processing
Likes
31
Share
@Sider79
Follow
Some Faded bottom leaves . Temps are lower . Not sure if my questions are seen but moving forward with my first Auto Blow Dream grow.

Likes
34
Share


Processing
Likes
25
Share
@AsNoriu
Follow
Day 85. First Diesel down. This was the most Colourfull plant in all year, sad that it was triggered by light shock, still she was always praying, drinking water fast and loved life. Smells so fruity and fresh.
Day 86. Other run pushes me to chop them earlier, but taste qualities i will get anyway, so Last to Chop is choped ;)

Likes
6
Share
@Rinna
Follow
It was a ride! My first ever indoor grow and I’m very pleased with how I filled up the tent, with autoflowers. The buds are looking dense so I’m guessing around 100 grams in dry buds 👌🏻

Likes
32
Share
@LapsekiliTayfur
Follow
150 w dob led yanıyor daha,Kızlardan biri özürlü doğmuştu genede bunu atmak istemedim ama 1 tane yedeklerden suya attım videoda onuda aldığımı görüyorsunuz


Likes
21
Share
@Bakeryguy420
Follow
really easy to grow. Had some issues in the begging being underfed and low ph issues. But still grew through all the struggles. Wasnt the biggest yield but wasn't the biggest plant. So wasn't expecting truly much. The purple pheno gave me a zip and half about. The other green one gave me a zip dry. Both smell lovely and can't wait. Will come back next week or so to update smoke report. Also fixing to make cannabutter from some of this can not wait ^_^ . Will grow it again but in a bigger pot maybe.

Likes
7
Share
@Staffedition
Follow
Сорт очень понравился!
На второй недели я его начал растягивать. Тянул каждые два/три дня.
Ни разу не стрессанул, в связи сэтим и качество итогого продукта на высоте.
Советую новичкам, кто хочет попробовать свои сылы грове!
Всем мира и хороших урожаев!

Likes
41
Share
@BOMbolenath
Follow
The plant is stretching very fast. It's very healthy. It's a nice plant, very vigorously and lot of ramifications.

Likes
3
Share
@Mimbra
Follow
Bueno ahí van arrastrando la defizcencia de potasio ya veremos a ver qué sale

Processing
Likes
13
Share
@Cheesefarmer420
Follow
Another week done, finished up week 6 of flowering, week 10 of the whole grow. The buds are continuing to fatten up, inching closer and closer to harvest. Noticed the first few Amber tricombs on some of the upper buds, going to be leaning off the big bud and switching to overdrive to help aid in ripening and the final bulk. I’d like the run them another 4 weeks giving them a full 9-10 weeks in flower. But will judge harvest on a near 45/55 or 50/50, Cloudy/amber tricomb production.
Likes
5
Share
@prebiancagrower
Follow
Hi People.
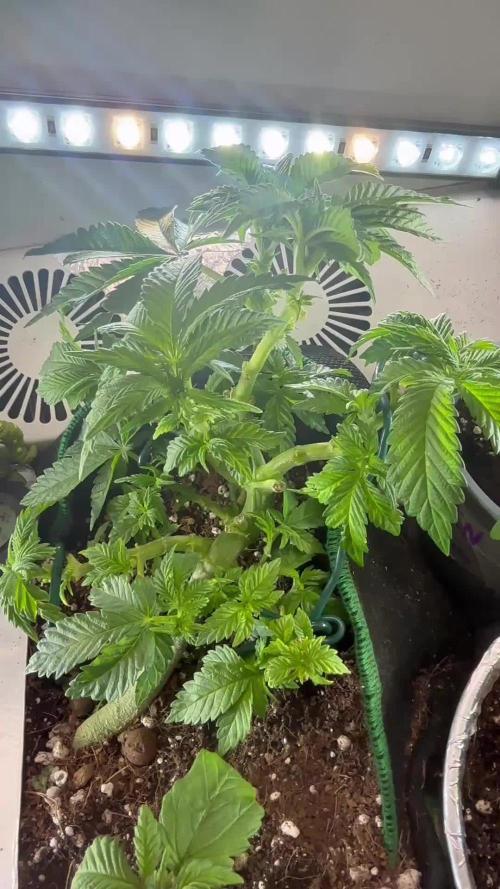
Week 3 here and my baby is fucking strong, is the first time I am using just LST as training and I have to say it blew my mind away.
The plant is very green, and strong, do you know when the plant is smelling healthy green? So, now I know what it is. hahahhaa
Thanks, people, and see you next week.
Love you all!


Likes
5
Share
@psychonaut420
Follow
Plant has been recovering from hst and lst still haven’t seen signs of flower apart from the streaching of branches and side branches hopefully as the week goes on I’ll start to see pistols start to form and a switch in development will keep the diary updated
Likes
7
Share
@GanjaFarmer101
Follow
Smooth week, lots of trimming and approaching the end of the harvest now (for the autos)
