The Grow Awards 2026 🏆 


Likes
Comments
Share
@Mr_Pgrow
Follow
What an amazing auto to grow.
She gave no problems whatsoever.
She loved her weekly compost extraction watering and responded brilliantly after each.
Although slightly overshadowed by her growing room partner, she still managed a pretty good yield
Weighting in at 52.3g of flower, probably the dencest and hardest buds I've grown so far.
Also pulled 18g of trim for extraction.
Follow me here
https://www.theweedtube.com/user/Mr.PersonalGrow

Likes
12
Share
@FloKTC
Follow
This is my first Grow Report
at first i thought i messed up some seeds because 2 of them was for about 24 hours under SANlight so i have plant new seeds from Norden Seeds , Nordic Gorilla Glue, but only one died and maybe that was my bad too so at the moment i not sure which plant has which genetics but we will see more in the flowering stage , i hope this is my last time i flush seeds out of the soil 😅
Germination Method was 24H glass of water and then 24H Paper Towel
Germination start 16.7.2024
first leaves 19.7.2024 ( 2 out of 6 )
water i used : osmosis water with calmag ( proled )

Likes
Comments
Share
@Kuetoo
Follow
En la semana doce, 10 junio de 2025.
Seguimos con el mismo proceso.
PH 6,5


Likes
12
Share
@RoyColt
Follow
Day115 25/03
4lt ro water -8ml BloomA -8ml BloomB -6ml FinalPart terra,
Total 790 ppm, ph 6,1
Drain 500 ml, 950 ppm.
Day117 27/03
4lt ro water -8ml BloomA -8ml BloomB -6ml FinalPart terra,
Total 790 ppm, ph 6,1
Drain 1100 ml, 1150 ppm.
Day119 29/03 RinseOut Day
4lt ro water -4ml sensi cal mag extra,
Total 200 ppm, ph 6,0
Drain 1000 ml, 1040 ppm.

Likes
Comments
Share
@MoneyMorris
Follow
The plants are looking really healthy, I've been defoliating here and there to get the light to penetrate to the lower leaves and branches. They have started to bush out from topping them last week. I started using Mammoth P Microbes halfway through last week. They seem to have grown a little quicker since adding them. The plants are still being fed 4 times a day at 1 minute each feeding. No signs yet of which is female and male, I am planning on pulling all the males once they show signs.
Likes
54
Share
@MadeInGermany
Follow
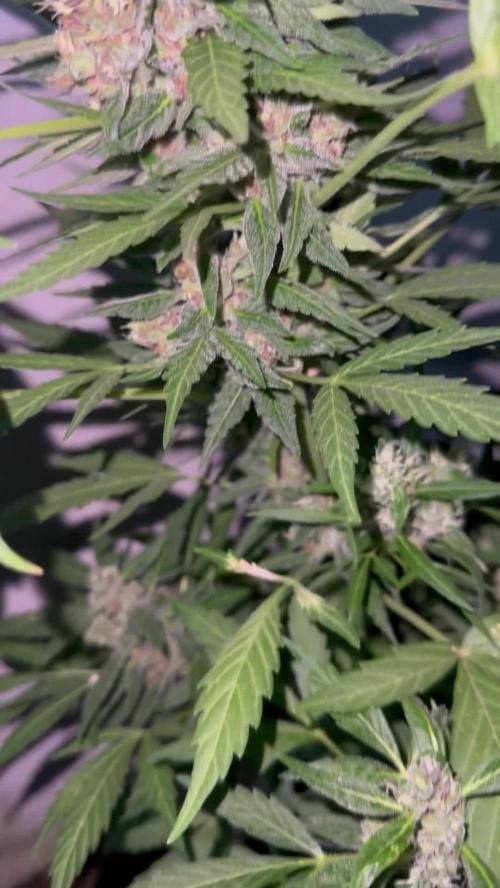
Flowering day 42
since time change
to 12/12 h.
Hey guys :-)
The lady develops more beautifully every week 💚.
She concentrates fully on her bud production.
This week she was watered 3 times with 1 l each time.
When watering, there was GHSC Enhancer 1 g per liter of water 👍.
Her health was checked every day.
Fresh osmosis water was filled in the tank for the coming week.
Stay healthy 💚🙏🏻
👇🏼👇🏼👇🏼👇🏼👇🏼👇🏼👇🏼👇🏼👇🏼👇🏼👇🏼👇🏼
‘Powered by GreenHouse Feeding’
Copy the link for 10% off all Nutrients 👇🏼
https://shop.greenhousefeeding.com/affiliate/MadeInGermany_PassionGrower
👇🏼👇🏼👇🏼👇🏼👇🏼👇🏼👇🏼👇🏼👇🏼👇🏼👇🏼👇🏼
You can buy this strain at :
https://www.amsterdamgenetics.com/product/choco-cheesecake/
👇🏼👇🏼👇🏼
Use the coupon code: madeingermany
for 10% on all Amsterdam Genetics seeds
Water 💧 💧💧
Osmosis water mixed with Cal/Mag (24 hours stale that the chlorine evaporates) to 290 ppm and Ph with Ph- to 5.8 - 6.4
MadeInGermany


Likes
24
Share
@DeepRootsGrowTrees
Follow
COLOMBIAN JACK by KANNABIA
WEEK #22 OVERALL
WEEK #11 FLOWER
This lady doing amazing she has some fat almost round dense buds covered in trichomes and she's got a aroma to her that kinda makes your mouth water she's been trained and it really worked out well for this plant she hasn't had any issues she's almost done!! Stay Growing!! Thanks for stepping by!!
Kannabia.com
COLOMBIAN JACK

Likes
172
Share
@Zannabis7
Follow
Day 12 of organic grow and all is well. Seemed to have dialed in the conditions and able to keep good air movement, CO2 levels, and consistent temperatures/humidity with the ThruWall Closet Fan (Model TW108 ), and the Holmes Twin Exhaust/Intake Fan (Model HAWF-2041). Humidity is maintained with a Lovoit 6L Ultrasonic Programmable Cool Mist Humidifier (Model# LV600HH). Added a SCROG screen (just a cargo net) and bought the Sample Pack of organic nutrients from Nectar for the Gods (just pay shipping and they will send you the sample nutrients - check out the website). People say their line of nutrients make the buds smell and taste like no other! I have always been an organic Earth Juice nutrient guy, so I am going to experiment with combining the two.
Lights are on 24/0 and she has tight internodal spacing with good vertical growth. Room that closet is in is beginning to smell skunky at times, and like diesel at other times. Will begin light organic nutrients with next watering.
Day 13 - Watered today with very low strength nutrients added. - Zannabis7


Likes
2
Share
@Grilla
Follow
I’m not 100% done collecting all the data. By the smell of it, this plant will be one of the dankest plants I’ve ever grown. More to come.
Tuesday, September 5
I have the nugs in jars right now. Hopefully I didn’t let it dry too much. Right now the humidity is at around 52% but I think if I move the jar around a bit I can them to sweat a bit more.


Likes
62
Share
@masterofsmeagol
Follow
7/12 Soil was a little damp so I watered lightly only what looked like it needed it. Dr. Zymes seems to have no negative effects. Plants just look super clean. I still saw some patches of PM and I only had the free samples so I'm going to have to use another product in conjunction to treat this. Overall I'm pretty impressed with the Dr. Zymes. HAD MY VIDEO AND TONS OF PICS UPLOADED BUT THIS SITE WOULDN'T ALLOW ME TO SAVE. I'LL UPLOAD THE REST LATER "IF" THIS EVEN ALLOWS ME TO SAVE. Went back over at three and watered the girls. Everything looks amazing. Trying to upload video now.
7/13 Didn't water this morning. Plants look fantastic. Went over at 4:30pm. Things looked great. Definitely stretching. I took some good pictures. Didn't water as plants seemed VERY happy and soil still had a little moisture. I gave them a touch of kindness which means I gave them a tiny bit of water to hold them over until morning. I know this is not a good practice to get into but I didn't want to come back to wilting plants. The little seedlings are turning more lime green (which isn't good) and have some yellow leaves. They have recycled soil from last grow. May need to feed more. I went through them and moths flew everywhere. We have a major brown tail moth problem here. I know I just sprayed Dr. Zymes but I'm going to have to spray BT. I must've seen at least half a dozen moths. On just those three tiny plants. Still struggling with PM.
7/14 Went to the garden briefly this morning. It rained last night and was drizzling while I was there so I obviously didn't water. Its still sprinkling and I'll be over there later to check. Plants are really stretching into "the asparagus" stage as I like to call it lol. What will eventually be a bunch of colas stretch into what I think looks like asparagus spears. That may be part of the reason why some of the leaves turn yellow and die in the lower middle canopy during this time. Everything looks great though and I certainly have plenty of leaves. I looked at last year's diary at this date and got some relief noticing the same things happening last year at the same time of year. UPDATE: Went back to the grow as the "rain" and "thunder showers" weren't producing much water. I checked the soil and it seemed to have dried out some (more on smaller bags) and hadn't FULLY watered the plants. I watered lightly. I listened and I could hear the water work it's way down the medium. Even if it pours tonight plants will be ready for a feed tomorrow. The 3 little ones in buckets outside especially. I have work to do tomorrow.
7/15 It's overcast today and looks like rain. Forecast called for a nice sunny day. Anyway I fed two gallons to nutes to the garden and did some slight defoliation. I had to hurry as I had a doctor's appointment. I have branches that need to be tied down and plants need to be cleaned up a bit. If it's not raining I may do a preventative BT spray. We have a HORRENDOUS outbreak of brown tail moths. I don't think the bother cannabis but they are poisonous and the rash that develops is hell. 90 degrees at 6:30 plants weren't totally dry but the top inch or so was so I gave them a good drink. Took some pictures and a video I'll upload when I have a better connection. Cop was watching me. Good thing I'm in a legal state and my grow is totally on point.
7/16 No water this morning. Soil was still wet. Plants are looking good. Will update more later on. Defoliation, pruning and spraying are on the agenda. Made a video and took more pictures but internet is spotty and doesn't want to upload. Went back and watered lightly before a massive thunder storm dropped sheet rain for like an hour. Internet is still slow so I'll have to wait till tomm to upload.
7/17 No water. Brown tail moth rash is driving me crazy. Plants still stretching and look overall healthy. Defoliated some this morning. Will update more later. Went back over and gave a little water before it began to downpour.
7/18 Raining with what looks like more rain in the forecast. Good. Hopefully will help me lower the pH a little. I didn't take pictures or even go in the cage this morning. This brown tail moth rash has me scared lol. It really sucks. Makes poison ivy seem pleasant. When rain stops BT will be sprayed.


Processing
Likes
3
Share
@MadBumbleBee
Follow
I wish I could've taken more picture this week and previous week but I just could'nt remember to do it. Feeling nervous, but wierdly excited. Most promising strains for big yields are Super Silver and Tangie. Girl Scout Cookies being an autoflower already started to flower, wish it would have taken more time on veg to get bigger but it is what it is.
Now starting flower. 12/12 cycle. 9 weeks

Processing
Likes
14
Share
@kevgrow
Follow
Hey Friends, end of week 11 from seed ☺️
Not much has changed this week in the growth of plant #2.
I noticed some orange on the leaf tips. This can be due to overfeeding nutrients or because I recently ran into a problem with my Ph meter, it broke so I had to purchase one at a local Hydroponics store, different model so it was giving me different readings. For example, after adding nutrients to the water, ph would read 4.5 - 5.0, with the old ph meter I would add 10 drops of ph up and it would rise to 6.0 - 6.2, with the new ph meter it goes down to 4.2 when adding nutrients and I need around 20-30 drops to bring the ph up to 6.0 +. The old ph meter was less expensive I purchased it for $15, and the new ph meter cost me about $60. I guess the new one gives me the correct reading. The plant was used to the old feeding dosage now it just needs to adapt to the new feeding.
Noticed some of the top leaves had curls so I lowered light intensity.
An increase in red stems so ill keep lowering the light to avoid too much strees
Colas are growing in width
Smell is slowly getting stronger, not sure what strain it could be but it looks and smells like cookies and og.
No amber trichomes yet, maybe there is some already but its not very noticeable yet
QUESTIONS
How long before flushing?


Processing
Likes
19
Share
@Fire_Farmer
Follow
I'm like 5 days late with this update so I have had to pin videos that I took the same week while I was communicating with TRYHARD so ignore any dialogue that's out of context they aren't diary logs they are simply correspondence between myself And TRY, oh and sorry about my language I'm common as muck me.
The pictures are just random pics I took that week as oppose to my usual more organised method but hey ho I'll do a more tidy job next week.
The week went swimmingly barring some nitrogen deff on the lowers which I initially put down to the hot weather drying the pots too quickly and causing nute lockout with the salt buildup so I flushed then gave them a nice feed after they dried the pot at which point I noticed the most heavily afflicted by the N deff were also the quickest drinkers and had lower EC on the runoff so I have been giving them a slightly stronger feed than the others and it seems to have solved everything so I'm happy with that.
Bud development is nice, frost is nice, terps are through the roof right now.....
Zkittlez ones are really stinking of lime and candy bubblegum
Punch ones are stinking berry berry nice!
Grandpas Crush is smelling kinda hazey right now but I'm hoping the berries comes out of her too.
Little else to report really.
Thanks for reading
One Love 💚
Fire Farmer🔥👨🌾
Likes
10
Share
@StonedFarm
Follow
09/28/24 - Purple Punch 👊 & Green Crack 💚
Both these girls will have the ☀️ today, and tomorrow will get a feeding with the
09/29/24 - Purple Punch 👊 - Green Crack 💚
Both these girls got the dunk, and runoffs are perfect. 1000-1100 PPM runoffs, with 6.4 Green Crack, and 6.5 Purple Punch

Likes
4
Share
@sunnykuyall
Follow
OG KUSH - Bag seed from a grateful dead show (Chem Dawg)
04 - 07 May 2023 - Germination Week
08 - 14 May 2023 - Veg week 1
15 - 21 May 2023 - Veg week 2
22 - 28 May 2023 - Veg week 3
29 - 04 June 2023 - Veg week 4
05 - 11 June 2023 - Veg week 5
12 - 18 June 2023 - Veg week 6 - Final Veg


