
Likes
Comments
Share


@GrowinHome
Follow
The plants are starting to fill out the scrognet. Might leave them vegging for 1, 2 or more weeks. We'll see how it goes.

Likes
12
Share


@Microsemilla
Follow
Esta tomas fueron hechas el 13 de Marzo de 2022-
Las copas ya formadas empiezan a engordar. A partír de acá el video habla x si solo.
Ya nada pueda malir sal :)

Likes
4
Share


@DatGuyGrows
Follow
Grown out this week and got them ready for the early flower growth. Trimmed heavy and wired all branches away from each other. LST in full effect. Hoping it’s not too much trauma for them.. they proved me wrong. Bounced back with vigor and bright excitement! Eager to see these buds start forming 👀

Likes
34
Share


@Southwest_budders21
Follow
CandyMan (kre8 Genetics regular seeds)
Week 5 Day 35 of veg!
First one has always looked smaller not sure if it's due to that light though but could also just be a weaker Genetic 🤷♂️🏼 the other two seem to fill out quickly even after pulling most leaves off they just bounce back looking bushy in 24hrs! Two more weeks until flip 😍
Processing
Likes
15
Share


@MG2009
Follow
05/19/2020
All going well, have to grow in containers this season, I might be moving before harvest so only veggies in the ground.
But all are adjusting well 😊
I will give more details on individual plants shortly
#1 is10" tall new growth looks good getting thick.
#2 is 11.5" tall
#4 is 7" tall but healthy
#5 is 16"
Likes
27
Share


@DogDoctorOfficial
Follow
Day 74 Flower and this girls keep on going and still have at least one or mb more weeks to be finished, they are going over my expectations e so many ways i cant even describe it in words 😆😆😆 it is what it is 💚💚💚 i change the ligth for a 10h day 14 sleep and have them dimmed down to 60% this will help them finish faster i believe, lets see 💚💚💚
As always thanks guys for checking and reading my diaries, I truly appreciate the love and it all 💚💚💚🙏🙏🙏 growers love and keep on groweing 💨💨💨💚💚💚
PPFD - 600Umol/m2
Girls:
Gelato OG @Seedsman
Light Lumatek Zeus 465W compact pro at 60%
More info and updates @
https://growdiaries.com/grower/dogdoctor
https://instagram.com/dogdoctorofficial
https://youtube.com/channel/UCR7ta4DKLFMg2xxTMr2cpIg
All i grow is medecine for myself, nothing to sell, dont even ask !!!!
Stay safe and do it with love for the love ❤️ 🙏
💚Growers Love to you all 💚

Likes
39
Share


@Festerus
Follow
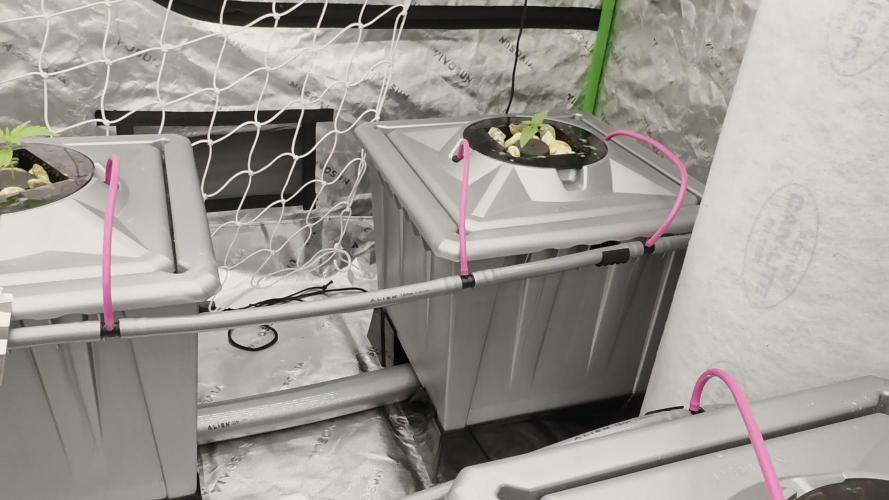
Lots of work this week on keeping up on training this week, buts it’s going well!
I split a fork when tying her down but the duct tape fix worked great and she didn’t exhibit any stress from it surprisingly :)
Each day I tighten the bindings and then defoliate about every other or 3rd day.
I keep doing 2 feeds to 1 yucca flush. She now uses 3 gallons to get my saturation and 20% runoff, about every 3 days.
When I yucca flush I also foliar feed her to keep things flowing, roughly 1/8-1/4 strength of my food dosage. Foliar feed mix is yucca, kelp, fulvic acid, 1-0-0 Calmag+, and a 14-0-0 ominA. And I fed that every day for 3 days until I watered her again :)
Interestingly, 3 days in a row just barely began to give her N toxicity by causing a slight clawing of the mature fan leaves, but no burn in the tip, and day 4 she was flat out again :) so it was right at the edge of useable nutrients IMO.
The netting is coming along nicely, lots of weaving going on, refilling the center and spreading the mains out to the corners of the tent.
Tried 2 different cloning techniques, one placing them into the peat pellets from Walmart with rooting powder, and the other is a Tupperware container filled with a PH’d weak nutrient solution, and sticking the stalks through the lid into the water.
Both techniques have produced roots, peat took longer but are stronger specimens. Tupperware seemed to shock them less but roots are tiny little nodules.
Thanks for stopping by and checking things out :)


Likes
27
Share


@Smokepurple137
Follow
I'm happy with the progress they have made, all have responded well to defoliation and LST. I'll be adding a few more light nutrients at some point this week. The gorilla zkittles is shorter than the rest but looks very sturdy and has plenty of bud showing already, I think this is because it started flowering maybe 7days before the rest and in them 7days the rest shot up rapidly! I'll update daily and try get some nice videos with lights out.

Processing
Likes
17
Share


@Hawkbo
Follow
Pics taken on day 36. Some, if not most of these are lightly seeded, I've checked for herms but cant find no nuts. Sucks but from what I've read and people I've talked to seems like it wont be too big of a deal in the end, some old school growers even prefer lightly seeded nugget, I've never tried it intentionally. The green buzz nutes are working well. I'm almost out of the more PK so I had to add herculean harvest liquid bonemeal to get the ppm where i want it while trying to conserve the Gbl to last the rest of the run. Didnt have the lady to take my pics today so I was limited and had to take them lefty one handed and was shakey af.
#1 is definitely lightly seeded I noticed after last weeks update. It looks pretty cool if the buds connect they will be like 2 feet bud sticks. Starting to give off a dank aroma as well.
#2 is #2


Likes
190
Share


@Burmese
Follow
Hi everyone, Here’s the update for this week along with some beautiful videos.
Please enjoy... 😊 ✌️
BTW Grow with Mars... 😉
Soil-Organic-LST
Day 92~98
This week I topped up my soil with 50g of my potting mixed,25g of tea leaves fertilizer and 15g of bone meal.
Soil
RO water
Coconut water- 15ml/L
pH- 6.5
ppm- 85
Run off
pH-6.7
ppm-650
Soil Potting Mixed Recipe
-Coco peat: 30%
-Soil Compost: 20%
(Soil,Sand,Cow manure,Ash)
-Bone meal: 10%
-Earthworm fertilizer: 10%
-Perlite: 15%
-Marble stone: 5%
-Crash egg shell: 3%
-Chicken manure: 3%
-Banana peels: 2%
-Gypsum: 2%
———————————————
Coco-Inorganic-ScrOG
Day 92~98
Becoming foxtails...
Coco
RO water
Bloom- 4.0ml/L
Micro- 2.0ml/L
B52- 2.0ml/L
Bud Candy- 2.0ml/L
Cal-Mag plus- 1.5ml/L
pH-5.5
ppm-890
Run off
pH-5.9
ppm-800
Coco potting mixed recipe
Coco peat : 70%
Perlite : 30%
Transplanted from 1gallon coco/soil mixed pot at Day-42.
Scrog size
Area : 1ft x 1ft (30cm x 30cm)
Hole size : 2” (5 cm)
Material : iron welded by four steel pillars.
Height from base: 6” (15cm)
Stay tune friends.
Happy growing to you all... ✌️ 🇲🇲
Likes
Comments
Share

@Garden_and_Guardian
Follow
Lady is now my tallest and growing strong. She is a heavy drinker now requiring about ~ .3 every 6-8 hours.
Heavy P & K early in flower led to slight tip burn. Have been straight watering for the last week and she has bounced back beautifully.
I topped her around week 3 she has now outpaced my untopped plant in the tent and has similar strong inter-node spacing. She's slightly dusty(trichomes) early!!!!!!!

Likes
6
Share


@Micogrow
Follow
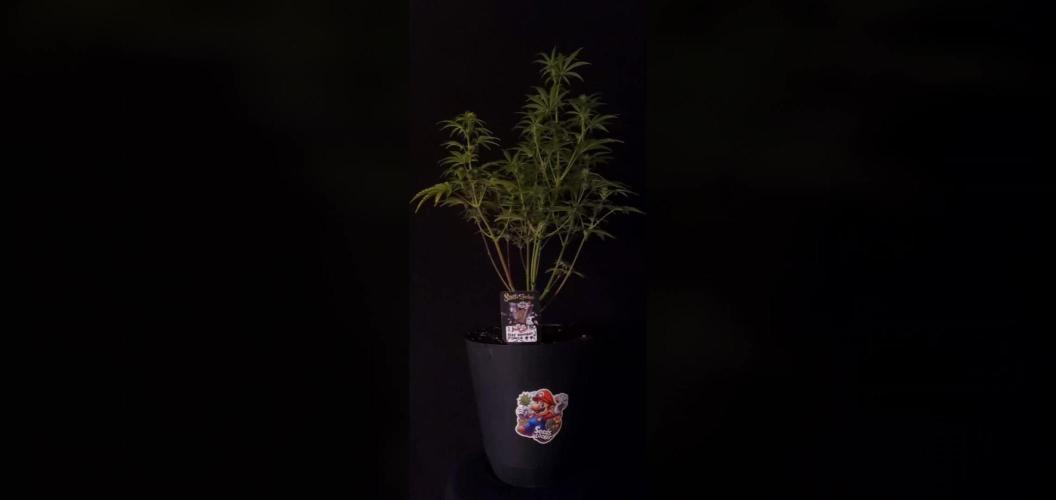
She has shown herself!
Definitely a relief since I was worried about the early use of OregonismXL.
Took a little more time to break the soil than her closet-mate, but it’s also very likely I was just inconsistent with my planting depth.
Worth mentioning: This plant is my summer outdoor grow, but it will do most of its veg stage indoors. The weather is dookie butt during veg season where I’m at.

Likes
2
Share


@nenenedudu
Follow
lowered the ionbeam lights and adjusted all lighting to get even 20k lux everywhere.
Likes
9
Share


@SamDo
Follow
Week 24 of growth, and this is the second week of flowering for the Pineapple Upside Down.
Flowering has clearly declared itself now, with the first pistils appearing across the plant.
That part is good news, but visually, the plant still isn’t where I’d like it to be.
The foliage color is off, and I’m being honest: it makes me question the final yield potential.
This probably won’t be the best run, but there’s no reason to panic or to quit.
The plan is to keep things stable, finish the cycle cleanly, and take the lessons.
Important timing clarification: this cultivar is advertised at around 45 days of total flowering, so we’re not “around day 45.”
We’re simply early in flower, and the plant is already showing pistils properly.
Stretch has remained quite limited so far.
Is that purely genetics, or is it also influenced by the plant not being in peak shape? Hard to say.
Either way, in a grow tent, limited stretch is honestly a comfortable scenario.
Feeding-wise, the key point isn’t “soft feeding.”
We’re staying under EC 2.0, with 2.0 as a ceiling, but the real note for this week is: no PK booster yet.
For now, we hold the base feeding steady, and we’ll introduce PK later, progressively, depending on how the plant responds.
So the strategy is simple: stabilize the environment, avoid adding stress, and let flowering build at its own pace.
Next week we’ll reassess color, vigor, and early bud development, then decide when and how to ramp up.

Likes
4
Share


@dailygrower
Follow
my tallest plant is a bit damaged i hope that it don't have any effect on result.
for the people with experience are the buds of the plant small for the time of flowering?????!!!!!
Likes
22
Share

@GermGrowFox
Follow
Ein weiterer grow geht zu Ende und ich bin sehr zufrieden :) Updates gibt es sobald es trocken ist und fermentiert werden kann.
Processing
Likes
13
Share


@GrowGuy97
Follow
Flower day 31 - Having a little trouble with the temperature getting higher than I would like because my dehumidifier puts off some heat while it’s running so it’s been a constant struggle to keep the environment in this tent stable! Definitely will not have so many plants next run lol, but all in all the ladies are growing great & I can’t wait to see how they turn out! Thanks for following friends & happy growing!✌️🏼🌱
Flower day 33 - Fed half the plants today with PH at 6.4 to try and keep the humidity down some I’ll water the other half tomorrow!


Likes
567
Share


@Rock_n_Roll_Randy
Follow
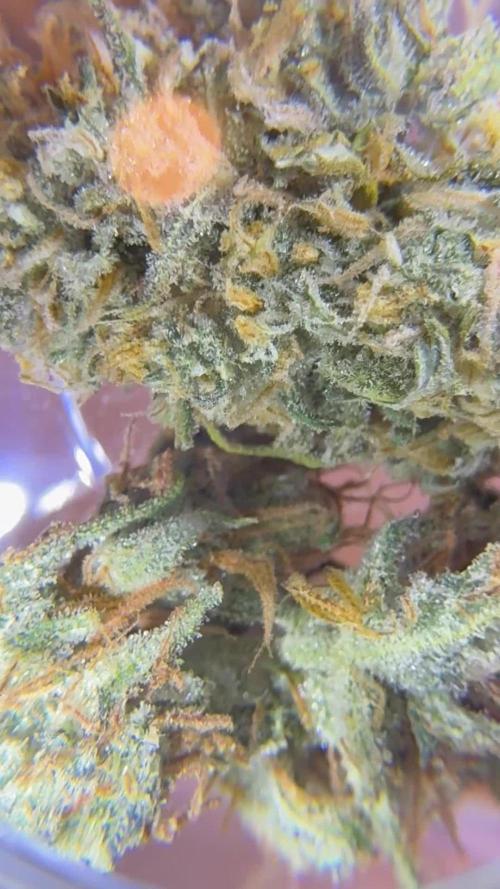
We are at 27 days of flowering now and they are starting to change colors now. The gorilla is really turning yellow. I could of gave her a bit of nitrogen but this is just a practice run with my custom bred seeds so I'm letting it go. Alot of frost showing now. They are loving the new fc4800 and 8x8 Grow Tent for sure🤘 another couple weeks and I should know more about the smell of them. Right now they smell more like the nuken but they are slowly changing to have their own unique smell. None of them smell like what the parents did. Except at the beginning of getting frosty they all kinda smelt like nuken. Like marshmallows. The monkey dough nuken smells like fruit loops and the gorilla smells like skittles. More than the original skittles does👍
WWW.MARS-HYDRO.COM
PROMO CODE: rocknroll
Instagram: @marshydropenny
Shout out and thanks to:
https://greenbuzzliquids.com/
#greenbuzzliquids
@GreenBuzzLiquids
Hers more information on the mars hydro products:
GET THE MAX FROM MARS👍: Welcome one of the newest members of the Mars Hydro family🤜🤛🤘. The Mars Hydro FC 4800 480W LED Grow Light can accommodate up to a 4' x 4' area for flowering. It has OVER 2000 LED chips consisting of the best selling Samsung LM301B diodes which has a Luminous Efficacy of: 220 lm/W
0.2 W, 3 V mid power,
Osram 660nm Diodes, Infrared light and UV LIGHT👍. It boasts the incredible efficiency of 2.8 µmol/J, maximum 2.5gram yield per watt with 30% higher Average PPFD. This High-intensity spectrum is beneficial for plants at all stages - from veg to bloom, and creates Big dense Buds👍. achieve 50% higher yields & quality compared with the old lights! Only consumes 480W for 4x4ft personal grows, and 3x3ft for commerical grow. It comes with a dimmer and daisy chain function with a maximum of up to 15 lights, the master light controls the rest👍. Wide 6-bar design offers even & wide canopy coverage and can maximizes your grow space. slim 180° FOLDABLE DESIGN... YES I SAID FOLDABLE🤘🤣 , making it compact and easy to install, it's IP65 WATERPROOF and will give you no worries while growing in a humid environment and makes it a flexible high performance commercial grow light for enormous SUPER FROSTY yields.😛😛😛. MARS GETS EM FROSTY BOYS👍
AWESOME HEAT DISSIPATION: The Low energy consumption FC4800 growing light has 6 passive-cooled bars and an aluminum heat-sink a removable driver you can upgrade later or have it outside your tent. with zero noise you can save up to 50% in your electricity bill compared to HID's or HPS lights!
It also has a removable driver so you can upgrade it in the future or have it outside your grow space for better heat control in your growroom👍
UPGRADED FULL SPECTRUM: Yield Max Spectrum with enhanced red (Top-Bin Samsung 3000k-5000knm, Osram 660nm Deep Red), speed up blooming & fruiting, perfectly suited for full-cycle growing. The FC4800 LED grow lamp was born for Big Buds, perfect for commercial, grow tent, grow room, hydroponics, and all soil grows.👍
THE BEST SAMSUNG DIODES: THE FC4800 has Top Bin genuine Samsung Osram Diodes, combined with remarkable 2.8 µmol/J Efficacy, 30% higher Average PPFD, 50% less energy consumption, to maximize your yields. They give you a TRUSTED 3 years warranty 100% Satisfactory guaranteed!!!
The MARS HYDRO 8x8 Grow Tent interior is made of a unique diamond design mylar which is highly reflective. (Other companies mylar and reflective rate is as low as 50%, and it won't provide efficient light. They use thick 1680D oxford canvas, and being double stitched, it is tear proof and perfect for locking in the light. Their grow tent keeps 100% of the light inside the tent and helps your plants absorb more light. EXTRA-THICK material means No light leaks or rips at all.👍
Strong Stable metal corner adapters and poles are the trustful supporters of the tent. It's very sturdy, neither rusting or paint flaking off. quick and easy tool-free setup. They use heavy-duty metal zippers, with double layer black lining, by far the best on the market which creates a light-proof seal.
The Easy observation windows are made by double layers of cloth. Observe the growing conditions of your plants without opening the tent and avoid disturbing your plants. The observation windows also serves to dissipate heat and ventilate the air.
The tent includes 2 removable waterproof floor trays to hold soil and water. The removable tray can be taken out to wash easily.
They guarantee the grow tents are easy to install even if you've never done something like this before. Clear Instructions and no tools needed! They also offer 30-day unconditional refunds for quality problems. Just contact their friendly 24 hours customer service 👍
WWW.mars-hydro.com
PROMO CODE:rocknroll
Instagram: @marshydropenny
https://greenbuzzliquids.com/
#greenbuzzliquids
@GreenBuzzLiquids
Please check out my YouTube👍
Like and subscribe right Now!!! LoL
Likes
29
Share


@mrb11
Follow
Had a few mishaps this week with my light schedule. Working nights now so I was not home when the lights were on and it was screwing up everything so I bumped the lights up and hour every night till it was turning on at midnight which is when I get off of work now. Well during that process a few things happened. My ac infinity controller 69 pro had lost wifi so I had been needing to do a reset because it’s still throwing an alert but I don’t use alerts so something’s wrong anyway I unplugged it during lights out and during the process of plugging it back in or something the lights decided to come on for a few seconds I believe is all it was so no worries it’s only once. Well that reset didn’t work so CS told me how to do it another way and I was able to do the reset but it didn’t work and I can’t remember exactly how it happened but later on the afternoon when the lights supposed to be off I realized I had the on for 23 hours 59 minutes and 59 sec lmao oops. So I went over 12hr by 2 hours so I just changed the schedule to give her 12hrs of dark then went back to my normal schedule but she only get 10 hrs of light that day. That was like a 2 or 3 day span of screwing up and I think I had another blip of the light turning on during dark period but can’t remember, trying to put that behind me and hope I didn’t stress her too much. She has been doing well besides that drama. Her ph has been crashing down to 5.5 fairly quick lately but I been on top of it. Got my auto top off setup I’ll see if I can add a pic, very simple gravity feed. I’ve noticed I’m pushing my limits on ppm, seeing some slight tip burn. Oh yeah bumped the light up to 7. Now on 7 of 10 which according to my new meter is not as bright as i expected