
Likes
Comments
Share


@BB_UK
Follow
Been a wonderful week! Defoliated for the last time until the flip and have great news! Have a new light on arrival TSW2000 and it will cover the whole space in the tent! Mars hydro have made me proud of myself! I’m glad I’m a loyal Martian 🙏💚 I will continue on as per usual until I flip them to 12-12 thank you for stopping by

Likes
6
Share


@Ninjabuds
Follow
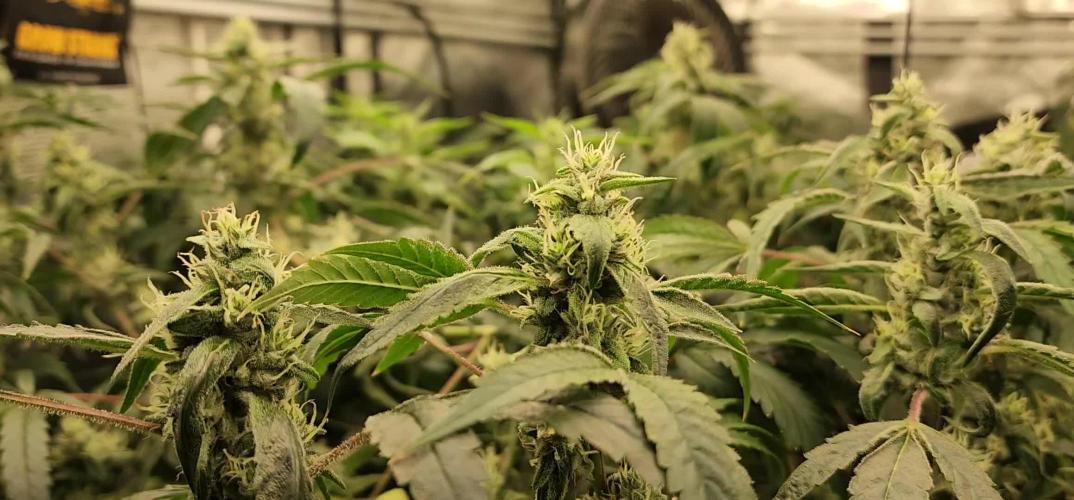
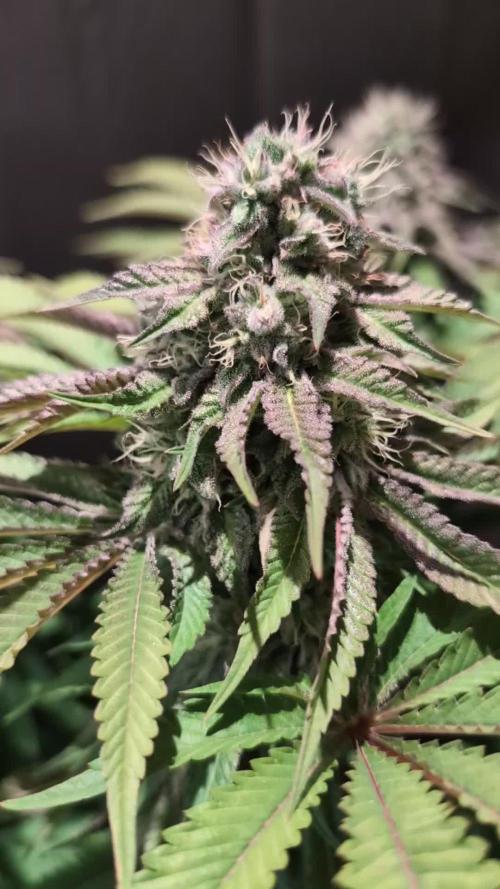
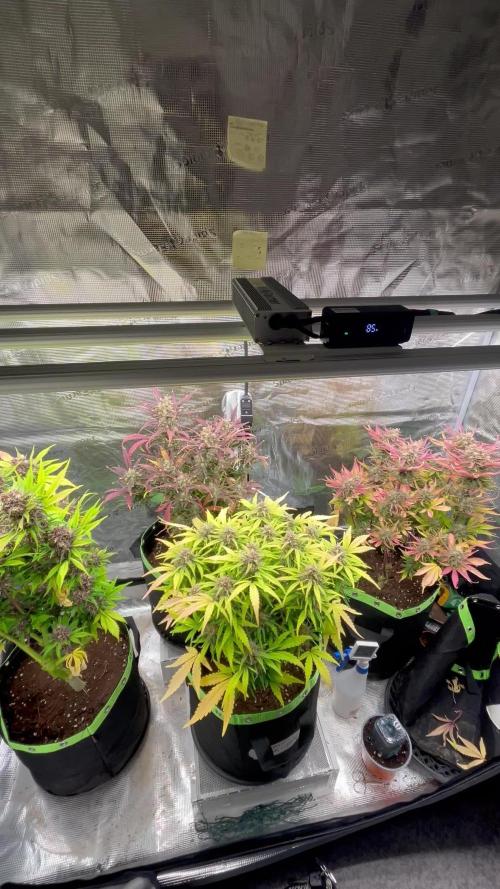
My permanent marker plants are looking really interesting! The short and stocky one with the purple leaves is super vibrant. I love that pop of color against the green of the other plants. It's a little different from the taller plant, which has this really cool stacked-up look to it. I'm curious to see if those stacked-up leaves will change color too.
The past few weeks have been so beautiful, watching the plants grow and change. It's amazing how something so small and fragile can turn into something so strong and vibrant. Now that they're getting ready to bloom, it feels a little bittersweet. I'm so excited to see the finished product, but I'll definitely miss having them around while they're growing.

Likes
13
Share


@Canadian
Follow
They are ready the only thing is I'm going to wait for the other plans to catch up probably 4 more days they smell really nice and can't wait to try this legendary strain.
Notice that they can be sensitive to foxtailing if light is to close to their buds.
Thank you for reading I will Continue to update have a happy grow.

Likes
4
Share

@Ensign420
Follow
|»» LOG DISCLAIMER: Not intended as a grow guide. Grow log entries are usually posted 3 weeks later and are for my learning reference. ««|
Introduction - Week 21 Summary -
Ensign's log, stardate 17578.1,
Pretty smooth grow week!
For the main tent, did a bit of super-cropping, but for the most part, been letting these girls do their thing! Bud growth is ramping up and looking beautiful!
As for the veg tent, transplanted two more clones into the right quadrants and topped the mothers in the left quadrant. Top watered all veg plants with a few microbial goodies. Also kept up with clonal RO waterings.
Decided to dive into the world of tissue culture and am stoked to give it a try!
Kind of forgot to take PPFD reading and height checks, but will do so next week.
Anyways! Onwards Ensign!
[START OF WEEK 21]
==========================================================
---------- [ 4x4 MAIN TENT ] ----------
Heady OG BX1 #1 [Round4 ~Wk14] - WEEK 21 - Full Bloom Wk5
TKO [Round2 ~Wk19] - WEEK 21 - Full Bloom Wk5
----------- [ 3x3 VEG TENT ] ------------
TKO - WEEK 04 - Full Veg
Gorilla Goat #1 - WEEK 00 - Transplant
Heady OG BX1 - WEEK 04 - Full Veg
Garlic Budder OG#1 - WEEK 00 - Transplant
09/08/25 → 09/14/25
This Week's Estimated Goals
----------------------------------------------------------------------------------------------
DLI: ~35 mol/m²/d
PPFD: ~810 μmol/m²/s
VPD: ~1.0 kPa
This Week's Meter Readings & Averages
----------------------------------------------------------------------------------------------
Light On/Off: 19:00 - 07:00 | Wattage: ~390.1W [LV05]
Distance From Canopy: ~7”, 7”
DLI: ~37.32 mol/m²/d
PPFD: ~864 μmol/m²/s
VPD: ~0.62 kPa
Soil %: [49.0, 38.9, 30.6, 52.3, 42.9, 40.9, 25.3, 43.0]
==========================================================
Day 01 - Monday - 09/08/25 - Total Days: 148
-----------------------------------
Daily Averages ~[+01:00]
- Temps: 84.0°F [28.9°C]
- Humidity: 83.5%
- VPD: 0.66 kPa
- Soil %: [49, 40, 31, 52, 42, 39, 28, 41]
-----------------------------------
- [+00:19]: Night check on the 4x4 tent.
--- Looking healthy and green in the garden!
--- Heady OG and TKO are swelling up with buds and growth looks dank and frosty!
- [+00:22]: Checked the Ecowitt soil moisture sensor data:
------------------ [ 4x4 MAIN TENT ] ---------------
------ 47% - [CH01 FT » G30 - Heady OG BX1 #1]
------ 40% - [CH02 FB » G30 - Heady OG BX1 #1]
------ 26% - [CH03 BT » G20 - TKO]
------ 51% - [CH04 BB » G20 - TKO]
------------------ [ 3x3 VEG TENT ] ----------------
------ 44% - [CH05 BL » GR7 - TKO]
------ 39% - [CH06 BR » GR7 - Pheno #2]
------ 27% - [CH07 FL » GR7 - Heady OG BX1 #1]
------ 40% - [CH08 FR » GR7 - Pheno #4]
--------- Veg: 38% - 45% | Flower: 45% - 55%
--------- General: 30% [Dry] «| 45 - 60% [Moist] |» 70% [Wet]
- [+00:25]: Checked the 3x3 veg tent.
--- Veg garden is healthy and perky with green growth!
--- Both mothers are looking great and growth is bushing out beautifully!
--- Both of the spare Heady OG clones need to be watered!
- [+00:27]: Here are the starting initial watering ranges:
------ Heady OG BX1 #1A » 237.7g → 300.3g
------ Heady OG BX1 #1B » 244.4g → 305.6g
--------- General Solo Range: [Dry] «| [Initial Cup Weight] + ~55-100g |» [Wet]
--- Both cups were last watered 4 days ago.
--- Took the starting weight of both clones before watering,
------ Heady OG BX1 #1A » 211.8g
------ Heady OG BX1 #1B » 241.7g
--- While on a scale,
--- Gently misted the straw mulch of both cups with RO water.
--- Focused on the straw and sprayed as evenly as possible.
--- Misted 10-20 sprays. Waited a moment, then misted again.
--- Made sure to reference the watering weights.
--- Repeated this process until both cups weighted at least 300g.
--- There was no runoff.
- [+00:47]: Took the saturated weight of both clones after watering,
------ Heady OG BX1 #1A » 325.3g
------ Heady OG BX1 #1B » 320.0g
--- Marked the final wet weight on the back of each cup. Also marked the watering date on the front.
--- Placed both phenos back into the tent.
- [+00:54]: Checked the humidifiers.
--- Tanks are still full and no leaks found.
Day 02 - Tuesday - 09/09/25 - Total Days: 149
-----------------------------------
Daily Averages ~[+01:00]
- Temps: 83.0°F [28.3°C]
- Humidity: 82.0%
- VPD: 0.70 kPa
- Soil %: [49, 40, 28, 52, 42, 38, 26, 41]
-----------------------------------
- [14:01]: [ » SUPPLEMENTAL LIFE ENTRY « ]
--- Fixed my computer! Glad the issue was just the PSU and not the motherboard.
--- Anyways!
- [20:58]: Night check on the 4x4 tent.
--- Ahh yea! Looking bushy and bud colas are starting to form!
--- Heady OG has taken over the front of the tent, but TKO is also looking great in the back.
--- There are a few tops that need a bit of training. Let’s go!
- [21:06]: Super-cropped and lowered the taller branches.
--- Nice! Now the canopy looks a lot more even!
--- Ca-Caw!! Ooo yea! Terps are getting louder!
--- While pinching the taller tops, noticed that Heady OG’s terpene profile is ripening into a more distinct lemon citrus gas on the nose and wow she is greasy! TKO’s terps have changed to more of an earthy creamy (or dough-like) fuel. Very nice!
--- Getting absolutely hyped for this cycle’s harvest!!
- [21:09]: Checked the Ecowitt soil moisture sensor data:
------------------ [ 4x4 MAIN TENT ] ---------------
------ 53% - [CH01 FT » G30 - Heady OG BX1 #1]
------ 39% - [CH02 FB » G30 - Heady OG BX1 #1]
------ 30% - [CH03 BT » G20 - TKO]
------ 53% - [CH04 BB » G20 - TKO]
------------------ [ 3x3 VEG TENT ] ----------------
------ 40% - [CH05 BL » GR7 - TKO]
------ 38% - [CH06 BR » GR7 - Pheno #2]
------ 26% - [CH07 FL » GR7 - Heady OG BX1 #1]
------ 42% - [CH08 FR » GR7 - Pheno #4]
--------- Veg: 38% - 45% | Flower: 45% - 55%
--------- General: 30% [Dry] «| 45 - 60% [Moist] |» 70% [Wet]
- [21:12]: Checked the 3x3 veg tent.
--- Looking healthy and thriving with growth in the veg garden!
--- Both Heady OG and TKO mothers are looking green and the canopy is getting a bit tall but still okay. Will need to top both soon.
--- All clones look healthy and the four in the propagation tray need watering. Let’s go Ensign!
- [21:17]: Here are the starting initial watering ranges:
------ Gorilla Goat #1 » 256.1g → 300.4g
------ Gorilla Goat #2 » 255.4g → 300.3g
------ Garlic Budder OG#1 » 263.5g → 305.2g
------ Garlic Budder OG#2 » 256.4g → 300.2g
--------- General Solo Range: [Dry] «| [Initial Cup Weight] + ~55-100g |» [Wet]
--- All cups were last watered 4 days ago.
--- Took the starting weight of all clones before watering,
------ Gorilla Goat #1 weighed 258.0g
------ Gorilla Goat #2 weighed 247.6g
------ Garlic Budder OG#1 weighed 255.2g
------ Garlic Budder OG#2 weighed 261.9g
--- While on a scale,
--- Gently misted the straw mulch of all cups with RO water.
--- Focused on the straw and sprayed as evenly as possible.
--- Misted 10-20 sprays. Waited a moment, then misted again.
--- Made sure to reference the watering weights.
--- Repeated this process until all cups weighted at least 300g.
--- There was no runoff.
- [21:58]: Took the saturated weight of all clones after watering,
------ Gorilla Goat #1 » 310.1g
------ Gorilla Goat #2 » 315.7g
------ Garlic Budder OG#1 » 315.3g
------ Garlic Budder OG#2 » 310.3g
--- Marked the final wet weight on the back of each cup. Also marked the watering date on the front.
--- Placed all cups back into the tent.
- [22:24]: Checked the humidifiers.
--- Tanks are still full and no leaks found.
Day 03 - Wednesday - 09/10/25 - Total Days: 150
-----------------------------------
Daily Averages ~[+01:00]
- Temps: 83.8°F [28.8°C]
- Humidity: 82.8%
- VPD: 0.68 kPa
- Soil %: [49, 39, 28, 52, 43, 38, 25, 41]
-----------------------------------
- [+00:20]: Night check on the 4x4 tent.
--- Looking great my girls!
--- Wow the top growth is getting stacked!
--- Both Heady OG and TKO’s buds are swelling up with more white hairs!
- [+00:24]: Checked the Ecowitt soil moisture sensor data:
------------------ [ 4x4 MAIN TENT ] ---------------
------ 54% - [CH01 FT » G30 - Heady OG BX1 #1]
------ 39% - [CH02 FB » G30 - Heady OG BX1 #1]
------ 30% - [CH03 BT » G20 - TKO]
------ 53% - [CH04 BB » G20 - TKO]
------------------ [ 3x3 VEG TENT ] ----------------
------ 41% - [CH05 BL » GR7 - TKO]
------ 38% - [CH06 BR » GR7 - Pheno #2]
------ 25% - [CH07 FL » GR7 - Heady OG BX1 #1]
------ 40% - [CH08 FR » GR7 - Pheno #4]
--------- Veg: 38% - 45% | Flower: 45% - 55%
--------- General: 30% [Dry] «| 45 - 60% [Moist] |» 70% [Wet]
- [+00:26]: Checked the 3x3 veg tent.
--- Veg growth is looking beautiful and green!
--- Both mothers and all clones are looking healthy!
--- Need to water the spare Heady OG clones!
- [+00:33]: Here are the starting initial watering ranges:
------ Heady OG BX1 #1A » 237.7g → 300.3g
------ Heady OG BX1 #1B » 244.4g → 305.6g
--------- General Solo Range: [Dry] «| [Initial Cup Weight] + ~55-100g |» [Wet]
--- Both cups were last watered 3 days ago.
--- Took the starting weight of both clones before watering,
------ Heady OG BX1 #1A » 216.1g
------ Heady OG BX1 #1B » 230.8g
--- While on a scale,
--- Gently misted the straw mulch of both cups with RO water.
--- Focused on the straw and sprayed as evenly as possible.
--- Misted 10-20 sprays. Waited a moment, then misted again.
--- Made sure to reference the watering weights.
--- Repeated this process until both cups weighted at least 300g.
--- There was no runoff.
- [+00:57]: Took the saturated weight of both clones after watering,
------ Heady OG BX1 #1A » 325.6g
------ Heady OG BX1 #1B » 325.4g
--- Marked the final wet weight on the back of each cup. Also marked the watering date on the front.
--- Placed both phenos back into the tent.
- [+01:02]: Checked the humidifiers.
--- Tanks are still full and no leaks found.
Day 04 - Thursday - 09/11/25 - Total Days: 151
-----------------------------------
Daily Averages ~[+01:00]
- Temps: 82.9°F [28.3°C]
- Humidity: 82.9%
- VPD: 0.71 kPa
- Soil %: [49, 39, 29, 51, 44, 41, 25, 44]
-----------------------------------
- [09:40]: Quick morning checked on the 3x3 veg tent.
--- Veg garden is looking healthy and all around growth is green with no issues!
- [18:17]: Evening check on the 3x3 veg tent.
--- Ooo yea! The veg garden is green and thriving with perky growth!
--- Okay! Need to transplant two of these girls!
--- After bit of self-debating (and quite a few bowls), I’ve finally decided on the ones!
--- Going to transplant Gorilla Goat #1 along with the original Garlic Budder #1
--- Decided to the transplant the Gorilla Goat #1 for the loudness and overall lemon chem gas terp profile.
--- As for the Garlic Budder phenos, going with the purple pheno. For a while, was planning on transplanting the #2 pheno, but after a 5-month cure, the unique and smooth smoke of the #1 pheno was the ultimate reason for switch.
--- Ca-Caw! Always pheno hunting! This is why we grow!
--- Okay, anyways!
- [18:22]: Time to transplant!
--- Both 7-gallon pots have been pre-amended and ready for more roots!
--- Alright let's go cutty!
--- Placed both of the spare Heady OG clones in the propagation tray.
- [18:25]: Gently removed the solo cups from both fabric pots (on the right side of the tent) leaving perfect holes.
------ Sprinkled 1/16tsp of Great White,
--- Dusted the sides of both holes.
--- Also sprinkled a bit around the top soil.
--- Great! Time to transplant!
--- It’s been two days since both have been watered.
--- To loosen and unstick the rootball from the cup, I gently squeezed the sides before pressing the bottom upwards.
--- Once fully loosened, I simply Vulcan-gripped the base of the plant and flipped her upside down.
- [18:33]: Gorilla Goat #1 dropped straight out of her cup!
--- Hmm. Not as rooted as I would hope, but roots look white and healthy!
--- The original Garlic Budder #1 pheno easily slipped out of her cup!
--- Similar the Gorilla Goat, she could have more roots, but that’s okay. Roots look healthy and that is all that matters!
--- Did not break up the rootballs.
--- Gently flipped and placed each clone carefully into the pre-inoculated holes.
--- Pressed and evened out the top soil for both phenos.
- [18:39]: Transplant done!
--- Gorilla Goat #1 was transplanted into the back right quadrant.
--- Garlic Budder OG#1 was transplanted into the front right quadrant.
--- To prevent transplant shock and to help even out the soil moisture, going to give 2 cups of wetting solution each.
--- Also adding in a few extra microbes.
- [18:55]: Filled a pitcher with 6 cups of RO water.
------ Added 1/64tsp of Quillaja Saponaria Extract [60]
------ Added 1/32tsp of Recharge
------ Added 1/32tsp of Stash Blend
------ Added 1/8tsp of Horticultural Aloe
------ Added 1/8tsp of Horticultural Coconut
------ Added 1/8tsp of Mycrobe Complete
------ Added 1/2tsp of WDG3000 Extra Strength BTI
--- Mixed the solution and poured 2 cups straight into a pump sprayer.
--- Misted Gorilla Goat #1's straw mulch with the wetting solution (back right quadrant).
--- Took my time and tried to go evenly.
- [19:15]: Repeated this process for the original Garlic Budder #1 pheno (front right quadrant).
--- Using the remaining 2 cups of the wetting solution, misted the straw mulch for both Heady OG (front left quadrant) and TKO (back left quadrant) mothers.
--- Ca-Caw!! Done with the transplant! Grow strong my veg queens!
- [19:22]: As for the remaining veg clones,
--- Decided to try to preserve the genetics in solo cups and basic clonal cycling techniques.
--- Plan to take new cuttings in a few weeks or so and will begin the rooting process once more.
--- Curing has really changed the way I currently hunt phenos and I really don’t want to lose another keeper pheno (recently regret not keeping a cutting of Garlic Budder #4).
--- Oh! Also finally decided to fully give tissue culture a go!
--- Another huge shout out to Laur and her independently ran business, Plants-In-Jars!
--- If successful, learning tissue culture will be a huge ganja journey milestone by providing a sustainable way to preserve and maintain a diverse genetic library.
--- Through continuous subculturing and micro propagation, I should be able to maintain unrooted explant cuttings forever.
--- Then when needed, theses cuttings can be rooted and conditioned back into a clonal state and back into solo-cups for transplanting.
--- Of course, I have absolutely no idea what I am doing, so developing a successful cannabis tissue culture protocol is going to be fun and full of failure, err, I mean, learning experiences!
--- What can possibility go wrong right!?
--- While learning (which will most likely take a bit), will continue to maintain the vegging mothers and solo cup clones.
--- The ganja journey continues! Getting hyped!
--- Don’t frack this up Ensign!
--- Anyways!!
- [19:28]: Checked the Ecowitt soil moisture sensor data.
--- Also made sure to update the Ecowitt sensor names:
------------------ [ 4x4 MAIN TENT ] ---------------
------ 54% - [CH01 FT » G30 - Heady OG BX1 #1]
------ 39% - [CH02 FB » G30 - Heady OG BX1 #1]
------ 28% - [CH03 BT » G20 - TKO]
------ 49% - [CH04 BB » G20 - TKO]
------------------ [ 3x3 VEG TENT ] ----------------
------ 54% - [CH05 BL » GR7 - TKO]
------ 55% - [CH06 BR » GR7 - Gorilla Goat #1]
------ 34% - [CH07 FL » GR7 - Heady OG BX1 #1]
------ 61% - [CH08 FR » GR7 - Garlic Budder OG#1]
--------- Veg: 38% - 45% | Flower: 45% - 55%
--------- General: 30% [Dry] «| 45 - 60% [Moist] |» 70% [Wet]
- [19:58]: Checked the 4x4 tent.
--- Ca-Caw!!! Ahh yea!
--- The canopy is looking beautiful and wow buds are thickening up beautifully!
--- Both Heady OG and TKO are healthy and getting frosty!
--- Pretty easy night in the main garden!
--- Let’s go my girls!
- [20:04]: Quickly checked on the auto-watering system.
--- System is still charged and no leaks or kinks found in the tubing.
- [22:00]: Checked the humidifiers.
--- Tanks are still full and no leaks found.
Day 05 - Friday - 09/12/25 - Total Days: 152
-----------------------------------
Daily Averages ~[+01:00]
- Temps: 83.7°F [28.7°C]
- Humidity: 81.7%
- VPD: 0.72 kPa
- Soil %: [49, 38, 32, 53, 43, 45, 26, 47]
-----------------------------------
- [22:55]: Night check on the 4x4 tent.
--- Ooo yea! Garden is thriving and terps are getting louder!
--- Heady OG and TKO are swelling up with top buds!
--- The canopy is completely full and with 4-5 weeks left in flower, absolutely hyped for harvest!
--- Will probably start checking trichomes in 2-3 weeks.
- [23:01]: Checked the Ecowitt soil moisture sensor data:
------------------ [ 4x4 MAIN TENT ] ---------------
------ 52% - [CH01 FT » G30 - Heady OG BX1 #1]
------ 38% - [CH02 FB » G30 - Heady OG BX1 #1]
------ 29% - [CH03 BT » G20 - TKO]
------ 51% - [CH04 BB » G20 - TKO]
------------------ [ 3x3 VEG TENT ] ----------------
------ 46% - [CH05 BL » GR7 - TKO]
------ 44% - [CH06 BR » GR7 - Gorilla Goat #1]
------ 25% - [CH07 FL » GR7 - Heady OG BX1 #1]
------ 45% - [CH08 FR » GR7 - Garlic Budder OG#1]
--------- Veg: 38% - 45% | Flower: 45% - 55%
--------- General: 30% [Dry] «| 45 - 60% [Moist] |» 70% [Wet]
- [23:04]: Checked the 3x3 veg tent.
--- Looking good ladies!
--- All mothers are looking beautiful and green!
--- Clones look great too but need watering, let’s go!
- [23:07]: Here are the starting initial watering ranges:
------ Gorilla Goat #2 » 255.4g → 300.3g
------ Garlic Budder OG#2 » 256.4g → 300.2g
------ Heady OG BX1 #1A » 237.7g → 300.3g
------ Heady OG BX1 #1B » 244.4g → 305.6g
--------- General Solo Range: [Dry] «| [Initial Cup Weight] + ~55-100g |» [Wet]
--- Gorilla Goat and Garlic Budder were last watered 4 days ago.
--- Both Heady OG phenos were watered 3 days ago.
--- Took the starting weight of all clones before watering,
------ Gorilla Goat #2 » 243.4g
------ Garlic Budder OG#2 » 272.3g
------ Heady OG BX1 #1A » 232.9g
------ Heady OG BX1 #1B » 244.6g
--- While on a scale,
--- Gently misted the straw mulch of all cups with RO water.
--- Focused on the straw and sprayed as evenly as possible.
--- Misted 10-20 sprays. Waited a moment, then misted again.
--- Made sure to reference the watering weights.
--- Repeated this process until all cups weighted at least 300g.
--- There was no runoff.
- [23:38]: Took the saturated weight of all clones after watering,
------ Gorilla Goat #2 » 320.0g
------ Garlic Budder OG#2 » 310.3g
------ Heady OG BX1 #1A » 330.2g
------ Heady OG BX1 #1B » 330.3g
--- Marked the final wet weight on the back of each cup. Also marked the watering date on the front or side.
--- Placed all cups back into the tent.
- [23:44]: Checked the humidifiers.
--- Tanks are still full and no leaks found.
Day 06 - Saturday - 09/13/25 - Total Days: 153
-----------------------------------
Daily Averages ~[+01:00]
- Temps: 83.5°F [28.6°C]
- Humidity: 80.1%
- VPD: 0.79 kPa
- Soil %: [49, 38, 33, 52, 43, 43, 24, 44]
-----------------------------------
- [07:59]: Quick morning checked on the 3x3 veg tent.
--- Veg garden is thriving and growth is looking green and healthy.
--- All mothers and clones look healthy and both transplanted ones seem to be rooting and perky!
- [20:03]: Night check on the 4x4 tent.
--- Ca-Caw!! The garden is bushing out and wow growth looks incredible!
--- Heady OG and TKO are stacking up with bud growth!
--- Let’s go ladies!
- [20:08]: Checked the Ecowitt soil moisture sensor data:
------------------ [ 4x4 MAIN TENT ] ---------------
------ 52% - [CH01 FT » G30 - Heady OG BX1 #1]
------ 38% - [CH02 FB » G30 - Heady OG BX1 #1]
------ 36% - [CH03 BT » G20 - TKO]
------ 56% - [CH04 BB » G20 - TKO]
------------------ [ 3x3 VEG TENT ] ----------------
------ 40% - [CH05 BL » GR7 - TKO]
------ 42% - [CH06 BR » GR7 - Gorilla Goat #1]
------ 23% - [CH07 FL » GR7 - Heady OG BX1 #1]
------ 44% - [CH08 FR » GR7 - Garlic Budder OG#1]
--------- Veg: 38% - 45% | Flower: 45% - 55%
--------- General: 30% [Dry] «| 45 - 60% [Moist] |» 70% [Wet]
- [20:13]: Checked the 3x3 veg tent.
--- Veg garden is looking healthy and growth all looks green!
--- All mothers and clones looking great and no need to water. Nice!
- [20:19]: Checked the humidifiers.
--- Tanks are still full and no leaks found.
Day 07 - Sunday - 09/14/25 - Total Days: 154
-----------------------------------
Daily Averages ~[+01:00]
- Temps: 83.9°F [28.8°C]
- Humidity: 79.7%
- VPD: 0.82 kPa
- Soil %: [49, 38, 33, 54, 43, 42, 23, 43]
-----------------------------------
- [08:16]: Quick morning checked on the 3x3 veg tent.
--- Looking good my girls!
--- Mothers all look great and clones are getting taller!
- [21:35]: Night check on the 4x4 tent.
--- Ca-Caw!! The garden is thriving and buds are stacking!
--- Heady OG and TKO are both looking beautiful and healthy!
--- The canopy looks pretty even and bud colas are thickening up!
--- Heady OG has taken over the front of the tent and can’t really reach TKO now. Not too big of a deal, but for future cycles, will try to train the growth from left-to-right instead of front-to-back.
--- Anyways!
- [21:41]: Checked the Ecowitt soil moisture sensor data:
------------------ [ 4x4 MAIN TENT ] ---------------
------ 50% - [CH01 FT » G30 - Heady OG BX1 #1]
------ 38% - [CH02 FB » G30 - Heady OG BX1 #1]
------ 32% - [CH03 BT » G20 - TKO]
------ 53% - [CH04 BB » G20 - TKO]
------------------ [ 3x3 VEG TENT ] ----------------
------ 40% - [CH05 BL » GR7 - TKO]
------ 41% - [CH06 BR » GR7 - Gorilla Goat #1]
------ 22% - [CH07 FL » GR7 - Heady OG BX1 #1]
------ 43% - [CH08 FR » GR7 - Garlic Budder OG#1]
--------- Veg: 38% - 45% | Flower: 45% - 55%
--------- General: 30% [Dry] «| 45 - 60% [Moist] |» 70% [Wet]
- [21:44]: Checked the 3x3 veg tent.
--- Veg garden is looking beautiful and all ladies are healthy!
--- Both the Heady OG and TKO mothers look green and bushing out with more growth. Nice!
--- All clones look great, but three need watering.
--- Let’s go Ensign!
- [09:48]: Here are the starting initial watering ranges:
------ Gorilla Goat #2 » 255.4g → 300.3g
------ Heady OG BX1 #1A » 237.7g → 300.3g
------ Heady OG BX1 #1B » 244.4g → 305.6g
--------- General Solo Range: [Dry] «| [Initial Cup Weight] + ~55-100g |» [Wet]
--- Gorilla Goat and Garlic Budder were last watered 4 days ago.
--- Both Heady OG phenos were watered 3 days ago.
--- Took the starting weight of all clones before watering,
------ Gorilla Goat #2 » 259.5g
------ Heady OG BX1 #1A » 240.1g
------ Heady OG BX1 #1B » 253.7g
--- While on a scale,
--- Gently misted the straw mulch of all cups with RO water.
--- Focused on the straw and sprayed as evenly as possible.
--- Misted 10-20 sprays. Waited a moment, then misted again.
--- Made sure to reference the watering weights.
--- Repeated this process until all cups weighted at least 300g.
--- There was no runoff.
- [10:15]: Took the saturated weight of all clones after watering,
------ Gorilla Goat #2 » 325.2g
------ Heady OG BX1 #1A » 335.4g
------ Heady OG BX1 #1B » 335.2g
--- Marked the final wet weight on the back of each cup. Also marked the watering date on the front or side.
--- Placed all cups back into the tent.
- [22:23]: Checked the humidifiers.
--- Tanks are still full and no leaks found.
--- Another grow week done!
--- Oops, forgot to take the weekly PPFD, and height measurements. Will updated PPFD and measurements next week.
--- Glad that it was a simple week in the garden so there shouldn’t be much change.
--- Life happens.
--- Anyways!
--- Onwards Ensign!
[END OF WEEK 21]
Likes
5
Share


@KiweeBudfe
Follow
This Gorilla bomb is come from cloning.
In veg. stage, she was trained by using LST at the early veg. stage and then using ScrOG net and a little HST on some stem (Super cropping).
Now flowering stage, she was lollipop 1 week before I'm flip light cycle from 18/6 to 12/12.


Likes
9
Share


@GoodTimesOrganics
Follow
Hi liebe Community and Welcome Back! 💚
Woche 9 (Tag 73) im Vergleichsgrow!
Bio Tabs NL. vs. Weedefix (Stuttgart/ Germany)
Hier im Bio Tabs Grow haben wir nun nach 73 Tagen des Einpflanzens eine Höhe von 136cm erreicht.
Der Stretch ging nur bei der Bio Tabs Pflanze so steil. 🤷
Daher habe ich den längsten Haupttrieb gecropped, das bedeutet einfach etwas abgeknickt, dass er gleich hoch bleibt, da mir sonst die Höhe ausgeht.
Blütetag: 28 (BW4)
Nach der dritten Blütewoche, lässt sich eine etwas differenzierte Performance der beiden Düngersysteme beobachten.
Der Stretch performed bei der Bio Tabs NL Pflanze etwas krasser.
Auch die Pflanzenmaße scheint hier nun insgesamt etwas mehr zu sein.
Diese Woche gibt es noch ein leckeren Komposttee. 🍺
Es bleibt spannend!
Ansonsten nur Wasser.
Die Bedingungen im Growzelt sind aktuell wieder in Ordnung!
—————
🌞 Temp: 26
🌚 Temp: 18°C bis 19°C
💨 RH: 62%
VPD: 0,74 kPa
💡ppfd: 630 mpm
—————

Likes
12
Share


@MaltaHerbman
Follow
Day 9 and allready can see the roots in the bottom of the first small pot.
She is getting feed with Hesi Nutrients.
Day 12 had to repot as you see in photos roots were ready to transplant
Likes
12
Share


@russrahl
Follow
Plants continued to stretch last week, I had to weave a couple branches through the top screen as well to keep them level with the canopy. Overall it’s going good, I did a defoliation again a few days ago to try and open up as many budding sites as possible to the light. I noticed some nutrient burn on my leaf tips at the end of last week so I diluted the reservoir water with 3 gal of fresh water. My HPS light is still turned down to 750w as the light output at the top of the canopy exceeds 75 000 lux directly under the light even turned down. I have a light mover moving my light though so it’s not always in one spot. This is only my second crop using this light mover though so I’m still adjusting its speed and pause time and doing some experimenting with it...lol smell is normal still, not strong but it’s noticeable when you open up the tent. I will be updating more pictures and videos throughout the week as well. Cheers 💨

Likes
10
Share


@PurelySly
Follow
1/22/24 day 24 flower. Growing good, one pheno is growing into the light and into the fan but not too worried about it.
1/25/24 day 27 flower. Added another trellis because one pheno grew past it and is getting some burned hairs.


Likes
30
Share


@Lady_NugWitch
Follow
Plant number 2 is harvested. Watched friends and my kitten destroy my house!!!!🙀😂😂
Likes
5
Share
@GoodTimesOrganics
Follow
Welcome Back!💚
Die Sleepy Joe befindet sich nun in der siebten Blütewoche und die Blütenbildung entwickelt sich wunderbar. Ich bin gespannt ob sie in der 8 Wochen range bleibt.
Nach dieser Woche kommt ein Trichomcheck.
Das Blattwerk habe ich nochmals ein bisschen ausgedünnt.
Der Geruch hat sich auch nochmal stark intensiviert. Aktuell kommen starke Nuancen von süsslicheren düften, kombiniert mit Lösungsmittel oder ähnlichem hervor.
Die Umgebungsgegebenheiten sind aufgrund des nassen Wetters etwas anders.
—————
🌞 Temp: 24°C
🌚 Temp: 18°C bis 19°C
💦 RH: 58%
💨 VPD: 0,91 kPa
😎 PPFD: 830 mqm
—————
Grüne Grüße 🥦
Processing
Likes
21
Share


@Fullmeltalchemist
Follow
04.25 F29
So I just posted all of these this week, so Ill give a little more background for documentation’s sake and those curious.
Started with 30 beans. Selected down to 19 in veg by vigor and further down to 15 after culling males. The passion berry, deadstar and star pupil are feminized - the rest are regs, so should have some pheno variability.
I made a few different types of living soil at the beginning of this grow due to the a availability of different composts. All roughly 1:1:1 base(reclaimed living soil):aeration:compost with appropriate amount of amendments from a coots kit on buildasoil. Composts are my homemade bokashi based quasi-vermicompost, OLY Fish or NaturesLivingSoil concentrate.
I use cal mag and Neptune's Harvest fish hydrolysates drenches and foliar in veg to balance deficiencies and top dressed before flower with Organic Maine lobster compost. Just applied my first homebrewed compost tea made with worm castings, OM lobster, NH hydrolysate, kelp meal, and black strap molasses and looking forward to a second half(+) of flower.
Most of veg was under COBs, but I upgraded to meiju qb288s for late veg and flower - loving them!
05.01 F36


Likes
3
Share

@Phileed
Follow
Week 9 mix pack… a bit late but because I was away so I did a video on Monday 30 (first one) before going and a video this Friday 3 (second one) after coming back. On Monday I also harvested the Guava RF3 because she looked ripe and was forward looking most of the time compared to the others. I’m gonna harvest the to Apple strudel RF3 next (beginning of week 10 probably) and last the Banana purple punch RF3 (end of week 10 probably.
Papaya cookies week 8 really stepped up in this day’s with bigger and denser buds.

Likes
56
Share

@Comfrey
Follow
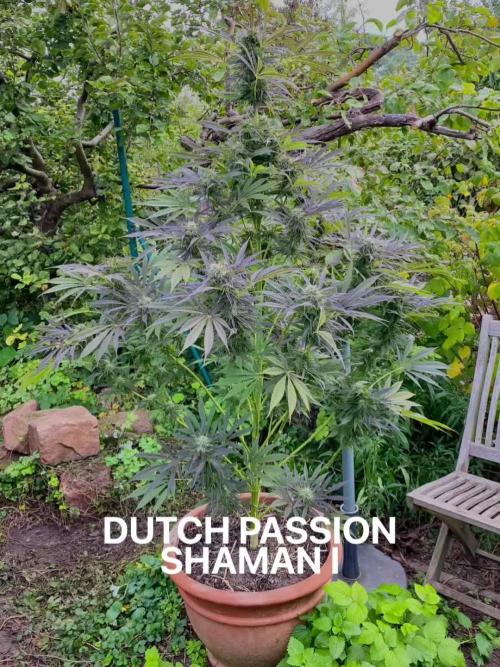
Dutch Passion Shaman
Eine aufregende und intensive Woche liegt hinter uns! Lange lasse ich die beiden nicht mehr stehen, Nebeltau und sehr hohe Luftfeuchte haben beiden Pflanzen etwas zugesetzt. Das tägliche Absuchen ist nun unerlässlich, ich finde regelmäßig neue Stellen an Blütenstielen, die sich im späteren Verlauf zu Fäulnis entwickeln würden. Die betroffenen Stellen befinden sich dort, wo ich während der Regenperiode entlaubt habe. So habe ich den Verdacht, dass ich die Blätter zu nahe am Stiel geschnitten habe. Denn dort, wo etwas mehr Blattstiel stehen blieb, sind die Stengel weiterhin gesund. Insgesamt empfinde ich die beiden als sehr robust und widerstandsfähig, vor allem wenn man bedenkt, dass dieser Sommer und Herbst immer wieder feucht bis nass war. Dennoch sollte man in dieser letzten Phase wachsam bleiben und die Pflanzen wirklich gründlich absuchen. So blieb der Verlust durch Blütenfäule sehr gering. Mit Hilfe einer Taschenlampe zum Ausleuchten von schattigen Bereichen, etwas Aufmerksamkeit und Liebe zu den schönen Pflanzen, werde ich ein sehr zufrieden stellendes Ergebnis in der Trockenkammer aufhängen können.
Der Duft der beiden Shamaninnen hat sich intensiviert. Sie sind noch einmal deutlich frostiger geworden und schön ölig-harzig. Nachdem ich bereits Probeblüten getrocknet und vaporisiert habe, sowie mehrmals einen starken Cannabistee aus den Blüten gebrüht und getrunken habe, bin ich mir sicher, dass ich nun jederzeit beruhigt ernten und eine ausgewogene Wirkung erwarten kann. Es ist ein klares aktivierende Sativa High, dass mich fröhlich und kommunikativ stimmt aber nie laut wird, selbst bei sehr hoher Dosierung im Tee. Die Wirkung setzt jeweils langsam ein. Auf ein fröhliches Gähnen folgt ein Hallo-Wach-Kick und ein langanhaltendes High, dass mich sanft zurückkommen lässt.
Danke für‘s vorbeischauen und das Interesse an meinen Shamaninnen. 💚

Likes
23
Share

@Grow_Mary_Green
Follow
Hi meine lieben, 🤗
Willkommen zur Ernte...
... was soll ich sagen. Das Ergebnis kann sich sehen lassen 😇
Der Grow selbst, war recht einfach. Es gab keine Komplikationen ausser der Zeitdruck zum Cup 😅 (war echt knapp)
Die Sticky Broccoli selbst, ist schon außergewöhnlich. Sie Sieht nicht nur aus wie Brokkoli 🥦 sie richt auch extrem Blumig mit einem hauch an Würziger Note...

Likes
10
Share


@carjos
Follow
enjoying some holiday time to search through old Ska tunes, I found some original albums on archives.org < since the exodus UK cheese (1989?) has in the past been described to be from Sensi Skunk, I thought Ska was big in UK in 1989, so enjoying a connection between the music and the era.
closet grow on-going as is last week.


Likes
7
Share


@Dpizzle1986
Follow
Most likely be the last week of nutrients.. topp.dress one more time beginning of week 5...
Likes
28
Share


@Trickybis82
Follow
Lovely to smoke. With a great weight given the set back with nute lock. Which Is the downfall to this run. Because this happened In last 3weeks which certainly resulted in small buds. However I am totally pleased with final weight and smoke from.this girl. Xx
