


Likes
24
Share


@BelSun_420
Follow
At the beginning of the week🌱
Pound Cake - 25 cm🥇
LSD 25 - 15 cm (the plant is one week shorter than the others)🥈
Banana Purple Punch - 14cm🥉
-----------------------------------------------------------
NUTS:
1 day : +/- 0.2 - Mammoth p
+/- 0.2 - Mico Chum
2 day : 0.2 - [email protected] Grow Soldier
0.2 - [email protected] Green Mystic
3 day - Just Water
Repeat ♻️
-----------------------------------------------------------
With the room already painted, it's time for them to grow up free from additional stress! 🌱😃
This week I should start with low stress training👨🏻🌾

Likes
22
Share


@Grassland
Follow
Nice progress this past week as well. Should be ready in specified time 63 ish days. Some leaves are showing there age and possibly that the lights were to close.
Dropped Root 66 and Diamond nectar thinking I am at least half way threw mid bloom. TDS = 750 , total wattage =277, 24 hr lights on.

Likes
6
Share


@m0use
Follow
Week has been easy, plant is thickening up and bit and getting extra stinky. happy with the way its going, cant report anything other then that.


Likes
13
Share


@diabloelnino
Follow
Chopped earlier than expected. I thought it was finished., I dried for a couple of days until the branches snapped without bending. Usually the good old stuff you can find from websites concerning this.

Likes
9
Share


@SamDo
Follow
This week was emotionally tough.
The Pineapple Upside-Down Cake hasn’t handled the transition well.
Her color shifted to a dull, washed-out tone, the posture weakened, and the overall metabolism seems depressed.
The stress accumulated during late veg is still showing:
nutrient fluctuations, environmental instability, and then the photoperiod flip pushed her over the edge.
She simply didn’t bounce back.
At this stage, expectations for yield have to be revised downward.
This run won’t deliver what the early training and maintenance work could have produced.
Still, the plan is to take the plant to harvest rather than abandoning the cycle.
Even a weak yield will provide useful feedback about stress management during pre-flower.
The priority now is stability:
hold EC steady, avoid aggressive feedings, monitor pH drift daily, and maintain a gentle VPD to reduce transpiration stress.
No interventions this week other than observation and minor parameter corrections.
The goal is to see whether she stabilizes or declines further.
Next update in one week.

Likes
16
Share


@SeshHouseCannabis
Follow
This strain give us a highest yield so far with 924g of dry buds after trimming and ready to be cured. And this pheno is pretty strong, it grows super fast, and have a very strong smell of jackfruit.


Likes
17
Share


@XoticGROW666
Follow
🎩🌈🍧🍨🍬
No toppin
No trainin
Jus test run
Terps on her is insane str8 candy fruity ice cream can’t wait till run her again with full toppin and trainin!! This a winter test grow outdoor so the buds won’t be that big but We will see 🤭

Likes
2
Share


@UrbanBoer
Follow
This Gorilla, has went ape.
All I need to do now, is nurse it to harvest, to get bigger buds,I want dense nuggets. But more than having nuggets, I need it’s potency to be on deadly level, I want smokers to crash after smoking. Or I would only get that if I was growing Gorilla Glue.
Likes
15
Share


@I_Identify_As_A_Dan
Follow
Week 18 for Gelato 41 by seedstockers
She's just becoming a monster... i know i went through a period of barely feeding her... well this week she's been fed 5-7L of water plus heavy heavy sprays every night😂 so a bit of a change up she doesn't seem phased either way. Im a little worried when it comes to flowering because she barely/never gets wind & her branches aren't very strong. Which is one of the reasons I spray them heavy every evening to build some strength. She also needs a nice defoliation again to keep PM away + also need to start thinking about giving her flower dry amendments top feed because i think she's partly going into flower because of the shade.

Likes
41
Share


@Silverback_Guerilla
Follow
1/4:
Moved a few other plants out of the closet, now they've got a little elbow room.
Both MPP's are fattening and frosting up very nicely. They are so similar that they could be mistaken for clones. Very, very stable genetic.👍
1/7:
Fed today and gave them the sniff test...delightfully sweet minty aroma!
I added a dose of endoboost in their feed today...kinda worried about the monstrous size of my plants considering that they are only in 3 gallon pots..
Likes
3
Share


@vilahaze
Follow
empieza a ter un olor muyy fuerte a gelato 33 con toques a vainilla sin duda sera una planta brutal, resina muy gorda , esta empezando a joder un poco algun gusano por eso y no parece demasiado resistente a los homgos con esos cogollos tan gordos y prietos


Likes
24
Share


@Frank_cultiva
Follow
Las 4 nenas del scrog iniciaron con el ciclo 12/12 el día 05/11/2021: están siendo alimentadas con advanced nutrients(dosis indicadas en la foto de la tabla)
-micro
-blom
-grow
-b52
-rhino skin
-big bue
-bud ignitor
-bud candy
-sensi cal mag xtra
Las 2 nenas en macetas de 30LT 18/6:
por el momento están siendo alimentadas con advanced nutrients(dosis indicadas en la foto de la tabla)
-micro
-grow
-blom
-b52

Likes
4
Share


Likes
7
Share


@Kirsten
Follow
💚 ORION F1 ORGANIC DRY AMENDMENTS 💚
The plant has well exceeded my 💚 ORION F1 LIQUID NUTRIENTS 💜
So far really happy, has taken very well to the topping.
She has shown good growth which I'm very pleased to see.
This is what I watered this week:
18.6.25:
I watered with 1.2L of dechlorinated water PH'd to 6.1 and containing the following nutrients per 2 litres;
♡ 0.5 ml Ecothrive Trace
♡ 1/4 Tsp Ecothrive Biosys
PH: 6.1
PPM: 373
23.6.25
I gave 3 ltrs of dechlorinated water PH'd to 6.3 with no nutrients.
PPM: 307
PH: 6.3
28.6.25:
I watered with 2ltrs of dechlorinated water PH'd to 6.5 and containing the following nutrients per 2 litres;
♡ 1/4 Tsp Ecothrive Biosys
♡ 2ml Ecothrive Trace
PH: 6.5
PPM: 418
Thanks for stopping in this week 💚😊🍃✌️🌱
Likes
13
Share


@SzkolaZiola
Follow
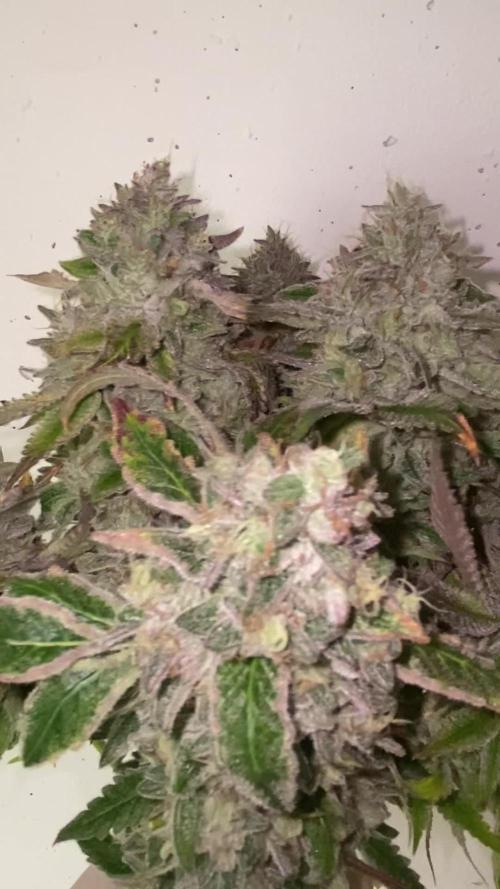
Last days for most of them - only Strawberry Cough will stay longer - she is super hungry and I can not keep up with feeding her - most of leaves are yellow now. 😱
The rest - four plants will be harvested on the weekend - 2-3 days from now and frozen - I'll be making bubble hash and fresh frozen live resin from them in the following weeks 😈
Trichomes are mostly milky with some amber starting - ideal ripeness and time to freeze those glands


Likes
10
Share


@oxieg3ngrows
Follow
This will go down as one of my favorite harvests to date. The rosin produced from this flower is so strong it had me TOO high lol
