
Likes
Comments
Share


@hooolian
Follow
30/12/21: final week of veg - the plants have responded better to the increased intake fan speed lowering the temperature overall. no more yellowing leaves. been on a dose of 0.5 bio bloom to prepare for flower. I have switched the lighting schedule today as they enter flower. the plants are responding well to the nutrients and the light - with tall stems and the topped kolas have sprouted well. I have added a carbon dioxide bag to increase CO2 intake.


Likes
19
Share


@Master_weeda
Follow
Plus 10 centimètres !
Jour70 arrosage avec 2 litres d'eau ph6. 3
Jour72 arrosage avec 2 litres d'eau ph6. 3
Jour75 arrosage avec 2 litres d'eau ph6. 3


Likes
25
Share


@FabioFobia
Follow
Questa settimana i fiori hanno rallentato la loro crescita ma continuano a produrre copiose quantità di tricomi.
Guardando altri diaries su questa stessa genetica ho notato che in molti casi tende ad aumentare il volume delle cime nella 8 e 9 settimana

Likes
4
Share


@NoviciOnWeed
Follow
Las ramas secundarias continúan sacando nudos y la floración sigue avanzando.
Continuamos con la defoliación y el lst.
Aparecieron unas mosquitas de la humedad, espero que el jabón potásico logre combatirlas.
Al girar la planta ya se siente el olor, una maravilla.

Likes
4
Share


Likes
7
Share


@NG420
Follow
Hi there!
I decided to cut the other plant like I said. I wanted to try the FIM method and I actually missed and did it in two times cut! 😢
From now on plant #1 will be mentioned as FIM and plant #2 will be the TOP.
Lst is a very interesting method and seem to work but I'm not totally sure if I do it right.

Likes
307
Share


@Ju_Bps
Follow
Hello growmies 👩🌾👨🌾🌲🌲,
👋 Stretch continues, hedgehogs coming along 🦔🦔
Weather start to be better with up temperatures.
💪 Just let Grow for the moment, try to kick off Fan leaves
💧 Give water each 2/3 day
2 l Water + Roots + Bloom + Zym + Sugar Royal (1 + 3 + 1 + 1 ml/l)
2 l Water + Roots + Bloom + Zym + Sugar Royal (1 + 3 + 1 + 1 ml/l)
PH @6
💡Mars Hydro - FC 3000
50% 35 cm.
Mars Hydro Fan kit
Setting 7
Have a good week and see you next week 👋
Thanks community for follow, likes, comments, always a pleasure 👩🌾👨🌾❤️🌲
Mars Hydro - Smart FC3000 300W Samsung LM301B LED Grow Light💡💡
https://www.mars-hydro.com/fc-3000-samsung-lm301b-led-grow-light
Mars Hydro - 6 Inch Inline Fan And Carbon Filter Combo With Thermostat Controller 💨💨
https://www.mars-hydro.com/6-inch-inline-duct-fan-and-carbon-filter-combo-with-thermostat-controller
Anesia Seeds - High Mars 36% THC🌲🌲
https://anesiaseeds.com/product/high-mars/

Likes
19
Share

@hooolian
Follow
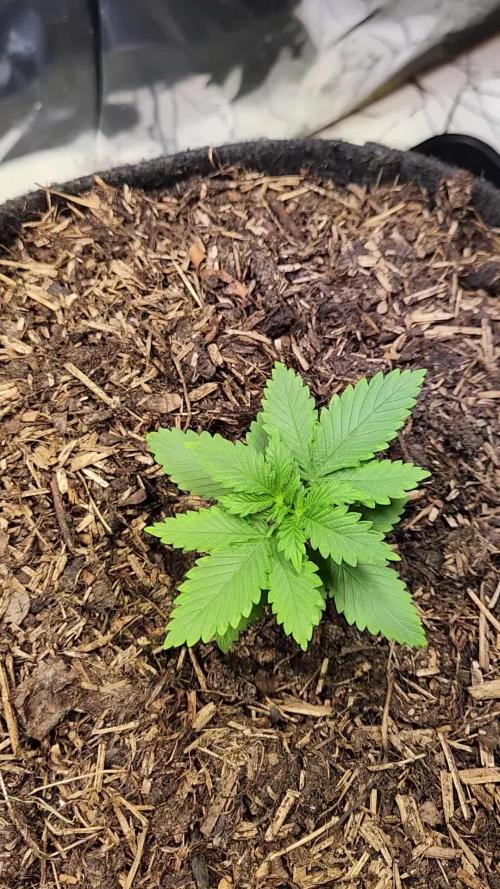
the plants have really grown this week and are on 250ml of filtered water every other day. nodes are looking nice and tight together and foliage is really taking shape. they seem to be growing at different speeds. Humidity can rise to 65% during the night may need to invest in a mini dehumidifier when flowering.
Possibly will switch to 12/12 light cycle and initiate budding at the end of next week which will be November 21st.


Likes
7
Share


@Hommero75
Follow
End of week 5 for Purple Lemonade FF. This week was better than the last week. She's bouncing back from her issues.She
is still developing and stretching slowly. No signs of pre-bloom yet. I just fed her Goldleaf feterlizer and I did some defoliation to the bad leaves. Hopefully week 6 is better.

Processing
Likes
43
Share


@IndicaRising
Follow
START OF WEEK 4 FLOWERING. NUTRIENTS SAME 4 ML PER LITER RO WATER OF BOTH A & B. 2 ML PER LITER BIG BUD.
MIXED UP 8 LITERS OF NUTRIENT SOLUTION
---------------------------------------------------------------------------------------------------------
Day 64 April 18th - 2019 Both ladies had a little trim to get rid of thick interior.
Day 64 April 18th - 2019 Both Jessica Rabbit & Elly May were fed 1.5 liters of nutrient mix.
Day 64 April 18th - 2019 Temp in tent is @ 78.4° F.
Day 64 April 18th - 2019 Humidity in tent is @ 51%.
Day 64 April 18th - 2019 Jessica Rabbits Coco temp is @ 70.2° F.
Day 64 April 18th - 2019 Elly Mays Coco temp is @ 70° F.
---------------------------------------------------------------------------------------------------------
NOTE - Day 65 April 19th - 2019 The Lady in the coffee can is a clone from the Blue Cookies. The clone was 2 weeks old put in soil in the coffee can
It was put in the tent straight to flower No Veg time at all the clump of leaves at the bottom was how tall it was.
I have been feeding Her the same Nutrients I am using for Coco flowering with the Big Bud for Coco.
---------------------------------------------------------------------------------------------------------
Day 65 April 19th - 2019 Both Ladies are looking good after their little trim.
Day 65 April 19th - 2019 Temp in tent is @ 81.1° F.
Day 65 April 19th - 2019 Humidity in tent is @ 55 %.
Day 65 April 19th - 2019 Jessica Rabbits Coco temp is @ 71.8° F.
Day 65 April 19th - 2019 Elly Mays Coco temp is @ 71.6° F.
Day 66 April 20th - 2019 Ladies are looking good coming alone.
Day 66 April 20th - 2019 Temp in tent is @ 79° F.
Day 66 April 20th - 2019 Humidity in tent is @ 40 %.
Day 66 April 20th - 2019 Jessica Rabbits Coco temp is @ 69.3° F.
Day 66 April 20th - 2019 Elly Mays Coco temp is @ 69.4° F.
---------------------------------------------------------------------------------------------------------
Day 67 April 21st - 2019 Both Ladies received 1 liter pre-mixed solution
---------------------------------------------------------------------------------------------------------
Day 67 April 21st - 2019 The girls are looking fine.
Day 67 April 21st - 2019 Temp in tent is @ 79° F.
Day 67 April 21st - 2019 Humidity in tent is @ 47 %.
Day 67 April 21st - 2019 Jessica Rabbits Coco temp is @ 70° F.
Day 67 April 21st - 2019 Elly Mays Coco temp is @ 70° F.
Day 68 April 22nd - 2019 Ladies are looking good no issues.
Day 68 April 22nd - 2019 Temp in tent is @ 71.2° F.
Day 68 April 22nd - 2019 Humidity in tent is @ 57 %.
Day 68 April 22nd - 2019 Jessica Rabbits Coco temp is @ 67.6° F.
Day 68 April 22nd - 2019 Elly Mays Coco temp is @ 66.6° F.
Day 69 April 23rd - 2019 Both Ladies looking good.
Day 69 April 23rd - 2019 Temp in tent is @ 69.4° F.
Day 69 April 23rd - 2019 Humidity in tent is @ 61 %.
Day 69 April 23rd - 2019 Jessica Rabbits Coco temp is @ 65.7° F.
Day 69 April 23rd - 2019 Elly Mays Coco temp is @ 64.8° F.
Day 70 April 24th - 2019 Both ladies are coming alone.
Day 70 April 24th - 2019 Temp in tent is @ 67.1° F.
Day 70 April 24th - 2019 Humidity in tent is @ 61 %.
Day 70 April 24th - 2019 Jessica Rabbits Coco temp is @ 65.2° F
Day 70 April 24th - 2019 Elly Mays Coco temp is @ 64.0° F.

Likes
3
Share

@Oldwied
Follow
The third week is over the stress of repotting is well absorbed and growth is in full swing.
Light Power: 50%
Day 16
Photoshooting
Likes
237
Share


@1Right_Angle
Follow
May 9th
- began today replacing the CMH lite that kicked-off during the night (new bulb is done!) MARS HYDRO to the rescue with a TS-1000 hanging above the kids now. Fine-tuning as we speak
- began mixing a Tea for tonight/tomorrow’s dinner
- LST to begin with a few of the plants this evening
- Defoliated some of the large fan-leaf pairs and now the plant structures can be fortified and shaped
- grabbed 6 clones from the Panama Reds and 2 each from Fighting Buddha and Pine Tar Kush !!! Into the LED Dome
(And i’m out of cubes… profanity)
- some branches get tied down tonight; let the games begin
10th,
- Nutrients fed for breakfast
- how to say this: things are so steady with daily progression
- raised lights again to maintain 2c difference between Room temp / Top-Leaf temp. My Phlizon 4500 is almost topped out in the room, and its running at 50% power. This last blast of growth and transition within the plants, tells me this set-up is going to last Just long enough !!!
Just big enough
- 2 more weeks come on!
- a few more clones taken last-nite; cloudwalker / black tuna / lsd / alaskan purple etc etc PurpsBerry will be last clone taken
- no foliar misting on Food mornings like today; every other day is still the target here in mid-Veg
11th,
- while rummaging through the crop early today, I found what is certainly a Male Panama Red plant. Action taken and trying to secure that new home. Picture 11, 12, 13
- Panama Red #2 removed
- Foliar Misted the Tent at lites-out
- clones treated to a Foliar Misting. Feeding them through their already developed Stomata on the leaves; when they have no roots to uptake nutrients yet. “Thanks Andrew at LegacyMarketFarm for that detail”
May 14
- the one plant i took real pride in FIMming successfully, has also raised the Kilt and declared his Gonads; dammit.
So, he’s gone lol. 2 males out of 38 plants… (txerri bilbo haze, the very first of many seeds produced alongside killer bud to show Male)
- 2 LSD clones appear to be doing well
May 15th
- Foliar Misted after Lites-out


Likes
11
Share


@TOTEM
Follow
I don’t say I’m impressed, because it wouldn’t be enough. This plant stretched in a way that I’ve always dreamed about. She’s a REAL sativa, but not all the phenotypes are the same. My other Dance World is not as strong as this one, and she’s not going to become as tall as this as well.
The heat lamp is now very close to her pot, and this makes the soil to drain up faster. This means that I have to water (+ nutrients) twice a week, instead of one like all the other plants inside the grow room. But this is not a problem since she’s very big and needs a lot of food to manage all that stuff.
Likes
7
Share


@Jolliejointz
Follow
21 branches over 40 bud sites only to be handled with nylon gloves. Bent the top over slightly to allow better distance from the light she is much taller than I thought I allowed for. Not complaining lol. I stopped adding the fast grow a while back it just never stayed deleted. Also added an extra light down below to give light to the bottom 45watt led at 30 cm away from closest branch. End of next week I will be adding extreme boost and removing the monster bloom.
Likes
28
Share


@Mtmtc
Follow
From 3 plants, from seed to harvest, one of them took only 74 days, the other two, took another week for 81 days. On their last days I Kept them under 48hrs of light instead of 48 hrs of darkness. Overall I’m happy with this harvest, white widow from fastbuds never disappoints 😉
Likes
8
Share


@Geili_Seili_fireinfireout
Follow
Heute ist 3-4ter tag bei mir in erde. Wie immer top clone die sofort das licht suchen.
Freu mich auf die nächsten 2-3 monate mit ihnen.
Die saubersten und vitalsten stecklinge gibts wie immer bei ROOTS-FARMS. The best in austria and maybe europe
