
Likes
Comments
Share


@TheGreenLeopard
Follow
Went west trim and will tidy up dry trim as I’m simply terrible At it. Great aroma
-
Very sticky !!! Very frosty. Almost a sun actually to cut them down. But they’re up for it, they know the medicinal love they bring. Think the smoke report should be high grade


Likes
2
Share


@El3vated
Follow
Being that this was my 1st grow, I found this strain very easy to work with. It did great with LST and the smell started being pretty strong during early flowering. I completed this grow in a small tent. Now that I have a bigger tent, I would love to grow it again and see if I can get it a little bigger.

Likes
44
Share


@I_and_I
Follow
New light installed, twice as powerful as before but still a cheap light I've yet to learn fully
Like the first batch of seeds to germinate, I again get a strange 'quad' seedling, 4 embryo leaves, then attempts to grow it's first 4 leaves instead of 2 also, growth is severely stunted in both seedlings to start with 4 embryo leaves after seed popped
Likes
15
Share


@HighOhioAn
Follow
Growing for FastBuds420 has truly been an honor their genetics are truly Best in the world in my book strange our name beautifully mimicking the smells and appearances of their names. Pineapple express is one . They nailed the name right on the head. This plant truly smells just like a pineapple and almost looks like a pineapple once the fade starts one of the biggest autos I’ve ever grown truly thankful for the opportunity to grow this plant
FastBuds420. 4 Life 🌿💨💯

Likes
10
Share


@wheedtobeus420
Follow
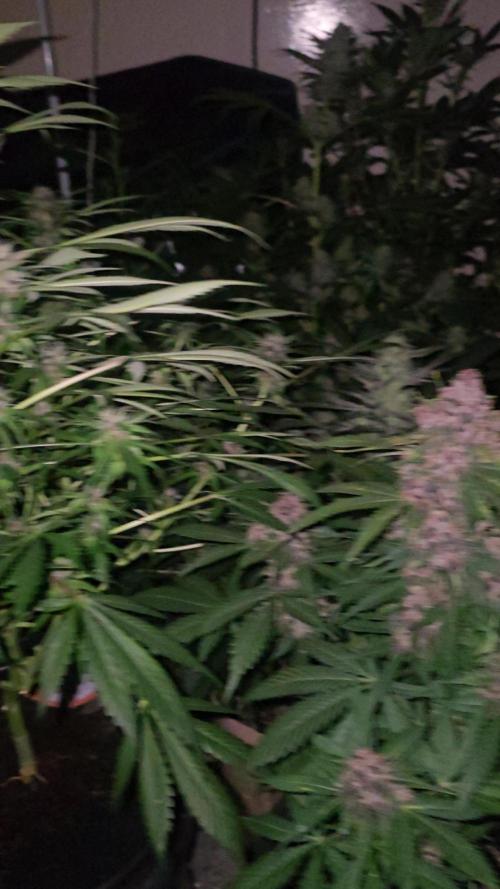
Day 77. Just wow she’s a beauty. Frosting up nicely. Not super dense like last time but more stretch and sativa looking buds. I’m excited how she has matured. She will
Begin flushing soon and getting the chop 💫💫 can’t wait to smoke her stinky butt

Likes
27
Share


@DeepRootsGrowTrees
Follow
Week # 15 Gelato-K By Kannabia
Week #15 Feb 15th-22nd
Week #4 Flower this week she is starting to stack and the trichome coverage looks amazing along with her aroma!! Check Kannabia for some great genetics!!

Likes
28
Share


@Growthetics
Follow
She had her last fed last night, microscope shows a few oranges so I think it the final week/10 days hopefully flush time! Oops forgot the videos

Likes
35
Share


@Greengirl420
Follow
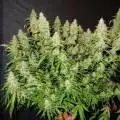
Harvested this beauty on day 79 and we got two ounces of amazing dry, sticky bud 🔥
This girl grew nice and tight and looked like the perfect bouquet! Nice tight dense buds that break up real good and fat! She is so sticky and smells super good! The buzz for me is strong and good and goes mostly to my head but doesn’t make me tired.
I will definitely grow this strain again
💨 💨

Likes
44
Share


@Ultraviolet
Follow
The gap between where you are and where you want to be is measured in decisions, not dreams. Dopamine release is not the pursuit of happiness; it's the happiness of the pursuit.
"Mens Dei"
Cannabis buds can expand or swell in warmer conditions, but this is not necessarily a desirable effect. High temperatures can cause the buds to become airy and loose, reducing their density and potentially impacting potency and aroma.
First 4 weeks flower, blazing hot expansion of buds, 4 weeks after cool off? Why??
What can be made to expand, airy and loose, can also be made to contract, dense and tight.
Why?
Trichomes do not discriminate, although we like to think of trichomes' primary purpose as being to get us high; they are there to provide photoprotection (sunscreen). Trichomes apply themselves based on area dimensions; the more area = the more trichomes in order to protect. Different from density: Trichomes, the resinous glands on plants, are often produced in response to stress, including high light intensity. This increased production can lead to denser trichome coverage on the plant, stress, stress, stress, stress is the signal.
There is a certain beauty in watching the large water-filled buds once swollen to the brim slowly shrink during drying, as the surface areas contract, the trichomes just cluster up to form denser and denser coatings, already dense from high light intensities, UVB exposure, and IPS, and every other stressor I could tweak.
Trichomes, the resinous glands on cannabis plants, are often produced in response to various forms of stress. These stresses can be environmental, like excess light(HIL) or UV-B radiation, temperature fluctuations, or drought, or mechanical, such as wind, pruning, or even the weight of the plant's own buds. The plant reacts to these stressors by increasing trichome production as a defensive mechanism to protect itself and its valuable compounds like THC and CBD. In essence, cannabis plants perceive stress as a threat and respond by producing more trichomes as a way to protect themselves and their valuable compounds. Several studies have shown this.
Not so much a "master" grower as a master of stress. Psssst. Tip.
Trichomes fill with "antioxidants," including THC.
Ant"ox"idants,
The production of antioxidants in plants is intricately linked to their oxidative apparatus.
The plant has limited oxidative capacity/apparatus. During daytime photosynthesis, a large percentage of that oxidative capacity is tied up in protecting the plant.
During the night, plants alter their metabolic pathways. This leads to a far more focused production of specific antioxidants, like THC. Plants also produce antioxidants during the day. Excess light, for example, can trigger the production of excess antioxidants as part of their defense mechanisms against reactive oxygen species (ROS). The differential ROS production by blue and IR light can have significant biological consequences. For example, high levels of ROS induced by blue light can lead to cell damage and death, while lower levels of ROS produced by IR light may be involved in beneficial cellular signaling pathways. Long nights under the IR (very low ROS), the boost in cellular respiration, and the boost in energy production. In a perfect world, I'd give the plant a shock treatment of 60DLI in 4 hours and give her the other 20 hours to perform cellular respiration under IR. The stress of those 4 hours would be rigorous and full of stress abound, 1800-2000ppm CO2 is easy for a couple of hours during daylight, it's maintaining it that's hard, but 4 hours is very doable with nothing but a little extra "carbon sugar" in your medium every other night during the first 4 weeks of flower.
In my opinion, you only need to jack CO2 for those first 4 weeks of flower to see maximal output, after that it's all about trichome preservation, everything else comes second. Without the temps to assist with metabolism, CO2 is reduced to normal levels along with temps 4-5th week of flower.
Buds are primarily composed of water. Developing flower buds, like other plant tissues, require a significant amount of water for growth and turgor pressure, which helps maintain their structure and firmness.
Turgor pressure in plant cells is primarily generated by osmosis, but transpiration plays a crucial role in maintaining it.
The optimal internal leaf surface temperature for photosynthesis at 1800-2000ppm CO2 is likely in the upper range of 97°F, meaning ambient would need to sit at 102°F-ish or thereabout for full metabolic utilization. That's putting your transpirational pulling force x5 x6 maybe x7 of what it would be if she were cruising at 68F.
"My buds won't fatten, what can I do!!"
Crank that bitch. If your purpose was to blow up a balloon as fast as you can, as much as you can, would you use 2x force or x5 Force to do so? Bad analogy, but you get the idea. Kiss.
Optimize photosynthesis & VPD by day, cellular respiration by night.
TECHNICALLY:
"While transpiration and cellular respiration are both ongoing plant processes, they are not neatly separated into day and night. Both processes occur both day and night, though at different rates and with different emphasis. Transpiration, the release of water vapor from plant surfaces, is primarily driven by sunlight and photosynthesis during the day, but it also continues at a lower rate at night. Cellular respiration, which provides energy for the plant, occurs continuously, both day and night. "
BUT Only 10% ATP can be processed through photosynthesis and carbon capture.
90% of ATP is processed when the plant's oxidative capacity becomes available (NIGHTTIME). Cellular respiration relies on the process of oxidation to generate energy. Specifically, the final stage of cellular respiration, called oxidative phosphorylation, utilizes oxygen as the final electron acceptor to produce a substantial amount of ATP, the cell's primary energy currency.
Several environmental factors can hinder cellular respiration in plants. These include low oxygen levels, temperature extremes (both too high and too low), humidity, water stress, and the presence of toxins. These factors can impair the function of enzymes involved in respiration, disrupt the availability of substrates, or directly damage plant tissues, thus reducing the rate of cellular respiration.
Factors such as oxygen concentration, glucose availability and temperature will all impact the amount of aerobic respiration an organism will perform.
See you next grow, *twiddles thumbs*
Signum Magnum.
Signum magnum
Appáruit in caelo
Múlier amícta sole
Et luna sub pédibus ejus
Et in cápite ejus
Coróna stellárum duódecim
Cantáte dómino cánticum novum
Quia mirabília fecit
Gloria pátri, et filio, et spirítui sáncto
Sicut érat in princípio, et nunc, et semper
Et in saécula saeculórum, amen
Signum magnum
Appáruit in caelo
Múlier amícta sole
Et luna sub pédibus ejus
Et in cápite ejus
Coróna stellárum duódecim
Cantáte dómino cánticum novum
Quia mirabília fecit
Gloria pátri, et filio, et spirítui sáncto
Sicut érat in princípio, et nunc, et semper
Et in saécula saeculórum, amen
Signum magnum
Appáruit in caelo
Múlier amícta sole
Et luna sub pédibus ejus
Et in cápite ejus
Coróna stellárum duódecim
Cantáte dómino cánticum novum
Quia mirabília fecit
Gloria pátri, et filio, et spirítui sáncto
Sicut érat in princípio, et nunc, et semper
Et in saécula saeculórum, amen
Signum magnum
Appáruit in caelo
Múlier amícta sole
Et luna sub pédibus ejus
Et in cápite ejus
Coróna stellárum duódecim
Likes
21
Share


@STAYINGONMYMAINCBATORUNTWO
Follow
I’ll be most definitely harvesting these next week! I will continue with water from now until they are ripe and ready! They are absolutely smelling like a sweet shop! Like I dipped my head in a pic and mix bucket, like Im wreck it Ralph and I’ve crashed into candyland! Makes my mouth dribble! The buds are starting to swell too so thinking next 7 days I’ll be ready!
Next upload will be harvest hope you like buddies! I’ll be hang drying this time! As I’ll have space and a tent to do it in as before I didn’t and used the brown bag method! But I can maintain between 14c - 18c with a humidity of 42 percent! So I’ll hang dry this time!
Any suggestions?? Let me know! I’ll be putting 2 fans on them for air circulation and a air vent only sucking out as it will draw air in on its own and keep the humidity lower in the tent while drying!
Likes
9
Share


@chapothegrower
Follow
Update. Photos from a few days from now, they way bigger, switched lights to 12-12 today, next weeks will try to make better photos out of the growroom. 100% organic grow😍 lst and defoliation
Likes
7
Share


@FlavoursUk
Follow
So, very first run with the new set up which I'm excited for. Currently just getting the environment dialled in. Running a RDWC system, along with LEDs, the recipe for success.
Running some great genetics from seed stockers (purple punch).
Will be back with an update soon, for now enjoy the pictures and videos I upload. FlavoursUK
Day 6. Girls doing well. Roots hit the water so expecting some nice growth now. pH fluxing between 5.9/6.0 which is good as that's where I want it, especially for veg. Cant wait to see what I can do with this. Stay tuned.

Likes
Comments
Share


Likes
11
Share


@TheMeltCorporation
Follow
Havrested a bit before just becouse i needed to have a harvest before the full one


Likes
1
Share


@BruWeed
Follow
08/05 - Comenzo su primera semana en etapa de floración.
Se encuentra perfecta, sin ningún problema
Ya esta con 12/12 y su aroma se siente.
Las chalas estan perfectas.
La luz la aumente un poco mas ya que entro en flora pero se encuentra al 100%.
Crecio bastante la ultima semana, mas que nada en altura.
En estos dias estare publicando mas imagenes de como viene.


Likes
8
Share

@Tbilisi2018
Follow
Please tell something with me for my plants is that good grow remp? Its 18 days old is that small ?
Likes
30
Share


@DrewbieDoobieNoobie
Follow
I had to transfer to the bigger pots the week. There was a lot of stretch in the cups and they were falling over. so will see how it goes this week. Coco with the Azomite and a little clone x myco powder at the root base, Just a baby feeding 1 mil/gal of the three part Emerald Harvest and Cal Mag in a 5 gallon bottle. PH at 6.1, then another 5 gallons of plain PH 6.2 water no food to get run off from the pots. The runoff was PH 5.8 so in happy with that. I got the time-lapse running so I will post it at the end of each week moving in to the next one. waiting on a green filter for the camera to help adjust the color so everything will not look blurpule. Cheers.

Likes
237
Share


@1Right_Angle
Follow
June 20th
- all plants get a visit this week
Updates start tonight.
22nd, prepping to make a tea for Fridays visit to PurpsBerry etc. Shaping the plants backwards, towards the Hillside will be the goal. Clean the hillside a minimal amount, not wanting to lose the wonderful camouflage it provides. We are looking to pull the plants tops northward almost to the ground, forcing the side-Branches into becoming Cola’s. Do it with 2nd opinions… making a Bush, thats the goal. It’ll Help achieve a lb per plant

