


Likes
Comments
Share


@RedRooM
Follow
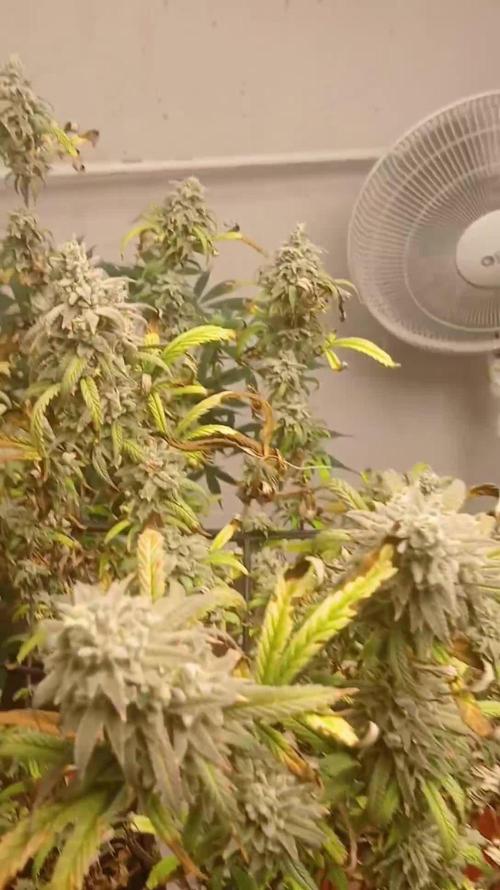
Unfortunately this will be the last week because the threat of the red spider has returned and I cannot afford to use other chemical remedies to eliminate it so I anticipate the harvest by a week even if looking at the trichomes I am not so far from full maturity, Too bad . !



Likes
8
Share


@eldruida_lamota
Follow
Que pasa familia, vamos con la quinta semana de floración de estás Zkittelz de Seeds Mafia.
La humedad está entorno al 50%, y la temperatura la tengo entre los 22/24 grados.
Controlamos en ph en cada riego a 6.2.
Y el agua que utilizo de riego suele estar estancada entre 24 / 36 horas, hasta aquí todo bien, tienen un buen color, ya van progresando y floreciendo a buen ritmo, vemos cómo avanzan estas semanas y como avanza el progreso de las flores.
Mars hydro:
Code discount: EL420
https://www.mars-hydro.com/
Agrobeta:
https://www.agrobeta.com/agrobetatiendaonline/36-abonos-canamo
Hasta aquí todo, Buenos humos 💨💨💨

Likes
4
Share

@Nocone_Purple
Follow
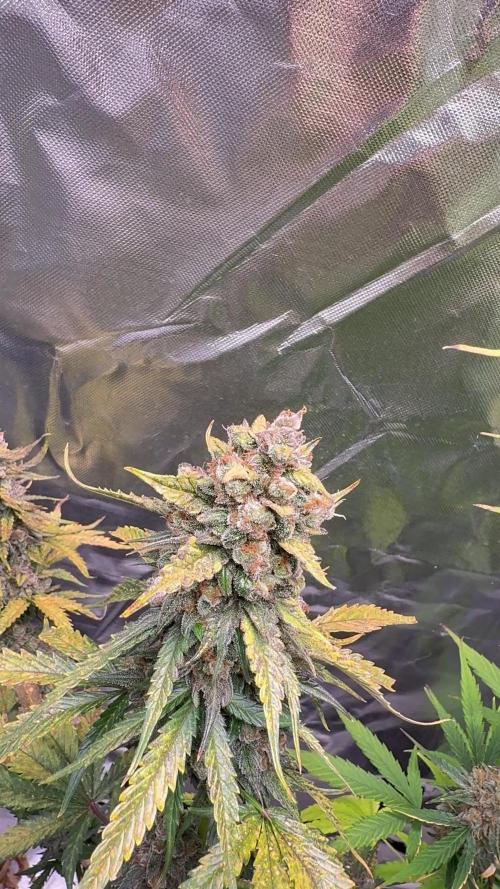
This week marks the final phase for my Blueberry from Zamnesia a truly beautiful plant that has shown its full potential during the last stretch. After completing the last feeding with Overdrive, I officially began the flush with plain water. The response has been perfect: a natural fade across the canopy, with fan leaves turning yellow and purple while the buds stay vibrant, dense, and sticky.
Under the loupe, the trichomes are mostly cloudy with about 15–20% amber, showing that the plant is entering peak maturity. The resin production is absolutely insane the buds are coated in a thick layer of trichomes from top to bottom, giving them that frosted, icy appearance that’s classic for high-quality Blueberry genetics. The calyxes are fully swollen, and the pistils have turned a rich orange-brown, curling inward as the plant finishes ripening.
This week, the aroma reached its peak an incredibly sweet and fruity blueberry scent with earthy undertones and a subtle creamy note. Every time I open the tent, the smell fills the entire room. The terpenes are clearly well-developed, and the overall fragrance feels deep, natural, and powerful.
Structurally, the plant stayed compact but productive, with thick, stacked colas covered in resin. Even the lower buds are tight and solid no airy popcorns, just consistent, frosty flowers. The upper colas are especially impressive, with a perfect balance of purple tones, orange pistils, and silver trichome coverage that makes them look almost unreal under light.
The fade has been very smooth thanks to a well-timed flush. The leaves are now fading evenly without any harsh burns, which should ensure a clean, smooth smoke after drying and curing. Trichomes look at their absolute prime right now, so harvest will likely take place within the next few days for maximum flavor and balanced effects.
Overall, this Blueberry exceeded my expectations strong, aromatic, full of resin, and visually stunning. The final yield looks promising for its size, with buds that feel heavy, sticky, and extremely fragrant. One of the frostiest and most terpene rich autos I’ve grown so far.

Likes
51
Share


@Chumpkilla
Follow
12/17/23 - Day 41 - It flipped to flower today. I didn't document it via video because it's just like all the other videos. Except this change uses different level of the nutes for Flowering.
Alot of the bud sites have tons of pistles on them. The plant itself is so round and bushy. The plants branches are very close together.
There is a video up there of me using the software to change from veg. to flower.
I'll update you tomorrow once the lights come on. Now I only get 12 hrs of light instead of 18.
12/18/23 - Day 42 - FLOWER POWER! Look at those flowers starting to form! It looks amazing!!!!! I think starting from a good seed is better than a clone. If this ends up better than the last grow..... it's already off to a better start. The leaves looks super healthy.
12/23/23 - Day 47 - What a WEEK! The whole family got sick and I was the lone ranger on the battlefield taking care of all the units! So posting had to take a back seat! I did manage to grab some pictures during those days. I posted them up top. This week is the first week of Flower, and its going great! As you can see in the pictures that the buds are starting to take off from the bushy part of the plant.
I installed a second Scrogg net, the buds are already starting to launch upwards and I can tell they are going to need some support as they get bigger.
The Leaf box has been taking great care of the nutes, humidity, temp, and lighting. There is only one thing that I have had to do manually. Toward the last day of the week, the day before the water change the PH seems to dip down to 5.5. It's not a bad thing to be there for a couple of hours, but it is the lowest range I would ever let PH go in a hydroponic (DWC) setup. I have been adding 2 cap fulls of PH+ to get the PH in check. To be honest, adding 2 caps full of PH+ once a week is NOTHING. I feel like it's the least I could do. The box is creating the perfect environment. It's the perfect Cannabis Oasis, I treat my girls to the finest of living before the end. :)
Happy growing and I'll post again after the water change tomorrow!
If you like this experience and would like to have the same one, you can order your Leaf system from www.GetLeaf.co.
(full disclosure, I paid in full for my Leaf unit. I was a Kickstarter backer back in 2017 this is not an advertisement, this is real life)
Likes
15
Share


@chupacabra80
Follow
привет ребята,вот срезал мой куст, вроде не плохо вышло?! посмотрим сколько будет весить когда высохнут )))) амнезия мой любимый сорт,как только высохнут отпишусь какой будет результат )))
30,06,2021
вот и результат почти 90 грамм,на весах 40 грамм но это моя доля урожая ,я выращиваю в месте с другом так что моя половина 40 грамм сухих шишек и мы еще и покурили пока шишки подсохли, так что приблизительно у меня получилось 85-90 грамм сухих шишек,шишки выросли толстыми но они не плотные,потому и такой результат, посмотрите мой апельсин у него хорошие плотные шишки , он начал цвести в 60 дней , растение без проблем,кто не любит ждать этот сорт не для него )))
09,07,2021 мой урожай пересох, +35,3 с было очень жарко и я не мог контролировать температуру (( я ожидал результат лучше но не вышло, надеюсь дальше все нормализуется

Likes
4
Share


@Autower
Follow
Well another week and a lot learned from a member on here so things will only get better next few weeks if there life still a while to go and there already looking like big colas are forming thanks for viewing and happy growing


Likes
5
Share


@OnlyTomatoes
Follow
[ Information ]
For all information on this grow, including strain and grow room details, please see Week 1 of Veg.
[ Updates ]
Day 10 - Topped at the end of Day 9. Foliar sprayed with neem at lights on today. C02 has been increased to 800 ppm average, humidity lowered to 70%. Light power has been increased, now running at 35%. Amazing growth, finally removed all the rogue sunflowers as I didn't notice any significant gains having them. They're getting thirsty today but I'm going to give them another day, possibly 2, before I feed again. I'd like one last heavy wet/dry period for root stretch and then I'll go heavy with some organic nitrogen into flip. I can't use the same net as previous harvests because of the new room design so I'll have to create a new frame to start building the final even canopy. I'm fairly happy with how both groups of plants are growing into an even canopy within their expected timelines.
Day 12 - Light intensity increased to 40%. Fed today, 1.05ec (6.8ph) with 10-15% runoff. No signs of light bleaching or stress, their leaves are almost always praying upwards. They could use a lollipopping, but with how quick they're growing I'll most likely wait until a couple days before flip to clean them up now.

Likes
33
Share


@StickyFingah420
Follow
Septima semana de vida y sigue todo según lo esperado, la planta va tomando altura velozmente y se va poblando de nufos donde estarán las futuras flores .
Los parámetros bien y la alimentación ya completamente dedicada a la formación de flores.
Es todo por ahora, Buenos Humos!


Likes
14
Share


Likes
3
Share

@HoneyBlunt42
Follow
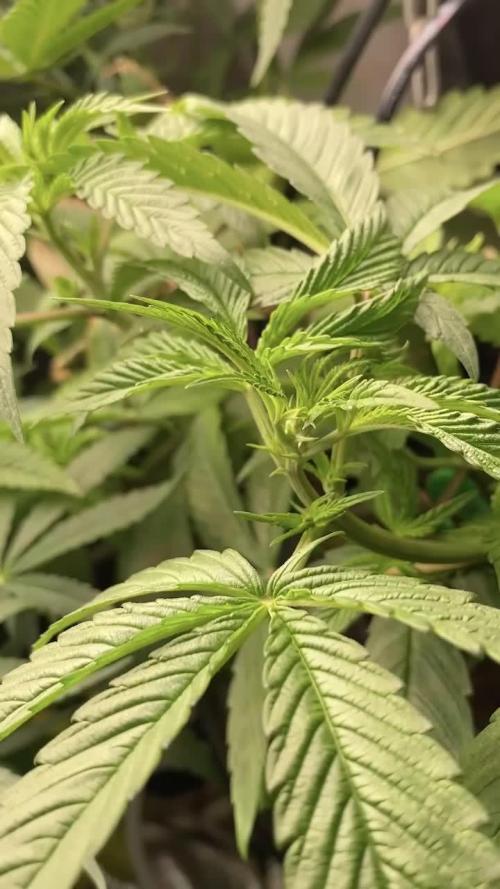
I need to share a secret about Black Widow. This report is about the second nut. The first one I soaked 17 days earlier. On day 13, it really slowed down after the transfer, so I just left it in the sun under the strawberry plant. Now it's been through two prunings and one nitrogen deficiency (the main stem was very red). I put it in a DWC bucket. It throws roots beautifully.
What I've learned about DWC:
Use it only after 1–2 weeks of rooting.
In hot weather, enzymes really help deal with flowering. With them, pH stays stable at 5.9 even at +28°C. The solution stays clean. Also, Hesi Root helps the roots survive the scorching heat (temps around +29°C, close to critical +30). And a CO₂Bag – without it, growth would stall. She drinks little by little.
Speaking of simplicity: my DWC runs on 15 liters of solution, using the simplest setup – an AquaPot for about 22 EUR, including the air pump. That's it. And the real simplicity is in the base Hesi line: one bottle for veg, one for bloom. Compare that to Canna – they need two bottles for each stage. Minimalism wins.
In the background – the second widow, which this report is about. She's flawless and planted in 15L of coco (Simplex Coco and UGRO RHIZA). Mixed in once: Powder Feeding Bio Grow 3 g/L and Bio Bloom 4 g/L. The second one is already throwing flowers and slowing down in growth. The first one, on hydro, I switched to 12/12 several weeks later, so she's in no hurry.
I'm happy to have the chance to try the full HESI HYDRO kit on coco at +29°C and on DWC without chillers, for about 330 EUR, no pH controllers or solution meters. I like minimalism, and it makes me happy when I can make it work in growing too. I missed one week – may the doctor forgive me.
Likes
16
Share


@Stinkfox
Follow
The stretch is done, and it’s time to start packing on buds. She’s not super smelly, like her older sister before her. 5 or so weeks to go. I just made the last ounce from the last plant into butter. Incredible stuff

Likes
4
Share


@Pokan187
Follow
Have some deficiencies or ph imbalance still troubleshooting.
The pH was off but now everything is back on track. I have some amber on the watermelon, the northern light is milky from top to bottom but no amber yet
The smell is pretty strong
I do not feed the plants at all besides watering them with water from fish tanks.
Made some live soil and added horse manure, homemade bone meal from fish bones, compost from vegetable scraps and black soldier fly frass.
I do not use chemicals on any of my grows.


Likes
21
Share


@MG2009
Follow
12/17/2021
They are growing well,#1 will be eliminated she is a runt, and way to far behind her sisters in growth, so culling her tomorrow.
Ps. #1 sprang back to life!
No sign of sex yet but soon I hope, as I was hoping for a short veg. More pics of #2-#8 in a.m.
Pretty cool to see plants know when lights going to out, and leaves look lower (drooping) about an hour before light shuts off !.
Getting ready for (sleep)? Pics 1-8 at lights on and leaves starting to reach for the sky (waking up)
Plants are about 31 days old and should start to show signs of sex.
Likes
4
Share


@ScouseCityLX
Follow
Very happy with the results for my first grow. Didn’t have any deficiencies. Only issue I ran into was some bugs. Ended up with white springtails but they didn’t affect anything.
Likes
103
Share


@SwissKush
Follow
Day 50 - growing well
a. what an interesting plant! she is small, but mighty!
b. I think we are going to have some flowers soon, still hard to tell
c. she should stretch up a bit this week, the stem is so thick on this plant
d. this has been so interesting grow! These buds will be HUGE!
e. added in GH Bloom (Pro Bloom) with this mornings 1.5L feed
Day 51 - growing very well
a. she is drinking so much water, the same amounts as if she was a monster
b. per advice of fellow growers I will not be blowing the ppms out of the water like normal for this plant (but I might anyway, hehe)
c. i can see the future flower sites forming
Day 52 - growth explosion overnight
a. she is drinking alot of water right now!
b. I hope this plant goes for 120 days!
Day 53 - tops are emerging
a. she has about 10 tops that are emerging from the shrub
b. the smell is so strong
c. removed the CO2 generator as flowering is beginning
d. i will remove about 10 big fan leaves today, they are not getting any light, and are crowding up the airflow
Day 54 - wow!
a. she is growing very well!
b. i lowered the LED to 40cm, at 100% intensity, the tops are begging for light!
c. we are going to have some big buds for sure!
d. removing those large old fan leaves really proved to cause her to explode in growth
Day 55 - she is really reaching!
a. everything is going well with the she hulk, she is really hulking out everywhere
b. she looks like she is begging for more nutrients, so I may just say fuck it and blast her to the moon with nutes!
Day 56 - she is eating everything I put into the DWC
a. the nutrient intake has become really high, the ppms are dropping so hard
b. keeping the PH at 6.5, she is growing like a monster
Likes
170
Share


@Master_weeda
Follow
Bonjour à tous les padawans et maîtres jedis jour84 arrosage avec 25 centilitres d'eau ph6.3
Jour87 arrosage avec 30 centilitres d'eau ph6.3
Jour88 pratique de la techniques du tronc fendu (videos explicatives) et arrosage avec 20 centilitres d'eau ph6.3
COMMENT FENDRE LES TIGES DE VOTRE PLANT DE CANNABIS
Pour fendre les tiges de votre plant de cannabis, il vous faudra :
Une lame propre et aiguisée (une lame de cutter fonctionne bien)
Un mètre ruban
Une ficelle ou un adhésif pour marquer les coupures que vous ferez le long de la tige
Un crayon, une baguette ou une brochette pour séparer la tige une fois fendue
1. Tout d'abord, commencez par mesurer la partie de la tige que vous allez fendre. Il faut faire une incision d'environ 10–20 cm juste sous la branche la plus basse de votre plant. Utilisez un ruban adhésif ou de la ficelle pour marquer le début et la fin de l'incision.
2. Ensuite, prenez votre lame et faites une incision en travers de la tige, en commençant par le haut. Attention à faire une coupe propre, jusqu'au centre de la tige.
3. Utilisez votre lame pour tailler en descendant vers le bas, jusqu'à la marque inférieure de la mesure que vous avez prise auparavant. Essayez de tailler aussi droit que possible. Une fois que vous avez atteint votre marque du bas, laissez la lame au centre de la tige, puis utilisez un crayon/baguette/brochette pour ouvrir la partie coupée, puis sortez votre lame.
QUEL EST LE MEILLEUR MOMENT POUR FENDRE LES TIGES ?
Il existe de nombreuses théories sur le meilleur moment pour passer votre tige au couteau, mais la plupart des cultivateurs suggèrent de le faire à la dernière semaine de floraison. Même si certains cultivateurs recommandent de le faire dans les 3 derniers jours avant la récolte, nous recommandons de le faire un peu plus tôt (7–10 jours avant la récolte).
QUELS SONT LES RISQUES À FENDRE LES TIGES ?
Fendre les tiges est une technique à stress élevé très agressive que nous ne recommandons qu'aux cultivateurs expérimentés. Nous ne recommandons également pas de fendre les tiges sur les variétés à autofloraison, car cela peut être bien trop intense pour elles.
FENDRE LES TIGES, ÇA MARCHE VRAIMENT ?
Il existe un solide ensemble de cultivateurs expérimentés qui déclarent que le fait de fendre les tiges peut produire de bons résultats. Malheureusement, peu de données qualitatives le prouvent. Cependant, il semble que la fente des tiges soit originaire des Pays-Bas, où elle est pratiquée par des cultivateurs néerlandais experts depuis les années 1970.