


Likes
Comments
Share


Likes
13
Share


@majic_happen
Follow
flowering day5 gelato - One branch opened, but I glued it, I hope it will heal soon. I will watch the growth process for another week, I want the plant to grow another 20 centimeters in height.
flowering day5 payote - Defoliation and branch correction. The growth process continues unabated. Thanks seedsman for producing quality seeds.
flowering day8 gelato - This beautiful girl wants more vegetation
flowering day8 payote - I want a big Christmas tree, I returned it to vegetation 18/6 👊
seedling day 40


Likes
28
Share


@PrairieFrostGrow
Follow
*
************** Week 7 - May 23 to 29, 2020 - Days 43 to 49 from germination ****************
*
This week she started to take more shape and came out of her ball form and standing up now. Side branches are still growing strong and reaching for the top of the canopy. Increased light intensity also as she is getting bigger and bushy with leaves now. She has increased her feed amounts this week and eating more now. She is happiest when her pot is dry and her leaves are up and praying.
Heavy leaf strip and removed some lower nodes mid week. Letting her focus on growing the top nodes by removing lower points. Opened up the middle nice now and she is looking like a cannabis plant😀 Keep an eye on nitrogen though as she is green. She was getting choked out on the lower growth so removing some and letting the light in, the rest of the of sites should help her fatten up.
Little more detail.......
May 23/20, Day 43
- 3L feed - VeloKelp & Rezin & L.Wt & Sensyzime @ 1.5ml = 150ppm and 6.1pH
- she is setting her buds but her leaves still look dark.
- keeping ppm lower at 150.
- main top reaching up more today.
- Flower light switch turned on and raised the lights to increase intensity now.
May 24/20 - Day 44
- Dry out day
- Only two girls in the tent today so she should react well.
- (GSC plants not flipping and moved to veg tent so made room in flower tent.)
May 25/20 - Day 45
- fed twice today
- 7:30am feed: 2L Sensyzime, Piranha, Rhino Skin, Rezin @ 1.5ml/L = 335ppm and 5.9 pH.
- 8:30pm feed: Vitathrive & Velokelp @ 1.5ml/L = 350ppm and 5.8pH
- heavy leaf strip today.
May 26/20 - Day 46
- dry out day.
- keep an eye on the girl because the last time the girl dried out she reacted well
- noticed the inner growth is slightly brown around the edges. Buds/pistols are not very tall. Light should help with this.
- still only two girls in the tent.
May 27/20 - Day 47
- 3L feed: Mass&Terp @ 3ml/L, Rezin&LWt&Vita @ 1.5ml/L, CalMag&Rhino&Piran&D.F. @ 1ml/L = 1250ppm & 6.0pH
- added more water to reduce ppm to 1080.........1250 a little high right now.
- she was ready to be fed.....eating a little more now.
- Her hairs are getting longer and reaching out more now......light helps😀
May 28/20 - Day 48
- 2L feed: Mass @ 4ml/L, Vita & Sensyzime @ 2ml/L, Dual Fuel @ 1.5ml/L = 1350ppm
- little high so added water reduce ppm 1100
- She is taller and today and really looking nice.
- She definitely likes it when her pot dries out.
May 29/20 - Day 49
- dry out day
- letting her be....she is happy😀
That wraps up another week. It has been great because she is really taking shape now and looking like the little girl I had in my mind👌

Likes
44
Share


@GODSGIFT_2005_JM
Follow
For LIQUIDS & NUTES ******GREEN BUZZ NUTRIENTS***** organic.
Also i’m using their LIVING SOIL CULTURE in powder form!
MARSHYDRO ⛺️ has large openings on the sides which is useful for mid section groom room work. 🤩
☀️ MARSHYDRO FC 3000 LED 300W
💨MARSHYDRO 6” in-line EXTRACTOR with speed-variation knob, comes complete with ducting and carbon filter.

Likes
218
Share


@DevilsBud
Follow
Week 2 of flowering phase
Critical royal queen seeds
Hallo fellow growers here we go
Day 8 flowering phase
looking good amazing to see them developing up close day by day . Today no watering maybe some defoliation below the net but that it cool beans 😎
Day 9 Flowering phase
Didn't see the plant for 20hours and jebus they grew over night they went up 15cm . But they are looking healthy
Gave them almost 1.2L nutrients was getting dry that was it .
Day 10 flowering phase
Today adjust some things in the tent it didn't feel a right not to happy with tents quality 🤔 also it's very challenging to get to back corner plant. I need to fully open the tent. There are no peak holes ore other opening to get to the back . And it feels unstable. The Plants i only did some final defoliation and gave 0.5l normal water
Day 11 flowering phase
Plants looking okay to me. Didn't water them today want to let them dry out some . I think because of all the watering i am Struggling with the humidity in the tent . It is around 80% and that little dehumidifier don't do jack patetoe . Def need to think of a solution for later in the weeks
Day 12 Flowering phase
Gave nuts water and put a 2nd ScrOG up a little higher .
Today got my seeds in from Zamnesia
3X 🧟♂️ haze seeds from sumo Seeds
3x Taison Autoflower from VIP seeds
1x girls scout cookies from Zamnesia
Free with order 👌
Day 13 Flowering phase
Sunday relax day no watering . Everything looking good that budcandy and Big bud from advanced Nutrients are working like a charm . I have bin semi keeping to the recommend advanced Nutrients schedule and i think works for me . I have here and there play around a bit but they seem to not be having problems with that . Advanced Nutrients is getting 10/10 for me
Day 14 Flowering phase
Week 2 of flowering phase complete
It was a learning week for me . Got bit scared how they grow 15 cm in a day . But it's seems to be oké i got still some real estate left. I think that i am not giving them any water what so ever . I need to learn to let them dry out some . Also a bit struggling with humidity in the tent . I am trying to give them water right before light on ore right after light out . It's definitely a learning process that i don't mind learning 🤘🏻🤘🏻
Thanks for stopping by growmies i appreciate it a lot 😎
And for the one's that read my stuff sorry for misspelled English

Likes
21
Share


@Green_Dream
Follow
Where to start?
The girls are well into flower now.
The signs of deficiencies progressed, so I decided to water with a bit of run off to see how hot the soil is, came out with an EC over 4 on all 4 ladies. So even though they are in amended coco I decided to give them a little flush with 3L ROwater with 3ml/l Bio-Bloom from biobizz(EC ca. 0,55). I hope this will do the trick for them.
I suspect it was a mistake to amend the coco 3 weeks before the transplant. It looks like they got a bit stunted because of that.
The smallest of them got the coco amended right before transplant and she looks much better then the others.
They started to give a nice floral fragrance. Very special!
I hope you’re enjoying the ride! 🍀
Likes
8
Share


@Kirsten
Follow
23.3.25:
Hulkberry 💜💚 is sprouted, and now progressing well. It was a slow start, as I did not soak the starter plug and the seed kept drying out.
I also added more perlite than usual and so when I was watering the seed, everything was moving with the perlite.
Now that we have broken soil, I did need to remove the shell as it had dried out and became stuck. It came off easily enough, and I did not cause any damage to the plant.
The extra perlite should be fine now, as we have roots to keep us in place at last, as well as the starter plug.
When I get some more coco I will top dress, as the level of the soil has lowered since it was filled due to the extra perlite.
That probably won't be soon though. It will probably coincide with the normal top dress schedule.
The super soil mix I made was approximately constituted 8 gallons of;
☆ 60% Canna Coco
☆ 30% Perlite
☆ 9% Worm castings
☆ 1% Organic dry amendments.
- Ecothrive Life Cycle
- Ecothrive Charge
- Diatomaceous Earth
- Ground Cinnamon
- RHS Mycorrhizal Fungi granules
- Great White Mycorrhizal Fungi blend
Thanks for hanging out 🍃 ✌️ 💚 🙂
Likes
12
Share


Likes
19
Share


@Troy_Farms
Follow
This was a great experience, my3rd Auto plant. As soon as it showed its first pistils I topped it and mainlined the new top two nodes into a 4 way mainline. The plant recovered very well and began flowering and filled out great and filled in evenly. Buds are not super big but compact and quality. Smoke is great, nice steady high. Success! Cheers😎

Likes
3
Share
@MaxWax
Follow
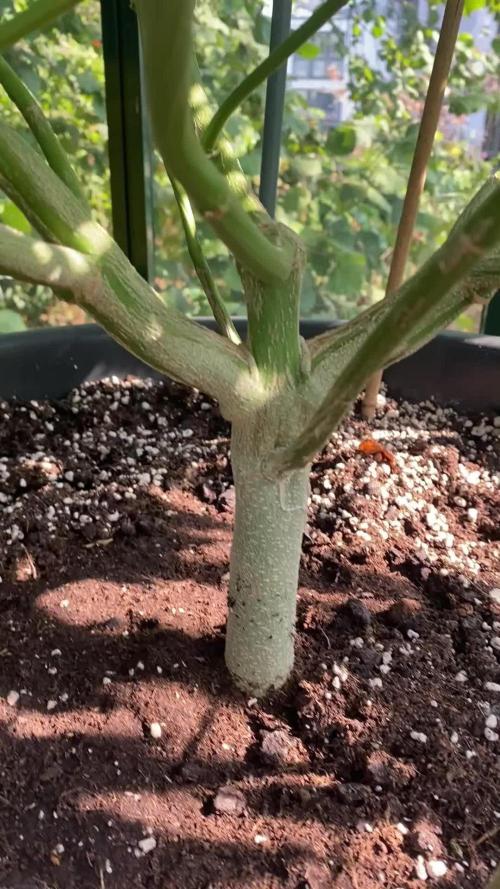
Everything is running smoothly and on schedule. Off on a two-week trip tomorrow, fingers crossed she doesn't miss me too much! 🙈

Likes
15
Share

@deFharo
Follow
Bienvenidos cultivadores de marihuana! 🖐️ 👨🌾
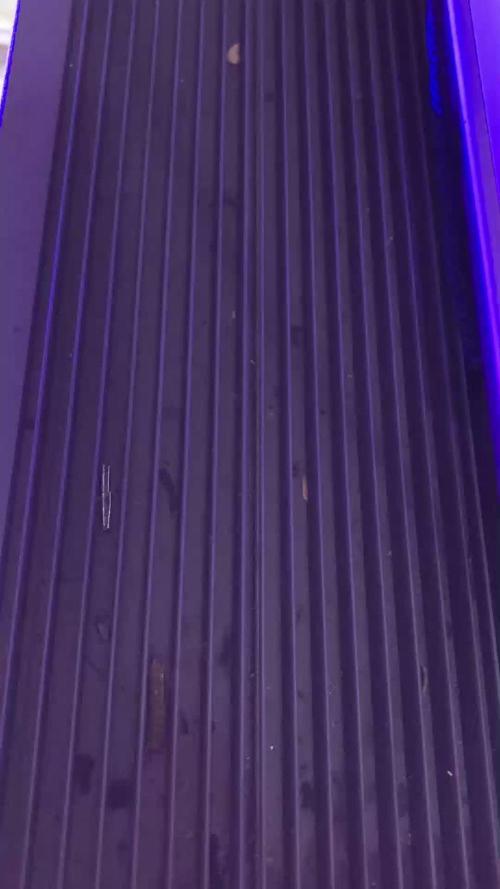
Desde el centro de la carpa de cultivo, elevada en un pedestal, porque es la planta más bajita del jardín, este cruce se reivindica poderoso y seguro.
Las ramas compiten entre si, las hojas captan luz y la convierten en energía, la fotosíntesis se encarga de todo.
No hay carencias, no hay excesos, solo paz y vida en esta transición a floración, hace 5 días cambié el horario a 12/12... nada puede fallar!
😁 HASTA LA PRÓXIMA. SALUD Y SALUDOS PARA TODOS!
=============================
- Esta semilla me la regaló mi compadre canadiense: https://growdiaries.com/grower/1right_angle
- Se trata de una semilla feminizada proveniente de cruce casero entre Northern Lights (100% índica) x Thai (100% Sativa), un espécimen original con el que espero disfrutar mucho durante el cultivo.
=============================
Likes
4
Share


@DmbTexasRanger
Follow
I think I did okay here. Harvest of indoor strawberry cheesecake by Humboldt seed co.
I’m going to run the diary through cookies comparison.
Cookies elephant trunk to run week 15-18. Going to flower in veg tent until these are done hanging


Likes
20
Share


@RunWithIt
Follow
I mean, overall this was an extremely painless grow. The test of whether we should or shouldn't top autos is still TBD imo. Our topped candidate produced denser, frostier buds, but weighed slightly less, at 14 grams of bud total. And our lst plant produced 18 grams of bud, not as frosty, and almost as dense as our topped girl. I'll be topping autoflowers from here on out only under the circumstance I have 4+ to grow at the same time. Seems like it could be used to speed up the autoflower grow cycle if done properly, like with right. Since I'm doing a perpetual cycle, it's still a viable option for me in the long run. A few tips I have for anyone growing this strain in organics:
Start feeding bloom nutes a little bit prior to flower transition - this makes the transition more seemless. From weeks 1-3 flower, I slowly dropped the grow dosage until I cut off grow nutes week 3 flower.
Starting the flush around week 6 flower seemed to really bring out this plant's potential. But I think you could get away with starting the flush around week 5. I hope this helps anyone trying this strain out. It's a good one, I hope to see more journals of it, eventually.
Cheers everyone! Time for me to take a well-deserved puff. :) ☁️ 🌼
Likes
46
Share


@Rollex420
Follow
Day 18
Transplanted today the plants into their 11L pots.😊
While instead i will let the Lemon Tree grow for another 4/5 days in the same pot because she only got 13 days, so I prefer to have it strengthened a little before the transplant.
Day 24
Mimosa, Meringue, and Kmintz were Topped, Defoliated and also applied a light LST to the main stems of the plants.
I will do the same for the Lemon Tree in the next 2/3 days..
I hope they have a quick recovery 🤞🏻
Day 27
LST also performed on the side branches of all plants except the Kmintz which is too small to bend its branches.
Also Today we got 21 days for the Lemon Tree which has a great shape! Carried out topping, LST and a little defoliation.. 🙌🏻
In the next few days I will let them grow them without further stress.
Have a great weekend gromies!! ☮️💚

Likes
27
Share


@RDWCGrowing
Follow
1/20/2023- So much to do pre grow and over the next 16 days, absolute first order of business is that I have to take down my current Grow---TIMBER-- Then I have a list of things I have to get done in order to be ready to start this grow 1 Feb.
With that said
T - 2 days until start 48 hour Flush
T - 2 days until Start 48 hours of Light
T - 4 days until TIMBER!!!
Items that need to be done before 1 Feb 2023
1. I need to clean the tent out
2. I need to clean the equipment- Proper Sanitization between grows in Hydro is a must!!!
3. I need to get the hole in the ceiling above my tent repaired- For my last grow I had a deep sink installed in my grow room, to make Hydroponics a little bit easier and have a water source in the same room. The seals on the pipes they were installing broke and leaked through the ceiling causing some damage all the way across my grow room, I was already weeks into my grow and couldn't risk them working above my tent and it would have been very awkward positon for them to be working in as well, so have to get this done quickly between chop and germination.
4. I have to install my new light- I was using a Vivosun 4000 and for this grow I am switching up to a Spider-farmer SF 7000.
1/20/23- For this upcoming grow I am working with M/F photo seeds so I ordered 4 Sex determination kits. I recieved my my 4 Sex determination testing kits from Rimrock Analytics today. I will be using these to test my plants at week 2 of Veg so that when/if I take clones I know I am taking them off females. As well as I don't want to accidently pollinate my tent during this grow I am looking for big beautiful buds not seeded buds. :-)
1/24/2023- Harvest of current grow- Started at 2:00pm and finshed wet trim and firt batch into the freeze dryer.
1/25/2023- Next batch into the freeze dryer and cleaning all my equipment for this Grow.
T-1 Day until the workers are supposed to be here to fix the hole in the Grow Room.
T-3 days until I instll my new Gorilla Grow Tent and my New Light Spider Farmer SE-7000 for this grow.
T-7 Days until Start of Germination
1/26/2023- Harvest is done ran through the Freeze dryer and dry tim completed.
1/27/2023- Grow Room repairs completed. Hole is gone Letting the paint dry before I install the new tent.
T-2 days until Install the New Gorilla Grow tent and the new Light
T-3 days until I put the hydro equipment in the new tent
T-5 days until Germination
1/29/2023- Day 0- Final Pre Germination activities
Germination Start T-3 days
The paint on the ceiling was dry and it was time to finish prepping for Germination. I got the following items knocked off my list.
New 4X4 Gorilla Grow Tent is up and ready
New Spider Farmer SE-7000 Light is installed- Thanks Moony Grows for the suggestion and for the Code that got me some money off and free shipping (Moonygrows)!! I turned the lights all the way up to max and set the timer to 18/6 0600-0000. I will keep an eye on the temperature and humidity without my plants and see how hot it gets with the new light.
I put my Hydro system back together and put in 40 gallons of water into it, time to monitor for leaks the next few days.
I Setup my cloning machine for Germination Days 3-11
1/30/2023
let me break down the situation, ROOM in the TENT.. Enough said.. No really I tried putting my exhaust system up in the new tent with my new light, The light is so big corner to corner that it really didn't give me enough room for the lights be be raised, with the exahust hanging the buckets my plants are Starting in are 2 and 1/2 feet off the ground, great for plenty of room for roots but not so great for upwards space for the plant to grow. In a 6' 11 tent with the exauhst in side and hanging that only gave me a little over 4 feet of grow room to play with. My last grow if you saw my diary, anyone could tell I was struggling to keep the buds off the lights. No good, Since space was such an issue I was running my carbon filter inside on the ground but It really needed to be up sucking the heat out not shooting the cool out. With that setup I was sucking air through the filter and pushing it out the tent at a bottom exhaust hole cold out. Wasn't doing me any good for my heat. I was hitting temps of up to 85 degrees. I bought a portable AC unit and have been running it in the grow room to try and keep temps below 85 and I have had to lower the power on my lights during grow also not ideal.. With that said a friend of mine MoonyGrows (Check out his diary) took the time to look at my issue send me a picture of my grow tent setup with detailed instructions on how to suck the air out from the top but putting my filter and fan on top of my tent so no room issue and I am sucking the air out from the top where the heat is instead of pushing the air out from the bottom where the cool is... THANK YOU MoonyGrows For taking the time to help me get this straightened out.. Now I have room and I have the exhausts working right and now my temps with everything at 100% are topping out at 80 this dropped the temp by 5 + degrees at 100% max.
T-2 days until Start of Germination
Prepped my seed tray with humidity dome
Prepped my Rapid Rooter plugs. I Used RO water, and I added a few drops of Hydrogen peroxide to Oxygenate the water. I then PH balanced between 5.7-6.0 the same that they will be getting in the Cloning Machine and when they get to thier final grow pod. I perfere the 5.8x range and I hit 5.84 for these rapid rooters. If you want to see a complete video on the process HowWeedGrow has an amzing video that shows step by step how to do it and explains it better than I ever could including how to plant the seeds. Which I will cover when I get to that step on Wed. https://www.howweedgrow.com/how-germinate-weed-seeds-cannabis-rapid-rooters/
1/31/2023
T-1 day until Germination Start
All set and ready have my Rapid Rooter plugs ready to go have my seeds out.. Have my seed tray warming up tonight. Tomorrow morning right into the Rapid Rooter then strait into the tray. I will spray the dome to start the humidity in there.
2/1/2023
Germination Day!!
Let the games begin!
0600am Put the seeds into the Root Riots. And then put the seeded Root Riots into their first home the Seed tray. I have them under the light 24/7. Sprayed the dome
7:30pm Sprayed the Dome to keep humidity going on the dome.
2/2/2023
Day 1 of Germination
Sprayed the Dome in the morning
Sprayed the Dome in the evening
2/3/2023
Day 2 of Germination
Roots are starting to come out the bottom of the root riot plugs and the heads are slowly popping out of Number 4 just below the surface.
Afternoon- Number 4 has popped up
Evening- Number 3 has popped up as well. Happy Dance!!
2/4/2023
Day 3 - Germination
Surprise Surprise Surprise- all 4 have now poked their heads up.. Happy day!! 100% Germination succeeded.
Now major milestone to track is how many are female and how many are male.
I will take look at the roots this afternoon/evening and see if they have enough root to go into the cloning machine for the next 7 days before they go into their Hydro Pods.
Day 3 - Germination - Evening..
Roots looked good and they were tall enough to make it into the cloning machine.
Now that they are all in the cloning machine I have switched the lighting to veg state 18 on 6 off.
2/5/2023
Day 4 - Germination - Morning
All the Ladies (fingers crossed) looking great stretching nicely and look nice and green, Photo synthesis underway....
UPDATE!! After a very interesting POD cast on FSTS by Dr. Bruce Bugsbee from Utah University, I have shifted my lighting to 24 hours on through seedling and then I am going to shift to 20 hours on the rest of Veg.
2/6/2023
Day 5 - Germination
While Checking on my conditions inside the new tent last night, I found that the Humidity was down to 39 Percent. I added an AquaOasis Cool Mist Humidifier, the reason I selected this humidifier is that I needed one that could be turned on and off utilizing my Inkbird Humidity Controller IHC200 that I have my Pro Breeze Dehumidifier currently running with.
Root structures are starting to get there about 1/4 of an inch.
2/7/2023
Day 6 - Germination
Everything seems on track more roots poking out of each today. They are each getting a little taller as well.
Checked in the evening and number 3 was drooping the Root riot plug on the bottome was dry and the roots were not in the water yet. I raised the water just enough that the longest root that was sticking out is now hitting the water.
2/8/2023
Day 7 - Germination
Everything looked good while checking in on them this morning number 3 is now full up and no droop again.
2/9/2023
Day 8 - Germination
T-2 days until Plant into Forever Pods and we start week 1 of Veg .. :-)
Surprising thing to me is that number 1 and 2 were later in popping then 3 and 4 but the roots are growing longer in 1 and 2.
2/10/2023
Day 9 - Germination
Number 1 and Number 2 are definitely ready for transplant today.. Based on how they were yesterday and where they are today I am hoping by tomorrow 3 and 4 are ready. Today they look to me where 1 and 2 did yesterday.. I really hope 3 and 4 catch up by tomorrow since..
T-1 day until transplant to new/ final home for grow.
Need the roots long enough to have some clay down in the basket to keep the root riot out of the water and only roots in the water..
2/11/2023
Day 10 - Germination
Today they got placed in thier forever Home, 7 days from Sprout and 7 days until Week 1 Start.
PPM- 180 this is water out of the Tap
Temp Water: 70.7
Temp Tent: 77
Humidity: 40% I have a humidifier going 24/7 to try and bring this up.. I also have Humidity Domes on each plant.
2/12/2023
Day 11 - Germination
Sprayed the domes, all are looking good.. Nothing much to do at this phase but Keep monitoring the PH level in the system and making sure they have a comfortable home.
T-6 days until Week 1 start
2/13/2023
Day 12 - Germination
Sprayed the domes, They were looking a little yellow today so I moved the light down to assist. Nothing much to do at this phase but Keep monitoring the PH level in the system and making sure they have a comfortable home.
T-5 days until Week 1 start
2/14/2023
Day 13 - Germination
Sprayed the domes, They were looking a little Florissant yellow today, with what looks like slight burn on the tips, I talked with a fellow grower and we agreed that It was probably that I was drowning them, Yes you can drown you plants even in Hydro, but only early on.. :-) It usually happens with the water being too high, which soaks not only the roots but the medium (root Riot plug in this case). I lowered the water from touching the bottom of the pot to about 1" away. This will probably take 3-4 days to resolve. I will continue my daily monitoring.
T-4 days until Week 1 start
2/15/2023
Day 14 - Germination
Sprayed the domes, continue my daily monitoring they look a little darker green instead of lime green now that I lowered the water levels in the system, so I think that I might have resolved the issue but it will take a few days for recovery to happen.
T-3 days until Week 1 start
2/16/2023
Day 15 - Germination
I looked in on them this morning, 3 and 4 look like they are doing well and recovering nicely. Number 1 not so much it has brown spots on the leaves, this very well can still be a side effect of the overwatering but I decide to go ahead and add Nutes earlier than I was planning just incase. I was going to wait until Saturday but I think intervention is necessary now especially after drowning them early on.
I added 1/2 what I am planning on adding for week 1 start. I also think I am going to adjust my chart to add 1/2 2 days after plant from now on. I don't think it would hurt it to have some Nutes to pull from.
.25ml/Gal Calmag = 12.5ml
1ml/gal GH FloraMicro= 50ml
1ml/gal GH FloraGro = 50ml
1ml/gal GH FloraBloom = 50ml
T-2 days until Week 1 start = I will drain the system and start it over on Saturday with Week 1 Nutes.
2/17/2023
Day 16- Germination
I didn't even want to post today after looking in on them this morning, 3 of the 4 are now showing signs of dronwing.. Brown spots on the leaves, the water levels were still too high.. I drained about another inch out of the tanks.. Will see how quick they recover.. I start week 1 tomorrow and will have to ensure my water levels are at least 1" away from the basket on this round.


Likes
85
Share

@Natrona
Follow
Auto Purple Hulk Auto by MSNL Outside
👉Sponsored Grow👈
W6F2
7/20-26
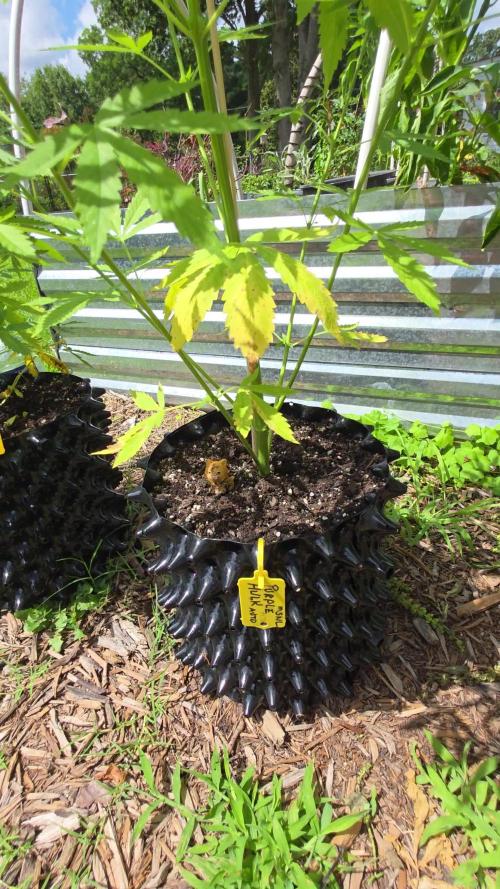
The hot weather returned with humidity and days of scattered thunderstorms. I fertilized once this week with I49 and top dressed with worm castings since I saw some yellow leaves near the bottom. Thankfully with all the rain we’ve had this month she doesn’t show any deficiencies or bud or root rot. I fertilized with I49 grow 1 tbsp/gal & 2 tbsp I49 Flower.
With the extreme heat and rain, my auto Purple Hulk had a huge stretch a full 10 inches this week. At 43 inches, she towers over her friends. There are no deficiencies and demonstrates resistance to fungal diseases.
As always, thank you all for stopping by, for the likes and most of all growers love and support.
Stay green, growers love 💚🌿
💫Natrona💫

Likes
11
Share

@myterpygarden
Follow
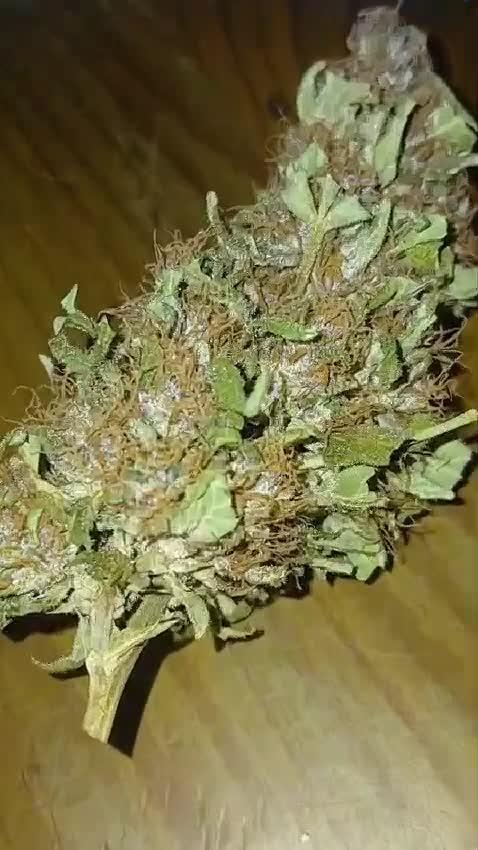
Ahora a secar y curar, muy buena genética, fenotipo muy resistente, colores preciosos, bien de resina y olor muy marcado a bayas
