Likes
Comments
Share
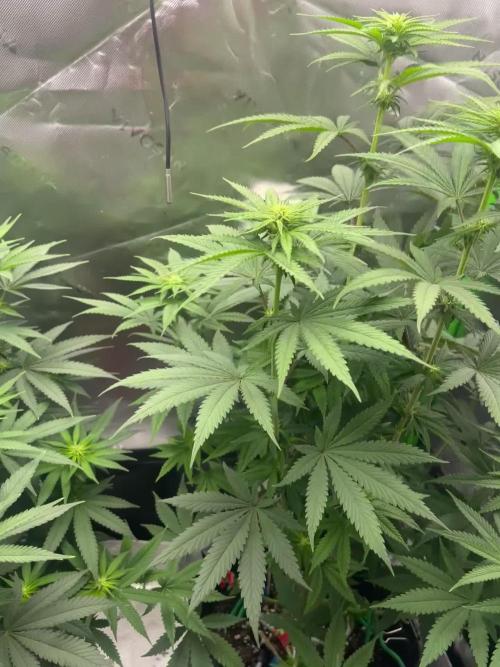
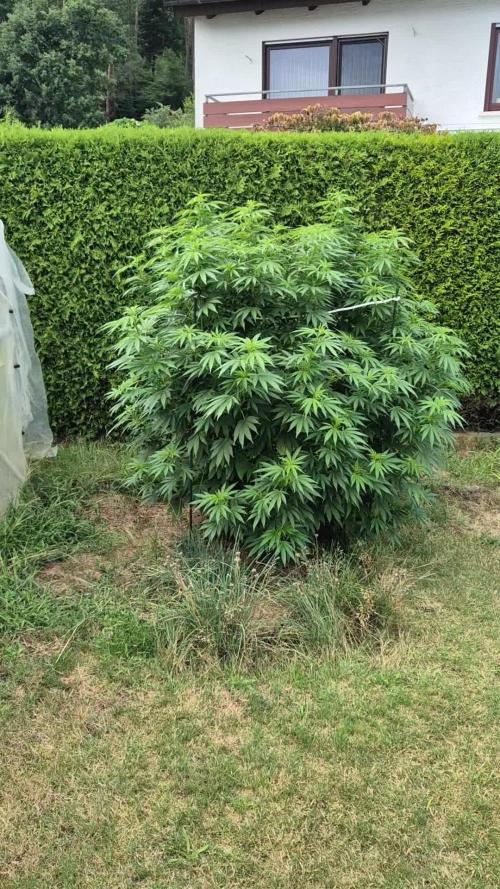
En esta semana con las lluvias y vientos se me quebro una rama 😬
Processing
Likes
5
Share
@Ensign420
Follow
Week 02 Introduction This week has been a bit of a struggle. Had my first experience dealing with slime and brown algae. But I think adding enzymes and increasing the beneficial bacteria helped to fix the issue. Also experienced nutrient burn for the first time. My nutrient solution strength got as high as 671 PPMs. So backed it down to about 430 PPMs during the end-of-week reservoir change. Also cut Hydroguard (expired?), CaliMagic, and Superthrive from this grow. Now she's still stunted, but is starting to recover. Hopefully... [START OF WEEK 02] Day 01 - Monday - 08/10/20 - Total Days: 008 ----------------------------------- - [0830]: Still looks a bit yellow. But getting larger! --- Solution strength was at 248 PPMs. --- Just topped off with a bit of distilled water --- PH went up to 6.1 so PH'd down to 5.8 --- Ran the top feed for a bit to wet the hydroton. - [2130]: She's looking even more yellow now. --- Even the new leaves are really yellow. --- Decided to add more base nutes. --- Added 4ml of Sensi A --- Added 4ml of Sensi B --- Now at about --- Solution Strength went up to 304 PPM. --- PH was at 6, --- Also raised the water level a bit more. --- I really hope it's a nutrient deficiency and not an over-watering issue. --- Please live! Day 02 - Tuesday - 08/11/20 - Total Days: 009 ----------------------------------- - [0830]: Looking less droopy. But still yellow. --- Decided to do a reservoir change. --- 4.5gal of distilled water --- 8ml of Sensi Grow A --- 8ml of Sensi Grow B --- 8ml of Voodoo Juice --- 4ml of B-52 --- 4ml of CaliMagic --- 4ml of Hydroguard --- 4 drops of Superthrive --- PH'd down to 5.8 --- Solution strength: 302 PPM --- Since I didn't want to risk over-watering the rockwool, I did not to do a top feed, may do one tonight after the sleep cycle (lights are still set to go off at 10am and back on at 4pm). --- As I was doing a reservoir change, I noticed that the tubes and bucket were a bit slimy. Didn't really stink or anything. Is this normal? Maybe due to the Hydroguard and Voodoo Juice? --- I hope she gets better soon! - [2215]: Getting larger! But still yellow. --- Also can see a root growing through the net pot! Tiny little thing but it's there! Will have to start dropping water once more appear. --- After looking over a few DWC diaries using AN nutes, seems like my solution strength is still too low. Most around this stage average around 500 PPMs with about 4ml per gallon. --- Top fed for a minute to wet the top of the hydroton. --- Solution strength went down to 263 PPM. --- Added 8ml more of Sensi A --- Added 8ml more of Sensi B --- Now base nutes are at 16ml for 4.5 gal of water. --- PPMs went up to 411. --- Still lower than 500 PPMs, but that's okay. --- PH was at 6. Not sure if I should adjust PH using AN nutes. So going to not ajdust unless PH goes above 6.1. Day 03 - Wednesday - 08/12/20 - Total Days: 010 ----------------------------------- - [0830]: Looks like more root growth! --- She still looks yellow. But leaves are perky. --- PH was at 6.2 so lowered down to 5.8. --- Solution strength was at 394 PPMs --- Since roots are still growing, I decide to lower the water level a bit. Now water level is a bit below the net pot. - [2200]: Root is getting longer! --- Slime is returning. Not sure why. --- Solution strength: 357 PPMs --- PH: 6.1 --- Decided to add an enzyme along with more beneficial bacteria to hopefully cure the slime. --- Added 16ml of Sensizym --- Added 5ml of Hydroguard --- Added 8ml of Voodoo Juice --- New solution strength: 430 PPMs --- New PH: 6.1 --- Top fed for a minute. --- This slimy residue is really freaking me out! I hope the added enzymes will help eliminate the slime. --- Going to do a full reservoir sterilization/nutrient change over the weekend. Please survive until then girl! Day 04 - Thursday - 08/13/20 - Total Days: 011 ----------------------------------- - [0930]: I think the enzymes worked! There is little to no slime now! --- Although I think the root was also dissolved in the process. It's now just a little stub sticking just below the net pot. The enzyme is also suppose to dissolved dead roots too but guess that root was too weak? Not sure what happened there. But I think the slime is cured! --- Solution strength went down to 395 PPMs. Decided to add more base nutrients. --- Added 8ml of Sensi A --- Added 8ml of Sensi B --- Added 4ml of B-52 --- Solution strength went up to 598 PPMs. --- PH was at 6.1 --- As long as the PH is between 5.5 and 6.3, I'm not going to use PH Up or Down. But still will monitor PH levels. - [1715]: Checked up on her after her nap and shes looking alive but stunted. But no slime! --- Decided to add some sugars to help maintain the enzymes and beneficial bacteria. --- Solution strength was at 587 PPMs. --- PH was at 6.2 --- Added 8ml of Bud Candy --- Solution strength went up to 671 PPMs. --- PH also went up to 6.3 --- Lowered water level a bit to hopefully promote more root growth. --- Top fed for a minute. --- She is getting bigger, but still looks yellow. Day 05 - Friday - 08/14/20 - Total Days: 012 ----------------------------------- - [0915]: Leaves look a little burnt on the tips. Still no slime. --- Going to back off on the PPMs to hopefully fix the nutrient toxicity. --- Solution strength was at 632 PPMs --- PH was at 6.3 --- Added/Removed water until PPMs were at 536. --- PH was still at 6.3 --- Raised water up a bit, then top fed for a minute. - [2200]: Looking better. Still yellow though. --- Solution strength: 514 PPMs --- PH: 6.5 --- Added PH down. --- New solution strength: 518 PPMs --- New PH: 5.2 --- PH was kind of high. So decided to PH down. Had to use quite a bit to bring it down. But eventually got it to drop down to 5.3. A little low, but so far, the PH has always gone up so wanted to start it really low. --- Ran the top feed for a minute to re-saturate the top of the hydroton. Day 06 - Saturday - 08/15/20 - Total Days: 013 ----------------------------------- - [0830]: She looks stunted. leaves are still yellow. --- Solution strength: 514 PPMs --- PH: 5.6 --- Top fed for a minute. --- Not sure what to do at this point. Going to do another reservoir change soon. Hoping she lives until then. - [2145]: Looking pretty much the same. --- A bit of slime has returned. Since I've been diluting the nutrient solution, the enzyme ratio has dropped. So I guess this is expected. --- Also noticed that slime build up was on the air-stones. Never really checked the stones so not sure how long that has been there. Looks brown too, which can't be good. --- Going to do an H202 sterilization of the system (minus the net pot) tomorrow so did not add anything. --- Lowered the water level to below the net pot. --- Then top fed for a minute. Day 07 - Sunday - 08/16/20 - Total Days: 014 ----------------------------------- - [0900]: STERILIZATION DAY! --- Decided to skip today's night cycle for a deep clean. --- I'm hoping that skipping a night cycle won't be too stressful. --- Temporarily moved her to a new bucket. --- Used about a half of gallon of straight distilled water to flush out the net pot. --- Drained the system and wiped up all the brown sludge. Also removed the air stones and cleaned up all the goo. --- Filled the system with 2 gallons of distilled water and at least 30ml of food grade hydrogen peroxide (35% strength). --- Yea its a lot, but since I'm not going to sterilize the system overnight, I went with a really high doseage. Basically I kept adding until I started to see little bubbles start to form. --- Then I ran the water pump. - [0915]: Boiled the air stones in tap water for about 10 min. Then reconnected them to the airlines. --- I let the air stones and hose soak in the sterilization solution for about 5 minutes so the peroxide can absorb into the stones. Then ran the air stone to help mix and agitate the solution. --- Occasionally, I'd repeat the process of turning the air pump off for a few minutes to let the stones soak. - [1000]: Covered the top two row of holes of the net pot with some aluminum tape. Hopefully this solves the light leaking in through the hydroton. - [1200]: Used an old toothbrush and scrubbed the pump clean. Then drained the system. --- Refilled with more distilled water and peroxide. Again added a lot. --- Ran system again to sterilize even more. - [1530]: Drained the system and refilled with distilled water to rinse. --- Ran the system for a few minutes, then drained and rinsed again. --- Did this a few more times over about an hour. - [1630]: Added 4 gallons of fresh distilled water. --- Added 15ml Sensi Grow A --- Added 15ml Sensi Grow B --- Added 12ml of B-52 --- Added 16ml of Voodoo Juice --- Added 16ml Sensizym --- Solution strength was at 430 PPMs --- PH was at 5.6 --- I was going to add Hydroguard, but I think the bottle is expired. Since 2017 or 2018!? I think Hydroguard is good for up to 2 years from the date on the bottle or 6 months after opening. So not going to use from now on. I wonder if this could have contributed to the slime build up. --- Also removed the CaliMagic and Superthrive too. Going to only use AN products to eliminate the chance of incompatible nutrients. --- Placed her back in the bucket and top fed for a minute. --- Here's hoping for the best. Going to let it ride until morning! Please feel better! [END OF WEEK 02]
Processing
Likes
7
Share
@gablmo
Follow
Another week with a lot of studing in order to understand what's going on, to then take the proper action. It hasn't been easy, most of the time I have no clue of what the plants are doing. I tried some fimming last week to help even the canopy but it didn't seem to work. Two of them are smaller than the others, I took the smaller one out of the center of the light to give the chance to the others to get more light since it wasn't growing at all due light burn, and one of them was too far from the light, so now is very stretchy. They have been growing fast, any suggestions on how to train them? I think is time to get a new light. I'm thinking about getting a HPS 600 watts, what do you think?
Processing
Likes
10
Share
@GrowerGaz
Follow
Very happy this week as my friend gave me a female Mac x Purple Punch he was using as a mother plant. That is in an 18 litre soil pot. The 3 Rado Z are now in 15 l autopots fitted with airdomes. A soil mix was made with dutch vega bio soil , Bio grow and silicium flash. The MacPunch I have stripped the lowers and trained it using easy bend clips.
Processing
Likes
6
Share
@Mannabis
Follow
What amazing genetics! The trunk on this hag at 21 days could support a huge cola right now! Underneath the lateral growth is happening without any sun, the giant fan leaves from this obvious Indica dom are preventing any light from getting down there. Once we flower I’ll use those branches for clones and keep that central kola going. This is a rare plant, I feel fortunate to be working with a powerful plant like this.
Likes
5
Share
Likes
17
Share
@Naujas
Follow
She is much prettier than she was a week ago :) I remembered that I have my first grow light, which is more compact and it will give me more space, so I changed my light, now the girl's side branches get light too:) I add a lot of video memes, because I really want to win Iphone16 pro ;) and those who don't take risks don't drink champagne:) good luck to everyone.
Likes
41
Share
Likes
2
Share
Seems to be doing well! Stretch appears to be complete and a little LST daily is keeping all of the air and light moving around nicely. Hoping for a solid harvest in a few weeks!
Likes
207
Share
And with enormous honor and pleasure that i start collaborating with Zamnezia and Viparspectra For this run i will have the pleasure of growing some Runtz genetics from Zamnezia seeds that they wore kind enough to send me for test and review 🙏🙏🙏💚💚💚🙏🙏🙏 and for the testing and reviewing i was blessed with the VIPARSPECTRA model P2000💚💚💚🙏🙏🙏 they wore amazing and send me this LED light for me to do some testing and some reviews. Special thanks to Zamnezia and to Viparspectra for this opportunity, lets make magic together 💚💚💚🙏🙏🙏 For now all is normal, seeds in glass of water and from there in to root riot, now lets see how the tiny babies come outside đŸ™đŸ’šđŸŒ± And not even 24h later we have them popping out from the root riot 😅 and we are off to what it look to be a great start 🙏🙏🙏 And a couple days latter and this beauty’s are ready to move and have their first contact with organic soil đŸ˜…đŸŒ±đŸ’šđŸ’šđŸ’š All i grow is medicine for myself, for me and for my best friend with is me 😆 nothing to sell, so don’t even ask 😅💚💚💚 All info and full product details can be find in can find @ https://viparspectra.eu/collections/grow-lights DISCOUNT CODE - DOGDOCTOR https://www.zamnesia.com DISCOUNT CODE - GROWITGD More info and updates @ https://growdiaries.com/grower/dogdoctor https://instagram.com/dogdoctorofficial https://youtube.com/channel/UCR7ta4DKLFMg2xxTMr2cpIg 💚💚💚Growers love to you all 💚💚💚
Processing
Likes
3
Share
@Kushizlez
Follow
Day 33-40 (May 24th-May 31st) (Day 34) I just found a herm branch on the tight blueberry pheno. It looks like a random pollen sack opened right above a lower branch. I removed the sack but I saw a small amount of dust fall onto one of the lower branches. I’m going to leave it to see if it will pollinate that small branch at all. I spent a good 5 minutes looking closely for bananas or claws but couldn’t find anymore. The main bud is clearly unaffected so I will just leave it unless it is visibly seeding itself. Too bad because I’m really excited for this plant. (Day 36) Not a lot has happened since I flushed them. Growth actually looks healthy and I don’t see any deficiencies on anything yet. (Day 37) Both of these badazz cheese phenos are picture perfect and easily hold up against Canadian and California quad grade. I might try to reveg them at the end and take some clones. They have this unique pungent, grassy, sour milk smell that is just wonderful. The density and bud structure is looking great too. This whole plant will probably take 3 minutes to trim if that. (Day 38) Just found a banana on the shitty blueberry pheno. This pheno is trash and I would honestly throw it away if it didn’t mess up the 3 perfect rows. It has almost no frost, no smell, is airy and has bad structure. I’ve actually never seen a plant with such little frost. Even outdoors. (Day 39) I think most of this tent will be done by day 60 but I will probably ride it out until day 70+. I don’t think the blueberries or the jacks will fill out very much either way but taking it too day 70 will ensure maximum production from each plant.
Likes
2
Share
This plant is growing well, I transplanted them this week into 3 gallon pots from 1 gallon pots. Structure on this plant is pretty nice and visually pleasing to the eye lol.
Likes
56
Share
Bonjour Ă  tous les padawans et maĂźtres jedis Jour84 arrosage avec 2 litres d'eau ph6.3 Jour86 arrosage avec 2. 5litres d'eau ph6.3 Jour89 arrosage avec 2 litres d'eau ph6.3 LE MEILLEUR MOMENT POUR RINCER SON CANNABIS Le rinçage commence en gĂ©nĂ©ral deux semaines avant la rĂ©colte. Si le plant a une pĂ©riode de floraison de huit semaines, le rinçage doit commencer six semaines aprĂšs le dĂ©but de la pĂ©riode de floraison. Il est prĂ©fĂ©rable de regarder de prĂšs les trichomes sur le plant pour dĂ©terminer quand votre cannabis est prĂȘt Ă  ĂȘtre rĂ©colter. Si les petits trichomes commencent juste Ă  passer d’une couleur transparente Ă  une teinte laiteuse et blanche, c’est une bonne indication que les plants peuvent commencer Ă  ĂȘtre rincĂ©s. Il faut s’arranger pour que la majoritĂ© des trichomes aient changĂ© vers la couleur dĂ©sirĂ©e pour la rĂ©colte aprĂšs deux semaines – ça devient plus facile Ă  faire avec l’expĂ©rience, alors accrochez-vous ! Le rinçage peut Ă©galement ĂȘtre un bon moyen de remettre Ă  zĂ©ro la terre quand un plant est toujours en phase de croissance vĂ©gĂ©tative. Parfois, un cultivateur suralimente par accident son cannabis, ce qui provoque un changement de couleur et un flĂ©trissement du bout des feuilles. Ceci est appelĂ© une « brĂ»lure par nutriments ». Rincer la terre peut Ă©liminer les nutriments excĂ©dentaires, ce qui aide Ă  rĂ©soudre le problĂšme. Cependant, c’est une mesure drastique Ă  ce stade de la culture, alors assurez-vous que le problĂšme soit bien une brĂ»lure par nutriments et non quelque chose d’autre. Le rinçage ne concerne pas que le moment de la rĂ©colte. Cette technique peut aussi ĂȘtre mise en place durant la phase de croissance afin de dĂ©barrasser le sol des nutriments. Bien Ă©videmment, les nutriments permettent Ă  votre plante de rester en bonne santĂ© et vous assurent des rendements maximaux, mais une trop grande quantitĂ© peut causer une accumulation et un Ă©tat statique durant lequel la plante ne peut plus y accĂ©der. Le blocage des nutriments peut ĂȘtre causĂ© par une accumulation saline ou des niveaux de pH incorrects. Ces deux causes peuvent ĂȘtre rĂ©solues par un rinçage de votre plante Ă  l’eau claire. Les fluides viendront pousser les nutriments en dehors du substrat et le dĂ©barrasseront de l’accumulation, permettant ainsi aux racines de pouvoir accĂ©der Ă  nouveau aux nutriments. EMPÊCHER LE BLOCAGE D'ABSORPTION DES NUTRIMENTS AVANT QU’IL NE POSE PROBLÈME Au mieux, le blocage des nutriments peut ĂȘtre un problĂšme, au pire, il peut ĂȘtre un vrai dĂ©sastre. Comme le dit l’adage, il vaut mieux prĂ©venir que guĂ©rir. Il vaut mieux prendre de l’avant pour empĂȘcher le blocage des nutriments plutĂŽt que de s’y atteler lorsque c’est trop tard. EmpĂȘcher le blocage des nutriments peut se faire par le biais d’un rinçage de routine. En rinçant vos plantes une fois avant la floraison et une fois au milieu de cette derniĂšre, vous minimiserez l’accumulation de nutriments. LES ENZYMES À LA RESCOUSSE AprĂšs le rinçage pour contrer l’accumulation ou le blocage des nutriments, vous remarquerez peut-ĂȘtre que vos plantes ont une apparence vert foncĂ©, c’est le signe d’un excĂšs de nutriments. Dans ce cas, certains cultivateurs choisissent d’ajouter une formule riche en enzymes Ă  leur substrat. Au cas oĂč vous auriez oubliĂ© vos cours de biologie, les enzymes sont des protĂ©ines qui catalysent les rĂ©actions. Elles aident Ă  rincer le substrat en dĂ©composant l’amidon, les glucides et les nutriments. Il existe sur le marchĂ© toute une variĂ©tĂ© de produits qui contiennent des formules d’enzymes trĂšs efficaces. Si l’eau ne suffit pas Ă  vos plantes, ces petites protĂ©ines ne feront qu’une bouchĂ©e de l’accumulation de nutriments ! COMMENT BIEN RINCER SON CANNABIS Rincer votre plant de cannabis est un processus simple. À chaque fois que vous apporteriez normalement des nutriments, vous rincez Ă  la place. De l’eau du robinet non traitĂ©e est tout ce dont vous avez besoin pour rincer, assurez-vous juste que son pH est sans danger pour le cannabis. La plupart de l’eau de puits a un pH sain et ne nĂ©cessite pas de traitement, mais s’il est nĂ©cessaire de traiter l’eau de rinçage pour avoir un pH adaptĂ©, faites-le. Les ajustements du pH seront donc la seule chose Ă  considĂ©rer. Inonder la terre avec autant d’eau fraĂźche qu’elle puisse contenir. Laissez l’eau durant quelques minutes pour qu’elle puisse absorber les nutriments, puis inondez la terre encore pour rincer les nutriments loin du plant. Si vous cultivez en intĂ©rieur dans des pots, notez la couleur de l’eau qui s’échappe du fond des pots. Elle sera tĂąchĂ©e et aura une couleur sale. C’est Ă  cette Ă©tape qu’un appareil de mesure des TDS (Total des Solides Dissous) est utile. Si vous rĂ©cupĂ©rez et mesurez le TDS de l’eau « Ă©vacuĂ©e », elle devrait avoir un taux de 1300ppm, ce qui est assez Ă©levĂ©. Il est important de rincer le plant jusqu’à ce que total baisse Ă  un niveau de 50ppm, ou du moins qu’il s’approche du TDS de l’eau fraĂźche que vous utilisez pour rincer le plant. La couleur de l’eau d’évacuation va s’éclaircir et apparaĂźtra plus propre. Vous devez tirer autant que possible de minĂ©raux dissous du plant. Comment et Quand Rincer les Plants de Cannabis Rincer les plants de cannabis avant la rĂ©colte peut faire la diffĂ©rence entre les meilleurs tĂȘtes ou la plus rude pour la gorge. Cette petite tĂąche est simple et facile Ă  faire. Ajoutez juste de l’eau ! Attention car le moment du rinçage joue un rĂŽle critique. Le b.a.-ba du rinçage de ses plants de cannabis. Sommaire: 1. Qu’est-ce que le rinçage ? 2. Le meilleur moment pour rincer son cannabis 3. EmpĂȘcher le blocage d'absorption des nutriments avant qu’il ne pose problĂšme 4. Les enzymes Ă  la rescousse 5. Comment bien rincer son cannabis 6. Comment rincer ses plantes en hydroponie 7. Les rĂ©sultats du rinçage de son cannabis 8. Quand Ă©viter de rincer son cannabis Vous avez enfin fini vos cultures et vous vous retrouvez avec un magnifique plant couvert de super tĂȘtes, maintenant sĂšches, vous avez fait le curing et vous ĂȘtes prĂȘt Ă  fumer – et pourtant quelque chose ne va pas. La weed semble ne pas vouloir se consumer et quand vous tirez une bouffĂ©e, c’est comme si on vous avait donnĂ© un coup de poing dans les poumons et vous toussez en craignant pour votre vie ! Le goĂ»t est rude et dĂ©cevant. Si c’est une situation que vous avez vĂ©cue, il y a des chances pour que vos plants n’aient pas Ă©tĂ© rincĂ©s correctement avant la rĂ©colte. Cette fumĂ©e bien loin d’ĂȘtre agrĂ©able est provoquĂ©e par la prĂ©sence dans le plant des nutriments et minĂ©raux utilisĂ©s lors de la culture, ce qui altĂšre la façon dont le plant se consume. Rincer le plant Ă©limine ces nutriments restants, ce qui amĂ©liore la qualitĂ© des sensations. Heureusement, le rinçage des plants de cannabis se fait facilement et sans effort, et cela vous permet de produire des tĂȘtes douces et dĂ©licieuses en un rien de temps. ARTICLE LIÉ Comment Utiliser les Nutriments pour Cannabis QU’EST-CE QUE LE RINÇAGE ? L’acte de rincer un plant implique d’utiliser de l’eau pour Ă©liminer tout nutriment prĂ©sent dans la terre. Une grande quantitĂ© d’eau est passĂ©e Ă  travers la terre et drainĂ©e sur une base rĂ©guliĂšre. Tous les minĂ©raux et nutriments prĂ©sents dans la terre sont rincĂ©s avec le temps avec l’eau, ce qui laisse une terre propre. Mais pourquoi vouloir Ă©liminer tous les minĂ©raux de la terre ? N’est-ce pas mauvais pour la rĂ©colte ? En fait, cela aide Ă  la rĂ©colte de maniĂšre significative. Quand les nutriments sont Ă©liminĂ©s de la terre, ceci force le plant de cannabis Ă  utiliser tous les nutriments toujours prĂ©sents dans le plant. C’est comme pour le corps humain. Quand on consomme beaucoup d’aliments, ce que nous n’utilisons pas est transformĂ© en graisses. Dans les situations extrĂȘmes oĂč la nourriture est rare, le corps s’appuie sur cette graisse stockĂ©e pour tirer de l’énergie. Comme rincer force le cannabis Ă  utiliser tous les nutriments restants dans le plant, aucun ne devrait rester et altĂ©rer les tĂȘtes rĂ©coltĂ©es. Cependant, si vous le faites trop tĂŽt, cela peut nuire Ă  la santĂ© du plant, le moment est donc clĂ©. LE MEILLEUR MOMENT POUR RINCER SON CANNABIS Le rinçage commence en gĂ©nĂ©ral deux semaines avant la rĂ©colte. Si le plant a une pĂ©riode de floraison de huit semaines, le rinçage doit commencer six semaines aprĂšs le dĂ©but de la pĂ©riode de floraison. Il est prĂ©fĂ©rable de regarder de prĂšs les trichomes sur le plant pour dĂ©terminer quand votre cannabis est prĂȘt Ă  ĂȘtre rĂ©colter. Si les petits trichomes commencent juste Ă  passer d’une couleur transparente Ă  une teinte laiteuse et blanche, c’est une bonne indication que les plants peuvent commencer Ă  ĂȘtre rincĂ©s. Il faut s’arranger pour que la majoritĂ© des trichomes aient changĂ© vers la couleur dĂ©sirĂ©e pour la rĂ©colte aprĂšs deux semaines – ça devient plus facile Ă  faire avec l’expĂ©rience, alors accrochez-vous ! Le rinçage peut Ă©galement ĂȘtre un bon moyen de remettre Ă  zĂ©ro la terre quand un plant est toujours en phase de croissance vĂ©gĂ©tative. Parfois, un cultivateur suralimente par accident son cannabis, ce qui provoque un changement de couleur et un flĂ©trissement du bout des feuilles. Ceci est appelĂ© une « brĂ»lure par nutriments ». Rincer la terre peut Ă©liminer les nutriments excĂ©dentaires, ce qui aide Ă  rĂ©soudre le problĂšme. Cependant, c’est une mesure drastique Ă  ce stade de la culture, alors assurez-vous que le problĂšme soit bien une brĂ»lure par nutriments et non quelque chose d’autre. Flushing Le rinçage ne concerne pas que le moment de la rĂ©colte. Cette technique peut aussi ĂȘtre mise en place durant la phase de croissance afin de dĂ©barrasser le sol des nutriments. Bien Ă©videmment, les nutriments permettent Ă  votre plante de rester en bonne santĂ© et vous assurent des rendements maximaux, mais une trop grande quantitĂ© peut causer une accumulation et un Ă©tat statique durant lequel la plante ne peut plus y accĂ©der. Le blocage des nutriments peut ĂȘtre causĂ© par une accumulation saline ou des niveaux de pH incorrects. Ces deux causes peuvent ĂȘtre rĂ©solues par un rinçage de votre plante Ă  l’eau claire. Les fluides viendront pousser les nutriments en dehors du substrat et le dĂ©barrasseront de l’accumulation, permettant ainsi aux racines de pouvoir accĂ©der Ă  nouveau aux nutriments. EMPÊCHER LE BLOCAGE D'ABSORPTION DES NUTRIMENTS AVANT QU’IL NE POSE PROBLÈME Au mieux, le blocage des nutriments peut ĂȘtre un problĂšme, au pire, il peut ĂȘtre un vrai dĂ©sastre. Comme le dit l’adage, il vaut mieux prĂ©venir que guĂ©rir. Il vaut mieux prendre de l’avant pour empĂȘcher le blocage des nutriments plutĂŽt que de s’y atteler lorsque c’est trop tard. EmpĂȘcher le blocage des nutriments peut se faire par le biais d’un rinçage de routine. En rinçant vos plantes une fois avant la floraison et une fois au milieu de cette derniĂšre, vous minimiserez l’accumulation de nutriments. LES ENZYMES À LA RESCOUSSE AprĂšs le rinçage pour contrer l’accumulation ou le blocage des nutriments, vous remarquerez peut-ĂȘtre que vos plantes ont une apparence vert foncĂ©, c’est le signe d’un excĂšs de nutriments. Dans ce cas, certains cultivateurs choisissent d’ajouter une formule riche en enzymes Ă  leur substrat. Au cas oĂč vous auriez oubliĂ© vos cours de biologie, les enzymes sont des protĂ©ines qui catalysent les rĂ©actions. Elles aident Ă  rincer le substrat en dĂ©composant l’amidon, les glucides et les nutriments. Il existe sur le marchĂ© toute une variĂ©tĂ© de produits qui contiennent des formules d’enzymes trĂšs efficaces. Si l’eau ne suffit pas Ă  vos plantes, ces petites protĂ©ines ne feront qu’une bouchĂ©e de l’accumulation de nutriments ! Comment et Quand Rincer les Plants de Cannabis COMMENT BIEN RINCER SON CANNABIS Rincer votre plant de cannabis est un processus simple. À chaque fois que vous apporteriez normalement des nutriments, vous rincez Ă  la place. De l’eau du robinet non traitĂ©e est tout ce dont vous avez besoin pour rincer, assurez-vous juste que son pH est sans danger pour le cannabis. La plupart de l’eau de puits a un pH sain et ne nĂ©cessite pas de traitement, mais s’il est nĂ©cessaire de traiter l’eau de rinçage pour avoir un pH adaptĂ©, faites-le. Les ajustements du pH seront donc la seule chose Ă  considĂ©rer. Inonder la terre avec autant d’eau fraĂźche qu’elle puisse contenir. Laissez l’eau durant quelques minutes pour qu’elle puisse absorber les nutriments, puis inondez la terre encore pour rincer les nutriments loin du plant. Si vous cultivez en intĂ©rieur dans des pots, notez la couleur de l’eau qui s’échappe du fond des pots. Elle sera tĂąchĂ©e et aura une couleur sale. C’est Ă  cette Ă©tape qu’un appareil de mesure des TDS (Total des Solides Dissous) est utile. Si vous rĂ©cupĂ©rez et mesurez le TDS de l’eau « Ă©vacuĂ©e », elle devrait avoir un taux de 1300ppm, ce qui est assez Ă©levĂ©. Il est important de rincer le plant jusqu’à ce que total baisse Ă  un niveau de 50ppm, ou du moins qu’il s’approche du TDS de l’eau fraĂźche que vous utilisez pour rincer le plant. La couleur de l’eau d’évacuation va s’éclaircir et apparaĂźtra plus propre. Vous devez tirer autant que possible de minĂ©raux dissous du plant. COMMENT RINCER SES PLANTES EN HYDROPONIE Le rinçage des plantes en hydroponie est bien plus simple que de se dĂ©barrasser des nutriments en terre. Les cultivateurs en hydroponie pourront simplement drainer leur systĂšme et le remplacer par une eau au pH neutre. Le rinçage des plantes en hydroponie est aussi un processus bien plus court. Une fois que la rĂ©serve d’eau aura Ă©tĂ© modifiĂ©e, les plantes en hydro n’auront pas accĂšs aux nutriments externes. Pour cette raison, un rinçage de deux jours suffira. LES RÉSULTATS DU RINÇAGE DE SON CANNABIS AprĂšs la rĂ©colte des tĂȘtes, prenez du temps pour bien faire le curing pour atteindre le potentiel le plus Ă©levĂ©. Un affinage correct par curing permet de rĂ©duire encore plus le cĂŽtĂ© rude des tĂȘtes, en Ă©liminant des choses comme un excĂšs de chlorophylle. Vous serez Ă©tonnĂ© de voir la diffĂ©rence que ce petite effort peut avoir sur votre produit. Tout votre travail se sentira dans la premiĂšre bouffĂ©e de cette weed douce comme de la soie, qui caresse la gorge comme du miel. Le plus doux de la nature. Vous pouvez donc amĂ©liorer la qualitĂ© de votre cannabis en ajoutant juste de l’eau ! QUAND ÉVITER DE RINCER SES PLANTES Le seul moment oĂč nous recommandons d’éviter le rinçage de son cannabis est lorsque l’on travaille avec une terre biologique amendĂ©e ou un super soil. Ces substrats ont Ă©tĂ© dĂ©veloppĂ©s avec prĂ©caution afin d’hĂ©berger des micro-organismes bienfaisants tels que des bactĂ©ries ou des champignons. Cette dĂ©licate biodiversitĂ© pourrait ĂȘtre Ă©liminĂ©e et endommagĂ©e par le rinçage. Une fois de plus, l’absence de rinçage ne devrait pas poser de soucis, car aucun nutriment externe ou synthĂ©tique n’aura Ă©tĂ© ajoutĂ© au substrat. À la place, les plantes comptent sur les micro-organismes pour dĂ©composer la matiĂšre organique et la livrer aux racines. May the force be with you đŸ’Ș
Likes
Comments
Share
Buenas a tod@s... Bueno otra semanita mĂĄs de estas hermosas nenas, ya mĂĄs grandes y empezando a desarrollar sus frutos, la verdad q estĂĄn creciendo muy bien, sin problemas, aunq hay veces q la temperatura este un poco alta las voy controlando y van muy bien, este cultivo yo creo q promete para bien... Me gusta ver buenos resultados cada vez q empiezo un cultivo nuevo, super contento y las niñas tanbm... đŸ™ŒđŸ»đŸ™đŸ»đŸ’€đŸ˜ŽđŸ’ȘđŸ» Buenos humos para tod@s...đŸ”„đŸ”„đŸ’šđŸ’š đŸ‡ŠđŸ‡·đŸ€đŸ»đŸ‡Ș🇩
Likes
7
Share
@im_ok
Follow
weather is too hot here , girls is not happy and not going well but they are resist 😁 we will see what hapəned to end ...🙄 6 weeks done 🙏
Processing
Likes
14
Share
So, this is my first grow, just starting out. After NJ passed recreational weed, I was like you know what... Went on an amazon spending spree and got some seeds from cropkingseeds and this is it! I let the seeds soak for 18hr in deer park spring water w/ 1 drop of Organic Liquid Seaweed and Kelp Fertilizer Supplement by Bloom City. At the end of soakage, it didn't look like any had cracked maybe one did not so sure. So I did up the papertowels according to the video and have to say I feel a little nervous/anxious that there is too much water/weight on the seeds and feer drownage. I'm going to keep it on there though. I check the towels a few times throughout the day and am surprised they're very moist throughout the day and next morning still somewhat damp. 24 hours in the towels I check my babies and one had cracked but the rest were still sealed up tight, unwilling to share the goodness that we all so desire, cmon babies crack that shell for papa! 11/12 looked like 1 seed popped, yay! I remoistened towels a bit but didn't wanna soak them. I also put some rapid rooters in water to soak overnight gunna throw the seeds in them in AM... I was going to do it tonight but figured I should wait see if some pop out more. 11/13 OMG upon checking seeds at 07:10 I found the papertowels like bone dry OMG WTF!!! Panic sets in but I just set up the little terrarium with 6 plugs and put the seeds in and tore some plugs off bottom of a plug to cover seedhole with. 11/14 Got a sprout! YES!! The plugs look nice and moist just going to let it go! 11/15 Woke up this mornin, saw a new sprout peeking thru and then another about to! I got ansy and took off the little top plugs and found all the sprouts were coming up! Leaving the top plug off, hopefully thats not a bad idea.
Likes
12
Share
@Borberad
Follow
Woche 7 Die Umstellung auf BlĂŒte wurde gut ĂŒberstanden, jetzt wird vorsichtig weiter trainiert und sachte entlaubt, um den 6 Trieben mehr Abstand und Licht zu geben.
Likes
4
Share
@DeadJoke
Follow
I just uploaded the near full blossom condition! may be .. i will upload another run
Likes
11
Share
Welcome to Flower Week 8-9 of Divine Seeds Auto Black Op1um I'm excited to share my grow journey with you all as part of the Divine Seeds Autoflowering Competition 2025. It's going to be an incredible ride, full of learning, growing, and connecting with fellow growers from all around the world! For this competition, I’ve chosen the Feminized Automatic strain: Auto Black Op1um Here’s what I’m working with: ‱ đŸŒ± Tent: 120x60x80 ‱ đŸ§‘â€đŸŒŸ Breeder Company: Divine Seeds ‱ 💧 Humidity Range: 50 ‱ ⏳ Flowering Time: 8W-10W ‱ Strain Info: 25%THC ‱ đŸŒĄïž Temperature: 26 ‱ đŸ” Pot Size: 0.5l ‱ Nutrient Brand: Narcos ‱ ⚡ Lights : 200W x 2 A huge thank you to Divine Seeds for allowing me to be a part of this amazing competition and Sponsoring the Strains. Big thanks for supporting the grower community worldwide! Your genetics and passion speak for themselves! I would truly appreciate every bit of feedback, help, questions, or discussions – and of course, your likes and interactions mean the world to me as I try to stand out in this exciting competition! Let’s grow together – and don’t forget to stop by again to see the latest updates! Happy growing! Stay lifted and stay curious! Peace & Buds!