Likes
Comments
Share
@HookahCli
Follow
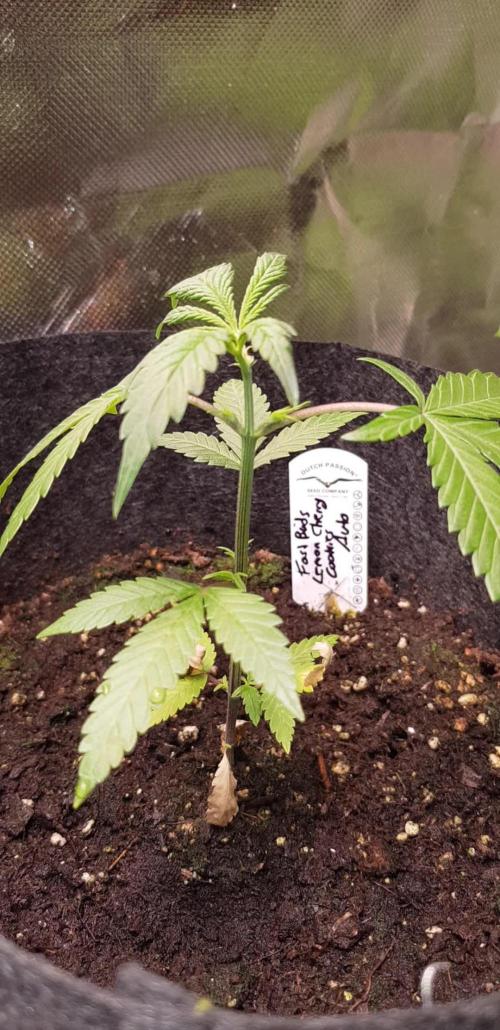
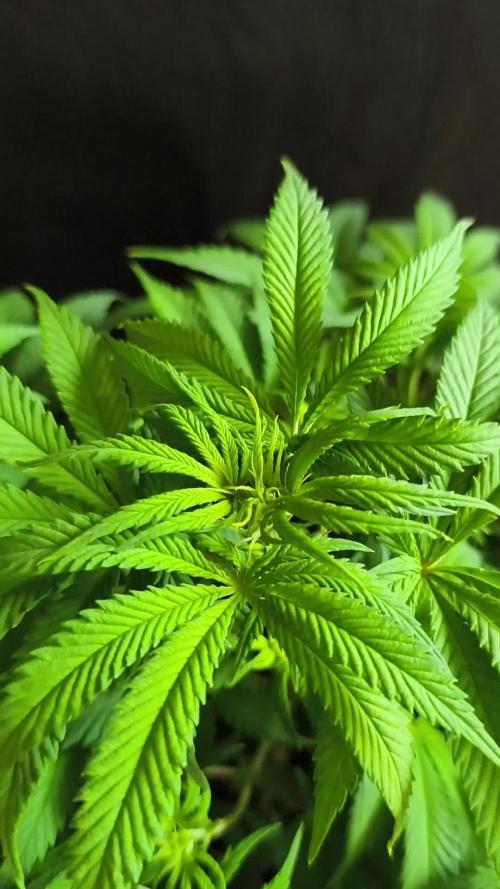
d39 ya no me caben dentro del Indoor, debajo del foco pequeño que tengo. Todavía se espera lluvia para la semana que viene, pero no caben y temo que alguna se ponga a florar por estrés, entonces las sacaré al exterior y las aclimataré. d40 Las he sacado a exterior , no les da mucho el sol, están a media sobra, esperemos que no se pongan a florar debido al cambio de fotoperiodo, son menos horas que en el Indoor, podía pasar, lo bueno es que las hemos sacado y ahora cada día están aumentando las horas de luz, mas o menos cada día tenemos 2 minutos más de sol, uno por la mañana y otro por la noche, amanece antes y se va más tarde poco a poco, si se adaptan bien, van a crecer mucho, pero si se ponen a floración veremos que hacemos, esperemos que no pase. Se le han puesto unas piedras para que se aguante la maceta, es de 2LT y con que haga viento la maceta se va al suelo y no queremos que pase eso. También se ha quitado el primer par de nodos LBP(Lower Branch Pruning), que normalmente salen ramas que no llegan a ser gran cosa. Se han quemado del sol, se ve que les da directo y no lo han soportado y se han secado, la tierra esta bastante seca al igual que muchas hojas, por suerte me he dado cuenta al cabo de unas horas, no esperaba que el sol ya pegase tan fuerte, las he cambiado de sitio y se han puesto donde no da el sol directo en ningún momento del día y están solamente a la sombra. Se han regado con un poquito de agua para que se recuperen, les he puesto una maceta más grande por fuera para que si diese el sol, que no le de a la maceta de dentro(2L) que es más pequeña y se calientan las raíces. d42 Se han regado y añadido aminoácidos(más Pro XXL 42% Aminoácidos) ya que eso ayudará a que la planta se recupere, por la tarde-noche les da el sol, no hay otro sitio que le de menos el sol directo, se han secado un pelín más la hojas, pero los brotes nuevos están blanditos y parece que las plantas seguirán creciendo bien.
Likes
50
Share
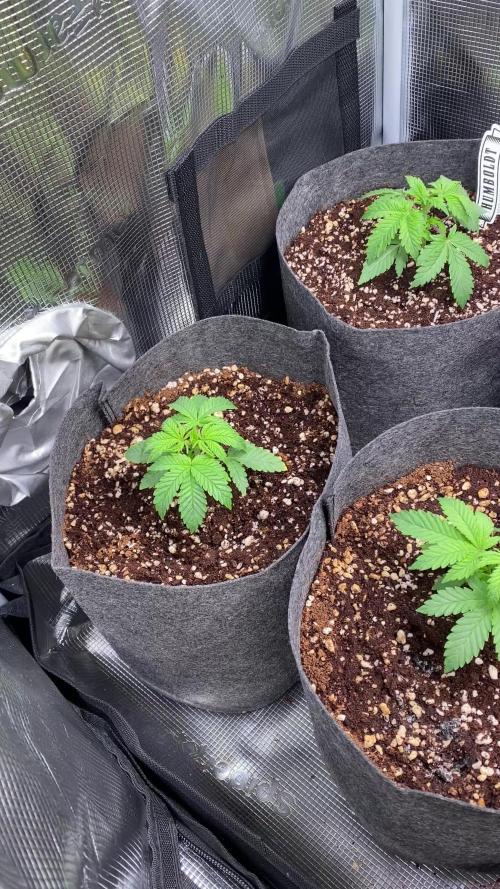
Room setup rundown, examples of bud, et al in pictures... Seedlings/Clones lights - Viparspectra XS1500. Vege lights - Mars Hydro FC-4800 Flower Lights - 650w 3400K 1900umol/s PAR, (3) 226w DIY 2900K 630umol/s PAR (678w and 1890umol/s), Substrate - 50/50 sphagnum peat moss and vermiculite in 5-gallon pots Climate Control - Luckily, the lights, winter and normal furnace use all equate to a decent temperature, though a bit on colder side in in vege phase, sadly. Humidifier is needed early and later a dehumidifier is needed when canopy develops. I only grow in the winter months. Irrigation - do not use the emitters in this diary. They suck a big fat dick to skip a line to suck a bigger dick. Use the pressure compensating type. https://growdiaries.com/diaries/232811-strawberry-cookies-og-r1-cherry-diesel-bbgs-ego-epg-ebg-grow-journal-by-001100010010011110/week/1366923 -- use something similar to those. They come in different shapes, too. Basic process The little light takes care of seedlings in 2.5" wide seedling pots until first up-pot. The 1-gallon pots fit well under the FC4800 in a 4x4 tent until day 21 after sprout. I plant 150% or more of what i need, so i can kill the weak without concern. The goal is for every plant that makes it to the 5-gallon up-pot being capable of producing a minimum of 160 grams with a maximum of a 35-40 day vegetative phase. Third up-pot is into 5-gallon nursery pots and now under the 3 DIY lights and the 650W light in the big tent for a couple more weeks of vege. An irrigation system in the big tent saves a lot of time. One scrog for training and another for support, just in case. Reverting back to a more systematic approach to canopy composition moving forward. About 2.3 colas per sq ft and 8 primary colas per plant. Yields were similar when over-crowding and being less systematic, but the proportion of less dense nugs is greater and trim time is needlessly elevated because of that fact. I was very controlling about this the first couple years but got away from it for far too long at this point. Drying / Curing - Into mesh racks for 9 days. I wet trim and cut down to similarly sized buds for even drying. Temps are controlled around 68F and RH is set to 60%. Then into some 5-gallon buckets with gamma seal lids and (3) 2-way 67g boveda humidipaks (58% or 62%) in each bucket - 1 at bottom, 2 at top. Temp/RH probe confirms that they hold the RH steady at 60-63%. Cost - 0.33 cents (USD) per gram produced. This includes an accelerated depreciation expense for all equipment used, fertilizer, water, electricity for all equipment used, new filters and other yearly purchases - bti, ph strips, sticky traps, etc. I'm a finance guy, so these numbers are comprehensively accurate and purposely err slightly on high side of cost. The only facet not included is the cost of my labor.
Likes
21
Share
A-Week 10(Day 74), B&C-Week 10(Day70) A- Still fattening up, took a Growmie’s advice, she was a little over fed, eased back this week on the nutrients and just used water and Sensi CalMag Extra. Gave her a regular dose Friday and she seems good, no new discoloured/burnt leaves. Tricomes are still showing as clear and cloudy mixed in with a few amber here and there. Watching closely to when I feel she is done, then I will start a water flush cycle for the last few feeds… B- Is looking great, doesn’t seem to have slowed down one bit, hard to tell sometimes when you are looking at them so frequently, but week to week you can see the stack grow 😍 Defoliated a little, and pulled her branches down a bit to let in more light, otherwise she’s chugging along! C- Is making me wonder how much she will produce?! Big colas all around, from 10-14 inches long 🤩Stacking very well, and loving the Indo Nutrient line. She’s a big drinker, takes almost a full gallon every 2.5 days. I figure it will be at least 1-2 weeks longer to harvest than A… Happy Gardening Growmie’s 🌱😎💨
Likes
33
Share
Welcome to GERGrowDesigns Breeding Cut Phenohunt #1 Diarie Week 10 (Flower Week 3 Day ~23 Since 12/12) This diary is designed for a documentation of an indoor grow, with a strong focus on plant health, environmental control, and optimized nutrient strategy to hold this Genetic and use her for Breeding in Future projects . The Harvested Mother Plant ,can be found in the older Strawberry Cola Sherbet Diarie💚 What happend in the past ? -Cut removed from Mother in Flower Week 2 -Clonex Gel used ~10 days Rooting Process - 2-3Weeks Revege Process -transplanted in 0.3l pot -transplanted in 12litre pot + Bigger Tent -Plant/Health/Root Care -Motherplant Feeding Shema , low EC , Spraymix -Took 9 Cuts From The Plant -Took 6 Cuts From The Plant -Feeding Shedule for Regeneration and Growth -Prepared New Mother Plant -Last Veg Week before Flower -tent move in bigger Home 100x100 -light Switch to 12/12h ,its Flower time 15.03 -One Time nutriets Boost for Flower Switch & Stretch -ScroG Install and Daily Training in First Flower Weeks Grow Setup & Strategy: • 🌱 Genetics: Strawberry Cola Sherbet -Sweet Seeds • 🏕️ Grow Space: 100x100x200cm • 💡 Lighting: 1x200W LED • 🌡️ Average Temperature: ~26°C • 💧 Humidity: ~50% • 🍵 Pot Size: 20L • 🌿 Base Nutrients: Hy-Pro • ⏳ Flowering Expectation: 5 weeks Flower Week Three is Done , Media is from 09.04 flower Switch was at 15.03 (12/12) Flower Day ~23 , looks like shes taking the shortcut of 4-5 Weeks Flower Again Like the Mother 🎯 Isnt it Fascinating how Fast some Strains can Develope After Switch🏆 she will probably overun my other Photo Tent which changed 2 Weeks before to Flower 🌱 Also Special attention will be given to Hy-pro during all phases, aiming to enhance Structure , nutrient uptake efficiency, and final quality, while closely monitoring plant response. Feedback, questions, and constructive discussion are always welcome. Community interaction is a key part of what makes competitions like this valuable. 🌿 Happy growing & good luck to everyone!
Likes
8
Share
“Since we have very little space, we have to use this area smartly, and that means a lot of training and trimming. I did everything I could. I know I should have topped them earlier, but since I only had one chance (because I don’t have any more seeds), I had to be careful with these beauties. After the 5th node, I topped the plants and took clones. After that, I waited a little bit for the recovery process. Then I replaced the male plant’s pot with a 1-liter one and cut it back very roughly. I want to create a bonsai-style plant from him only for breeding. For the female plants, I did Low Stress Training and some defoliation. After a while I topped them again. This will increase the amount of product, but at the same time it will also increase the vegetative time by about one week. In my opinion, this is actually a really good thing, especially if you are working with very little space like me.” In my country, which is a legalized country, you can buy 3.5 grams of weed for about 70 dollars. I spent approximately 150 dollars on this cabin, and that includes electricity bills and fertilizer. That means the whole setup is only worth about 6 grams of weed. Now, the vegetative time for this run can be around 6 weeks. But since I have a clone room, I can replace the seedling stage and skip a long vegetative phase earlier. That means I can take a harvest every 3 months (every 90 days). So my goal is 90 grams from this system. I know it’s a very low yield, and my first goal is actually to breed plants, create my own genetics, and build a sustainable system so I no longer need any dealer or have to wait all the time. It’s not good for my life or my money. So, 90 grams of weed equals 1,800 dollars every three months. I spent nothing — not even on seeds. I didn’t pay any money for them. These are just dealer weed seeds. This project represents that you can do everything DIY when growing weed. Because, like its name, it’s weed. It’s basically a bush. Even with a little chance, they can survive. Let’s look together at what will happen.
Processing
Likes
7
Share
@Mrg7667
Follow
(Week 36) installed another oscillating fan to dry up top soil faster. Started getting allot of knats also realized that vacummingnuo my stagnant water is definitely the way to go. Finally feel like im getting back to normal!
Processing
Likes
14
Share
Water rainwater + epsom salt and diluted nutrients with more total water of 180 ppm ph 6.2 temperature of the 20 ° solution, gradually using more water due to the 10% runoff temperature, slightly relieving the roots without much removal, sprayed with water without ppm complement due to perspiration and water loss when it's hot, more soil around the stem "I made some abrasions around the stem that is now covered with soil in order to create more quick roots, added more mycorrhizae around to heal and root and stretch with mycorrhizae. Always covered with coconut fiber so it doesn't dry quickly without absorbing enough, I really need one more exhaust fan to pull in fresh cold / fresh air from the outside in, and limit one little use of fans since air conditioning is not part of my plans at the moment.
Likes
25
Share
Day 15 18/07/24 Thursday De-chlorinated tap water pH 6 with calmag 5ml -5L. I have scratched back surface soil, and topped up with canna terra pro and DyNoMyCo ✌️💚 Day 16 19/07/24 Friday Lite Feed today, 250ml each pot small run off. Seeing excellent start to these babies. Let's get it 👌💚 Day 18 21/07/24 Sunday De-chlorinated tap water pH 6 with calmag 5ml to 5L. Watering in 1L each day from now. Updated video Day 19 22/07/24 Monday Nothing new to report. Starting to see them beautiful fans appear that's all 😁✌️ Day 20 23/07/24 Tuesday Feed today, giving them straight all nutes Inc flowering nutes. I will update the dose as they grow and develop a bigger hunger. Video updates 👌💚 Day 21 25/07/24 Wednesday END OF WEEK Still no water or feed since Tuesday, it has been overcast last two days though so not a lot of energy been used. Still happy and healthy 💪💚
Likes
4
Share
@Selkot
Follow
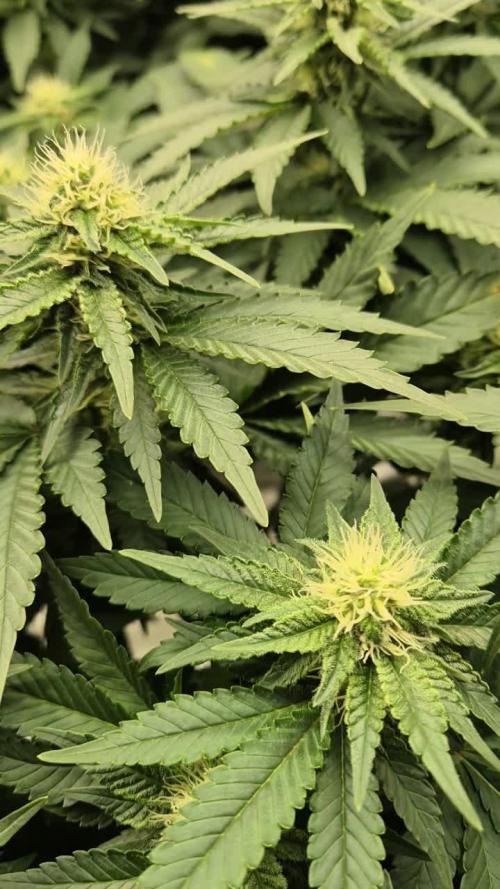
Despite the return of some rain (finally! 😊), temperatures are still high, once again reaching close to 30°C around midday. This weather seems to suit my Strawberry, whose stretch is slowing down, while her buds are now visibly starting to develop. The leaves in the greenhouse are becoming supple again. I kept the feeding very light throughout the week, and the substrate feels more aerated today. I’m still keeping things modest for a few more days before increasing the P and K.
Likes
33
Share
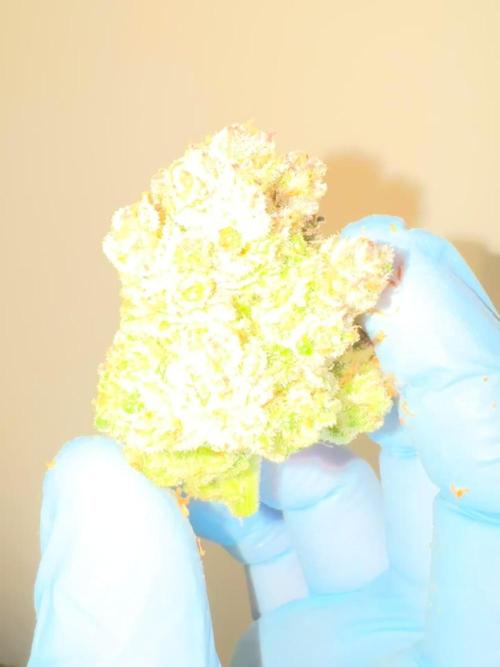
This strain smell is best. It's sweety orange smell and the buds looks nice and frosty
Likes
9
Share
@BUZIMAN
Follow
Elle commence à bien grossir et bien sentir aussi ! 😎
Likes
8
Share
@dillande3
Follow
Hello! Day 28 Lemon Haze, looking good, I did first topping and started LST training, Light 50% 12-14 inch distance hope its ok only for this week and next week i ll turn it in to 100% reason for this i have small seedling there same zone, pls correct me if i am doing it wrong thanks GD community. I also got some white Dots , about this i ll ask a grow qus. Thanks
Likes
36
Share
@nonick123
Follow
Día 37 (08/07) Ajustes de LST en todas las plantas! 🚀 Día 38 (09/07) Ajustes de LST en todas las plantas. Las ramas inferiores están creciendo como un cohete! 🚀😍 Riego con 250 ml H2O pH 6,5 Día 39 (10/07) Las plantas se muestran sedientas! Creo que el cepellón está lleno de raíces y piden el trasplante! El crecimiento no se ha visto afectado de momento Riego con 500 ml H20 pH 6,5 Día 40 (11/07) Paso a regar con 500 ml / día, ya que hace mucho calor (30 ºC) y efectivamente las plantas ya han copado la maceta de raíces Las ramas de nodo inferior se han quedado enanas tras el entrenamiento, de modo que las elimino y aplico canela en polvo en los cortes Riego con 500 ml H20 pH 6,5 Día 41 (12/07) Riego con 500 ml H20 pH 6,5 Clones! Mi experimento vuelve a demostrar que NO necesitas complejos productos de clonación ni sistemas para obtener clones! Hace 15 días puse 2 clones con el tallo sumergido en miel durante 5 minutos en una maceta de 400 ml con PRO-MIX HP BACILLUS + MYCORRHIZAE He mantenido la humedad alta con una cúpula de humedad casera hecha con una botella de agua PET de 5 litros cortada por la mitad y pulverizando a diario. Han estado los 15 días en mi terraza con luz indirecta, y temperaturas que rondan los 30 - 32ºC durante las horas centrales del día Hoy los he trasplantado a una maceta de 1 litro porque ya habían formado raíces y empezaban a formar nuevas hojas! 🐥🐥🚀🐥🐥 Día 42 (13/07) Riego con 500 ml H20 pH 6,5 Día 43 (14/07) Trasplante a maceta definitiva de 21 litros de ROOTPLUS Pot de GSKOREA GLOBAL! Estas macetas son una maravilla! Proceso de trasplante: Se prepara con 17,85 Litros (85%) de sustrato PRO-MIX HP BACILLUS+MYCORRHIZAE + 1,05 Litros de Humus de Lombriz (5%) + 2,01 Litros de Insect Frass (10%) + 210 gramos de Earth Vibes Super Soil (10 g/L substrato) Se llena la maceta de sustrato con las manos (limpias) y rompiendo los trozos más gruesos, para que el sustrato esté aireado y esponjoso, sin presionar Se coloca una maceta vacía de 6,5L para que quede la forma perfecta de la maceta donde están actualmente Se espolvorea la parte proporcional de la probeta de microorganismos sobre el agujero de trasplante Se saca la planta de su maceta actual (bonitas raíces 😍) y se coloca en la maceta final Se riega muy lentamente hasta percolación profunda con H2O EC 0,5 pH 6,5 Una vez asentada, complemento con un riego de 500 ml con 25 ml/L de Humus de Lombriz Liquido Se coloca mulch (acolchado) de paja para evitar traspiración excesiva y cuidar a los microorganismos del suelo A ver como reacciona al trasplante! Aplicación foliar Kelp hidrolizado de Lurpe Solutions a 0.25 ml/l Realizo ajustes de LST aprovechando el trasplante a la nueva maceta. De momento tienen una canopia muy bien formada! 💦Nutrients by Lurpe Solutions - www.lurpenaturalsolutions.com 🌱Substrate PRO-MIX HP BACILLUS + MYCORRHIZAE - www.pthorticulture.com/en/products/pro-mix-hp-biostimulant-plus-mycorrhizae
Likes
4
Share
Sono arrivate alla ottava settimana di fioritura e le parti apicali delle infiorescenze sono già pronte per essere raccolte tra qualche giorno o settimana. Verranno raccolte in modo graduale e poi le rimanenze trasferite in outdoor per farle rigenerare. Due varietà impeccabili sia la Dutch cheese molto abbondante e resinosa, mentre la mimosa cherry kush ha un profumo molto speciale e fruttato, strutturalmente sono delle varietà ottime, rimangono di dimensioni medie ed i fiori sono di qualità molto raffinata! Sarà una bella raccolta di qualità.
Likes
3
Share
@Redeyebud
Follow
EC Problem not solved yet. Clear water: 0.67 With nutrients: 2.5 Just trimmed some leafes. Vanilla Kush is slowly getting better but deep cheese is getting really huge.
Likes
7
Share
FASTBERRY (Fastbuds) 21 Days from sprout. Still a little easy with the nutrients this week. She seems to be doing well. I tore a small piece of a fan leaf by accident! Was considering some LST, possibly pony tailing. Although I did start some bending and securing of the main stock to try and open up some of the mid level to the light.
Likes
33
Share
@SkunkyDog
Follow
Hallo zusammen 🤙. Habe ihr diese Woche nur Wasser gegeben. Werde sie diese Woche ernten. Sie bekommen 20 % Rabatt bei Zamnesia und der Code lautet ZAMMIGD2023.
Likes
22
Share
@Rap_a_cap
Follow
7.21 ft tall, sturdy branches in the final days of preflowering. Absolutely no defoliation or fertilization, the soil provides for all nutritional needs, for now. Maleb is in flowering, very early girl.
Likes
49
Share
@Regenwurm
Follow
Die letzten Woche bleibt es nun mit dem Klima noch schwierig! Die Luftfeuchtigkeit und Temperatur im grünen Bereich zu halten mit sehr hohen Außentemperaturen….. der neue große externe Entfeuchter ist in Betrieb genommen ….er macht seinen Job ! Der Externe Entfeuchter im Vorraum entfeuchtet jeden Tag zwischen 5-7 Liter! Diese Woche eine minimale Entlaubung gelaufen …. Diese Woche gab es nach dem fluchen mit canna flush keine Nährstoffe mehr ….ich habe die Pflanzen nochmal mit 40 l gespült….der ec im drain wurde danach gemessen …. Danach immer noch 1,1-1,2…. 3 Tage gewartet und noch mal mit 40 l gespült…. Danach dann ec 0,7 so bleibt es nun…. Den ph habe ich beim letzten flushen auf 7 gesetzt da die wurzeln nichts mehr transportieren sollen…. Der Herbst muss schnell her 😁( 1 mal als erstes geflusht mit Canna flush mit 15 l pro Pflanze) Die tricome sagen das alles fertig ist. Ich warte noch bis das Substrat ausgetrocknet ist und dann wird sofort geerntet .zum abreifen auf 70 % runter gefahren , Nebeneffekt ist, geringere Temperatur im Zelt und das ist gut… Tage der Keimungsphase = 4 Tage Tage in Wachstum = 52 Tage Tage in der Blüte = 68 Tage Gesamt = 124 Tage Wachstum h (in einer Woche)= 0 cm 2 mal in dieser Woche mit Purolyt Mischung 1:25 besprüht Lichtstärke: 75 % PPFD: ca. 800 umol Lichtabstand: 35 cm Std Tag/Nacht: 12/12 Temperatur Tag: ca. 25,5 Grad RLF Tag: 55% Temperatur Nacht: 21 Grad RLF Nacht: ca. 55 % VPD Wert: ca. 1,0 PH Wert Wasser/Düngelösung: 5,7 -7,0 EC Wert: 0,7-1,2 Ventilator Oszillation: Stufe 1 Befeuchter: Aus Entfeuchter: an Bewässerung: manuell alle 3 Tage geflusht Purolyt Besprühung: 2 mal Controlling: Grow Control Dünger: Canna Coco Licht: Pro Emit Vollspektrum Abluft: EC Carbon Active 750 m3
Likes
23
Share
25.08.2025 Recovery-Week! Die Afghan Kush befindet sich auf dem Wege der Besserung und ich bin happy, happy, happy 😍 Wie prophezeit, ist die Zkttlz OG mittlerweile die größte und schönste Pflanze. Da sie eine Woche zurückliegt, konnte ich rechtzeitig mit der CalMag-Gabe beginnen. Also, Pro-Tipp: Aptus Dünger immer mit CalMag supplementieren. 28.08.2025 Die erkrankte Afghan Kush findet so langsam zurück ins Leben und streckt sich ganz gewaltig. Womöglich habe ich ihr, durch zuviel Wasser, auch noch den Rest gegeben 😅. Aber Hey, here she comes! Leider fallen die anderen Beiden gerade etwas ins "Pflegehintertreffen". Eigentlich brauchen sie mich gerade gar nicht 💜 30.08.2025 Der Afghan Kush geht es sehr viel besser. Die Blattdüngung mit Bittersalz haben alle drei gut vertragen. Allerdings war dies mein erster Aptus-Run und womöglich auch der letzte. Ich hoffe, dass es alle drei irgendwie bis zur Ernte schaffen und bitte, bitte auch ordentlich Ertrag bringen 🌸
Likes
18
Share
Muy buenas amigoooos!! Aquí dejo una nueva publicación de otro par de las matas de mi amigo que como podéis ver para colmo después de todos los problemas que an pasado.. Para colmo cogieron araña algunas de ellas, como podéis ver la Royal Domina a sido la más afectada pero hemos podido sobrellevar el cultivo y finalizarlo a pesar de esta plaga tan temida, la hemos combatido con aplicaciones foliar es de agua muy fría y mucho aire para que no se reproducieran más y las que estuvieran se fuesen y la verdad que a resultado bueno a podido cosechar algunas ya. Solo le quedan tres ejemplares en vida que lo iremos viendo estos días, lo dicho.. Espero que os guste!! Buen día y buena semana!