
Likes
Comments
Share


@love_2_grow
Follow
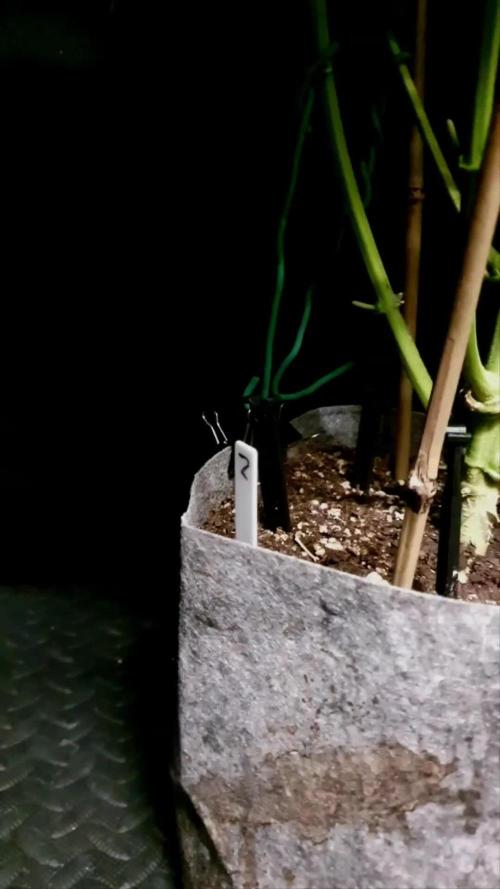
FD36 - True to form I completely forgot to take any pics before the lights were out. The third week in a row. I'm detecting a pattern... lol
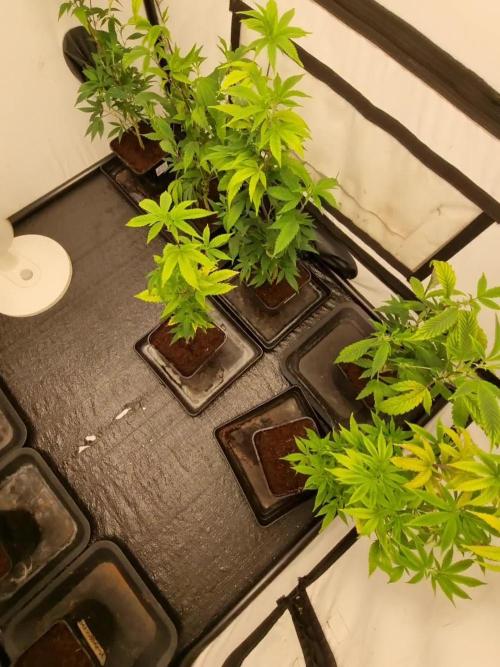
FD37 - Pics!
FD38 - Today, I was proactive in trying to prevent botrytis (budrot) since I have had problems in the past when temperatures and humidity get too high in late flower.
I started with defoliating hard by removing fan leaves. That should lower the humidity in the tent as there are fewer leaves to transpire moisture, and also increase the airflow around the buds.
Finally, I put my small humidifier in the tent to further lower the humidity.
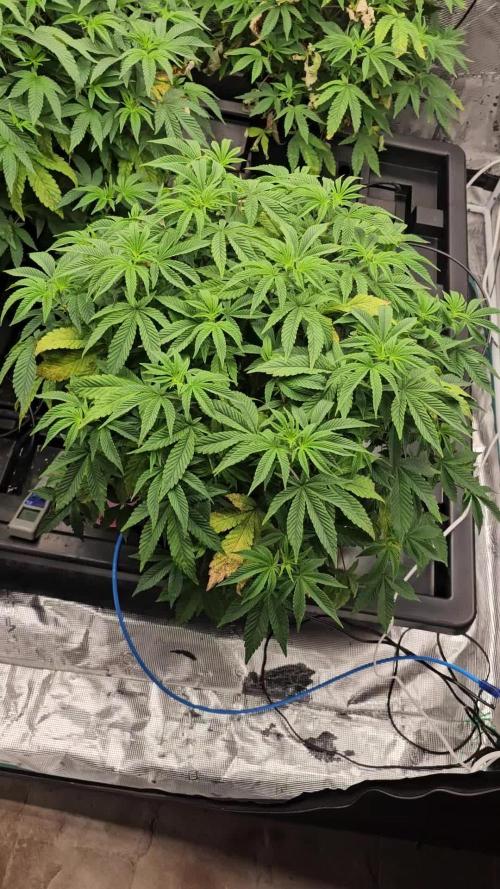
FD41 - The anti-humidity measures are working. The tent went from an average RH in the high 60s to the high 40s. (The average RH in the last 24 hours was 48.9%.) I'm happy with that, which should be enough to avoid budrot. Better safe than sorry, so I did additional LST to open up the plants and thus increase the airflow around the buds. It's also helpful to increase light penetration, so win-win.
FD42 - We're at the end of the sixth week of flower, and things are chugging along in the tent. The buds are slowly fattening up, but it will take some time before they are done.
There isn't much to do in the tent this late in flower besides watering. Today, each girl got 2.5-liters of water @ pH 6.5.

Likes
5
Share


@Dendegrow
Follow
Apple Strudel Auto – Week 5 of Flower 🍏🌸
Okay, she took her time, but now it’s really starting! 🕰️💥
The buds are finally forming and she’s already standing tall at around 95 cm 📏🌿
No trichomes yet, but structure and growth are looking 🔥
She’s the biggest one in the garden and seems full of potential 🍎🌞
Can’t wait to see how frosty she’ll get in the next few weeks! ❄️👀
Apple Strudel Auto – Blütewoche 5 🍏🌸
Okay, sie hat sich Zeit gelassen, aber jetzt geht’s richtig los! 🕰️💥
Die Buds bilden sich endlich und sie steht schon bei etwa 95 cm 📏🌿
Trichome sind noch keine da, aber Wuchs und Struktur sehen top aus 🔥
Sie ist aktuell die größte im Garten und scheint ordentlich Potenzial zu haben 🍎🌞
Bin gespannt, wie frostig sie in den nächsten Wochen wird! ❄️👀

Likes
2
Share

@LittleBigTrees
Follow
Defoliated and cut them back ready to flower them.
Took some new cuttings of both phenos.


Likes
16
Share


@CzAlmighty
Follow
hello friends 🍰🍰🍰🍰
frequent watering of flowers. sprays. 💧💦💦
I try to tie a flower for the good LsT.
Please leave me here like if you read these words. I wonder if anyone reads it at all.😅
Have nice day friends 💚
Likes
18
Share


@Kmikaz420
Follow
Voilà dernier jour avant de couper .
Demain la plante aura 14 semaine j ai pousser la flo et le flusch un peut plus que d habitude (histoire d avoir le plus de chance possible d avoir se goût et odeur de chewing-gum à la fraise après curring) voilà voilà encore un grow qui c est super bien passé (chose abituel chez fast bud mais qui mérite d être sous ligné !!! Leur plantes sont vraiment assez simple à faire pousser et surtout elles autorise LES ERREURS DE DÉBUTANT. ...du style ph non ajusté. Excès d engrais ou trop peut ...toutes ces chose font que même des débutant arrive à avoir une weed d excellente qualité après 10..15 semaines (je rappel qu une photoperiodique devrais pousser presque le double de temp!!! )
Et au final l herbe est souvent aussi forte voir plus forte que les strain photoperiodique !!! Et pour tous cela merci fast bud
On se retrouve pour smoke test !!!! J ai hâte
Likes
14
Share


@Echevarriaf
Follow
I have been having some sorr of issue and can Not figure out what is causing my leaves to yellow..? Heat stress? I am having issue with RH staying above 30. It not hot in the box but i can not make it humid in there no matter what i try. Shes still growing string and has a great root ball. She also is so compact that I can not lst her to get her side shoots out. She is thick like a pencil with at least 6 nodes at only 5 inches..?

Processing
Likes
18
Share


Likes
2
Share


@DRXXI
Follow
Tag 71, die 11. Woche hat begonnen. Die blüten wachsen weiterhin und nehmen an Volumen zu. Ich werde nur noch einmal mit halben Düngeschema gießen und ab dann ohne Dünger weiter gießen. Vorraussichtliche Ernte Tag 80-85.
Tag 76, Spülung beginnt. (gießen ohne Dünger)

Likes
45
Share


@BodyByVio
Follow
Beautiful flower full of trichomes. Smell and test fantastic. Very fast flowering. She was done on day 49 but I cut her down few days later.
I love the strain, the only thing that I will like this strain to have is a better yield. Beast quality buds I ever grew.

Likes
33
Share

@Hashy
Follow
********************************************
📋 Comments
I really like the structure of this plant, and I'm tempted to do another just because she looks awesome.
📋 Data
Seed to havest=114 days.
Veg time=28 days.
Flower time=86 days.
Wet weight=805g
Dry weight=86g
📋 Smoke report
This smoke is nice, slight skunk taste with a bit of a sour lemon after taste. Strength wise I'd guess she'd be around the 25% THC mark.
📋Grow stats for GDG 23
#1 Runtz=50g
#2 Fat Bastard=86g
Total=136g
Lights on.
20hrs×7days=140hrs
18hrs×21days=378hrs
12hrs×86days=1032hrs
Total hours=1550hrs
Light power=159.09Kw
Rad power=105.69Kw
Extractor=39.93Kw
4 gang=50.91Kw
Top fan=21.36Kw
Total electricity=376 98KW
Electricity cost @£0.25/Kw=£94.25
Average light power a day=1.4Kw
Average watt per hour=102w
g/watt=(136÷102)=1.33g/w
£/g=£0.73/g
📋Final word.
Trimed on the 14/6/25. Trimming was quite easy, not to long in trim jail. 86g of solid nugs and 7g of nugs I couldn't be bothered trying to trim, they can go with the trim for hash. I would highly recommend growing this strain.
Back soon.
Take it easy.
********************************************

Likes
49
Share


@Guerilla_Jack
Follow
End of fifth week of flowering!!All four girls looks really fine.Cant't wait to smoke 😋😁


Likes
63
Share


@AsNoriu
Follow
Day 15. Girls are bad, will recalibrate ph meter and give first nutes, very strange grow, looks like all 4 cookies want to selftop aswell ..
Cant get a brake ...
On some girls see nutes def, so my guess is that ph meter went wrong and i have all those mutations or shitty seeds ;)))))))))))))
Day 16. Recalibrated ph pen and fed them with first full nutes.
Lets see, cookies looks really sad, 3 gorillas are ok, bunny gorilla will have two main stems - funky ;))
Day 17. Girls responded well to first feed, still sad situation with most of cookies.
I plan to veg them long, so bad grow rate is not a problem, but health is, one girl is in tragic state, lets hope she will bounce back !
Day 18. Girls start to love life, looks like they responded well to nutes. Worst Cookie show sighns of progress, maybe again she will be that Black Swan story ? ;))
Would start training today before watering, but will give them one more nutes and then will start.


Likes
19
Share


@Tmasm
Follow
Saudações.
Menina está bem, botões formados e lindos 🤩. Agora esperar e torcer 🤞, para que engordam muito e bem.
Ela está ficar com uns tons de roxo 🤩, bem tenho borrifando ela com água de torneira, que tem um ph alto, o alto ph e sua genética deve ficar roxa no final, esperamos para ver.
Bem tenho borrifando ela por ter ácaros aranha na sala, tenho mantido praga controlada. Mas ácaros aranha se reproduzem muito rápido, nunca se sabe bem dia de amanhã.
Bem por agora tudo controlado, menina não foi afetada. Espero manter limpa até ao fim, 🤞 torcer para que tudo corra bem.
Visite Dutch Passion conheça suas novidades e promoções.

Likes
3
Share


@Organic473
Follow
Another Hurricane Beryl Survivor. I will let her dry out for a few days and add come charcoal with molasses for the buds.

Likes
27
Share


@GODSGIFT_2005_JM
Follow
🥊
🍼Greenhouse Feeding BioGrow & Bio Enhancer
⛺️MARSHYDRO
The ⛺️ has a small door 🚪 on the sides which is useful for mid section groom room work. 🤩
☀️ MARSHYDRO FC 3000 LED 300W
☀️Also special thanks to VIPERSPECTRA P2000 (200W) & XS2000(240w) LED growlights
🌱 FASTBUDS 420
Likes
1
Share

@TheBulldozerSicily
Follow
Switch 12/12 - 18/11/2025
Ieri dopo 2 giorni che non andavo a controllare mi accorgo che gli irrigatori erano tappati, quindi non circolava acqua nell'impianto, 2 delle piante sembravano morte che non cel'avrebbero fatta... invece in sole 24 h si sono riprese alla grande, domani cambio acqua e nutrienti
Likes
26
Share


@OGbros
Follow
ciao a tutti,
le piante sembrano stare bene. Da quando ho tolto lo scrog non mi sembra ci siano state molte differenze nella struttura generale delle piante, sembrano stare su anche senza l'aiuto della rete. I fiori hanno iniziato a formarsi, ma ho alzato la lampada di qualche cm perché la punta dei fiori della purple punch stavano diventando albini per la troppa luce (che stava causando il problema), mentre nessun problema nella glookies. Le piante sono alte all'incirca 40 cm e sono molto simili per superficie occupata, tuttavia la glookies ha una settimana in meno di vegetativa rispetto alla purple punch, la quale essendo a forte predominanza indica (10%-90%) si è allungata meno nelle prime settimane di fioritura rispetto alla glookies (30%-70%). La purple punch rimane comunque a mio avviso più compatta e ramificata rispetto all'altra pianta. Ho aggiunto 20 litri d'acqua con la quantità di fertilizzanti scritta sopra e ho aggiunto infine direttamente nella soluzione circolante 15 ml di pH- poichè il pH aveva raggiunto un valore di 6.6.
edit giorno 25: si inizia a sentire un certo odore super dolce. Il pH si è assestato sui 5.9 prima di versare 10l d'acqua con l'aggiunta di
0,8ml/l di floragrow
1,6ml/l di floramicro
2,4ml/l di flrabloom
1ml/l di calmag
Le piante sembrano stare molto bene👌
Likes
4
Share


@pzwags420
Follow
gsc is about a week away from harvest blueberry will be shortly after and og kush plus blueberry muffin are a little longer still, they were slow to start flowering.


Likes
3
Share


@Babaorhum
Follow
Petit problème sur un de mes plant je pense à un blocage nutritif
Je vais donc leur donner 5l à chacune histoire de leur faire un runoff et enlever les sdk minéraux accumulé dans le Substrat
A part sa le strech commence et la bonne odeur se fait sentir 👃

Likes
11
Share


@SteffenX
Follow
week 27
18.10.2024
near harvest
19.10.2024
2nd partial harvest
20.10.2024
ca. 4g of dry buds