


Likes
Comments
Share


Likes
6
Share


@Magical_Surgeon
Follow
After you found some good sector and clone it you let the mycelium grow and fill almost all the petri dish like I did last week.
So now you're ready to move forward.
Making grain spawn!🍄🍄
For grain you can use Organic Rye Berries, but you can also get away with wheat berries, or brown rice or even corn kernels(which I used myself) !
And you'll need some mason jars or honestly I used some jars that I had home just clean them very well and sterilise before using
Making a grain spawn can be broken down into 6 easy steps.
🍄Hydrate Grain By Soaking
🍄Make Specialized Lids
🍄Simmer, Drain and Dry The Grain
🍄Sterilize
🍄Put your agar in the jar
🍄Colonize
🍄Soak the grain by placing it in a bucket, covering in water, and leaving it for 12 -24 hours. Easy.
🍄Drill 1 hole on top of the lid. Right in the center and cover with a small dab of high temperature silicone sealant, and leave it overnight to dry. And your jars are done. There other diff types for different methods like liquid culture etc. But I'm just going roughly through what Ive done.
🍄The next step is to simmer the grains on the stove. This will thoroughly hydrate the grains, and will soften them to make them easier for the mushroom mycelium to consume.
Cook soaked grain on the stove for about 15 minutes. You don’t want to cook it too long, because eventually all the grain will crack and you’ll get some mushy grain spawn. We don't want that. 🧐After the grains have simmered on a low boil, you’ll need to drain them off. What I did is I drop them in the sink with the drain cover on. The grains will drain over an hour or so, after which you can go ahead and fill your jars.
🍄Once your jars are filled, they need to be sterilised.This kills off all the other nasty contaminants in the grain cover the lids in tinfoil (to prevent water dripping into the lid) and then just pressure sterilise them for about 90 minutes at 15 psi.
🍄After that let them cool down. Get your SAB, wipe down the walls with some alcohol wipes and place the jars inside. And wait untill they will be warm to the touch... not hot and painful 😤patience is key. Bring in your plates that had been stored by you in a dark place. And what u have to do is sterilise your scalpel and just accurately and efficiently decide your mycelium into about 10 pieces and quickly place them in your jar. And complete for every jar u make. You have to be very quick. The more you keep you're jar and your agar plates lids open the more cans they will get contaminated. There certain technics you can see online..
🍄Ones you're done close all your jars lids tight and Jake your jar so the mycelium pieces will mix around the jar and place them in the dark place to colonize. And just keep waiting... 😅 Untill the mycelium will conquer your grain. Keep your eyes on the jars, any weird smells or colour during the waiting time.. because that would mean you got a contamination going on. Oh yeah and when about 55% of your jar is filled with mycilium shake the sh*t out of it so it will break the mycilium inside and make spread more faster.
Likes
Comments
Share


Likes
7
Share


@SkullRipper
Follow
Hi Greenies,
Harvest update, Now free from trim jail after 2 x 11 hours to processing the dry buds,
This time round I used the AC infinity Trim set, this was primally used to collect the sift from the trimming, and I was shocked by the amount captured.
(33 gms in total)
As the the flower itself 1.3 kilos after cure, which is a massive improvement on the first run reason being the 2nd run was heavily defoliated especially in weeks 2 and 3 of flowering, allowing only the main bud sites to flower.
Quality of the buds is fantastic really nice dense and hard nugs with fruity aroma and a distinct peach smell.
although I used 2 660 w LED,s I state on the outcome 1000w were used as the lights were only run at 75% max.
I also have a lot of trim that's in the freezer awaiting wash which I will be using on the rosin press.

Likes
17
Share


@OldskoolHed
Follow
Nice harvest. big dense , aromatic buds..super easy to grow. Will grow again.

Likes
21
Share


@BLAZED
Follow
Week 16 (16-6 t/m 22-6)
16-6
Temperatuur: 31 graden (licht aan) 23.4 graden (licht uit)
Luchtvochtigheid: 50% (hoogste) 35% (laagste)
De toppen zien er echt super goed uit, ze worden steeds wat vetter en ze zijn echt goed compact. Het ruikt ook echt heerlijk, als ik de top aanraak dan ruikt het echt super lekker zoet en mijn vingers plakken gelijk! Ik krijg gewoon water in mijn mond hahaha.
Deze week geef ik haar al wat minder voeding, vanaf volgende week alleen afgezuurd water voor de flush.
Watergift: 1100 ml, met 0.2 ml Silica Power per liter, 0.3 ml CalMag per liter en 0.8 gr Calcium en 0.25 gr PK+ PowderFeeding per liter. EC: 0.8 PH: 6.4
17-6
Temperatuur: 31.5 graden (licht aan) 23.8 graden (licht uit)
Luchtvochtigheid: 52% (hoogste) 40% (laagste)
Vandaag de lamp op 100% sterkte gezet.
Watergift: 1100 ml, met 0.2 ml Silica Power per liter, 0.3 ml CalMag per liter en 0.8 gr Calcium PowderFeeding per liter. EC: 0.5 PH: 6.4
18-6
Temperatuur: 32.9 graden (licht aan) 23.8 graden (licht uit)
Luchtvochtigheid: 62% (hoogste) 40% (laagste)
Watergift: 1100 ml, met 0.2 ml Silica Power per liter, 0.3 ml CalMag per liter en 0.8 gr Calcium, 0.4 gr Hybrids en 0.5 gr PK+ PowderFeeding per liter. EC: 1.6 PH: 6.4
19-6
Temperatuur: 32.8 graden (licht aan) 24.5 graden (licht uit)
Luchtvochtigheid: 59% (hoogste) 42% (laagste)
Watergift: 1100 ml, met 0.2 ml Silica Power per liter, 0.3 ml CalMag per liter en 0.8 gr Calcium PowderFeeding per liter. EC: 0.6 PH: 6.5
20-6
Temperatuur: 32.4 graden (licht aan) 24.9 graden (licht uit)
Luchtvochtigheid: 66% (hoogste) 42% (laagste)
Ik weet het niet zeker maar ik denk dat ik een stuifmeel zakje zag en heb dat voor de zekerheid maar weggehaald.
Watergift: 1100 ml, met 0.2 ml Silica Power per liter, 0.3 ml CalMag per liter en 0.8 gr Calcium en 0.25 gr PK+ PowderFeeding per liter. EC: 0.8 PH: 6.4
21-6
Temperatuur: 32.9 graden (licht aan) 24.7 graden (licht uit)
Luchtvochtigheid: 71% (hoogste) 53% (laagste)
Vandaag nog een stuifmeel zakje weggehaald.
Watergift: 1100 ml, met 0.2 ml Silica Power per liter, 0.3 ml CalMag per liter en 0.8 gr Calcium PowderFeeding per liter. EC: 0.6 PH: 6.4
22-6
Temperatuur: 32 graden (licht aan) 23.1 graden (licht uit)
Luchtvochtigheid: 76% (hoogste) 51% (laagste)
Volgens het schema moet ze nu nog 1 weekje en dan kan ze geoogst worden, ik ben benieuwd!
Watergift: 1100 ml, met 0.2 ml Silica Power per liter, 0.3 ml CalMag per liter en 0.8 gr Calcium en 0.25 gr PK+ PowderFeeding per liter. EC: 0.8 PH: 6.4


Likes
1
Share


@Og420gorshok
Follow
Welcome to Week 1 of Bloom! ⚡️🌿
Shifted to 12/12 schedule on Oct 16, kicking off the official Week 1 count from Monday. Tucked the main branches nicely under the ScrOG net and trimmed off redundant fan leaves to optimize airflow and light coverage. Canopy is looking uniform, vibrant green, and primed for heavy flowering! 💚

Likes
4
Share


@FlowerPower559
Follow
This week was busy.. feeding, training, defoliation, trying to figure out how I was going to handle the branches now that they're outside of the bag. This is what happens when you wing it. Worked out well though!
Processing
Likes
2
Share


@dubmusicrocks
Follow
The plant with calmag looking issues is growing height still the others seem to be not, one I didnt trim much is growing much denser nugs, with Crystal's sprinkling out much more than the trimmed /more trained plants. The middle plant is yellowing hard after I fed it tapwater for the first time in a long time. Lots of pistols starting to darken, I'll check trichomes next week.. might feed once more at least.
Likes
Comments
Share


@MrIssa3x3
Follow
Day 49- no real swelling yet. Buds are maturing and getting funky. Mystery bean is the biggest and fullest and just starting to put on some trichs. Still citrus smelling but not my favorite.
Mostly just cronk bud booster and sticky bandit being fed at a very low dosage so mostly water till the end

Likes
6
Share

@eldruida_lamota
Follow
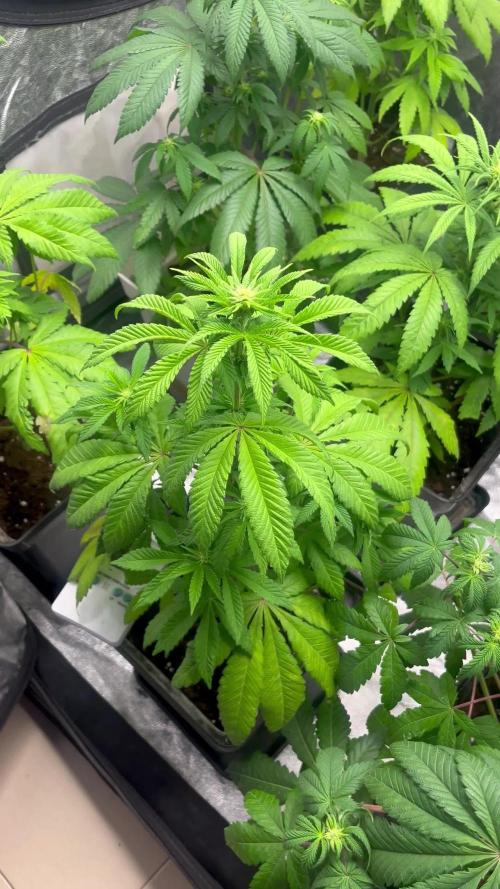
Que pasa familia, vamos con la segunda semana de floración de estas Fishy Zoap feminizadas de Seedstockers.
Vamos al lío ,se trasplantaron en macetas de 7 litros definitivamente.
El ph se controla en 6.0 , la temperatura la tenemos entre 24/20 grados y la humedad ronda el 50%.
El ciclo de floración puse 12h de luz, el foco está al 50% de potencia.
De momento van creciendo a buen ritmo y tienen un buen color, estaban muy bien enraizadas al realizarle el trasplante se notaba la abundancia radicular.
Comentar que llevan un pequeño estrés hídrico debido a la bajada de temperatura , par de grados por la noche, lo cual no absorbieron bien, pero estoy al tanto de solucionarlo.
Gracias Agrobeta por el envío de la Gold series para esta temporada, se vienen cositas 🙏
- os dejo por aquí un CÓDIGO: Eldruida
Descuento para la tienda de MARS HYDRO.
https://www.mars-hydro.com
Hasta aquí todo, Buenos humos 💨💨💨
Likes
14
Share


@fivegrow
Follow
Top leaves are turning yellow probably due to excess light and heat. Temperatures are very high above 30oC in southeastern Brazil. I increased the lighting distance 30cm from the top. QB LM301H 120W

Likes
10
Share


@CVK31
Follow
Went back through my calendar and found that today is first day of week 11 above the soil. Plant is doing really well, som3 of the large lower leaves are getting crispy-curly. Buds are very dense, mostly orange curled up hairs. Mostly cloudy with a lot of amber trics on sugar leaves. Hardly any amber on upper buds. Started flush a week ago but just couldnt bare the thought of stsrving this poor plant so I added a little cha-ching back. Shes super stinky, the most beautiful stinky Ive ever experienced. Ive found that its almost impossible to wash the smell off of my hands! Made a little slide show this morning while drinking my tea. Hope you like it!

Likes
24
Share


@AsNoriu
Follow
Day 86. Almost no sugar leaves, most of trim went to bin, part left for bubble hash. Kind off hoped a bit more from this strain, maybe smoke will bright me up ;)
Day 96. 77 g. went for curing. Smallest from all.
Two month later. Made some bubble hash. Great strain, waiting for sunny day and will make smoke review. Not a lot of bubble, but it was great !
Happy Growing !

Likes
12
Share


@tampert
Follow
A couple of ladies died through the bad weather conditions in the Netherland in May. (candy Kush, Fat Banana, Green gelato). I learned a wise lesson. Be more patient. Once the seedlings started to sprout I already put them outside. If I just took some more time to let them grow a bit. before I put them in the final destination. This would have saved me a lot of headache.



Likes
16
Share


@AestheticGenetics
Follow
4/9/25
This plant is beyond frosty. Stacking up super nicely. Seems like she will yeild quite a bit.
My only gripe is that she has like no smell at all.
Using the foil as a soil cover is working quite nicely. the top soil is getting filled with roots quite well.
Top dressed 1tsp of Bloom
1tsp microbe charge
1tsp bloom

Likes
2
Share


@GermanGrow182
Follow
Woche 2 ist rum und es läuft gut. Alle wachsen gleichmäßig, die eine schneller, die andere langsamer. Demnächst werde ich die ersten beiden toppen. Welche, erkennt man 😉 es gibt nur Wasser, kein Training, kein Dünger, das startet Ende kommender Woche. Es läuft gut 👍 bis nächste Woche ✌️
Processing
Likes
37
Share


@MG2009
Follow
GTH SEED #1 in training, just super cropped on one side to even conopy.
The first site im recording will be a clone,it is on back side of plant and will not produce. #2,#3,#4 pics,#2 is stripped of leaves at about 12 inches.
06/16/18
#4 is showing
pre-flowers,#2,#3, no sign yet. #1 check in the morning.
06/19/2018
Still no pre -flowers on #1,#2,#3, #4 however is female so I Fimmed her to encourage side shoots to grow biggest of wider canopy. #1 reacting well to supercropping 20 tops as of today. Praying she is female🙏🙏. She is a stretchy girl in flower 2 to 3 x her vegged height so trying to be low profile as possible.👍


