Likes
Comments
Share
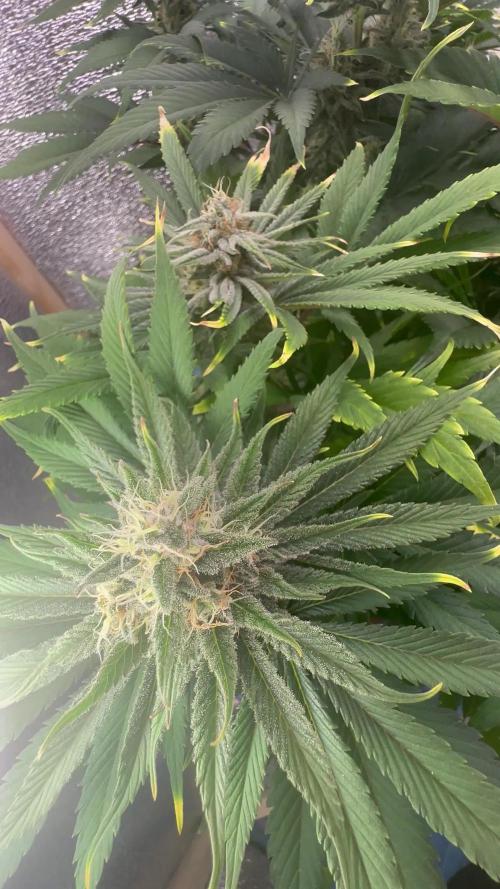
She's one of the tallest ones. I love this strain, for me it's a good nighttime - it's especially great at comforting me to sleep if I have a migraine. 😌 Works like a charm every time. I hope this pheno works like the flower I've had.
Likes
3
Share
10/04 - DAY 71 - Girls are within the harvest window per breeder. Trichomes still immature and 70/30 clear/cloudy - Both girls giving off slight diesel aromas with Jane giving off more strawberry. 10/08 - DAY 75 - Some purple filled trichomes are appearing. Foxtails are starting on Mo. Gonna push for another week.
Likes
Comments
Share
Vamos familia, actualizamos la tercera semana de vida de estas Frosty tooth de Seedstockers, salieron las 5 de 5, 100% ratio Ă©xito. Aplicamos varios productos de Agrobeta, que son increĂ­bles para aportar una buena alimentaciĂłn a las plantas. Temperatura y humedad dentro de los rangos correctos dentro de la etapa de crecimiento. La tierra utilizada es al mix top crop, por cambiar. De 5 ejemplares seleccionĂ© los 3 mejores para completar el indoor y trasplantĂ© directamente a macetas de 7 litros, se ven bien sanas las plantas, tienen un buen color y progresan a muy buen ritmo por el momento. Agrobeta: https://www.agrobeta.com/agrobetatiendaonline/36-abonos-canamo Hasta aquĂ­ todo, Buenos humos 💹💹💹
Likes
114
Share
@Natrona
Follow
Week 4 This week 4/28-5/4 Germination April 6. Week 1 water only Week 2 water only Week 3 added recharge and TPS1 increased ppm to 570. Week 4 continues with recharge and TPS1. I added Fox Cal mag increasing ppm to 685 - 805. 5/1 That was a fun feeding week. I got heavy handed with the TPS1 which put the ppm to 1600= so I had to dilute with more water which changed the ph. So I carefully added the smallest amount oh PHdown..then the PH was 5.08 so then added ph up. Oops too high, let’s try again. Ok finally within range with 6.02. Am I the only one?? Hopefully next week I have better control on the nutes. With my AC controller in charge of the humidifier, I must add 3-4 gallons of water a day. (Getting my lifting exercises in regularly). Girls are fed 2 liters of water every other day. Nutrients: TPS1 7ml per gal Recharge 5 ml/gal Fox Cal-mag 5 ml/gal Took pics 5/1 and 5/3 which show the vigorous leaf growth after only 2 days following defoliation and training. Lemon Drizzle is V shaped with a primary main stalk and a secondary smaller one, With my upcoming vacation, I am going to be hardening off these ladies to relocate to their outside location. Until the plants are big enough to go outside, I will be using my AC Infinity tent and equipment. Once outside, I will be watering with well water and recharge and any additional fertilizers or amendments will be determined at that time. Thanks for the likes and comments, I appreciate all the plant love💚. Have fun & love what you grow 💚 Sending love and light đŸ’« đŸ’«Natrona đŸ’« Pots: 5gallon Air pots Soil Fox Farm Happy Frog Amended with worm castings, dolomite lime and mychorihiza ================================= Equipment: AC Infinity CLOUDLAB 844 – Advance Grow Tent 48”x48”x80” CONTROLLER 69 PRO – Grow Tent Controller CLOUDLINE LITE 6 - Inline Fan 6" IONBOARD S44 – LED Grow Light Board 400W CLOUDRAY S6 – Oscillating Circulation Clip Fan Carbon Filter 6” Nutrients: Total Plant Solution TPS1 Canopy Signal 👉👉👉Lemon Cake Seeds Lemon Cake strain seeds generate typical Sativa buds known for their heavy trichome covering against a bright green background. Let's look at this great strain and learn about its genetics, growing information, and how to obtain it. Cultivar Profile Terpenes Caryophyllene, Myrcene, Terpinolene Strain Type Sativa Difficulty Moderate Height 30 in – 78 in Yield (oz/ft2) 1 – 3 Flowering Time 9 – 10 weeks Harvest Month October Pack Size 3, 6, 12, 24 Seed Type Feminized Brand Premium Cultivars The History of Lemon Cake Strain Seeds Lemon Cake by the European-based firm Heavyweight Seeds is a strong Sativa-dominant hybrid of Lemon Skunk and Cheese. Lemon Cake seeds are easy to cultivate, especially outdoors, with a 9-10 week flowering cycle, squat shape, and large output. 👉👉👉Lemon Drizzle Cannabis Seeds Type: Feminized Weed Strain Lemon Drizzle Strain by Barneys Farm Indulge yourself in the tantalizing aroma of our Lemon Drizzle strain, a sensually crafted cannabis strain that is sure to tantalize your senses and leave you in a state of blissful euphoria. Bred from a seductive blend of Super Lemon Haze and OG Kush, this sativa-dominant weed strain will transport you to another plane of existence. With a flowering time of 60-65 days, Lemon Drizzle's exquisite buds are bursting with a potent THC percentage of 20-25%, ensuring an unparalleled and satisfying high. The complex terpene profile of this alluring strain is sure to captivate your senses with notes of zesty lemon and a hint of earthy Kush undertones, providing a flavor explosion that you won't forget. This tempting beauty grows to a height of 1m - 1.2m indoors and 1.5m - 2m outdoors. You'll be impressed by the generous indoor yield of 550g/m2, while the outdoor yield of up to 1.5 - 2kg is beyond substantial. Experience the ultimate in relaxation with Lemon Drizzle's outdoor flowering time, which begins in early October, allowing you to bask in the sweet sunshine and savor the heady effects of this tantalizing strain. Succumb to the charms of our Lemon Drizzle strain and discover a world of unadulterated pleasure that will leave you in awe. Is Lemon Drizzle Indica or Sativa? The Lemon Drizzle strain by Barneys Farm is 85% Sativa 15% Indica. What is the best way to store my Lemon Drizzle strain seeds? To properly store Lemon Drizzle seeds, it is recommended to keep them cool and dark in an airtight container ideally in a refrigerator with proper labeling and dating, avoiding freezing. Lemon Drizzle Cannabis Seeds Strain Specifications Type: Feminised Genetics: Super Lemon Haze Strain x OG Kush Strain Photoperiod: Normal Sativa %: 85% Indica %: 15% Flowering Time (days): 60 - 65 Feminised Outdoor Harvest Month Week: 1st-2nd week - October Indoor Height (cm): 100-120cm Indoor Yield (g): up to 550-650 gr/mÂČ Outdoor Height (cm): up to 150-200cm Outdoor Yield (g): up to 1500 gr/plant Taste: Sour, Lemon, Sweet, Citrus Fruits Aroma: Sweet, Sour, Citrus, Pine, Earthy Effect: Energizing, Uplifting, Focused, Motivated
Likes
23
Share
Likes
38
Share
For LIQUIDS & NUTES ******GREEN BUZZ NUTRIENTS***** organic. Also i’m using their LIVING SOIL CULTURE in powder form! MARSHYDRO â›ș has large openings on the sides which is useful for mid section groom room work. đŸ€© ☀ MARSHYDRO FC 3000 LED 300W 💹MARSHYDRO 6” in-line EXTRACTOR with speed-variation knob, comes complete with ducting and carbon filter.
Likes
16
Share
💧 Wir sind in der 4. BlĂŒtewoche angekommen, insgesamt Woche 9 fĂŒr die Strawberry Banana. Die Pflanze hat sich gut gestreckt und geht jetzt voll in die Produktion, die BlĂŒtenansĂ€tze an den Trieben werden deutlich erkennbar. 📋 Diese Woche gab es 2 BewĂ€sserungen. Als extra Schub fĂŒr die BlĂŒtenbildung habe ich 3 ml BioTabs Bio Pk 5-8 hinzugefĂŒgt, um den Phosphor- und Kaliumbedarf in dieser Phase abzudecken. Die Lichtperiode lĂ€uft stabil mit 18 Stunden pro Tag. 📾 Die aktuelle Optik zeigt eine gesunde, krĂ€ftige Pflanze mit einer durchgehend satten, dunkelgrĂŒnen Blattfarbe, was auf eine gute NĂ€hrstoffversorgung hindeutet. Die Struktur ist offen und lĂ€sst ĂŒberall genug Licht an die BlĂŒten. Einzig ein einzelnes unteres Blatt zeigt eine gelbliche VerfĂ€rbung, was bei diesem Stadium aber völlig im Rahmen liegt und kein Grund zur Sorge ist. Die BlĂŒtenbildung sieht fĂŒr den aktuellen Zeitpunkt sauber aus, die Stigmen sind zahlreich und vital. 🧐 Alles in allem ein solider Stand. Die Pflanze steht gut im Futter und die Energie wandert jetzt spĂŒrbar in die BlĂŒtenentwicklung. Ich werde das Blattwachstum weiter beobachten und schauen, wie sie auf den PK-Zusatz reagiert, aber aktuell gibt es nichts zu meckern. NĂ€chste Woche heißt es dann, die BlĂŒtenbildung weiter genau im Auge zu behalten.
Likes
7
Share
Likes
Comments
Share
@Ensign420
Follow
|»» LOG DISCLAIMER: Not intended as a grow guide. Grow log entries are usually posted 3 weeks later and are for my learning reference. ««| Introduction - Week 15 Summary - Ensign's log, stardate 17711.1, Been a great week in the garden! Wow the 4x4 tent is thriving and the canopy is full of tops! By the end of the week, all phenos have begun to show signs of flowering! Growth has continued to stretch so added the second scrog frame and netting. By the end of the week, the canopy has stretched through the second layer and looking green and healthy! In the veg tent, been tending to solo cup waterings as needed. Also up-potted Chill Out OG into a 3-gal pot (with BluMat watering). Took more veg cuttings and now have them in Coco Coins rooting and looking healthy! Onwards to next week! [START OF WEEK 15] ========================================================== ---------- [ 3x3 VEG TENT - GR7 / GR3 ] ---------- TKO #2 - WEEK 07 - Full Veg Gorilla Goat #1 - WEEK 07 - Full Veg Chill Out OG #3 - WEEK 04 - Full Veg Chill Out OG #2 - WEEK 00 - Transplant ---------- [ 4x4 MAIN TENT - GR30 ] ---------- Chill Out OG #2 - WEEK 15 - Full Bloom Wk1 TKO #2-2 - WEEK 09 - Full Bloom Wk1 Heady OG BX1 #1 - WEEK 11 - Full Bloom Wk1 02/09/26 → 02/15/26 [WEEK 15] This Week's Estimated Goals ---------------------------------------------------------------------------------------------- DLI: ~13 mol/mÂČ/d PPFD: ~300 ÎŒmol/mÂČ/s VPD: ~1.2 kPa This Week's Meter Readings & Averages ---------------------------------------------------------------------------------------------- Light On/Off: 16:00 - 10:00 | Wattage: ~386.3W [LV05] Distance From Canopy: ~[22”, 13”, 13”] Plant Height: ~[30”, 39”, 39”] Max Plant Height: ~52” [Lamp-to-Soil Distance] DLI: ~16.80 mol/mÂČ/d PPFD: ~389 ÎŒmol/mÂČ/s VPD: ~0.89 kPa Soil %: ~[47.9, 47.1, 43.3, 53.0, 48.3, 63.4, 47.1, 61.9, 48.6, 72.3] ========================================================== Day 01 - Monday - 02/09/26 - Total Days: 096 ----------------------------------- Daily Averages ~[+01:00] - Temps: 81.1°F [27.3°C] - Humidity: 74.4% - VPD: 0.92 kPa - Soil %: [48, 47, 44, 51, 49, 66, 48, 65, 50, 75] ----------------------------------- - [22:14]: Night check on the 4x4 tent. --- Garden is full of tops and the canopy is getting taller! --- Chill Out OG #2 is getting taller, but is staying shorter than Heady OG BX1 #1 and TKO #2. --- The under canopy is looking clean and all pots are clean and no signs of flooding. - [22:17]: Checked on the BluMat soil moisture sensors: ------ Chill Out OG #2 » 46mbars ------ Heady OG BX1 #1 » 42mbars ------ TKO #2 » 49mbars --------- Watering Range: [Too Wet] ~25mbars «| [Ideal Target] ~40-80mbars |» ~125mbars [Too Dry] --------- BluMat Max Values: [10mbars «||» 750mbars] - [22:24]: Checked the Ecowitt soil moisture sensor data: ------------------ [ 3x3 VEG TENT – GR7 / GR3 ] ---------------- ------ 45% - [CH01 » M1 » VBL – TKO #2] ------ 46% - [CH02 » M2 » VBR – Gorilla Goat #1] ------ 44% - [CH03 » M3 » VFL – Chill Out OG #3] ------ 51% - [CH04 » M4 » VFR – Dry Soil] ----------------- [ 4x4 MAIN TENT – GR30 ] --------------- ------ 49% - [CH05 » P1 » FLT – Chill Out OG #2] ------ 66% - [CH06 » P1 » FLB – Chill Out OG #2] ------ 47% - [CH07 » P2 » BLT – TKO #2-2] ------ 64% - [CH08 » P2 » BLB – TKO #2-2] ------ 51% - [CH09 » P3 » FRT – Heady OG BX1 #1] ------ 75% - [CH10 » P3 » FRB – Heady OG BX1 #1] --------- Veg: ~38%-45% | Flower: ~45%-55% --------- General: ~30% [Dry] «| ~45-60% [Moist] |» ~70% [Wet] - [22:27]: Checked the 3x3 veg tent. --- Wow the veg garden is blowing up with growth! --- All mothers and clones are perky and getting tall! Definitely need to top soon, but not today! --- A Chill Out OG #2 clones needs watering! - [22:33]: Here is the starting initial watering range: ------ Chill Out OG #2 » 267.3g → 301.0g --------- General Weight Range: [Dry] ~275g «| [Dryback] ~300g |» ~325g-400g [Wet] --- Been 2 days since the last watering. --- Took the starting weight before watering, ------ Chill Out OG #2 » 289.2g --- While on a scale, --- Evenly misted the top of the cup with RO water. --- Did not spray the top growth. --- Misted 10-20 sprays. Waited a moment, then misted again. --- Repeated this process until the cup weighted at least 300g. --- There was no runoff. - [22:44]: Took the saturated weight after watering, ------ Chill Out OG #2 » 390.7g --- Updated the wet weight and watering date. --- Placed the cup back into the tent. --- All veg clones in the propagation tray look great and no need to water! - [22:53]: Checked the humidifiers. --- Tanks are still full and no leaks found. Day 02 - Tuesday - 02/10/26 - Total Days: 097 ----------------------------------- Daily Averages ~[+01:00] - Temps: 81.0°F [27.2°C] - Humidity: 76.9% - VPD: 0.83 kPa - Soil %: [50, 47, 44, 51, 49, 64, 47, 63, 50, 74] ----------------------------------- - [21:06]: Night check on the 4x4 tent. --- Ca-Caw! Wow the garden soaring upwards with healthy tops! --- Heady OG and TKO are stretching up at equal heights and are almost tall enough to begin the second level or netting. Nice! --- Chill Out OG is chilling and staying squat, but looking perking! - [21:12]: Checked on the BluMat soil moisture sensors: ------ Chill Out OG #2 » 48mbars ------ Heady OG BX1 #1 » 44mbars ------ TKO #2 » 56mbars --------- Watering Range: [Too Wet] ~25mbars «| [Ideal Target] ~40-80mbars |» ~125mbars [Too Dry] --------- BluMat Max Values: [10mbars «||» 750mbars] - [21:16]: Checked the Ecowitt soil moisture sensor data: ------------------ [ 3x3 VEG TENT – GR7 / GR3 ] ---------------- ------ 47% - [CH01 » M1 » VBL – TKO #2] ------ 49% - [CH02 » M2 » VBR – Gorilla Goat #1] ------ 43% - [CH03 » M3 » VFL – Chill Out OG #3] ------ 51% - [CH04 » M4 » VFR – Dry Soil] ----------------- [ 4x4 MAIN TENT – GR30 ] --------------- ------ 48% - [CH05 » P1 » FLT – Chill Out OG #2] ------ 64% - [CH06 » P1 » FLB – Chill Out OG #2] ------ 47% - [CH07 » P2 » BLT – TKO #2-2] ------ 63% - [CH08 » P2 » BLB – TKO #2-2] ------ 51% - [CH09 » P3 » FRT – Heady OG BX1 #1] ------ 74% - [CH10 » P3 » FRB – Heady OG BX1 #1] --------- Veg: ~38%-45% | Flower: ~45%-55% --------- General: ~30% [Dry] «| ~45-60% [Moist] |» ~70% [Wet] - [21:21]: Checked the 3x3 veg tent. --- Woah! The veg garden is stretching upwards and has reached the grow light! --- Time to top! --- Also going to take more Gorilla Goat clones. Not too sure on the current one in the tray, so cutting a couple more just in case. - [21:33]: Filled a measuring cup with 2 cups of RO water. ------ Added 1/8tsp of Horticultural Aloe --- Mixed the solution and poured it straight into a clear solo cup. --- Made sure the PVC tube on the rig had the correct names marked. --- Placed the rig into the cup just above the aloe water. --- Okay! Time to take the cuttings! --- Using a pair of clean trimmers, - [22:05]: Topped and defoliated each mother plant. --- Removed a decent amount of growth (a good 7-8 inches of top growth). --- Mulched the trimmings. - [22:07]: Also cut several Gorilla Goat #1 clonal cuttings. --- Made sure to trim most of the branches leaving a top node or two. --- Did not cut any leaf fingers and made sure to cut the tip of the stalk (about 45-degree) before placing each cutting into the cup of aloe solution. - [22:09]: Placed the cup into the veg tent. --- Have the cup resting on top of the drip tray (front left pot). --- Okay! Let the soaking begin! - [22:10]: Decided to cull the Gorilla Goat #1-2 clone in the propagation tray. --- Mulched the entire cup. - [22:18]: Checked the humidifiers. --- Tanks are still full and no leaks found. Day 03 - Wednesday - 02/11/26 - Total Days: 098 ----------------------------------- Daily Averages ~[+01:00] - Temps: 81.7°F [27.6°C] - Humidity: 76.9% - VPD: 0.85 kPa - Soil %: [47, 47, 43, 50, 48, 64, 47, 62, 50, 74] ----------------------------------- - [16:09]: Evening check on the 3x3 veg tent. --- Veg garden is looking nice and clean! --- The growth is still recovering from the topping, but all mothers and clones look great! - [16:22]: Okay! Time to transplant Chill Out OG #2 into a 3-gal pot! --- The 3-gallon pot has been already pre-amended and prepped for a fresh transplant. --- Will also be installing the BluMat watering carrot before connecting it to the water source loop. - [16:46]: Took a 3-gallon pot out of the veg tent and set it on a drip tray. ------ Removed the drip tray and Ecowitt soil sensor. --- Loosened the soil and made a hole in the center of the pot. ------ Set a clear cup into the center of the pot. --- Tucked the sides of the cup in snug with the surrounding soil. --- Gently removed the clear cup from the fabric pot leaving a perfect hole. ------ Sprinkled 1/16tsp of Great White ------ Sprinkled 1/32tsp of Beauveria Bassiana Plus - [17:06]: Dusted the sides of the hole. --- Also sprinkled a bit around the top soil. --- Great! Time to transplant! --- Chill Out OG #2 weighed 291.2g and was watered 2 days ago. --- To loosen and unstick the rootball from the cup, I gently squeezed the sides before pressing the bottom upwards. - [17:14]: Once fully loosened, I simply Vulcan-gripped the base of the plant before flipping her upside down. --- Ooo yea! Nice pearly white roots! --- She’s more than ready for a larger pot! --- Did not break up the rootball. - [17:16]: Gently set her straight into the pre-inoculated hole. --- Pressed and evened out the top soil. - [17:22]: Using fresh BuildASoil Organic Straw Mulch, --- Covered the top soil with straw. - [17:35]: Then using a fully filled 5" BluMat watering carrot (pre-soaked and set to gold for gravity feed) along with a 5" drip ring, --- Placed the drip ring around the base of the plant. --- Then gently inserted the BluMat carrot into the soil near the drip ring's fill tube before connecting it with a 3mm connector. - [17:58]: Also set the Ecowitt soil sensor back. --- Placed the fabric pot back into the Veg tent. --- Shut off all flow-valves and made sure the (8mm) water source loop had no water pressure. --- Then cut the tubing and installed an RO valve-rig (with 3mm T-fitting). - [18:12]: Finally connected the watering carrot's 3mm fill tube to the valve-rig before turning all flow-valves back on. --- Ca-Caw! Done with the transplant! --- The soil moisture was pretty wet so decided to not water. --- Will continue to check and will water if needed. - [18:20]: Decided to also cull the extra Heady OG BX1 clones. --- Mulched the trimmings and soil. - [18:54]: Checked the Ecowitt soil moisture sensor data: ------------------ [ 3x3 VEG TENT – GR7 / GR3 ] ---------------- ------ 52% - [CH01 » M1 » VBL – TKO #2] ------ 50% - [CH02 » M2 » VBR – Gorilla Goat #1] ------ 43% - [CH03 » M3 » VFL – Chill Out OG #3] ------ 56% - [CH04 » M4 » VFR – Chill Out OG #2] ----------------- [ 4x4 MAIN TENT – GR30 ] --------------- ------ 48% - [CH05 » P1 » FLT – Chill Out OG #2] ------ 64% - [CH06 » P1 » FLB – Chill Out OG #2] ------ 47% - [CH07 » P2 » BLT – TKO #2-2] ------ 62% - [CH08 » P2 » BLB – TKO #2-2] ------ 51% - [CH09 » P3 » FRT – Heady OG BX1 #1] ------ 74% - [CH10 » P3 » FRB – Heady OG BX1 #1] --------- Veg: ~38%-45% | Flower: ~45%-55% --------- General: ~30% [Dry] «| ~45-60% [Moist] |» ~70% [Wet] --- Also updated the soil sensor names a bit. - [19:07]: Checked the 4x4 tent. --- Ooo yea! The garden is thriving and the canopy is still stretching upwards! --- All phenos are looking great and will need to set the second scrog frame layer soon. Nice! --- Not too sure if Chill Out OG will make it to the second netting, but she’s looking healthy and perky so not a big deal. --- Stoked that the under canopy is clean and looking healthy! - [19:17]: Checked on the BluMat soil moisture sensors: ------ Chill Out OG #2 » 51mbars ------ Heady OG BX1 #1 » 46mbars ------ TKO #2 » 53mbars --------- Watering Range: [Too Wet] ~25mbars «| [Ideal Target] ~40-80mbars |» ~125mbars [Too Dry] --------- BluMat Max Values: [10mbars «||» 750mbars] --- All veg clones and cuttings are looking great! --- Need to change the Gorilla Goat cutting’s aloe water out. Also a couple clones need watering. --- Filled a clear cup with fresh RO water (1.5cups). - [20:21]: Gently lifted the PVC rig out of the cup of aloe water and set it gently into the RO cup. --- Going to let these soak for another day before transplanting into Coco Coins for rooting. --- Two clones need watering! - [20:34]: Here are the starting initial watering ranges: ------ TKO #2-1 » 290.7g → 340.5g ------ Gorilla Goat #1-1 » 279.9g → 340.6g --------- General Weight Range: [Dry] ~275g «| [Dryback] ~300g |» ~325g-400g [Wet] --- Both cups were last watered 8 days ago. --- Took the starting weight of both clones before watering, ------ TKO #2-1 » 289.8g ------ Gorilla Goat #1-1 » 295.6g --- While on a scale, --- Evenly misted the top of both cups with RO water. --- Did not spray the top growth. --- Misted 10-20 sprays. Waited a moment, then misted again. --- Repeated this process until both cups weighted at least 300g. --- There was no runoff. - [21:06]: Took the saturated weight of both cups after watering, ------ TKO #2-1 » 355.5g ------ Gorilla Goat #1-1 » 355.4g --- Updated the wet weight and watering dates for both cups. --- Placed both cups back into the tent. - [21:36]: Checked the humidifiers. --- Tanks are still full and no leaks found. Day 04 - Thursday - 02/12/26 - Total Days: 099 ----------------------------------- Daily Averages ~[+01:00] - Temps: 81.5°F [27.5°C] - Humidity: 75.3% - VPD: 0.91 kPa - Soil %: [49, 48, 43, 56, 47, 63, 46, 62, 50, 73] ----------------------------------- - [16:01]: Evening check on the 3x3 veg tent. --- Veg garden is looking incredible and growth is recovering nicely! --- Also veg clones and cuttings are looking good! - [17:03]: Okay! Time to start the rooting process! --- Filled a measuring cup with 1.5 cups of RO water. ------ Added a pinch of Quillaja Saponaria Extract [60] ------ Added 1/64tsp of Horticultural Aloe ------ Added 1/32tsp of Mycrobe Complete --- Mixed the solution thoroughly. - [17:04]: Dropped 2 Coco Coins into the measuring cup. --- The coins immediately started to expand. ------ [» ~5 MINUTES LATER «] --- Placed each fully saturated Coco Coin into half-cut solo cups. - [17:25]: Using a squeeze bottle filled with Clonex, --- Gently filled each pre-made hole with Clonex rooting gel. - [17:38]: Time to plant the cuttings! --- Using a pair of clean trimmers, made a final 45° cut. --- Also stripped and scrapped some of the stem’s outer membrane. --- To help with planting, gave each Coco Coin a squeeze to loosen the coco. --- Made sure to insert each stem straight and snug with the tip about a 1/4 inch from the bottom of the Coco Coin. --- Also secured the stem by pinching and pressing in the top of the Coco Coin. --- Once each cutting was planted, - [18:11]: Placed each Coco Coin into the propagation dome’s tray. --- Made sure to keep each cutting properly tagged. --- Did not spray the top growth with any water, but did fill the bottom of the tray with RO water. --- As far as PPFD, --- At the lowest light intensity (and raised ~14 above the tray), the PPFD is around 42 ÎŒmol/mÂČ/s which gives a DLI of 2.72 mol/mÂČ/d under an 18/6 light cycle - [18:18]: Decide to cull TKO #2-2 along with the spare Gorilla Goat cutting. --- Going to mulch the trimmings, but going to add something more to the mulch pot. - [18:23]: Since I also make and drink my own F1 kombucha (helps to maintain healthy gut bacteria along with a great way to lose weight), I have a decent amount of spare scobys. --- Placed a few spare scoby pellicles into a plastic bin. --- Using scissors, chopped up the scoby pellicles into smaller chunks and added the soil and trimmings from the culled clone and cutting. --- Set the container aside. Will top dress the mulch bin in the main tent later. --- Might move the mulch bit to the front of the tent for the next cycle and am thinking about turning it into a potential worm bin. --- Anyways! - [18:41]: Checked the Ecowitt soil moisture sensor data: ------------------ [ 3x3 VEG TENT – GR7 / GR3 ] ---------------- ------ 49% - [CH01 » M1 » VBL – TKO #2] ------ 45% - [CH02 » M2 » VBR – Gorilla Goat #1] ------ 43% - [CH03 » M3 » VFL – Chill Out OG #3] ------ 55% - [CH04 » M4 » VFR – Dry Soil] ----------------- [ 4x4 MAIN TENT – GR30 ] --------------- ------ 47% - [CH05 » P1 » FLT – Chill Out OG #2] ------ 63% - [CH06 » P1 » FLB – Chill Out OG #2] ------ 46% - [CH07 » P2 » BLT – TKO #2-2] ------ 62% - [CH08 » P2 » BLB – TKO #2-2] ------ 50% - [CH09 » P3 » FRT – Heady OG BX1 #1] ------ 72% - [CH10 » P3 » FRB – Heady OG BX1 #1] --------- Veg: ~38%-45% | Flower: ~45%-55% --------- General: ~30% [Dry] «| ~45-60% [Moist] |» ~70% [Wet] - [19:05]: Checked the 4x4 tent. --- Ca-Caw! Let’s go ladies! Wow the garden is looking incredible! --- Growth is ramping up and the canopy is definitely in full stretch! --- The under canopy is looking clean and pots all look great! - [19:09]: Nice! All phenos are showing clear signs of bud crowning! --- Chill Out OG seems to be further along than the rest of the cultivars, flower has officially begun! --- Heady OG and TKO has slight signs of crowning, but will continue to stretch for a few more days. I think. --- Anyways! - [19:17]: Quickly checked on the RO reservoir and auto-watering system. --- Reservoir looked good and no leaks detected. - [20:14]: Took the kombucha top dressing from earlier and spread the mix top of the mulch bin (in the back right of the tent). --- Spread the top dressing out evenly. Since kombucha is naturally and acidic ferment, going to let the top dressing dry out a bit (smells great too). --- Will continue to add leaves and trimming on top after defoliation and toppings. - [20:21]: Okay time to build the second scrog frame layer and re-string the second level of netting! --- Prepped and built the PVC scrog frame outside of the tent. --- Using mason string, restrung the netting and double-looping each screw. --- Once the frame was fully assembled and re-strung, - [22:21]: Placed the PVC riser poles and installed the second scrog frame into the 4x4 tent. --- The first scrog layer is currently about 18.5" from the top soil. --- The second scrog layer is currently about 35" from the top soil. --- Done! - [22:59]: Checked the humidifiers. --- Tanks are still full and no leaks found. Day 05 - Friday - 02/13/26 - Total Days: 100 ----------------------------------- Daily Averages ~[+01:00] - Temps: 82.2°F [27.9°C] - Humidity: 75.7% - VPD: 0.91 kPa - Soil %: [46, 47, 43, 55, 47, 63, 46, 61, 48, 71] ----------------------------------- - [21:16]: Night check on the 4x4 tent. --- Wow the garden is raging with growth! --- The second layer is almost pretty much already full! --- Chill Out OG is chilling in between the netting and looking healthy with signs of bud crowning starting to swell up! --- Both Heady OG and TKO are also continuing to stretch with slight signs of crowning. Nice! --- Let’s go my girls! - [21:24]: Checked the Ecowitt soil moisture sensor data: ------------------ [ 3x3 VEG TENT – GR7 / GR3 ] ---------------- ------ 46% - [CH01 » M1 » VBL – TKO #2] ------ 50% - [CH02 » M2 » VBR – Gorilla Goat #1] ------ 43% - [CH03 » M3 » VFL – Chill Out OG #3] ------ 55% - [CH04 » M4 » VFR – Chill Out OG #2] ----------------- [ 4x4 MAIN TENT – GR30 ] --------------- ------ 47% - [CH05 » P1 » FLT – Chill Out OG #2] ------ 62% - [CH06 » P1 » FLB – Chill Out OG #2] ------ 46% - [CH07 » P2 » BLT – TKO #2-2] ------ 60% - [CH08 » P2 » BLB – TKO #2-2] ------ 48% - [CH09 » P3 » FRT – Heady OG BX1 #1] ------ 71% - [CH10 » P3 » FRB – Heady OG BX1 #1] --------- Veg: ~38%-45% | Flower: ~45%-55% --------- General: ~30% [Dry] «| ~45-60% [Moist] |» ~70% [Wet] - [21:26]: Checked the 3x3 veg tent. --- The veg garden is looking nice and perky with healthy growth! --- A Garlic Budder clone needs watering. Let’s go Ensign! - [21:37]: Here is the starting initial watering range: ------ Garlic Budder OG#1-1 » 299.1g → 340.6g --------- General Weight Range: [Dry] ~275g «| [Dryback] ~300g |» ~325g-400g [Wet] --- Been 8 days since the last watering. --- Took the starting weight before watering, ------ Garlic Budder OG#1-1 » 298.5g --- While on a scale, --- Evenly misted the top of the cup with RO water. --- Did not spray the top growth. --- Misted 10-20 sprays. Waited a moment, then misted again. --- Repeated this process until the cup weighted at least 300g. --- There was no runoff. - [21:43]: Took the saturated weight after watering, ------ Garlic Budder OG#1-1 » 355.6g --- Updated the wet weight and watering date. --- Placed the cup back into the tent. --- Gorilla Goat cuttings are looking great in the propagation tray! No need to spray or water. Great! - [22:04]: Checked the humidifiers. --- Tanks are still full and no leaks found. Day 06 - Saturday - 02/14/26 - Total Days: 101 ----------------------------------- Daily Averages ~[+01:00] - Temps: 80.9°F [27.2°C] - Humidity: 75.7% - VPD: 0.88 kPa - Soil %: [48, 47, 43, 54, 48, 62, 47, 60, 47, 70] ----------------------------------- - [19:01]: Night check on the 4x4 tent. --- Ooo yea! The garden is looking healthy and looking great! --- Ca-Caw! Heady OG is still raging upwards and stretching through the netting - [17:14]: Checked the Ecowitt soil moisture sensor data: ------------------ [ 3x3 VEG TENT – GR7 / GR3 ] ---------------- ------ 52% - [CH01 » M1 » VBL – TKO #2] ------ 50% - [CH02 » M2 » VBR – Gorilla Goat #1] ------ 43% - [CH03 » M3 » VFL – Chill Out OG #3] ------ 54% - [CH04 » M4 » VFR – Chill Out OG #2] ----------------- [ 4x4 MAIN TENT – GR30 ] --------------- ------ 46% - [CH05 » P1 » FLT – Chill Out OG #2] ------ 61% - [CH06 » P1 » FLB – Chill Out OG #2] ------ 46% - [CH07 » P2 » BLT – TKO #2-2] ------ 60% - [CH08 » P2 » BLB – TKO #2-2] ------ 47% - [CH09 » P3 » FRT – Heady OG BX1 #1] ------ 70% - [CH10 » P3 » FRB – Heady OG BX1 #1] --------- Veg: ~38%-45% | Flower: ~45%-55% --------- General: ~30% [Dry] «| ~45-60% [Moist] |» ~70% [Wet] - [19:18]: Checked the 3x3 veg tent. --- Veg garden is looking great and growth is healthy and green! --- A Garlic Budder clone needs watering! - [19:25]: Here is the starting initial watering range: ------ Garlic Budder OG#1-2 » 279.2g → 340.3g --------- General Weight Range: [Dry] ~275g «| [Dryback] ~300g |» ~325g-400g [Wet] --- Been 9 days since the last watering. --- Took the starting weight before watering, ------ Garlic Budder OG#1-2 » 297.3g --- While on a scale, --- Evenly misted the top of the cup with RO water. --- Did not spray the top growth. --- Misted 10-20 sprays. Waited a moment, then misted again. --- Repeated this process until the cup weighted at least 300g. --- There was no runoff. - [19:40]: Took the saturated weight after watering, ------ Garlic Budder OG#1-2 » 355.5g --- Updated the wet weight and watering date. --- Placed the cup back into the tent. - [20:01]: Checked the humidifiers. --- Tanks are still full and no leaks found. Day 07 - Sunday - 02/15/26 - Total Days: 102 ----------------------------------- Daily Averages ~[+01:00] - Temps: 80.8°F [27.1°C] - Humidity: 76.2% - VPD: 0.85 kPa - Soil %: [47, 47, 43, 54, 50, 62, 49, 60, 45, 69] ----------------------------------- - [19:04]: Night check on the 4x4 tent. --- Ooo yea! Let’s grow my ladies!! --- The canopy is packed with bud top crowns and the mid canopy (in between the netting) is getting really dense! --- Plan to do a deep defoliation soon, but going to let everything grow and stretch upwards for now. --- Grow strong my girls! - [19:11]: Checked on the BluMat soil moisture sensors: ------ Chill Out OG #2 » 38mbars ------ Heady OG BX1 #1 » 93mbars ------ TKO #2 » 43mbars --------- Watering Range: [Too Wet] ~25mbars «| [Ideal Target] ~40-80mbars |» ~125mbars [Too Dry] --------- BluMat Max Values: [10mbars «||» 750mbars] - [19:14]: Decided to make a slight adjustment to Heady OG’s watering carrot. --- Using the provided allen key, increased the water moisture by turning the BluMat’s tension cap slightly counter-clockwise. - [19:18]: Checked the Ecowitt soil moisture sensor data: ------------------ [ 3x3 VEG TENT – GR7 / GR3 ] ---------------- ------ 44% - [CH01 » M1 » VBL – TKO #2] ------ 47% - [CH02 » M2 » VBR – Gorilla Goat #1] ------ 43% - [CH03 » M3 » VFL – Chill Out OG #3] ------ 54% - [CH04 » M4 » VFR – Chill Out OG #2] ----------------- [ 4x4 MAIN TENT – GR30 ] --------------- ------ 51% - [CH05 » P1 » FLT – Chill Out OG #2] ------ 63% - [CH06 » P1 » FLB – Chill Out OG #2] ------ 50% - [CH07 » P2 » BLT – TKO #2-2] ------ 60% - [CH08 » P2 » BLB – TKO #2-2] ------ 45% - [CH09 » P3 » FRT – Heady OG BX1 #1] ------ 69% - [CH10 » P3 » FRB – Heady OG BX1 #1] --------- Veg: ~38%-45% | Flower: ~45%-55% --------- General: ~30% [Dry] «| ~45-60% [Moist] |» ~70% [Wet] - [19:22]: Checked the 3x3 veg tent. --- Veg garden is looking great and all top growth is green and perky! --- Clones are also looking good and don’t need watering. Nice! --- Gorilla Goat cutting in the propagation tray look green and healthy! --- Easy night in the veg garden! - [20:15]: Checked the humidifiers. --- Tanks are still full and no leaks found. --- Another grow week done! --- The main tent has begun to flower and the stretch has started to slow down for the most part. Almost time for a top dressing! --- Probably need to defoliate again soon. Just stoked that growth is all around healthier than ever! --- As for the veg garden, there’s work to be done and plan to overhaul the veg garden to be able to better preserve my current (and future) genetics. --- Anyways, onwards to next week Ensign! [END OF WEEK 15]
Likes
51
Share
@urbi09
Follow
FEEDING As previous weeks, plant was given nutrient solution twice a day in the concentration down bellow -    FloraSeries Gro-->1.8 mL/L -    FloraSeries Micro-->1.2 mL/L -    Flore Series Bloom-->0.6 mL/L -    Calcium solution-->1 mL/L I started with 5L of tap water measured at 240ppm. Then added Calcium solution from gardening store and ppm were around 500. Then Flora series nutrients were mixed in and ppm reading was around 1000. This is to high so I diluted the solution with tap water to 800ppm and ended up with 7.5 L of nutrient solution. Plant was given a total of 12 L of nutrient solution every day. DIARY Day 105 I did some defoliation on the lower branches...nothing too serious, just the leaves that were in contact with the soil. WEATHER REPORT Day 99-100 It was mostly raining these two days. On day 99 we had some hail to, so the plant had to be moved under the roof. Day temperatures were 25 °C, night temperatures were 18 °C Day 101-105 Weather was sunny all the time. There was some raining going on during one night. Day temperatures were 35 °C, night temperatures were 23 °C.
Likes
47
Share
Info: Unfortunately, I had to find out that my account is used for fake pages in social media. I am only active here on growdiaries. I am not on facebook instagram twitter etc All accounts except this one are fake. Flowering day 58 since the time change to 12/12 h. Hi everyone :-) . The lady will be harvested in the next 7-14 days ;-). It smells very tasty and I'm really looking forward to it. She will be flushed in the coming days. Until then, have fun and stay healthy đŸ™đŸ» You can buy this Strain at : https://www.exoticseed.eu/ Type: Herz Og â˜ïžđŸŒ Genetics: Larry OG X Kosher Kush Indica 60 % / Sativa 40 % 👍 Vega lamp: 2 x Todogrow Led Quantum Board 100 W 💡 Bloom Lamp : 2 x Todogrow Led Cxb 3590 COB 3500 K 205W đŸ’ĄđŸ’Ąâ˜ïžđŸŒ Soil : Canna Coco Professional + â˜ïžđŸŒ Fertilizer: Green House Powder Feeding â˜ïžđŸŒđŸŒ± Water: Osmosis water mixed with normal water (24 hours stale that the chlorine evaporates) to 0.2 EC. Add Cal / Mag to 0.4 Ec Ph with Organic Ph - to 5.5 - 5.8 .
Likes
23
Share
@noak47
Follow
Hi everybody at this week my plant has growing well and its stop streching start to perduce some tricome i have force to add more nutrient and its seems to be find for me -bigbud -voodoo juice -pk13 14 and i have do more defoliation so i do its with those plant like 5 time i have add new item bluetooth speaker to let plant listen to the music hope they are enjoy hahaha thanks for follow my plant please comment i happy to reply and ready to take any advice thanks byeeeeeee
Likes
43
Share
@Roberts
Follow
Bruce Banner #3 fast is growing fast. She just got topped, and roots pruned. It took a bit to grow into the nutrition. I made it a little strong my bad. She is all good now, and making progress under the Hortibloom Solux 350. Nothing else to report. Thank you Hortibloom, and The Orginal Sensibile Seeds company. đŸ€œđŸ»đŸ€›đŸ»đŸŒ±đŸŒ±đŸŒ± Thank you grow diaries community for the 👇likes👇, follows, comments, and subscriptions on my YouTube channel👇. â„ïžđŸŒ±đŸ» Happy Growing đŸŒ±đŸŒ±đŸŒ± https://youtube.com/channel/UCAhN7yRzWLpcaRHhMIQ7X4g
Likes
24
Share
GORILLA COOKIES đŸȘ FF/ FASTBUDS WEEK #9 OVERALL WEEK #8 VEG This her last week of veg she getting flipped to 12/12 to start the flower phase is that's time. She didn't have any issues during the VEG cycle!! Stay Growing!! Thanks for stopping by and taking a look!! Thank you FASTBUDS!! GORILLA COOKIES đŸȘ FF/FASTBUDS
Likes
11
Share
@Rob691
Follow
Everything is perfect. The plants no longer grow in height, but begin to get bigger. They have 3 weeks left to produce very thick and full flowers, it's impeccable. The 2 “twin towers” ​​rise to almost 93cm. The others are more around 80-85 cm high. The plant that gained space following the death of its sister produces larger, thicker but lower flowers. The others have relatively thin flowers (for now!), but I'm really not worried. With 3 weeks of flowering remaining, the harvest will be excellent! I no longer have the appearance of a polene sac, which is also a good indicator of good health. The harvest should be done around 03/01, which will be precisely 8 weeks of flowering. Knowing that for this variety we must be between 7 and 9, it will be simply perfect! I plan to do 7 days of flushing. But I'm already starting to monitor the tricîmes. So another 2 weeks full of nutrients and after that (around 12/27), it will be clear water until the end. Come on, just for the game, I bet the harvest will be around 250g of dry weed. I'm a player :) Chuss guys, we'll talk again next week!
Likes
22
Share
Switching to 12-12 this week. Getting new lights next week. I wrote more comments but i closed it by mistake.
Processing
Likes
1
Share
So This week was the same as the last really, It seems all I have to do is sit back and watch these ladies do their thing! Ive not gone full on with the bloom supplements or PK yet as only 2/5 of the GG are seriously flowering. The other 3/5 GG are now Finally showing some signs of flower and some tops are starting to build and lowers producing more pistils each day! The Stardawgs continue to explode, even some friends who were sceptical about the performance of the Quantum board LED's have been flow away by the results. All of the buds seem to be building dramatically top to bottom which no shortage of frost! Macro shots on the way!!
Likes
Comments
Share
@Borberad
Follow
BlĂŒtewoche 3 D Die BlĂŒte ist in vollem Gange! Die Pflanze streckt sich ĂŒberhaupt nicht, als hĂ€tte sie verpasst das die Tage nur noch 12h lang sind. Jedoch entwickelt sie BlĂŒtenstĂ€nde. Der DLI wurde sukzessive auf 40-45 angehoben. Der DĂŒngeplan bleibt unverĂ€ndert. * Zustand der Pflanze: Kein BlĂŒtestretch, erste BlĂŒtenstĂ€nde wachsen. * Wichtige Ereignisse: Anhebung des DLI. * DĂŒngung & Messwerte: * Gießwasser: pH ca. 6,3. Leitwert 1,4 bis 2 S. * Drain: Wir stellen sicher, dass der pH-Wert nicht unter 5,5 und nicht ĂŒber 6,8 liegt und der Leitwert die +/- 500 S Abweichung einhĂ€lt.
Likes
9
Share
And we have arrived at the end, the last lady branded Zamnesia F1 Hybrid has been harvested, she is probably the most beautiful and largest of all and her name is Pineapple Express F1 Hybrid Auto. I talked about the harvest of the smallest plant last week if you want to go and see the second one go to week 8. As for this one it is definitely the tallest plant, I still have to weigh the dry buds, but it certainly seems to be the most productive plant, there is really a lot of weed in the dry room. Lots of weed in a short time guys don't overlook this factor, I know especially new growers love autoflowering plants like crazy and have also specialized in growing them: you can certainly see the advantage of finishing in 8-9 weeks instead of 12. 2 more harvests per year do the math guys that's a lot of more weed. Lovers of topping on autoflowering plants, an experimental practice for me on these plants and only recommended on strains that respond well and quickly, will be able to finish the plants in reasonable times without stretching out as if they had grown photoperiodic plants. Guys, if you have to do topping on autoflowering plants, either grow very fast F1 Hybrids or switch to photoperiodic plants, we have excellent strains. It makes no sense to harvest autoflowering plants at week 16, with F1 Hybrids even if you do topping you get to 12. Of course, if you need speed and want to do topping, the advice is to choose those that the breeder indicates as the fastest. Our Pineapple Express is burning with resin and very productive, see for yourself, James Franco and Seth Rogen would be proud of us. The main cola has a wonderful shark fin formation that drives me crazy, I photographed it from different angles but when I see the shark fin I become a schoolgirl. The level of ripeness is medium, halfway through the harvest window we have some amber trichomes, many milky ones but also something transparent still, I could have kept it a little longer but as I said several times: I don't like super ripe plants, the pistils were super ripe so for me it's a symptom of mold lurking, in the growbox now there are 40 degrees.... The heat is not a friend of the quality of the buds and resin. So speed also helps us escape the arrival of the most hostile climates. Really a lot of grass in a short time and I fill the jars and have good times. SUmmer and autumn are assured, see you for the super harvests of October-November the best of the year. Strong, fast, stable as promised by Zammi. https://www.zamnesia.io/it/10681-zamnesia-seeds-pineapple-express-f1-automatic.html Feeding is by Plagron with the Power Buds - Sugar Royal - Green Sensation + Alga Bloom combo that drives me crazy https://plagron.com The lights are from Viparspectra p2000 and provide super light www.viparspectra.com/ Tent & Air www.secretjardin.com Music of the week www.radionula.com +++ 432 hz frequencies to keep in line my Girls to Gaia. Site Description ZAMNESIA SEEDS - PINEAPPLE EXPRESS F1 HYBRID AUTOMATIC: FRUITY FLAVORS AND ENERGETIC EFFECTS Combining Trainwreck with Hawaiian, Pineapple Express F1 Hybrid Automatic brings a beloved strain to new heights. This autoflowering F1 hybrid cultivar ensures exceptional uniformity, reliability, and stability, making it well-suited to growers of all experience levels. If you haven't checked out the Pineapple Express F1 hybrid Automatic for yourself just yet, now is the time. GROWING PINEAPPLE EXPRESS F1 HYBRID AUTOMATIC It takes 8–9 weeks from germination before Pineapple Express F1 hybrid Automatic is ready to harvest. Thankfully, very little effort is required throughout the growing process, aside from a bit of maintenance, to ensure large, high-quality harvests. Thanks to its F1 genetics, Pineapple Express F1 Automatic offers superb resilience and uniformity, meaning all plants will have a similar height and appearance, and will churn out comparably large yields. Reaching heights of 50–70cm, Pineapple Express F1 Automatic is not an overbearing plant and can effortlessly slot into any setup. Once ready to yield, growers can expect returns in the region of 400–550g/mÂČ indoors and up to 200g/plant outdoors. AROMAS, FLAVORS, AND EFFECTS OF PINEAPPLE EXPRESS F1 HYBRID AUTOMATIC Just one hit of Pineapple Express F1 hybrid Automatic treats users to a rich assortment of flavors and aromas. This strain offers strong pineapple notes alongside moments of citrus, spice, and pine, making for a mouth-watering blend that's extremely moreish. Bolstered by 21% THC and an array of cannabinoids, Pineapple Express F1 Automatic showcases an energetic and uplifting high that will have you feeling chatty in no time. So if you've been looking for a strain to enjoy with friends, Pineapple Express F1 Automatic might be just the thing. All F1 Hybrids and more and more and more on www.zamnesia.io
Processing
Likes
7
Share
The flushing phase is on, time to get rid of the rest of those nutrients that got locked up in the plant system, this step will affect almost 60% of the end result bud quality and taste along side with curing and drying properly the buds. The plant will remains in darkness until i harvest to slow the degradation of thc to cbn and to squeeze the most out of thoses resin glands that activates the most at night . Beside a bit of foxtailing due to the heat differences caused by the addition of 3 cfl buld, the buds are looking great
Likes
8
Share
@Damballa
Follow
Esta semana realizo el corte, la planza empieza a amarillear al llegar el final de la floraciĂłn. Los tricomas son de color ambar y trasparente.