
Likes
Comments
Share


@902EastCoast
Follow
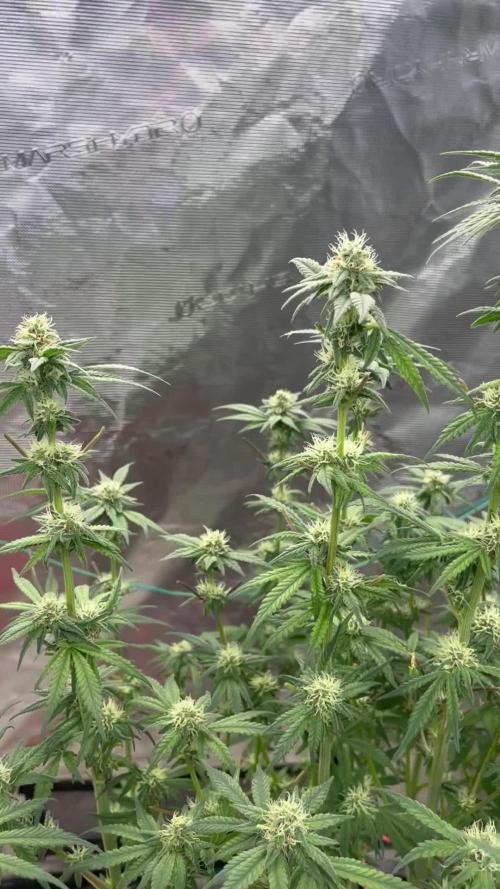
This strain was easy to grow right from seed. I think it will be one of my favourite strains this grow. Time to dry and cure. I will report the weight when dry. 💚✌️🏼


Likes
28
Share


@eldruida_lamota
Follow
Que hay familia, vamos con la primera semana de crecimiento de estas Apple Fritter de Zamnesia.
De las 5 que germine que salieron con éxito, una de ellas se a podrido por enterrarla mal así que van 4 que saldrás adelantes y van a crecer y veremos todo el progreso.
La temperatura está entre los 21/24 grados, la humedad está entorno al 60%, y el ph lo mantengo ahora al principio en 6.2, el foco por supuesto está enchufado 18 horas , tener tienen que crecer fuertes.
Y aparte añadimos nutrientes de Agrobeta, que no puede faltar semejante gama.
Os comento que tengo un descuento y para que compréis en la web de Zamnesia de un 20%, el código es ZAMMIGD2023
The discount 20% and the code is ZAMMIGD2023
https://www.zamnesia.com/
agrobeta: https://www.agrobeta.com/agrobetatiendaonline/36-abonos-canamo
Mars hydro:
Code discount: EL420
https://www.mars-hydro.com/
Hasta aquí es todo, buenos humos 💨💨💨.

Likes
88
Share


@PEAKYPLANTERS
Follow
HOLY GOD ..... WHAT MUSIC! BOYS !
MY FRIENDS ARE STRETCHING AND GAINING WEIGHT !!!
VAMOS!
LET'S GO TO GET THE PRIZES IN THE RANKING AND BREAK THE PODIUM!
HAPPY AND ABUNDANT HARVESTS FOR EVERYONE

Likes
8
Share


@Cannabis_Sativa
Follow
the Germination process was very easy and had no problems to sprout in paper towel. After she first touched water it needed 5 day to get root and open shell with her tiny white baby leaf and next I put it in to the pot in coco coir it was already watered and i just put the cup on top next day she was fully green and strong stem with little hairs <3

Likes
3
Share


@Dabking
Follow
Every video and picture were taken on the same day (113/ week 16). If you look at the bottom branches and colas, the pistils are nearly finished and there aren't many clear pistils left. I have attached microscope photos as well. It is important to check many sites on the plant, as only checking one or two colas may be deceiving as to if the plant is ready to harvest or not. I have taken the lower branch and chopped it about two days ago and will sample it in a few days. I'm excited for this plant to be done soon.

Likes
Comments
Share


@Alexkghdjnd
Follow
In the end I was pretty happy and surprised about the dense and hard buds! Especially when I think about the way we had to move this plant in a setup that was completely crap except the LEDs.
Likes
10
Share


@Notsoaveragegrows
Follow
Swapped out a light that’s slightly too big for my tent but squeezed it in with minor cuts to the tent. Probably should’ve done it sooner. Can only run the light at 50% or below.

Likes
10
Share

@Rangaku
Follow
Apple fritter got sticky this week , buds are putting on nice weight. She’s a real set and forget type strain this , keep up the defol , feed her up and the class of the strain does the rest . Getting to the interesting part now she really looks like she’s about to shine

Likes
422
Share


@Crashoverite
Follow
Hi everyone.
Welcome to my🍌💜👊 week update.
Hope everyone keeping well and having a great week.
Daily updates and uploads so if week not over yet. Please revisit to see full week content😊
Thank you all for such amazing support 😊🤗💜
So far everything is going great. No issues at all. Both girls started preflower on Tuesday and already I can see that they started stretching nicely. Scrog net will be installed by the end of this week.
Week 5
13-19 Nov.
13/11 day 36
First runoff experience for girls. Loaded both pots with approx. 2.5 ltr each in 4 stages of 500-700ml. Runoff 100-150ml from each. Runoff PH 5.9. Nutrients for this watering were same as on previous week and added only calmag. Next watering possibly Friday but with new measurements.
14/11 day 37
Both 🍌💜👊 girls started preflower on same day. Xena is catching up quick to her larger sister and possibly soon they will be sharing this growing space 50/50
15-16/11 days 38-39
Just happy and healthy days 😁 nice steady growth.
17/11 day 40
Second watering for this week. 5.5l beetwen both. Runoff Ph 6.1
19/11 day 42
Most busiest day so far. Both girls got very bushy in last few days and they stretched enough to install scrog net. Before installing net applied selective defoliation on both girls. 8-10 fan leaves from each.
It's the end of this amazing week 😁
Thank you all again for such a great support 🤗✌️💚
Likes
3
Share


@I_Identify_As_A_Dan
Follow
Week 10 for Fuel D.OG by seedsman
Starting to get some nice pistols coming in but no stretch whatsoever... which surprised me compared to how much the black Lebanon's are stretching.
She's getting fed every 3/4 days still.
Struggling a bit to keep temps low.. have lights on during the night & still having to run my big A/C unit at 19/20 ish to get okay temps in the tent.
Plants are loving the Taurus TRS600 every time i come in they are praying
😇

Likes
7
Share


@DillyGenetics
Follow
Gorilla cookies week 8 flower next week first week of flushing going to do coconut water for 3 weeks after dry back from first flush back , Tropicana Hammer F2 Next auto transplant during flowerI wouldn’t suggest it but if can stretch more from 1 gallon to -4 gallon pot with soil recharge , with fish fertilizer 1 tsp ph 5.8 for shock 🏽♂️
Likes
7
Share


@Grow_for_Happiness
Follow
Great strain to grow. Have done outdoors a few times so had an idea that it would take well to SCROG but wow really even canopy and all the buds are nice and solid.
Trimming was a sticky operation, so so much resin and red hairs.
Looking forward to smoking it!
Really really happy with the yield

Likes
15
Share

@I_Identify_As_A_Dan
Follow
Week 18 for Gelato 41 by seedstockers
She's just becoming a monster... i know i went through a period of barely feeding her... well this week she's been fed 5-7L of water plus heavy heavy sprays every night😂 so a bit of a change up she doesn't seem phased either way. Im a little worried when it comes to flowering because she barely/never gets wind & her branches aren't very strong. Which is one of the reasons I spray them heavy every evening to build some strength. She also needs a nice defoliation again to keep PM away + also need to start thinking about giving her flower dry amendments top feed because i think she's partly going into flower because of the shade.

Processing
Likes
61
Share


@Dunk_Junk
Follow
She's over doubled her height this week!!!!!!!!!!
Looks like she's going great!
An educated guess says she is just about to enter flowering in the coming week.
Likes
34
Share

@Growbody
Follow
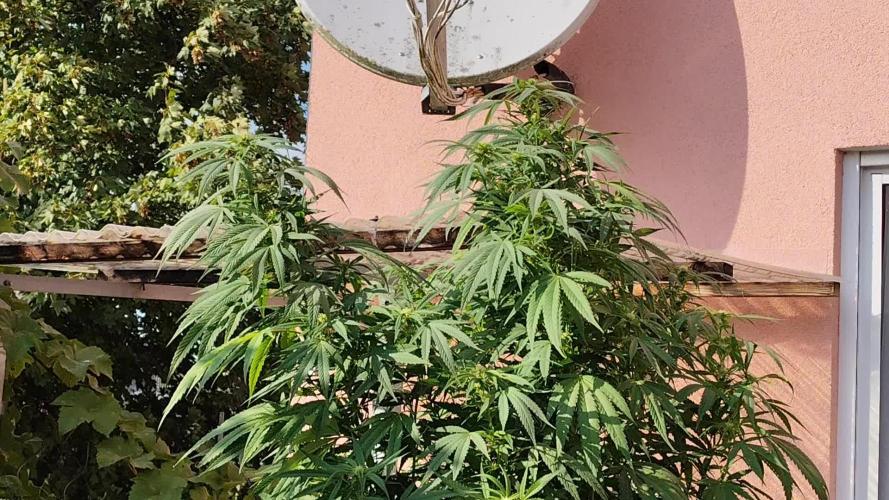
Hallo und herzlich willkommen zu meinem Growbericht Outdoor 2025 mit den Sorten Power Flower Feminized, Royal Medic Feminized und Special Kush #1 Feminized, alle 3 von Royal Queen Seeds. Es ist das erste Mal, das ich Töpfe für den Outdoor grow verwende, bisher waren alle Gorilla grows und direkt in die Erde gepflanzt.
Die URL der Power Flower Feminized: https://www.royalqueenseeds.de/feminisierte-hanfsamen/120-power-flower.html
Die URL der Royal Medic Feminized: https://www.royalqueenseeds.de/cbd-samen/148-royal-medic.html
Die URL der Special Kush #1 Feminized: https://www.royalqueenseeds.de/feminisierte-hanfsamen/138-special-kush-1.html
Die Planung für den Grow ist, die Samen in easyplug Anzuchtwürfeln keimen zu lassen und danach in 0,6L und 2,2L Plastiktöpfen, dann letztlich in die neuen komplett doppellagigen ROOTIES 15 Liter Wide Version Stofftöpfe umzutopfen. Sobald die Witterung es zuläßt, sollen die Pflanzen an die frische Luft.
Es ist schon eine Weile her, das der Grow losging, die Bilder sind jetzt aktuell.
Tag 189: Die Sonne scheint heute wieder etwas mehr, es ist leicht windig und leicht bewölkt. Die letzte Woche haben die drei Großen pures Brunnenwasser bekommen, jetzt kommt wieder ihr Sirup dazu. Sie sind jetzt über ein halbes Jahr alt. 🥂🍾🎂🕯️🌲🤗
Tag 191: Der Schreck war groß heute morgen. Ein Ast der Special Kush ist fast komplett abgebrochen. Zum Glück sehen die Blätter des Astes nicht Welk aus.Hoffentlich wächst er wieder an. Zur Sicherheit hab ich alle Äste am Hauptstamm fixiert.
Wenn's dir gefallen hat, schau wieder vorbei ✌️😎
Likes
15
Share

@D33jW
Follow
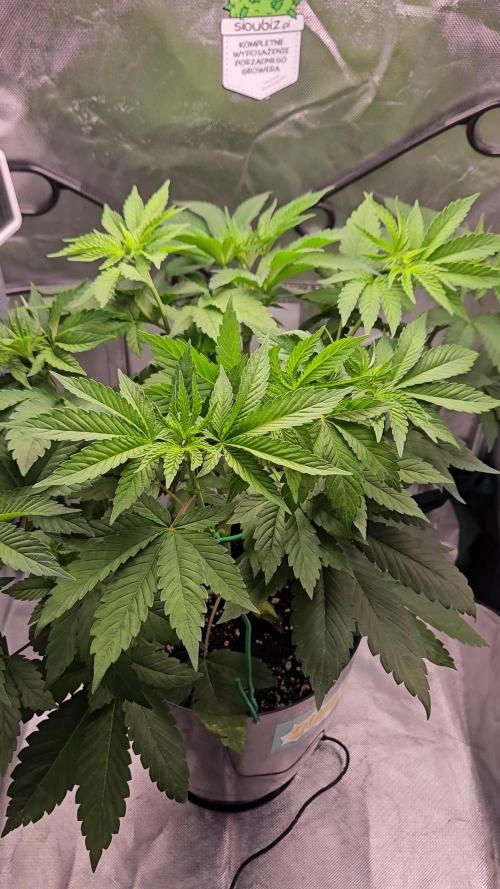
📅 Week 4 – Day 28
BOX: 50x50 – 100W lamp
🌞 Temp: 27°C
💦 RH: 68–70%
💥 PPFD: 650 µmol/m²/s
🌬️ VPD: 1.2 kPa
I switched to 12/12 today after doing a gradual flip, reducing light by 1h per day.
Watering: trying not to overwater – this week they averaged about 600 ml/day. They received two feedings at EC 0.6 and 0.8.
Airflow: keeping the fan strong at this stage so the stems are always working. I’ll keep this going until the first pistils show.
Stay tuned – and keep growing 🌱
Likes
10
Share


@Polliceverde18
Follow
Benvenuti nella mio prato!!! 13/10 inizio settima settimana, siamo a più di metà strada con i tempi .. sinceramente le vedo un po troppo alte con piccoli steli sottili quindi gli ho messo un listello di legno per supporto. Se ti piace lascia un like ! Buon cultivo!!
Likes
8
Share


@Mrgreenhand
Follow
IT is only week 4in flower and the plant is in total only 8weeks today!

Likes
111
Share


@DogDoctorOfficial
Follow
Harvesting An ELEPHANT !!!
And after 118 day from seed and 101 from wen she started her mix veg/flowering process, i cant say for sure but i am starting to believe that this auto world do veg, then veg and flower in conjunction for a wile and only after they a wile they move to a flowering stage completely but thats another post another day lol today was harvest day for this Auto Elephant from SSSC , and let me tel you she is a delight with huge fruits, so big that i normally cut and hang the all plant and for this i did not take the risk of doing that and getting bud rot , better safe than sorry, so what i broke her in smaller peaces and put it all in the rack.
Now not much to do than waiting for it to get around 10/15% humidity and jar with it all.
This one as you guys can see from the video , this is a full covered in trichomes BIG MAMA and touching her is like touching super glue or something lol i was trying to put all the colas in one picture , but is simply just not possible , they all look great so i selected 4 of them for a true back back ground <3
Thank you Super Sativa Seed Club for this opportunity, i fell like a champion no matter what with this 2 Mamas, much respect on the work you guys did on this Elephant
As always thank you all for stoping by for your love and for it all, i fell humble and honored

Likes
23
Share


@Wazowskid
Follow
I've stopped giving them fertiliser and did a root flushing 4 days ago. They are looking good, smaller buds of what could have been with the correct equipment and dedication but I can't complain. I don't have a magnifying glass so I'm basing myself on the pistils to know when to harvest. I think I'll give them one more week but everyone is welcome to give me advice, would love to receive feedback from more experienced people.
Likes
23
Share


@adam_pawloski87
Follow
This grow was pretty simple ! They went a total of 103 days from seed! Very trichomy dense buds with the smell of Berries vanilla and skunk ! This is a must try for you all Fastbuds has the greats!!!