The Grow Awards 2026 🏆 


Likes
Comments
Share
@weedhouse420
Follow
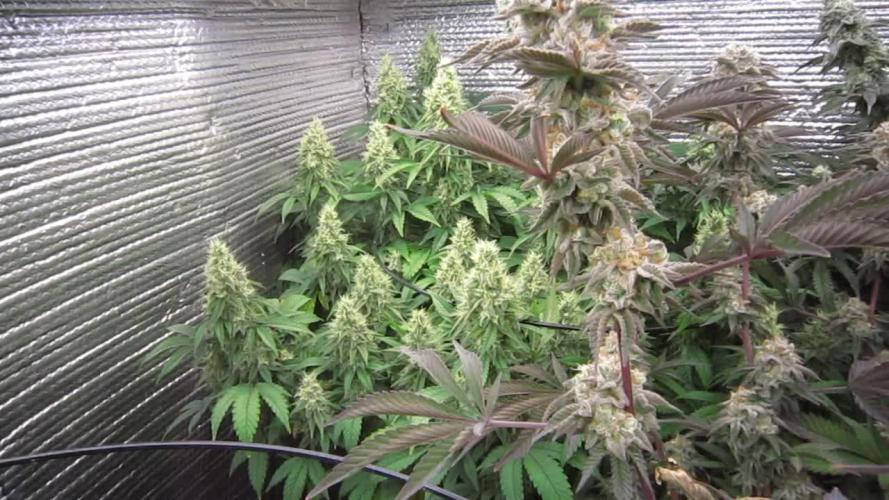
las plantas siguen con su bloque o carencia pero ya esto se termina en nada , tienen muy buenos olores dulces y flores apretadas me gusta este cultivo y son semillas de granel baratas y con agua dura ,alguna semilla de mas calidad y agua bien controlada de ec pueden salir cosas buenas en 11L

Likes
134
Share
@DogDoctorOfficial
Follow
OMG OMG OMG finding hard to put on words all i am felling with this one, she was a delight to grow and without trying yet her medicine she wen strait to my top 3, i mean super strong Mama, strong to everything pests you name it, amazing structure her terpene profile is taking me back to the 90s with her almost like gasoline smell mixed with limes and pines OMG cant wait to try out this one much but much respect to DutchPassion on this creation of them she is so so so , like glue that you cant touch without getting it everywhere <3 <3 haded the last 3 weeks and harvest time-lapse i fell like this one could have gone more than the 71 days in flower that she did, but there is no time for that in this run but i will run her again thats for sure and a must for me.
Guys trust me on this one , she is a must , a real must in any garden <3 <3 <3
Thank you so much Dutch Passion for this blessing of an opportunity and for everything you guys do for the community much respect and appreciation <3<3<3
Everyone best of luck for the contest this was an amazing and fun one <3 <3 <3
As always thank you all for stoping by for the love and for it all, i truly appreciate and enjoy the ride so much more with you guys around <3 <3 <3 you guys make me fell super blessed <3 <3 <3
#aptus #aptusplanttech #aptusgang #aptusfamily #aptustrueplantscience #inbalancewithnature #trueplantscience #growerslove #dogdoctoofficial
With true love comes happiness <3 <3 <3 Always believe in your self and always do things expecting nothing in return and with an open heart , be a giver and the universe will give back to you in ways you could not even imagine so <3 <3 <3
More info and updates @
https://growdiaries.com/grower/dogdoctor
https://instagram.com/dogdoctorofficial
https://youtube.com/channel/UCR7ta4DKLFMg2xxTMr2cpIg
<3 <3 <3 Growers love to you all <3 <3 <3
I will post more photos from her dry trimmed bud report smoke etc asap <3 <3 <3 and need to clean space on my iPad so that i can upload the rest of them photos and videos , my apologies <3 <3
Done hehehe waiting on this beauties to dry now <3 <3 <3


Processing
Likes
11
Share
@Chimney_Chief
Follow
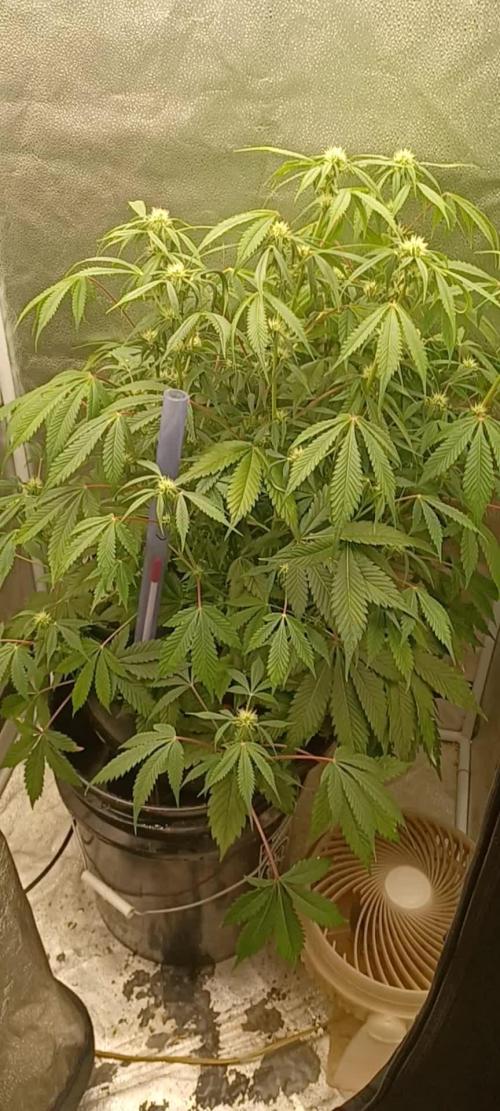
Plant has shown slow but healthy growth since its arrival, LST continues and I've managed to keep the plant at the same height it was last week but now at a horizontal angle.
I did up the nutes for one feed to a slightly under recommended dose but in the days following I noticed the plant looking a little 'droopy' and since she has been with me she hasnt been drinking very well so I opted to flush her for a feed, since then she has seemed very happy :) whilst drinking much better (possible nute lock was imminent). Now back down to half doseages with the exception of CalMg (to help after flush) but will be increasing them in the following days.
As of next week I will be transferring her and another plant my partner is nurturing into single bucket DWC set ups. Fingers crossed I will see some hearty results for making the crossover to hydro.


Likes
21
Share
@DeepRootsGrowTrees
Follow
SATIVA DREAM by KANNABIA
Week #18 Overall
Week #3 Flower
This week she continues to look healthy no issues to report overall she's doing her thing outside. Stay Growing!!
Kannabia.com
SATIVA DREAM


Likes
73
Share
@Roberts
Follow
Deep Forest Auto is still trucking along. She is still bulking and the ph has bee. Stable all week. She should be on her way to finish soon. Thank you again Doctor's Choice, Medic Grow, and Gen1:11. 🤜🏻🤛🏻🌱❄️

Likes
12
Share
@CanarianGrow92
Follow
Week 6 for the Oreoz from Super sativa seeds club.
Amazing strain, the buds are hard as rocks and explode in trichomes. This strain is a must! I hope super sativa seeds club add this one to their catalogue after they completely finished their testings.
Likes
50
Share
@D33jW
Follow
🌸 Runtz - Week 1 of Flowering 🌸
🌿 Genetics: Gelato x Zkittlez
⏳ Flowering time: 8–9 weeks
🔥 THC: Around 27%
🌈 Effects: A balanced mix of euphoric uplift and deep relaxation, perfect for both creative moments and evening chill.
🍬 Aroma and flavor: Sweet, fruity candy notes with tropical and creamy undertones.
This plant has completely stolen my heart! ❤️ The structure is absolutely stunning
- beautifully forming flowers and an abundance of side branches make this one truly special.
The way it's shaping up already has me excited for the weeks ahead!
The first week of flowering went perfectly under great conditions,
and I couldn’t be happier with how she looks at this stage.
At the start of the week, I performed lollipopping to ensure that lower branches,
where less light reaches, don’t take away energy from the top canopy.
Now, she can focus all her strength on producing some buds!
Grow Conditions (FLO Week 1):
🌞 Light schedule: 12/12
🌱 PPFD: 750 µmol/m²/s
💧 VPD: ~1.2 kPa
Let’s see what week 2 brings! 🚀🔥

Likes
13
Share
@SzkolaZiola
Follow
Hello everyone!
Welcome to my Tent-X Ultimate Grow Challenge diary. 💪
I'm germinating 2 seeds from every of the selected cultivars on paper towels:
👉 Strawberry Cough (Dutch Passion)
👉 Mimozz (Perfect Tree)
👉 Slurricane (Advanced Seeds)
👉 Cherry Atomic Sledgehammer (Welcome To The GrowTent)
Did not have much success this time - germination rate was just over 60% - my worst in years. But still - I'll get enough plants for my tent - I always try to sprout 200% of what I really need, for ocasions like this one. 😎
After they germinated I moved sprouts to easy plugs - which is wher they normally start they life (I usually ommit paper towel step and go straight into plugs).
First time in years I'm really having problems with germination. The one Slurricane that did germinate seems to have broken growth cone or something - it is no growing at all.
Mimozz seems like it wants to die so it probably will... I did drop one more seed just to be sure I have at least 4 plants:
👉 Grandpa's Cookies #6 S1 (ETHOS Genetics)
More updates coming soon 👋
Thank you, come again! 😅


Processing
Likes
10
Share
@btcywtsitw
Follow
So I definitely fucked up this week and missed some crucial water times. I passively knew in the back of my mind to but I was just having busy and stressful days.


Likes
2
Share
@Chucky324
Follow
Hello. This is the end of week 7 and the beginning of week 8 of flowering.
I like to flush... So this will be the last week of nutrient for these girls.
They will just get ph adjusted tap water for the last 2 weeks.
When the water flushes the medium, In the past I've put a meter in the reservoir, the ppm's are about 500ppm for the first week of flush and about 250 the 2nd week of flush.
I'm expecting some yellowing leaves then.
It's odd that 1/2 of that Pink Kush plant died. I don't think it's got root rot that can spread through the hydroponic system.
OK. Keep Growing Straight.
Chuck.


Likes
28
Share
@Roberts
Follow
Auto black Opium is doing good.i changed her solution to the blooming mix today. She is starting to develop her colas. Even is look great. Thank you Divine Seeds, Athena, and Spider Farmer. 🤜🏻🤛🏻🌱🌱🌱
Thank you grow diaries community for the 👇likes👇, follows, comments, and subscriptions on my YouTube channel👇.
❄️🌱🍻 Happy Growing 🌱🌱🌱
https://youtube.com/channel/UCAhN7yRzWLpcaRHhMIQ7X4g.

Likes
13
Share
@Fidoe1
Follow
Good week for the girls..started way hot but has been getting cooler witch is great for flowering...they growing very fast now and have shot out meny new bud spots. My clones will db my yield and have been a great learning experience ...I have raise every kinda plant ..but these girls are a joy to grow... challenging ..frustrating .. but always a joy!


Likes
35
Share
@BigDaddyK
Follow
Smell is sweet and fruity, but dark......
Starting to pack in on , buds are so dense

Likes
35
Share
@Da420Andi
Follow
Howdy fellas it's day 54 of flower. Yesterday I had a defolliation going. Most of the bigger leafs had to go. Im feeding water only since 8 days. I guess 10 more days and they should be ready. The smell of especially 3G and Wedding Gelato is crazy. Both North Thunderfuck have also nice smell and are very high yield plants. Hulkberry is also looking really good but will take a Lil bit longer than the other ones.
I wish everyone a nice day 😊
Likes
6
Share
@jaydee702
Follow
This strain is growing fast and flawless so far they are stretching alot more than expected and hope that stops soon running out of room after 4' tall wich is 5' tall from the tent floor was 2' only last week
