
Likes
Comments
Share


@Secretflower
Follow
Hello my friends,
...May 26, 2022.. Day N°75..
...Flowering day N°19...
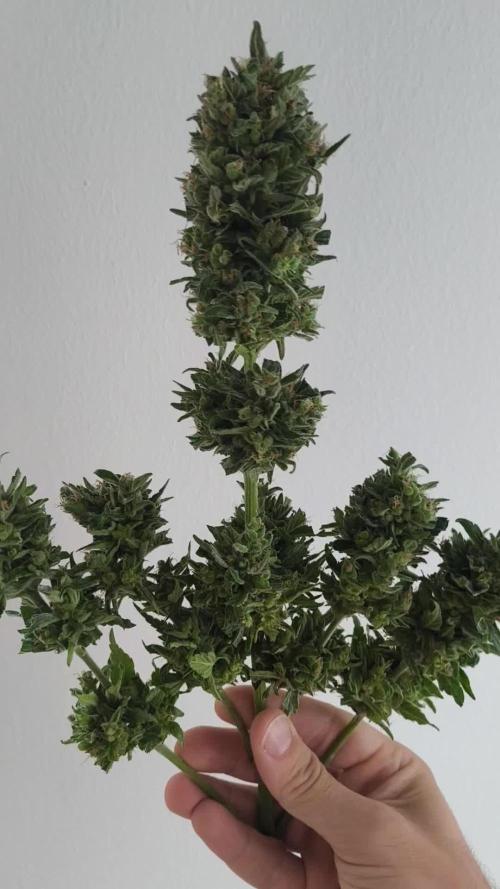
My three Feminized Bubblegum are fine, developing very good, they are beautiful, they stretching normally, the flowers are here. I made a little defolliation.
I feed them with the Hybrid Powder and some Booster from Green House Feeding Nutrients,
I gave them some CalGreen from Metrop, the best Cal-Mag of the market.
They are under a MarsHydro TS 3000 at 50% of power and at 50cm of the canopy.
www.00seeds.com
www.mars-hydro.com
Thank a lot for passing through here.
Wish you the best with your green projects, peace.
See you soon 💨💨💨


Likes
5
Share

@BalconyBoy
Follow
24.07.25 after a last sunny day lemon Kix was chopped and trimmed. I went for very few amber trichomes to have a less sedating effect and was surprised with two mature seeds already. I'm curious if I'll find many more when the buds are fully dried. The maturity of the seeds seems a good indicator that I'm not harvesting impatiently ahead of time. Due to the tiny result I will not grow auto strains on the balcony again unless diaries on this platform show that its really a XXL Auto.

Likes
8
Share

@Bncgrower
Follow
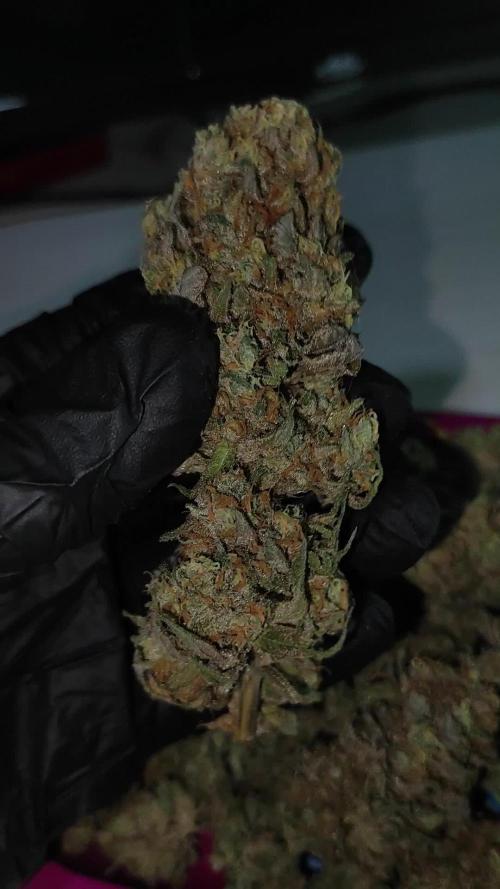
Harvested today, truly strong smell, cultivation was absolutely perfect from start to finish. Very happy with the result, anxious for the drying and curing process! Thank you for following along.. 🤜🤛🌱🌿🌲
Likes
58
Share


@Krisis
Follow
7/1 Chopped these babies down. Now they’ll be hung in the dark (full plant) at about 60/60 until they’re ready to go in jar. Hopefully about ten days, but these are small so idk if they’ll go that long. Will update when we get there
Tried to update smoke report but it just keeps erroring out. I’ll try it again another time. :/
Meanwhile, I’ll leave some info here.
This hasn’t even cured yet and wow. Wasn’t thrilled with what I could see the yield would be.. still not thrilled, but damn. The shits good. Perfect density, smell, and taste. It’s loud af and definitely potent. It’s pungent with a hint of sweet but not too much.
Would absolutely grow again, but would grow more plants since the yields not there .. at least for me.
5.2 ounces - 2 plants. Buds no trim ;(

Likes
10
Share


Likes
32
Share


@Ciocanna
Follow
From the 9th day I started adding Hesi Root Complex 1ml and 2ml PowerZyme per 1L of water. We poured out water only as needed and did not water the stem!
Day 13. I increased
Hesi Root Complex to 5ml/1L
Hesi PowerZyme
2ml/1L
We poured out water only as needed and did not water the stem!


Likes
7
Share


@CreatureCreator
Follow
Twiggy and Zoey will be hurting this week. Trying a bit of drought stress to see how it will affect the terps. They look great going into it, so we'll see how it goes. Pots have dried out and are super light as of 5/21AM

Likes
11
Share


@SlowerLowerGrower
Follow
No it’s not weight but it was a fun little side grow next to my bed that gave me no headache and top shelf bud 👍

Likes
22
Share


@Njaak
Follow
For this grow I kept my setup a lot simpler than last year. Going with Jack 47 because, well, reviews are awesome and we've had success with Sweet Seeds germinating well.
From the pics and videos you can see I've got a simple bucket for the plant with no air stone, pump, or other shit in the plant bucket. All that is in the reservoir. Should make it easier to clean, flush, etc. I'll be able to just pop the lid off (with plant in the net) and put it on a clean bucket with pH balanced water while I clean the rest of the system, then hook it right back up. I also over-designed so I could add a second grow bucket if I want. Don't have space for that at the moment but non-loadbearing walls are easy to move, right?
Using General Hydroponics for nutrients and Hydroguard for good measure.
Knock wood I'm not jinxing things by posting before I have seedlings.

Likes
88
Share


@ILoVeThiSpLaNt
Follow
Che dire di questa varietà? Ho ancora tantissimi semi in frigor da fare ma ho deciso subito di ricomprarla e ti consiglio di farlo immediatamente anche tu.
Brava RipperSeeds!!!

Likes
7
Share


@Oktoberfest
Follow
19. Mai 2025
- Neues Video aus dem Zelt.
- Links nach rechts/Left to right: Sleepy Joe, Lava Cake, Runtz


Likes
3
Share


@BrigadeDesTerps
Follow
7 jours actuellement 19/10/24
Elle est devenue beaucoup plus violette et son odeur intensifie et changeante, on voit des signe de développement, lent mais ça pousse
J’espère que la reveg va bien prendre

Likes
19
Share


@Joeycrack9
Follow
Lemon Mandarin 1 & 2 09/17 5 weeks
Orange Sherbet 1 09/17 5 weeks
Papaya Sherbet 1 & 2 09/25 4 weeks
Gorilla Melon 1 & 2 10/04 3 weeks
Lemonpaya 1 10/04 3 weeks and 2 10/14 2 weeks

Likes
3
Share


@Blunoser
Follow
Week 8 Veg. Moved to groom this week. Getting ready to flower in a week or 2. Switched from Cfl lights to 2x 315cmh

Likes
Comments
Share


@MrStarOn3
Follow
At the end of week 3 I topped one of the strawberry cough they are all looking good and starting to veg I’m all caught up with the grow diary’s and will add at the end of every week. I’m in Australia and did start a little late into the season but hope to get a decent grow in they will be at my brothers once transplanted and he has a few aswel that I will add into the grow log nothing but sun and water only use a little thrive that’s from Bunnings that I get from my pops shed. They will be in a nicer cleaner soil when transplanted into veggie beds and will have chicken poo as a nutrient source first time ever using chicken poo so see how it goes. Will keep the grow log updated and hopefully everything goes all well for the travel and transplant for the plants in the next few days
Likes
18
Share


@ljack494
Follow
Well well well, what do we have here what a good crop so far. The discolored plant had some calcium deficiency so I upped calmag plus 2tps look like it did the trick so everything is good now!

Processing
Likes
2
Share


Likes
249
Share


@Metatronix
Follow
A big hello to all the cannabis growing gardeners...and all the other visitors that came across my grow journal.
This week i need to change the reservoir again, the plants drink solution just as I add fresh water the EC stays at 2.7 and i need to add PK and Calmag so that's why.
The weather outside is very cold this whole week around -18 degree Celsius at night...this made my reservoir water go under 15 degree Celsius.
Since i ran the Spider Farmer UV lights i noticed some purples on my cannabis plants i think it's their doing....i run it now for two weeks the UVs
----------------------------------------------------------------------------------
The SE 7000 is hanged at 40 cm. over the canopy and runs at 520W.
This whole grow's main sponsor is Spider Farmer. You can easily obtain all the great grow equipment we use at: spider-farmer.com
A big thank you to Jessie and the whole Spider Farmer crew for supporting me with the newest technological advancements in horticulture. Thanks to them what i do here is possible.
Thank you Zamnesia for giving me the opportunity to try out your stock.
zamnesia.com/uk/7686-zamnesia-seeds-do-si-dos.html
20% discount code: ZAMMIGD2023
Plagron did send us their Contest package for the Power Buds competition .
Thank you for your visit, please leave a like and hope to see you beck here in about a week.