


Likes
Comments
Share


@MariRemediesLLC
Follow
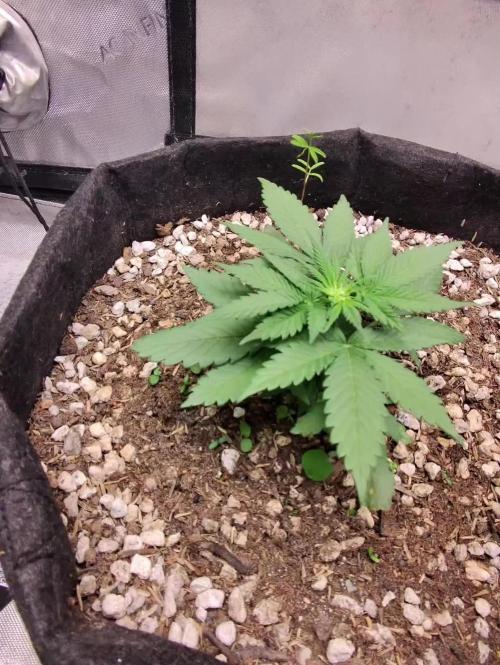
Day 9: Diagnosis: Slight Nutrient Burn, Growth Normal. Treatment: Feeding Cal-Mg tomorrow
Day 12: 👍🏾(Looking Good!)


Likes
17
Share


@The_Projexx
Follow
Welcome to week 7 of flower! Our new camera should be in this week so I'll be able to capture better photos! Things are just grooving along at a nice pace, I will be looking to check the trichomes this week to see where everythings at but I know for sure we still got some time left especially for Fuel D.og. Over all really excited to see what this week will bring and hopefully we will be starting flushing the plants by weeks end!
Huge Shout outs to the following for all their outstanding work with everything from equipment to genetics: @MarsHydroLED , @Seedsman , @PyramidSeeds , @GreenHouseSeedCo
HUGE HUGE shout outs to all my followers and people who stop into the diary alike! Keep inspiring to grow!
-The Projexx
Day#43F Plants reacting well to water increase! Fade continues to get more pronounced and the flowers still putting on mass but starting to slow down.
Day#44F Pictures N/A. Ladies continue to grow. Fuel D.og#2 is really starting to smell like my old shop now, a mix of gas and grease!
Day#45F Checked trichomes, Black Cherry Punch and Kings Juice will begin their flush at the end of this week, I will sneak in 1 final feeding with nutrients before flush.
Day#46F Ladies are grooving along, Fuel D.og is still putting on mass daily! New camera came in and I think it does the plants justice now!


Likes
25
Share


@DrGanj
Follow
This plant was a dream to grow, wish I'd taken cuts. Halfway through dry at 7 days. Drying at 55 - 60 % RH and 17 - 19 degrees C. I anticipate she'll be done between 10 - 14 days total dry time and I'll then trim and update weights on this Harvest.
133.75g total after trim. She's a nice smoke, very happy.

Likes
38
Share


@Homegrown93
Follow
This was a lovely strain to grow out, never have I seen a more purple strain. She did not like the full strength N but once I pulled back to 75% she was happy again. Everything else was smooth sailing and she competed well for light and space with the others crammed in the tent. Harvested on day 77.

Likes
122
Share

@Qutro
Follow
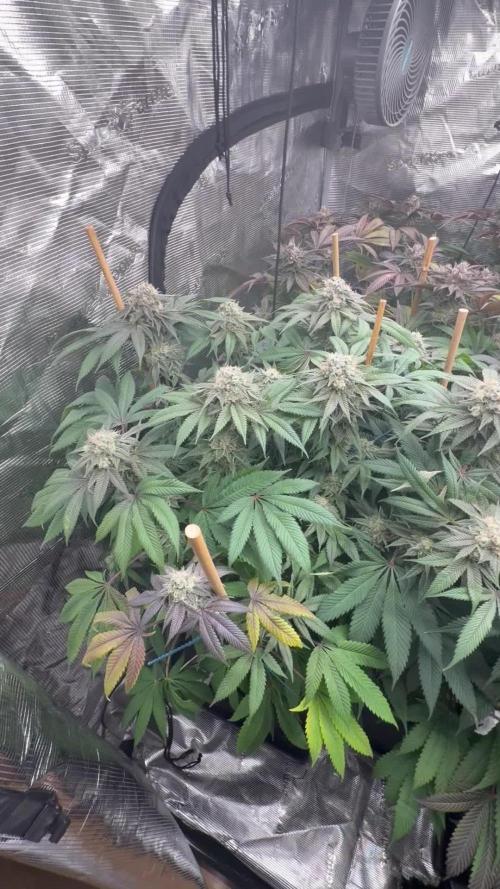
Week 8
Autumn vibes hitting the tent hard 🍂🔥 Just look at those colors, absolutely beautiful.
What blows my mind is how these girls keep stacking frost even this deep into the ripening phase ❄️🌿 They just don’t want to stop.
Opening the tent every day honestly feels like walking into a luxury aromatherapy session at a fancy wellness spa 😂 The terp profile is getting crazy complex and the bag appeal right now is a solid 10/10 👌
This is the first strain I’ve run from Humboldt, but definitely not the last. They completely won me over with this one 🙌
Pretty sure this was the last week of nutrients for the ladies. Starting the flush next week 💧
Trichomes are almost fully milky from top to bottom now 🥛✨ Getting really close… can’t wait to see how the final numbers turn out 🤞

Likes
Comments
Share
@Wierie
Follow
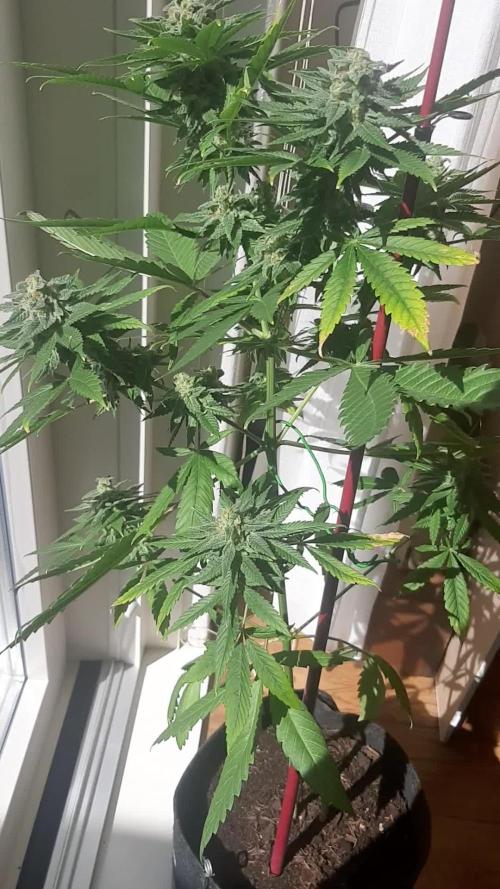
Day 52 of flowering
Good day friends...
We are lucky with a lot of sun these couple of days...
She has been puffin up realy nice..
Just giving her water with nutes and pk13/14
Chekout my outdoor plant.. also super lemon haze..
Same age as my other plant ... maybe a couple days younger... topped her for the second time on some branches ... just to see what will happen.. she has some spots here and there ..messed up with the water but she is doin fine...
Lets see what happens ..
Good day untill we meet again 🌴👍
Likes
15
Share

@TrickzGrowz
Follow
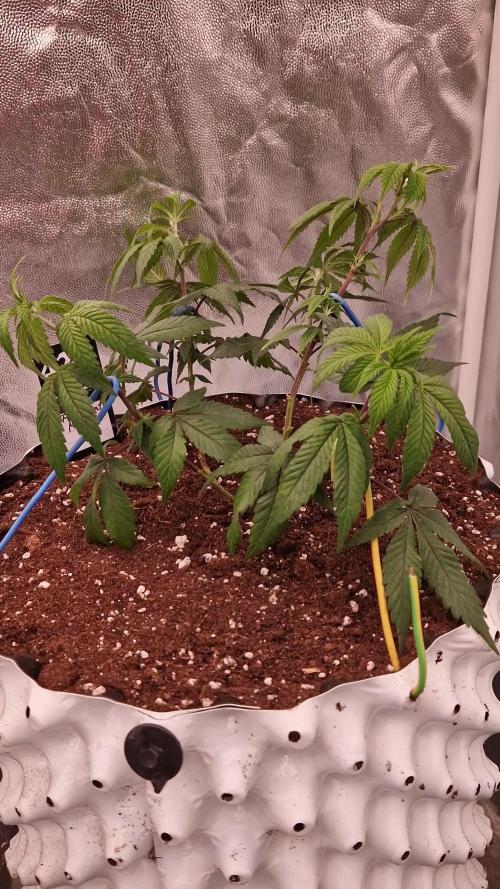
Servus Moin!
Wieder ein super Wachstum von der Permanent Melons, ich habe nichts anderes erwartet. Sie wurde diese Woche in einen 20L Airpot getopft.
Likes
21
Share

@Tower84
Follow
🇩🇪 Woche 4 🌱 | Cherry Limeade 🍒🍋
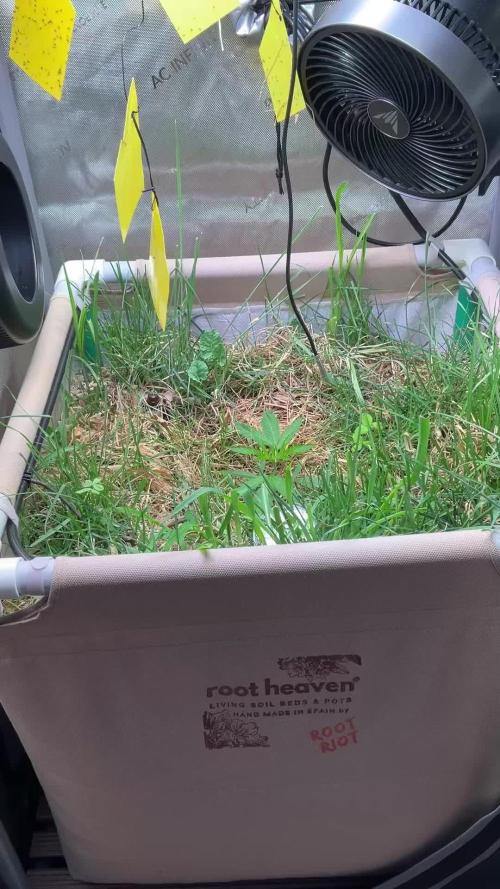
Die Cherry Limeade macht endlich Fortschritte! 🙌 Mit mittlerweile etwa 8 cm Höhe nimmt das Wachstum langsam Fahrt auf. Trotzdem ist sie für ihr Alter noch deutlich zu klein. Rückblickend vermute ich, dass die direkte Keimung im sehr nährstoffreichen Living Soil für einen Sämling einfach nicht optimal war. Wahrscheinlich musste das kleine Wurzelsystem zunächst viel Energie investieren, um sich in dem aktiven Boden zu etablieren, bevor oberirdisch wirklich Wachstum sichtbar wurde. 🌱
Genau dafür habe ich mir bereits die Bottomless Pots von Almicanna besorgt. Beim nächsten Durchgang werde ich die Pflanzen zunächst in BioBizz Light Mix innerhalb dieser Töpfe anziehen. Die Töpfe stehen direkt auf dem Living Soil Beet, sodass die Wurzeln später selbstständig nach unten in den lebenden Boden wachsen können. Ich bin gespannt, ob sich dadurch der schwierige Start vermeiden lässt. 🔬
Mit der Blumat-Bewässerung kämpfe ich aktuell noch etwas. Durch das ständig wachsende und wieder zurückgeschnittene Cover Crop verändert sich der Wasserverbrauch permanent, wodurch es gar nicht so einfach ist, den Sweet Spot von 100 mbar konstant zu halten. Im Moment schwankt die Bodenfeuchtigkeit noch recht stark, aber das gehört wohl dazu, wenn man ein neues Living-Soil-System kennenlernt. Ich bin sicher, dass ich mich mit der Zeit noch besser auf das Setup eingrooven werde. 💧🌾
Insgesamt bin ich trotz des holprigen Starts optimistisch. Die Pflanze sieht inzwischen deutlich vitaler aus und wächst endlich kontinuierlich. Jetzt heißt es: Geduld haben und das Living Soil seine Arbeit machen lassen. 🌿💚
📊 Aktuelle Parameter:
💡 Licht: 200 PPFD (18/6, Stufe 2, 40 cm Abstand)
🌡️ Temperatur: 27 °C
💧 Luftfeuchtigkeit: 82 %
📈 VPD: 0,69 kPa
🌿 CO₂: Ø 750 ppm
💧 Bodenfeuchtigkeit: 50–150 mbar
⸻
🇬🇧 Week 4 🌱 | Cherry Limeade 🍒🍋
Cherry Limeade is finally starting to pick up some speed! 🙌 She has now reached about 8 cm in height, and growth is becoming noticeably more vigorous. However, she’s still much smaller than expected for her age. Looking back, I believe directly germinating the seed in a nutrient-rich Living Soil wasn’t the best choice. The young root system probably had to spend a lot of energy establishing itself in such an active soil before visible top growth could really take off. 🌱
To solve this, I’ve already bought the Bottomless Pots from Almicanna for my next run. My plan is to start the seedlings in BioBizz Light Mix inside these pots, which will sit directly on top of the Living Soil bed. Once the roots are strong enough, they’ll naturally grow through the open bottom into the living soil below. I’m really looking forward to comparing the results. 🔬
I’m still dialing in my Blumat irrigation system. The constantly growing and regularly trimmed cover crop changes the water consumption all the time, making it surprisingly difficult to keep the ideal 100 mbar soil tension consistently. Right now the soil moisture fluctuates between 50 and 150 mbar, but that’s part of learning how this new Living Soil system behaves. I’m confident I’ll get the hang of it over time. 💧🌾
Despite the slow start, I’m feeling much more optimistic now. The plant looks healthier every day and has finally started growing consistently. From here on, it’s all about patience and letting the Living Soil ecosystem do its job. 🌿💚
📊 Current Parameters:
💡 Light: 200 PPFD (18/6, Level 2, 40 cm distance)
🌡️ Temperature: 27 °C
💧 Humidity: 82%
📈 VPD: 0.69 kPa
🌿 CO₂: Ø 750 ppm
💧 Soil moisture: 50–150 mbar

Likes
9
Share


@WeedleyScott
Follow
Habe die Pflanzen wieder etwas Entlaubt und ein zwei Triebe entfernt.
Likes
31
Share


@Cremo
Follow
Sweet mother of god! What a beautiful plant!
Now I finally know what it means to grow US genetics. Sherbinskis in collab with Sensi Seeds has made some uniquely beautiful plant. She's dark, almost black, she's extremely good looking, and frankly I didn't expect the plant to look as good as the advertisement photographs but here she is! As beautiful as it can get! I've pushed my photography skills again and god damn, it was worth it. I don't know if any other plant has been this photogenic!
The yield is great, as expected from a extra longer veg period. The smell is off the hooks!
Please, have a closer look at all the photographs, there are soooooo many gems that should be able to win dozens of contest IN MY OPINION XD
PS: Hopefully I'll grab your attention with these bomb ass macro shots!!!!! I love me some great Trichome worlds, and this is a special one!
Cheers
XOXO
Cremo

Likes
2
Share

@Black_Widow
Follow
Привет садоводы и огородники !!!
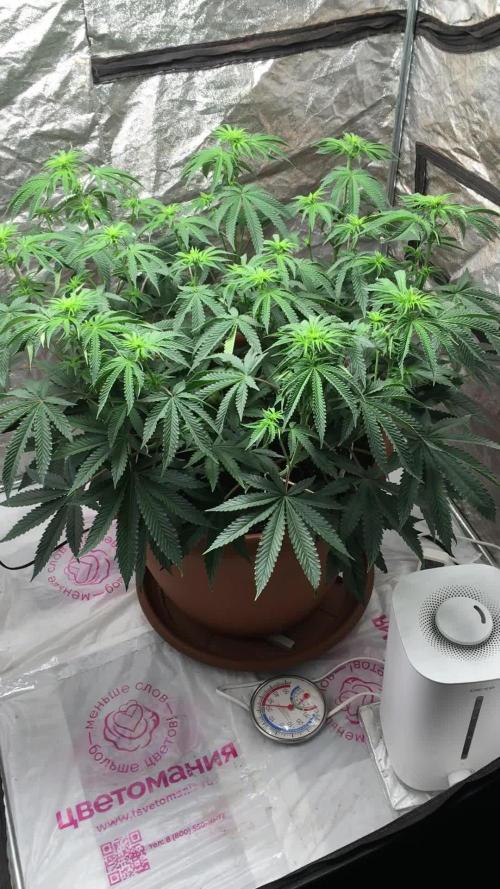
Растение чувствует себя хорошо
оно зачвело и вытянулось до 50 сантиметров
цвет листьев отличный
Processing
Likes
1
Share


@Funkyskunky1
Follow
They are looking real good. I think I may have gotten some nutrients on one plants leaves and it caused some yellowing and leaf curl, I’m hoping it straightens out.
Likes
26
Share

@Kirsten
Follow
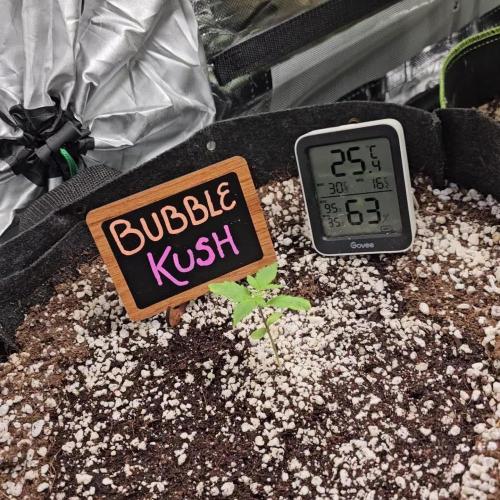
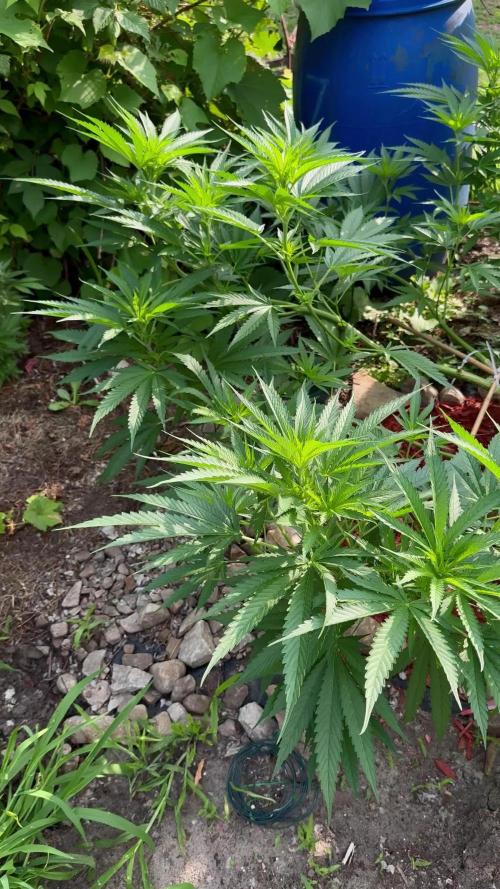
Keeping the plant watered the leaves are looking a little suspect, which I will keep an eye on.
Nothing much else to report this week.
Thanks for checking in this week 😁💚✌️🌱🙌



Likes
24
Share


@Spazmagi
Follow
12/16 - Today is Day 77 from seed. Mid-last week I switched her over to 60% strength (~1.2ec) and today I switched her over to flush with 10ml/gal GH FloraKleen. Upon checking multiple buds for trich ripeness and I found an average of approximately 10% amber across the whole canopy. Some of the larger, more mature buds were closer to 15-20% Amber while some varied as low as 3-5% Amber. I am choosing to go ahead and flush her out since I need the space in the tent sooner, rather than later. I am planning on a 48-72 hour flush then chop. This will definitely be my biggest yield to date, but her sister, the Amnesia XXL Auto might top her out yet, though she is still a couple weeks out.
Thanks for checking out the garden. Stay tuned for updates this week as we approach chop day. As always, Happy Growing!

Likes
17
Share


@Noob_quest
Follow
So I’m on cloud 9. Way past my goal!
I’m now free from the prick kids turning up late to sell me overpriced crap weed.
Goodbye forever wankers!
So the 3 in this diary are not super potent and still smell & taste a little bit grassy. Maybe a little to do with being so keen to harvest, perhaps they could’ve gone a little longer. Am hoping the cure improves smell & potency.
That being said the 3 other plants in my grow (all different strains from Fastbuds) yielded about as much and are a lot more potent than these.
So everything is abso-bloody-lutely marvellous over here.
I’m just about ready for grow no 2. Super excited about what I can achieve now I won’t make so many idiotic errors again.
Thanks for reading and have a great week One and All...😊

Likes
35
Share


@StonedandSteady
Follow
3rd w/ Flower: Buds Action and Everything is Supreme and Savory at thier 3rd week of Flower!
3rd Week of Flower: 3rd Flower Feed of #HumboldtCountysOwn and the Ladies Love the Bloom portion of Nutrients! They're Stacking Up Great and Filling Out thier Mighty Branches with Giant Gorgeous Budz! 5 Confirmed Females!!!
It's been a few days since I gave the Ladies thier 3rd Feed of #HumboldtCountysOwn Nutrients and they look Fantastically Divine!!! We'll definitely Grow back to everything here soon! 11th w/ Veg and Flowers Update #Pre-Sexed🚺 #SuperCropped #Defoliated #Lollipoped
Good Day and Happy Growing Everyone! These Ladies were Growing into thier 11th Week of Veg and Looking Totally Tight and Phenomenally *Femed* from the Right!
#Pre-Sexed 4/9/21 #Opium/#PabloEscobar *Fems* breed by Team #DivineSeeds #DivineSeedsSquad #DivineSeedsBreedingCompany and #SuperCropping continued! I'm Very Excited and Extremely Gracious!!!
Heck Yeah Growmies and Growmets!!! Check Out these Confirmed Females with thier Wild Pistol Hairs popping and I'm still Training and Widening them Out with #SuperCropping Everything looks Expanded and Growing Great!
After #SuperCropping the plant will Grow Bushier, Produce More Buds, and possibly even Produce More THC! This is how the plant naturally responses to danger and protects itself! Growers take advantage of this technique to get Bigger Yields and More Potent Buds than would be produced otherwise!
Getting Trained out into thier 11th Week of Veg and Looking Mighty Fine!!! Thier getting Humongous and Hearty in thier 10 gallon Grow Bag from Broski #www.as420.ca These Cannabis plants are Camping out in the Closet for a week or so! Lol
This is my 2nd run using the Osree.Light QB1000w and Everything is Mesmerizing!!!
My #Opium and #PabloEscobar *Fems* from #DivineSeeds Regs: SalamiLegF3's×2 and FireAlienRomulan look$ Outstandingly Awesome and Growing Up Phenomenally Fine into thier 11th week of Veg in our 2- 10 gallon The Grow Bags from Broski #www.as420.ca and also 2- 5 gallons as Well! Our others are Super and Breed by #thehumancannabiniod #AlienBloodGenetix #TNBNaturals #Foop
Yo!!! Thanks Again for All the Love and Support my fellow Growmies and Growmets!!! These Magnificent and Magical Ladies were Growing in our 48×24×60 ViparSpectra Official Club 🌿 ®️ Grow Tent and under our #Osree QB1000w and #GrowStarStore Kokokala QB1000w and our Purple Rose Cutting×2, Aloe Vera Cutting, Maters×3, Morel Mushroom, Lavender×3, Sunflowers×5 and The 5 Brand New and Fresh Starts are Wonderful with a Huge Hint of Fantastical Fire is my #SalamiLegF3×2 by Broski #thehumancannabiniod #DankFlowGenetics #EastCoastSeedBank #FireAlienRomulan by Broski #AlienBloodGenetix my #PabloEscobar and #Opium by Team #DivineSeeds #DivineSeedsBreedingCompany We Grow with #Growatt 600w with #FoopOrangicBioSciences and #TNBNaturals The Enhancer Co2 Despersal canister and ph'd them w/ Declorinated watering w/ TNB ph Up and Down! Totally Top Quality Topz all Around! Thanks Again #GallowGlas420 #HarleyGrower #thehumancannabiniod #AlienBloodGenetix #TNBNATURALS #FoopOrangicBioSciences #www.as420.ca #divineseeds #divineseedssquad #divineseedsbreedingcompany #BioFlux Family's and Teams!!! Your Genetics are Merry Magnificent, Mega Marvelous and Mighty Medical! Love um!!! I really Can't stress enough how Thankful and Grateful I am of All of you and what you've Shared with Us! Means the World!!! It's definitely a Pleasure being able to Grow with these Phenomenal Grow Lights! Please Enjoy! BudBrothers4-Life! Cheers Famz!!! Much Props and Much Topz!💯🔥 #Osree #GrowStarStore #Growatt #TNBNaturals #TNBTeam #FoopOrangics #GrowYourOwn #Bliss
HumboldtCounty'sOwn:
Email: [email protected]
Phone: (707) 725-4119
Toll free: (866) 872-9434
Humboldt Bottling
Po Box 429 · Fortuna, CA 95540
HumboldtCounty'sOwn Website Link: https://humboldtcountysown.com/
HumboldtCounty'sOwn Instagram Link: https://instagram.com/humboldtcountysown?igshid=1qj809qkkwych
https://instagram.com/osree.light?igshid=1vrsbdyhzg2h8
https://instagram.com/growstarstore?igshid=2yjn0r00r6ru
https://instagram.com/divine.seeds?igshid=1r90iwe9xiwz8
https://instagram.com/thehumancannabinoid?igshid=17k159pumklkq
https://www.instagram.com/alienblood_genetix_official/
https://instagram.com/as420.ca?igshid=1f116alw054wp
The Grow Bags: https://www.as420


Processing
Likes
5
Share

