


Likes
Comments
Share


@Troll60x60
Follow
Esta es la semana actual en la que me encuentro, con plantas recuperadas del súper cropping (cayos formados), se sigue utilizando en menor intensidad para mantener la altura del cultivo, el riego aumento en 300ml, raíces ya más fortificadas y cogollos más grandes, el crecimiento ya es mucho más notorio, seguimos aplicando floración B y engorde C.
Recordar la poda de hojas que obstaculizan la luz.


Likes
12
Share


@thonhash
Follow
Subimos algo más los ml de terranabis,buena asimilación y engorde,gracias a enzynabis que busca el equilibrio de todo.

Likes
1
Share

@HanzzCZ
Follow
Servus! 🖖
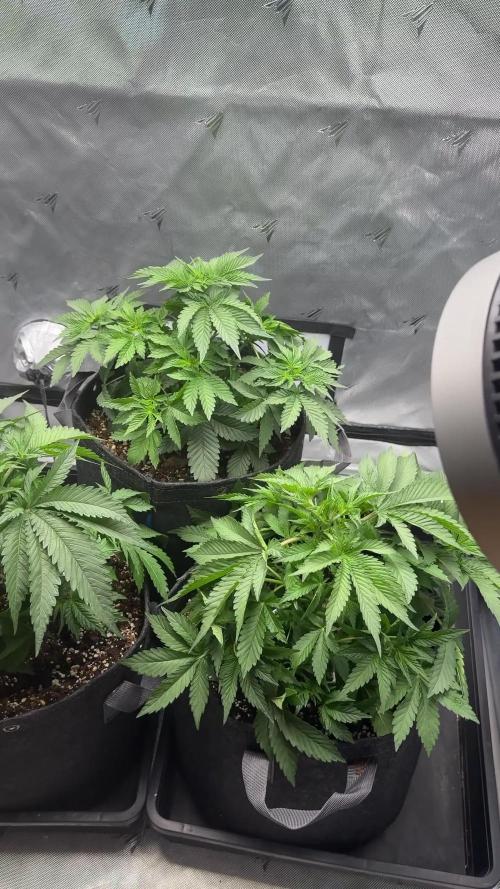
Mame za sebou 28 dni.
Tento týden byly nižší teploty, tak jsem 26den nasadil LST kulturu by @ZhulenejJohny a pri tom odebral pár listu.
Stále přemýšlím, že toto kolo nebudu topovat.
Holky vypadají zdravě. Myslím, že jim nic nechybí.
Ať se daří! ✌️🍀
____________________________________________
What’s uppp! 🖖
28 days are behind us. 🌱
This week the temperatures were a bit lower, so on day 26 I started some LST, inspired by @ZhulenejJohny , and removed a few leaves at the same time.
I’m still thinking about skipping topping this run and letting the girls grow naturally.
The girls look healthy and happy. I don’t think they’re missing anything. ✌️🌿
Good luck and happy growing! ✌️🍀

Likes
59
Share


@TheCannaProphet
Follow
~ AirCube Active Oxygen Ebb/Flow System sponsored by GrowAce, featuring Tropicana Cookies by FastBuds ~
Well guy's and gal's here we go again on another exciting Autoflower run together! This time will be different as I will be doing a 'Hydroponic' run utilizing the AirCube Active Oxygen Ebb/Flow System by GrowAce, who were kind enough to sponsor me for this run, so it should be interesting to see what results I get and have some fun along the way!
•Let me first tell you about this 6 Pot Ebb/Flow system from GrowAce:
"The AirCube system is the one and only Ebb & Flow grow system on the market that combines the benefits of air pruning with a fully automated Ebb+Flow system! With the AirCube's proprietary fabric pot in bucket design, this system is guaranteed to outgrow any other Ebb + Flow system on the market. The results speak for themselves- grow MASSIVE roots that result in MASSIVE fruits!
Air Pruning- Air Pruning only happens with fabric pots. As the roots reach the fabric walls of the pot, they penetrate and grow into the breathable fabric. Once penetrated, the roots are exposed to air, which causes the tips of the root to dehydrate and naturally prune themselves. This natural pruning process forces the roots to grow tons of lateral fibrous feeder roots. This results in a plant that utilizes the entire root zone and fills the entire pot with tons of roots. These fibrous feeder roots are incredibly effective in uptaking water and nutrients, resulting in a plant that grows healthier and more vigorously!
Oxygen Benefits- Without oxygen, nutrient absorption cannot occur. On a molecular level, oxygen is needed to transmit nutrients across the cell walls and into the roots of a plant. With the AirCube's proprietary bottom lifted draining design, the system actively draws all of the water out of the bucket pulls vital oxygen into the root zone.
Maximum Versatility with Any Grow Medium: The AirCube System is the only system on the market that allows you to use any growing medium you like. Use coco coir, soil, peat moss, perlite, vermiculite, hydroton, rockwool or any other medium you wish! This system is the most versatile Ebb and Flow bucket system in today's hydroponics industry.
Temperature Control- with the fabric pots constructed with highly porous polypropylene fabric, heat dissipates easily and effectively. Unlike standard plastic pots, heat isn't trapped in the root zone. Heat in standard plastic containers can reach temperatures of up to 125 degrees. When this type of heat is trapped and unable to escape, it can damage your plant's health and limit the potential of your harvest. Growing in the AirCube System, plant roots grow cooler, healthier, and more vigorous.
Largest Pots in its Class- this system features 5 Gallon grow buckets, the largest pot size of any other ebb and flow hydroponic system in the market.
Modular and Expandable- start with 6 grow buckets and expand up to 36 grow buckets with the optional 105 gallons PopTank reservoir!"
For my medium and nutrients I decided to also switch things up from my regular Organic runs, going with Plagron Nutrients and Root Royale 70/30 Coco/Perlite. When filling the fabric pots with medium, I first added just under a gallon of horticulture perlite from Nor-Cal as a base layer to ensure good drainage and then filled the remainder with the Root Royale.
•Now for the outstanding, award winning strain from my friends at FastBuds... Tropicana Cookies Auto:
I'll be running Tropicana Cookies Autoflower which is a 60/40 Indica/Sativa Hybrid. "Tropicana Cookies Auto is the perfect variety for growers of all levels, especially beginners as this strain performs very well outdoors and indoors, and can produce up to 500 gr/m2 in 56-63 days without needing extra maintenance. Reaching up to 110 cm, this strain grows fairly tall with medium-sized branching, showing its mixed heritage. Definitely the right choice for those with a high tolerance looking to get their hands on the strongest autoflowers out there. You can expect an extremely powerful and long-lasting high that’ll boost your mood and give you that extra push you need to start your days on the right foot. This variety offers the whole range of citrus and woody flavors with a strong candy-sweet background that will keep you coming back for more and more."*
*References: GrowAce.com, 2fast4buds.com
______________________________________________________________________________________________________________________________________________________________________________________________________________________________________________________________________________________________________________________________________________________________________________________________________________________
The Setup:
• AC Infinity 4x4 tent
•AC Infinity Cloudline T6 Exhaust Fan w/ Controller 67
•HLG 650R w/UVA Bar
•AirCube Active Oxygen Ebb/Flow 6 pot System
•TrolMaster Hydro-X Controller for light
•AutoPilot APC8200 co2 controller fed by a 50# tank
•16" Hurricane oscillating fan and 8" floor fan
•Tent cooling via filtered outside air delivered by AC Infinity Cloudline T6 fan
•BlueLab instruments: PH Pen and Truncheon Nutrient Meter
______________________________________________________________________________________________________________________________________________________________________________________________________________________________________________________________________________________________________________________________________________________________________________________________________________________
Weekly Updates:
10/1- Setting up the AirCube system when off without a hitch, with very easy to understand directions. I did have one issue, the Drain Petcock on the 25g reservoir was broken during shipping. After a phone call to GrowAce, they had a replacement one on its way to me which I received in just a couple of days! I did however make one addition to the system. I placed a pair of air-stones, one in the Reservoir and the other in the Distribution Bucket to really oxygenate the water.
I started all my seeds by first soaking them in tap water for 12 hours, then transferred them into pre-moistened (6.3ph) peat pellets. I placed the pellets in half Solo cups in the tent with 24hrs of light under which they sprouted within 48 hours. I kept the tent temperatures between 80-84℉, the RH at 65-70% and made sure that the pellets stayed moist, not wet.
10/3- All of the Tropicana Cookies are looking healthy and have good color and vigor! I'll be moving them into their fabric pots which have already been pre-moistened in the next day or two, or as soon as I see roots emerging from the pellet.
10/5- Today I moved all three Tropicana Cookies into the fabric pots, adding some Xtreme Gardening's Mykos into each hole before placing the peat pellets. I have the HLG 650R set to 15% and hung 30" from the seedlings. Tent temperatures are 80-84℉ with RH running 65-70%.
10/7- Well there's the first week on the books for these three little ladies and they're looking fantastic. I'll be giving them their first feed this coming week and they should start to really take off... stay tuned! 😎👍❤️
💚 Thank you for checking out my passion in life! Please visit as often as you wish and I hope you enjoy this journey as much as I know I will! Grow what you love, Love what you grow!💚


Likes
5
Share

@bkickstand
Follow
Week 3: The Big Move for Charlotte & Makayla
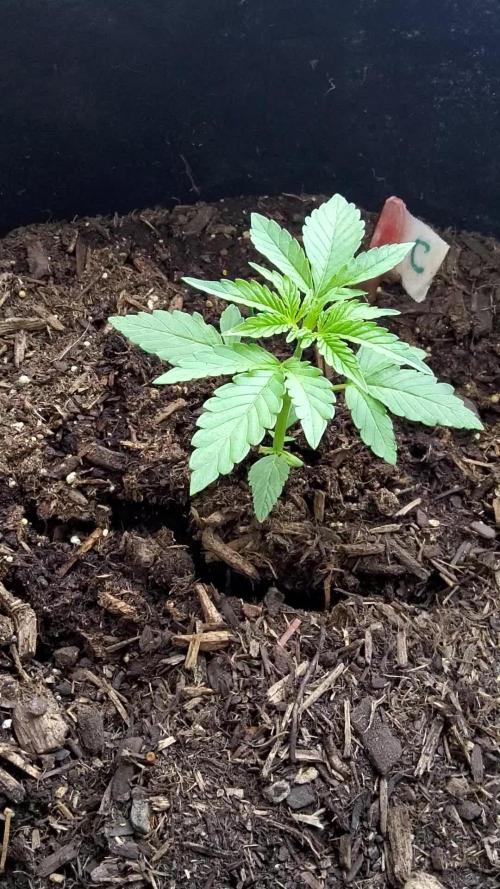
The "Solo Cup Sisters" are officially leveling up! This week was all about transitioning the Northern Lights into their permanent homes. They’ve handled the shift like champs and are looking vibrant and healthy as they settle into the 10-gallon fabric bags.
Growth & Vitals
Charlotte: Currently standing at 100 mm (approx. 4 inches). She’s showing great vigor and tight node spacing.
Makayla: Following close behind at 85 mm (approx. 3.3 inches). She might be the "little" sister for now, but her leaf structure is incredibly robust.
Appearance: Both plants are sporting a deep, healthy green with no signs of transplant shock. The internodal development is exactly where I want it to be for future training.
The Setup
Medium: Using the "secret sauce" 50/50 organic garden soil and potting soil blend.
Containers: 10-gallon fabric bags. These are perfect for providing the drainage and root aeration these girls need.
Environment: They’ve been spending time on the deck to soak up the morning sun. I’m keeping a close eye on the High Plains weather—bringing them inside when the Colorado wind gets a bit too rowdy to ensure they don't get beat up.
Strategy & Next Steps
Training: I’ve got some LST (Low Stress Training) hooks ready to go. I’ll start gently guiding their growth once they establish their roots in the new medium.
Trellis Prep: The plan is to let them grow into a trellis system set about 12 to 18 inches above the soil line. This should give us plenty of airflow and a manageable canopy.
Nutrients: Sticking with the organic regimen. I’ll be introducing the FOOP line—Veg, Bloom, and Sweetener—on a weekly schedule once they’ve fully recovered from the transplant.
**Note:** The focus for the next few days is purely on root establishment. I'm keeping the moisture levels consistent but being careful not to overwater while they adapt to the larger volume of soil.
#GrowDiaries #NorthernLights #Cannabiscommunity #Homegrown #OrganicGardening #Week3 #TransplantDay**

Likes
2
Share


@Kern420
Follow
Woche über haben sich die Blüten weiter entwickelt. Die Trichome wurden mehr und man fängt an erste Terpene zu riechen.
Wir haben Donnerstag (BT 2) stark entlaubt und schauen jetzt wie die Pflanzen wachsen.
C.C ist bissl kleiner aber trotzdem hat sie starke Triebe und scheint gute Blüten auszubilden. Der Geruch ist aufjedenfall schon funky.
Processing
Likes
20
Share


Likes
5
Share

@Bread_n_Buds
Follow
Merry Christmas and happy holidays to everyone, and above all, a fantastic new year of growth with monsters, plants, unicorns, and all the magical beings we love.
** This week, mostly just grow tent photos, so you don't miss any updates over the holidays.
Our Nectar Drip #3 is growing beautifully and healthily. It's not a giant in terms of characteristics or technique, but it looks very interesting. It's been trimmed and will be flowering in 7-10 days.
Selected Techniques - This plant will grow with a classic main lining but without the traditional lst application that spreads the plant across the pot. This is only because the plant, or rather this phenotype, has very short internodal spacing and hardens quickly, risking cracking. So, a healthy classic main lining (topping mainfolding 3 internodes topping x2 and then x4, maybe if the plant goes well).
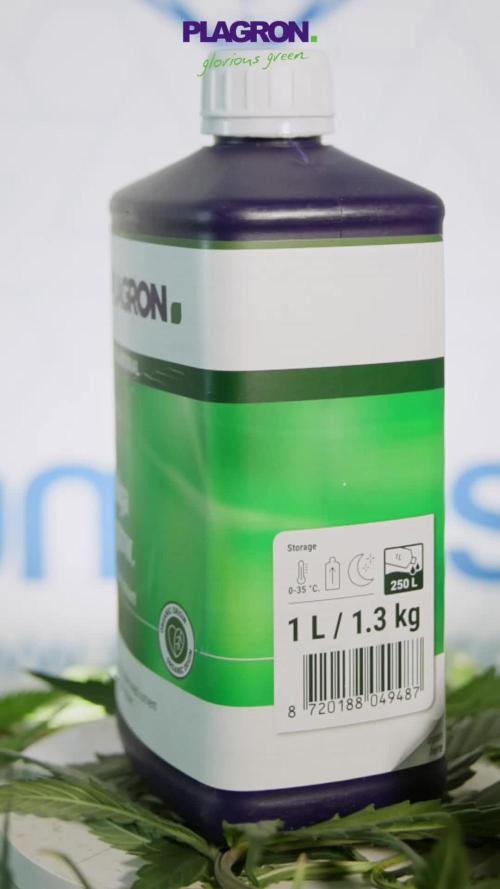
We're 100% organic and 1000% Plagron, as always.
The soil we've chosen is the recently launched Plagron Bio LightMix, which will allow us to get our growing process off to a smoother and more reliable start, without the sudden changes that liquid fertilizers can cause. A week is more than enough, so don't overdo it.
We're in the early stages of the vegetative phase, but we're well-equipped with nutrients and additives. We've added:
- Power Roots 1 ml/l
- Pure Zym 1 ml/l
- Silic Rock 1 ml/l
- CalMag Pro 1 ml/l
- Sugar Royal 1 ml/l
- Alga Grow 5 ml/l
Once a week as a foliar spray:
- Vita Race 5 ml/l
Choose your preferred style and calculate the results on the website:
www.plagron.com
Our new 720W Spider King lamp from Vanguard Hydroponics is still set to the lowest setting. Visit the new Growshop area on the Zamnesia website:
Z - https://www.zamnesia.io/it/531-growshop
Crazy, it was sold out, it was a limited edition! Try another one: the shop is full!
Z - https://www.zamnesia.io/it/35-semi-cannabis
T - https://www.zamnesia.io/it/35-semi-cannabis/745-tical
Z - Nectar Drip is a unique cannabis hybrid created in collaboration between Zamnesia Seeds and TICAL. These flowers are pure power, with up to 26% THC and effects that stimulate the mind and stabilize the body. But if you want to try them, you'll have to hurry: only 750 packs are available!
There's nothing better than a good collaboration: we know that better than anyone! For this partnership, we joined forces with TICAL to create a strain packed with flavor and potency. We brought our delicious Apple Fritter, while TICAL contributed its 24K Gold Fangs. After perfecting the result, Nectar Drip was born. This strain produces potent flowers with a THC content of up to 26%, accompanied by delicious fruity and skunky aromas.
Considering one of its parents is Apple Fritter, you can be sure that Nectar Drip has inherited a burst of fruity aromas and flavors. Skunky notes are also noticeable, creating a rich and intriguing profile. When you smoke this beauty, you'll feel relaxed, with a pleasant cerebral buzz accompanying the experience. It's definitely a great evening smoke, perfect for when you want to take a moment for yourself.
You know it, but I recommend it. You'll find so many wonderful things here, essentially "all the best that nature has to offer."
Z - www.zamnesia.com //
Music //
www.radionula.com
+ Feng Shui Music
+ Frequencies 432 Hz
Processing
Likes
15
Share


@MG2009
Follow
06/02/2020
Gonna feed them today 1tbls of blood meal.
I snapped a branch on #2 (see video) her stems, I don't like break to easy so I will give some micro nutrients to help stems from breaking. Unless she is the HOLY GRAIL. I will cull her clone.
All others handed super cropping well. 🙏
#4 in hydro is in it's own diary called Small Batch Seed making some F1
#1 showed her sex today, clones well took cut on 05/20/2020 is rooting well outside in coco coir, in humidity dome just cut and scrape the stem,once rooted I cut off yellowing leaves i hope her smoke is as good as she looks.
5 days into week 10 and #2, and #4 are male so indoors they go for pollen collection. Will dust one bud of each female with each male and hunt for what I want. Also see what each passes on in the cross.
Likes
28
Share


@Verbalist
Follow
#30.8.2021 - 6th week of flowering in progress ~ it still needs another two weeks to finish.
~ 6th week - Last nutrient ramp up ~
~ 7th week - *COMMING* ~
~ 8th week - *HOPEFULLY HARVEST* ~
The foliage slowly finishing their lifespan. Leave tips are slightly burnt, looks like PK booster doing the job. 🥦
#1.9.2021 - Gave them first good flush to get rid of the excess Nitrogen and other unecessary stuff
#2.9.2021 - Last week feed: Topmax, PK booster and sedweed/kelp extract
— First test nugs were cut! 🤩🥦
#4.9.2021 - End of the 10th week — Flowering day: 45 (1-1.5 weeks more till harvest)

Likes
18
Share


@Lonnert
Follow
Start of week 8, Ladys getting Fade for nitrogen deprivation and a slightly higher PH of 6.3. Harvest next week.

Processing
Likes
14
Share


@DonPato
Follow
Fin de la semana 5, entrando a la semana 6, fue increíble la forma en que crecieron estas señoritas, sin duda haber renovado la bomba de CO2, por una nueva, completamente hecha a mano y casera (1,5 litros de agua tibia, 500 gr. de azúcar blanca granulada y 15 gr. de levadura fresca, en una botella de refresco, con un hoyo en la tapa), hizo que la fotosíntesis fuese mas apresurada, ideal para las plantas de tipo autoflorecientes, el volumen de crecimiento fue aproximadamente de un 45% y logro que ya empezaran a aparecer los primeros pistilos, estoy muy emocionado como han respondido todos los componentes agregados en este cultivo, desde el sustrato de Canna Terra Proffesional, hasta los nutrientes Top Crop, ademas de mencionar a las semillas Fast Buds y las semillas a granel de Bocanda Growshop en Temuco, Chile.
Una vez dicho eso, las plantas entraron al quirófano para hacerles su única defoliación pesada entrando establemente en floración, para ello, elimine las hojas más grandes y los micro-tallos que no alcanzaron a entrar en flora esta semana, dejando a los más aptos y fuertes, para su engorde con nutrientes orgánicos (Top Bud y Top Candy). Ahora veremos como reaccionan a la defoliacion y al regado con solo agua con PH controlado.
Saludos a todos, buenos humos y gracias por visitar este diario.
Abrazos. Don Pato!
___________________________________________________________________________________________________________________________________________________
(Eng)
End of week 5, entering week 6, it was amazing how these ladies grew up, without a doubt having renewed the CO2 pump, for a new, completely handmade and homemade (1.5 liters of warm water, 500 grams of granulated white sugar and 15 grams of fresh yeast, in a soda bottle, with a hole in the lid), made photosynthesis more rushed, ideal for autoflowering plants, the volume of growth was Approximately 45% and I have already begun to appear the first pistils, I am very excited how all the components added in this crop have responded, from the Canna Terra Proffesional substrate, to the Top Crop nutrients, in addition to mentioning the seeds Fast Buds and bulk seeds from Bocanda Growshop in Temuco, Chile.
Having said that, the plants entered the operating room to make them their only heavy defoliation stably entering flowering, for this, eliminate the largest leaves and the micro-stems that did not reach to enter flora this week, leaving the fittest and strong, for fattening with organic nutrients (Top Bud and Top Candy). Now we will see how they react to defoliation and watering with only water with controlled PH.
Greetings to all, good smokes and thanks for visiting this diaire.
Hugs. Don Pato!

Likes
3
Share


@AustinRon
Follow
Week 6 - Bolt II - Lemon Jeffrey (FEM)
Lemon Jeffrey by IRIE Genetics (6 Starts for 2 Finishers)
63-70 Days Flower (9 - 10 Weeks)
Seeds Wet: Monday 14 May 2023
Harvest Date Range: [ 2023-06-30, 2024-07-07]
Weeks Observations
After flip, #7’s Meristem switched to Alternate Nodes instead of the symmetric typical of Meristems. It also is a 9 leaflet plant. (One of 3)
End of week struggling with humidity, can’t bring below t68-69% with medium high inline fan. De-foliated bottoms again, super cropped Overly tall plants (4) to lower canopy, raised light to HIGHEST DISTANCE at 100% - ~680 PPFD across canopy. Will have to remove some lower growth tips that don’t reach with 2” of canopy.
Start of week:
- Dates: [2023-06-26: LJ2Q 43:B:2:1, 07–02-2023-07-02: LJ2Q 49:B:2:7 ]
End of Week:
- Plant Height Range: [ 13, 26, in]
- Water/Day/Plant: [420, ml]
EnvironmentalCurrent:
- LightIntensity: [ 811, µMol//m2/s ]
- LightDistance: [ 19.5, in]
- TempAvg: [79.1 , °F]
- RH: [ 70, %]
- VPD: [ 0.75, kPa]
- Scotoperiod: [ 12, hrs]
- Feedwater per Day: [ 3360, ml]
- EC: [ 1.8, mS]
Environment NOTES:
- Because room temperature overnight is 68°F, we need to
1. Nightly (2200) CLOSE AC VENT to Grow Room
2. Daily (0700) OPEN Vent to Grow Room
- Goal is to maintain TENT & CABINET TEMPERATURES OVERNIGHT
- RULE
- CLOSE Room Airflow during LOW TEMP periods(2200 - 0700)
- OPEN during HIGH TEMP Period (0700 - 2200)
SOG Strategy
- Eliminate weak, funky plants
- @18” Height @ Flip to 12/12 (or …?)
- Target Minimal DLI: 40 Mol/day (Optimal w/out CO2 Supplementation)
- Ref: https://hortamericas.com/blog/science/mastering-light-management-optimizing-crop-performance/'
Objective
- 8 Plants, Single Colas, Sea of Green
SOP:
- WEAR CLEAN GLOVES FOR ALL SEED OPERATIONS
- CLEAN All Instruments before use
- Light Strengthveg := 100 + (#nodes * 100)
- Light Strengthflower := [ 1000, 600, µMol/m2/s]
- Scotoperiodveg := [ 1300, 1900, 6, hr]
- Scotoperiodflower := [ 0700-1900, 12, hr]
Environment
- Bolt (3 Weeks) (Week 5-7) (F1-F3) # Last Week of Bolt!
- Temp: 78-82°F
- VPD: 1.0 ± 0.1
- Photoperiod: 12/12
- Light Strength: 930 µMol/m2/s
- Rooted Leaf Hydro (Reservoir), (RLA EC 0.8 - 1.6 - Half the RLA Hydro Chart)
- Primer A, Primer B: [ 8 ml, gal]
- Silica Skin: [ 4, ml, gal]
- EC: 1.1 - 2.2 # 1.1, 1.4, 1.7
- Mid Flower (2 Weeks) (Week 8-9) (F4-F5)
- Temp: 78-82°F
- VPD: 1.2 ± 0.1
- Photoperiod: 12/12
- Light Strength: 930 µMol/m2/s
- EC: 1.7
- Late Flower (Week 10-14) (F5-F9)
- Temp: 78-80°F
- VPD: 1.2 ± 0.2
- Photoperiod: 12/123
- Light Strength: [930, 850, µMol/m2/s]
- EC: 1.7 # Week 9-11
- EC: 1.4 # Week 12
- EC: 1.1 # Week 13
- Finish (Week 14) ( F10)
- Temp: 78°F
- VPD: 1.3 ± 0.2
- PPFD: 750 peak
- Resin Bloom ONLY
- EC: 0.8
Rooted Leaf Hydro 1.7 - 2.0 EC (Half RLA,Hydro Chart, EC to Targets):
- Primer A: [ 8, ml, gal]
- Primer B: [ 8, ml, gal]
- Silica Skin: [ 4, ml, gal]
- SLF-100: [ 5, ml, gal]
- PhotosynthesisPlus: [ 6, ml, gal]
____________________
Mon 26 Jun 2023 # Bolt 2
LJ2Q 43:B:2:1
- Canopy Grew 1.5”, Raising Light to Maintain Intensity
- Are we ready to raise EC to a Max ~ 2.0 mS? NO! Not Yet (If ever)
- We’re going through 4 Gallons in 3 Days
- [x] Refill w/ 6 Gallons Rooted Leaf Hydro Feed
- [x] Add 6 Gallons Filtered H2O to Reservoir
- [x] Add
- [x] Primer A: [ 48, ml, 6, gal]
- [x] Primer B: [ 48, ml, 6, gal]
- [x] Silica Skin: [ 24, ml, 6, gal
- [x] EC to 1.7 mS (1.8 MAX)
- [x] Mix 1 Gallon of FULL Flower Week 2 Nutes, EC: 1.2 @ Lights On @ 300 ml/plant: 2.4 Liters
- Primer A: [ 6, ml, gal]
- Primer B: [ 6, ml, gal]
- Silica Skin: [ 3, ml, gal]
- Calmag Fuel: [ 3, ml, gal]
- Lush Green: [ 3, ml, gal]
- Root Anchor: [ 3, ml, gal]
- Peak Bloom: [ 3, ml, gal]
- [x] @2300: Enable normal HYRDO Chart Feed @ EC 1.8, @ 67 ml/plant per 90 Minutes
Take Two Cuttings per Plant

- [x] Prep Clone Dome
- [x] Clean, Rinse, Dry
Clone Procedure
- [x] Cut 1” below desired node,
- [x] Immediately dip in Aloe Gel AND place tip in Rooting Plug
- [x] Apply Tag to Cutting
- [x] Create TAG for EACH Cutting
- [x] Load Rooting Tray with Pre-Soaked (Filtered H20, Fulvic Acids [Ful-Power) Rooting Plugs (FloraFlex 40/40)
- NEXT!
- [ ] Take Cuts
- [ ] #5b
- [x] #1a
- [x] #1b
- [x] #5a
- [x] #6a
- [x] #6b
- [x] #7a
- [x] #7b
- [x] #8a
- [x] #8b
- [x] #10a
- [x] #10b
- [x] #11a
- [x] #11b
- [x] #13a
- [x] #13b
- [x] For 3 Weeks, monitor Humidity, Start with Vent’s CLOSED!
Tue 27 Jun 2023
LJ2Q 44:B:2:2

- Canopy Grew 1.5”, Raising Light to Maintain Intensity
PEAK Tent PPFD: [ 829, µMol/m2/s]

Peak DLI: [ 35.8, Mol/m2/s]

Center PPFD: [ 709, µMol/m2/s]

Center DLI: [ 30.6, Mol/m2/s]

Wed 28 Jun 2023
LJ2Q 45:B:2:3
Thu 29 Jun 2023
LJ2Q 46:B:2:4
- Tallest Grew ~ 2-1/4” ‘Overnight’ - Raised lamp to maintain minimum 19.5” Distance
Friday 30 Jun 2023
LJ2Q 47:B:2:5
Sat 01 Jul 2023
LJ2Q 48:B:2:6
Sun 02 Jul 2023
LJ2Q 49:B:2:7
- Added 5-1/2” overnight
- first ‘real’ pistils apparent.
- Can’t survive another week of 2-1/2 to 5 1/2 “ a day :-)
- I can’t get RH below 72, night or day. Need to defol lowers again, and remove sure ti be larf lowers.

Likes
93
Share


@Roberts
Follow
Auto Opium is doing her thing. She made one more little push of stretching. Now tge bulking should begin. She had a solution change about 5 days ago. Been selectively defoliating around her center when I get time. Everything is going well. Thank you Divine Seeds, and Medic Grow. 🤜🏻🤛🏻🌱❄️🌱
Thank you grow diaries community for the 👇likes👇, follows, comments, and subscriptions on my YouTube channel👇. ❄️🌱🍻
Happy Growing 🌱🌱🌱
https://youtube.com/channel/UCAhN7yRzWLpcaRHhMIQ7X4g

Likes
22
Share


@Mr420
Follow
Day 15 plants are doing great 👍 still having problems with fouth seed second seed didn't germinate so here I go with number 3 seed for Yumboldt auto...
Day 17 diffently great white is growing fast The Acapulco gold is still small really slow growth and Northern lights is average growth. filled resivors with ro water no nutrients yet....
Day 18 plants doing great took a Blueberry auto seed and germination has started. This is for the fourth plant for this room..none of the Yumboldt auto seeds germinated. All three of them Duds.
Day 19 plants seem to be growing a little faster filled resivors with plane ro.
Day 20 plants are starting to grow and are looking fine.
Day 21 three weeks in and I'm thinking about adding nutrients to resivor by day 25 because great white shark is looking like roots maybe already down in resivor this thing is growing faster then the others.


Likes
10
Share


@SgtDoofy
Follow
5/8
Watered both with plain PH'd water yesterday. Both of the plants are sucking up leaves. Trichomes are only really looking amber on the brown leaves, but otherwise milky.

Likes
37
Share


@Aedaone
Follow
The temperatures, humidity, and watering volume(if measured) in grow conditions are all averaged for the week. The pH is soil pH. Any watering done by me is well water which is 7.6 pH and 50° F. Any listed nutrients are ml/gallon of water to be fed.
Day 1 we have high temperature of 91°F with mostly sunny skies. I watered 2-3 gallons from the hose.
Day 2 we had a high temperature of 90°F with clear, sunny skies. I watered 2-3 gallons from the hose.
Day 3 we had a high temperature of 97°F with mostly sunny skies. It was a scorcher. I watered 2-3 gallons twice today from the hose.
Day 4 we had high temperature of 95°, but it felt like 102°. Skies were partly cloudy. I watered 2-3 gallons twice today.
Day 5 we had rain the previous night and early morning. We had cloudy skies, with high temperature of 81°F. I did not water today. I added 50ml blood meal to each pot spread evenly on top of the soil.
Day 6 we had a high temperature of 87°F and mostly sunny skies. I watered 2-3 gallons.
Day 7 we had partly cloudy skies and a high temperature of 86°F. I watered 2-3 gallons each pot
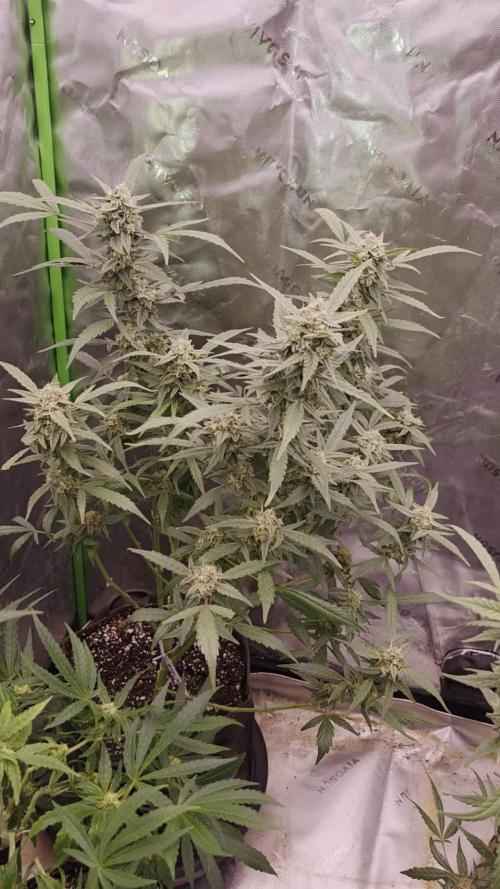
This week was a success. These girls really began to fill out. We've got another month ish til flower begins so I expect these to be monsters.

Likes
2
Share

@The_Doctor_Green
Follow
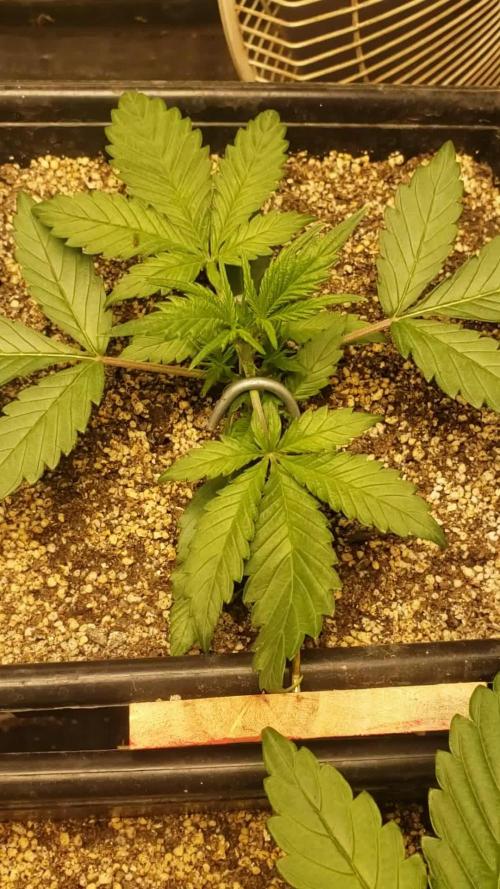
Hola a todos!.
Las imágenes corresponden al periodo 28/08 al 03/09.
Esta semana he regado con agua 400ml ph 6.3
Y le agregue un poco de top crop (top veg) 100ml solamente.
La empecé a doblar en las ramas principales veremos que pasa.