
Likes
Comments
Share


@Secretflower
Follow
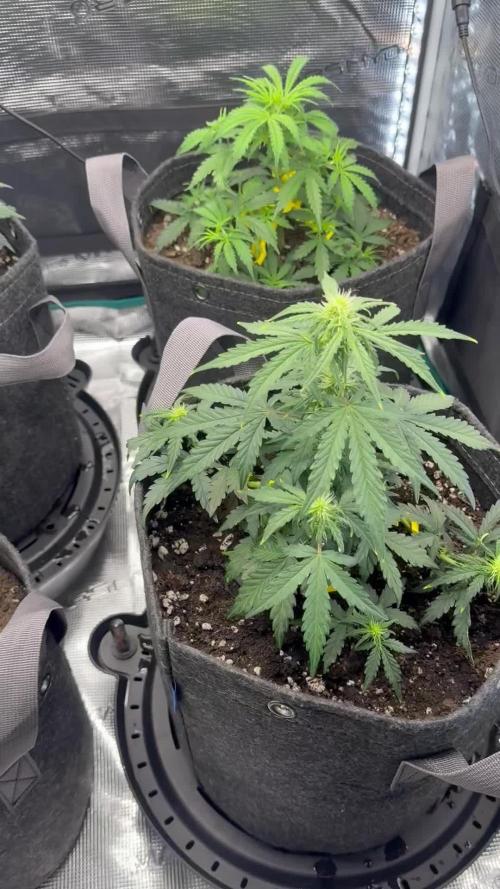
Hello my friends,
...June 7, 2022.. ..Day N°87...
...Flowering day N°31...
My two Feminized Royal THCV are fine and beautiful, they are monster plants, the stretching seems stabilized and the flowers smells awesome sativa.
#1...140cm
#2.. 145cm
I give them water with a tablet of Easy Micronutrients from RQS Organics Nutrients.
They are under a MarsHydro TSW 2000 at 70% of power and at 20cm of the canopy.
www.royalqueenseeds.com
www.mars-hydro.com
www.marshydro.eu
Thank you very much for passing by.
Wish you the best with your green projects, peace.
See you soon 💨💨💨

Likes
32
Share


@ArtisticGrown
Follow
It’s the first week of flower!! I’ve been having troubles with knowing where to foliate and direct the growth with these plants. As 2 seem to be growing faster than the other 2! Over all looking good I think.
Likes
12
Share


@MicroHidroGrow
Follow
Esta es la última semana de crecimiento. Espero llegar a unos 30cm de altura para esta semana. He hecho varios cortes de bajos, defoliacion y super cropping. Se ven saludables y sigo esperando el estiramiento de la pequeña que quedó atrás. Iré actualizando.
Día 25. Hoy hice una corte de hojas grande. Esta noche voy a aplicar EMRO foliar. Algunas plantas se van muy arriba. Pero dentro de todo vienen parejas. En unos días paso a floración. Probablemente ya la próxima semana sea naranja.
Día 28. Último día de crecimiento. Esta noche cambio el depósito. Voy a tener que comprar otro, o ir rellenando a los 3 días del cambio, dado que estan tomando mucha solución. Algunas se estiraron más de lo esperado y la pequeña no alcanzó el tamaño deseado, pero no importa. Voy a ir aplicando LST para mantener una altura pareja. Las raíces crecieron muchísimo, pero por ahora es manejable el tema. Ahora llega la hora de la verdad.

Likes
1
Share


@Maxximillia420
Follow
Day 36 week 5
22.01.2020
Plant is doing great but atm the grow rate is slowing down a bit or maybe it’s just me !!!
I did cut her down quite a bit and that’s maybe why , other then that strong thick branches and a low profile like I wanted !! She’s ready to go into the bloom box as soon as I free up some space there what should be in a few days to a week !!
She’s getting 2 best spot under lamp but still a prime spot I would say
So from now it’s getting interesting so stay tuned

Likes
9
Share


@SouthGermanGrowGirl
Follow
This lady grows very good so far...
She shows slightly stress because of the HEat and Sun the last days..
But she is very strong!
I increase the Nutrients from 1tls to 2tls(6gram) of the Nutrient Salt

Likes
14
Share


@Mr_BFL
Follow
Salute comrade !
According to the passport, it would be time to harvest, and they look very appetizing.
Not all trichomes are still amber, it will stand for 1 week in a solution with honey and molasses.
5 days of flush, 2 days of the night👌

Likes
2
Share

@Snugens
Follow
This was a big week for the girls. We added our bud trainer clips updated the light to the EVO4 and they all seem to be doing really well. I also added some black strap molasses into the regimen to get some thick budz and nice resin. Starting to actually smell some smelly smells but the smells are tooooo smelly. All things said and done it’s going as it should. Another week down. Doobz up growmies


Likes
4
Share


@iopiopiop
Follow
So it seems like the destilled water did the trick. The leaves have stopped yellowing rapidly. This is now the 12th week of flowering and alos its last week of nutes. The whole 13th week will be used for flushing. (with tap water with a ph val of around 8)
Plant is very very close to the 6500k lamp to ensure enough light. I am using a portable fan to blow away the warm air from the leaves.
I am feeding the plant around 50% the recommended dosage of nutes and yet some leaf tips are turning brown and curling up. Nutrient burn? Nutrient defficiency due to high ph?
If anyone can pinpoint what my actual problem is please feel free to do so!
Sprayed some buds and leaves with h202 to remove WPM,

Likes
9
Share


@Kindbot
Follow
Began with equal parts of GH at a very diluted concentration.
This week, I increased the concentration to the manufacturer's recommended dosage for seedlings (1/4 tsp per gallon).
Likes
14
Share


@LokalGrenz
Follow
Still just water and some fish shit
Jan. 1 Happy New Year welp to start new year off drop my very cheap PH meter in the bucket water and now the readings are off and I probably watered them today with wrong pH water Sour diesel looks cool didn’t water today soil was still moist but the amnesia haze be


Likes
18
Share


@GYOweed
Follow
Lsted n defoliated the bruce and trainwreck.
My gg4 is doing shitty.
My Sorbet is????


Likes
19
Share


@AutoDevilHQ
Follow
Strap yourselves in this is gonna be quite the revelation update.
Day 33 - Northern Lights
This girl is fast becoming the pride and joy of the tent showing no signs of flowering yet still well and truly in Veg mode without the female indicators about to end week 5 so she will be getting another round of LST this weekend to maximise freeing up access to light for the parts that otherwise without a Defol wouldn't get chance to blossom.
She wants the full tent to herself at this point and the next update is going to help her with that.
20210219_103956.jpg
I mean just look at her. She's a monster!
Now onto some slightly less satisfying news and an admission of another noob fail.
Day 28 - Chemdawg #1
This girl is abnormal. She has already made it perfectly clear she's not far off going into flower so whilst I did tie this girl down for some LST upon inspection from @autobeast he recommended we leave this stocky girl to try and get a bit of height without LST.
Now for the admission....
When this girl was topped I cleaned out the top 2 Colas in the process so the top node was literally just two big fuck off Fan Leaves sucking all the good stuff away from the rest so off they came last night leaving this girl with only 6 branches to grow from instead of what should have been 8 had I topped her properly. In a way I'm glad this has happened and I spotted it myself and managed to understand why she wasn't flourishing as much as her cousin. Granted they are different Genetics but you only need to look at the next girls update to see that something just doesn't seem right with this one.
20210217_222845.jpg
Here's what she could've won but instead we are going to be leaving her to her own devices. I am a little gutted about this as I've only been able to observe the Defol and training on one plant before I'm let loose with my own little lady that you're about to see next. Here's how Chemdawg #1 is looking today.
20210219_104008.jpg
Don't get me wrong she is very healthy and happy and already kicking out that dank stardawg aroma and she may surprise with some fat nugs but I expect her to be having a shorter life span than the Northern Lights and with this in mind I'm going to apply that insight to the 3rd girl.
Day 19 - Chemdawg #2
With the mistake in mind from the previous Topping I double checked with AutoBeast on where to top this and I'm kinda happy that he just stayed silent and said top it where you want its your baby. So being careful not to cut the top cola off too I chopped her head off and cheered her up with 1L of Water with 2ml BioBizz Fish. I've also been adding a foliar spray to her of the biobizz FishMix.
Once the leaves reach the edge of the pot I'll be starting with 4ml of Parts A and B of Monkey Nutrients Grow Feed and 1 tablespoon of Blackstrap Molasses every 3 days.
This is my favourite 6 days of growth I've witnessed so far as the plant tries to decipher which of its Colas is dominant.
20210219_104018.jpg
Summary
Don't top your main cola off when you realise what you've done it'll hurt like hell.
Approaching 2nd week of feed keep a closer eye on the water levels in your plant they get thirsty sometimes but other days not so much so there is no one size fits all in those weeks 4-5 in my experience so far in Organic.
Not all plants have the same life span so if growing a variety in one place understand that they will all veg and flower at different ages so while it's nice to have rules of thumb ie no earlier than x to top or no later than day x to start feed there will always be flex between days and that applies even to the same genetics although perhaps not so prominently variant.
Every day growing is a day learning.
Ok so it's end of week 5 for this @fastbuds_genetics @fastbuds_backup_account @420fastbuds Northern Lights Auto and well just fucking look at her.
She's taking over the tent with her canopy dwarfing the 2 Chemdawg Autos and only just showing signs of Preflower.
A vast contrast from the 2 Chemdawg but the aerial view gives an idea of the incredible amount of Bud Sites formulating on the upper canopy.
I've been leaf tucking twice a day this week for around 15 minutes each time talking to my girls about what I'm doing to free up light to the lower canopy and its bearing fruit for sure.
I knew this week was going to be an eventful one for this staggered tent but having thought the Chemdawg had fallen behind she is in fact further ahead in her life so adjusting the feed schedule for the baby accordingly.
Every day growing is a day learning.
Processing
Likes
3
Share


@Dico29
Follow
Day 128 it’s good smells sweet and every time I walk into my room it smells like gas
Even though quantity is lower then I expected, the trichomes are crazy

Likes
37
Share


@iMpulsive_Grow
Follow
I went in scared that I would screw this up and waste money. I kept learning and fell kore and kore in love with it. Now I’m building a room and already growing 7 plants moving to 20 🙏🏼😝

Likes
2
Share


@Takeaims
Follow
Getting there tied down the white widow just ti see if it makes a difference loads of shots coming through sweet manderain shouldn't take too long now am hoping withing 4 weeks lol
Sweetseeds always providing monster
Likes
8
Share


@Rabidreject
Follow
This weeks been hectic! Iv had a lot of training to do and a fair amount of defoliation - all only done until my plant had no feed left.
Iv signed up to a couple of patreon accounts : ‘Willymyco’ and ‘DGC - dude grows podcast’s. Another great podcast.
However, over the past week there’s been a heatwave and I accidentally pulled the red on/off plastic valve from the res for a second , it’s all good and just went on insulated wires…so I just mopped it up.
I changed it to a mars hydro ts-1000w, and then the ts-600.
Glad the dimmer works though or temps will be insane! I am still thinking of putting in the fc-e3000 but if I do that I’m going to have to take out the stoppers from the ends and hacksaw some off. It’s only cheap aluminium and then I’m going to think about removing one of the light strips if I can. Then I’ll just keep it low. It’s still weird working with a plant they suggested, un-topped— this is the first time i have done this in my life - I have literally always - HST’d, using the early veg stage and making used of the time for it to heal.
Likes
36
Share


@Ganjagrandaddy
Follow
Day 27 from seed: An exciting week this week with a change to Mega crop. This nute has it all and even my Los girls are responding well to it. At 1g/L it is keeping them very happy at the moment. Seeing how quickly they have grown this week is a comfort tbh. The last thing I want is 1oz plants. Inwont be working the #1and #2 too much as they are fairly squat. # 3 is getting well over her pot edges so will be a good trainee I hope.


Likes
19
Share


@adam_pawloski87
Follow
Let’s go Day 46 from seed!! What a great week it’s been, girls structured up real nice veg has been huge for us, looking super healthy an catching a nice smell ! This will be the last week of feeding them the veg schedule, next we will be dipping right into bloom, starting Monday yall We will be in full bloom !! Can’t wait to watch these ladies stack over the next few weeks 😍! I hope you all enjoy an have an amazing productive day an week ! Peace love an positive vibes y’all Cheers 😶🌫️💨💨💨💨💨🤙🏻