
Likes
Comments
Share


@SkunkBender_nz
Follow
The Dr seedsman CBD germinated backwards but she looks fine🤞😅


Likes
8
Share


@Growbody
Follow
Tag 147: Die CBD 20:1 Auto von FastBuds war eine Geduldsprobe. Mit mehr als 20 Wochen Wachstum war Sie nicht wirklich eine Autoflower. Die Blütenstände sind zwar groß, die einzelnen Blüten jedoch sind sehr luftig, was die weitere Trocknung sicher noch verstärkt. Ich hätte mir ein kurzes Statement von FastBuds in der Wachstumszeit gewünscht. Schließlich sieht die große nicht aus, wie im Katalog.
Tag 154: Es sind 46 Gramm zitronig und süß riechende trockene luftige Buds geworden.

Likes
299
Share


@Metatronix
Follow
Good day to all my friends and visitors here on GD.
Decided to finally finish this diary, I took my time with his one ;)
Now we cut the second POGP auto plant, the first cut you can find in week 17. The plant from week 17 weighted 660g. wet, this one finished at 1,85kg. wet.
The girls where autoflower but thanks to me starting this grow in cold day temps (14 degree Celsius) the started flower really late, maybe that's also the reason for all my problems with this strain during the grow?!
The two plants where different phenotypes, the smaller one (from Week 17)though small had nice hard flowers, the bigger one as the only plant from four I grew during the growop started foxtailing.
Both of them branched nicely the smell was quite strong and awoul xD like gasoline and something rotten, it smelled so bad i checked a couple times under microscope for any signs of mold in the flower and to my suprise I found nothing.
Thank God later during drying the smell would subdue to a more generic "hazediesel" smell
--------------------------------------------------------------------------------------------------
SE7000 done it's magic with this grow as with all my other grow ops.
For anyone who is interested in obtaining this efficient and affordable light fixture ($ to gram) here's the link:
https://spider-farmer.com/products/spider-farmer-upgraded-se7000-730w-commercial-led-grow-light/
A shout out to SSSC for the gift of genetics: supersativaseedclub.com/
Thank you all for your companionship on this voyage, I hope you enjoyed it at least as much as I did.
Also thank you for this awesome year together here.

Processing
Likes
105
Share


@Green_Friends_Inc
Follow
Commencing week 5/Day 29: on Nov 21st
Day 29
All is doing well now and a few more plants have roots in water but tomorrow is going to be well below freezing as well as the humidity has dipped very low
Day 32
Still growing steady the cold temps and low humidity haven't hurt or slowed them down too much
Day 34
Happy to say 6 out of 8 girls have pretty massive root masses developed in past week into bucket.
I have been very lightly foliar feeding every day a slightly acidic low ppm solution.
Lights were put back on timer since the temp and humidity are going back up I don't need the lights for heat.
pH has remained steady for past two days in low to mid 5.8s.
Is this too steady I wonder 🤔
I put on fans today today as well as under lighting LED strip.
D35
Am check-in and all is going well.
All 3 Gorilla Zkittlez are absolutely killing it, way bigger than the rest of the bunch. Although the 818 Headbands and the Raspberry Diesel are not far behind. Unfortunately both the Boss Hoggs seems to be runt-ish. One especially is really funny looking. But I always cheer for the under dog in the fight so who knows 😎
Turned off under lighting. Raised overhead LED Panels up 3-6 inches and re-oriented (angled) towards girls.
*I've decided to break off the barely mentioned personal crosses into their own journal in the next few weeks in case anyone was watching or wondering, it's coming. I'll be editing this journal accordingly when the time comes to be more accurate and useful. Lastly I am adding a new journal today for "🍋🍰" aka Lemon Cake by Moxie. It's terpalicious 👅. super sugary and lemony on the nose. Does anyone from the US or elsewhere know what's "Country-Time" lemonade mix is?? It makes your mouth water and smells almost too much like the sugary lemonade mix. Stay tuned
💚🙏


Likes
216
Share


@CRiSPrGrow
Follow
Week 2. Colorado Cookies in Mr.B's
So it's taking a heck of a long time to dry, but as you can see i'm using the hygrometer method to dertermine when to water, it says moist so it's moist and it's gonna have to wait until dry for me to water it. basically i've not watered since last week tuesday ! waiting for the next watering so i can top off the pot with some peat, overwatering compacted the soil already, kinda disappointed i've already made such a critical mistake, but hopefully sticking with it and following her cycle will help. Will try to get an in soil ppm reading asap. Took a few vids of the amino spray which is for the soil, and the kelp and micro sprat which goes directly on the leaves. beyond that what i can say is i got three identical phenos so far in the colorado cookies pack, all three plants are real even, shot up healthy then started making nodes i'm at 3 full nodes, gonna wait for 5 but i dont think i'm gonna top, something about the cookie heritage tells me it wont like getting topped much lol vpd since last week 0.6-8, now slowly getting to 0.8-1.1

Likes
4
Share

@DogDoctorOfficial
Follow
🌿 Week 2 Flower – Super Silver Haze Queens by Zamnesia
Two weeks into flower, and the Super Silver Haze girls are showing us why they carry the weight of legend. Despite a week where photos were few, the video walkthrough tells the story: the tent is alive, the room is humming, and the girls are thriving. Their transition into bloom is unmistakable, pistils, morphology shifts, and that unmistakable “flowering energy” filling the air.
✨ Recap of the Journey So Far
From the start, these seeds germinated strong, three for three. Early veg was compact and stable, surprisingly stress-free for haze genetics. Transplanting into 11L Zamnesia fabric pots with a tailored Aptus soil mix gave roots the space and nutrients to explode. Week after week, they’ve grown strong under a spectrum of full power LEDs, with an environment tuned by hand and tech alike.
Now in flower, they carry the old-school spirit of Super Silver Haze, a strain with cups, history, and heavy nostalgia, now represented by Zamnesia, but forever rooted in the haze heritage. This isn’t just another grow. It’s a living tribute.
🌱 Feeding Recipe This Week
The girls are feeling the switch from Start Booster to Top Booster (0.25 ml/L), and the difference shows. Morphology is shifting beautifully. On top of that, we’re layering in some Plagron support — a little experiment to push the expression further:
• Aptus Regulator – 0.15 ml/L
• Aptus CalMag Boost – 0.25 ml/L
• Plagron Power Buds – 1 ml/L
• Plagron Sugar Royal – 1 ml/L
• Plagron Green Sensation – 1 ml/L
• Aptus Top Booster – 0.25 ml/L
The Aptus All-In-One Liquid is staying aside for now, since the pellets in the soil are still doing their job beautifully. EC in the soil is ~2.0, with incoming solution at ~0.6. pH around 6.1.
Watering is based on substrate moisture, waiting until ~19–20% dryness before irrigation. Average uptake: 1.5–2L per day.
🌡️ Environmental Conditions
• Room Temp: Peaks up to 34°C (a bit higher than ideal, AC unit arriving soon!)
• Humidity: 50–70% depending on the day
• VPD: ~1.8–1.9 (not perfect, but plants are handling it well)
• CO₂: ~700 ppm
• Soil Temp: 25°C
• PPFD: 760–780 μmol/m²/s across canopy zones
⚙️ Gear & Ecosystem
The grow room is evolving into a proper ecosystem:
• Lights:
• ThinkGrow Model on and ICL-300 LEDs
• Future of Grow Black Series 600W
• Lumatek Zeus Compact Pro 465W
Together delivering a full, balanced spectrum across the 8x8 tent.
• Airflow & Extraction:
• 2 × 6-inch extractors (Trolmaster Aerofan + Spider Farmer) with carbon filters.
• Trolmaster unit fully integrated, Spider Farmer on its GGS controller.
• Automation:
• The Trolmaster WCS substrate sensor is a game-changer — giving live readings of soil EC, pH, and moisture.
• Tent-X brain keeps everything connected, making hand-watering smarter and data-driven.
🌼 The Girls This Week
Compact, stable, symmetrical, both phenos are tracking almost identically. Pistils are pushing fast, leaves are deep green, internodes are filling with energy. It feels like they’re already a week ahead, and yet, they’re right on schedule.
🐝 A Moment for the Bees
This week, alongside the plants, we pause to thank the bees. A photo of one busy bee pollinating a flower reminds us: without these tiny workers, there would be no flowers, no fruits, no life as we know it. In the fairytale of the growroom, the lights are the sun, the soil is the earth, and the bees are the quiet guardians of the cycle. May we never forget how important they are.
🙏 Closing Thoughts
Week 2 flower, and already the tent is bursting with energy. Genetics this stable, this historic, deserve respect. The environment isn’t perfect, temps and humidity will improve once the AC kicks in, but the girls don’t seem to mind. They’re thriving, and the journey is only just beginning.
To the growers, the sponsors, the community, the lovers and the haters alike — thank you. You make the journey worth sharing. This is more than just a grow: it’s a story, a legacy, and a chance to honor the Queen that is Super Silver Haze.
📲 Don’t forget to Subscribe and follow me on Instagram and YouTube @DogDoctorOfficial for exclusive content, real-time updates, and behind-the-scenes magic. We’ve got so much more coming, including transplanting and all the amazing techniques that go along with it. You won’t want to miss it.
• GrowDiaries Journal: https://growdiaries.com/grower/dogdoctorofficial
• Instagram: https://www.instagram.com/dogdoctorofficial/
• YouTube: https://www.youtube.com/@dogdoctorofficial
There’s a new series blooming and it’s more than just plants. It’s about process, patience, and paying attention.
⸻
Explore the Gear that Powers My Grow
If you’re curious about the tech I’m using, check out these links:
• Genetics, gear, nutrients, and more – Zamnesia: https://www.zamnesia.com/
• Environmental control & automation – TrolMaster: https://www.trolmaster.eu/
• Advanced LED lighting – Future of Grow: https://www.futureofgrow.com/
• Root and growth nutrition – Aptus Holland: https://aptus-holland.com/
• Nutrient systems & boosters – Plagron: https://plagron.com/en/
• Soil & substrate excellence – PRO-MIX BX: https://www.pthorticulture.com/en-us/products/pro-mix-bx-mycorrhizae
• Curing and storage – Grove Bags: https://grovebags.com/
⸻
We’ve got much more coming as we move through the grow cycles. Trust me, you won’t want to miss the next steps, let’s push the boundaries of indoor horticulture together!
As always, this is shared for educational purposes, aiming to spread understanding and appreciation for this plant. Let’s celebrate it responsibly and continue to learn and grow together.
With true love comes happiness. Always believe in yourself, and always do things expecting nothing and with an open heart. Be a giver, and the universe will give back in ways you could never imagine.
💚 Growers love to all 💚
P.S.- Why These Plagron Additives? – A Deep Dive
I’ve decided to complement the Aptus base with three Plagron boosters. Each one has its own role in the flowering process, and together they form a very balanced support system for the Mango Kush ladies.
🌸 Power Buds (1 ml/L)
• Purpose: Early flowering stimulator
• What it does: Power Buds encourages the plant to initiate bud development faster. It shortens the “transition phase” from veg into bloom, helping flowers form sooner and more consistently across the canopy.
• Why now: We’re in Week 2 Flower, the exact point where we want to signal the plants: “It’s time to build flowers.” Power Buds sends that hormonal nudge.
⸻
🍯 Sugar Royal (1 ml/L)
• Purpose: Enhances resin, aroma, and stress resistance
• What it does: Sugar Royal contains amino acids that stimulate the plant to produce more chlorophyll and secondary metabolites. In plain terms: richer terpene profile, stickier resin, stronger smell, deeper taste.
• Extra benefit: It also reduces stress from heat or drought, very useful right now since our temps have been spiking up to 34°C.
• Why now: As stretch continues, plants need to stay strong and not waste energy on stress. Sugar Royal helps them thrive despite less-than-ideal VPD.
⸻
💎 Green Sensation (1 ml/L)
• Purpose: All-in-one bloom enhancer for the second half of flower
• What it does: Green Sensation is a powerful 4-in-1 booster that improves:
• Flowering: denser, heavier buds
• Resin production: frostier flowers
• Nutrient uptake: more efficient feeding
• Soil health: stimulates beneficial microbial activity
• Why now: Even though it shines brightest in late flower, starting early allows the soil ecosystem and plant metabolism to adapt gradually. By the time we hit peak bloom, the system is fully primed.
⸻
🌱 How They Work Together
• Power Buds → Kickstarts flower sites
• Sugar Royal → Enhances resilience + resin quality
• Green Sensation → Boosts density and overall flower performance
The trio works like a team of specialists: one accelerates the start, one polishes the quality, and one pushes yield potential. Combined with the Aptus base (Regulator for strength, CalMag Boost for structure, Top Booster for bloom push), it’s a balanced, experimental, but very promising recipe.
💚 Growers love to all 💚

Likes
7
Share


@einamio
Follow
Day 88 Fresh lemon aroma feels the room. Looks like my carbon filter is getting old because she stinks through a bit. It's a pleasant smell no complains there.


Likes
5
Share


@OhanaMatata
Follow
harvesting soon do not want to many amber trichomes, looking for the full sativa effect.

Likes
Comments
Share


Processing
Likes
1
Share


@Teddy01500
Follow
Bonjour à tous, ces derniers jours ce sont bien passé pour mes petit bébés elles grandissent doucement mais sûrement.C’est la première fois que je travail avec cette gamme de produits (je vous est mis des photos des produits 😉) pour l’instant j’en suis satisfait après, il faut voir le résultat final ce qui est moins facile 😂. Mes petit bébés commence leurs 5ème semaine (je me suis trompé d’une semaine 😕 désolé 😉) trop pressé!!! 😂 de mettre de nouvelles photos 😜. Je vous dis à là semaine prochaine vivement 😉 bonne journée à tous. Je vous remercie 😉.

Likes
4
Share


Likes
2
Share


@Mr_nugs_lover_David
Follow
She looks super beautiful,just like her 2 sisters I have another 2 somango auto by gea seeds as purple as her, msame aroma,just very stable Strain,the smell it's just pure authentic mango,plus she has a very gorgeous purple color on her flowers,definitely need to grow her many more times. 💚🌱💎🔝

Likes
20
Share


@SKUDUDUBAW
Follow
Plants are looking good, they start smelling a little bit.
I water with 2 liters every 3-4 days
Some pistils are becoming purple maybe because of the cold temperature
Happy growing and Happy New Year!

Likes
13
Share


@Naujas
Follow
77 days, for some reason, the girl is growing without me, I see that she lacks water, I water her every other day, but she needs more, I will come back to her next week, good luck to everyone :)
Likes
6
Share


@Muravushka
Follow
During my previous grow, I harvested and made some bubble hash. Afterward, I dropped the used, wet buds onto this coco, and it seems some seeds sprouted from the leftover material. I’m not even sure if they’re photoperiod or autoflower, but hey—let's roll with it!
Both my pH meter and PPM meter are broken. I have no idea why they keep breaking so often. They’re ADWA meters, and while you can replace the reading elements, the replacements cost half the price of a new meter. It’s frustrating, and I really don’t want to keep buying them every time I start a new grow
Likes
1
Share

@DrGL_Thumb
Follow
Girls doing well, clearly see all hit with hit substrate 😂 but ChemDawg is despite the hit battling n fast 😂
Likes
56
Share


@Master_weeda
Follow
Bonjour à tous les padawans et les maîtres jedis
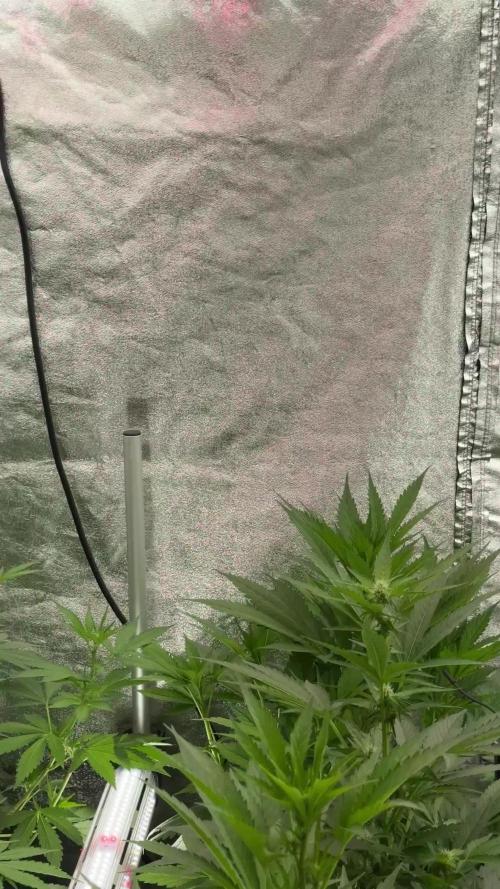
Le LST est fini mon tronc en forme de colonne vertébrale fais un tour sur lui meme (vidéo jour32) cette forme me satisfait pleinement je décide donc de retirer la majorité des fil de fer servant au LST
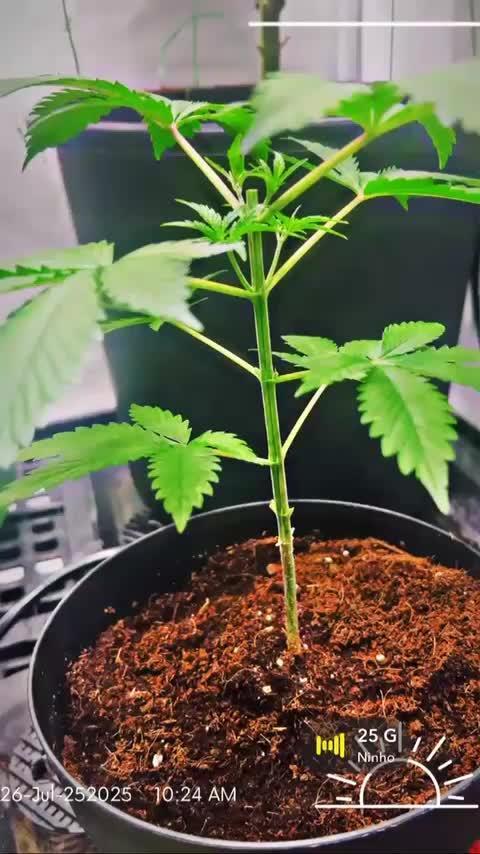
Le pincage d'Apex offre à la plante une canopé homogène (photo jour 32 34)
Jour33 arrosage avec 2 litres d'eau ph6 à laquelle j'ajoute 0.5ml de topmax biobizz (dosage très léger pour ne pas provoquer un lock-out) cela favorisera son entrée en floraison.
J'effectue une légère defolliation pour permettre une meilleure pénétration lumineuse aux apexs du bas.
Quesque la defolliation ?
LES CULTIVATEURS AMATEURS, PRENEZ GARDE, MAIS NE PRENEZ PAS PEUR
La défoliation consiste à retirer les feuilles des plants de cannabis en intérieur afin d'accroître le rendementfinal. Le cultivateur amateur doit faire preuve de vigilance lorsqu'il commence à appliquer cette technique de taille. Malgré le débat sans fin entre ceux qui prônent cette technique et ceux qui la dénigre, il n'y aucune raison pour qu'un amateur ne s'y essaie pas afin de voir si ça lui convient ou non.
COMMENT DÉFOLIER
Que vous tailliez les feuilles ou les branches des plants de cannabis, il vaut mieux utiliser un sécateur stérile qui est confortable en main. Arracher des feuilles à la main manque de finesse et engendre souvent par accident, l'arrachement des couches d'une tige en plus de la feuille. L'objectif principal de la défoliation est de permettre une meilleure pénétration de la lumière et de promouvoir la production de plus grosses têtes. Les feuilles éventails qui font de l'ombre doivent être retirées. Tailler la tige principale et/ou les pousses secondaires n'est pas de la défoliation.
La règle d'or lorsque vous donnez à vos plantes un rafraîchissement est de commencer avec les feuilles nourricières les plus grandes et les plus larges, en taillant du bas vers le haut. Il est important de retirer les feuilles stratégiquement et non pas au hasard. Pensez également qu'il vous faut limiter votre rafraîchissement à approximativement 10 à 20 % des feuilles totales de votre pied. Il est très facile de s'emporter durant la taille et de se retrouver avec des plantes chauves. Un excès de taille de feuilles empêchera la photosynthèse et paralysera vos plants.
QUAND FAUT-IL DÉFOLIER
Il est assez rare d'appliquer la défoliation comme seule technique pour obtenir un fort rendement. La taille des feuilles est généralement associée à d'autres méthodes de tailles et de palissage pour un meilleur rendement telles que le topping ou étêtage, le FIMming, le LST, le manifolding, le supercropping et le ScrOG. Les cultivateurs utilisant la méthode ScrOG auront besoin de retirer toutes les croissances inférieures ainsi que les feuilles et les tiges se trouvant sous le filet.
Les plants de cannabis peuvent être défoliés dès lors qu'ils sont passés de la phase de plantule vers la phase de croissance végétative. Cependant, il est recommandé aux cultivateurs amateurs de laisser aux plantes 1 à 2 semaines de croissance végétative avant de s'attaquer à la défoliation de celles-ci. De plus, certaines variétés sont plus sensibles à la taille que d'autres et de ce fait, seront plus stressées par la taille des feuilles. Surveillez minutieusement le comportement de vos plants après la taille. Une période de convalescence de minimum 3 à 7 jours avant de recommencer la défoliation est fortement recommandée pour éviter trop de stress aux plants. Les cultivateurs peuvent également défolier pendant la phase de floraison, ce qui permettra à l'énergie de la plante d'être concentrée vers la production de têtes tout en limitant l'ombre et l'excès d'humidité. Néanmoins, il est important de ne pas défolier trop tard sous peine de simplement blesser ses plants inutilement.
LES AVANTAGES DE LA DÉFOLIATION
Évidemment, l'avantage numéro un de la défoliation, c'est l'augmentation du potentiel de rendement de cette technique de taille pour tous types de cannabis allant de la photopériode aux variétés autofloraison. Ce n'est pas un secret que les fleurs qui reçoivent plus de lumières deviennent plus grandes et larges que celles dissimulées dans l'ombre des feuilles. De plus, retirer les feuilles intérieures des plants touffus aide à prévenir toutes menaces de moisissure. Les plants très feuillus avec un feuillage intérieur dense produiront une quantité importante de têtes pop-corn. Dans le pire des cas, les branches de têtes et les têtes qui sont denses succomberont au pourrissement.
Si vous observez des gouttes d'eau se former sur la surface des feuilles, il est grand temps de penser à faire de la défoliation. Libérer la zone inférieure et médiane des feuilles est un excellent moyen d'améliorer la circulation de l'air.
LES DÉSAVANTAGES DE LA DÉFOLIATION
Les plants de cannabis en intérieur bénéficient de la défoliation pour deux raisons. La première est parce qu'ils reçoivent la lumière d'une source stationnaire au-dessus d'eux, et la deuxième est parce que les conditions environnementales sont contrôlées par le cultivateur et non Mère Nature. Les plants d'extérieurs eux, n'y gagnent pas beaucoup, car les cas échéants se vérifient pour eux. Le soleil traverse le ciel, illuminant sur sa route, différentes portions de la plante de son lever à son coucher.
Les cultivateurs en extérieur n'ont pas besoin de manipuler les plantes afin qu'elles se développent en adoptant une structure plate puisque le soleil est infiniment plus puissant que n'importe quelle lampe de culture et qui plus est, il est toujours en mouvement. Tailler les feuilles des plants extérieurs les rend également plus vulnérables aux conditions humides et brise leurs barrières naturelles contres les nuisibles.
De nombreux cultivateurs d'intérieur peuvent, et malheureusement, c'est souvent le cas, réduire le rendement final à cause d'une défoliation faite au mauvais moment et/ou excessive. Tailler les plantules n'est pas conseillé et engendre souvent des plants nains. Scalper les plants matures est encore pire, et au lieu d'obtenir de longues branches de têtes, vous obtiendrez probablement encore moins de fleurs. De même, tailler des plants malades ou en mauvaise santé à n'importe quelle période de la croissance risque de paralyser la croissance plutôt que d'encourager la formation de fleurs denses.
Que la force soit avec vous 💪

Likes
22
Share


@RDWCGrowing
Follow
12/25/2023-Germination Day 1
Merry X-mas 2023 I decided to start a run of SolFIre Gardens Hoodz Candyz S1. I am going to do a cup filled with RO water a touch of Hydrogen peroxide and let it sit for 24-48 hours until I see tap root then I am going to put it into a rapid rooter.. Tap root Down and put it about 1/4 of the say down the Rapid rooter.
I made some modifications to my basket on this run.. I have taken a few Pods that I use for my cloning machine and decided that I am going to try and use them as sure plants, so that I can take my water right up to the bottom of the basket this time and see if these can make my planting more consistent.
12/26/2023-Germination Day 2
Tap root achieved Planting Commencing
12/27/2023-Germination Day 3
Misted the dome lightly misted the rapid rooter and added a little water to the bottom of the pan to encourage root growth to the pan.
12/28/2023-Germination Day 4
Ground Hogs day
12/29/2023- Germination Day 5
She is up, she has broken surface, I misted the root riot, and around the bottom of the tray to try and entice root growth down rapidly.
12/31/2023- Germination Day 6
Ground Hogs Day
1/1/2024-Germination Day 7
HAPPY NEW YEARS!!.. I did it I planned it out so my planting day would fall on New Years and it worked.. Yay!!!
1/2/2024- Germination Day 8
Since the roots are not to the water yet, I am pouring one cup of water lightly on the hydroton around the lady to try and encourage root growth down to the water..
1/3/2024- Germination Day 9
Ground Hogs day, will continue until roots hit the water.
1/4/2024- Germination Day 10
Ground Hogs day, will continue until roots hit the water. I will just continue to top feed until roots are in the water.. Shouldn't be more than a few more days.
1/5/2024- Germination Day 11
Ground Hogs day, will continue until roots hit the water. I am going to change the water Sunday and kick off Week 1, I will just continue to top feed until roots are in the water.. Shouldn't be more than a few more days.
1/6/2024- Germination Day 12
Ground Hogs day, will continue until roots hit the water. I will just continue to top feed until roots are in the water.. Shouldn't be more than a few more days.
1/6/2024- Germination Day 13
Ground Hogs day, will continue until roots hit the water.
1/7/2024- Germination Day 14
Ground Hogs day, will continue until roots hit the water.
