
Likes
Comments
Share


@JerMeds
Follow
They are swelling up pretty nicely and hairs are starting too turn colors finally.
I switched #1-6 from Big Bud too Overdrive on day 64 and I moved a few of them around to get them more comfortable.
Looking to harvest sooner rather then later because humidity is 50-70%... I normally have good judgment and harvest right when they are ready and avoid mold/rot.
I plan too start flushing on about day 70ish. I shouldn't need too flush them for very long because only half there pot is soil.
I will get pre harvest pictures for sure maybe even videos.

Likes
33
Share


@420DeepGrow
Follow
Gracias al equipo de Sweet Seeds, Marshydro, XpertNutrients y Trolmaster sin ellos esto no sería posible.
💐🍁 Sweet Mandarine Zkittlez F1 FV :
Genética feminizada y fotodependiente de floración ultrarrápida. Primera generación filial (F1) resultante del cruce entre un clon élite de Zkittlez (muy potente y resinoso, con un marcado aroma tipo Sour Diesel cítrico, entre naranja y mandarina) y nuestra Sweet Mimosa XL Auto (SWS94) que también tiene tonos aromáticos cítricos entre naranja y mandarina.
El resultado del cruce es una vigorosa variedad híbrida fotodependiente muy resinosa, potente y aromática.
El aroma de esta variedad es delicioso, con tonos Sour Diesel muy especiados, tonos de naranja y mango, fondo amaderado y lejanas pinceladas frescas como de pino o hierba recién cortada.
Algunos individuos pueden mostrar flores y hojas con tonos púrpuras y rojizos al final de la floración.
El efecto es enérgico, alegre y estimulante de la concentración y la creatividad.
💡TS-3000 + TS-1000: se usaran dos de las lámparas de la serie TS de Marshydro, para cubrir todas las necesidades de las plantas durante el ciclo de cultivo, uso las dos lámparas en floracion para llegar a toda la carpa de 1.50 x 1.50 x 1.80.
https://marshydro.eu/products/mars-hydro-ts-3000-led-grow-light/
🏠 : Marshydro 1.50 x 1.50 x 1.80, carpa 100% estanca con ventanas laterales para llegar a todos los lugares durante el grow
https://marshydro.eu/products/diy-150x150x200cm-grow-tent-kit
🌬️💨 Marshydro 6inch + filtro carbon para evitar olores indeseables.
https://marshydro.eu/products/ifresh-smart-6inch-filter-kits/
💻 Trolmaster Tent-X TCS-1 como controlador de luz, optimiza tu cultivo con la última tecnología del mercado, desde donde puedes controlar todos los parametros.
https://www.trolmaster.com/Products/Details/TCS-1.
🍣🍦🌴 Xpert Nutrients es una empresa especializada en la producción y comercialización de fertilizantes líquidos y tierras, que garantizan excelentes cosechas y un crecimiento activo para sus plantas durante todas las fases de cultivo.
Consigue aqui tus Nutrientes:
https://xpertnutrients.com/es/shop/
📆 Semana 2:
Gran primera semana, ella ha dado un gran estiron estos días, si sigue así será una gran cosecha.
Esta semana se practica defoliacion, poda de ramas bajas y se le agrega Sticky Fingers
La carpa está ocupada al 100%, sigue una floracion explosiva gracias a @Marshydro y @Xpertnutrients y @Trolmaster con esta gran genética 💪.
Potencia de la lámpara: 70%

Likes
13
Share


@Organic_G
Follow
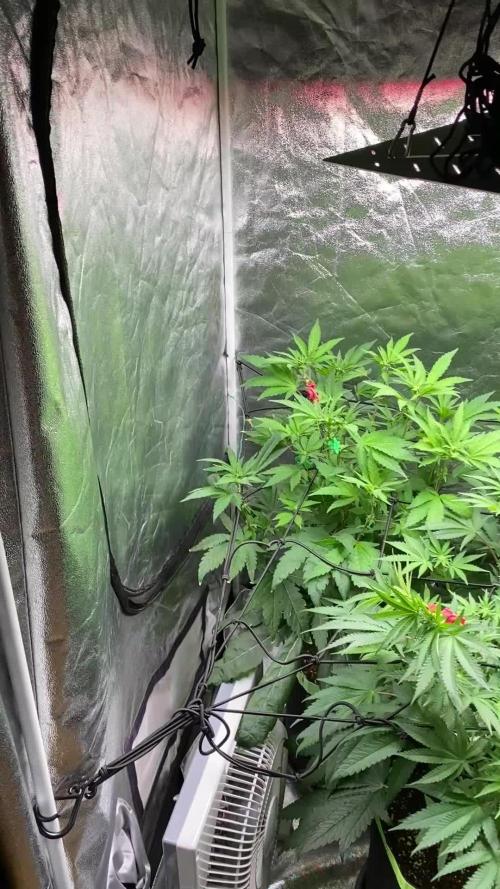
Mal schauen wie hoch die noch in der Blüte gehen werden😎
Kollege kümmert sich gut

Likes
Comments
Share

@shwable
Follow
They develop beautifully going into stretch and I really enjoy this run. Great genetics as usual with seeds by thegreenabbot.
I just love the journey of growing, learning something new from every run! This one will be crazy.
Likes
17
Share


@ButterfliesLittleFarm
Follow
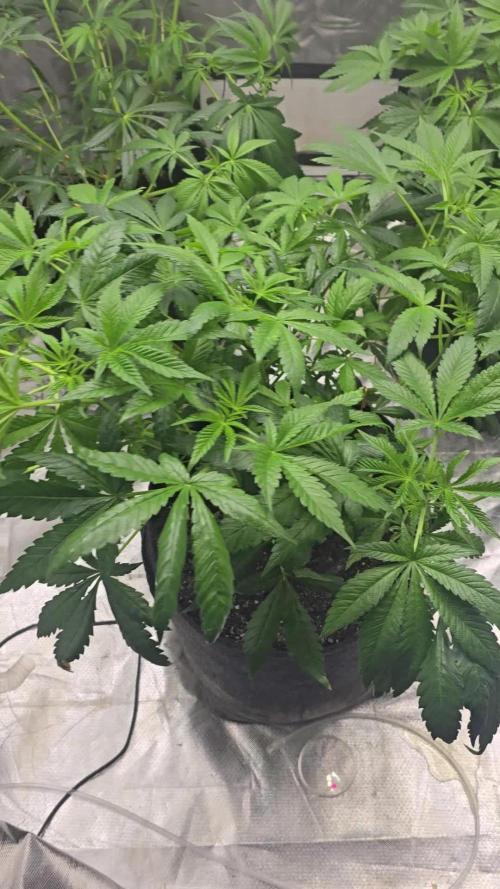
Hello Diary.
Finished and the fifth week of flowering, a total of the eighth week, Purple Punch looks wonderful. another week or two and there will be a harvest. The flowers themselves are well filled, and are hard to the touch, and the scent is amazing.
As you can see in the photos, the shape of the plant is beautiful, as if I was doing some LST, but I just did defoliation from the lower branches.
The leaves are a beautiful healthy green color, here and there some leaves have become more yellowish with a slight purple tinge, which are the first signs that the harvest is approaching.
Watering is every three days, I stopped adding nutrients, I only regulate p.H of water to values between 6.0 and 6.5.
Conditions on the Farm are satisfactory, the temperature is around 25 degrees while the humidity is below 40%.
Here's what it looked like last week:
17/03/2021 - Day 50.
Watering. I prepared a total of 7 liters of water, adjusted the p.H to 6.3 and watered all three plants on the farm evenly.
Temp / Humidity on the farm - 24.5 degrees and 38% humidity.
20/03/2021 - Day 53.
Watering. The procedure is the same as three days ago.
Temp / Humidity on the farm - 25.1 degrees and 34% humidity.
23/03/2021 - Day 56.
Watering and photography. As for watering, the same procedure as three days ago, after which I photographed Watermelon and her roommates, two Purple Punch.
Now I have to water and wait for the right moment. I check with a microscope the development of trichomes but they are still transparent. That’s it for this week, see you soon.

Likes
15
Share


@Fabii
Follow
I pretty much stopped All Nutrients only giving small doses of A&B once every other watering soon i will only pour regular Water (not ph) just a couple of videos this time not to many because they haven’t gained size .
Pure Videos today of both Mazari & Strawberry OG.

Likes
2
Share


@EtnoGrow
Follow
1st photo
We did the scrog, it helped us a little more to use as support to tie the branches with threads and manipulate them as we wanted, so we tamed it. but they kept growing as my colleague affirms
Likes
1
Share

@Dendegrow
Follow
🌈 Mental Rainbow (Sweet Seeds) – Week 7 | Flowering Day 1 🌸
Here we go – the bloom begins! 🚀 Yesterday I flipped her, so today is officially Day 1 of flowering. She’s thriving in my own homemade Living Soil, and the root structure is crazy thanks to my custom booster 🌱.
The smell is already phenomenal – sweet, intense and super fresh 🌿💨. Today I removed a few leaves 🍃✂️ to let the light penetrate deeper into the canopy. She also got just a light dose of Greenhouse Feeding Bloom – nothing heavy, since the Living Soil is already full of life ✨.
This lady looks ready for a colorful journey – follow along to see how bright this rainbow will shine 🌈🔥.
---
🌈 Mental Rainbow (Sweet Seeds) – Woche 7 | Blütetag 1 🌸
Jetzt geht’s los – die Blüte startet! 🚀 Gestern umgestellt, heute offiziell Tag 1. Sie wächst in meiner selbstgemachten Living Soil Erde und hat durch meinen eigenen Booster eine extrem starke Wurzelstruktur entwickelt 🌱.
Der Geruch ist schon jetzt phänomenal – süß, intensiv und richtig frisch 🌿💨. Heute habe ich ein paar Blätter entfernt 🍃✂️, damit das Licht besser nach unten kommt. Dazu gab’s eine kleine Portion Greenhouse Feeding Bloom – nur ganz leicht, da die Living Soil schon genug Power hat ✨.
Das wird ein richtig bunter Run – bleibt dran und schaut zu, wie dieses Rainbow in voller Pracht erstrahlt 🌈🔥.
Likes
4
Share


@AustinRon
Follow
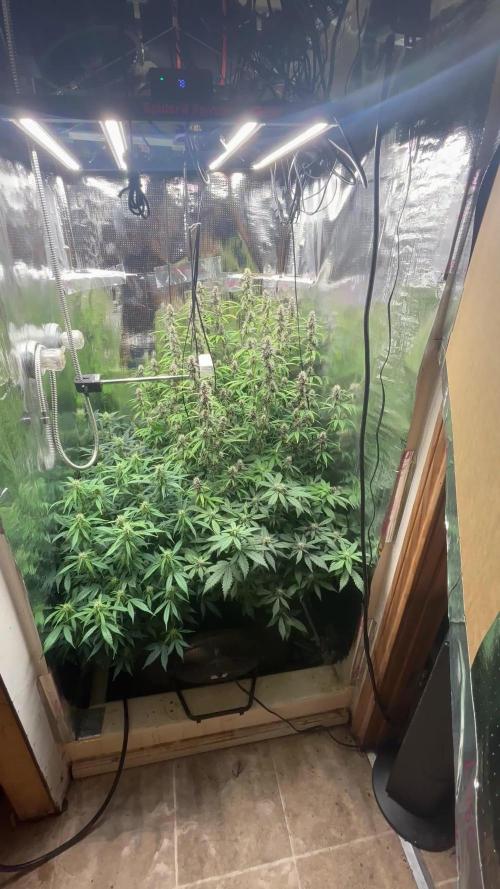
OG 4Q24 Flower Week 10
Orangegasm (Fem) [ IRIE Genetics ]
12/12 @ Bolt (Day 21)
Germination: 20 November 2024
#3A Earliest Harvest Date: 9 February 2025
#3B Latest Harvest Date: 19 February 2025
_________________________________________
Start of Week: [Wed Feb 12, 2024 CR2 4Q24 64:F:9:1]
End of Week: [Tue Feb 18, 2024 CR2 4Q24 70:F:9:7]
OrangeGasm Fertigation:
- MAX: EC: [ 1.6, mS]
- LightIntensity MAX: [ 850, µMol/m2/s]
______________________________________
__
Wed Feb 12, 2025
OG 4Q24 64:F:9:1
Refresh Reservoir
- Amount: [ 5, gal]
- EC: [ 1.6, mS]
- Primer A&B: [ 48, ml]
- SLF-100: [ 15, ml]
Reclaim Dehu
- Amount: [ 4, gal]
EC: 1.6
Runoff
- Amount: [ 1.25, gal ]
- EC: [4.3 , mS/cm2]
- EC∆: [ 1.6 , mS/cm2] # Danger!!! (I don’t think so - Happy Plants)
__
Thu Feb 13, 2025
OG 4Q24 65:F:9:2
Runoff
- Amount: [ 2, gal ]
- EC: [ 4.6, mS/cm2]
EC: 1.5
Refresh Reservoir
- Amount: [ 2, gal]
- EC: [ 1.5, mS]
- Primer A&B: [ 32, ml]
- SLF-100: [ 10, ml]
Reclaim Dehu
- Amount: [ 2, gal]
If we see the pistils of the last two plants shrink/collapse in the next 3 days, we may be ready Tuesday/Wednesday . . .
I also note we’re about 2 days after from OPTIMAL BUD Structure, Foxtailing is becoming less well formed at largest top and some of the sooner ready buds …
__
Fri Feb 14, 2025
OG 4Q24 66:F:9:3
EC: 1.4
1.5 gal dehu
3 gals+ refresh
Reduced Fertigation Time 50% as Tank is at refill after 4+ gal yesterday, again. :-{
__
Sat Feb 15, 2025
OG 4Q24 67:F:9:4
Reclaim Dehu
- Amount: [ 2.5, gal]
Refresh Reservoir - 2 Gal
- Primer A&B: [ 17.9, ml]
- Resin Bloom: [ 9, ml]
EC: 1.3
Runoff
- Amount: [ 0.5, gal]
- EC: [ 3.0, mS/cm2]
- EC∆: [ 1.7, mS/cm2]
__
Sun Feb 16, 2025
OG 4Q24 68:F:9:5
Refresh Reservoir - 2 Gal
- Primer A&B: [ 16.5, ml]
- Resin Bloom: [ 8.3, ml]
Runoff
- Amount: [ , gal]
- EC: [ , mS/cm2]
- EC∆: [ , mS/cm2]
EC: 1.2
__
Mon Feb 17, 2025
OG 4Q24 69:F:9:6
EC: 1.1
__
Tue Feb 18, 2025
OG 4Q24 70:H:9:7
1000
- Remove Plants from Tent
- Remove Drip Tray
- Remove Light
- found water unseen in bottom tray - the reason for unreasonable humidity
- Removed Drip Rings
- Dried bottom drip tray
- Resealed Tent - Low RH
_______________________
Harvest Log
Max Min Average
Height (in)
40 21.5 29.875
Weight (g)
700 157 385.5
Secondary Stem Count 30 17 21.125
Est Dried Trimmed Wt 140 31.4 616.8

Likes
113
Share


@Skunky
Follow
Day 1
It seems like she's a little slow but the smell finally starts to come.
No big changes for the rest. I'll probably need to feed her tomorrow.
I dropped the temps a little bit. No other changes so far.
Day 2
Feeding time! Up with the nutes to 75%... Only the Boost is at 100%.
Changed the values above as well :)
Day 7
Feeding time. Nutes were at 85%. Boost is at 100%. Changed the values above.

Likes
8
Share


@Roberts
Follow
Fast version B is doing good. She is just vegging along. She should be showing her maturity here in the coming weeks. Then we can get her to a flowering room when it's open. Thank you Dutch Passion, SSSC, Medic Grow, and Athena. 🤜🏻🤛🏻🌱🌱🌱
Thank you grow diaries community for the 👇likes👇, follows, comments, and subscriptions on my YouTube channel👇.
❄️🌱🍻 Happy Growing 🌱🌱🌱
https://youtube.com/channel/UCAhN7yRzWLpcaRHhMIQ7X4g.


Likes
40
Share


@iLoveGoodWeed
Follow
Week 9 she is huge and I'm running out of space. So far she is growing well and very fast I hope she will not stretch any more because there will be no space 😀


Likes
10
Share

@PicoDeGallo
Follow
Gelato Auto 10 pack
Front Left
It’s still second in height. It’s full of tops and gaining a little more height.
These seeds are supposed to be 10 week start to finish but I think it’s going to be around 3-4 more weeks.
Likes
13
Share


@NAG420
Follow
She strong little thing this the 2nd seed I planted of this strain the 1st one didn't pop for me idk why. Only spray and bottle watering her for right now she is in a 5 gallon pot don’t want to over water the pot and cause nat or mold issues. Today is the 1st day of the 2nd week. Dome came off the past few days also.
Likes
3
Share


@Organic473
Follow
It's been a crazy 10 days better late than never...i met this plant dug up. Must have been an animal sniffing the fish fertilizer regardless she bounced back after a few days...i am grateful i caught it a few hours after i reckon.
Road to 📈
