


Likes
Comments
Share


@Guillhemp
Follow
Primera semana de floracion hice el cambio de fotoperiodo el 1-11-18 la auto ya esta sacando pistilos todo crrrecto. acabo de descubrir este apartado de week coment, :) por eso la primera semana hice una pregunta por error.


Likes
17
Share


@ScouseCityLX
Follow
Good week, all showing pistols, still to spot balls on London Mint Cake. Will know in a week of they are hermy by genetics as estoric growing experienced


Likes
26
Share


@MG2009
Follow
05/27/2021
Drinking less water, she only took 1.5 liters of water/feed may be right on time for week #9 harvest!
🙏
Likes
27
Share


@Smokwiri
Follow
Almost finished
Amazon: http://url-9.cn/0y9i
Amazon US: https://amzn.to/3e0P2bk
Amazon CA: https://amzn.to/3bTnEJC
Amazon discount Code:
it10smokwiri XS1000 10%
XSsmokwiri XS1500 8%
it20smokwiri XS2000 5%
it40smokwiri XS4000 5%
ViparSpectra 8% DISCOUNT CODE on the viparspectra websites (.com/.eu)
RUFFSELEKTAH

Likes
6
Share


Likes
35
Share


@Rangaku
Follow
The girls have chilled right out growing up and are growing out an phat , I’m seeing some purple there . Big defoliation coming up as soon as I can move that auto out which is looking chunky as but a bit on the small side prolly due to the 12/12 , still odds on to have some fresh Chrissy smoko .

Likes
28
Share


@H2Smith
Follow
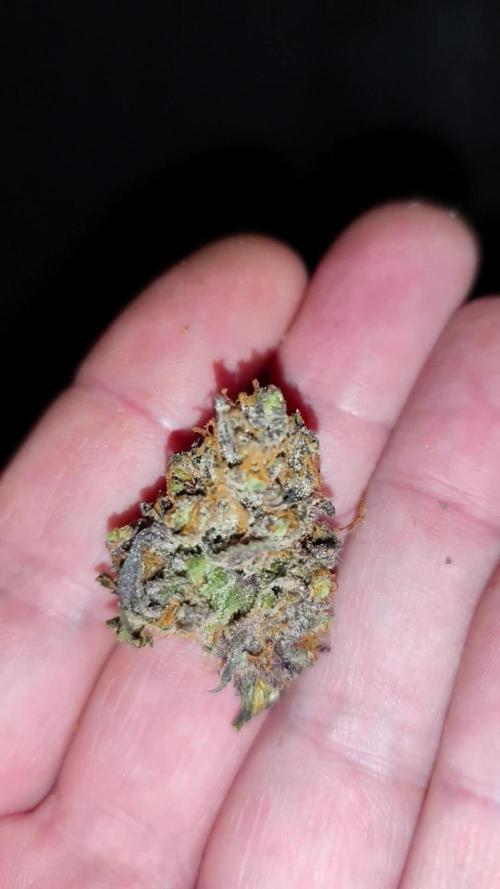
Ratio peridoser:
Green house feeding hybrid: 2.33
Green house feeding booster: 1.00



Likes
5
Share


@Ensign420
Follow
Greetings fellow growers 🖖 and welcome to my first grow ever. This adventure actually started several months ago when I decided to stop buying flower from dispensaries and just grow my own bud. How hard can it be!?
This is actually my second seed of this strain. The first bean sadly died due to over watering (sorry girl, RIP). I was literally watering the cube to the point where water was dripping from the bottom, then heavily sprayed the humidity dome and tray with the vents completely closed. Everyday. Multiple times. I never let the dome or try dry out. So after about 8 days of not sprouting, there was a funky smell of rot. So that was that.
Later I learned that rockwool retains a lot of water and can easily drown seeds. So a wet/dry cycle is best for rockwool germination.
So even after hours of researching and digging through forums and tutorial videos, I was still under prepared for this journey. Did not consider how delicate the germination phase is. Oh well. Lesson learned. Reset and try again!
I hope everyone is safe and stoned during this corona crisis. Just like everyone else in the world, I want this pandemic to be over with. But in the meantime, let's grow some weed! 🖖
[START OF WEEK 01]
Day 01 - Monday - 08/03/20 - Total Days: 001
-----------------------------------
- [0830]: Light Schedule: 24Hrs/0
--- Soaked cube in 5.5 PH water for 10 min. Did not shake water out.
--- NO NUTES! Only PH'd down to control the PH levels.
--- Did not use the default hole (way too deep).
--- Flipped cube upside down and made a shallow hole for the seed (less than 0.25" deep).
--- Placed seed in and pinched hole close. No additional water added.
--- Sprayed the tray and dome with straight water (5.5 PH).
--- Vents are cracked opened a for ventilation (about 1/4 opened each).
--- Distance between the light and tray was 53"
--- AC was set to 80 °F
--- Exhaust fan was set to 86 °F
--- Room average temp was at 85 °F
--- Dome humidity was at 85-99% when sprayed.
--- Allowing to completely dry before respraying.
- [2200]: Dome and tray were completely dry! Sprayed only tray and dome with more water.
Day 02 - Tuesday - 08/04/20 - Total Days: 002
-----------------------------------
- [0845]: Sprayed dome and tray in the morning. Everything was dry.
--- Hoping for the best!
- [2130]: Everything was dry again, so sprayed dome and tray at night along with a light spray on the cube.
Day 03 - Wednesday - 08/05/20 - Total Days: 003
-----------------------------------
- [0830]: Everything was dry again. Resprayed dome and tray. Slightly sprayed cube.
- [2125]: Hooo damn!! She popped! Am little stub is visible! Resprayed dome and tray again.
--- Still going 24/0 for lights.
- [+0033]: Just checked up on her and I swear she grew a bit taller! Getting excited!
Day 04 - Thursday - 08/06/20 - Total Days: 004
-----------------------------------
- [0845]: Wow! Went from a little stub to fully sprouted overnight! Everything was pretty dry again so resprayed dome and tray.
- [2200]: Tap root is visible! Over 1" long too! Just resprayed dome and tray again.
-- Going to prep for hydroton transplant tomorrow!
Day 05 - Friday - 08/07/20 - Total Days: 005
-----------------------------------
- [0930]: She keeps growing!
-- Added a bit of CalMag to the spray bottle (8 drops to 650ml of distilled water). Resprayed dome and tray. Water was at a 5.4 PH with 141 PPM.
- [1045]: Prepped the bubble bucket with 4.5gal of water. Water is high enough to reach about 0.25" above the bottom of the net pot.
--- Added 3 drops of Superthrive
--- Added 3.5ml of CaliMagic
--- Added 2ml Hydroguard
--- Then PH'd down to 5.6
--- Solution Strengh: 120 PPM
--- Water chiller is set to 20 °C
- [1100]: Transplant time!
--- Filled the net basket 1/3 with hydroton. When placed in the bucket, air bubbles are not visible, but are slightly below the surface (slight digging will reveal the water/bubbles below).
--- Removed plastic on rockwool cube and placed in basket, then filled around and covered with hydroton. Making sure to block any light from passing through the net pot and into the nutrient solution.
--- Covered with a half-bottle dome sprayed with the CalMag water from earlier.
--- Hoping for the best!
- [1300]: Raised Bucket 5" higher. Now light distance is 48" to top of bucket.
- [1820]: Lowered tent exhaust temp to 76 °F
--- Lowered AC to 75 °F
--- Raised bucket even higher so light distance is 30" to top of bucket.
- [2300]: Looking good!
--- Sprayed dome and surrounding hydroton with more CalMag water.
--- Attached timer to light! So new 18 Hrs On/6 Hrs Off light schedule.
--- Lights On: [1600] (4pm)
--- Lights Off: [+1000] (10am the next day)
--- Decided to go with lights on during the evening/night and off during the later mornings/afternoon (the hottest part of the day) to see if temps can be controlled better.
--- Please survive girl!
Day 06 - Saturday - 08/08/20 - Total Days: 006
-----------------------------------
- [0800]: Everything was dry. Resprayed hydroton and dome.
- [2000]: Here first night cycle seemed to go well! Get'n taller!
--- Dry again. Removed the dome.
--- PH went up to 6.5 so PH'd down to 5.7
--- Ran the top feed drip ring for a bout a minute to wet the hydroton and rockwool with the nutient solution.
---Too scared to leave the top feed on 24hrs (I don't want over water her and cause dampening-off). Will let dry before re-watering.
- [2100]: After closer inspection, I think she's looking a bit yellow.
--- Decided to add a bit of grow nutes to the bubbler solution.
--- Added 2ml of Sensi Grow A
--- Added 2ml of Sensi Grow B
--- Solution strength after adding more nutes: 176 PPM
--- PH went up to 6
--- I hope that the extra chelating properties of the 'PH Perfect' solution is enough of a buffer for proper nutrient uptake.
Day 07 - Sunday - 08/09/20 - Total Days: 007
-----------------------------------
- [0800]: Water dropped a bit (mostly due to evaporation) so solution strength was at 190.
--- Checked PH again. Was still at 6, so PH'd down to 5.4
--- Ran the top feed for a minute to wet the hydroton a bit.
- [0915]: Since she's looking perky but still a bit yellow. So decided to up the nutrient concentration even more before lights out.
--- Added 2ml more of Sensi Grow A
--- Added 2ml more of Sensi Grow B
--- Solution strength after adding more nutes: 199 PPM
--- PH went up to 5.8
- [1700]: Checked nutrients.
--- PH: 5.9
--- Solution strength: 202 PPM
--- Added 4ml of Voodoo Juice
--- Added 4ml of B-52
--- PH after adding more nutes: 5.9
--- Solution strength after adding more nutes: 238 PPM
- [2130]: Decided to make a new foliar spray to address the continued yellowing.
--- Started with 500ml of distilled water.
--- Added 3 drops of CaliMagic
--- Added 3 drops of Sensi Grow A
--- Added 3 drops of Sensi Grow B
--- Added 3 drops of B-52
--- Added 1 drop of Superthrive
--- Solution strength: 164 PPM
--- PH was at 5.9 and did not adjust.
--- Gave her one spray.
--- Also sprayed the surrounding hydroton.
[END OF WEEK 01]
Likes
36
Share


@valiotoro
Follow
Super frosty & rock hard buds💥
Delicious terps🤤
Perfect buds leaf ratio
Likes
574
Share


@TOTEM
Follow
Hello everybody! This week will be the hardest one. I’ll have to work a lot inside the room, and even on GD to document all the changes. Last week I topped for the last time (in reality this happened the first day of this week), and finally stopped with high stress training. From now on, our attention will fall totally on ScrOG.
Day 43: Topped the 4 colas at the extremities. Red blood came out from them (see the photos). Amazing! Sorry for the bad quality, but I got just the phone with me when I did the job. When I took the second photo (a few hours later), the plant had already sucked up all the lymph. You can still see the red blood by the way.
Day 44: Set the timer to start with 12/12 from midnight of day 45.
Day 45: SO MANY THINGS HAPPENED TODAY. Flowering started, baby! 🤩 Today, in the evening, I worked for about 4 hours to prepare the ScrOG environment.
- Improved the LST before placing the grid.
- Took some photos.
- Removed the humidifier.
- Since my LED panel has half of the blue lights broken (this happened three weeks ago), resulting in 100W less of total potency, I added 3 new lights pointing where the panel is broken (2x 36W led bulbs and 1x 30W COB led light). I uploaded a photo and a video to better understand what I’m talking about. I even tried changing the broken LED driver, but it didn’t work, so now I’ll have to wait until the end of this cycle to send it to maintenance.
- Put 20gr of BatMagno (which is bat guano), 10gr of “Farina di Neem” (Neem Flour), and 50gr of Alghe, all of them over the soil. I’ll write something about these fertilizers at the end of the comment.
- 4.5L of tap water (corrected to PH6.5), which gave zero runoff. Haha, she’s drinking like a camel.
- Placed the grid.
- Took a few photos.
- Little defoliation.
- Took all the other photos.
- There we go!
I preferred not to add the bloom fertilizer now because I’m a little worried about overfertilizing this baby. During veg, she showed me she doesn’t like nutrients, so I’m just listening to her requests. I’ll add the bloom one as soon as she seems hungry again. By the way she’s just 20cm tall (I’m so proud of this result) and the grid is located a few centimeters above her. Let’s see if I switched to 12/12 at the right time: I heard this strain usually stretches for about 6 weeks!!! 😱😱
Let’s talk about the ferts I placed on the surface of the soil.
- BatGuano: it’s a mixture of organic fertilizers of natural origin and suitable to produce a high amount of organic nitrogen and phosphorus that can be assimilated at 100%. It’s a natural slow-release fertilizer for flowering: the raw materials used (guano, dried borlanda with ammonium salts, kieserite of natural origin, flagpole, meat meal, bone meal and dried poultry) are the result of a careful selection which ensures a low salinity and a gradual transfer of the elements. The phosphorus content in BatMagno (being organic) does not undergo insolubilization.
- Alghe: they are a portentose substrate activator made of a mixture of algae of the species Ascophillum, Fucales and Laminariales, obtained through a process of dehydration and grinding without the use of any chemical substance. They can be used during the preparation of the soil, and increase and strengthen the formation of the root system, mobilize the nutrients in the soil, reinvigorate the plants, protecting them from adverse weather conditions, help plants to overcome stress conditions and improve the quantity and quality of production. All of this is possible thanks to the presence of betaine, cytokinins, vitamins, auxins and alginates polysaccharides.
- Farina di Neem (Neem Flour): it’s a vegetable product based on Neem seeds, obtained from the extraction of Neem Oil through a process of cold-squizzing out, which increases crops, improving both growth and flowering, as well as strengthening the roots of the plants. The Neem Flour is mixed with nitrogen fertilizers, that slow down the conversion and leaching of nitrogen. Repeated interventions improve the endogenous resistance of plants to pathogens, creating an unsuitable environment for the development of insects and cryptogams. Due to the presence of important trace elements for plant life, it prevents imbalances and nutritional disorders. It also protects plants from Nematodes, ants, insects and soil larvae.
Let’s say Alghe is the most smelly product. My room now smells like seaweed! I need to figure out how to give her water now that the grid is on. I think I’ll plug a 2m pipe at the end of my watering can. That’s the most easy and cheap way to fix this problem. I just need to find the right size of the pipe. I’ll show you my solution next week.
Likes
7
Share


@Staffedition
Follow
Всем привет. Вот и вылезли мои маленькие малыши!
Выглядит растение счастливым и здоровым!
Сегодня 4 день от каски.
Увидимся на следующей недели друзья!

Likes
72
Share


@HighFromHome
Follow
Another week done. Hard to see progress day to day but just looking back at photos it's easy to see her moving along.
It's my weekly ritual, photo, measure, smoke then update diary!
So...
She is still getting 1.5L each time i feed or water every 2 to 3 days. Increased the bloom nutrients further and decreased the grow to minimal.
Removed a few leaves blocking sites again. Also a couple poking into the fans. As for lst, i slighty tweaked the 4 middle stems. The rest would snap with any bending below the top 40mm.
Temperature spiked to 34 degrees in the tent for a few hours today but luckiky was watered last night. I think that helped her through those tough times. If she was almost dry and then had those temps i think she would be a bit annoyed! I was helping my brother move house and was a sweaty mess! Bet she was too and definitely appreciated my lights out being 1pm til 5pm. If it happens again and im home i will treat her to some ice packs by the intake again. :D
All seems good overall. Can't really complain about anything. Last week i mentioned how she didnt smell. She did smell if you rubbed her trichomes and smelt your fingers. But just putting your nose to her was only a plant smell. Now, she has just started to have a smell of weed.
I have a water pump and another timer to water her while i am away. All tested and after a bit of playing around i can feed 1.5L in 1 min :D
On to another week that i am as excited for as the last.
Thanks for checking it out
P.S Off to visit our remaining 2 outdoors tomorrow. Will get photos and upload next week. Fingers crossed all is good lol. (I say our, the outdoors grows were/are 50/50 with me and a close friend).
Likes
27
Share


@Smokepurple137
Follow
All doing perfect not alot to say, defoliated on 18/1/21 and tied a few branches where I could to make a little more room. Maybe 3weeks then ripen +flush Daily updates
Likes
10
Share


@Zurban_Poison
Follow
Hello friends! I am glad to be a participant of such a large-scale and simply cool competition! Thanks to the organizers and the website administration for such an opportunity. I will say a few words about my plans. I am going to grow 2 plants in one pot, using the Mainlining method. Good luck to all participants! May the best one win!

Likes
5
Share


@ricoo
Follow
They are growing nicely, i forgot to upload for some time and now they are finally fully flowering, i pretty much fertilze them with everything.


Likes
7
Share

@IslandTerps
Follow
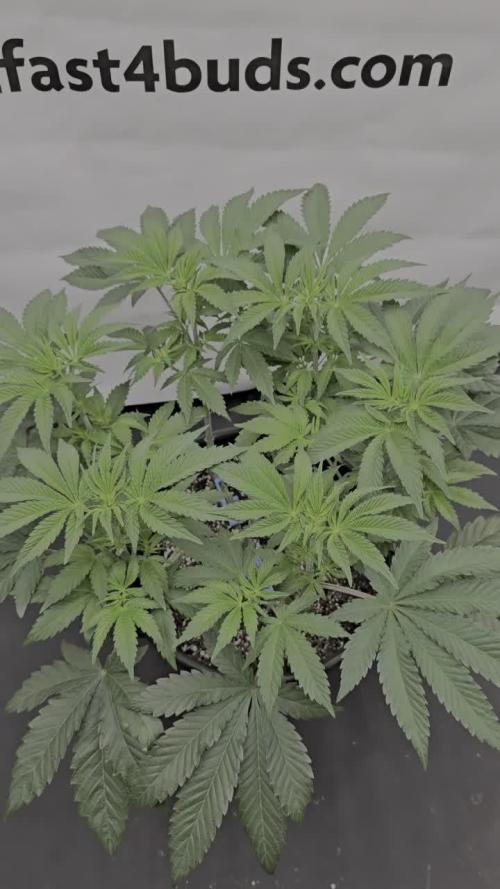
Strain: Fast Buds – Mixed Photoperiod Pack #1
Grow Type: Indoor
Pot Size: 3 Gallon
Medium: Peat Moss & Perlite
Nutrient Line: Athena (Bloom)
Week 7 Update
I’m honestly amazed at how well I trained this plant, the 6-manifold came out perfect. She’s doing excellent, showing vigorous growth and a strong, balanced structure.
Everything about her looks healthy, from the canopy to the bud sites starting to fill in. She’s taking her nutrients really well with no signs of deficiencies or stress.
I’m excited to see how she looks later in flower once those buds start packing on.
Feeding
1.9 L Athena Bloom nutrient mix (steady from this point).
Indoor Climate Conditions
Temperature: 24–27°C
Humidity: 45–55%
VPD: ~1.3–1.8 kPa
See y’all next week! And don’t forget to use my discount code ISLANDT for 15% off your next order at Fast Buds!


Processing
Likes
37
Share

@MG2009
Follow
These girls sprouted and then had no light for 2 and a half days, so a little leggy. Put them under 25% power LED to see how they respond will increase as needed over next few days, to 100% blue spectrum.. The genetics are either, selfed (G T H), or stray Skywalker that also selfed.. Soo a selfed GTH or sky ghost train. I think I like the possibilities.🙏
03/27/2018 Day 6, 100% blue spectrum, 25% red, perking up watered.
Likes
57
Share


@nonick123
Follow
Día 6 (29/04) Spray solo agua el top del sustrato. DLI 13
Día 7 (30/04) Spray solo agua el top del sustrato. DLI 13
Día 8 (01/05) Spray solo agua el top del sustrato. Subo a DLI 17
Día 9 (02/05) Elimino la cúpula casera de humedad y empiezo a regar con 300 ml solo agua
Día 10 (03/05) Empiezo a luchar con una ola de calor inesperada para esta época, que me trae temperaturas exteriores de 30 ºC y humedad relativa del 30%...
Mantengo la cúpula casera de humedad
Día 11 (04/05) Hace muchísimo calor.. 30 °C. A ver como lo llevan
Hago un invento casero para aumentar la humedad
Día 12 (05/05) Primera alimentación con Aptus! 300 ml H2O + Regulator 0,15 ml/l + CaMg-Boost 0,25 ml/l + Startbooster 0,25 ml/l - pH 6.2
Creo que las plantas se ven un poco pequeñas para tener 12 días... esperando por explosión de crecimiento en los próximos días....
💦Nutrients by Aptus Holland - www.aptus-holland.com
🌱Substrate PRO-MIX HP BACILLUS + MYCORRHIZAE - www.pthorticulture.com/en/products/pro-mix-hp-biostimulant-plus-mycorrhizae
