


Likes
12
Share


@ChiTaN
Follow
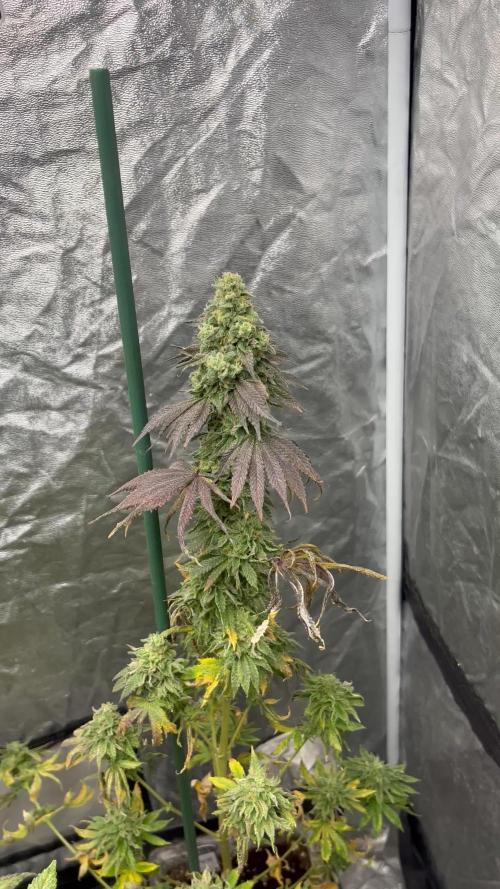
The girl is huge, the buds are huge and meaty😃The smell is overwhelming, breathtaking :) I can't wait to finish😅

Likes
13
Share


@GIJOSE
Follow
Good morning everyone! First off I want to say a special thank you to grow Diaries for Choosing Tutorial "how yo build a scrog" for Second Place!
Now for the update I discovered two males in my grow both of them are Blue Hawaiian. I decided to inspect the root development sence they were going to be destroyed anyway. I was really upset on the how they look. Normally I transplant at least 4 times before I reach my final pot. On this grow I experimented by transplanting from a solo cup to my final pot and also another by just placing the seed directly into the soil. You can see from the pictures that the roots did not develop much at all. I will not be using that method again.
On another note for those of you that have experience using molasses in your feeding schedule for your plants can you chime in and tell me what you would use and how you would mix?
As far as the girls Our concern they are stretching out very nicely! And looking very good. Hope everyone's day goes well cheers! G.I.JOSE


Processing
Likes
22
Share


@herbalistssword
Follow
Decided to give them a break from nutrients this week and gave them a good watering without any nutrients to clear out the soil, will start feeding again with next feed.
The girls are growing well. I keep thinking the Candy Kush plant 2 is going to be ready in a week then deciding to leave her for another couple of weeks. I'm hoping she'll be ready this coming Monday, she'll be 78 days and I'm running out.
The other girls look like then need another 3 weeks at least. The buds are getting fatter every day :D These last few weeks test my patience so much.


Likes
Comments
Share


@Backyardnewbie
Follow
Moved light to 3ft above plants. 400ppfd plants are reacting well.

Processing
Likes
5
Share


@PETEROG
Follow
Hey guys everything is going great with these ladies all 6 germinated and popped up in 3 days after planting 1 of the six shooters is a lot smaller than its sisters so I've order LEMON PIE from FASTBUDS should be here tomorrow to take its place and I'm going to move the six shooter outside so if you would like to see its journey comment and like bellow ⤵️
The only thing I wish I did differently would of been starting these girls under a cfl or a cheap led to stop stretching but lesson learned if anyone has any question's please comment and thank-you all for your support ✌️
Likes
29
Share


@NoProbation4Weed
Follow
Light hitting with around 1000 PPFD
She is looking beautiful! Smell is getting realy intense.
Plant training did its job - many same size Buds with same quality.
One of my favourite grows so far!


Processing
Likes
14
Share


@Dre25
Follow
How they looking Growers!?! Saw white tips developing on my babies and I just flush them last week to fix the problem. They bounce back and Looking Beautiful 😭. Going to feed them tomorrow back to the nutrients.
Northern on the left, Amnesia in mid, purple lemonade on the right. Happy Growing and Be Safe!


Likes
12
Share

@3rnest
Follow
Die Pflanzen wurden jetzt alle gespült und werden vermutlich nächste Woche geerntet.
Ich überlege noch alle Pflanzen gleichzeitig zu ernten, damit ich das aktuelle Zelt zum Trocknen nehmen kann oder ob ich "Chocolate Rainbow XXL" noch etwas mehr Zeit gebe...

Likes
21
Share


@Enollam
Follow
Servus zusammen 🏽
Im Vergleich zum Rest im Zelt ist alles beim Alten... Sie hängt ein paar Tage hinterher... Was aber nichts ausmacht... Sie macht sich gut und zeigt eben etwas langsamer in welche Richtung sie will😁
Ich bin zufrieden und weiterhin gespannt
Likes
47
Share


@blazin_skywalker
Follow
Day 8 - Color improving, but not at the rate I'd expect or like, so I went ahead and gave her more food. I am feeling so hesitant in doing so, just because I've never had such a hungry baby, but I'm adding slowly over the course of the past few days to try my best to avoid nutrient burn.
Day 9 - This girl is getting greener and stronger, but she's still on the pale side. I added 2 more mls of both Veg A, B, and Coco Cal - slow and steady. I'm hoping I can find her sweet spot soon. I'm starting to get that "I don't know wtf I'm doing" feeling lol 😂
Her environment is pristine - Ph is great, temp in the tent and water is perfect, I brought up the humidity to 48%, air circulation is on point... I'm not sure what else I could offer this princess.🤷♀️
C'mon little FF3, show me what you got!
Day 10 - continued improvement in color, but not seeing what I want. I'm watching myself as to try to avoid nutrient burn, but she just seems hungry.... So far the more she eats the greener she's getting so, fingers crossed! 🤞added 5ml Coco Cal
Day 11 - I think we've found our happy place. Her color looks much better, and she's growing happily. Her little mutated leaf has grown so fat you can barely appreciate its uniqueness anymore.
Day 12 - added another half gallon of water along with 2mls of Veg A and B, as well as 4ml Coco Cal.
Day 13 - I continue to keep feeding with hesitation, only because I've. Never experienced an eater like this before. Still. No signs of nute burn, but I do have continued improvement of color and gusto. 💪
Day 14 - Closing out a happily uneventful week. She's fat and happy, and that's all I can hope for at this stage. She really enjoys story time! 💜🤣

Likes
13
Share


@Medmandan420
Follow
Sorry about late update
lots of stuff going on
great smelling flowers
far more advanced then the rest of the tent
Likes
23
Share


@Gram_Solo
Follow
Last week for these 3 remaining Runtzz
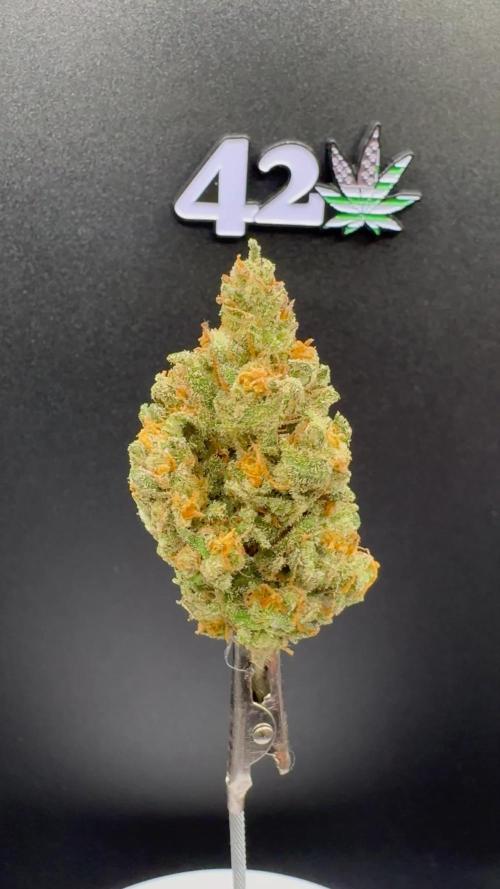
I flushed them 4 days ago with flawless finish they had 2 feeds of flawless so far 1 more and then we chop them on Tuesday. Will be doing 10-15 days drying in a 3x3.
Looking very frosty all 3 of these now orange hairs all curled and looks like they have packed out really well!
The smell when you open the tent is heaven!! Old school bud smells!
The journey is nearly fully complete!
😎😎😎😎
Will post harvest pics of these 3 on the next update!
12/05/25
Last 3 have been chopped and are now drying

Likes
2
Share


@viggagrow
Follow
I started to feed him a little more Monster Bloom, which seemed pretty cool.
I continued to spray blizzard once a day for 1 week, and base water.

Likes
15
Share

@MaryJaneJo
Follow
Apple Strudel went into flower early last week & has already doubled in size. She drinks her feeds like there is no tomorrow & is slowly taking over the grow space. She takes no prisoners.
See you next watering.👽
Likes
5
Share


Likes
11
Share
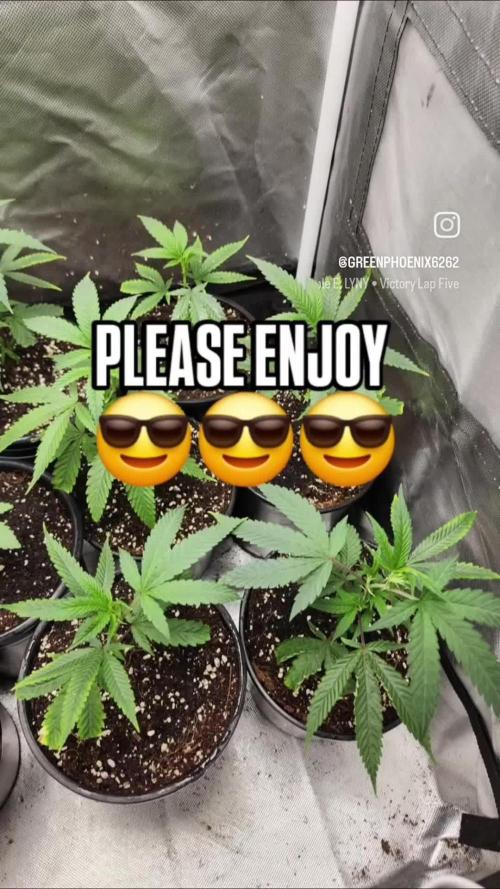

@GREENPHOENIX6262
Follow
03/01 - (M) - Currently in pre-flower - She is growing amazingly - No deficiencies, wilted leaves or visual que's - I have changed her feeding program to daily micro-dosing between clean water and nute feed alternating days - She will be transferred into the 4x4 flower tent within the week.
03/01 - (C) - The clones are coming along nicely - Transplanted the 7 into 1 gallon pots last night - The substrate is the same as the mother with an added top dressing of worm castings last night - Increased feed formula on some of the nutes (Nitrogen/Silica and Cal-Mag) - High humidity/High heat is the name of the name the game - Specs to follow
Clone specs - Week 2
Height - 13 Inches
Temps - 82°(f)
Feed Temp - 65° (f)
Humidity - 79 - 81%
Watering Vol - 2 cups every 3 days
Nutrient Feed - Nitrogen - Silica - Cal-Mag - Microbes - Kelp - Horti Grow - Myco
03/04 (M) - She has been transferred into the 4x4 - Her setup run is identical to the 3x3 setup with the difference being the 4x4 has 2 AC infinity fans and a 6 inch carbon filter - Her nute feeds are twice a day running of the drip emitter (9 drippers) watering for about a minute.
03/04 (C) - The clones have transplanted without any issues into their 1 gallon pots - all 7 will be transplanted into 5 gallon pots in about a month - They are running alone in the 2x2 tent until next transplant.
03/08 -(M&C) Closing out the week on a good note - Mother is doing fine and the clones as well 😎😎😎😎😎😎😎

Likes
5
Share


@Dr_THC_420
Follow
The smell of these 2 girls are amazing , smells like berries / fruit , and really fresh , I have trained them quite a lot so the flowering has delayed but the amount of bud sights are unbelievable and are all really starting to fatten , said it once and I’ll say it again , blackberry 420 fast buds best strain/seeds I have ran to date I have loved watching this plant grow and bloom into what she is now carnt wait for some more colour to come through
Likes
4
Share

@eldruida_lamota
Follow
Que pasa familia, vamos con la octava semana de floración de estas F.U.H. feminizadas de Seedstockers.
Vamos al lío, las plantas se trasplantaron a macetas de 7 litros.
El ph se controla en 6.5, la temperatura la tenemos entre 24/21 grados y la humedad ronda el 50%.
El ciclo de crecimiento puse 12h de luz, el foco está al 50% de potencia.
Tenemos como visitante de nuevo los trips, compré depredadores que coloque.
Me gustaría estar más encima este cultivo pero la salud me está impidiendo un poco estar 100% con el proyecto.
- os dejo por aquí un CÓDIGO: Eldruida
Descuento para la tienda de MARS HYDRO.
https://www.mars-hydro.com
Hasta aquí todo, Buenos humos 💨💨💨
