
Likes
Comments
Share


@LoganatorDude
Follow
I am feeding with tps one and CalMag oac one time, then it’s back to regular tap water (well water) that comes at 8.5 pH with 156ppm of tds. The feed was approx a pH of 6.5. More importantly is the consistent soil pH which appears fixed at 6.8
I know it’s lazy! However…. I have noticed doing this to reveal to me that the soil pH is very stubborn and not easily changed by the pH of the water alone. Stuff in the water can definitely have an impact. But still, most feed waters I use don’t change the soil ph. I do make sure the pH is within a healthy range for soil, something between 6 and 7 I figure is ideal. I’ve found if there is enough lime in the mix, and as long as I don’t over feed soluble nutes, then the soil pH appears stable and fixed. With enough lime in the mix, I can ultimately arrest the soil pH at 7. It’s really cool. I thought adding too much lime would give me something potentially alkaline, and maybe it will. But I’ve added lots of lime before and still haven’t gotten past 7 pH. Maybe I didn’t add enough to go further? Nevertheless I’m not interested in going past 7.
I haven’t seen any issues with the speed of growth watering with 8.5 tap water, surprisingly. As I’ve said the soil pH would read 6.8 before and immediately after watering with the 8.5 tap. So….. I’m thinking the stability of the soil pH is a positive indication that the microbes are not being subjected to pH shifts, or at least nothing substantial.
I mean, at the end of the day when things are looking good, I feel like I must have something right.


Likes
30
Share


@Blabina
Follow
👻👻👻 Reminder : 👻👻👻 So, I created the diary the 15th of september, I wrotte every previous informations on paper then on a word sheet. I reallized that I got everything to create a diary here, so I did it. I should maybe try to end this first grow without buying any fertilizer and keep going with my home made receips (taken from several sources and reading). I think I will do some fun experiments on a following diary. It is well known, dwarves don't run fast, so next batch will be 3 quick one from royal queen seeds, with smart pot and coco
ideas i had. It will be fun an probably in 3-4 weeks (I plane to harvest my dwarves a little bit later around week 11, but I don't know, I have to check trichomes, they will give me the answer.)🙌💩So from week (8) we are in *LIVE* mode for this diary. Hello elves (you are the elves, you reading me). Smiles are allowed (this is unfair you smoke your plants so you have a strong adventage) while reading. Orcs are the pests and desease attacking the dwarves (the 3 plants)👻👻👻
👉 I've cut every branches, it was an amazing experience : My dwarves killed the orcs, they survived and escape from this AMAZING journey. They where really impossible to kill. They suffered from : Overwatering, over defoliation, nutrients burn, probably root rot, to much heat (more than 30 degree for some days), a too small pot... And they smell like : 😅😇😇😇 a wounderfull smell. I did all the "noob" mistakes basically but I learned so much. I started to feed them with home made nutrients and ended to use biobizz really at the end. I don't know what was the best for those dwarves but they made it.
I will update this diary with a video and will give in 1-2 weeks the weight dry, I am really curious about it, I left really no branches, they are like ready to be in a jar.
So:
👉 The famous 3/3 with amazing colors gave me : 38 gr. wet
👉 The famous 2/3 gave me : 34 gr. wet
👉 The famous 1/3 gave me : 30-31 gr. wet
The harvest seems not amazing, I don't know how much weight I may loose by drying (I kept really only the heads). For a first grow, I am happy, because I simply made it. I know that it is now a growing experience, like those wounderfull amazing plants. And I learned a lot. Allready excited to launch a second harvest. A matter of time actually. It was fast, joyfull, stressfull, great to do it.
SUMMARY :
😮 Why this diary name ? 😮
👉 Because when I descovered growdiaries.com 3-4 weeks before harvesting I was completly sure to fail and that my dwarves were gona die. 😁
😮 Is it the first time you have a kind of relationship with dwarves or plants like this ? 😮
👉 Hell yeah... I am totally a casual smoker and I never did this in my life before. I have to say that I started to have like a real relationship with those 3 dwarves, they start to miss me ( I just cuted them like 2-3 hours ago). 😞😢
😮 Did you enjoy to do that ? 😮
👉 Well... It will be definitly hard to don't do it again. Hopefully when seeds arrived at my home, they where not alone, 3 quick one are waiting to have a funz experience with me. The trick what started to be a small investment turned into buying more and more stuff (ph and ec meter etc...) So I want to use them more 😲😘😍
😮 Are you high right now ? 😮
👉 Absolutly not, I haven't smoke any weed for about 3-4 months maybe and I don't drink, I mean, I am naturally like this. 😕
😮 What about the elves ? 😮
👉 You mean the readers of this website who followed, liked, help me a lot with A TREMENDOUS AMOUNT OF GOOD ADVICES ? I love them ♥️☺️♥️ Thank to all the readers, growers, people taking care of this website and not giving any infos to the police, breeders for giving us the opportunity to do this, light crafters for giving us sun in a tent, tent builders, special potions crafters (who create amazing nutrients) specially those dedicated to the natural 100% products... I mean thank you to all elves. ♥️

Likes
88
Share


@CBD_Sweden
Follow
The growing cycle it self worked out as expected, except that the pH-level was way off from where it should be, and I found out a bit too late. Because of this the outcome of the harvest didn't say much about the potential of this strain, but as soon as I got enough time and space, she will get a new chance to shine.
2018-03-01.
This is my review / smoke report of this lovely cbd flower.
There are rock hard buds and almost no give at all, even in those smaller buds.
When you grind it the scent will appear more than just smelling on the buds.
It smells a little weak of grass, wood, bark, sweet, lemon, honey, skunk and some kind of spice.
The taste is orange, mandarin, honey, bark, popcorn and pepper.
The effect is directly, the thc feeling above the eyes and in the forehead, it fells like its a higher thc levels in this strain compered to the cbd strains i tried before.
A little light ringing in the ears and a slight dry mouth.
After 10 minutes, the cbd kicks in and and balance the thc high.
The neck and shoulders begin to relax and the feeling continues down over the back and chest down to the stomach.
A calming, relaxing, and slightly energetic feeling.
After 15-20 minutes it is down in the legs and feet, and you can feel a vibrating feeling in your muscles, joints in a pleasant way.
It reduces my tense muscles and some of the nervpain i got.
Its a good strain for releasing stress and get you in a relaxed and satisfied mood.
It is a very well-balanced strain and it fits in all sorts of contexts.
If you take this in the morning or mid day it will give you a small energy boost and get you in the mood for doing something.
I think this is a lovely strain and I highly recommend it to everyone but especially for more inexperienced people that dont like the high thc strains and want to have a good relaxant, pain controlling, anti depressant medication that also can give energy or help with getting to sleep.
This is a must try strain.
Likes
49
Share


@masterofsmeagol
Follow
7/18 Plants are looking great. I was able to rearrange the plants so they have a little bit more space and so I can get around every plant. I have small random pest damage (i.e. I caught a four lined plant bug while hunting jpn beetles) but not enough h to warrant treatment. I will probably spray before flower. Sun's out amd plants were praying. I rotated a couple and it only took a few hours for them to "straighten out." I went to look again rhis morning and made the final determination to expand the cage. I'm looking for the 2x4's and the wire in the next couple days. The work that ive done now will but me sometime. I wonder how this rain impacted my soil.
7/19 Plants are looking fantastic. The stretch is starting. One purple punch looks like it's beginning to flower. I think I'm entering the transition period. Jpn beetle damage is evident but not significant. I defoliated a leaf with a a leafminwr or something in it. It's so much easier to get around the plants now. I'm seeing some chunks missing sporadically though. Went to the roses out back and found TONS of jpn beetleson top of each other reproducing. They destroyed that rose bush. I'm going to keep it as a trap plant. My dad's girlfriend wanted to spray it but that doesn't make sense as theflowers are all gone. Dad's grabbing the materials to extend the cage today I think. Right now I can get around every plant but the two big ones in the back. I just cant get to the backs of them and they are huge. Almost reaching the top of the cage. A 4'-6' extension will do wonders in flower. Can't wait.
UPDATE: Dad got the 2x4's and we assembled the extension and attached it. He's grabbing the wire as I type this. This worked out beautifully. I had no idea how big the blueberry cheese in the 50 gallon was! This extension (4ft i think) is PERFECT! Then I can get a little extra wire and pull it out if I wanted to. I think I have another 2x4 that I'm going to use in the middle. Lots of great pics and a video I'll upload tomorrow. Hot af today and humidity still super high. Even the commercial dudes was surprised I don't have wpm l and that judging by some of my plants structure that I may do better than I think. I certainly hope so. I WATERED 3 GALLONS OVER THE WHOLE GARDEN. The blueberry cheese in smart pots were drooping. They drink far more water than tje others. I would've given more but we are supposed to have thunderstorms. I left my back tarp off for the night. It will increase airflow and wind is down. I feel like this is going to be my year.
7/20 I updated and loaded everything on the app but notjing would save. Did it again in the website hopfully this saves
i didnt put it all up. Didn't water the plants today. Bags seemed okay weight wise. Good thing I did the extension yesterday because those three plants were drooping they were so thirsty. I focused most of the water yesterday on those plants that needed it. The others were somewhat dry but still had some weight. Like i said the blc drinks much more water than any of the other plants. I'm impressed with the growth I'm seeing. Especially since I have been being very stingy with the water and I've only fed like twice and that was just the kelp me/you and big bloom in negligible amounts. I'm watching for deficiencies. I'm just not seeing them. I'm picking up the wire and finishing the extension and then rearranging things. I'll update.
UPDATE: WATERED 4 GALLONS CONCENTRATING ON THE PLANTS THAT WERE DROOPING THE MOST. FINISHED ENCLOSURE AND INCREASED PLANT SPACE. TRELLIS WILL GO UP THIS WEEK. VIDEOS WILL BE UPLOADED TOMORROW.
7/21 I should've watered more volume last night. I noticed two plants that seemed much lighter than the rest. After some deliberation I gave them each a half gallon of water. One was the purple punch in the 10 that's huge amd the other was that huge blueberry cheese. I think I'm going to swap places with them, take out a pallet and get some other way to elevate that ONE plant and I'll have even more room. Then I'll add my supports. It's a dream working in there now. I noticed some small interior leaves being used up and dieing. I defoliated them but it was only a couple. I'll need to start nutes at some point. Doesn't need it yet though. I'm going to add some kelp me/you for the heat stress. I need to get the watering down better but it's more difficult when they each have different needs. I kinda have to read the plant. I'd rather be overwatered than underwatered. I tried to upload what I could but some won't.
UPDATE: I went over to clip off some fencing that was doubled up AND just to check on tge girls. Found two caterpillars (small but hairy so they were older not the inch worms and possibly what has been contributing to damage on those plants. Things are spread out so it will be harder for insects to move from plant to plant and I have better air flow. I worry that leaving my tarp off might lead to high winds and plants not able to take it buf I digress. I'll add supports later. Plants are huge and drinking far more water than I've been giving them. When I got there several were drooped right over and dry as a bone. The bags are essentially all roots now. I mixed up 8 gallons of water and split it between the plants. I gave less to the two Co trainer plants that weren't drooping and the 10 I watered yesterday that wasn't drooping but for the most part the ones that needed if got at least a gallon or more. The others a little under a gallon. It might rain A LITTLE tonight too. Oh, and since it's been so hot I added 1/2 tsp per gallon of kelp me kelp you to help the plants deal with heat stress. I also noticed that some of the very bottom interior leaves are being used up. I have a feeling ill need to switch to nutes pretty soon. Plus I need to suppirt those plants if I'm going to leave that tarp off and Gove them air. Took a video. But it won't upload here. I'll have to wait till tomm.
7/22 Didn't have much timevthis morning bit I dod a video. Boy those plants loved that water and that kelp. This morning everyone was standing straight up at attention. Supposed to get rain last night but didn't. Good thing I watered. I think I'm going to up the water next watering and then again to the 10% mark if necessary. Especially with the Blueberry cheeses. I'm noticing that a FEW INTERIOR leaves are showing nute deficiencies so I'm probably going to have to start feeding soon. I'll update later.
UPDATE: Went back over and cut off the extra wire. I'm going to need to water more volume. Specifically on two plants. The two huge blueberry cheese in 20 gallon smart bags dries out much faster than the rest. I'll have to out that on a different schedule or increase the amount given. Next watering will be 1.5 or 2 gallons a plant and it might be tomorrow from what I was seeing. It's super hot and with the added airflow the bags dry out faster. I also went through EACH plant looking for pests and defoliating old leaves that needed it. Plants are still nice and green but a VERY few older interior leaves are showing deficiencies. I know this is Normal especially since they are trying n g to transition to flower. I also saw pest damage on a couple plants. Four lined plant bug. I already found the one on the other plant and killed it but I'm considering doing a spray before flower. I'm thinking either captain Jack as a "catch all", BT which works great but mostly just on pillars or the organocide bee safe 3 in one pesticide. I also have pyrethium and other things. Thus far picking things off manually has been good enough. At the very least they will get an application of BT very soon.
7/23 Held off on watering this morning. Supposed to get thunder storms I DID split a gallon with two blueberry cheese that were the lightest in the 20 gallon smart pots. Thet drink way more. My water volume is going to need to increase. We haven't had nearly enough rain. I'm going to bump it up to 1.5 to 2 gallons each plant which will be 10% for the 20s and a little less for the others. I'm still seeing various pest damage. Nothing bad but I found another couples leaves that were chomped on by a four lined plant bug so I'm debating applying something tonight when I water. I'm also noticing old leaves being used up and some interior leaves showing slight deficiencies. It will be time to start nutes soon. I'll update as I go.
UPDATE: GOT THE FEELING I NEEDED TO CHECK THE PLANTS. SOMETHING DODNT LOOK RIGHT ON THE CAMS. WENT OVER AND EVERY PLANT BUT THE TWO I SPLIT A GALLON WITH AND THE PLANT IN THE 50 WERE DROOPED RIGHT OVER. LIFELESS. I SHOULD'VE WATERED THIS MORNING BUT I DIDNT HAVE TIME. I FIGURED THEY COULD WAIT UNTIL NIGHT. EACH PLANT GOT 1.5 GALLONS AT LEAST. I USED SIXTEEN OR SEVENTEEN GALLONS ON THE GARDEN. I GAVE EACH CONTAINER PLANT ONE GALLON AND GOT RUN OFF FROM BOTH. IM NOTICING SKIGHT FADING IN LEAVES BUT IM NOT INTRODUCING NUTES TO UNDERWATERED PLANTS. I THINK 10% IS GONNA BE TGE MAGIC NUMBER. 2 GALLONS EACH. EVEN THE 10 GALLON SMART POT. ALMLST AS BIG AS THE 30S BUT DRIES OUT QUICKER.
7/24 Plants looked fantastic this morning. Defoliated a few leaves that needed it. Showed my commercial buddy and he said things looked fantastic. Since the soils still holding nutes and I'm not seeing many deficiencies I may hold off on feeding. I'm starting early flower now. I will be using nutes soon. I think ive got the watering schedule pretty much down.


Likes
9
Share


@wiz4rd
Follow
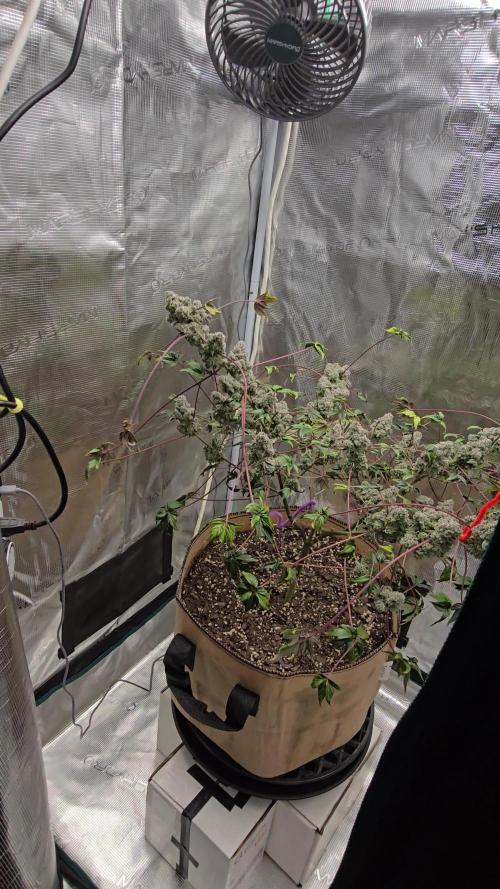
The plant is doing really well now. Although it isn't growing as much in height as expected, it is putting a lot of energy into flowering. Given its size, I don't expect huge yields, but I am still surprised and excited to see what comes next.
Through training, I managed to make the plant wider and produce more buds, which are now clearly visible and covered in trichomes. The plant's scent has become very strong, with a sharp lemony and earthy aroma, reminiscent of a lemon soda, or even Sprite. The buds are incredibly sticky and have grown well, although the plant remains very compact.
Next week, I will keep using the wooden plant stakes with wire to support the plant and continue the LST gently, but I will soon remove them.
In addition to the regular fertilized watering, I am also giving tap water from the bottom, both of which are well absorbed.
In the video, you can see the trichomes clearly and also get a good size comparison of the buds.
Likes
39
Share


@MrSpooky882
Follow
Es geht langsam dem Ende zu die Pflanzen zeigen voll schöne Farben und glitzern schon schön 🤩😎 es sind ja noch ein paar Wochen also da geht noch was

Likes
Comments
Share

@frigo_camelo
Follow
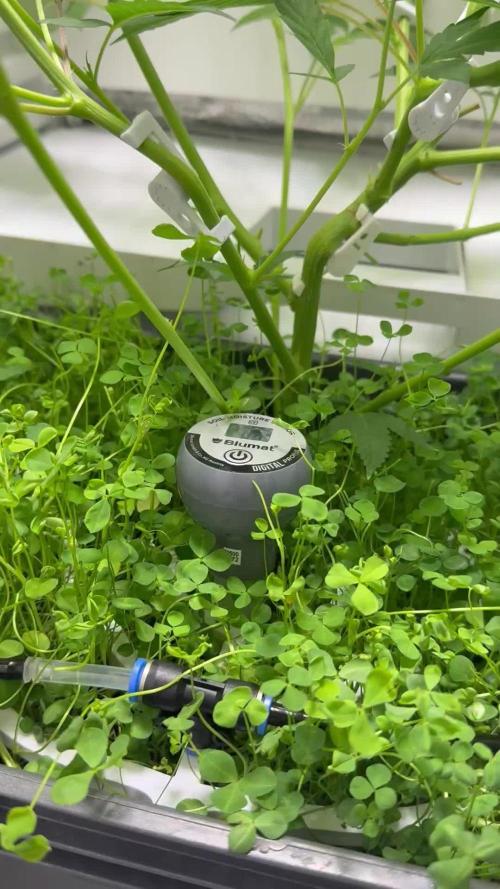
end of week 1 flower | plant looking really green | changed from using blumats to the good old drip ring in the closed loop config | hope i now got better controll over the humidity in soil | plant grew very nicely to be spread under the net | installed the scrog end of week 1 | now 2 weeks of holiday | hope for the best
Likes
6
Share


@weedelicious
Follow
Hey growmies,
It's been four days since the last short. Today, the Pink Gelato finally started drinking water again. Looks like the cinnamon and light watering actually helped. The other plants are doing okay, but the heat’s getting to them too. I think harvest time is coming up soon – just gotta find the right moment to start drying. All three plants got two liters with Cal-Mag today. Fingers crossed they all pull through!

Likes
24
Share

@MistaOC
Follow
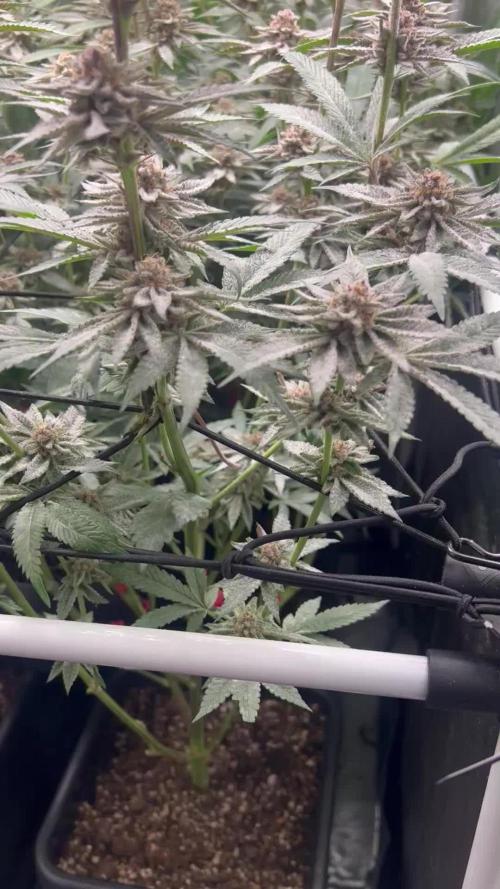
14.12. F43
General Overview
• Flower Day 43, deep into Week 6 of bloom.
• Overall performance remains very strong — nutrition, structure, bud development, and system stability are all on point.
• Despite ongoing airflow challenges, the grow will be taken all the way to harvest.
⸻
Airflow & Mildew Situation
• A second fan positioned low in the tent was added to push air upward through the canopy.
• While this improves circulation, it is still not enough to fully eliminate powdery mildew under these dense conditions.
• At this stage, the situation is accepted as damage control rather than prevention.
• Long-term, the lesson is clear: future runs will require even more internal circulation with multiple clip fans to constantly disrupt stagnant air pockets.
• For now, infected leaves continue to be removed manually to keep the buds as clean as possible.
⸻
Plant & Bud Development
• Buds are developing beautifully — dense, well-formed, and stacking nicely across all main colas.
• Resin production is increasing, and the plants remain visually healthy despite the mildew pressure.
• The canopy structure is strong and uniform, and the stretch has fully settled.
⸻
Feeding & System Performance
• Feeding is now aligned with Week 6 of the BioTabs flowering schedule, followed exactly as recommended.
• Nutrient uptake is flawless — no deficiencies, no excess, no imbalance.
• BioTabs continues to impress with its consistency and simplicity, especially when paired with the AutoPot automatic irrigation system.
• This combination has proven to be extremely reliable: steady moisture, steady nutrition, minimal intervention, maximum plant performance.
But now i need a dehumidification device?!
⸻
Looking Ahead
• The plan is to finish the run cleanly, maintain airflow as best as possible, and continue selective leaf removal.
• Harvest decisions will depend on how the mildew situation develops in the coming weeks.
• A full post-harvest deep clean is already planned to ensure the next cycle starts in a completely sterile environment.
⸻
🌸 Flower Day 43 Summary:
Week 6 of flower is running perfectly from a nutritional and system perspective. Buds look excellent, BioTabs + AutoPot perform flawlessly, and plant health remains strong. Powdery mildew is still present due to airflow limitations, but the grow will be carried through to harvest with careful management and aggressive sanitation afterward
Likes
2
Share


@Not_a_tutorial1990
Follow
Germinated 2 seeds had 50% success [still hoping the other pops up] chocolope #1 doing very well. They are in a 2'×2'×4' grow tent which they will spend rest of their lives as I'm trying my hands at cannabonsai. [Pretty calming]
Lights are lowered close to dome to reduce stretch.
Let me know what u think
Likes
46
Share

@Hempface86
Follow
This is it last week. I am going to give her the chop in a day or 2 I am going to not give her anymore water. As you can see, the buds are super heavy. This plant has been an amazing grow, because of the mutation and how the fan leaves are, it really showcases how beautiful the buds are, themselves.. really looking forward to this one big shout out big.Thank you too @Grow4releaf because this would not be possible without him... God bless everybody and happy growing! Next update will be the chop

Likes
6
Share


@burnout
Follow
Day 21 of flowering more defoliation. Added 7 tablespoons of rock phosphate to each container. House is starting to smell like fruit infused gasoline despite the two carbon filters and Ona gel all over the place.

Likes
50
Share


@AsNoriu
Follow
Day 106. Joe is well behind, trimmed her a bit, catching up, but only 8 days left till harvest, will be week or so too early for normal time i guess... smells of rubbed leaves reminds very specific strain, cant recall yet ... very sticky already, bottoms miss light and penetration a lot ! But bulks ;) i see signs of fade starting too.
Watered today, one more left. No work needed, just waiting ;)
Mars TSL2000 is a bit too far in my mind, but stil gives enough power for Joe to have nicely stacked bottom parts. Good light , no doubts !
Happy Growing !!!

Likes
40
Share


@xbrico
Follow
Day 29. Things still ticking along nicely. Saw a few leaves on my Sativa dom Pheno exhibiting Ma deficiency so gave an Epsom Salts foliar while Lights out was happening. Also upgraded my mechanism for holding flood pipes in place.
Have the girls on Wooden Risers now to allow the bottom of the pots to fully dry and to allow the smart pots to do their thing. They're all starting to fill out a bit now so hopefully not long until flip!
Likes
7
Share


@Canabisseurs
Follow
Halfway through flower and the tent smells like someone dropped a cheese platter in a forest. Buds are stacking, pistils popping, and the frost is starting to show.
Fed her bloom juice, MPK sprinkles, CalMag snacks, and a fishy cocktail midweek.
Stretch is slowing down, but the girl is bulking up like it’s gym season
Next week: less N, more K, and watch the trichs sparkle
#BlueCheeseBloom #Week4Funk #CheddarInTheTent


Likes
10
Share


@LittleManGrow
Follow
Plants are doing well, The 84" inch tent is a must if your not training or topping. I removed all the sacks that appeared last week and I haven't seen anymore show up so fingers cross, I check daily. Bigger tent also helps with heat control as the air has more room to rise. Hope you all like the pictures, I started to take videos as they provide more detail with less work.


Likes
252
Share


@Tropicannibis_Todd
Follow
💩Alrighty then Growmies We Are Back At it 💩
Well folks we just finished up the last run and so we are back to do it all over again 😁
So what do you say we have some fun 👈And what we got here folks is a Strawberry Blast 🍓 🍓 🍓 🍓
Strawberry 🍓 Gorilla , Strawberry 🍓 Banana 🍌 and there new release 🍓 Ztrawberriez 🍓 from FastBuds
And we also got Strawberry 🍓 Cola from Exotic Seeds
👉 I had ruff time keeping the Humidity up so 8 had to boil water in conjunction with my Humidifier more work but it worked out 😮
So it's been a great week so far 👌 👉 So as you can 2 pots have 2 plants well one will be chopped , it's a survival of the fitest 👈
FC4800 from MarsHydro Lights being readjusted and chart updated .........👍I've added a RU45 to the mix 👍
www.marshydro.ca
👉I used NutriNPK for nutrients for my grows and welcome anyone to give them a try .👈
👉 www.nutrinpk.com 👈
NutriNPK Cal MAG 14-0-14
NutriNPK Grow 28-14-14
NutriNPK Bloom 8-20-30
NutriNPK Bloom Booster 0-52-34
I GOT MULTIPLE DIARIES ON THE GO 😱 please check them out 😎
👉THANKS FOR TAKING THE TIME TO GO OVER MY DIARIES 👈


Likes
17
Share


@Naujas
Follow
She is much prettier than she was a week ago :) I remembered that I have my first grow light, which is more compact and it will give me more space, so I changed my light, now the girl's side branches get light too:) I add a lot of video memes, because I really want to win Iphone16 pro ;) and those who don't take risks don't drink champagne:) good luck to everyone.
Likes
40
Share


@GreenZealand
Follow
So this week we started with her signals of pre-flowering.
It still far from the development that the other plants achieved, but since this is my first time ever growing plant, it's quite possible that I committed some mistakes that cause this low pace process.
Hopefully, it will be good from this point forward!

Likes
84
Share


@Belverde
Follow
Hi guys
Welcome in the last weekly upgrade 🙂
In the end ten weeks of flowering for this beautiful phenotypes of the brand new DOS SI DOS # 33
For being precise today (the same day where I have do the photos on the top) we are at 68 days of flowering..
I probably will doing harwest in one or two days , so we will arrive at day n°70..
I have still prefere to continue her maturation because she tell me to do that..
So , she decide it..
She know when it's ready , and in some way she tell it us , if we listen..
Probably it's a thinks comes from mind of a stoner , but for me it work well 👌
Anyway..
She's was easy to grow , specially using this Living Soil Hig-Brix recipe I have make..
The resin production it's very very good , super sticky glue 🔥
Like I say in previous weeks..
The aroma reminds me a lot of a Kush earthy , spicy with some other notes like citrus , but faraway for now..
After the cut I will dry it properly , for 7 to 10 days in temperature around 20/22°C and ur 55/60% , the entire plant..
After that , when the branches are dry but before the crack sound , I will do a nice manicuring and then I put the flowers in a browbag for one or two days , it depends..
Then , when I will think the moinsture of the buds can be good , I will put the flowers in to the jar..
Not all full but just for 3/4..
And then I will start the curing process..
Usually after the first time I have put the buds in to the jar , I leave it closed for 24 h..
After this full day closed , I will start to open up the jar four times a day every six hours for the first week..
And then I will doing it for about three to four weeks , and every week I will open the jar one time less..
Sometimes I change the metod , but the final product it's always be the same..
But when I will finish this process I show you in a video how the ash it's and especyally how it's will burn , nice and slowly without still continue to light up..
Unfortunately now I can't do nothing for show you how clean and rich can be the taste..
I hope for the future..
Anyway..
The first test will be around half may and after that I can be able to posting the harwest rewiew..
So stay tuned ⏳
Thank you so much for stopping by here all this pass weeks , or just only now for the first time..
And thanks for reading and support , I appreciate it 🙏
See you in a few weeks..
Or already now in some others diaries 🤙
Do vape some weed and stay safe..
Sun always comes..
But if he doesn't arrive , go in to your growbox ☀️😎
Ciao ✌️
🇮🇹
BONUS
I'm always growing the same strain but in different ways..
Here is the link below 👇
https://growdiaries.com/diaries/48209-barney-039-s-farm-dos-si-dos-33-grow-journal-by-funclouds
And I'm also using the same type of "Living Soil High-Brix" with this other lady , Blue Gelato #41 👇
https://growdiaries.com/diaries/46282-barney-039-s-farm-blue-gelato-41-grow-journal-by-fun-clouds
If you want to see 🌱😉