
Likes
Comments
Share


@SolitudeCorners
Follow
This cross between Cherry Pie and Chemdawg and do-si-dos It smells vaguely like brain cake. However, chempie has a stronger aroma than brain cake. strong terpenes of linalool, and the smoke was quite harsh and powerful with each hit. The nicest form and most substantial buds in this crop

Likes
16
Share

@DogDoctorOfficial
Follow
🍋🍒 Lemon Cherry Gelato — Week 6 From Seed
(Week 2 Flower · 12/12 From Seed)
Hello everyone 👋
Quick recap and a warm welcome to anyone joining the diary now, here’s where we are and how we got here.
🌱 From Seed to Now, Quick Context
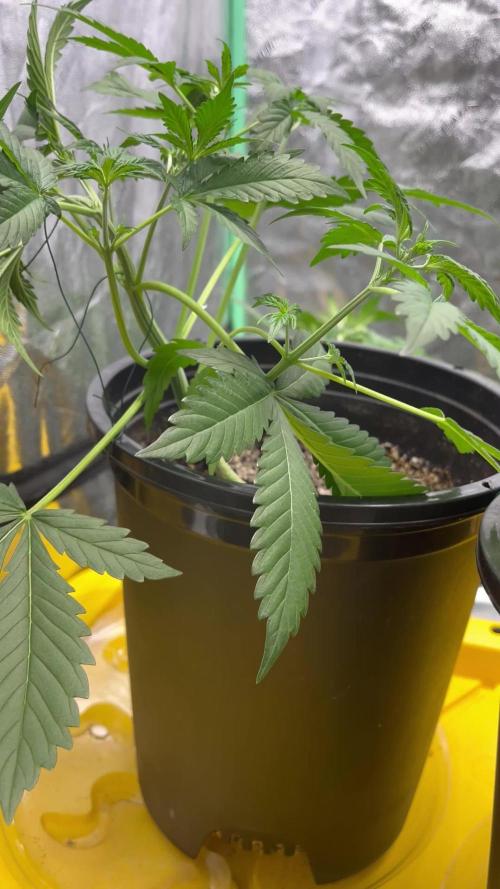
These Lemon Cherry Gelato girls have been grown 12/12 from seed, and we are now entering what we consider Week 2 of flower / transition.
Pre-flowers are clearly visible, stacking has begun, and the stretch is now turning into early bulk.
They are in that beautiful in-between phase where they still look slightly vegetative, but their behavior is unmistakably flowering.
⸻
🌡️ Environment Update
• Day temperature: ~28°C (successfully raised)
• Humidity: ~65%
It’s still a bit cold outside, but as plant mass increases, lighting intensity goes up, and under-canopy lighting is added, the tent itself has become a stronger heat source.
This allowed us to stabilize conditions without forcing anything, exactly how we like it.
• PPFD: ~600–850 (depending on plant size and position)
• CO₂: ~900 ppm
• Airflow: unchanged
• vortex extraction
• cross-winds with multiple fans
• constant, gentle movement across the canopy
⸻
💧 Feeding & Nutrition Strategy
This week marks an important nutritional transition.
• EC: 2.4
• pH: 6.5
From this point forward, all feedings will be pH 6.0 and above.
The reason is simple: as flowering progresses, plants shift their nutrient uptake priorities, and slightly higher pH improves availability of key elements needed for bloom development.
Nutrient Change
• Introduced: Terra Bloom — 5 ml / L
• Removed: Terra Grow
This change is happening now, not earlier, because the plants have clearly entered the flowering transition.
There’s no rush, no shock, just following the plant’s signals.
The current recipe (our “Plagron” approach) continues to perform exceptionally well, and plant response has been outstanding so far.
⸻
🌿 Training & Plant Handling
We are continuing with a very minimal-stress approach:
• No topping
• No aggressive defoliation
• Only leaf bending and leaf tucking
This method keeps the structure open, exposes bud sites naturally, and avoids recovery downtime.
Simple, effective, and extremely practical, sometimes simplicity isn’t laziness, it’s efficiency.
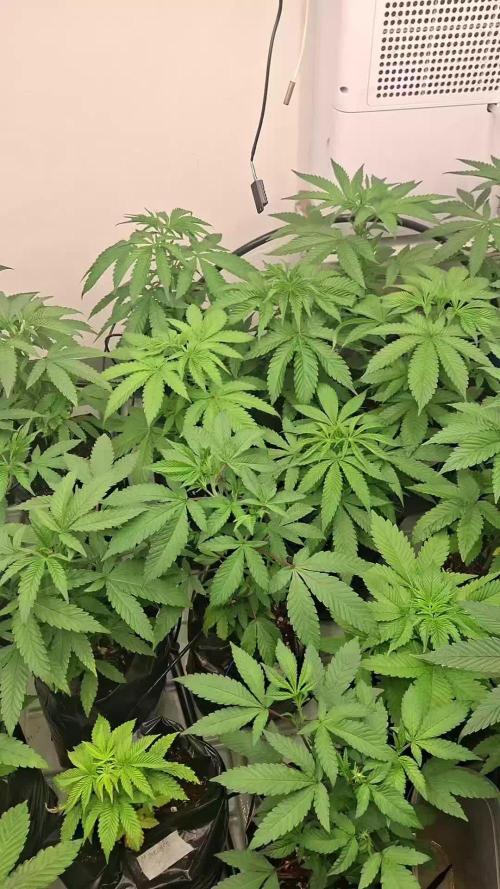
The results speak for themselves:
• strong branching
• compact “ball” formations
• clean stacking
• healthy color fade beginning naturally
⸻
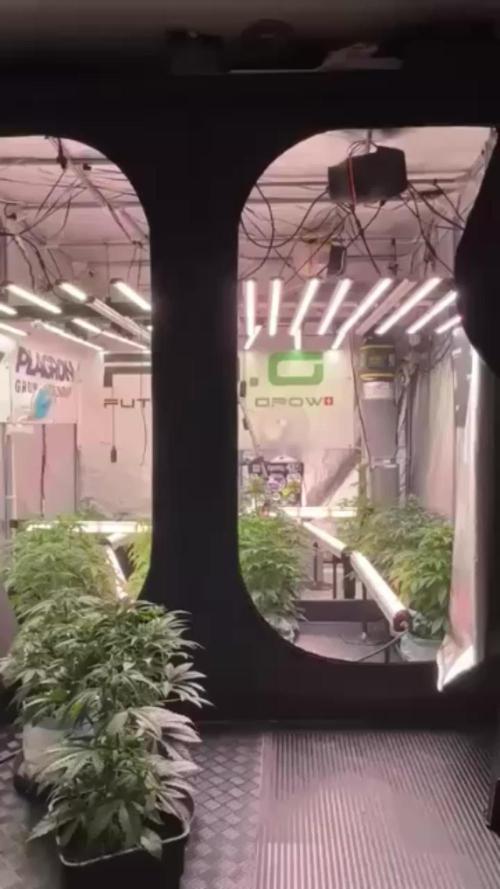
📸 Visual Progress
This update includes a large set of photos (studio + tent shots) to clearly show:
• the transition phase
• stretch turning into bulk
• visible growth differences over just one week
Every time the tent doors open, growth is noticeable, and comparing earlier photos to the latest ones makes that even clearer.
⸻
🔮 What to Expect Next
Over the coming weeks:
• stretch will gradually slow
• bulk and stacking will take over
• plant handling will be reduced even further
• stability becomes the priority
What not to expect:
• heavy pruning
• forced corrections
• unnecessary interventions
At this stage, the goal is to let the plants do what they already know how to do.
⸻
🙏 Thanks
Big thank you to:
• everyone following along
• newcomers and long-time readers
• supporters, critics, observers, all welcome
• the Grow Diaries Team and platform
• and all sponsors backing the journey
This is a key week in the run, and we’re excited to document it properly and share the learning with the community.
As always — we’re here to observe, guide gently, and let the plants express themselves 🌿💚
FOR DISCOUNT CODES AND MORE JUST FOLLOW THE LINK https://website.beacons.ai/dogdoctorofficial
📲 Don’t forget to Subscribe and follow me on Instagram and YouTube @DogDoctorOfficial for exclusive content, real-time updates, and behind-the-scenes magic. We’ve got so much more coming, including transplanting and all the amazing techniques that go along with it. You won’t want to miss it.GrowDiaries Journal: https://growdiaries.com/grower/dogdoctorofficial
Instagram: https://www.instagram.com/dogdoctorofficial/
YouTube: https://www.youtube.com/@dogdoctorofficial
⸻
Explore the Gear that Powers My Grow
If you’re curious about the tech I’m using, check out these links:
🔆 Lighting & Environmental Control
• Future of Grow — Advanced LED lighting technology
https://www.futureofgrow.com/
DISCOUNT CODE: DOG20
• Lumiflora — Under-canopy LED lighting
https://lumiflorade.com/
• TrollMaster — Environmental controllers and automation gear (past collaboration)
⸻
Genetics
• Zamnesia Seeds — Genetics used in this project
https://www.zamnesia.com/
⸻
🌱 Soil, Substrates, Boosters & Root Support
• Plagron — Substrates, bio mixes, and supportive products
https://plagron.com/en/
⸻
🎒 Storage, Curing & Preservation
• Grove Bags — Curing and storage solutions
https://grovebags.com/
⸻
📸 Photography Equipment & Tools
(Not sponsors, but part of my creative toolkit)
• Sony A6700
• Sony full-frame macro lens + few more
• Stacking photography workflow - learning
• iPhone (for behind-the-scenes shots)
We’ve got much more coming as we move through the grow cycles. Trust me, you won’t want to miss the next steps, let’s push the boundaries of indoor horticulture together!
As always, this is shared for educational purposes, aiming to spread understanding and appreciation for this plant. Let’s celebrate it responsibly and continue to learn and grow together.
With true love comes happiness. Always believe in yourself, and always do things expecting nothing and with an open heart. Be a giver, and the universe will give back in ways you could never imagine.
💚 Growers love to all 💚
📸 P.S. – The Eye Behind the Lens
All photos in this diary (for now — except for the ones showing the camera, which I took with an iPhone) are taken with a Sony A6700 paired with a Sony full-frame macro lens and a few more.
Photography is part of the story — it’s how we share the fine textures, the glow, and the quiet details that words can’t always capture.
I’ve also started experimenting with photo stacking — a technique where multiple images, each taken at a slightly different focus point, are layered together to create one perfectly sharp image from front to back.
It’s not digital enhancement or AI; it’s pure photography — a way to reveal the plant’s beauty in microscopic depth, from trichome to petal.
You’ll even see a few shots of "ghost me" capturing the shots — camera, lens, setup — because every grow deserves not just to be cultivated, but documented like art.
FOR DISCOUNT CODES AND MORE JUST FOLLOW THE LINK https://website.beacons.ai/dogdoctorofficial
NEW DISCORD - Official Server Invite Link : https://discord.gg/ksjAkA5T74

Likes
25
Share


@Ganjeiro420
Follow
Olá, sejam bem vindos a este ciclo com essa seeds maravilhosa da empresa FastBuds a Banana Purple PUNCH Auto, tenho um grow caseiro feito de sapateira e vou trazer todas as fases dessa planta pra vocês em busca do melhor resultado possível, conto com a ajuda de vocês pra que tudo ocorra de forma certa pra chegar na tão esperada colheita 🙏

Likes
13
Share


@Swamp81
Follow
Week 3 - doing very well!
Moved the plants to an attic room in my house and positioned them under a sky light - seem to be thriving now. I taped some tinfoil around the plants to maximise sunlight.
Vegetation looks healthy and I have been watering sporadically when needed. No signs of any problems or stress, fingers crossed!
Thinking about repotting them into their final, larger containers soon. Nothing added in terms of nutrients or anything like that!
So far, so good. Let's hope they stay on track.

Likes
15
Share


@Siriuz
Follow
Check out the videos guys, she is flowering real good even tho we are not using any special nute like big bud for example, but i really want to try it soon, hopefully!
Still she is doing great and im happy to have her!
How are you doing growers whats up!?
Dont forget to leave a comment
Any suggestion is welcome!
We are happy to learn new things alwas,
Thanks for the support happy growing everybody
Enjoy the footage thanks to Siriuz

Likes
3
Share

@Growing_Spartan
Follow
November 2nd - 38 days since first sprout.
The plants were just top dressed for the flowering phase of the grow, the top dressing is as follows:
3 tbsp of bloom
2 tbsp of mineralized phosphate
2 tsp Alfalfa meal
2 tsp Kelp meal
2 tsp Dolomite lime
1 tbsp Basalt rock dust
2 tbsp worm castings
This was for each plant. I don’t see any deficiencies so far in the run, at least none to be worried about. The plant that actually has NO training to it besides a structural support stick actually has yellowed out tips, I couldn’t figure out why but it doesn’t seem to be an issue yet.
My main cola for my middle back plant unfortunately snapped when performing some LST on her, completely wrecked me but I just kept it going cause what else can I do? Yknow? lol
Likes
11
Share


@SintrexGrow
Follow
Germination success 🙌 the sprouted seed is in a DIY tent that i made until it veg. The is my first ever cannabis seed so this is a big experiment. Lets see how the voyage will be 🤞

Likes
2
Share

@walletinspector
Follow
The growth exploded last week, I just have no words on how beauty this is... On the other hand Im flipping officially tomorrow 🏾


Likes
81
Share


@m0use
Follow
SPONSORED DIARY===SPONSORED DIARY===SPONSORED DIARY
Nothing to crazy to report they are growing up well. have some pistils showing and I think it might be starting to enter flower soon.
Looked to be showing a bit of magnesium defencity so I gave them both some Epsom salts to supplement the Gaia Green and other fertilizers in the mix.
I always find gaia green needs a bit of a magnesium boost.
SPONSORED DIARY===SPONSORED DIARY===SPONSORED DIARY
This is my diary entry into the Dynomyco Show Us What You Got Contest!
#DynomycoShowUsWhatYouGot!
@DynomycoShowUsWhatYouGot!
@Dynomyco
Big Shoutout to @Dynomyco for picking me in their contest. Happy to be involved and as a user of Dynomyco I am curious to see this side by side with my own eyes. I will be honest I am a little skeptical it will show any major differences. but we will see what happens. Some disclaimers, I am still using LABS serum I made, This is also beneficial to the root mass however it's a bacteria based product and not fungal or mycorrhizae like Dynomyco.
https://growdiaries.com/giveaways/DYNOMYCO_Show_Us_What_You_Got
Likes
21
Share


@3lementa1
Follow
These guys aren't growing as fast as the White Widow. I topped the one in the DWC. I'm going to wait a bit for the others. Other than that they look pretty good!
Likes
19
Share


@HighDran
Follow
Semana 8 y aun no engordan mucho los cogollos,creen que es hora de iniciar lavado? Cuantas semanas más le dan? O le sigo con nutrientes?


Likes
2
Share


@GroloCup
Follow
Continuing to progress as she should, lots of white hairs and a little stretch from the lowers making a lovely canopy. Just staying on course with pH 6.0 water and letting the soil blend fuel her flowering fury!!! Should be another solid week, were now on the lookout for some trichome development!

Likes
15
Share


@BushDoctor740
Follow
First off I want to give a big thank you to Zamnesia and Plagron for the awesome package right before Christmas 🎄.This may be one of the best gifts I will receive this year 😊.I will germinate these 5 seeds on New years and get the New year started off right.Well had a few things to wrap up but finally Jan 21st all 5 and added one extra Zamnesia Runtz bean so I will have a 6 plant auto run in the 5x5.
Day 1 Jan/20/2025 the Runtz have sprouted :)
Likes
127
Share


@DreamIT
Follow
🎃👹👽MONSTERCROPPING RED MANDARINE 👽👹🎃
____________________________________________________________________________________________
💀 12.2 everything is OK. tomorrow I try a new macro lens to photograph purple trichomes 😍
💀 13.2 ...
💀 14.2 Happy Valentine's Day
💀 15.2 ...
💀 16.2 Ready the carnival photos ... which is your favorite? 😁🦄
💀 17.2
💀 18.2 Red Mandarine bonsai shaped in the shape of a heart, with a ring in the center. Created to celebrate 3 years with my current partner, if you read, hello I love you <3
____________________________________________________________________________________________
📜👀 A look at the details of what I'm growing 👀📜
🍊💚 Red Mandarine F1 🍊💚 by 🌱🍭 Sweet Seeds 🍭🌱
📋 Details
⚧ Gender
▪️ Feminised
➰ Genes
▪️ 55% Indica / 45% Sativa
🎄 Genetics
▪️ Red Poison Auto (SWS39) хCalifornia Orange x Skunk hybrid)
🚜Harvest
▪️ 400 - 500 g / m²
🌷Flowering
▪️ 49 - 63 days
✨THC
▪️ 16%
✅CBD
▪️ 0,2%
🏡Room Type
▪️ Indoor
🌄Room Type
▪️ Outdoor
🕋Room Type
▪️ N/D
🎂Release Year
▪️ 2019
__________________________________________________________________________
👀📷🥇 Follow the best photos on Instagram 🥇📷👀
https://www.instagram.com/dreamit420/
🔻🔻🔻Leave a comment with your opinions if you pass by here🔻🔻🔻
🤟🤗💚Thanks and Enjoy growth 💚🤗🤟


Likes
2
Share


@Ultraviolet_
Follow
Electrical Conductivity refers to how easily a material or solution allows electrons or ions to flow continuously when an electrical potential is applied.
Electrochemical Reactance is the opposition to alternating current (AC) caused specifically by the temporary storage of energy in electric or magnetic fields, rather than energy being lost as heat. Reactance does not directly alter a material's intrinsic electrical conductivity. Instead, it dictates how the system stores and releases energy over time, which creates a temporary barrier to current flow in AC circuits. Together with resistance, reactance makes up total impedance. Electrical impedance (the combination of resistance and reactance) in the rhizosphere dictates how easily ions and water move into plant roots, directly impacting the Electron Transport Rate (ETR). High impedance restricts ion mobility, leading to nutrient deficiencies that decrease ETR and stunt overall plant growth.
Using copper and zinc plates in the plant medium to form a natural earth battery to assist with Electrochemical Reactance. The moist soil acts as an electrolyte, while zinc serves as the anode and copper as the cathode. Zinc is a highly reactive metal and oxidizes, losing electrons into the soil. These electrons travel through an external wire to the copper plate. The moisture and dissolved salts in your plant medium allow charged ions to move freely between the plates, completing the circuit and generating a small direct current (usually between 0.8 and 1.1 volts). This micro-current subtly alters/the Electrical Conductivity (EC), allowing more effective breaking apart of chemical bonds in the soil (electrolysis), making soil nutrients like phosphorus, calcium, and potassium more accessible to roots. Buried the zinc plate on one side of the plant’s root zone and the copper plate on the opposite side. Ran an insulated copper wire above ground to connect the zinc plate to the copper plate, creating a closed loop. Make sure your soil remains moist and contains natural mineral salts; entirely distilled water or bone-dry medium will prevent ion exchange and block the current.
Not all minds think the same; it's a hard concept to grasp for one who has only ego. When someone operates solely from the ego, they tend to view their own perspective as the objective truth. To them, if someone else thinks differently, it is seen as a flaw, a lack of intelligence, or a personal affront, rather than simply a different, valid experience. The ego assumes that others are just extensions of itself. It cannot easily differentiate between "I think this" and "This is the universal truth". This is called the Mirror Fallacy. True understanding of another mind requires stepping out of oneself. The ego, by definition, is obsessed with self-preservation and being "right," which blocks empathy. Different perspectives are interpreted as attacks on the ego's stability. Instead of curiosity, it feels defensive. Acknowledging that others have entirely different internal worlds—with unique motivations, fears, and histories—requires dismantling the illusion that the world revolves around one’s own viewpoint. It’s a shift from "Why are they wrong?" to "How did they get to that perspective?"
Gospel of Thomas #17 "I shall give you what no eye has seen, what no ear has heard, and no hand has touched, and what has not come into the human heart." precedes saying #18, which questions the "beginning" and "end".
First, you need The Eyes to See, The Ears to Hear & The Mind of the Heart.
"Alpha to omega" refers to the first (Α/α) and last (Ω/ω) letters of the Greek alphabet, symbolizing "the beginning and the end". It represents totality, eternity, or the entirety of something.
Revelation 22:13, "I am the Alpha and the Omega, the First and the Last, the Beginning and the End" (NKJV, NIV).
Both originate from Greek. Alpha (Α/α) is the first letter of the Greek alphabet (representing the beginning). Atom comes from atomos, meaning "indivisible," often seen as the foundational "first" particle of matter. In some esoteric and linguistic theories, the biblical name "Adam" (Hebrew for man/earth) is connected to "atom" because both represent the original, foundational unit (the first man vs. the first particle). Alpha Particles are particles emitted during radioactive decay, named "alpha" because they were the first type of nuclear radiation discovered. They are atomic nuclei consisting of two protons and two neutrons.
The study of the atom often deals with the "beginning" (alpha) of chemical reactions and fundamental building blocks. The terms are linked primarily as symbols for "the beginning" (Alpha), the "fundamental unit" (Atom), and the "original man" (Adam).
The uppercase symbol Omega (Ω/ω) is primarily used in electronics and physics to measure electrical resistance in ohms, representing how materials resist electron flow. It is also used in various fields to represent the density parameter in cosmology, solid angles in physics, and special constants or asymptotic growth rates in mathematics.
In quantum mechanics, "Omega" (Ω/ω) can refer to several concepts related to measuring or representing quantum coherence, generally categorized into dynamical, mathematical, or physical parameters:
Dynamical Coherence Measures
Omega Pattern (Superconducting Circuits)
Coupling Strength
Angular Frequency
Quantum Coherence Framework v24.0
Electron flow is not the same as electrical conductivity, but they are intimately related. Electron flow is the physical motion of electrons, while electrical conductivity is the material property that determines how easily that flow can happen.
Electron Flow (The "What"): The physical movement of negatively charged electrons through a conductor (usually from negative to positive). It is the act of carrying a charge.
Electrical Conductivity (The "How Well"): An intrinsic material property that measures how easily a material allows electrons (or other charge carriers) to move through it.
Electron Flow (The Action): The actual physical movement of electrons from one molecule (donor) to another (acceptor) in a pathway, such as the photosynthetic electron transport chain or cellular respiration. The current itself (dynamic electricity).
Electrical Conductivity (The Property): An intrinsic property of a material (like copper,glass,soil) that measures how easily it allows electric current (electron flow) to pass through it. A measure of ease. A high-conductivity material has low resistance and lets electrons move freely.
Electron transport rate (ETR), the rate at which electrons travel through the chain.
You can have Electron Flow occurring (electrons moving through the chain), but a very low Electron Transport Rate if the plant is in the shade. If light increases, the Electron Flow still follows the same path, but the Electron Transport Rate increases because more electrons are moving per second. In summary, ETR is a quantitative measure of electron flow. Think of "Electron Flow" as the movement itself, and "Electron Transport Rate" as the speed or quantity of that movement.
Photosystem II (PSII) is a critical multi-subunit protein complex in thylakoid membranes that initiates photosynthetic light reactions by splitting water and transferring electrons.
"Et lux in tenebris lucet, et tenebrae eam non comprehenderunt," John 1:5

Likes
10
Share


@HerrnLubitz98
Follow
Waiting for the end to come… getting a little colorful now. Harvest time is around the corner - ready for thanksgiving 😎
More closeups will follow before the harvest is done, can’t make much time for them atm.
Bananas looking fatter and shin day by day 💪🏻✨
Growdiaries is missing a Flush option for the Nutrients.

Processing
Likes
12
Share


@Tazard
Follow
I supercropped the tall Enemy of the State branches that were in the light. As you can see In the video there was no light burn! We also have about 30” of light penetration even though I’ve not performed any defoliation! Loving these lights.

Likes
4
Share


@MistaOC
Follow
**************
13.03. Day 1
**************
🤞🏼😎
I have new cuttings. Sour Frootz from Karma Genetics. I planted the cuttings in 0.2 L pots. I only applied fertilizer to the large pot.
So Let’s grow again 💚💯
*******************************************
18.03. Day 6
sprinkled with bactrex and transferred into the large pots
*******************************************