
Likes
Comments
Share


@Tropicannibis_Todd
Follow
💩Holy Crap Growmies , we are outdoors and in the Ground and there Doing Great💩
👉It's been another full week 56 days from seed and she's doing great , very nice Growth, considering shes been up against the wind and rain 👈
No problems 😊 so far so good 👍And she's now in full on flowering 😁👈 weather has been great as of late 😎
I GOT MULTIPLE DIARIES ON THE GO 😱 please check them out 😎
👉THANKS FOR TAKING THE TIME TO GO OVER MY DIARIES 👈
👉NutriNPK NUTRIENTS USED FOR FEEDING 👈rain water to be used entire growth👈
👉www.nutrinpk.com right now get 10% off using SPRING2022 as the coupon code👈

Likes
Comments
Share

@The_Doctor_Green
Follow
Hola a todos! Espero que anden bien!!..
Les comento que hice esta semana, la he regado con agua un riego y el último hoy, con nutrientes en sus dosis indicadas más arriba.
La planta ha crecido mucho esta semana 37cm en 7 días, ha pegado el estirón, y también han mostrado sus preflores.
Esta semana he tenido una humedad alta 70% y no la he podido bajar,pero con humedad y una temperatura que ha rozado los 28 grados por momentos, he notado que las plantas les gusta ese ambiente, por eso el crecimiento que ha pegado.
Hoy (17/09 ) ,dia 35, de la Auto Divine Rapier he quitado las hojas más grandes que tapaban las ramas bajas, espero que en este momento no estrese la planta.
Bueno, no los aburro más, nos vemos la próxima semana!.
Buenos humos!!
Las imágenes corresponden al periodo del 10/09 hasta el 17/09 (dia 35) inclusive.

Likes
14
Share


@Leeyum
Follow
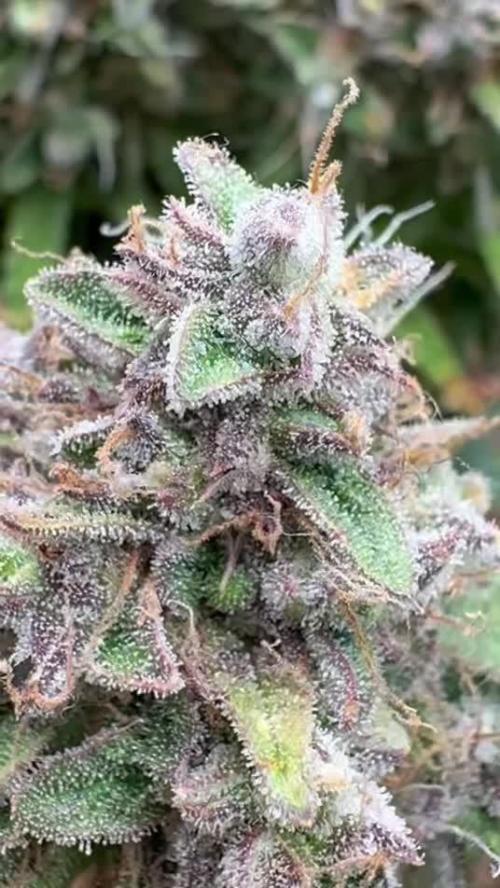
She was a pleasure to cut. Beautiful trim. So far pure berries and gas. I'll update on the smoke report once she's cured. I had a mini toke sesh earlier and it was definitely LSD. Definitely turning on some different visual/auditory receptors. It was nice and long and happy. She's only going to continue to get better. The buds are kind of fluffy but I find that all the purples I've grown turn out like that. The greens tend to produce much more weight/density. I'm not one to harp on density. I'm more about the flavor/effect.

Likes
103
Share


@DeepWaterGrower
Follow
🌱🌿🌸SUMMARY🌸🌿🌱
I started this crop with 4 plants as you can see in the pics, 2 autoflowers by RQS and 2 photoperiodics. My plan was as follows: grow the two autoflowering plants until harvest and in the meantime do a long vegetative period for the two photoperiodic plants, and then proceed with the switch. One autoflowering plants, the Titan F1, did not respond well to the training and I preferred to remove it on week 5. Fortunately there were no problems with the other three plants (I made a different diary focused on the two photoperiodic). Milky Way F1 grew in a space dedicated to her of 90 cm x 40 cm (0.36 m2), under a 150 watt lamp which in the meantime also illuminated the other plants.
🌱 GERMINATION (2 days)
Seed in a glass of EC 0.4 tap water for 10 hours, then in root riot and under the lamp. It sprouted after 48 hours from dry seed.
🌿 GROWING STAGE (3 weeks and half)
During the 23 days after sprouting she had an impressive growth ratio. When she reached 25 cm in height I decided to bent the main stem to the side. On day 24 I opened the canopy with some tie, then I removed a good amount of leaves. The key with this kind of auto, the F1, is not stress them in the wrong moment but if you want to boost them yield you need to do some train, carefully!
During the veg stage PH was always between 5.5 and 5.9, about EC I started with 0.6 and was 1 on the last veg week.
🌸 FLOWERING STAGE (7 weeks)
She began the flowering stage on day 26 from dry seed (was 20 cm height after the bending) and by the end of the stretching she more than doubled the height, reaching 46 cm despite the LST on week 3 and 4. During the flowering I just removed some leaves on week 4 and 8. The light cycle I used is 18/6 and the last two weeks I lowered the light hours to 16/8 first and 14/10 then. I chopped her when trichomes were 95% milky and 5% amber. That gave me a very balanced high.
During the flowering stage PH was always between 5.9 and 6.2, about EC I started with 1.6 and was 2 on the last week before flush.
✅ HARVEST
- From dry seed to harvest: 74 days (2 days germination + 23 days veg + 49 days flo).
- Chopped after 4 days flush, no dark time;
- Wet trim, removed fan leaves. This plant had a ridiculous calyx-to-leaf ratio, it was just big buds!
✅ DRYING STAGE
- Time: 15 days;
- Average: 18° C - 60% RH.
- After that I made a dry trim, removed branches and sugar leaves.
⚖️ DRY WEIGHT
- 110 gr very frosty buds, no larf 😁
✅ CURING STAGE
- Curing is done after 45 days with Boveda 62%.


Likes
2
Share


Likes
54
Share


@MadeInGermany
Follow
Hey guys :-)
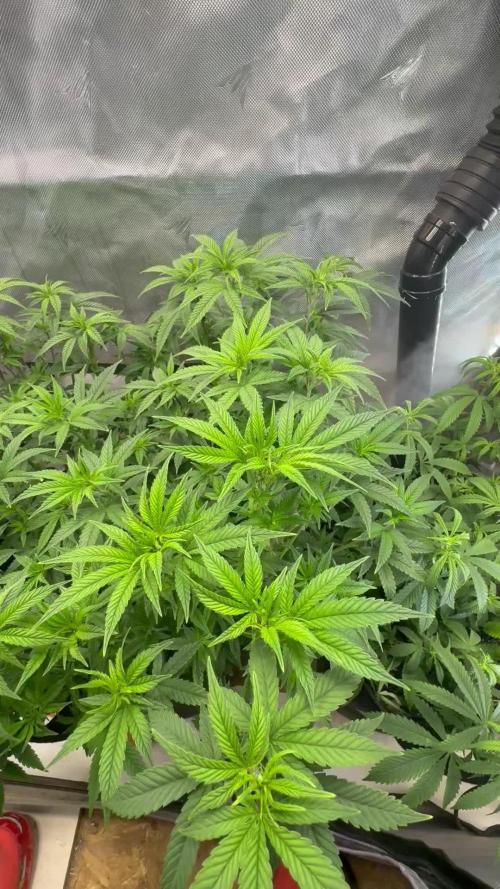
She is growing great and will be ready for the flowering tent in the coming days :-)
A few cuttings are taken beforehand.
Was poured 2 times with 1 l each.
I'm looking forward to the start of flowering :-)
have fun and stay healthy 🙏🏻
👇🏼👇🏼👇🏼👇🏼👇🏼👇🏼👇🏼👇🏼👇🏼👇🏼👇🏼👇🏼
‘Powered by GreenHouse Feeding’
Copy the link for 10% off all Nutrients 👇🏼
https://shop.greenhousefeeding.com/affiliate/MadeInGermany_PassionGrower
👇🏼👇🏼👇🏼👇🏼👇🏼👇🏼👇🏼👇🏼👇🏼👇🏼👇🏼👇🏼
You can buy this strain at :
https://www.amsterdamgenetics.com/product/choco-cheesecake/
👇🏼👇🏼👇🏼
Use the coupon code: madeingermany
for 10% on all Amsterdam Genetics seeds
Water 💧 💧💧
Osmosis water mixed with Cal/Mag (24 hours stale that the chlorine evaporates) to 290 ppm and Ph with Ph- to 5.8 - 6.4
MadeInGermany

Likes
2
Share


@LittleBigTrees
Follow
Still giving max feed , will stop soon as the trichomes are starting to turn cloudy but the buds are still swelling, maybe another week , I'll keep a close eye on things .
Here's a discount code for zamnesia.com
For anyone wanting to try out their products:
ZAMMIGD2023

Likes
Comments
Share


@High_Grade_Dadli
Follow
Haven't been keeping up with pic/vid in the veg stage so bare with me....flowering should be
Likes
5
Share


@Chisinh0
Follow
Hola a todos! Esto va por la semana 12 desde la germinación, subo fotos y video seguimiento, espero alguien me pueda dar algún consejo (faltan algunas fotos recientes que subiré pronto). Un saludo y gracias


Likes
41
Share


@Ganjagrandaddy
Follow
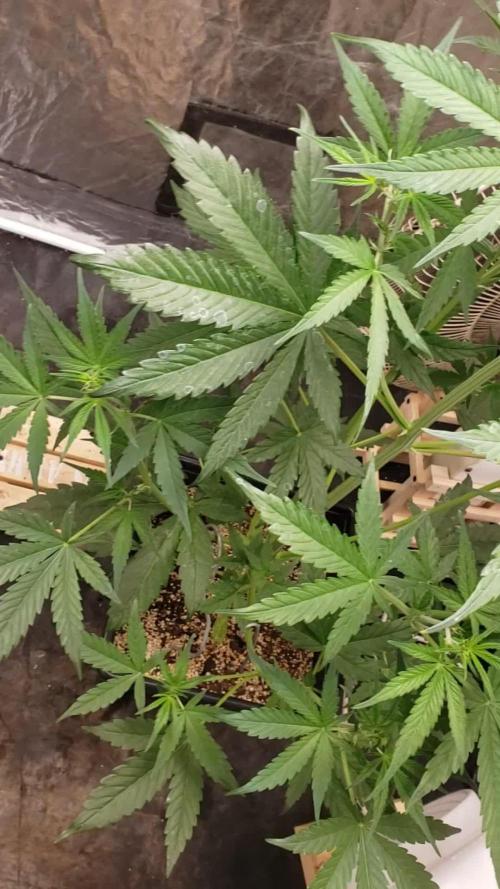
DAY 28 : Hi all , hope your past week has been a positive one with lots of love and affection.
I am at the point now where flowering should be starting to show throughout the plants usually. Their are many tiny white pistil hairs showing their female genetics across the bracts of them all now so it looks like flowering has begun !!!!
The FC3000 has really given them plenty of light on their perfect spectrum to develop those nice fat fan leaves and now will no doubt take them through a great flowering period. It doesnt produce much heat at all and you can touch it for a while and still not feel too much heat. Ideal for stealthy gardens..
The Tip Spreading has been continued up to this point and it is clear to see how it works on keeping the heights down. By using additional l.s.t that wont slow growth down like the leaf tucking and threading the growing tips above the larger fan leaves that are still being used like solar factories producing copious amounts of food for the developing growth tips. The stems on the majority are nice and thick from the close stacking of the nodes and their is very little popcorn to remove from lower down. I will be keeping them all as open as I can now that we are going into the stretch periods pre flower. The potential is there now to create very chunky bud stacks but I think the Strawberry Pie have ideas of bursting out more . !
They are certainly all a lot more happy than the bonsai Mexican that has emerged in #1. Still very short and half the size ( or less!) than her sister in the next bed. She looks happy and healthy now but her initial shock at the soils make up had a negative impact very early on.
Overall it has been a good week for their tip spreading l.s.t and setting them up for flowering and I hope that our next update will be the bud porn early stages. Be well and prosperous growmies


Likes
45
Share


@SupaDank
Follow
End of day 27 flower for White Widow and Royal Gorilla. White Widow seems to be packing on more weight then RG but both are starting to get frostier by the day.
Day 3 flower for Platinum Banana and Critical. They are showing flowers now
Lollipop all 4 girls and changed all reservoirs to fresh nutrients.
WAiting to refill my CO2 tank so these girls can pack on my weights.
Take care and keep growing my friends...


Likes
4
Share

@hassehujasse
Follow
Best time !!! Everything works well, time to bring visual lab on top
From beginner to professional. Grow as God raised you and enjoy it!!!
Looking. for harvest as soon she realise her potencial
Likes
27
Share


@BoytzzBudzz
Follow
Yoooo!
Welcome back 🙌🏼
Just a quick update for week 7 of flower. Plants looking incredible. Zkittlez is really packing on the frost now and starting to develop some lovely colours. The Runtz seems to be continually packing on size and developing - most of the trichs are still clear but I’m seeing cloudy and a few amber ones here and there, so I’m looking to get the flush going in a few days time.
Thanks for stopping by!
Cheers 🤟🏻
Likes
27
Share


@Trickybis82
Follow
OK so nearly at the finish line. The ribbon 🎀 is in sight lol. J8st onto Flushing stage which I will flush 3days then 4days for 2weeks and hopefully cut these gems down and get ready to hang dry and cure in pots
Peace and love ❤️
Likes
51
Share


@kansasscott725
Follow
Well, this is it. Wish I had bigger buds. Everything was moving in the right direction until the end. I switched the Mars Hydro 3000 out with two HLG 300s, so I could maintain the PAR just under 1000, but perhaps it wasn't enough.
G13 is definitely not ready, and could benefit for a couple more weeks, but like a store liquidation, THEY ALL MUST GO NOW
All in all, Learned a lot. No seeds, reveg, or signs of mold, so hopefully I'll make up for quantity with quality.
Only Dry Time will Tell...


Likes
6
Share


@HAN_GROWER17
Follow
Esta semana a estado marcada por un excelente desarrollo, ya esta culminando el desarrollo de los capullos para dar inicio al proceso de engorde de las flores.

Likes
9
Share

@MotoXfarmer
Follow
Corleone Kush is right on track doing great sucking up all nutrients I can give it I feed every other watering as for the strawberry gorilla still no flowers but it looks like it’s ready to start the preflowering. It’s just a fat big fat plant. They say I have nothing a time just time for these plants, but I think I’m running out of time I don’t I don’t know. I was gonna run until it’s finished. See where it ends up. It’s a fat plant. It takes everything I thought of it. Light feed.
Likes
4
Share


@Lilze
Follow
This week I changed the scrog net (2”holes) it’s about 7” above the pots
upped the nutes to 1.8-2 ec .
Watering every morning to about 10% run off
Sprayed with canna cure (350ml per ltr)
They have really started taking off
Lollipop and defoliation
There’s still not sign of sex but they are feminised seeds so I will be flipping to 12/12 by next week hopefully they show signs by then .