


Likes
Comments
Share


@GrowMoSapien
Follow
Stems are getting top heavy, more weight packed on and they are starting to lean, I don't have room for a scrog net. Pistils are turning amber, only about 10% so far on day one. I hand plucked off the small larfy, sucker buds. I let some go too long and the large majority are worth keeping. Next time I will have the courage to defoliate properly! I get so scared after weeks or months of growing and then removing growth.
Final day of week and these colas are stacking on so much weight they are bending over. Noticed nutrient deficiencies and tried to adjust accordingly. Hoping the problem doesn't get exacerbated.

Likes
29
Share


@TheCannaProphet
Follow
------------------------------------
~SEEDSMAN PEYOTE GORILLA~
------------------------------------
Peyote Gorilla is a cross of Gorilla Glue #4 (Chem Sister x Chocolate Diesel) and Peyote Purple, a colorful pheno-type of Bubba Kush. The potent, medicinal effect of the Gorilla meets the stimulating and uplifting high of the Peyote Purple.
With a flowering time of around 70 days Peyote Gorilla has a typically Indica structure, medium-sized with large, broad leaves. Yields are exceptionally good; indoors growers can expect to yield between 500 - 650 gr/m2 while outdoors as much as 1500 gr/m2 can be realized. Resin levels are very high and this means that it is very suitable for making extracts and concentrates with.
This strain's scent is sour with lemon, petrol, earthy and woody notes and these properties are reflected back in the taste. THC production is very high at between 22 - 26% with CBD at just 1%. The effect is a very potent, uplifting high which gradually evolves into a physically relaxing state that will be almost certain to ease any aches and pains.
__________________________________________________________________________________________________________________________________________________________________________________________________________________________________________________________________________________________________________________________________________________________________________________________________________________________________________________
-Strain Characteristics-
BREEDER/BRAND: Seedsman
PRODUCT TYPE: Seeds THC
GENETICS: Gorilla Glue #4 (Chem Sister x Chocolate Diesel) x Peyote Purple (Bubba Kush purple pheno)
VARIETY: Mostly Indica
FLOWERING TYPE: Photoperiod
SEX: Feminised
THC CONTENT: 22 - 26%
CBD CONTENT: 1%
YIELD: Indoor: 450-600 g/m2; Outdoor: 1500 gr/plant
PLANT HEIGHT: 80-160 cm
GROWS: Indoors, Outdoors
FLOWERING TIME: 70 days
HARVEST MONTH: September
MEDICAL CONDITIONS: Fatigue, Insomnia, Pain, Stress
TASTE / FLAVOR: Berry, Earthy, Fruity, Petrol, Sweet
EFFECT: Euphoric, Powerful, Relaxing, Uplifting
_________________________________________________________________________________________________________________________________________________________________________________________________________________________
_________________________________________________________________________________________________________________________________________________________________________________________________________________________
THE SETUP:
~Planted into Jiffy Peat Pellets that were hydrated with de-chlorinated water with SuperThrive added then ph'd to 6.0 @ 80℉
~Grown 100% organic in 10g fabric pots with Mother Earth 70/30 Coco/Perlite medium amended with 2tbs/g of Down To Earth 4-4-4 / 2 cups/g of Earthworm Castings / 1tbs/g of Dr. Earth Flower Girl 3-9-4, 1tbs/g of Dr. Earth Bat Guano, 3/4 cup of Down To Earth Azomite and 1 tsp/g Down To Earth Fish Bone Meal.
~24hr light cycle during Germination / 19/5 light cycle for Vegetation and 12/12 for Flower
~Straight water ph'd @ 6.2-6.8 when needed and weekly Compost Tea's.
__________________________________________________________________________________________________________________________________________________________________________________________________________________________________________________________________________________________________________________________________________________________________________________________________________________________________________________
Weekly Updates:
9/13- With approx. 10 weeks of growth behind her now she's going into her 5th week of flower now and let me tell you the pictures don't do her justice... This is one phenomenal cultivar! 😍
She was given Compost Tea yesterday and today was still fairly heavy so I skipped watering and just removed a few leaves to maintain light penetration, turned her pot and sat and chatted with her awhile!
9/15- Well she really must have liked that last batch of Compost Tea as she looks exceptionally vibrant today!
She's continuing on her mission of stacking her flowers, which are developing beautifully and have a delicious sweet citrus aroma to them right now.
I did not water yesterday, so today I watered with 1.5g of straight de-chlorinated water that was ph'd to 6.5 @ 72℉ and rotated her pot... Damn she is looking great! 🤩💖
9/17- Yesterday I top dressed her with 1/2 cup of Down To Earth Bio-Fish then watered it in with 1.5g of straight de-chlorinated water that was ph'd to 6.5 @ 72℉.
Her flowering is continuing beautifully and she's smelling stronger every day it seems! I'm staying on top of tucking leaves blocking light and turning her pot daily as well.
9/19- Five weeks of flower on the books! We're halfway there now, she's stacking her flowers tightly going into Week Six and she's looking phenomenal! 🤩
When I watered her today I added 1 tbsp/g each of Kelp Extract and Fish Emulsion (both liquid) to the 1.5g of straight de-chlorinated water she received, which was ph'd to 6.2 @ 74℉.
~Thanks for stopping in! Things should be getting a lot more interesting in the coming weeks...Stay lifted and be Blessed! 😎🙏~


Processing
Likes
6
Share


@Kush_T_Big_Nugz
Follow
This week I transplanted all of them and started lst training. Of all 3 strains I’ve got going, gummy buns defo has the best vigour and structure on nearly all of them.

Likes
16
Share


@AestheticGenetics
Follow
4/9/25
This plant is beyond frosty. Stacking up super nicely. Seems like she will yeild quite a bit.
My only gripe is that she has like no smell at all.
Using the foil as a soil cover is working quite nicely. the top soil is getting filled with roots quite well.
Top dressed 1tsp of Bloom
1tsp microbe charge
1tsp bloom

Likes
13
Share


@Livinit2019
Follow
The plants LOOK good, but I made a big mistake when LSTing the plants, and some leaves got cuts, and 1 branch on both of the plants snapped off entirely :( I stopped LST entirely for the time being. Am considering getting another 1000w (132w actual) led identical to my current one. Growing in a 2x2 shower so I'm still 70 actual watts under what I should have based on the 50x area rule. Thoughts?
They seem to be bouncing back well, though I'm definitely keeping a close eye on them.
I started adding nutes last week (1/3 of recommended quantity) and everything seems to be looking good -- I noticed that growth significantly expanded, and there doesn't appear to be any negative side effects. I upped it to half the recommended dose today. Fingers crossed!
It looks to me like plant #2 might be starting to flower, and maybe even plant #1 as well. Can anyone see what I'm talking about and let me know? Much obliged!

Likes
3
Share

@JVKdopegrow
Follow
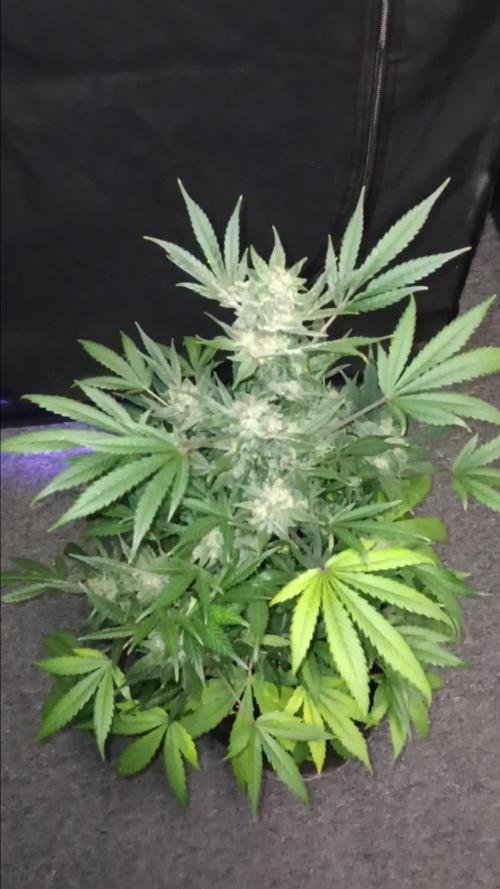
Getting close. Nice buds but trichomes are still mostly clear. Very healthy lady. I really let this girl go on her own after some early trimming. Definitely the best plant grown by me to date!

Likes
79
Share


@Natrona
Follow
Apricot Auto FastBuds
W10 F7 12/7-13
12/8,13 Ph 6.5 PPM 190 65,9f water only.
I am flushing Apricot 1& 2 with Ph 6.5 water. They are ready. I removed the remaining fan leaves. I took pics and videos and trichome shots. #1 is the short gal with very dark purple leaves and still pushing more calyxes and fattening her buds. Her trichomes show many amber and milky. These really ripened fast compared to last week trichome pics. I hope I didn’t miss the opportune time.
#2 has mauvy pink buds with green leaves. The trichomes don’t show as many amber tops as #1 but I will water/flush once more then harvest them at the same time.
Stay green, growers love 💚🌿
💫Natrona💫


Likes
26
Share


@Nistnov
Follow
I left the honey cream outside in a dark place, which turned out to be a big mistake.
None of the branches that I trimmed and dried directly had bud rot but around 6 buds that were left outside had bud rot.
The mass of this plant really put me to the test took a whole lot of time to trim every branch. In fact I still have a bunch of branches that I'm too lazy to trim right now so I'll do a dry trim someday.
Although this grow had some problems it was an absolute pleasure to watch these plants grow and to now having this harvest is absolutely beautiful, a perfect strain mix.
I won't ever let them grow this big again since I really don't need that much weed and I think I'll going to have more fun with some extreme LST or something like it and I guess I'll look for strains that will flower earlier and not for ones that flower fast.
Likes
3
Share


@Unculti_responsable
Follow
Bueno esta semana se amoldaron muy bien las ramas a la malla ya se levantaron y están engordando muy bien tiraron bastante resina y bienes muy bien, esta va a ser la última semana se fertilizantes después de esta semana vamos a empezar con el lavado de raíces, esperemos que sigan así de bien !

Likes
98
Share


@DogDoctorOfficial
Follow
I love growing its a big passion of mine , and the fact that GD exists makes everything so much better, one can interact with others and enjoy and learn from each others. Thank you all growers love and keep them green <3 <3 <3

Likes
22
Share


@420DeepGrow
Follow
📆 Semana 11
Fase final completa, con cogollos totalmente formados, muy duros y en su máxima densidad. La resina está en su punto más alto, con tricomas mayoritariamente lechosos y cada vez más ámbar, marcando la ventana óptima de corte.
La planta ya no crece y centra todo en la maduración final, intensificando terpenos y aroma, ahora más profundo y persistente. Aparece un ligero desgaste en hojas grandes, señal del consumo de reservas antes del lavado de raíces.
Cultivo estable, limpio y listo para el cierre.
Seguimos creciendo fuerte 💪!

Likes
10
Share


@Lady_NugWitch
Follow
This girl is so big! We are just into flower and I bet my tent will struggle to hold them all.. Lol
Likes
4
Share

@CCSAUTOGROW
Follow
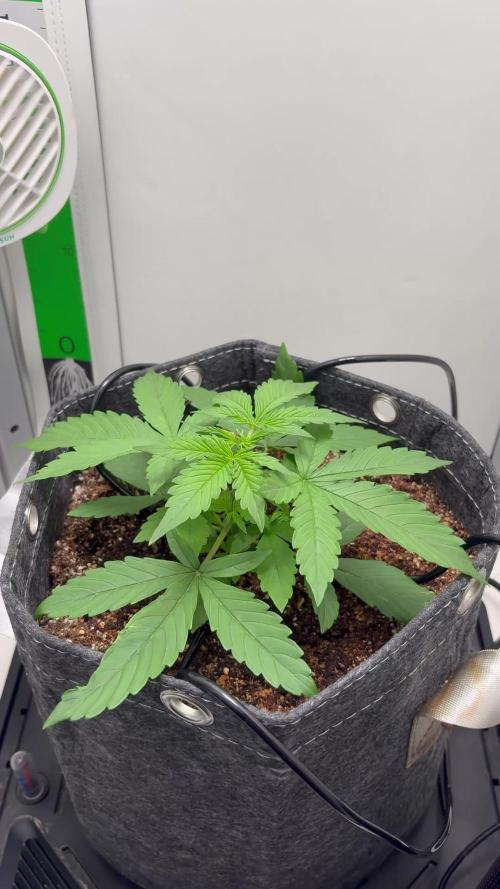
Week 2 Veg for Northern Lights Auto. She's looking great! A lot of growth this week. Added nutrient water to the base & started in on some leaf tucking.
Likes
6
Share

@420-Grow
Follow
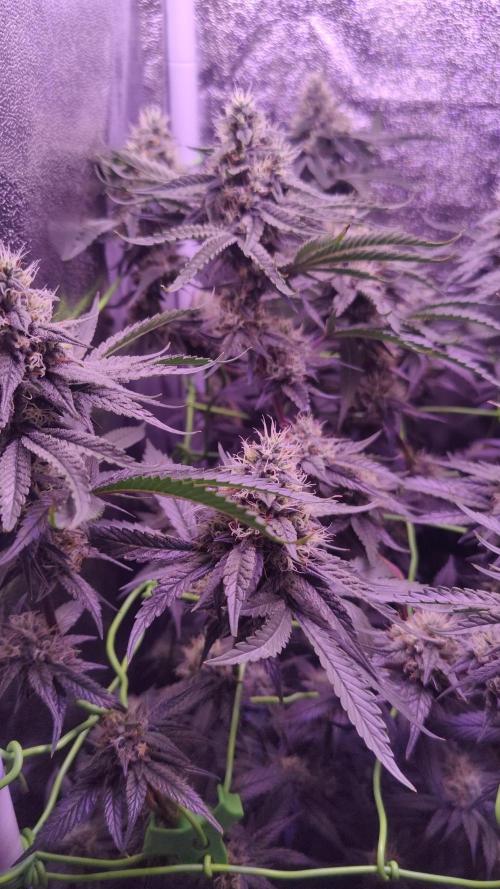
Sie wird immer harziger macht auch keine Probleme bis jetzt mal gucken was rauskommt


Likes
73
Share


@Rando1314
Follow
Flushed HARDCORE this week!! Ladies are not looking well nor do they seem like they’re reacting to the flush well either!! Almost seems like they’re locked out but also having deficiencies! I could use some advice on this. 3/5 of the taller plants have yellowed out and the other 2 look great!! Pretty much all the same watering and neuts. I think the issue was that I’m using fabric pots and not allowing enough penetration to the bottom and it created a salt pocket. Correct me if I’m wrong
Updated a few more pics of the deficiency/lockout issues all the help is appreciated thanks to everyone whose chiming in and helping!! Y’all the real deal!!
Likes
38
Share


@Cariboo_OG
Follow
Utopia Haze is a rare heavily sativa dominant hybrid (90% sativa/10% indica) strain created through back crossing Brazilian Sativa strains. This tasty little bud took home 1st Place for Best Sativa in the 2008 High Times’ Cannabis Cup and for good reason – with its potent 18-22% average THC level and long lasting cerebral effects, Utopia Haze is one powerhouse smoke. The Utopia Haze high comes on soon after you finish your first toke, hitting you with a strong cerebral lift that infuses you with a sense of hazy relaxation.
Type: Feminised/Photoperiod
Cultivation: Indoor/Outdoor
Flowering Time (days): 70-75
Indoor Yield (g): Up to 650
Feminised Outdoor Harvest Month: October
Feminised Outdoor Harvest Month Week: 3rd-4th week
Aroma: Citrus, Woody, Pungent, Mint
Effect: Cerebral Lift, Hazy Relaxation, Sleepy
Welcome Everyone to the Final Entry of my Utopia Haze Grow !
There is so much to discuss ! I have been extremely busy as of late trying to get this Harvest together, but i am happy to have it here for you now !
I Seriously under estimated the amount of time, help from others, and my own necessary skills to pull this off.. and i still kind of screwed it up lol !
But its worth noting i have never actually done this before and trying to document it during....was extremely hard.
It is next to impossible to work an iPhone with rubber gloves on !
First I want to discuss everything step by step so before you jump straight into the comments on how the end product is so small in "quantity"
Rest assured i am happy with its"quality"...and thats all that matters to me because Life is a journey not a destination! and i have learned so much from this grow that I couldn't be any happy even if i messed some things up :)
But at the very least I hope you read through this entry in its entirety with an open mind and focus more on the process, rather than just the outcome!
I ran out of Ice & i was only able to wash three times..(normally I've heard you should go sometimes 5-6 washes)
Preparation is Key & things will be much better next round :)
Photos 1-22
These are pretty self explanatory but for those of you just tuning in now.. this is what happens to a very happy plant when you don't have the necessary tools to monitor key components of growing cannabis.. Ph, as well as EC levels play a very key role in the outcome of your grow lol that being said I was just able to save this plant by purchasing both tools but that doesn't mean the plant didn't suffer because of the prior events.. This was a Huge reason behind me choosing to turn this harvest into what i would consider
"Solventless Hash Rosin" from "Ice water extracted Bubble hash".
Pictures 23
The idea here is the process of using "fresh Frozen Cannabis" this has been discussed many a time online on such sites as instagram and here on grow diaries as well.. I personally have Never tried the process so i decided to try it out and make a judgement for myself..
Video 24
The Cannabis has now been in the freezer for 72 hours making it very well frozen.. as you can tell i struggled getting it all into the 25u Screen Wash Bag. One thing of note i would do differently is i will de-stem my next batch as i also believe this played a part in the amount of plant matter that escaped through the sieves.
Photo/Video's 25-28
The idea here is "ice water Seiving" & especially with the bags that I am using here that are only have screen material on the bottom portion of the bag it is very important to have spaces in-between the screens to allow the water to pass directly through the screens into the bottom bucket with the least amount of resistance.. because the hash is so extremely temperature dependant if it gets warm on the side of the bag.. it will stick there and not make it to the bottom to become use able product..
29
You do not need to use as much Ice as i used here lol... the idea is to keep everything very cold..i certainly achieved that but at the sacrifice of using so much that i ended up grinding product and producing "contaminants" but in the end they are just plant matter that i would be smoking when i rolled up my joint either way so.. I'm not super disappointed..
But it should be noted that what you want to achieve here is a Layering effect where you have the wash bag between two small layers of ice while the "water current" washes the Trichomes away allowing them to be separated by the screens setup below :)
Before Starting the machine you should allow some time (i.e.;10-12minutes pre soak to allow the product to become saturated) before the first cycle.
By video 32 I have just ran out of ice lol..
Video 33-34
Here I have a tip for you.. to separate the screens that you sieve through.. cut 5 gallon buckets to stretch them across nice and tight.. it'll make scooping your Bubble that much easier ! i learned this from the many "Frenchy" videos I have watched :)
Picture 35
Here in lays the problem for most people.. drying your hash without loosing vast amounts of "Terpenes" whilst also stay ever vigilant against mold !
Thanks to all those videos I've watched on youtube.. id like to think this was one of my most successful parts of this process..
Things to Note; Terpenes start to seriously evaporate at temperatures 68F or 20C
you need to stay as cold as possible whilst bringing the Relative Humidity in the space down into the 40-30% to stay away from that nasty mold !
I used my cold storage room in the basement.. with a dehumidifier running to keep the space at 45% RH & staying at a constant 15c.
All while spreading the hash as thin as possible across parchment paper, on top of the white screens with a fan moving air across both sides of the paper.
Pictures 36-38
These are some macros i took in the middle of my drying session I fell in love with the colour.
Yes i know the black spots are plant material but they will get caught when i bag the hash & squish the oil out.
Thing to Note; at this stage it is important to ensure you 'micro plane" the hash down as fine as you can whilst staying weary of the temperature... any "chunks" will hold pockets of moisture.. that lead to potential problems..ie; mold ...
Picture/Video 39-41
Successfully planed bubble hash ready to be bagged and Squished !
Picture 42
Ive decided to follow Pedro.. from Pedros Grow Room and double bag to be on the safe side so i don't have any blow outs.
So thats One 25u bag inside one 160u bag ! :)
Pictures 43
This is almost 3 grams of the bubble hash from above, already melting in the bag.. this is where i ran into trouble again lol things started getting to warm in the house and i was only able to get one of the three squish's i did on video :( things started getting sticky.
Picture 44
This is basically just a photo of the equipment I'm using; 3x5 LowTemp Cage in the frame I built myself, with a 20Ton bottle jack.
Something to note here is this is an older Lowtemp model with only a single heating zone which is which i have it closed here heating Both sides of the press :)
As well as the importance of having adequate pressure on your plates.. my rig is very overkill for the size of hash bags..lol
Video 45
Here is the lovely press video.. its didn't quite work the way i wanted either lol my directional folding wasn't quite tight enough for a big "drip" :)
&the Press was set to 65°c
Photo's 46-50 are pretty self explanatory :) I had a blow out.. but still managed to pull an 80% return from the hash once squished...& yes it tasted amazing :)
Was it worth it in the end... that could be debated.. for some..i understand..its not your thing, but for those of us that are interested in making our own concentrates.. free from Solvents...
I wouldn't make it any other way :)
If even ONE of you reading this diary finds it helpful to reference for ANYTHING.....even if its "what not to do" ill consider it a success !
Thanks again for tagging along on this garden adventure.. its been one heck of a journey !
Much Love from B.C. Canada,
Until Next time,
Cariboo
Likes
1
Share


@Mars8_8
Follow
Week 3 into flower and it’s time to top dress and seabird tea.
Using 3 gallon potstop dress with 1/3 cup craft, 1/4 cup worm castings, 1/2 ocean forest, and small amount of kashi.
Seabird tea: 4tbs seabird guano, recharge, and worm castings, Humic acid, and alfalfa meal in the tea bag. pH to around 6.6-6.8. Should give me around a 2.5-12.5-2.5 feed. As I used equal parts alfalfa to seabird. Probably a little more nitrogen with the worm castings. Brewed for 24 hours and fed straight, no water down.
Just bought the mammoth lighting 6 bar LED, I got suckered into the green spectrum and the ability to penetrate the canopy using green light. Science backs it but science also backed Covid vaccines soooo I guess I’ll have to test it out myself. 😂
But so far enjoying my first grow back after a year off. Took a while to remember everything and dial everything back in. Only took me going to the dispensary for a year to remember it’s just way better to grow and press my own rosin instead of paying 50 for brown boo-boo or flower i can’t even smell before buying it.
As a young lad I was in charge of a 30 light/ 600 plant grow house. This famous rap producer had a pool house in his back yard he turned into a grow house. I ended up being very successful there using their recipe and styles, Rockwell cubes 20-25 plants a light of some SFV og and synthetic nutients and eagle 20 for daysss. Was at about 2lbs a light. Eventually I moved on and this guys house was raided as he was sending drugs back east to gangs and money laundering. Major wake up call, as California finally started cracking down on all the growers stealing electricity. Never thought I’d be growing weed but when your best friends brother has a grow house and it’s trim season, all hands on deck so I got introduced to it then and because my attention to detail and passion to science they gave me a shot opporating a 600 plant facility. Also showed me the dark side of the business with pesticides and mold… and all the “growers” that have no sanitation techniques and wonder why they have to use eagle 20 and avid all run… if you have trust issues don’t go into the underground cannabis grows of the early 2010s. People be trying to sell powder mildew as frosty nugs. But fast forward a bunch of years I move to Washington and the cannibus industry is all sealed jars with labels. No smell test, no scales, no free dabs… it felt like gambling every time I gave them money for weed. Looks fire taste like dirt or looks fire taste fire cost 60 an eighth…. Not substainable for a daily stoner, so I got my first 2.7x2.7 grow tent and some soil and 100s of hours of YouTube videos to figure out how to grow roots and not plants. Growing in rockwool cubes is all about recipes and pH. Growing in soil is all about microorganisms, oxygen, and relationship building.
