
Likes
Comments
Share


@NordicCropz
Follow
Day 50! She is stretching, allowing me to tuck tallest tops out to the sides, exposing new budsites in the middle. Seeing one or two pistils here and there

Likes
46
Share

@Natrona
Follow
Strawberry Cadillac – STRNG Seeds
W9 01/04-10
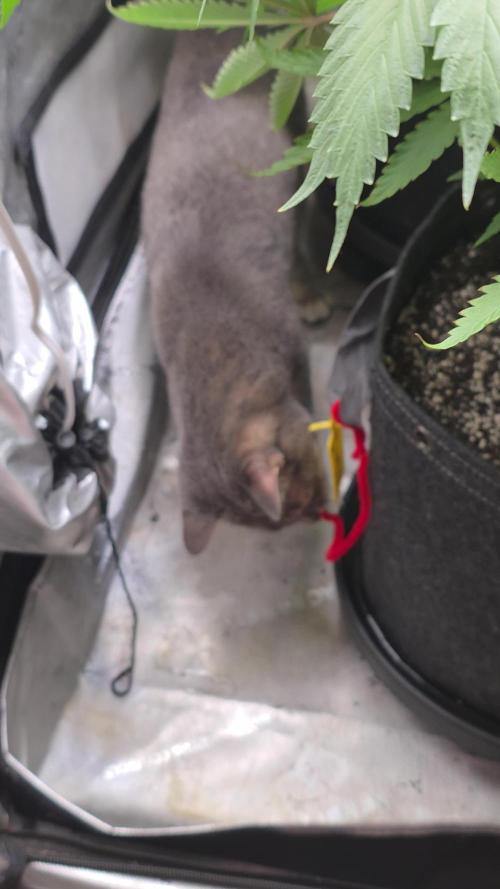
These strawberry collection gals are growing steady during this early stretch. I gave water only last week to contain the stretch. I also turned the lights down to 80%. Other than Cadillac1 all the plants look the same so I tied ribbons to the pots as identifiers for pictures. Kitties lost interest in my leaves, now is play with the pipe cleaners.
I’ll have to tighten them up as I found one on the grow room floor.
Strawberry Cadillac -Purple
Straw-Trop Cherry-Red
Straw-Lectric Lemonade-Yellow.
01/05 Supercrop Last week I indicated I might supercrop Cadillac1 since she is so tall. Well, you will see pics during the process of bending the stem and taping the position. I pinched the stem in my fingertips and rolled it a bit, then bent the stem, (notice the outer casing is not broken) applied tape to the joint to keep the branch from completely bending over. Each side had at least 3 nodes.
1/06 the side nodes on the branches have turned up and made more tops.
All gals show the beginning of white hairs identifying they are female.
1/9 Strawberry Cadillac #1 46” #2 37“
Strawberry Trop Cherry #1 24” #2 41”
Straw-Lectric Lemonade #1 33” #2 35
A side note: I’m taking applications for Spring & Summer cabana boy (girls allowed to apply, no discrimination here) positions when I go to the beach. Strawberry Cadillac has the big fans needed for the job.
Important dates
11/9 Germination
11/25 Transplant to 1.5 gal,
12/1 Topped, Pinned and removed 2 large center leaves
12/5 Repositioned pins and removed lowest fan leaves
12/16 Topped 4 tops on each plant except Cadillac1 (first topping) and put manuka honey on the cut.
12/24 Transplant to 5 gal
12/27 Defoliate all
12/28 Flip to 12/12
01/05 Supercrop Cadillac #1 at the joint where I topped her.
Stay green, growers love 💚🌿
💫Natrona💫
Likes
6
Share


@Silverback_Guerilla
Follow
10/6:
She's doubling in size every day now, so.. me thinks she'll be a real specimen.
10/7:
She continues to impress!
I installed my new AC Infinity 6" fan in the attic and hooked up a 16" carbon filter today. I used some sound deadening foam on the rafter that I mounted it to and removed 100% of the vibration. I haven't programmed the thermo/hygro stuff yet, but tested it on high and I can't hear a thing anywhere in the structure.👍
I'm also purchasing a dual 120mm fan system from AC Infinity in the door, behind the grille I already installed to serve as fresh air intake. It also has a thermostat feature that will allow me to set it to only come on when the temps are too high, so I'm optimistic that it will allow me to manage the temperatures in this closet with about 1000w running for 18-20 hours a day.🙏
I moved the 200w 3500k+660nm to the top section today and lowered my QB frame to 32" above the plants. I have two pairs of them running now(480w), and received the replacement HLG 240-48A driver today for the third pair. I'll hook it up later..dont need it now..
10/8:
I fed her today for the first time...about 16 oz of solution containing grow big, big bloom, kelp me kelp you, boomerang, and armor si.
I hooked up the 3rd pair of qb's today....wow that's bright....she's gonna love it!😎
10/9:
She experienced her first night time today...4 hours, from midnight to 4am..at approx 72f and 50% RH.
10/10:
I sprayed her with Axiom today and gave her a few ounces of spring water.
10/11:
I sprayed her with Boom Boom spray right before dark and also started brewing some compost tea today.
10/12:
I just gave her a little spring water today because she's getting douched with compost tea tomorrow. I wish I had some additional blue light to dose her with to get her branching better, but she's doing okay I guess. Since I've overplanted the space, I'm not gonna have much elbow room for her anyway.

Likes
56
Share


@Wicked_Stix
Follow
First week of flower is over and the stretch is on. Already started crushing and bending some branches on the taller plants to keep them as short as possible. They are really starting to fill out and the sour sorbet was fast to start popping pistils. I started some defoliation and cleaned up a few of the bottom branches. They need some more work over the next few days. I started them on a little maxibloom. I will increase it as I lower the maxigro over the next couple weeks. No water change this week and the ph is holding steady with no adjustments. Nutrients pumping 24 hours a day. Should see some nice fuzzy tops developing by the end of next week. I got some clones rooting from all but the twisted helix. They will be getting dusted with sugar cane pollen.


Likes
5
Share


@Krissci
Follow
Not much training this week...leave it to bloom and do its thing.
Maybe light defoliation towards the end of the week
Likes
2
Share


@obeee
Follow
1. Strain-by-Strain Overview
Permanent Marker (The Titan): Experiencing a massive explosion in flower mass this week. The tightly stacked nodes analyzed in previous weeks have officially fused into towering, ultra-dense colas. The calyxes are swelling heavily, confirming its status as the primary yield driver of this run.
Strawberry Banana (The Resin Queen): An absolute frost machine right now. While the bud structure remains lighter and more aerated as expected by its genetics, the trichome coverage is outstanding. The density of resin glands per millimeter is staggering, making it an incredible gourmet profile.
Super Boof (The Terpene Champion): Developing an incredibly sweet, loud, and mouth-watering aroma. The flower structure is rock-solid and highly resinous, perfectly balancing heavy production with elite olfactory qualities.
2. Environment, Inputs & Strategy Adjustment
Nutrition Ramp-Up: Stepped up the organic input regimen this week. All tailored KNF (Korean Natural Farming) inputs have been increased to 4 ml per Litre to support this critical cell-expansion and ripening phase.
Liquid Bio-Availability: Maintained the immediate "Mix & Go" liquid delivery protocol to feed the living soil directly without stalling the Lacto Bacillus (LAB) or risking calcium precipitation from the WCA. The plants are converting these pre-digested complex sugars and minerals into pure bud density instantly.
Snaescence & Rinsing: Natural fading is progressing beautifully on the lower fan leaves. The progressive nitrogen depletion is allowing the plants to naturally flush their tissues, ensuring maximum terpene purity and zero harshness on the final smoke. I also increased the dosage to 4ml/L for all my KNF nutriment

Likes
8
Share


@TorvicKofran
Follow
ESPAÑOL:
Hola chicos, espero se encuentren muy bien!
Esta semana las chicas han mejorado un poco, se detuvo el amarillamiento, descubri que Cal-Max de Grotek interfiere en la composicion de la linea hesi por lo que las chicas sufren un bloqueo de nutrientes, dejé de utilizarlo y las chicas han continuado con su desarrollo relativamente normal.
ya estan en su 5ta semana de floracion, Tutankhamon ha producido una cantidad gigantesca de resina, Lennon esta engordando a toda velocidad y aun le quedan 6 semanas aprox.
Anubis a pesar de su color intenso amarillo palido esta engordando bastante bien y su produccion de resina es inimaginable y ya solo que quedan 2 semanas y media aprox.
espero que a partir de ahora ya no surjan mas problemas y que las chicas terminen su floracion de la mejor manera.
esto es todo por esta semana chicos, espero que se encuentren muy bien !
INGLES:
Hello guys, I hope you are very well!
This week the girls have improved a little, the yellowing stopped, I discovered that Cal-Max from Grotek interferes with the composition of the hesi line so the girls suffer a nutrient lock, I stopped using it and the girls have continued with their relatively normal development.
They are already in their 5th week of flowering, Tutankhamun has produced a gigantic amount of resin, Lennon is gaining weight at full speed and he still has about 6 weeks left.
Anubis, despite its intense pale yellow color, is gaining weight quite well and its resin production is unimaginable and there are only about 2 and a half weeks left.
I hope that from now on no more problems arise and that the girls finish their flowering in the best way.
This is it for this week guys, I hope you are doing well!

Likes
13
Share


@Growyourownathome2x2
Follow
Thursday the 8th of June day 43 of 12/12 just plain ph water from now until harvest

Likes
5
Share


@dwotTV
Follow
Harvested the more mature plant, it had lost it's top to the wind, harvested a few days ago and has had a couple spots with a little rot removed. Seems stable enough and mature. Going to let the remaining one run out a bit as it seems a bit slower.

Processing
Likes
26
Share


@eldruida_lamota
Follow
Buenas tarde familia, actualizamos el diario de las skunk de Zambezaseeds, y es que estoy tan sorprendido , es una cepa que produce flores muy muy compactas, sigue floreciendo con lo cual sigo regándolas solo agua ajustando el ph a 6,5 .
Temperatura y humedad dentro de los parámetros, 1/3 anda algo sobre fertilizada de las últimas semanas las 2/3 están como la seda , aún así todo pinta fenómeno tengo muchas ganas de cosechar y probar esta variedad y ya queda menos , pasen buen finde semana fumetillas.

Likes
5
Share


@Brendanfromtherose
Follow
Plant is looking good and healthy, starting to develop good roots rapidly and is now fully in the veg stage,
Rhizotonic is working great as far as I can see and Canna start looks the job, I have Canna A&B for later but after studying reviews etc Ice gone for Canna start for the first 3 weeks and then on to the A&B later as it comes into flower,
Plant has grown 4 inches or more the last few days and is now 8-9 inch tall with nice lush green leaves, I'm increasing nutes and supplements and have introduced calmag at a 1/7 recommended dosage I don't want to stress the plant at this early stage,
I've decreased the reservoir level since last week to about 1.5 inches under the net cup as the roots and hairs are developing well and want to give them some air as they grow further into the reservoir
Pump on 24/7
Ph in reservoir is slightly decreased to 6.0-6.1
PPM around 250-300 will increase next week

Likes
25
Share


@BudGardener420
Follow
This week I had almost no time at all due to family commitments - I'm also completely at a loss as to what deficiency my plants are suffering from. I would say a serious calcium magnesium deficiency. But why? I mixed every watering with calmag - I suspect that the pH value in the soil was not right at times. The deficiency came overnight with the second compost tea. Oh well - I hope I can still salvage something. I would be very grateful for help. Thank you 🙏

Likes
7
Share

@smoking_hills9
Follow
Almost ready, want to give 1 more week for some brown trichomes. Super hard frosty buds. Smells super good.
. Last few times watering with raw cane molasses or just water.


Likes
31
Share


@420DeepGrow
Follow
La aventura ha acabado antes de lo esperado, entre las condiciones climáticas y el ataque de un jabalí 🐗 han acabado con este proyecto, la próxima vez será 😃
Likes
4
Share


@HomegrownGenetics
Follow
Just shy of 3 pounds, love the density on these nugs- definitely running this strain back.


Likes
2
Share

@deseed_uy
Follow
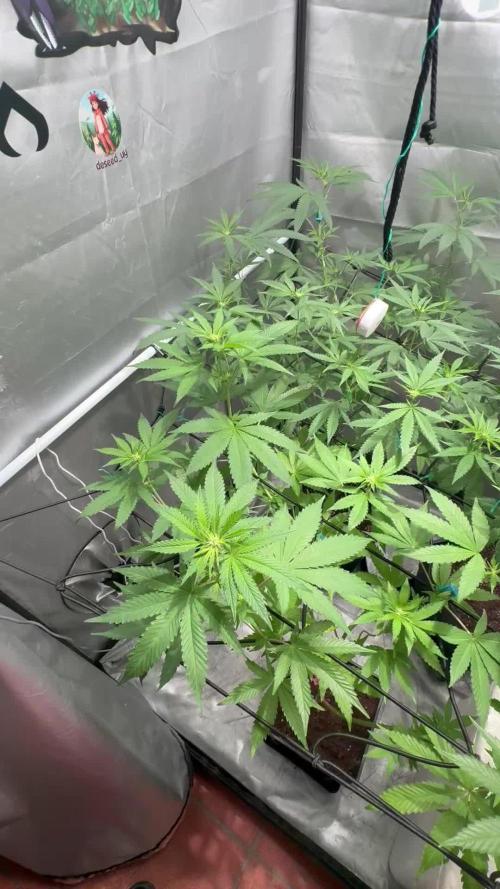
Puse los ultimos clip lst para nivelar las ramas mas altas del medio y ahora si a esperar unos dias para hacer las podas bajas

Likes
52
Share


@WhiteEdge
Follow
12.03.2024
Continue into week two. Target EC is the same for this week
Girls looking great
Clean tanks and filters with h2o2+vinegar acid +bleach
Replace all filters
Mix new batch with 2ml AN connoisseur AB + Silica @ 1% H2o2 - total 30l
Donne one pass off long misting 2m
700 PPFD @ center, VPD 1.0, RH 53-56% day, RH 45-48% night, Temp Night-20c, Day-25/26c, Leaf temperature 23c, Light distance 60-65cm, CO2 750+ppm
560w@60cm distance
NT-Nutrient Tank - PH -5.9, EC -1.15, Temp-21c
13.03.2024
Top up tank with 10l off 1.2EC solution - 2ml AN Connoisseur A+B + 3g Big Bud @ 18l (1.16EC)
Replace all filters
Before top up, nutrient solution in tank was 0.84, after adding 1.2EC new mix is 1.03
PH is slightly rising, normal when EC is drooping
Girls grow nicely, no deficiencies, this week is start off stretchy faze
Remove some big and bottom leves
PAR 800 PPFD, VPD 1.0-1.1, RH 50-54%, Temp Night-21-22c, Day-25/26c, Leaf temperature 23c, Light distance 60cm, CO2 750+ppm
580w@60cm distance
50s ON time 20min OFF time Day Time
50s Off time 30min OFF time Night Time
NT-Nutrient Tank - PH -5.92-5.99, EC -0.89-1.0, Temp-20-22c
14.03.2024
Position TrolMaster Tent-X Box on tent and connect to internet. Temperature ,Light and humidity sensor is great, I lake that all sensors and connector boxes are on RJ connectors
Great and fast install, registration and connections off all cables, censors and light! Like ability to expand system with Aqua-X and Hydor-X for irrigation ,PH/ EC/Temp monitoring off nutrient tank
Controlling solenoid valves and pump will be SUPERB!!! Recycling type off timer are great for Aero misting!
With Inkbird equipment i have issues that all connections are permanent and if you have longer cables....😡
HLG Scorpion Diablo LED light is connect via LMA-14 light adapter ! Wow i can control dimming and timing off my light via Wi-Fi😀😊😎👏🙏🙌
PAR map 800max/600min PPFD, VPD 1.0-1.1, RH 50-54%, Temp Night-21-22c, Day-25/26c, Leaf temperature 23c, Light distance 60cm, CO2 750+ppm
HLG Scorpion Diablo@83%
580w@60cm distance
50s ON time 20min OFF time Day Time
50s Off time 30min OFF time Night Time
NT-Nutrient Tank - PH -5.95-5.99, EC -0.89-1.1, Temp-20-22c
15.03.2024
Top up tank with 15l off 1.2EC solution - 2ml AN Connoisseur A+B + 3g Big Bud @ 18l (1.16EC)
Replace all filters, still everything in pristine condition after every changing, nutrient solution in tank looking and smell fresh and clean.
Reducing humidity in night time below 50% , humidifier rise temperature to 22-23c at night
Day RH is 53%, in first two hours keeping temps and humidity lower to reduce deferential form night time to 1-2c
Don't want to have more than 10-15cm off stretch in next week
Girls drink more water and nutrients every day, think around 10-12l per day
Managing EC strength with adding slightly higher nutrients solution when top up tank. Overall its around 0.9-1.0EC for most of the time
PH is stabile , slowly rise in small increments. Need to adjust @ 6.2 to 5.9 every two-three days. Probably i will leave it to swing even more.
Diablo is at 80% power @ 45-55cm from top canopy, 900+PPFD in center, lowest corners get 650+
PAR map 920max/650min PPFD, VPD -1.1, DRH 50-54%, NRH48-50%, Temp Night-21-22c, Temp Day-25/26c, Leaf temperature 23c, Light distance 45cm, CO2 750+ppm
HLG Scorpion Diablo@80%
580w@45cm distance
50s ON time 20min OFF time Day Time
50s Off time 30min OFF time Night Time
NT-Nutrient Tank - PH -5.95-5.99, EC -0.89-1.1, Temp-20-22c
17.03.2024
Top up tank with 10l - 1.2EC solution - 1.8ml AN Connoisseur A+B + 3g Big Bud @ 18l (1.16EC)
Replace all filters, install one new. Total 5 mash filters + 2 disc filters
Remove some large fan leaves from all girls. Nothing crazy. Next week is final BIG defoliation and pruning
Clean room benches a little bit after defoliation.
Whole week all girls are doing great , no sign off any kind off stress or deficiencies. Superb fast growth.
Stretching is more apparent in the end off this week. Next week is going to be madness!
18.03.2024
Raise light 10cm , adjusting to canopy level..
HLG Scorpion Diablo@83%, Set sunrise/sunset dimming @ 30min - TrolMaster Tent-X
PAR map 890max/650min PPFD, VPD -1.1, DRH 50-54%, NRH48-50%, NT-21-22c, DT-25/26c, Leaf temperature 23c, Light distance 45cm, CO2 750+ppm
Week 2 off Flowering in Summary
100l off RO water
190ml+190ml AN connoisseur A+B, 15g Big Bud Powder
70kW electricity in total for light, Pumps and AC Infinity Fans. 58kW for Light + 8kW Dehumidification + AC Infinity ventilation
Week start @ 1.14EC, nutrient strength. Strength dropping every day by 0.1-0.2. Topping up tank with 1.2EC solution bring back strength to 0.9-1.0EC
Start using AN Big Bud powder for day two off this week. For next slowly reducing Nitrogen and add more Big Bud. Next week start @ 1.2EC
Girls look superb all time, Tropicana Cookies is short and bushy with lots off side branching. Need good defoliation next week .
Flowering going nicely, obvious sign off formation off bud sites, pistils have shown an all girls.
PH was stabile and move from 5.85 min to 6.2 max. Swing all week without chasing perfect number.
Light distance start at 65cm from canopy finish week at 45-50cm , PPFD levels around 800-940 in center, trough whole week
Temperature vary slightly from 23c at start off day to 26c max at some points. AC Infinity T6 extracting fan program in AUTO to kick in @ 26c
Night temps around 21-23c, dehumidifier start to work at night time to bring down humidity, trying also to minimize Day/Night temperature differential for this week also
Continue in next week at same environment settings and light strength..
Likes
62
Share


@nonick123
Follow
Día 43 (02/12) CBD Auto 20:1 #1 no para con el stretch! 🚀😍 Le elimino algunas hojas de abanico que tapan la luz a los cogollos inferiores
Está empezando a pedir más agua cada día, pero no me extraña con lo grande que es!
CBD Auto 20:1 #2 está empezando a engordar y engordar los cogollos 💥😁
OG Kush Auto tiene unos erizos preciosos!
Día 44 (03/12) CBD Auto 20:1 #1 sigue imparable. Elimino algunas hojas de abanico
OG Kush Auto se empieza a mostrar más sedienta en la formación de cogollos!
Día 45 (04/12) CBD Auto 20:1 #1 sigue imparable. Elimino algunas hojas de abanico más!
OG Kush Auto también le elimino algunas hojas de abanico
Día 46 (05/12) CBD Auto 20:1 #1 Schwazzing / defoliación intensiva
OG Kush Auto Defoliación!
Día 47 (06/12) CBD Auto 20:1 #1 repetimos Schwazzing / defoliación intensiva debido a que la planta no para!
Es increíble lo que crece esta planta!
Día 48 (07/12) OG Kush Auto ha empezado a aumentar el consumo de H2O, y se muestra sedienta en esta fase. Mañana aumentaré el volumen de riego de 750 ml a 1.000 ml
Debido a que se acerca una ola de frio, hago una mejora sustancial en la tienda
Coloco un radiador de aceite + un termostato digital Wifi (controlador de temperatura) para poder controlar el radiador
Me encanta porque desde la App puedo programar eventos en función de cualquier parámetro, de modo que puedo controlar la histéresis del radiador 😁
Tras un par de días de pruebas, consigo una temperatura estable de 22 - 24 ºC con luces ON! 😁
Día 49 (08/12) CBD Auto 20:1 #1 ha crecido increiblemente esta semana comparandola con la semana anterior! Un monster pheno!
CBD Auto 20:1 #2 hago riego con 750 ml H2O RO + BIO PK 5-8 10 ml/l. ¡Un empujón para la recta final de floración!
Tiene unos colores preciosos en los cogollos! Con tonos rosas y morados en los apices! 😍
LSD-25 Auto hago riego con 750 ml H2O RO + BIO PK 5-8 10 ml/l. ¡Un empujón para la recta final de floración!
Está preciosa con ese morado casi negro que presenta en cogollos y hojas, unido a los pistilos de color naranja fuego conforme van madurando
OG Kush Auto tiene una formación de cogollos impresionante, y ha empezado a cubrir de tricomas todas las hojas que salen de los cogollos 😍
Lo unico preocupante es que ha empezado a mostrar algunas manchas marrones en las hojas de los cogollos...
Riego con 1 litro de H2O RO + 1 g/L de BACTREX para ver si le ayuda con la gestión de este exceso / deficiencia
💦Nutrients by Bio Tabs - www.biotabs.nl/en/
🌱Substrate PRO-MIX HP BACILLUS + MYCORRHIZAE - www.pthorticulture.com/en-us/products/pro-mix-hp-biofungicide-plus-mycorrhizae
"GDBT420" 15% DISCOUNT code for the BIOTABS Webshop https://biotabs.nl/en/shop/