


Likes
Comments
Share


Likes
26
Share


@MrJones
Follow
Strawberry Pie Auto
~~~~04.20.23~~~~
“DAY 72 Above Ground”
📝Sunday 07.02.23 - These ladies are looking ready to harvest, going to cut after lights-on, and do a pre-harvest report.
📝Wednesday 06.28.23 - The buds continue to pack on weight and ripen, the smell in the tent is amazing, fed with a Mayan tea from Humbolt Nutrients, loved the way it looked, they have great products.
~~~~~~~~~~~~~~~~~~
📝Strawberry Pie Auto
📝Grown By: MrJones
📝@fastbuds_official
📝Soil - ProMix HP
📝Medic Grow Smart 8 LED - SETTINGS 60% F1
📝@medicgrow420
📝@gaiagreenorganics
~~~~~~~~~~~~~~~~~~
📝 A true delight with a delicious aroma and a stunning 26% THC. This eye candy of a cultivar boasts unique colors and reeks of red berries and cookie dough that will leave your mouth watering.
~~~~~~~~~~~~~~~~~~

Likes
63
Share


@Canna96
Follow
Hey now, so this week went very well, I topped one of them for the last time on day 22,, and I wanted to top again but I started seeing some white pistils so I decided not to. I am now feeding 3 times per day with a total EC of 1.4 I am giving .4 to Cal Mag and 1.0 to Maxi Gro. I am also utilizing LST to try and keep an even canopy. I felt like my last grow produced far too many fluffy buds, so I am trying to focus on fewer bud sites, and denser colas. I am also testing the runoff and I am getting readings of 1.5 to 1.6 so I am good with that. Thanks for checking out my diary, be safe and blaze on!

Likes
8
Share


@Budhunter
Follow
As I stated before this is my mutant plant hehehhe.. looks like buds are fattening up a bit and more light penetrating in the colas.. she seems to be growing.. happy days


Likes
5
Share


@Jardineiro_Br
Follow
Chegando ao fim mais um ciclo , gostei das sementes e o resultado final ainda que não seja muito em quantidade pode ser favorável em qualidade .

Likes
5
Share


@SkunkyDog
Follow
Hallo zusammen 🤙.
Sie wächst sehr schön und riecht schon leicht nach Haze 😜

Likes
8
Share


@Satta
Follow
She's now kept fully indoors, producing more buds hopefully. I removed nearly all seeds developing in the popcorn buds, avoiding damage to the colas as much as possible. Tested the little charas built up on my tweezers, pretty dang potent I have to say. Temperature and humidity is a bit high and I can't do much about that for the time being, she's doing fine regardless. She used to have more of a freshly brewed coffee smell to her in the past 2 weeks, now that has turned into the smell of an entire pastry shop with an italian espresso machine running. I've removed a tiny branch with some popcorn buds that wasn't going to grow into anything substantial anyway, it dried until now and I gave it a try. VERY potent already, tingling body sensations straight away, clear headed and gently uplifting high just a touch towards the indica side, but otherwise very balanced.
Likes
18
Share


@valiotoro
Follow
Hello everyone week 3 of flower has passed for this Gelato auto 🍦
Spider Farmer SE7000 80%
have a great day and wish you all happy growing 😎👨🌾🏻
Likes
5
Share


@Bryankush
Follow
Molto bene le ragazze si stanno ingrassando rapidamente e mangiano bene😈, sono congelate😁
Giorno 2 annaffiata con 2L di acqua
Giorno 6 in un qualche modo sono riuscito a guadagnare quei 10 cm di altezza sulla lampada per crescere bene la cima centrale😅😁
Likes
23
Share

@therealgrowmie
Follow
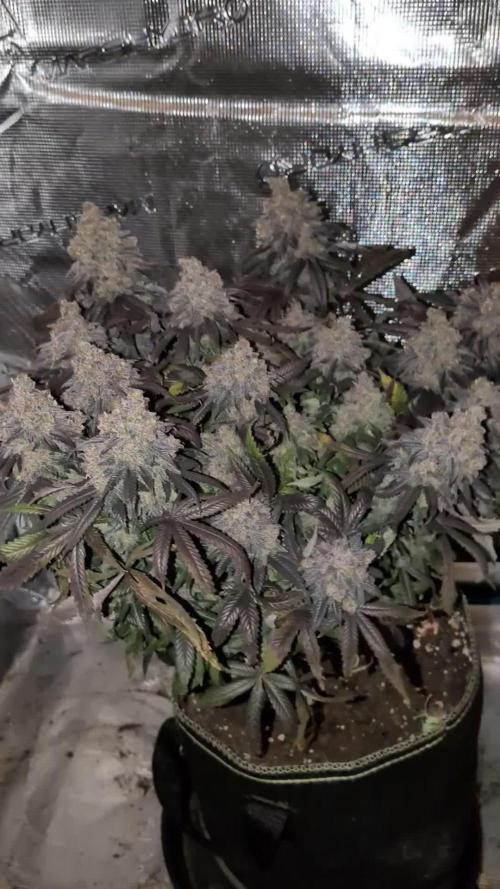
Harvest day has finally arrived ✂️❄️
After weeks of checking trichomes, watching pistils darken, and waiting through one of the longest flowering periods I’ve had so far, the moment is finally here. These plants really tested my patience, but seeing the dense purple flowers completely covered in frost made every extra day worth it.
The tent smells absolutely insane right now — sweet, gassy, and loud enough to fill the whole room the second the zipper opens. Looking back at the whole run, it’s crazy how much changed from early veg to these fully ripened colas.
Now it’s time for the final step: chop, trim, dry, and cure. The grow may be ending, but the real magic is only beginning 🔥🌱
📊 Final Stats:
💧 Watering: Every third day
🌡️ Temp: 26–28°C
💦 Humidity: 65% RH
📈 VPD: ~1.18 kPa
💡 Light: ~700 PPFD


Likes
5
Share


@Wobbleysausage
Follow
Letting her rip. Full on feeding now she seemed to have a deficiency this last week. Seemed it was a bit too cold for her new growth. It has darkened up as I turned the heat back up in my house. Strawberry cough is stinky. The smaller one doesn't really smell. Not expecting much from her. Started my vanilla frosting haze crosses on like Wednesday.
Oh I added worm castings to both top soils and a layer of rice hulls over top as a mulch layer. I did this to help the soil in case the yellowing was from a ph issue or somehow a nitrogen issue which I doubt.

Likes
2
Share


@MountainGrowBR
Follow
finally it reached the size needed to start training. topping done on the 5 knot and lst in the form of a star.

Likes
3
Share


@Briangrowss
Follow
I got some dark brown spots on the leaves after vita race , connected plagron and they told me I can spray it better in the morning as evening so the plant can absorb all the nutritions

Likes
30
Share


@Togoutouseg
Follow
J'ai lancé la floraison le 24 avril !!
J'espère que mes plantes vont faire de belles fleurs 🌱🌴


Likes
12
Share

@Hempface86
Follow
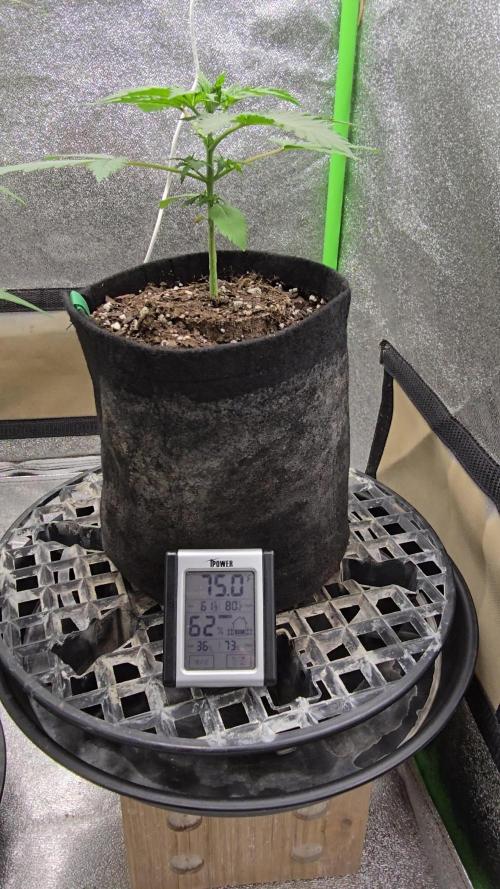
Big shout out to Herbies Seeds for making this grow possible, this is a very exciting grow for a couple reasons, one being that I love purple haze, and secondly, this is my first run with growdots so I'm really hoping they work great because I don't have the time with work. Anymore to do my old concoction, because it would take me literally 3 hrs some days just to gave all the plans their own individual feed, because I would make each batch for each individual plant depending on their needs... I hope everybody's doing well. I am doing better than I was doing, and so God is good ... i hope everyone's having a great day. And I really look forward to this girl growing out because there's a good chance as well that this is gonna be my last auto flower for a little bit.. I have a couple that I wanna grow ( purple b****** eater by roc bud and banana daddy bx auto my ethos ... both thanks to my buddy @Grow4releaf...
Hope everyone is doing well.God bless and happy growing ✌️


Likes
21
Share


@AlpineGoat
Follow
1.12 welcome december!
We’re moving close to the harvest line, in a week and a half I’m gonna start checking the tricromes.. i run one last add of nutritions, from now only water until the last day!
The sweet zz is smelling great, the amnesia is growing strong and dense, the gorilla glue’s scent is pungent, unique, and the blue berry is growing slowly but very well.
I pruned a bit of yellow leaf, now I wait until the harvest, leaving all untouched!
2.12 i added a smol video :3
5.12 they’re maturing very well! Now I’m start monitoring the trichomes! Hoping in a week and a half max I’m gonna dry everything.. soo happy!


Likes
18
Share


@ChitownCannaChica
Follow
Wow! These really do flower fast! Loving them so far! I have other plants on the same time line that are not even close to this progression!
Started with the bloom nutes, did a little defoliation and she’s off!
I did find a pollen sack on a lower and just peeled it off🤷♀️🏻