


Likes
Comments
Share


Likes
11
Share


@Chubbs
Follow
420Fastbuds
FBT2303/Week12
These twins are super duper close to getting the chop. Been checking trichs on them and still have a few clear with just a hint of amber popping up. I enjoy this point in the plants life seeing the fade of yellow leafs. They are super sticky almost to the point of needing gloves when handling. The flower sites have swollen up nice and don't think they'll get any bigger. All in all Happy Growing

Likes
13
Share


@NiceGuyGrows
Follow
Started on Growdiaries at week 7 of flower. Back at the start there were four plants. Two were feminized and the other two turned out male. Unfortunate because those were the two Scooby Snacks. Actually the showcase plant. Playing the odds didn't work out for me this time. :) Two remaining plants started off at large size difference. Liberty Haze was almost twice the height of the Super Skunk. Used LST early and topping late in veg to control the canopy. Overall I got them to a pretty close height. The combination of the lolipopping and SOG produced some monster buds. Of course genetics helped but they were much larger than previous grows. The tent and the environment stayed nice and consistent throughout the grow. No unexpected incidents other then the two male Scooby Snacks. Used an updated Heavy 16 feeding schedule which seem to make the girls pretty happy. They both have been chopped and are hanging for 7 days-ish. I will take some pictures and give a taste review then. Sorry the pictures and video are so poor.


Likes
8
Share


@Black_Widow
Follow
Привет любители травки
Началась новая неделя
С утра я подгибал ветки на цветке и одна кола лопнула и переломилась и осталась висеть на четверти стебля
После перелома меня охватила паника и боль , но я вовремя зафиксировал стебель и наложил ей шину
Прошло пол дня и вроде все обошлось
Стебель у этой девочки жесткий , но хрупкий
с ней LST очень аккуратно надо проводить
А в целом мне нравится её генетика .
Day 40
Сегодня я поменял раствор на стадию цветения
будем дальше наблюдать как пойдут дела

Likes
6
Share


@Lazuli
Follow
Its ripening, final week before harvest
I love the fade this plant has so purple/yellow/blue
Likes
5
Share


@BigGGrows
Follow
This week was good for the Cream auto. I performed some defoliation and undid the LST for a couple days as well as raised the lights to 24" to induce some stretching. I did selectively begin LST on the Cream towards the end of week 5. She has been getting 1/4 strength flower nutes and recieved a fresh top dressing of hot soil coco coir mix; as her roots were surfacing. So far so good. Atleast 20 budsites are visible and she has responded well to all the training and is coming into her stretch period. Now all we are waiting on is them white pistols to start shooting at the budsites. Hopefully week 6 will entail this! She should be at about half of her life span at this point. 4-5 weeks more of flower is expected before harvest.

Processing
Likes
3
Share


@The_Chef_420
Follow
Seeing some tips beginning to burn so I went back down to 1 tsp of the girl's base nutes. Starting to see calyxs and pistils. Also alternate branching is appearing, also signalling that flowering has commenced.
Likes
60
Share


@Professor_Chaos
Follow
Beginning of week..
I went ahead and bumped the TDS to 1000 PPM this week. I don't think I'm going to go much higher than that. Usually don't have to.. Hopefully that's not too much.. I also started adding a bloom booster from Advanced Nutrients called Kushie Kush.. It works great for all strains tho lol. So the runoff is still acting up.. But it is getting better... Slowly. I emailed General Hydroponics on the issue a few days ago and they have not gotten back to me yet... Ugh. But going in: 1000 PPM.. Runoff: 700 PPM.. That was this morning.. Still have not given her plain water yet.. Just been feeding every watering.. Not really any signs of issues right now. A couple leaves are a little yellow (literally 2).. Another couple have some spots (maybe 4 or 5 leaves).. But other than that she is happy, healthy and smelling like a fucking champion! Seriously fucking delicious.. And to think the smell is supposed to warn off predators.. Hah! Good luck with that!!! Barely 8 days of flowering and she is already stacking so fucking nicely! I can't wait to see what kinda magic this gal is gonna do! So happy and excited!!! The light sits about 18 inches from the canopy right now at 100% power. She is still stretching a little but seems like she may be done with that pretty soon.. Maybe even before this week is over. Clones didn't make it.. I think it was too cold. They all sprouted roots but just stopped and they all yellowed out like a mf'r.. Looked like shit so I took them out back Ol' Yeller style and put them out of their misery 😭.. But it's ok.. The mama needs all the focus on her right now! Lol.. Oh yeah.. I went ahead and pulled a couple of the tallest branches down.. Just a tad.. Brought the ties up a node or so on each and pulled it tight.. Spread her out a little but I was nervous of snapping one off so I didnt try to push it too much.. These branches are tough af!
Later that day..
General Hydroponics finally got back to me.. They said that I'm an idiot for using FloraKleen during transition like that.. Lol jk.. They did say that I should have NOT done that.. And that my runoff should ALWAYS be lower than it is going in due to the ppant taking up the nutrients.. But that just doesn't seem right to me.. Ive ALWAYS had my runoff higher.. Literally ALWAYS.. but without issues. They said that if the runoff PPM is higher, then there's a problem.. Maybe if I was doing frequent fertigation.. But I'm not.. And never will because that just sounds like a waste of nutrients.. But whatever.. Today I learned that FloraKleen is ONLY for pre-harveat flushing.. Or hydroponic reservoir cleaning in between nutrient changes.. But definately not the way I used it lol.. Thankfully she is still doing good 👍... Buuuut whoops lol
Mid week..
Still doing magical things! Lol.. I didn't think she was gonna fill out this tent so nicely! Trichomes are forming nicely.. The purpling is looking amazing also! Some spots on SOME leaves.. But not alot.. Not sure what that is about.. No pests.. No deficiencies as far as I can tell.. Maybe just a mutation? Nothing to worry about tho.. This girl is so fucking gorgeous! I love it!.. Back to feed, water, feed, water, etc. schedule now.. I'm hoping that 1000 PPM isnt going to be too high for her.. But if it is, I will adjust accordingly.
End of week..
Seems to me like the stretching has stopped.. So I'm going to cut out the FloraGro.. Double up on the FloraBloom and later into flower I will bump up the Kushie Kush Bloom Booster. She's doing great! Smells fucking amazing! I thought my ETHOS Early Lemon Berry R1 was gonna be the best strain ever.. Then I grew this girlie! Not just a lemony scent.. But like a very sweetened lemonade.. Incredible! Trichomes are EVERYWHERE! Such an awesome, beautiful strain! Good job FastBuds.. Can't wait to try more of your strains! Too bad you wont even acknowledge my grow journal like you do everyone elses.. But whatev.. Lol.. On to the next week!!!...


Likes
7
Share


@ChitownCannaChica
Follow
Hard to keep this little lady from constantly falling over and properly watered, but the lemon auto is plugging along! Probably another 3 weeks! ✌️💚🌿💨


Likes
31
Share


Likes
3
Share


@Mr_nugs_lover_David
Follow
Anotheer amaazing Black cherry punch pheno, beautiful colas, they looks just like rockets, so fat dense and sticky colas man. So in love with this black cherry punch, same sweet aroma, very fruity and sweet just like her sisters. I'm very happy with how this strain has performed in my garden. All my plants are 100%organic grown. She's been grown with florganics FLO Living soil, guanokalong organic dry amendments and Silicium flash by biotabs which contains bug shit and helps to keep a good microbial activity in your soil, it also contains silica, Flo living soil is full of life too man, I'm getting top clean aromas, very clean medicine for myself. It's such a pleasure to work with what I love the most. My cannabis 🤞💚😋🍪 peace everybody!!

Processing
Likes
2
Share


@Cannatech
Follow
So in this week the bids really start taking off so you can see how the colas formed and how they will start to swell


Likes
8
Share


@sweetkaya
Follow
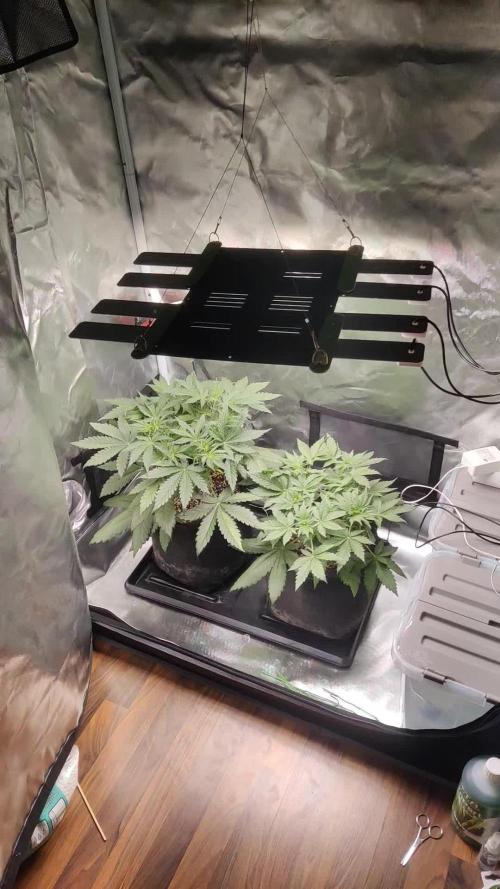
Continuing tie down the taller branches. They are showing sex, I think they'll be into flowering for next week.


Likes
11
Share


@VividGreen
Follow
Heavy defoliation done on 12/22
EC 2.6 strong solution to help with recovery from defoliation in flower
