


Likes
Comments
Share


@steadfast_grower
Follow
#########################################
HARVEST (Day 93 / June 4)
#########################################
-----------------------------------------------------------
GROW SUMMARY
-----------------------------------------------------------
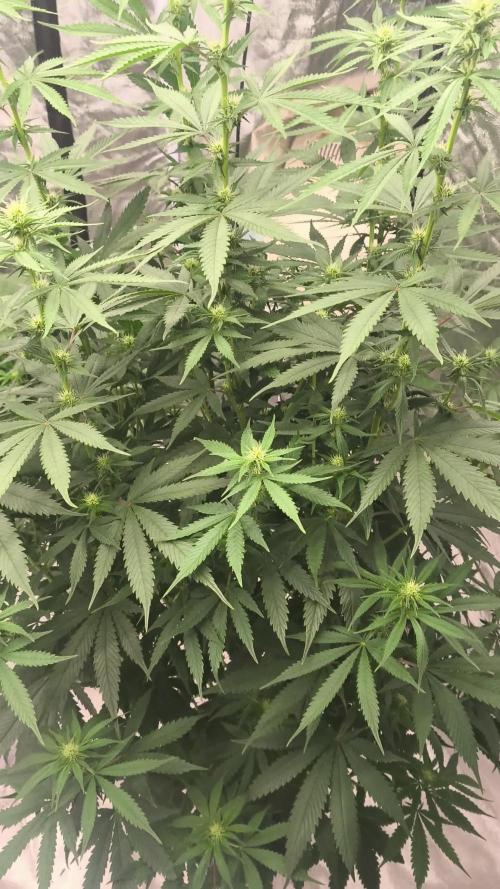
Grown in 4x4 tent - but I only used 2x2 space because of heater and dehumidification and other plants (Outlier Z). This plant used a dedicated CMH 315 light. The plant was grown in hydroponics using a custom single-site PA hydroponics clone RDWC system with Advanced Nutrients Sensi Coco line, Microbial Mass and Orca for beneficials. I also experimented with Rapid start in the RDWC system, but I didn't see explosive root growth relying on Rapid Start as an additive to the system verse using it when starting in rapid rooters which worked well.
All around a pretty easy grow and things went very well. Topped twice for a mainline structure and she really spread out. Sparkling golf ball size nugs down the branches and spaced out nicely. The scent off her was like burned rubber/tires or maybe fresh blacktop. A single water change which was only performed when switching to bloom nutrients around week 7.
-----------------------------------------------------------
HARVEST
-----------------------------------------------------------
No dark period and no flush. On day 93 she was chopped and hung to dry.
-----------------------------------------------------------
DRYING
-----------------------------------------------------------
Entire plant hung upside down for 15 days. The temps were dialed in at 60F by using the S6 intake fan pulling air from the AC through intake vent on side of the tent. Humidity was dialed in at 63%/60F for 24hr, 62%/60F for the next 48hr. Then 60%/60F for the third day and onward. AC Infinity T6/S6 exhaust and intake fans were on the setting of '2' during drying until day 7, then I could turn down to a setting of '1' once the plants were not transpiring excess moisture. Trimmed on day 18. Then the jars were left open in the tent for another 12 more days for a full 30 day dry at 60%/60F while rolling the jars frequently. Also ran dehumidifier in the tent but it only ran for 1-2 minutes every hour because the AC was doing most of the dehumidification on the intake.
-----------------------------------------------------------
TRIMMING
-----------------------------------------------------------
Trimming was an absolute breeze. All swelled nuggets, very little sugar leafs left to trim.
-----------------------------------------------------------
CURING
-----------------------------------------------------------
Flower product was transferred to 1L mason jars averaging 35g of product per jar. I added a mini hygrometer to each jar and chose not to use a boveda this time. The RH averaged 62-64% when trimmed flowers went in jars.
Jars were left open in the tent for a total dry time of 30 days from harvest keeping the tent at 60%/60F.
Once closed, the jars were burped once a day for the first seven days, once every other day for the next seven days, rolling jars often. The burp was only for 3-5 second for air exchange until a. 62% was maintained in the jar.
-----------------------------------------------------------
YIELD
-----------------------------------------------------------
* Weight calculated at 62% humidity after 30-day dry and 14-day cure.
==============================
FLOWER PRODUCT
==============================
180.41g (6.44oz)
==============================
TRIM PRODUCT
==============================
57g (2.03oz)
** All major fan leaves, stems, and branches removed from trim product.
==============================
TOTAL OVERALL YIELD
==============================
Total: 238.41g (8.51oz)
==============================
SPACE YIELD
==============================
238.41g / 4 sqft (2x2 canopy) = 59.60g per sqft
==============================
WATTAGE YIELD
==============================
315 Watts / 4 Square Foot (3x4 canopy) = 78.75 watts per sqft.
238.41g / 315 watts = 0.76 grams per watt
-----------------------------------------------------------
PRODUCT TEST
-----------------------------------------------------------
Bag appeal is top-notch. Trichome covered, with aromas of that unique 'kush' you can quickly identify based on experience.
Best OG Kush I've ever tried, hands down! The flavour is kushy, smoke is smooth and definitely my favorite strain in my tote of cured harvests at the moment. I can't keep my hands off of the jars. Definitely not a daytime strain, even for experienced users, although I'll use it in the afternoon when life is throwing curve balls. The effects rise you up, then sets you right down and will wash away all that anxiety after a long day. Put it this way....if I puff a few hours before bed, I still feel it the next morning when I peel my eyes open. No joke.
I'll definitely be growing this one again, maybe even next run because I'll be sad when I run out.
-----------------------------------------------------------
REGRETS
-----------------------------------------------------------
Not running more of this amazing plant.
-----------------------------------------------------------
NEXT RUN
-----------------------------------------------------------
This was the first run at my new residence so it will take some time to get it dialed in. I had some calibration issues which are now fixed. I'm going to be shooting for 1gram per watt on the next run.
-----------------------------------------------------------
FINAL THOUGHTS
-----------------------------------------------------------
DarkOwl is the best autoflower I've grown yet. I'm now eager to give the Bruce Banner #3 they released a run and will surely acquire future releases from DarkOwl.
-----------------------------------------------------------
THE END
-----------------------------------------------------------
Thanks for checking out my diary! I typically journal in my notebook but I put some time and effort into documenting my grows on this platform in hopes it will help a new or experienced grower with their DWC journey. Any questions or suggestions are welcomed.
Happy growing!





Likes
25
Share


@eldruida_lamota
Follow
Hola familia, como siempre, otra semana más por aquí, vamos actualizar la sexta semana de floración de esta cepa de dutchfem.
Casey’s rollex O.G. Es una variedad Indica de una tirada de semillas limitada, la verdad que tenía ilusión por cultivar algo así.
No ramificó lateralmente como quien dice pero dará buenas flores, se empiezan a ver ya algunas tonalidades y cómo se llena de resina.
.
La humedad esta al 45% la temperatura está entre 21/25 grados , y como siempre el ph , ya que es de lo más importante,está en 5,8/6,0.
.
AgroBeta:
1 ml x L Flowering black line , vía radicular.
0,2 ml x L Beta shark, vía radicular.
0.5 gr x L mega PK , vía radicular.
0,8 ml x L Terminator, vía radicular.
0,5 gr x L Engordacogollos, vía radicular.
0,3 ml x L Tucán , vía radicular.
0,1 ml x L Betazyme, vía radicular.
0,3 ml x L Tricoma, vía radicular.
0,05 ml x L Gold Joker, vía radicular.
0,2 ml x L Silver, vía radicular.
.
Hasta aquí todo familia 🕸️ , un saludo y buenos humos fumetillas💨💨💨.

Likes
1
Share

@Growfather1
Follow
Hello everyone,
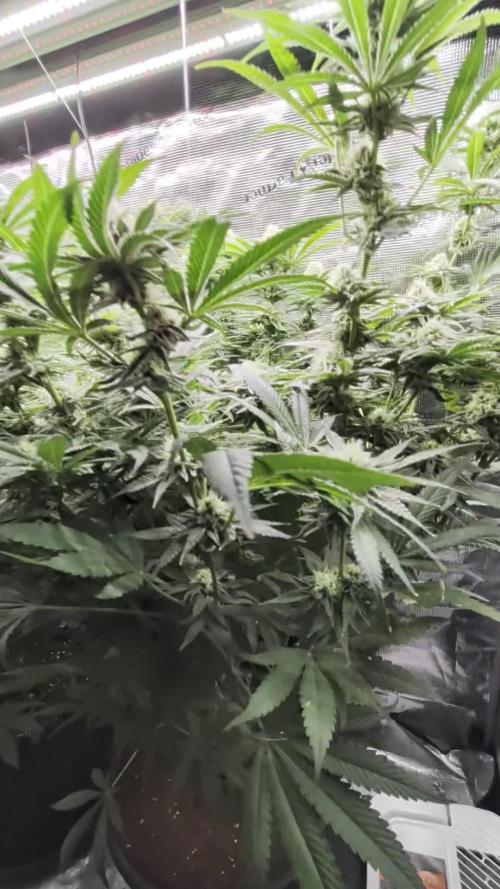
We are into week 5 with the Gorilla Glue nr. 4 x White Widow, and everything is looking well.
The buds are developing nicely, and I am adding 1.5 milliliters of 13/14 per liter water to the mix.
Temperatures are ranging between 20° Celsius when the lights are off and 27° Celsius at the highest when the lights are on and the humidifier is running.
For the rest, I can't say anything else than it's a waiting game; patience is the name of the game.
Thanks for stopping by and have a nice day.
Best regards,
Growfather.

Processing
Likes
2
Share


@BigBuds95
Follow
Day 39, had a little nitrogen toxicity, been flushing and seems to be recovering okay, much stronger Skunk smell and nice resin production with orange hairs starting to form as well!

Likes
2
Share

@DogDoctorOfficial
Follow
🍃 Purple Haze Photo A — Week 4 | Preparing for Gravity-Fed Growth
Every grow has one plant that quietly starts telling you a story before flowering even begins.
Purple Haze A is becoming exactly that.
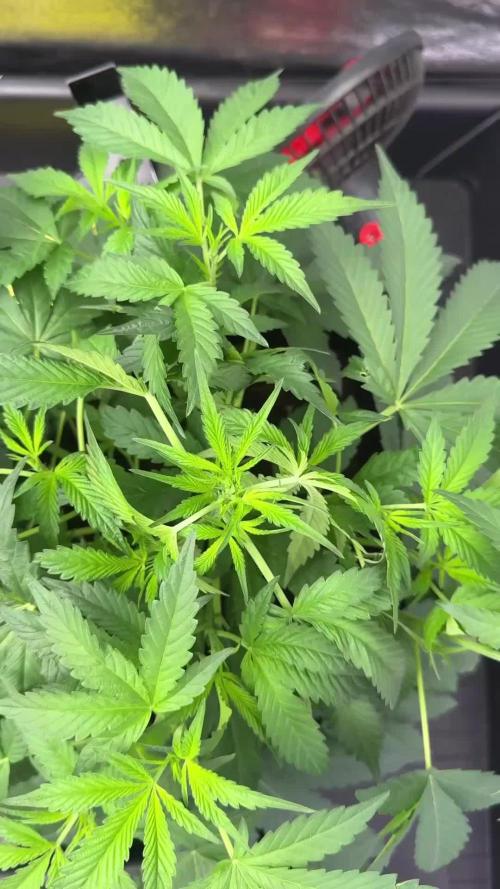
Growing under the same Future of Grow LED, receiving the same PPFD, sharing the exact nutrient recipe, environmental conditions and care as every other plant inside the tent, she has decided to express herself in a completely different way.
Instead of remaining compact, she has embraced her sativa heritage and is already showing the elegant structure Purple Haze is famous for.
Longer internodes.
Large healthy fan leaves.
Fast vertical growth.
Strong side branching.
Exactly the characteristics we hoped to see.
This diary is part of my ongoing 12/12 From Seed Challenge, documenting every step exactly as it happens. No shortcuts, no hidden techniques—just honest observations from a home grower enjoying the journey one day at a time.
⸻
🌱 Week 4 Development
This week was all about preparing for the next big milestone.
Purple Haze continued building an exceptionally strong root system while producing vigorous new shoots across every node.
The leaves are deep green, beautifully flat and reaching toward the light, showing excellent nutrient uptake and a very healthy metabolism.
Stem thickness has increased noticeably, giving plenty of confidence that she’ll easily support future flower production.
The spacing between branches also makes her an excellent candidate for training later, allowing light to penetrate naturally through the canopy.
Sometimes you can already tell a plant has personality long before flowers appear.
This one certainly does.
⸻
🚿 Time for AutoPot
This week also marks another exciting step.
Purple Haze A will soon become one of the plants running on my AutoPot system.
Since every plant in this project receives identical lighting, nutrients and environmental conditions, this creates a great opportunity to observe one important variable:
Top watering versus gravity-fed irrigation.
Rather than trying to prove one method is universally better, I simply enjoy comparing different growing styles under the same conditions and documenting the results honestly.
That is one of the things I love most about this hobby.
Every grow teaches something new.
⸻
💧 What is an AutoPot?
For anyone discovering these diaries for the first time, AutoPots are a completely passive irrigation system.
There are:
❌ No pumps
❌ No electricity
❌ No timers
Instead, everything works using gravity.
A nutrient reservoir sits slightly higher than the pots, allowing the solution to flow naturally through the tubing.
Inside each tray sits the heart of the system:
The AquaValve
The AquaValve is an ingenious little mechanical valve.
When the tray becomes empty, the valve opens and allows fresh nutrient solution to flow in.
Once the tray reaches the correct water level, the valve automatically closes.
The plant then drinks exactly what it wants.
Only after the tray is empty again does the cycle repeat.
Because the substrate experiences a natural wet-dry rhythm while always having nutrients available when needed, roots tend to develop extremely well.
Healthy roots often translate into healthier plants.
At least, that has been my experience.
⸻
🌿 Why I Enjoy Growing with AutoPots
Every grower eventually finds methods that simply fit their style.
For me, AutoPots offer several advantages:
• Consistent moisture around the root zone
• Reduced daily watering workload
• Excellent oxygen availability inside the substrate
• Stable nutrient delivery
• Very vigorous vegetative growth
Perhaps most importantly…
They let me spend more time observing the plants instead of carrying watering cans every day.
And honestly, watching the AquaValve quietly doing its job never gets old.
⸻
📊 Week 4 Environment
• Week 4 — Vegetation
• Height: 25 cm
• EC: 1.35
• pH: 6.1
• Temperature: 33°C Day / 25°C Night
• RH: 63%
• CO₂: 639 ppm
• Light Schedule: 12/12
• Water consumption: approximately 1.1 L per plant every 24 hours
⸻
🌿 Feeding Schedule
This week the nutrition remained simple and balanced using the Plagron Terra line.
• Terra Grow – 1.8 ml/L
• Power Roots – 1 ml/L
• Pure Zym – 1 ml/L
• Sugar Royal – 1 ml/L
• pH Plus – 0.03 ml/L
• Lemon Kick – 0.03 ml/L
The plant responded beautifully with rich green foliage, vigorous growth and absolutely no signs of nutrient stress.
Exactly the kind of consistency every grower hopes for.
⸻
💚 Final Thoughts
Week 4 feels like the beginning of something special for Purple Haze A.
She has developed into a vigorous, healthy young plant with beautiful structure, outstanding leaf health and plenty of energy heading toward the flowering stretch.
Now the AutoPot system enters the picture, adding another interesting chapter to this diary.
Whether gravity feeding produces bigger plants or simply makes life easier, we’ll discover together over the coming weeks.
That’s the beauty of documenting everything honestly.
Every plant becomes its own little experiment.
⸻
🙏 Thank You
A huge thank you to everyone following this journey and supporting home growing around the world.
Special thanks to all the amazing companies helping make this project possible:
🌱 Zamnesia Seeds — for the incredible Purple Haze genetics.
? Plagron — for providing the complete Terra nutrient line and outstanding growing media.
💡 Future of Grow LED — for delivering consistent full-spectrum lighting throughout the entire grow.
🌿 GrowDiaries — for bringing together growers from every corner of the world and giving us a place to learn from one another.
And finally…
Thank you for taking the time to follow this adventure. Your comments, advice, questions and encouragement make these diaries far more enjoyable to create.
Growers Love and see you next week, where Purple Haze A begins her AutoPot journey in earnest. 🌱💜

Likes
12
Share


@Xpie77
Follow
✂️ Oogst & Droging
Aantal planten: 5
Verwachte opbrengst: ±30g per plant
Totaal verwacht: ±150g droog gewicht
Status: Hangend te drogen in een donkere ruimte, 18–19°C bij 55% RV
Verwachte droogtijd: 7–10 dagen, daarna start de curingfase
De geur is tijdens het drogen al zeer intens: een combinatie van zoete bessen, kush en gas. Toppen zijn compact en rijk aan trichomen.
---
🔜 Wat volgt
Zodra de toppen voldoende gedroogd zijn (stelen breken met een ‘snap’), start het curingproces in glazen potten. Dit zal het terpenenprofiel nog verder verdiepen.
---
Eerste conclusie:
Zeer sterke run met Blue Zushi. Alles wijst op een premium eindproduct, met een goede balans tussen geur, smaak en potentie. Eindbeoordeling volgt na curing & testsmoke!

Likes
17
Share
@eldruida_lamota
Follow
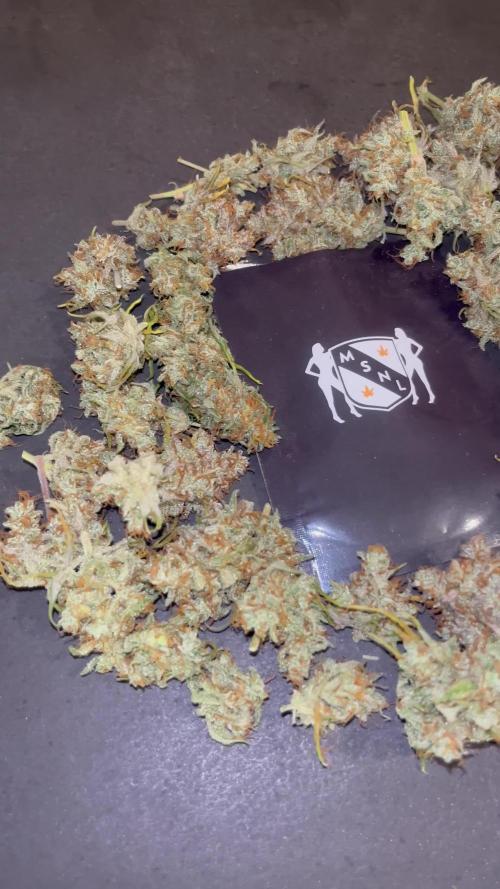
Venga familia ya viene la cosecha de estas GG4 de MSNL, que ganas que tenía ya de darles tijera.
Para empezar me dieron gato por liebre, nunca mejor dicho, me dijeron que era feminizada de temporada y resultó ser autofloreciente. Eso muy mal.
Las flores aparte se ven resinosa y tienen colores llamativos.
La planta sin más, típica rudelaris que sinceramente detesto.
Fue una genética con la que no disfruté cultivarla, aunque es bastante fácil de cultivar.
Agrobeta:
https://www.agrobeta.com/agrobetatiendaonline/36-abonos-canamo
Mars hydro:
Code discount: Eldruida
https://www.mars-hydro.com/
Hasta aquí es todo , espero que lo disfrutéis, buenos humos 💨

Likes
1
Share

@ChronicNerve
Follow
The atlas had a bad start to the week when my cat fell on top of it after a small fall but the good news is both are totally fine.
Excellent growth on the Atlas, lovely colour and node spacing.

Likes
15
Share


@Sid93
Follow
the plant keeps swelling at a slow pace. looks bigger every day and smells stronger

Likes
16
Share


@AestheticGenetics
Follow
4/9/25
This plant is beyond frosty. Stacking up super nicely. Seems like she will yeild quite a bit.
My only gripe is that she has like no smell at all.
Using the foil as a soil cover is working quite nicely. the top soil is getting filled with roots quite well.
Top dressed 1tsp of Bloom
1tsp microbe charge
1tsp bloom

Likes
15
Share


@tokesly
Follow
Flush ended two days before the darkness period. Decided on a 48 darkness periods though some prefer 24 or 72. The darkness did help trichomes reappear at the tops of the canopy. Going for a longer dry of 10 days, best temperatures are 60-70F to preserve the terps with 50-60RH. This has been an amazing experience, definitely putting in more passion into the next run.

Likes
13
Share



Likes
9
Share


@Bread_n_Buds
Follow
After the first few days of germination, when it was time to fertilize our Fruit Punch Automatic plants started off strong.
In this diary you will find the plant worked with the first topping that led to the formation of our mainfold thanks to the cleaning of everything else and we will continue with the mainlining technique.
The other one you will find in the other diary left to grow free like a wild plant.
Comparison is the salt of experience.
We have started the Plagron fertilization program, we are in 100% organic configuration, the soil is recycled Promix + 1/3 fresh soil + 10% Perlite + RQS Mycorrhiza Mix (4 mixes, 1 under the small fiber pot).
We are administering // 1 ml/l of Power Roots - 2 ml/Alga Grow
I have doubts about the compatibility of Pure Zym with mycorrhizae. If in doubt, ask the experts, do not mix too much at random.
https://plagron.com/en
Doubts about Pure Zym / Mycorrhizae compatibility have been dispelled, they can go well together according to Plagron experts. If someone tells you that enzymes eat mycorrhizae, which in principle may seem possible, explain to them that it is not true.
https://www.royalqueenseeds.it/growing/452-easy-roots-mix-di-micorrhize.html
Try this strain, it's one of the best in recent years with a very high THC level
---- https://www.zamnesia.io/it/10965-zamnesia-seeds-fruit-punch-automatic.html
Brief description of Zamnesia // Sativa strains are very rewarding to grow, but their long flowering times and their greater susceptibility to disease and overfertilization can make them a little more difficult to manage. Also, their imposing heights are less suitable for indoor use and can attract unwanted attention if grown outdoors. However, with the arrival of Fruit Punch Automatic, growing sativa strains at home just got a whole lot easier. Combining Skunk #1, Haze and ruderalis, Fruit Punch Auto is 70% sativa dominant and produces up to 21% THC, along with a delicious blend of terpenes. Plus, it can be grown indoors, outdoors and in greenhouses. With their bright green hues, golden pistils and thick layer of resin, Fruit Punch Auto buds always have a great appeal. When you smoke her, you will be amazed by her flavours, aromas and effects! As the name suggests, Fruit Punch Automatic boasts delicious tropical aromas reminiscent of banana, pineapple, mango and citrus. When you open the jars you will feel like you are in a tropical cocktail bar on an exotic beach. Fruit Punch Auto will delight your palate with pungent fruity notes followed by light notes of Skunk and spice on the exhale. Within minutes of your first hit, this potent sativa will stimulate your mind, leaving you in an energetic and carefree state, ideal for morning or daytime sessions, as well as social settings or creative pursuits.
You can find the entire world of growing on Zamnesia and more, just take a look at the site and you will find "all the best that nature has to offer" in various shapes and colors.
The new strains are fantastic and the old ones are no exception...
p.s. no hermaphrodites yet, can you growers say the same?
---- // www.zamnesia.com
Likes
9
Share


@Herbz_Unkraut
Follow
another resin monster from seedstockers, with a very special scent, full of flavors! grinded it smelled like peppermint, and vaped it has a great sweet creamy taste!


Likes
Comments
Share


@gr3g4l
Follow
Esta semana le hice una poda de hojas y me deshice de algunas ramas que habían crecido en medio los nudos, algo así como las triploides y la verdad es que prefiero mantenerlas diploides xd.
Me deshice también de los dobladores y puse unos agarres para mantener la horizontalidad de las ramas y así queden más abiertas.
A partir de esta última poda o defoliación tocó dejarlas tranquilas durante unos dias para que se desestresaran .
A los 40 dias decidí que era su último dia de crecimiento. Crecieron bastante bien y coparon suficientemente todo el espacio así que decidí pasarlas tal cual a Floración.
Likes
13
Share


@BigDripFelgo
Follow
Sherbet is growing very well, fast and healthy. Want to take cuttings from this one but also want to top it, don’t know what route to take first?! Would also like to keep a clone to breed with GSC to make some Gelato 45, then eventually cross that with Zkittlez to make some Runtz and so on and so forth! Hopefully everything go as planned.

Likes
247
Share


@Polygus
Follow
A big hello to all the cannabis growing gardeners...and all the other visitors that came across my grow journal.
Just on harvest day I was summoned on a long quest...around 700 km. will be away for three days. I will update this diary as fast as i"m back. For now just the photos as no time for anything.
----------------------------------------------------------------------------------
Now cannabis smell is overpowering in my grow room I can finally write something about Spider Farmers 6-Inch Inline Fan with Smart Controller and Carbon Filter :)
As my grow room gets really stinky at times i always invest in a top shelf carbon filter almost twice the size of the one provided by Spider Farmer, to my shock Spider Farmer carbon filter absorbs the smells wonderfully well.
No smell leaks and that just when the fan is running at 5 out of 10 levels of output. The smart controller is something completely new to me, and had a lot of fun experimenting with it during the veg and early flower, when the smell began i needed it to run full time at level 4 or 5 to rid the fragnance.
All in all the whole combo is a great deal. If you are not as keen on technology the set without the controller is awesome on it's own. But to have some extra options open, the controller at the device throws at you a ton of settings you can use to optemiase you grow enviornment.
The SE 7000 is hanged at 40 cm. over the canopy and runs at 520W.
This whole grow's main sponsor is Spider Farmer. You can easily obtain all the great grow equipment we use at: spider-farmer.com
A big thank you to Jessie and the whole Spider Farmer crew for supporting me with the newest technological advancements in horticulture. Thanks to them what i do here is possible.
Thank you Zamnesia for giving me the opportunity to try out your stock.
zamnesia.com/uk/7686-zamnesia-seeds-do-si-dos.html
20% discount code: ZAMMIGD2023
Plagron did send us their Contest package for the Power Buds competition .
Thank you for your visit, please leave a like and hope to see you beck here in about a week.