
Likes
Comments
Share


@Bwright_315
Follow
A tale of two plant that are the same strain
Plant A is growing like a champ just waiting for tricone to be turn red10% but other then that not issues
Plant b I gave a hair cut and trim hoping the buds will fatten up also I love one of my light closer to see if that will help


Likes
8
Share


@North420Wolf
Follow
Very frosty buds the smell is going out of the house and I use carbon filters 😍 I can’t wait to smoke that shit , next week harvest soon new photos

Likes
11
Share


@LiamF
Follow
So after 106 days + 11 days drying im finally done with my first grow.
Got 97g dry buds + 30g shake
Way more then i anticipated.
Alot of the buds are pretty airy but the top ones qre pretty solid and all of them have amazing coat of trichomes.
Im so greatful i had this experience. I learnt alot and have way more confidence to grow more and my plan was to have my first grow to anwser all the questions i had.
Im cant believe i spent less then 300$ on this setup and harvested equals to like 1,500 - 1,700 $ of buds(prices in my country) thats definitely going to help me with the economy situation right now. And all this was stealth inside my closet, i had family members comming and didn't notice nothing i just had to turn off the blower fan since it's the only thing in my setup which isn't stealth.
I know i didn't gave her the best conditions but she showed me how strong is a Cannabis plant 😍
Im just starting my 2nd grow - Auto Northen Lights. Stay tuned


Likes
16
Share


@osmrducks
Follow
Day 29: The girls are looking great. I upped the nutes yesterday, as I have been giving them barely any at all. Will up them once again on next feeding. Looking like tomorrow. The main branch that I snapped off did not make it. Lesson learned on that one.
Day 30: Removed all other lights and added the HLG 550 V2 RSpec. Did some defoliation on the girls along with another feeding. Will do straight PH'd water next go. The girls are looking strong and healthy. 💪 Just on the small side. Still having to leave the tent wide open to subside temps and humidity.
Day 31: Nothing new to report. Looking very short and stubby and healthy!!
Day 32: Looking like they had some good stretching going on over the 3-day weekend. Will be needing fed tomorrow after work. May water a little less this time, as it is taking 2-3 days for them to dry out.
Day 33: Great stretch and bloom on the girls today! They are looking super healthy and strong! 💪 No smell yet.
Day 34: Girls are looking decent. Noticed some rusty looking splotches on the leaves. I'm thinking possibly Cal-Mag deficiency? Not sure.
Day 35: Not looking too happy today. I let them dry completely and watered with only Cal-Mag. Hoping the patchiness clears up for them!

Likes
8
Share
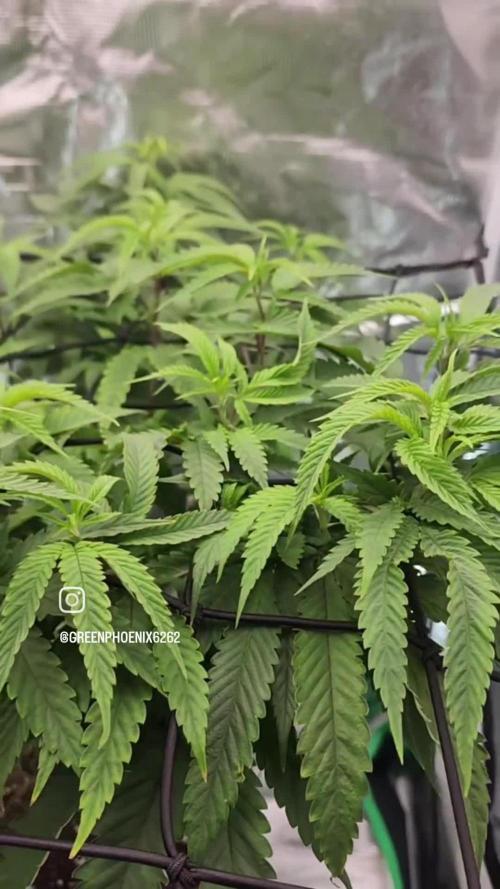

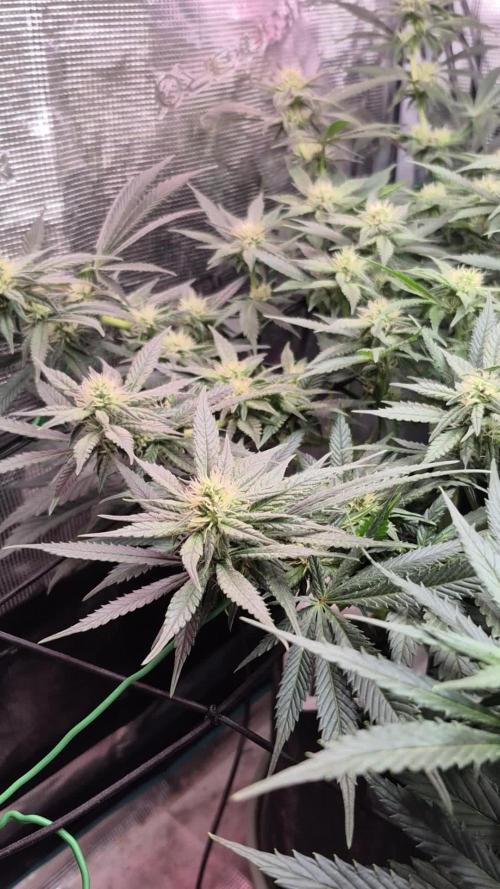
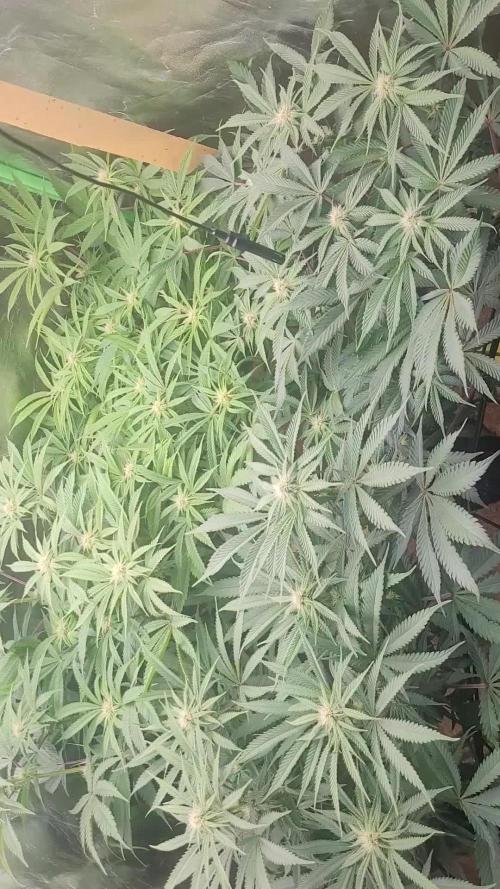
@GREENPHOENIX6262
Follow
02/15 (M) - Prepping her to flip into flower within the next week or two - Weaved her under net for better light coverage - Running 8 drip emitters with a 5 gallon res - 45 sec feed every 8hrs.
02/15 (C) - Thus far all 15 are still kicking but they did take a hit - starter roots for all 15 have begun - I will update with pics within the next 2 weeks - Running high temps and high humidity during lights on.
02/18 (M) - Mom is doing great - No deficiencies - Flipped her into flower today - running 8 line feed with 5 gallon res - clean water feeds for the first 2 weeks.
02/18 (C) - The babies to a bit of a hit they are looking a bit funky but they are rooting - some of the clones are growing their own babies - I will let them rock as to seeing they are rooting and showing new growth.

Likes
9
Share


@Siriuz
Follow
Alright guys, now we're up to date
I didn't write that much before because I wanted to get here first.
Actual date
Feb 10th
They're looking good
No nutrient burnt so far
24/0 Schedule
Watering every 2 days but continue to spray on them like 2 liters everyday to increase humidity lvl to optimal condition
Temp is OK
Wish it was better but have to repair A/C
Anyways bout the girl
This gorilla girl XL is slow but developing good, taking her time to grow while it's fully LST, she's redirecting her energy to the other stems and leaves plus main trunk and slowly continues to grow its main stem
We're already on 1900PPM
We've been giving nutes from the very beginning plus bloom to make sure she gets loaded, but certainly lil bit not to mess up too much with her so we already on 1300ppm bloom stuff 😏
Want to get big yield let's see if we as much as we want


Likes
19
Share


@BB_UK
Follow
So after topping all single heads into doubles she outgrew her space for me to continue the autos and other young plants in there so as the weather is aiding I took her out and out her in my room near the window and she is loving it! She’ll remain there for now as the females in bloom finish and then I’ll trim her down a little and place her in with the clones by then and bloom all together is the plan! And the clones are an amazing size so should be like 3-4 weeks ahead with them when they root and I’ll transfer them into 12l pots too! Even the outside other plant has set in and started to really grow! Even after her trim she has so much re growth

Processing
Likes
4
Share


@XoticGROW666
Follow
DAY 30 of flower 🌸🌼
Tall gelato41 pheno
Terps & nose comin of her is stupid Candy icecream lik 🍬🍭🍦🍧🍨🥜
Had a pheno lik this lik couple years ago bring
Most gelato strains I kno of got spicy & nutty herb lik terps but this pheno got that candy terps brings mi back to so much memories!! just the nose on her 🍬 yum yum can’t wait till see her fatting up

Likes
6
Share


@E5Jackalope
Follow
These pictures are from week 1 to week 5 of veg. I didn't waste no time working these plants pulling and topping and defoliation. I started with 2 plants and I belive I just stressed the one out so much it stunted the growth in the pictures you can tell a high difference in size. I ended up getting rid of the smaller plant. The one thing that I learned about the bigger plant is that it loved being at a ph of 5.5 it ate so much more and grew so much faster then if it was at 5.8-6.0ph. The veg stage was a great learning experience for me.
Likes
82
Share


@BigBadLion
Follow
Heeeey guys! 👋
Sorry for the very late update! I had so many things going on but now I can finally update the diary!
This is the last week before harvest and I kept an eye on my plants pretty much all the time! When I started to notice more amber trichomes were appearing I knew that my babies were finally ready! I just wanted a small amount of CBN, so probably I reached a good balance! Besides that I believe everything was quite relaxing and simple this week. Their smell was wonderful! I also trimmed by babies almost everyday, I kept removing the most ugly leaves to allow some of the lower buds to develop a little more this final week!
I stopped watering them 4 days before harvest and then I gave them one day of total darkness.
I hope you all enjoy the videos and photos!
Thanks!

Likes
82
Share


@Streptokok
Follow
Purple Buds are amazing.I could not be happier with their color, buds are chunky and frosty, the smell is indescribable. It reminds me a certain sweet from the childhood :) and I bet it will taste even better. Later, I will show some more pictures for Industrial CBD which is doing fine. I will move Purple Buds tomorrow out of my tent for two days in the darkness and then - harvest time :) CBD has got one more week to go I think. Happy growing to everyone.


Likes
23
Share


@Grey_Wolf
Follow
Fust Buds Originals Sour Diesel 5th week of flowering completed 18th Jan 2020
So that's another week gone by and the sour diesel auto looks pretty tasty to be honest. Not a lot of bulk and there is a tad too much internodal spacing for my liking
However the quality is definately there , with every bud glistening with trichomes and emitting a strong Diesel like smell.
The other plant (polyploid) isn't doing much really but will add to the final yield I get from this grow. Cheers for stopping by 👍
Likes
14
Share


@LazysHomegrow
Follow
The girls have recovered from the defol and are really filling out! 1 more week in the tub and then off to the flower tent.
I started spraying lost coast plant therapy this week as preventative measures. It's given the leaves a bit of a deeper green shine, but otherwise, the plants are looking great!


Processing
Likes
39
Share


Likes
53
Share

@TruTraTri
Follow
Defoliation. Took 2 small branches of Lexx and some more of Stanley.
Lexx and Kai are very similar.
Zev is a little bit "lighter".
Stanley is smaller with more branches. Well, I don't have the best access to Stan.
Canopy is not perfect but more or less even. Not too good visible with lights on, but they are slighty too green for my taste.. also fine.
Still got some height left to adjust. Final distance to lamp will be 35 cm, so they can grow a little - then I'll keep distance, still 15-20 cm left to raise the lamp. But I think stretch is more or less over.
Wattage 200W until BW 6-7 (😂😂😂😂).
Likewise to photography I am not too good with video. 😎
“I am still unable to locate the Stripper crew, Stan.” — Lexx
“Perhaps in the Dark Zone, I will be light.” — Kai
“I should be captain because I am the captain.” — Stanley Tweedle
“I used to want to die, but now I want to live.” — Zev Bellringer

Processing
Likes
9
Share


@Love2Bud_UK
Follow
Bud sites/ pistils starting to pop through now
...really happy with how she has turned out in the end, learned so much from this plant I've become emotionally attached...and took 2 clones
...really hoping they take to (never cloned on my life🤞)
Likes
8
Share


@Alejangrow
Follow
Time for chop is here 🤚🏼😎
Smells good, looks good. I have these three girls hanging upside down in a dark room with a heater on to keep between 60°F & 70°F & indirect airflow in the room to prevent mold & preserve terps. Aiming for 7-14 days drying time followed by a minimum of 21 days burping & curing. Will make a harvest post regarding dry weights smells & better flower pics in 4-5 weeks time. Until then check out my other grows & happy growing to all. 😊🌿
