The Grow Awards 2026 🏆 


Likes
Comments
Share
@Gabriel_OD
Follow
On Day 01, I germinated 5 Fat Banana (Auto) in a Rockwool tube and put it in a propagation tray with a dome on it. With room temperature above 80'F and humidity above 90%.
From Day 01 to Day 03, the temperature is around 85'F with humidity above 95%. The room temperature kept rising so I gave cool air in the room and removed the dome on Day 04.
On Day 04, the temperature dropped sharply from 85'F to 70'F. Humidity also dropped from 95% to 50%. To avoid the being too cold, I increased the temperature of cool air.
I gave cool air from 6 A.M to 12 P.M.
The temperature has been steady around 75'F and humidity 55% on Day 05, Day 06, Day 07.
On day 07, 4 seeds produced 4 leaves each and showed promising. So, I transferred into air pot. I used the growing soil from Superbud - Super Living Soil. I used 1 soil bag per 2 air pots.
Throughout the whole germination process, I used no nutrients and only used water to soak the rockwools.
As for light, I gave
>1500 lumen on Day 04
>7000 lumen on Day 05
>10000 lumen on Day 06
>12000 lumen on Day 03
This is my very first time growing cannabis so let me know your thoughts about how I should improved my germination methods.


Processing
Likes
10
Share
@YAKDADDYDWC
Follow
Nice colas popping up showing to see the hard work pays off


Likes
15
Share
@Roope
Follow
This week was fuked up multiple reason, first clonecubes has been molding and reason was old bread pack and ain looking good for lastones (maybe can still take clone maybe not?) And I didn't wash box as good it should wash (silly me

Likes
44
Share
@MadeInGermany
Follow
COMMENTED BY
MadeInGermany MadeInGermany 6 days ago
Unfortunately, I had to find out that my account is used for fake pages in social media.
I am only active here on growdiaries.
I am not on facebook instagram twitter etc All accounts except this one are fake.
Hello everybody :-)
Another nice week goes by.
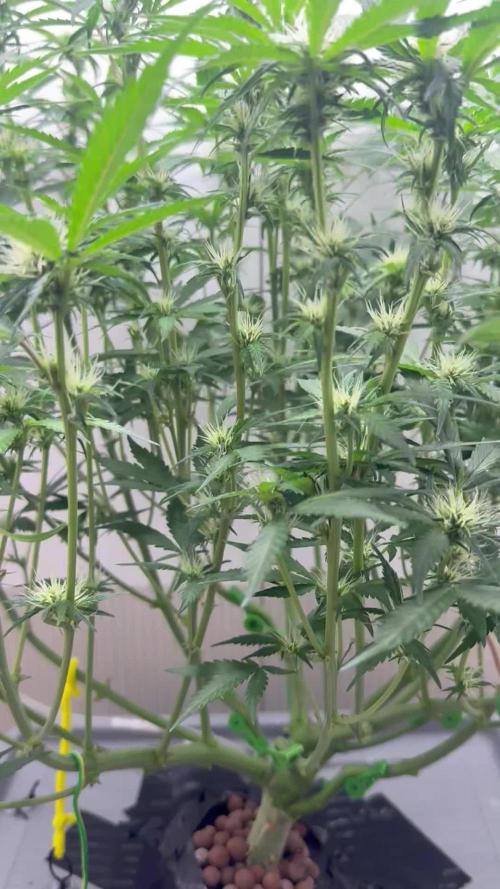
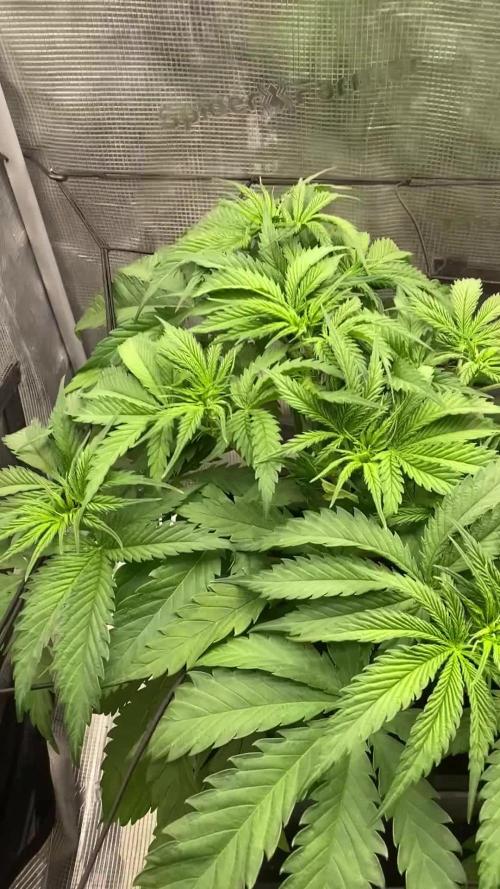
The network for the ScrOG was stretched :-)
It is really strange how fast it grows in Aerophonic :-)
no comparison to all media 👍.
I will put it in bloom again in the coming days because the stretching at Aerophnic is extreme :-).
With training I stopped so she was only topped 2 times in total.
As always, the water was completely replaced every 10-12 days and everything was cleaned.
She was checked for health so nothing stands in the way of her :-)
Have fun with the update and stay healthy
You can buy this Strain at
www.Zamnesia.com
Type:
Runtz
☝️🏼
Genetics:
Zkittlez
X
Gelato
👍
Vega lamp: 2 x Todogrow LED CXB3590 COB 55 W
1 x Sanlight S2W 62 W
💡
Flower lamp : 2 x Todogrow LED CXB3590 COB 55 W
1 x Sanlight S2W 62 W
💡 ☝️
Grow Aero System : Growtool 0.8
☝️
Fertilizer:
Canna Aqua Vega A + B , Canna Aqua Flores A + B , Rizotonic, Cannazym, CANNA Boost, Pk 13/14, Canna Cal / Mag, Canna Ph - Grow, Canna Ph-Bloom
☝️🌱
Water:
Osmosis water mixed with normal water (24 hours stale that the chlorine evaporates) to 0.2 EG. Add Cal / Mag to 0.4 Ec Ph with ph- to 5.2 - 5.8
💦 💧

Likes
56
Share
@Master_weeda
Follow
Bonjour à tous les padawans et maîtres
Stretch 15centimètres
Jour42 defolliation
Jour45 arrosage avec de l'eau 1ml topmax
Jour47 arrosage avec deux litres d'eau ph6.3 à laquelle j'ajoute 1ml par litre d'eau de topmax biobizz
Quesque le stretch ?
How to Control Stretching: Mastering Cannabis's Growth Push
Stretching is a natural growth spurt for cannabis plants, but it is known to affect final yield. We dive into what causes stretching in the first place and how to prevent it from invading your growing space.
There is little more irritating than an overloaded grow room. Stretching, the term used to describe the accelerated growth of cannabis stems, is part of the natural process of the vegetative phase and is influenced by plant genetics among other variables.
Unfortunately, stretching is a recurring culprit in poor yields and plants that are too long resulting in the wobble of physically unstable crops. Despite the threat it confers, stretching can be controlled by first examining the factors influencing growth and then creating a protocol to accompany these problems step by step. Controlling cannabis stretching requires an understanding of how plants interact with their internal and external environments.
WHY DO PLANTS STRETCH?
There are many reasons why plants are stretched, one of which revolves around the varieties themselves. Genetics play an essential role in determining the possible height of sativas, indicas and hybrids. While most indica varieties are reared to grow in a smaller and denser way, sativas often undergo significant stretches of up to sometimes almost 2 or more mothers depending on the species.
While stretching itself is not harmful, drastic flare-ups on the part of the stems can result in the potential loss of a large crop of between 20% and 30% in total. When thinking about species for your next home growing session, look for the standard size of each variety you are interested in so you can judge whether or not these species undergo drastic stretching during flowering.

Likes
142
Share
@MadeInGermany
Follow
Hey everyone :-).
The last plants were also placed in the bloom chamber kammer.
Everyone has made great progress this week 🙏🏻.
There is not much to say about this week, I think videos and pictures say more like words 🙈😎.
I wish you all a good start into the week :-) Stay healthy and let it grow 🙏🏻👍


Likes
2
Share
@IIIStonerIII
Follow
Week was pretty smooth. no ups and downs. just takin a few leaves every now and then. added Green Sensation and Hesi boost to the party. Shes drinking close to 2L per day. Or at least 10liters have been refilled over the last 5 days raising the overall EC from 0.9 to 1.2. We're heading into one of the final stages where buds will hopefully swell like crazy. Back in 7 days. Stay tuned. ✌️✌️

Likes
4
Share
@eldruida_lamota
Follow
Vamos familia, actualizamos la sexta semana de floración de estas Thunder Banana de Seedstockers, salieron las 3 de 3, 100% ratio éxito.
Aplicamos varios productos de Agrobeta, que son increíbles para aportar una buena alimentación a las plantas.
Temperatura y humedad dentro de los rangos correctos dentro de la etapa de floración.
La tierra utilizada es al mix top crop, por cambiar.
De 3 ejemplares seleccioné los 2 mejores para completar el indoor, cambié el fotoperiodo a 12/12 y también apliqué una poda de bajos, se ven bien sanas las plantas, tienen un buen color progresan a muy buen ritmo por el momento, las flores están tricomando que da miedo.
Agrobeta:
https://www.agrobeta.com/agrobetatiendaonline/36-abonos-canamo
Hasta aquí todo, Buenos humos 💨💨💨.

Likes
Comments
Share
@DrShotzUK
Follow
Not a bad strain inbox for info on growing it
Seem to keep wasting money with fast buds as out of 3 seeds I never get 100vpercent germination success never have so might try diffrent genetics from now on as I’m a loyal customer to them only ever grew there strains and they never send me care packages like other growers I see and other company’s have done to me so yeh time for
DRSHOTZUK 🍀🍀🍀🍀
Likes
5
Share
@Hempcules
Follow
WEEK 8 (DAY50-56)
This week, my beloved Dos-si-dos have put on a good amount of bulk. Due to the very small pots in the SOG setup and the aggressive mainlining, the plants have taken on quite a bonsai-like appearance. The stretch is still ongoing, but I don't think it plays a major role here. Otherwise, all the plants have developed beautiful, even shoots that are already fully covered with young, delicate buds.
The stems of the plants have already reached over 15mm in thickness, which I find quite impressive for their size. Essentially, one could say that Dos-si-dos grow quickly and in a very compact manner.
Starting this week, I have supplemented the fertilization schedule with Green Sensation from Plagron, which I now use about once or twice a week.
Additionally, I have adjusted my lamp upwards again. On average, I now have a light intensity of approximately 700 PPFD, which, over a 20-hour period, results in a DLI of around 55. I try to keep the humidity consistently below 60%.
The next few weeks will be interesting with this strain. I believe the plants will ultimately look quite peculiar due to their small stature but productive growth. Even aromatically, the Dos-si-dos are beginning to develop a pleasantly sweet scent.
With this code, you will receive a 20% discount on your next Zamnesia order:
ZAMMIGROW2024
Likes
33
Share
@PEAKYPLANTERS
Follow
hi to all, brothers of the weed! Welcome to Peaky's Enchanted Gardens
this week we will get rid of all excess nutrients by rinsing the plants with only pH balanced water and push them to also get rid of accumulated reserves!
kiss kiss to all
you are the best


Likes
20
Share
@4F1M6
Follow
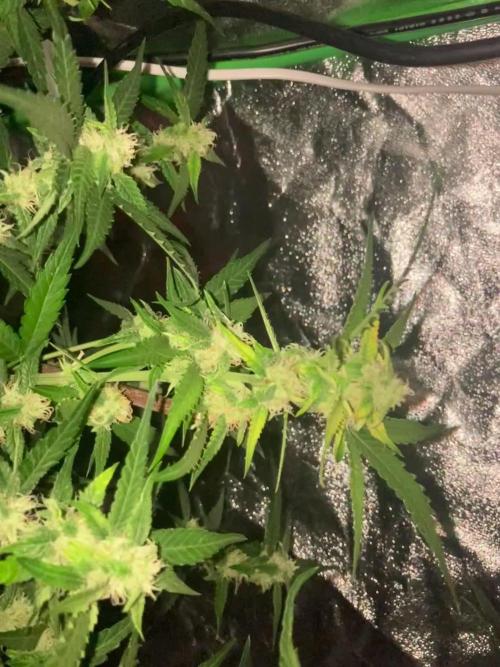
So she really stretched super hard when she geared up for bloom. Over night she hit me with 6 inches of growth. Leaving my grow light far to close for the fragile new growth that was coming in. It was a lot worse mid grow week last week. I re adjusted my lighting SMH. Her tips slightly recovered but They will never fully recover.
Other than that... shes stack amazing. Super bushy and LOTS of budsites. Bunch of donkey dock cola candidates. If I can stop beating em up with light intensity. She spans the full 2x2 like a beast. What an autoflower.
I preventative treated her again with Dr zhymes. Shes due for another shower mid week. Got her on a solid balanced feed. I will adjust levels as needed from here. Until next update. Happy growing and stay lit fam.


Likes
39
Share
@AestheticGenetics
Follow
4/30/25 one of the plants R3 got the chop at day 54 of flower and has been trying for 2 days.
The rest of the plants are still producing pistils and seem to have atleast a few weeks left but we shall see.
Likes
39
Share
@Rodamis_Prime
Follow
Started to remove a few leaves here and there . This tent is really impressing me and really putting a lot of size on the buds . So many tops that are just killing it , buds all the way down the stems . Tent is starting to smell pretty fruity . I was pulling leaves off that were covering other bud sites and my hand was sticky from reaching into the canopy and it smelled alot like blueberries. These girls are loving the Innovating plant products nutrient line up I have been feeding them , red sun helped to flip them super fast and I had bud formation 7 days after going to 12/12 schedule. 👍 Thanks for taking a look at my girls .

Likes
Comments
Share
@Brocolis_Grow_Br
Follow
Chegando ao final desta colheita como comentei na última semana, por conta das pragas. Elas já estão em um nível quase incontrolável e eu já sabia que perderia alguma parte para mofo, já que tomou muita chuva e os buds estão densos.
Colhi 71g, descartei talvez uns 2g logo de cara. Ficou secando em condições um pouco ruins, pois os dias muito quentes e úmidos continuaram. No final, a planta ficou bonita e densa, mesmo que pequena. Acabei ficando com 13g secos, sendo que 4g foram para o lixo com mofo. A quantidade foi super baixa, mas fiz um teste no vape e gostei muito. Mesmo com todas as desgraças que ela passou, o produto final ainda ficou bem legal, o que já me motiva para fazer novamente mas agora com um cuidado diferente e no indoor.
Likes
29
Share
@Ukfarmer420
Follow
Nfsot
Day 15 on the fastbuds auto run under the marshydro tsl2000.
All looking healthy, showing there lady parts so all ready to start the stre9tch over the next 2 weeks where I will be tieing down the nodes to try and get a nice even canopy before they start flowering.
I'll help you all updated 🙂
Likes
3
Share
