


Likes
Comments
Share


@TeknoRanger
Follow
🌱 Sour Apple⠀⠀⠀
🌸 flowering 9 weeks⠀⠀⠀⠀⠀⠀
💚 70% Indica, 30% Sativa⠀⠀⠀⠀⠀
💣up to 27% THC⠀⠀⠀⠀
👅Apple, lemon⠀⠀⠀
⚖️ 550g/m²⠀
Sour Apple was created by an intersection of the original Sour Diesel and a Pure Kush. It is an indica dominant hybrid with a combination of both indica and sativa effects. It has an delicious intense taste of sour apples and lemon and a gigantic potency.
The rockhard buds are covered in a thick layer of milky white trichomes and are packed with sweet resin. Users describe the high of the sour Apple as a strong mental shift, a uplifting head high that leaves you motivated and focused with a sense of overwhelming euphoria and social tendencies. This is followed by a slow fade into an intensely overwhelming couch-lock. Sour Apple sends her 27% of THC stright to your mind to kick you in other psychedelic spheres. We proudly present this unique goddess to all the growers in the world.
GROWING SOUR APPLE
When growing indoors it is a good idea using screen of green or sea of green methods. You can expect big yields of 500g or more per squae meter indoors, 700g per plant outdoors. The flowering time is 9-11 weeks. Indoors, Sour Apple is a vigorous grower with many side stems which can be trimmed to keep the plant in bounds. Indoors, the plants grow between 1,00-1,50 m depending on the introduction of the flowering phase, outdoors Sour Apple can reach four metres of hight.
MEDICAL USE
Because of its strong effects Sour Apple is an ideal strain for treating patients who suffer from conditions such as chronic stress or anxiety, chronic pain due to injury or illness, and sleep disorders (insomnia and sleep apnea). In low doses it is daytime suitable for medical applications, at higher doses, it is the ideal weed for medication at the evening.

Likes
7
Share


@Danger90946
Follow
Here we are in week six of flower and not a lot has happen this week other than the usual watering and letting her do her thing. Only trouble this week was updating GoPro had to try a few times. Other than that we got some rain in my home town and collected about 60 gallons that I'm going to use to finish the rest of the grow. Also, got my new AC Infinity CLOUDLINE T4, Quiet Inline Duct Fan System with Temperature and Humidity Controller, 4-Inch. I was really hoping this two plants would finish before the year ended, however, it looks like they got others plans. See you guys next week.

Likes
46
Share


@Daweed83
Follow
So i’ve learned this week that the plant at the back has “foxtail” buds which is probably due to some sort of light stress. Im not too worried about because apparently the quality isn’t damaged at all. Just very curious on why only one has it out of the 2 peanut butter. Anyway getting closer to harvest. Caaannot wait 😍🙏🏽
🖖🏽🖖🏽


Likes
5
Share


@pzwags420
Follow
At the start of week 6 Gsc and CH are going to get winterfrost for the next week than flush as they are fairly close to harvest. I will wait on WW as shes still a few weeks out.


Likes
146
Share


@Natrona
Follow
Apollo is coming along nicely and enjoying new friends, zkittles, gorilla cookies and granddaddy purple. All autos. Godzilla cookies is the runt.
Apollos schedule : Water & feed Tues, Thurs, and Sunday.
Increased TPS to early bloom at 9ml/g and Signal to 3ml/g. I think she could use more fertilizer but I'm gun shy on feeding too much.
I noticed the new leafs are thinner than veg leaves indicating early flower.
No pics on 10/12. My special day.
10/13 pics and video outside before first defoliation. And after defoliation.
Note to reduce impact of stress, I ground up 1 of my B vitamins and dispersed in water after feeding on Friday 13th.
Apollo is strong. Once I did definition you can really see her.
1)Very thick strong stem.
2) Very tight node structure. There was no space between the first and 2nd leaf group.
3) Side shoots almost as thick as the mail stem
4) roots at the soil top. I used MycoBliss in the soil and planting hole.
Friends, Royal Queen Seeds Is offering a discount on purchases
👉**GROWERS20** for 20% 👈
Https://www.royalqueenseeds.com
Link to Apollo
https://www.royalqueenseeds.com/us/56-f1-hybrid-cannabis-seeds
Variety: F1 Hybrid auto
Genetic Background: Lemon x Black Domina x Sugar Mangolia
THC: Very high
Yield: XXL
Height: 55 - 75 cm
Flowering time: 45 - 50 days
Harvest: 75 - 80 days after sprouting
Effect: Calming, Creative, Motivating , Physically Relaxing
Flavor: Citrus, Herbal, Lavender, Pine, Vanilla
Major terpenes: Caryophyllene, Farnesene, Myrcene, Terpinolene
Climate: Short Summers
====================================
Equipment: AC Infinity
CLOUDLAB 844 – Advance Grow Tent 48”x48”x80”
CONTROLLER 69 PRO – Grow Tent Controller
CLOUDLINE LITE 6 - Inline Fan 6"
IONBOARD S44 – LED Grow Light Board 400W
CLOUDRAY S6 – Oscillating Circulation Clip Fan
Carbon Filter 6”
Pots: 5 gallon Air pots
Soil Fox Farm Happy Frog amended with worm castings, dolomite lime and mycorrhiza.
Seeds provided by Royal Queen Seeds Check them out 😎
Https://www.royalqueenseeds.com
Link to the seeds
https://www.royalqueenseeds.com/us/56-f1-hybrid-cannabis-seeds
use Discount Code
👉 **GROWERS20** for 20% discount 👈
Nutrients: Total Plant Solution
>TPS1
>Canopy
>Signal
Amended soil recipe #2 used for soil prep.
https://www.paramountseedfarms.com/super-soil-recipes/

Likes
6
Share

@Space_kydebt
Follow
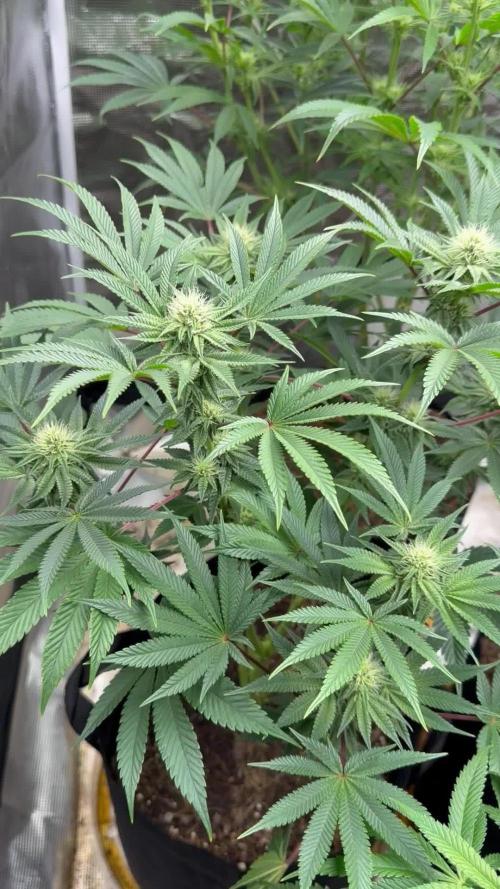
Hello and good afternoon 😃 well I popped four and I still have four but what great about these they all smell exactly alike , different looks on two phenos but they all seem to be doing well I have one that looks like she more or less on the sativa side which is cool but I think in flower still look stunning . These plants grew really tall release three of them did . There on keep out this one and it the sativa dominant one .. purple since she started but yeah love the plant I need to see alittle more to really get detailed but they are not going fast lol . But good flowers usually to longer time to process so will see .. but the all have the kushy nose so far and one smell kinda of orangish.. lol peace out people

Likes
29
Share

@Hempface86
Follow
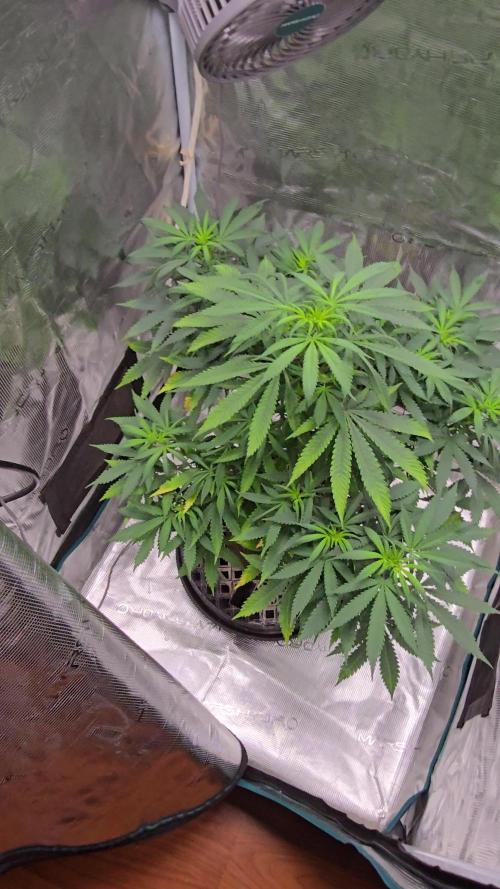
Okay, ladies and gentlemen, I am starting to get concerned.... This girl should i've been in flower for a while now considering she is in such a small pot ( 1gallon ) ... i'm starting to think I'm going to have to flip her tonight... I'm starting to think she is not an autoflower...idk tho .. Herbies Seeds thank you for letting me showcase her. If indeed she is not an auto flower, I would not hold it against you as I know mother nature is unpredictable and nobody, not one breeder, out.There is perfect ... hopefully everything works out well.But she's running out of nutrients, because she should be flipped already.. I hope everybody's doing well.God bless and happy growing 🙏 ✌️.
P.S i flipped her to 12 and 12 two days ago, and she is now starting her stretch, so this is not an auto flower... Especially being in such a small pot, she should be almost ready for harvest, and as you can see, she's running out of nutrients because the growdots our for a cycle of 5 weeks of veg not 9 or 10 ... i top dressed with more grow dots.We'll see how this pans out... I'm not even sure if it's purple haze at this point... Hope everyone is doing well!! God bless 🙌
Likes
9
Share


@Kushizlez
Follow
Day 69 (March 6th)
Just gave everyone their last watering. I’m going to harvest and wash everything tomorrow night on day 70. I‘m not going to do that whole 48 hours of darkness thing because I didn’t see a difference last time I did it. In fact, it made my plant under watered before drying which caused it to dry too fast. Slurricane and cheese will be washed with h2o2 and the rest will just be rinsed off in warm RO water and hung up. Before and after washing I’m going to go over each branch with a flashlight and make sure there is no dog hair or debris in or on the buds. I will be drying in my spare bathroom (that no one uses!) from hangers. Aiming to keep it around 60-62F and 50-60 RH. Hoping for that 10-12 day dry. I wanted to do a full plant hang but the tent got pretty dirty and I would feel more comfortable just cutting and rinsing everything off branch by branch. I’m going to try my best to keep the full plant intact. Got my humidifier hooked up and running RO water because with tap water it deposits calcium and lime all over the buds and walls. For air flow I’m just indirectly running a small usb fan. I’m not worried about air flow in the bathroom honestly. It stays nice and breezy down there anyway.
Got the food grade peroxide and RO water to wash up the slurricane and cheese. Everything except for the cheese and garlic#1 is looking more than done. Trichomes all look pretty well done. Some of them have even burst open. Smells are all super ripe and mature too. Can’t wait to smell each individually in jars.
Next week I will recap what went wrong and what I will do differently next time to keep it from happening again.
(Day 70F) Just got everything chopped, washed and hanging. The vast majority of the PM was washed out but I can still see very small amounts. When they dry out I can shake the branches a bit to get the rest off. At very least it’s sterile now. There is no question I lost some potency while washing but the amount is negligible for a much cleaner product.
I could see lots of dirt and other debris float to the surface of the water after being washed. And no those are not trichomes, those sink to the bottom. I could put that nasty water through a bubble bag and wouldn’t get all that much. Although it probably does remove a lot of the actual trichomes heads. I’ll have to check with the microscope.
Everything is rigged up for a nice slow dry. Temp is sitting at 64 and RH is at a nice 60%.

Likes
61
Share


@Dunk_Junk
Follow
Well she's looking fine this week!
Romping through flowering.
She's getting very sticky!!!
Still no sign of purple. 😭


Likes
29
Share


@DesDeGrower
Follow
Pow pow and we are in week 4 of bloom already 🤘
Girls just stopped stretching and getting to 46inch in highest point. From now energy is going only into forming flowers what we can see day by day.
From how thing are looking in next few days we will introduce Overdrive in the feeding regime aiming to finish them on week8.
Stay tuned with photo updates 🙌
Photo update - day 3 🙌
Video update - day 6 💥
Processing
Likes
Comments
Share


Likes
110
Share


@FoTwenny
Follow
⏹️⏹️⏹️⏹️⏹️⏹️⏹️⏹️
⏭️ WEEK 7 - BLOOM ⏮️
⏹️⏹️⏹️⏹️⏹️⏹️⏹️⏹️
⏭️ Sept.19 - Sept. 25 ⏮️
⏹️⏹️⏹️⏹️⏹️⏹️⏹️⏹️
🙋♀️Fo' Twenny here!🙋♀️
Back with another update on our Grandaddy Purple cultivar from breeder Blimburn Seeds! It's week 7 and all is looking great! She is getting super frosty and starting to present some really nice purpling. She smells of fuel right now. She is incredibly resinous and frosty! She was great the first time I ran her, but she is on a whole other lever under these quantum boards! This is going to be some very potent medicine!
Now on to the details!
________________________________
9/20 - Day 44 of Bloom: 🚿FEED DAY!🚿
She received approximately 3.25 gallons of nutrient solution. Of 10 gallons mixed, 36 oz is divided by 3 autoflowers and the remainder of the solution was shared by 3 plants.
👩🔬NUTRIENT SOLUTION👩🔬
⬇️Mixing Rundown⬇️
12 oz tap H2O run through x2 KDF filters
Start ppm 630
Start ph 7.8
.5 tsp/gal Fox Farm Gringo Rasta Cal-Mag
1.5 tsp/gal Fox Farm's BIG Bloom
1 tsp/gal Fox Farm's Grow Big
1 tsp/gal Fox Farm's Tiger Bloom
.5 tsp/gal Fox Farm's Kelp Me Kelp You
1.5 tsp/gal Fox Farm's BEMBÉ
.125 tsp/gal Fox Farm's Cha-Ching
pH: 5.8
I always make sure pH is in the range of 6.0- 6.6 prior to adding any microbial innocclants. pH already in range, no adjustments needed.
Add 5 tsp of pH up
pH: 6.1
1 tsp/gal Grower's Choice Recharge
.6 ml/gal Mammoth P.
pH: 6.3
PPM: 1430
________________________________
9/23 - Day 47 of Bloom: Photoshoot and filming! 📸 Some light selective defoliation. 🌿
________________________________
9/25 - Day 49 of Bloom: I have been regularly checking the moisture 💦 level in my medium and she still isn't quite ready for her next watering. Based off where it's at now, I will plan to water tomorrow.
_________________________________
Want to see all the strains I have running?
Please check out my other diaries & give me a follow!
Happy growing my friends! ☺️🌱
Thank you for stopping by my garden!
Peace, ☮️✌️
Love, 💚🤟
& Frosty Nugs! ❄️🌲
- Fo' Twenny

Likes
3
Share


@blacknpearl
Follow
jule 15. Megacrop ~2 litre feed number 14. 1.32gr/litre. ph 6.14
jule 18. Megacrop ~2 litre feed number 15. 1.32gr/litre. ph 6.2
This week has been a troubled one. Had some issues with overheating. I believe to be related to the cooker hood carbon filter I was testing on my pc blower/extractor. Removed it and it has improved pretty fast.


Processing
Likes
5
Share


@zombikush81
Follow
Beginning 4 weeks of flowering ...! for any question or curiosity write me ... peace and love my friends 🤙👍🤟✌️


Likes
9
Share


@Silverback_Guerilla
Follow
TUESDAY 9/3:
I almost want to delete this diary..not even worth my time I'm afraid.
She seems to be stuck. Hasn't really recovered from her root problems despite being transplanted into a looser mix with a couple extra gallons of soil. She doesn't look any worse, but she also doesn't look any better, and the calendar tells me that there isn't much time left for things to change....😟
WEDNESDAY:
I was out at the property for awhile today, hosed off the horsies and cleaned their hooves really well. I was there long enough that I was able to move the plants into direct sunshine for an extra couple hours. I fed her with a half-gallon of water including bembe, terpinator, tiger bloom, beastie bloomz, armor si, and big bloom.
THURSDAY, FRIDAY, SATURDAY, SUNDAY:
I was sick as a dog . 2-day stomach virus, followed by an acute pancreatitis attack...
😷
MONDAY:
I gave her about a half-gallon of aquarium water with some bembe, beastie bloomz, and tiger bloom.
Likes
4
Share

@Drobubba
Follow
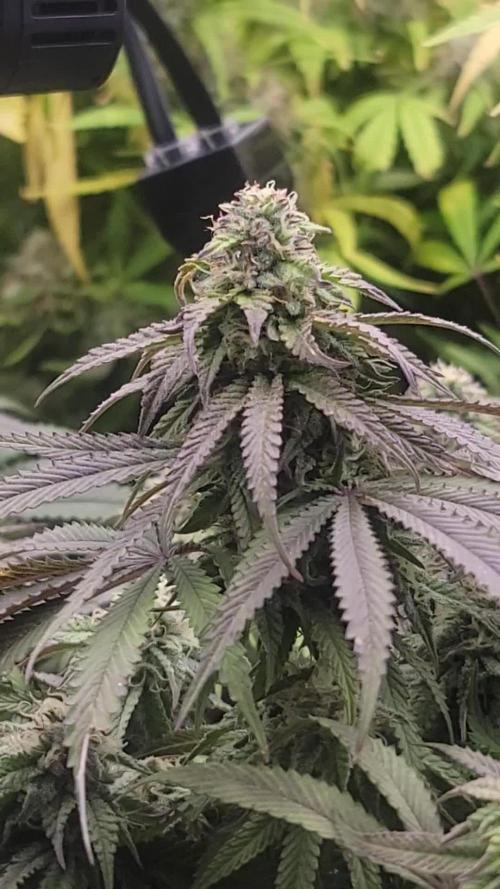
Week 12 day 84 from seed. Im trying to be patient. Ill give them another week or so. The banana bread auto suggested seed to harvest 75-85 days.The all gas og auto suggested seed to harvest 90-100 days. The kalini asia is 4 weeks of flower.im not sure how im going finish her, considering i have one tent. Nonetheless hope im making the right call. Fingers crossed!!!.
Likes
2
Share


@4F1M6
Follow
Made the flip to flower to start this week. Did a bunch of lst to get the side branches booming for the Scrog. Put a second net right above her to start things off spacing and structre wise. Second she starts to stretch its scrog game on!
Got her on a well balanced diet to support her transition period. Can't wait to see her explode and take off! Start rowing me out some colas! Treated her with lost coast as a preventative. Next up us dr zhymes in 5 days. Until next update. Happy growing and stay lit fam.
Likes
7
Share


@julianw12321
Follow
Another solid week with more sun, but the plants got kinda shot up from wind. No damage, but after a whole night of wind the plants were leaning a bunch and looked visibly frightened. Strung up the wedding cake for early training and it’s looking a lot better, CC seems to have mostly straightened itself out. Let me know what you guys think!

