





Likes
128
Share


@Tropicannibis_Todd
Follow
💩Holy Crap We Are Back At It And Loving It💩
Growmies we are at DAY 21 and she's just killing💀it👌
So I'm starting to see she needs watering every single day and now need nutrients 🙃
Lights being readjusted and chart updated .........👍rain water to be used entire growth👈
👉I used NutriNPK for nutrients for my grows and welcome anyone to give them a try .👈
👉 www.nutrinpk.com 👈
NutriNPK Cal MAG 14-0-14
NutriNPK Grow 28-14-14
NutriNPK Bloom 8-20-30
NutriNPK Bloom Booster 0-52-34
I GOT MULTIPLE DIARIES ON THE GO 😱 please check them out 😎
👉THANKS FOR TAKING THE TIME TO GO OVER MY DIARIES 👈

Likes
5
Share

@PhinolaGreen
Follow
8. Woche
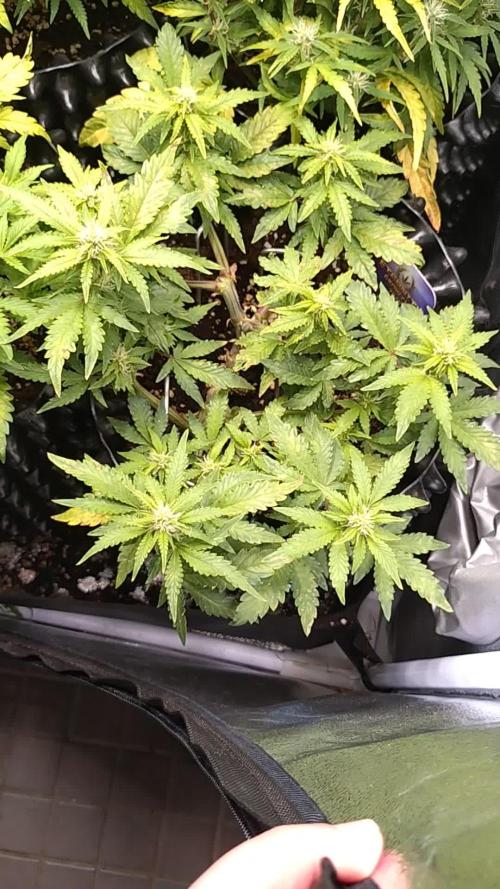
Sticky Broccoli Auto von Zamnesia hat die Strapazen vom Mainlining Prozess hinter sich gelassen und konzentriert sich nun auf die Ausbildung der Blüten. Mir gefällt die Sorte wirklich sehr gut bis jetzt, stress steckt sie gut weg, arbeitet Fleißig und Produktiv. Wenn sie mir auch noch von der Wirkung gefällt, werde ich sie wohl auch in Zukunft nochmal ausprobieren und dann normal wachsen lassen 😊
Leider habe ich paar Probleme mit Mg durch mein Leitungswasser, Bittersalz hat sie schon bekommen 🙄


Likes
24
Share


@Elixx
Follow
In this week wheatear was very bad. It rain a lot and plant suffer, It was attacked by mold in one of the apical buds. I remove it in the first stage of mold, I hope that spores was not spread on the rest of plant🌧️😥

Likes
4
Share


@all_about_420
Follow
Die finale Phase der Vegetation war ereignisreich. Pünktlich zu Beginn der Woche stand für die Jelly Donutz der finale Medienwechsel an. Die Dame wurde erfolgreich aus ihrem alten Schuh in den großen 15-Liter-Stofftopf umgetopft, um dem Wurzelsystem maximalen Freiraum für den kommenden Stretch zu bieten. Die Oberfläche wurde zudem sauber abgedeckt. Beim Blick auf die Wachstumsstruktur im Nachhinein fiel auf: Das eigentlich geplante zweite Topping wurde schlichtweg vergessen. Dieser ausbleibende Schnitt wird das finale Wuchsmuster natürlich ein wenig beeinflussen – die Haupttriebe durften dadurch ungestört weiterziehen, anstatt sich nochmals aufzuspalten. Das tut der brutalen Optik des Humboldt-Strains jedoch absolut keinen Abbruch. Die Pflanze strotzt vor Vitalität, steht extrem stämmig im Substrat und hat den neuen Topf zügig angenommen. Zum Ende der Woche hin waren alle Parameter im grünen Bereich, sodass die Beleuchtung nun offiziell auf den Blüte-Rhythmus von 12 Stunden umgestellt wurde. Wir verabschieden uns aus einer starken Vegi und sind bereit für die ersten Blütenansätze!

Likes
16
Share


@Bread_n_Buds
Follow
I needed some CDB, I really push a lot of THC in my body and I feel the need to balance this thing a bit.
I asked my friends at Zamnesia cpsa for advice on growing and I got this really beautiful plant, a pleasure to grow in the F1 Hybrid Automatic version and we have two plants.
The one you see in most of the photos that was worked with a main lining that I would say was successful is very beautiful in structure and has a fast flowering such that we are moving on to the green sensation. Unfortunately we have been a bit over fertilized and we are carrying some aesthetic defects,
but nothing particularly worrying I am sorry for the unsightly yellowing of the tips of the leaves.
Of the other one left to grow straight I will only put a few photos in the growbox and as soon as it is ready however it will have the full service like the others, the plants worked with the techniques have stolen a bit of the scene from the plants left to grow straight which are naturally finishing a bit earlier.
We are still using 100% organic soil, fertilizers and all the additives recommended by Plagron. We are still in the early flowering program that keeps the same additives Power Roots, Sugar Royal, Pure Zym and adds the flowering stimulant Power Buds. Of course the basic fertilizer is now Alga Bloom.
The Green Sensation hero of the late flowering will arrive and at the same time it will be time to remove power roots and a week later the enzymes. (The plant left to grow straight and straight in advance has been taking it for a while)
---- Decide on the right soil and calculate your fertilization program based on the soil on the official website. -- www.plagron.com
Try a seed of this variety that drives us crazy..
---- https://www.zamnesia.io/en/10672-zamnesia-seeds-green-cure-cbd-f1-automatic.html
Description Zamnesia // Zamnesia's breeding team has harnessed F1 genetics to bring you Green Cure CBD F1 Automatic. This autoflowering cultivar is easy to grow, accessible and reliable for all levels of experience. Ready in just 11 weeks, growers can expect impressive yields of tasty buds with a clear-headed effect that's ideal for meditative moments.
All the best that mother nature can offer is on ---- www.zamnesia.com
Likes
19
Share


@cpt420
Follow
Overall I'm extremely pleased with the grow and yield I got from using the Autopot system. By far my biggest yield yet. The clones were happy with the growing conditions and new setup. Would recommend the Autopots to anyone wanting to try something new or doesn't have the time to hand water or be with their plants 24/7. Also collected some decent kief/pollen from the dried leaves which can be used for smoking, making of hash or dab. Still deciding what I'll do with it. Thanks for making the effort to view my dairy, see you with the next one. Much love and happy smoking my fellow growers.

Likes
5
Share


@123Grow
Follow
Filling out the trellis net. Looks like another 2-3 weeks until I flip the ladies. Using SST’s, LABS and natural inputs for this grow. I have made some mistakes in the past using Organics, but have figured out HOW to use them for an entire grow. The vegetative state, I have never had a problem with. The transition into the first 3 weeks is when I have had the most issues. After a little research and testing, I finally have a basic blue print of how to feed plants in flower for 10-12 weeks now or shorter. Mark Bowell from Perfect Gardens on YouTube and Mr Canucks Grow from Canada are my largest information inputs. Final Thank you to Mr McGooz for keeping me in the know.
10-11: yes, some of the stalks are turning purple. This is not due to phosphorus, magnesium, or any deficiency. It is due to the light being too intense for the plants. I am at the max distance and running the light at 30% ( it’s a 600 watt 🤣🤣). Soooo yeah, that purple is going to stay for a bit. Purple with other leaf discoloration or senescence IS a problem, purple stems with NO leaf issues isn’t serious issue. Cant it be fixed? We are going to find out….Photosynthesis Plus will be on hand in the next 5-6 days. This permits the plant to USE more of the photons ( yes, I have carbon in my media). This should minimize the purple and allow me to UP THE WATTS 🗣️🗣️
10-14: spoke to my “guide” and we made the decision to go ahead and flower these ladies. We saw how much stretch there is to be had and realized we are currently filling the trellis by 75%. We are estimating the entire 4x4 area to be completely filled. I defoliated and pruned the smaller sites off the lower areas of the plant. Not quite lollipopping, just selectivity choosing sites to keep and bones that will get in the way.
For transition I am using a ratio of 1:1:1 on NPK’s to ease the flip. The ppm’s will be between 750-800. Once we reach early flower, we switch the NPK’s to 1:3:2 ( flower girl by Dr Earth OR Fish bone meal and langbenite). I switch each feeding between the two for 5-6 weeks. At week 7 we switch to 0:3:3 ( seabird guano and Langbeinite) at 500 ppm’s. Week 8 the same feed. Week 9 kelpseaweed/water Only ( these are 10 week cultivars). Thank you for taking the time to read.
10-16 😍😍😍 Plants are starting to show deficiencies!!! Yes, normally one freaks out 😂😂😂 The slight deficiency is a sign that I can go ahead and start: The Flowering Cycle. When using Organics, you have to use your eyes because nothing is specific. Meaning: you have to see when the amendments are running out to A: Top Dress B. Make compost teas. We are going the compost tea route for flower. I made a video showing exactly what I use. The ratio is 5-5-5 ( yes earlier we were going to use 2-2-2, but we found out there is no calcium or magnesium in the all purpose mix by Dr Earth…another reason to learn to read your plants).

Likes
2
Share


@HighZenBerg
Follow
Start of week 6
The ducks are healthy and little white hairs stuck out on the branches. Can’t wait to see them flowering
Also the growth progressed well. They got a lot of leafs and the side branches developed nicely
Keep in touch !
Cheers
HighZenBerg
Likes
3
Share


@GoldenWeedGrower
Follow
WEEK 12-18 of May: Only few buds remaining for the blooming phase and only one for the left one, I'm curious to see the outcome. The final count of buds should be around 12 buds.
Processing
Likes
Comments
Share


@MG2009
Follow
07/07/2020
She drank 2 liters of OVERDRIVE this week, so one more week watering with OVERDRIVE and MICRO to supplement growing seeds, they getting fat.
07/10/20/20
New pistils popping out on sides of buds none on top so filling out. I guess she responding to (OVERDRIVE) Her last stage of flowering has begun should be done in 2 weeks 🙏 so one more week watering with OVERDRIVE and MICRO then water only for the flush week. And Harvest???


Likes
8
Share


@Kawannabic
Follow
RESUMEN DE CULTIVO: Esta cepa es brutal, resiste muy bien las manipulaciones y genera cogollos grandes y prietos, también soporta una fertilización poco controlada y ligeramente excesiva. Perfecta para alguien con pocos conocimientos (este es mi primer cultivo)
OLOR: No tiene un olor fuerte, una buena opción para quien necesita disimular el olor del cultivo.
SABOR: Su perfil de terpenos es muy bueno pero suave, varia en funcion de la planta, algunas tenían un sabor ligero, especiado y tirando a lo picante pero una en particular si sacó matices de olor y sabor muy dulces y afurtados entre el mango y el platano realmente buenos, me encantaría tener una madre de ese ejemplar.
EFECTOS: Tiene altos porcentajes de THC, a tumbado a más de un amigo, me parece una buena opción si buscas una variedad potente.
LO MALO: Poco malo tengo que decir, aunque tampoco es tan sabrosa como me hubiera gustado. Seguiré buscando otras variedades pero seguro que repito.

Likes
10
Share

@DogDoctorOfficial
Follow
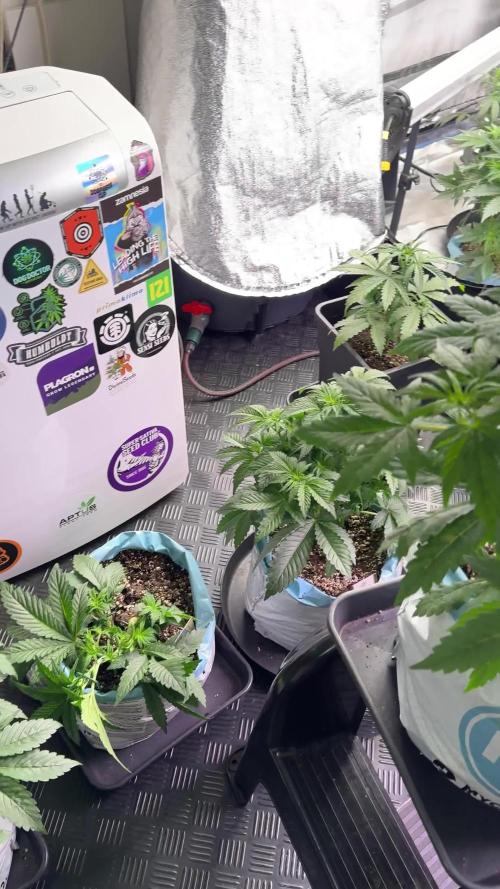
🌱 Ghost Train Haze — Week 5 From Seed (Late Veg / Pre-Transition)
This week nature reminded us who’s in charge.
Outside temps dropped to 4–5°C with 90–95% humidity, and instead of fighting it, we adapted — and so did the girls.
🌡️ Environment
• Tent temperature: ~21.8°C
• RH: ~58%
Considering the outside conditions, this is a very comfortable and stable environment, and the plants are showing zero stress signs. Leaf posture is relaxed, growth is steady, and overall vitality is excellent.
We’re embracing seasonal changes rather than forcing extremes — and the plants are responding beautifully.
⸻
Nutrition & Watering Strategy
Hand-Watered Plants
• pH: 5.9
• EC: 1.43
• New addition this week: CalMag Pro — 1 ml/L
This is not a reaction to deficiencies.
Calcium and magnesium become increasingly important during this phase due to:
• accelerating cell division
• structural development
• increasing transpiration as light intensity rises
Introducing CalMag before problems appear helps maintain:
• stronger cell walls
• stable nutrient uptake
• smoother transition toward flowering
This is prevention, not correction.
⸻
Autopot Zone
• EC: 2.29
• pH: 6.0
• Solution temperature: ~22.8°C
In the Autopots we’re running minerals only.
Organic inputs don’t behave consistently in passive systems and can lead to:
• biofilm buildup
• line blockages
• unstable nutrient availability
Keeping this zone clean, mineral-based, and predictable ensures long-term stability.
⸻
💡 Light & PPFD
• PPFD range: ~700–850 (depending on plant size)
• Top light: 100%, unchanged
• Plants are praying constantly and clearly growing toward the light — no pushing, no forcing.
Under-Canopy & Inner-Canopy Lighting
• Beginning of week: OFF
• End of week: ON (very gently)
This is not to increase total PPFD yet.
The goal right now is education, not intensity.
By introducing photons:
• from below
• from inside the canopy
• from multiple angles
…we’re teaching the plant early that light is everywhere, preparing structure and bud sites for later stages. Intensity will increase only as the plants evolve.
⸻
🌿 Training & Structure
• No heavy training
• No aggressive defoliation
• Only:
• leaf tucking
• gentle branch bending
• very light LST
These plants are naturally compact, with:
• beautiful branching
• large, healthy leaves
• lush green color
• excellent vigor in the Autopots
Growth is slower compared to other plants in the room, which may be linked to the sativa-leaning genetics. In my experience, sativas often:
• develop more slowly early
• take longer to finish
• but reward patience later
We’ll let the plant tell the story.
⸻
🌸 Veg or Flower?
This is a 12/12 from seed run.
Some plants in the room are already showing pre-flower.
Ghost Train Haze is not — and that’s completely fine.
She is still in vegetative growth, building structure.
Delayed transition can often mean:
• more stretch later
• potentially larger final size
But we don’t guess — we observe.
The plant flips when she’s ready, not when the calendar says so.
⸻
🔁 Quick Recap for Newcomers
• Week 5 from seed
• Still vegetative
• 12/12 light cycle
• Stable environment despite harsh weather outside
• Preventive CalMag introduced
• Clean mineral strategy in Autopots
• Multi-angle lighting slowly being introduced
• Minimal intervention, maximum observation
⸻
🔮 What to Expect (and What Not To)
Expect:
• continued structural development
• slow, steady growth
• eventual self-triggered transition
Do NOT expect:
• forced flowering
• rushed development
• aggressive training
This run is about letting the plant express herself naturally.
⸻
🙏 Thanks
Big thank you to everyone following along, supporting, and sharing knowledge.
Appreciation as always to the sponsors — including Lumiflora for the under-canopy lighting — and to the community that makes these shared journals meaningful.
Growers love
Onward, calmly and patiently.
👽 New team member
Meet Mr. Baggy
Our new fluffy alien/beaver/whatever-he-is friend, won through a Grow Diaries contest.
Expect to see him around — he’s officially part of the grow now.
Week 5 Veg/pre-flower | 8×8 Tent | Master Conditions
🌍 External Environment (Context) • Outside temperature: ~5 °C
• Outside RH: 92–96% (very high humidity)
• Strong seasonal pressure influencing internal stability
⸻
🌡️ Internal Tent Conditions
• Tent temperature: ~21.8 °C
(noted drop due to cold external temps)
• Tent RH: ~58%
→ Very good considering outside conditions
⸻
💨 Airflow & Circulation
• Primary airflow: Bottom → top → wall return
• Pattern: Full-room vortex circulation
• Additional fans: Central airflow to break blind spots and mix layers
• Goal: No stagnant pockets, uniform VPD across canopy
⸻
💧 Water Source & Rationale
• Water: Dehumidifier water + rainwater
• Base EC: force
• Systems designed to support plant intelligence, not override it
FOR DISCOUNT CODES AND MORE JUST FOLLOW THE LINK https://website.beacons.ai/dogdoctorofficial
📲 Don’t forget to Subscribe and follow me on Instagram and YouTube @DogDoctorOfficial for exclusive content, real-time updates, and behind-the-scenes magic. We’ve got so much more coming, including transplanting and all the amazing techniques that go along with it. You won’t want to miss it.GrowDiaries Journal: https://growdiaries.com/grower/dogdoctorofficial
Instagram: https://www.instagram.com/dogdoctorofficial/
YouTube: https://www.youtube.com/@dogdoctorofficial
⸻
Explore the Gear that Powers My Grow
If you’re curious about the tech I’m using, check out these links:
🔆 Lighting & Environmental Control
• Future of Grow — Advanced LED lighting technology
https://www.futureofgrow.com/
DISCOUNT CODE: DOG20
• Lumiflora — Under-canopy LED lighting
https://lumiflorade.com/
• TrollMaster — Environmental controllers and automation gear (past collaboration)
⸻
Genetics
• Zamnesia Seeds — Genetics used in this project
https://www.zamnesia.com/
⸻
🌱 Soil, Substrates, Boosters & Root Support
• Plagron — Substrates, bio mixes, and supportive products
https://plagron.com/en/
⸻
🎒 Storage, Curing & Preservation
• Grove Bags — Curing and storage solutions
https://grovebags.com/
⸻
📸 Photography Equipment & Tools
(Not sponsors, but part of my creative toolkit)
• Sony A6700
• Sony full-frame macro lens + few more
• Stacking photography workflow - learning
• iPhone (for behind-the-scenes shots)
We’ve got much more coming as we move through the grow cycles. Trust me, you won’t want to miss the next steps, let’s push the boundaries of indoor horticulture together!
As always, this is shared for educational purposes, aiming to spread understanding and appreciation for this plant. Let’s celebrate it responsibly and continue to learn and grow together.
With true love comes happiness. Always believe in yourself, and always do things expecting nothing and with an open heart. Be a giver, and the universe will give back in ways you could never imagine.
💚 Growers love to all 💚
📸 P.S. – The Eye Behind the Lens
All photos in this diary (for now — except for the ones showing the camera, which I took with an iPhone) are taken with a Sony A6700 paired with a Sony full-frame macro lens and a few more.
Photography is part of the story — it’s how we share the fine textures, the glow, and the quiet details that words can’t always capture.
I’ve also started experimenting with photo stacking — a technique where multiple images, each taken at a slightly different focus point, are layered together to create one perfectly sharp image from front to back.
It’s not digital enhancement or AI; it’s pure photography — a way to reveal the plant’s beauty in microscopic depth, from trichome to petal.
You’ll even see a few shots of "ghost me" capturing the shots — camera, lens, setup — because every grow deserves not just to be cultivated, but documented like art.
FOR DISCOUNT CODES AND MORE JUST FOLLOW THE LINK https://website.beacons.ai/dogdoctorofficial
NEW DISCORD - Official Server Invite Link : https://discord.gg/ksjAkA5T74
Likes
29
Share


@DeadwebsiteBoringcommunity
Follow
Hello folks wonderful news it's getting a little more fragrant in the tent there.. Decided to add some pics of the other plants.. Anyway all is well. A bit of ph damage again just being lazy and was a busy week but we all made it through relatively unscathed and everybody is happy.. 4 weeks.. I can't wait for this harvest.. Long time these plants have been kicking around and here we are.. Getting to the home stretch.. Bulking and all that jazz.. Very pleased.. Very happy with the lights, they are almost too powerful. . Gonna try some other lights next grow... I like to light up my life!.

Likes
13
Share


@jardindeautos
Follow
El cultivo parte de 16 semillas regulares, pasadas 2 semanas hacemos el primer descarte por anomalía en el crecimiento, en la tercera semana de cultivo se muestran 4 machos y 11 hembras, descartamos 2 machos y separamos otros 2 para la posterior polinización de las 4 hembras seleccionadas para dar luz a la siguiente generación de esta cepa!!
Olores pungentes a kush a limón, bayas y uvas verdes
La polinización se realizó en ramas bajas de las hembras seleccionadas
Likes
27
Share


@Trickybis82
Follow
Hi growmies,
I have added a few more new pictures 📸 📷 🖼️ 🤳 🙂
Any comments from other growers on how they look much appreciated. As this my 1st fem run hence title of this grow lol
✌️ peace and love ❤️
Likes
11
Share


@Eddjack
Follow
Beve come una Ferrari ogni giorno 1.5 litri . Cresce forte i rami sotto sono un po' deboli per poca luce ma purtroppo lo spazio è poco ed ho paura a defogliarla troppo .


Likes
13
Share


@knicko
Follow
In Woche 4 der Blüte gebe ich den Ladys die zweite Ladung Greenhouse Feeding BioBloom je 2.5g/L vom Topf.
Dazu gebe ich per Gießwasser ab jetzt alle 2 Wochen 1g/L den BioEnhancer von Greenhouse Feeding und bei jedem Gießgang den Greenhouse Feeding Booster 0.2g/L.
Die Ladys wurden auch großzügig entlaubt. jetzt Konzentrieren sie sich auf die Produktion der Blüten.