The Grow Awards 2026 🏆 


Likes
3
Share
@MarihuAchA
Follow
Última semana de alimentación amigos ya empezaré a hacer lavados de raíces para no cortar tan tarde. En Estos días seguirá engordando un poco y me interesa. Pero más me interesa enfocarme en lo que va a ser el próximo cultivo y ponerme a ello lo antes posible. Así que vamos a ver, un abrazo

Likes
14
Share
@Bread_n_Buds
Follow
And we are ready, our two Sticky Beast Automatic are literally above average, even by a lot, both in terms of flower quality and weight, they seem to be latest generation autoflowering but they have been on the market, successfully for a few years now.
ATTENTION: The harvest of the first and very valid plant is in the previous week, I divide them so that you can distinguish the plants and the trichomes and because I take a lot of photos it would be a huge diary.
This plant that you see in the photos has a strong tropical phenotype since the first weeks of flowering, touching it was evident a direct trip to the tropics.
It has put on a little less body than the other but it is still a large plant and full of flowers the results are excellent also from the point of view of weight we should exceed 50 grams by a little.
The flowers are nice and full, maybe a little, but a little less compact than the other specimen, they have matured gradually and very well and we can't wait to smoke it or rather vaporize it.
The genetics are truly exceptional, everyone speaks highly of it, many have grown it, if you haven't done so, you who are reading this should do so soon.
// AWARD WINNING STRAIN // First Prize at Autoflowering Highlife CUP 2018
--- Get a seed of this amazing strain --- https://www.zamnesia.io/it/3331-zamnesia-seeds-sticky-beast-automatic-femminizzato.html
The fertilizer kits that you can find on the Zamnesia website are perfect
for this purpose, there is everything. Choose them based on their mineral/organic composition and the soil you have chosen.
The plant has eaten the 100% Organic feeding of Plagron: Alga Grow and Alga Bloom as basic nutrients, the rooting Power Roots, the amino acids of Sugar Royal, the Enzymes of Pure Zym that eat the dead parts in the soil, Power Buds that always gives us immense satisfaction with rapidity of start of flowering and composition of the buds, the legendary Green Sensation that now needs no introduction, a name a guarantee. Also the foliar Vita Race used for the first time with success.
The fertilizer kits that you can find on the Zamnesia website are perfect
for this purpose, there is everything. Choose them based on their mineral/organic composition and the soil you have chosen.
at the link --- https://www.zamnesia.io/it/11457-plagron-easy-pack-natural.html
The quantity was measured using the sheet prepared on purpose on the Plagron website based on the soil chosen: Plagron Pro Mix + Perlite.
at the link --- https://plagron.com/en
The growbox is the DS120w by Secret Jardin as well as the DF16 ventilation system and all the fans
at the link --- https://www.secretjardin.com/it/
The light was supplied in the past by Viparspectra and it went crazy but it came back to me to produce very well too...
at the link --- https://www.viparspectra.com
A fantastic selection of seeds, a headshop and a selection of exceptional accessories on the world of cannabis, many other things about mushrooms, health, well-being and all the beautiful things that nature offers only on the Zamnesia website
at the link --- www.zamnesia.com
Instagram ----
@zam.nesia - @zamnesiawebshop - @zamnesia_usa - @bread_n_buds

Likes
12
Share
@SSKNFbyHAZE
Follow
In a week, I give compost tea, and fermented plant juice once each ^^
Hope you guys have a wonderful day today ^^v
*** Please Like, comment & share ***
Highly appreciated -----/-----<@

Likes
20
Share
@WeEdandGrowLover
Follow
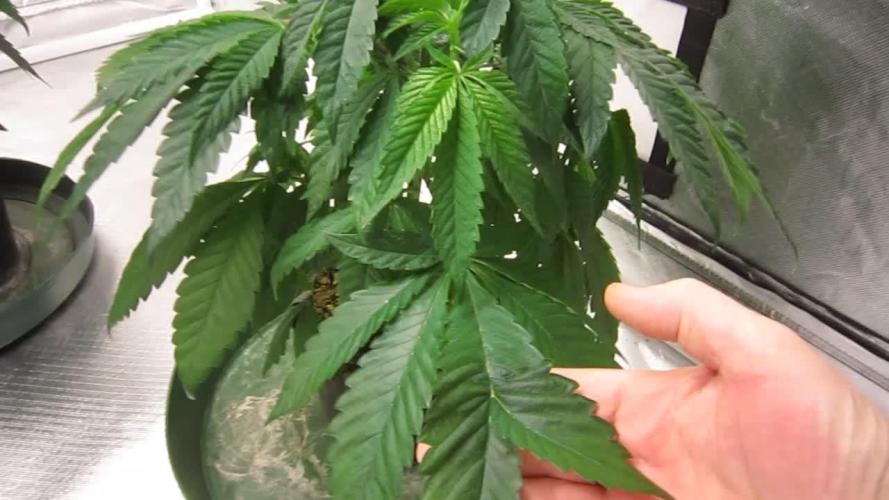
The little is growing really really good,so much that i had to defoliate on day 30,earlier than i anticipated.
Hope she will like🤞🤞
On day 33 she's Still really growing well,getting more thirsty day by day.
Will do another defoliation on week 6,hoping to be last before harvest

Likes
43
Share
@Lukush
Follow
Hey growmies its flushing time for mi watermelon 🍉 🍉!!
Her smell is vary fruity and sweet, can't wait to smoke this one !!
WhiteWidow also is in flushing time !
All the girls are looking good 👍💪❤️
I just installed mi new Sp 6500 👍💪👍💪 we gonna finish them up whit some good extra wats !
Check out this led on the website💪👍
https://marshydro.eu/products/mars-hydro-sp-6500-led-grow-light/
SP6500, as one of the huge single bar LED grow lights, installed with top quality Samsung LM301B diodes, designed with enhanced red in broad-spectrum light, emits the highest central PPF and has the superb penetration that its major applications are for high-wire plants and greenhouses.
Wattage – 650w
Veg Coverage – 4×5 ft
Flower Coverage – 3×5 ft
Featuring a thick aluminium passive heat sink and densely arranged chips, the SP Series provides high efficacy but low heat output while minimizing obstruction to natural LIGHT!


Processing
Likes
57
Share
@LockDownGrow
Follow
Coming along very nice now and bushing out nice too ,
The side branches are as thick as the main stem and showing the early stages or pre flowering ,
Still not done a great deal too this lady and have left her too do her thing ,
Likes
Comments
Share
@Chucky324
Follow
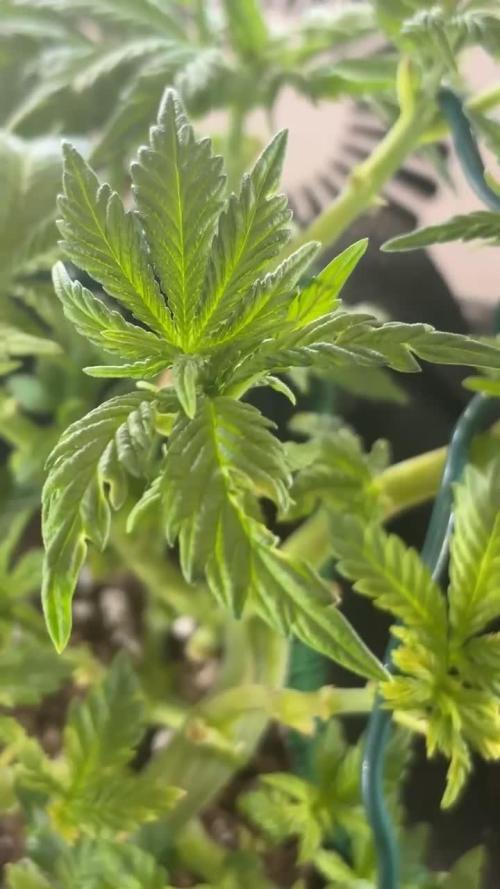
Hello. This is the end of week 5 and the beginning of week 6 of veg.
This girl got topped last week, getting ready for training.
I hope to repot this plant this week and it will get a tomato cage too.
I can spread out the branches and tie the branches with the big buds to it.
OK. Be Great.
Chuck.

Likes
18
Share
@Sti_Cazz
Follow
So this week the plants streched like crazy, the NL started to flower too and has actually become taller then the other 2 plants, even though its technically 2 weeks behind. the strange thing is its way more spacious then the packed Diesel.... it'll be fun seeing how they match up in the end!
My new fan and dehumidifier solved the RH issue I had and I crushed it down to under 50% now! Things are looking like they're on the right track.....fingers crossed!
I wonder if there is anything else I can add , nutrient wise... i know I shouldn't overdo it but I'll play around a bit and see.
Got rid of most bigger and medium fan leaves that i felt were blocking the bud-sites from getting light...again, not sure about if I'm going about this the right way, seems counter-intuitive to get rid of so much green but hey ...it helps greatly with lowering humidity and keeps the bottom of the girls nice and ventilated. I actually took off a bit more because it keeps growing shut.
Update: got some big bud and overdrive from my local grow shop... I'll give it a try...

Likes
16
Share
@GreeneScene
Follow
What to say about this week? For starters LST was started this week. Initially I used garden ties but soon after replaced them with 6” garden staples .
2 of the 6 girls began throwing pistals resulting from the LST starting around day 15 YIKES 😬.
The Zkittlez & the Runtz both from (Expert Seeds ) began giving the 5x5 its first smells .
The LST so far has been a pleasure no ooosy daisies so far & the girls are showing what they are made of . The secondary shoots have great potential to form a nice round bush that I can train out into an even-as-possible canopy .
Today is day 21 & day 20 for this bunch . They are only using Gaia Green dry amendments for feedings but I decided to take some advice given to another grower & supplement my girls with some compost tea . NO I DONT THINK THEY NEED ANYTHING ADDITIONALLY IM REALLY HAPPY SO FAR WITH MY NUTES bbbbuuuuuttttttt in the short chance that my ladies may take a liking to an occasional tea & reward my pampering with large , long , frosty, stacked cola’s . . Thennnn I’m supplementing , I consider this all “4-play” for my ladies Ik a giver 🤷♀️😭
My only concerns are racing against this clock to get as much size & solid structure before flowering sets in I’ve really got my heart set on a certain outcome & I’m one for a good challenge.
Finally , atleast as much as I can remember, I increased the dimmer knob on the light from 65% to about 78%. I won’t increase the watts any higher until bloom sets in fully & at that point I’ll be turning it to 100% raising it a maybe 6 inches & watching patiently for my girls to start praying 🙏 to it .
Week 3 in the books !


Likes
34
Share
@PEAKYPLANTERS
Follow
hi to all, brothers of the weed!
my orange juice is nice and ready to be harvested!this beautiful plant was really very strong and resistant, in a short time it dominated all the cousins that were in the room! as always we will perform a dry trim and we will do a lot of good content and other reviews on the smoke so stay up to date!
Likes
12
Share
@Nickeluring
Follow
Day 30 of flower;
This beautiful girl starts to build some very long nice looking colas. She starts to smell beautifully and she should get some beautiful buds in a couple of weeks.


Likes
31
Share
@SkunkyDog
Follow
Hallo zusammen 🤙.
Das war die letzte Woche für sie morgen werde ich sie ernten habe etwas Angst das sie sonst Schimmel bekommen könnte weil die Buds so hart sind und draußen ein Scheiss Regenwetter ist.
Sie erhalten 25 Prozent Rabatt in unserem Shop
Mindestbestellwert beträgt 75 Euro
https://greenbuzzliquids.com/en/shop/
Code: GD42025
Likes
2
Share
@dwotTV
Follow
Moving right along, tucked inside out of the weather for a couple days but back outside and happy now.
Likes
5
Share
@psychonaut420
Follow
As December is near the growth is slower than would like but is still thriving with more stretching happening for the side branches and the mini side branches start to stretch as well one side branch I recently topped is recovering at a decent rate hoping for some start of preflowering signs within the week or 2

Likes
10
Share
@Bigbombbudz
Follow
Another week closer....
Well its coming to an end and the girls are going into there last 10 days, the flush will begin tomorrow, with 5 days of PH water with Sweet Raw added, then last 5 days straight PH Water.
It was a great crop, very easy to grow and no problems at all just feed and watch them grow.
Until next week, smoke a fatty, help out your fellow grower.


Likes
3
Share
@tangie
Follow
She doesn't fit in the box lol, will use ScrOG to restrain her vertically. Streeeeettttchyyyyyyy!
Accidentally snapped off a funky 10-bladed fan.
Likes
72
Share
@Schnabeldino
Follow
_____ Week 13 | Day 85 - 91 | 6th week of Flower ______
Day 87🌞💧
Three days are over again and the plants are hungry again. 3 liter each Plant, small drain.
Day 88🌞
What can I say this week went by quickly because of Christmas and New Year... I looked less into the tent.
The trichomes of all plants are developing very well. They were fed Overdrive for the first time.
Amnesia: The buds are slowly becoming more voluminous and quite sticky. Slowly the typical Amnesia smell spreads in the tent.
Biscotti: Look very tasty and frosty. Development of the trichomes is very good, the buds swell.
Lemon Power Haze: All 3 plants look different. LPH#1 is the smallest in terms of bud size, I think it will take longer than the 8 weeks. The trichomes of LPH#3 are very pronounced and the most beautiful of all 3 plants.
Day 90 🌞💧
3 liter each Plant, small drain.