


Likes
12
Share


@Staffedition
Follow
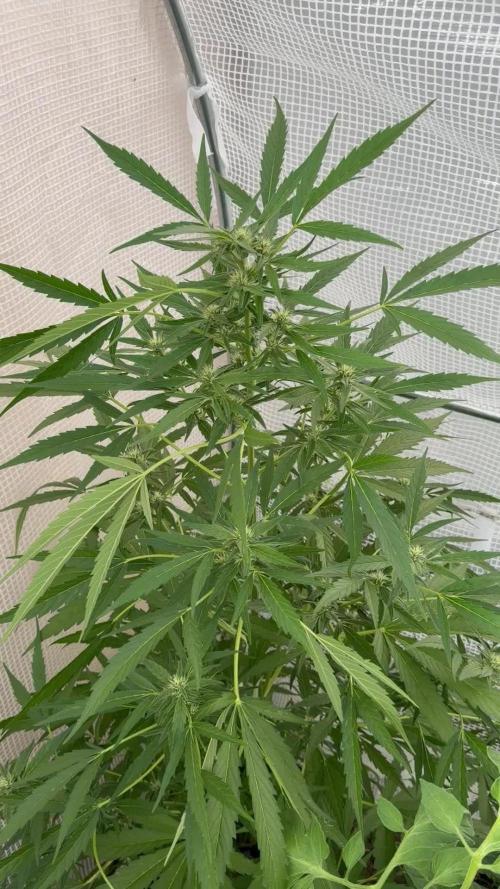
Привет друзья. Моей растихе сегодня 34 дня.
Начал применять LST технику на 19 дне и продалжаю применять её через день, а 18 августа добавил ДЕФОЛИЗАЦИЮ
С 20.08 ДЕФОЛИЗАЦИЮ делаю каждые 3,4 дня
С 20.08 применяю технику LST каждые 3,4 дня
На сегодняшний день влажность 63%
Растение растёт хорошо. генетика радует.
Всем мира и добра!
#Smail_Seeds


Likes
14
Share


@CANNASIM
Follow
Moving forward, blooming nice, this second gen is taking form and gaining weight.
A few weeks and we will have a nice harvest.
Tent is nicely populated and filled. Once i have setup the “semi scrog” it has conformed to it in a couple of days and did a massive difference.
It really opens the canopy and create a huge surface to take advantage from the light as opposed to letting it go naturally.
I’m defining the technique as semi scrog because i did not setup the net in a traditional early way knitting in veg... It was done later.


Processing
Likes
70
Share


@Kid_Colombia
Follow
Finally back to the garden after 4 weeks away.
They were really in need of love by the time I got back to take care of the garden.
BIG NEWS! Now running a California Lightworks Solarxtreme 500 as my main light.
Will add a second SX500 light into the room once I start flower.
Hit the LST on the again and just making sure they are getting fed and lots of love.
Will have to push back my starting flower by another few weeks. See how the recover


Likes
6
Share


@TheSurfBud
Follow
Following High Powered Organics Gro-dirt Gro-Guide..
Things are looking up
Massive leaves..
No topping or Lst..

Likes
25
Share


@Snaak
Follow
This week ill try to switch over to an English diary because the translation is absolutely crap and i might learn a thing or two about the English terms in growing, also because the American and Canadian researchers extended the growing knowlegde in an absolute insane tempo and i would probably get most of my information from them.
I don't have a spelling-check on this pc, therefore i apologize in advance ;).
I uploaded some photo's with crappy lighting (Next grow ill switch day-night rythm and should give me better opportunities for photo's, but we'll get to that in the future) but also i short video of some notes which i will elaborate below:
Last week on saturday i turned off the carbon vent because i could not get the humidity level right and i was still waiting for my humidifier. I placed a big fan inside the tent for air circulation and besides that i installed a small vent-filling fan in in front for clean-airflow.
Last weekend i closely watched what the humidity and temperature did and started playing with the setup.
All the changes i made in the tent last week are:
06-02:
- Shut down carbon vent
- Added rotation fan inside
- Added small front-fan for clean airflow
07-02:
- Added humidifier (setting 55%)
- Dropped HPS 600W about 15 cm's to 110 cm height
08-02:
- Humidifier setting 60%
09-02:
- Dropped HPS 600W about 20 cm's to 90 cm's height
10-02:
- Front fan on 2 instead of 1
11-02:
- No changes because all is stable
12-02:
- Placed humidifier at the back instead of the side of plants
- Dropped HPS 600W 15 cm's again to 75 cm's height
- Moved the inside fan more to the top-back of the tent (more facing downwards)
- Opened up a vent-hole in the top of the tent for a little warmth release
From the moment i turned off my carbon vent last week the sprouts started flourishing, especially when i added the humidifier. All the changes, noting, and looking at them how they pose, reading blogs and learning have brought me to the point that i think i stabelized it. Allthough i am going to turn on the carbon vent sooner or later (i might do this tomorrow) i need to pay attention again because i'm predicting it will drain the humidifier in a higher speed and that means i have to refill approx. 15 liters in 2 days? The tank is 5.5 liter and at the moment i refill it every evening, so thats already 11 liters in 2 days. I'm really expecting it to increase significantly i ill keep my notebook ready. :p
I'm also a bit worries it will be so warm in my tent because the outside temperature is pretty cold, and that might also be the reason the temperature doesen't go above 28 degrees anymore.
Okay enough about the tent setup changes. Lets talk plants.
After the transplant last week to their end-pot these auto's started to grow immediately and i think they did really well this week. Since the humidifier got added to the tent, every morning the plants praise their "Hallelujah" pose which is really pleasing to watch...
**Last weeks's first time watering in the big pots:**
06-02 around 09.00:
- 750ml around the side
- 750ml around the middle area
- 750ml with nutrients spreaded around the pots
All is equally divided through 4 plants.
This week's watering and nutrients:
08-02 around 16.00:
- 750 ml around the pot
- 750 ml with nutrients
11-02 around 10.00:
- 500ml around
- 500ml around
- 500ml with nutrients
12-02:
- Sprayed Vita Race first time 4ml in 750 ml and sprayed about 15% of it on the leaves, no drups, mostly nebula.
The vita race really made the leaves shine, also within 1,5 hours all moist was took in or evaporated, Today probably again around 1600 ill water them again but ill hold the next vita race for tomorrow or something. as long as the plants shine the same i don't know if it's neccasary?
Okay, last but not least.... This week on wednesday i kinda mis-read some shit on internet and topped 3 of my 4 plants. I think it went okay, because they don't seem to stressed about it. They still flourish and hallelujah on! Still i'm pretty worried because i made the cut right next to the nodes which isen't the best thing (learning phase :p)...... The reason i topped 3 outta 4 because i wanted to see if i diden't stress the smallest one, he would out-grow the others, but that does absolutely not seem to be the case.
Also i think it's a great way to learn by not stressing one plant to see the differences, i want this first grow not to be about end results but more about learning and developing my own personal experience and point of view.
Oh PS, i also drilled all the holes to prepare for LST, but i think they were kinda to small on 10-02 when i drilled it. I'm going to watch the recovery from the topped plants closely coming week and maybe start with LST.
Stay tuned while this noob messes around with Auto Critical Orange Punch of Dutch Passion.
Processing
Likes
9
Share


@Luv2Grow
Follow
Day 43 - Starting week 7 and she’s looking good. She’s starting to stretch more every day and flowers are starting to fatten up a bit. Gonna continue with the foxfarm feeding schedule. Can’t wait for her to finish!
Day 44 - The room is really starting to smell amazing. Just keeping on with the foxfarm nute schedule until she’s ready to be cut in a couple more weeks. Still plenty of fattening
and growing to go.
Day 45 - No major changes, she’s just chugging along. Gave a feeding of just water today and tomorrow will be the foxfarm feeding. I love her look and the smell starting to really come from her.
Day 46 - No major changes, just continuing to fatten, grow and definitely getting really frosty!
Day 47 - What can I say? This thing is an amazing grow and smelling amazing. She just growing and fattening each day. Still to early to really look at the trichs but wanted to look anyway. Got a few decent pics and there’s a few cloudy ones in there. Gave her straight pH’d water today and tomorrow and will give another feeding on Saturday.
Day 48 - No big changes, just continuing to fatten up. Held off on watering today, she didn’t really drink munch compared to the GC. Will give her an actual “feeding” tomorrow.
Day 49 - All is looking good and she’s plumping up each day. Gave her the foxfarm feeding today. Tomorrow starts week 8 so will continue with the feeding schedule until the end. She’s really starting to smell up the room in my house and loving it.
Processing
Likes
11
Share


@MemesBeforeDreams
Follow
Ran out of headroom in the tent, WW#2 is sitting at about ~49 Inches Tall with NL 1&2 close behind at around 42 inches. WW#1 is flowering nicely and sitting at 27 Inches, propper up on buckets and with added supplemental lighting which will also help the lower budsites on main colas on the other plants. Hope that WW2 doesnt stretch any further or i'll have to start training it a little to keep it away from the light but growth is definitely slowing at least.


Likes
3
Share


@Krautbauern
Follow
As with the other plants, it was high time to harvest the main cola. The rainy season in Germany begins next week, the temperatures no longer rise above 20 degrees and there is a lot of rain. So it's high time to harvest! Exactly 67 days after sowing we harvest all the upper buds, only the lower popcorn buds stay on for a few more days. It is a little more airy than the Ztrawberriez from the first grow but still beautiful
Thanks to fastbuds!
Likes
9
Share


@CanarianGrow92
Follow
Great plant, she's getting bigger and bigger, im sure some nice buds are gonna start to grow, im planning to get some moster crop clones of these girls 😊 just for the fun! I never tried monster cropping so i think this is the time and the strain!


Likes
16
Share


@Foggedaboudit
Follow
These are faster than expected. The smell is wonderful too. Pineapple and candy, the second pheno although it has less trichomes is bigger and has an added creaminess to its aroma. Truly great stuff even if they really don’t match the NTF description. Added some PK supplement too. Should be another week or two for these.
Processing
Likes
5
Share


@Mr_nugs_lover_David
Follow
Amazing clasic amnesia smell, very strong, very sweet and citrus at the same time, cannot wait to to see this buds fully developed what a pleasure to work with this strain. Stay tuned for more of this wonderful strain!! 💚❤️💛👨🌾
Likes
1
Share

@psychonaut420
Follow
first 2 plants are lemon cherry cookies auto and last one is frozen face auto the white stigmas and streaching side branches are streaching outwards I’ve done more lst and defoleation for light penetration to each bud site


Likes
19
Share


@GoldenWeedGrower
Follow
Legend
Timestamp: 📅
EC - pH: ⚗️
Temp - Hum: 🌡️
Water: 🌊
Food: 🍗
pH Correction: 💧
Actions: 💼
Thoughts: 🧠
Events: 🚀
Media: 🎬
D: DAY, G: GERMINATION, V: VEGETATIVE, B: BLOOMING, R: RIPENING, D: DRYING, C: CURING
________________________________
📅 D77/B15 - 31/01/24
⚗️ EC: 1.2 pH: 6
🌡️ T: 19-22 °C H: 40-60% (Min-Max values taken from the app.)
🌊 2L
🍗 CalMag - Bloom A-B - Bud Candy - Big Bud - B52
💧
💼 Thanks to the TM+ Pro app and the use of the Humidifier now the T-H of the enviroment is correct and i got quite good VPD (Vapor Pressure Deficit) rate
🧠
🚀
🎬 Added Timelapse video
________________________________
📅 D78/B16 - 01/02/24
⚗️ EC: 1 pH: 5.9
🌡️ T: 19-25 °C H: 45-70 %
🌊 2L
🍗
💧
💼
🧠 Quite time to change res
🚀
🎬 Added Timelapse video, 3 pics and "TM+ Pro" App screenshots of T-H values daily graph, and quite perfect VPD daily rate
________________________________
📅 D79/B17 - 02/02/24
⚗️ EC: 1 pH: 6.2
🌡️ T: 19-25 °C H: 40-60%
🌊
🍗
💧 Added few drops of pH-
💼
🧠 The res was for many time on the upper side of pH range, so now I would like it to goes down to a more acidic solution. I'll do it on the next res change, maybe tomorrow
🚀
🎬 Added Timelapse video but today it was trunked because of a problem on the camera, but I posted it anyway
________________________________
📅 D80/B18 - 03/02/24
⚗️ EC: 0.15 pH: 6.6
🌡️ T: 19-25 °C H: 40-60%
🌊 RES Changed 💦💦💦. Flushing until tomorrow
🍗
💧
💼
🧠
🚀
🎬 Added Timelapse video and VPD, T-H graphs screenshots
________________________________
📅 D81/B19 - 04/02/24
⚗️ EC: 1 pH: 5.7
🌡️ T: 19-25 °C H: 45-65 %
🌊 15L
🍗 CalMag - Grow A-B - Bud candy - B52 - Big Bud
💧
💼 Some defolation and sistemation of buds
🧠
🚀
🎬 Added Timelapse video and VPD, T-H graphs screenshots
________________________________
📅 D82/B20 - 05/02/24
⚗️ EC: 1 pH: 5.4
🌡️ T: 20-25 °C H: 52-84 %
🌊
🍗
💧
💼 Little defolation and raised up the lamp
🧠
🚀 I forgot the humidifier on manual mode, so H increased until 80%and VPD went out of control
🎬 Added 4 pics, one is from timelapse set. Added Timelapse video and screenshots
________________________________
📅 D83/B21 - 06/02/24
⚗️ EC: 1 pH: 5.0
🌡️ T: 19-25 °C H: 45-70%
🌊
🍗
💧
💼
🧠 pH decreased a lot and it's a good thing it stay on the acidic side for a while
🚀
🎬 Added Tmelapse video and screenshots of VPD and T-H

Likes
18
Share

@Staffedition
Follow
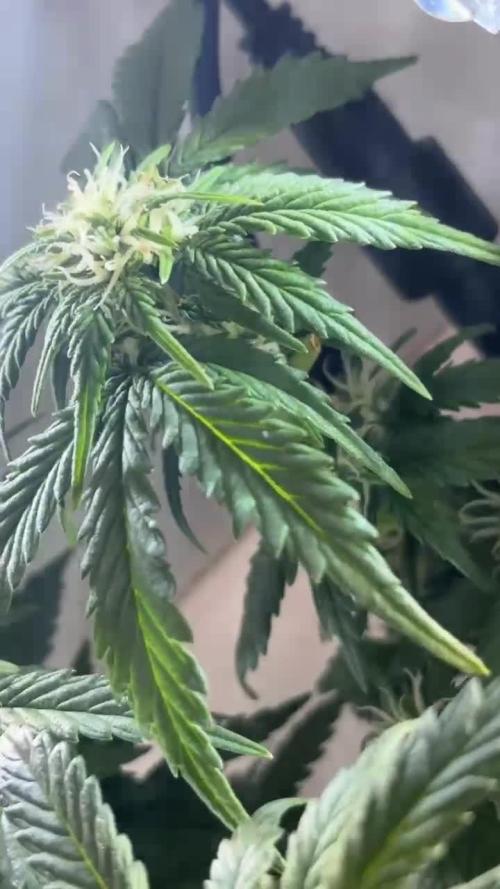
Привет друзья. Моей растихе сегодня 80 дней.
Растение хорошими темпами приходит в себя.
Через неделю буду переводить на цвет.
Начал применять LST технику на 19 дне и продалжаю применять её через день, а 18 августа добавил ДЕФОЛИЗАЦИЮ
С 20.08 ДЕФОЛИЗАЦИЮ делаю каждые 3,4 дня
С 20.08 LST технику делаю каждые 4.6 дней
На сегодняшний день влажность 54%
5.09.2023 заметил высокий Ph 7.9
С 48 дня Ph не ниже 5.8
На сегодняшний день Ph 6.0
Начал кормить с 60 дня Canna Terra Vega
PPM 550
Погладитель влажности хорошо справляется со своей задачей. Рекомендую
Всем мира и добра!
Не забудь поставить лайк❤️, если понравилась как прошла неделя
И читайте наш TELEGRAM: https://t.me/smail_seeds
#Smail_Seeds 😀