
Likes
Comments
Share


@TheSurfBud
Follow
So heres my germination method.
Soak/shake seeds in 3% h202 solution for a few minutes and let sit until tiny bubbles form on seed coat.
Rinsed in clean rain water.
Then placed in HPO's GREEN-SUPREME used as seed soak solution. With a small amount of ANTI-MATTER for enzymes. Soaked 12hrs
(mostly I just soak a few hrs)
Straight into Gro-Dirt Super Starter soil.
Watered seeds in gently with diluted DARK-MATTER solution to get the mycorrhizal species attached as soon as possible.
Once they came up, 18-24hrs later, sprayed gently with a mix of GREEN-SUPREME & RHIZO-MOJO
Just a small pinch of both in a 1ltr spray bottle.
All this was done in a dark warm place on a heat mat. In a humidity dome.
Happy growing friends

Likes
2
Share


@fabialien
Follow
Lunes 26 de Agosto 2024, segunda semana de vida de estas preciosas, siguen en giffy, próximamente trasplantar a macetita de cartón, iremos a Walmart a comprar sustratito para ese trasplante.


Likes
7
Share


@Organic473
Follow
Buds everywhere…the smell is also coming along. I gave her too much tiger bloom which is noticeable on her leaf tips but the benefits are worth it. I had an attack of the aphids trying to destroy the stem but I pulled out the spray and got rid of them. She takes training really well and bounces back from the pest attack quite nicely. I am also impressed with the way she leafed out after the defoliation.

Likes
13
Share


@knicko
Follow
In Woche 4 der Blüte gebe ich den Ladys die zweite Ladung Greenhouse Feeding BioBloom je 2.5g/L vom Topf.
Dazu gebe ich per Gießwasser ab jetzt alle 2 Wochen 1g/L den BioEnhancer von Greenhouse Feeding und bei jedem Gießgang den Greenhouse Feeding Booster 0.2g/L.
Die Ladys wurden auch großzügig entlaubt. jetzt Konzentrieren sie sich auf die Produktion der Blüten.

Likes
3
Share

@GorkedOut
Follow
I did a staggered harvest (chopped the top colas) off 3 of the plants. 1 plant is a few weeks behind on growth so I left that one alone.
The colas I chopped looked beautiful. Nice and chonky.


Likes
128
Share


@DreamIT
Follow
There isn't much more to say about this fantastic strain. Hardy, easy to clone, quick to flower and absolutely delicious in every respect. It resists well to high temperatures, "accidental" over fertilization, and recovers soon after a period of drought. Easy and fast.

Likes
5
Share


Likes
1
Share


@Filiaes
Follow
05.01 Happy new year! The official time of bloom, regarding to the breeder, is done (8 Weeks). I checked the trichomes and still see some clear and mostly cloudy trichomes, amber isn't really shown yet so I think they will need one to two more weeks. I will reduce my nutrient scheme now, check next week for the scheme if you are interested. Beside that I reduced the Light to ~650PPFD for the last ripening process.

Likes
20
Share

@DevelGrow
Follow
Hallo Freunde 👋 der Demon ist 7 Tage alt und macht sich langsam aber sicher!🌱🍀 Denke das nächste Woche mehr an dem Burschen ist bis dahin ! Keep Green and grow High ✌️🍀💚🍀

Likes
20
Share


@TheGourmetWeed
Follow
One more week is now finished, let's have a look as what happened during this last 7 days and nights
Used the weekend to make a nice cleaning again - I like to take all from the tent and clean on Sundays. Gives a good feeling.
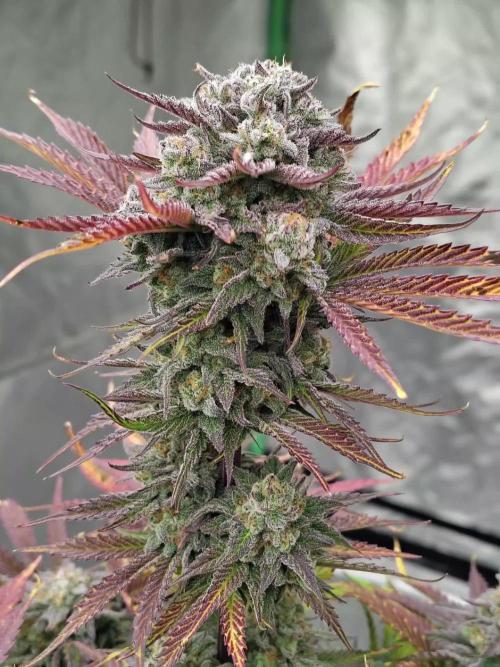
The plant is still full flowering, finally some yellowing and browning pistils. The color of the bud is gorgeous.
Flush has started officially, 2l water every second day for a week, and then probably should be ready a few days after.
It's a great smell coming from this plant, so sweet. Is amazing!
Temps and RH are very stable, which is great. 27c day 60%Rh 24c night ~70%RH
That's all for now, next week there'll be more.
Have a nice week, happy grows to all, and better smoke :D


Likes
100
Share


@ILoVeThiSpLaNt
Follow
Giorno 65
Ad oggi ho tagliato le due Rainbow Belts (qualche giorno prima per esaltarne il gusto Zkittlez) e le due Zombie Kush una al giorno 58 l'altra giorno 63.
Rimane questa bestia di Milk Monkey. Sento biscotti sento vaniglia ma sento anche dell'acido. Mai avuto cime così piene di resina. Mamma mia che spettacolo di banca semi questa Exotic Genetics (meglio spendere qualche euro in più e avere erba che vale 20/25euro al grammo che spendere poco per avere erba commerciale)
Saluti e a settimane prossima 🖐️ ❤️


Likes
110
Share


@Hydro_Hiebs
Follow
We have more autos from Ganja farmer seeds started today. I sowed them directly into the soil. The hydroponic ebb and flow system I am using this round is new and is called AirCube from growace. If your interested in looking for more info on it here's a link to there website 👇
https://growace.com/?rfsn=7577242.b784c7&utm_
source=refersion&utm_
medium=affiliate&utm_
campaign=7577242.b784c7
This will cut out my automatic watering and help bring more oxygen to the roots while still maintaining a fully organic grow.
Likes
7
Share


@inversi0n
Follow
Hello, readers!
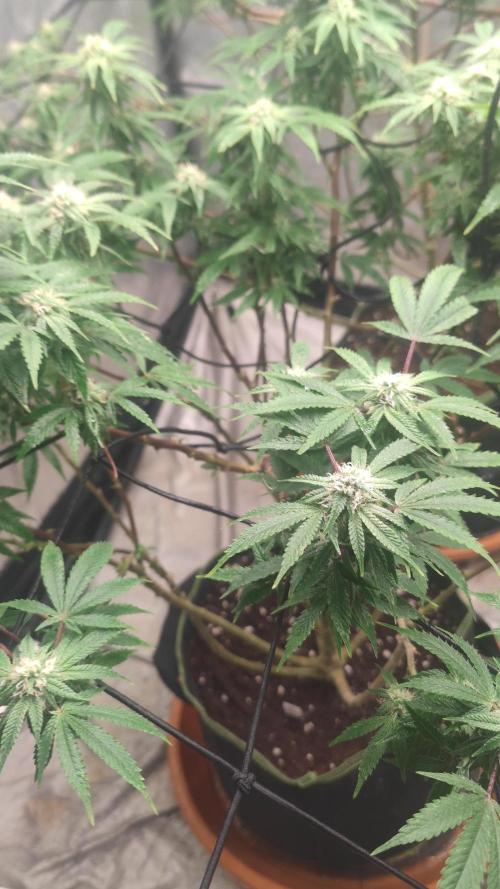
I'm still trying to stretch her a little bit, just to keep it's form, when she begins to grow rapidly.
Even though she' s on her preflower now.
This week I also removed quiet a lot of leaves (~30). The main goal here was to open all end-branches, future colas.
Also I switched nutrients proportions to more flowering. It means more PK and S. And less N.
Light on 100% now!


Likes
21
Share


@Dezignertreez
Follow
Getting frosty! Can’t wait for my next update gonna upgrade some things in the tent 🏕️!
Likes
32
Share


@Zurban_Poison
Follow
Good evening, Ladies and Gentlemen!)))😎
Our little killer moved into a 5 liter cool personalized pot of a "Cannapedia Pro Growers Cup" participant !!!
I really liked these small cool and bright pots!)) I hope Peinkiller will like it)) especially if you take into account the fact that the peat soil in which she was transplanted was enriched with "BioGrow" from "GreenhouseFeeding"!!!
I am using this fertilizer for the first time and I am very interested in how it will be in further its growth and development will advance ..) we will see everything together))👌
Likes
17
Share


@Pochogrower
Follow
On day ten I did my first feeding at half dosage and lowered the lights from 21inches to 18, ladies responded really well. Notice growth by the next morning. On day day twelve I did second feed which went well. Did my third feed on day thirteen, which did not go well, 5 hours after feeding I notice leafs were cured up, I brought the lights up to 21 inches and fixed the problem. Light burn. Day fifteen I tried LST which did not go well since this was my first time doing this. Day 16 ladies where back to normal so I did Fimming and see how that works out for me. Wish me luck.
Likes
3
Share


@factoryofweed
Follow
En esta primera semana las mantenemos bien húmedas para su correcto desarrollo.