


Likes
Comments
Share


Likes
127
Share


@DreamIT
Follow
🎃👹👽MONSTERCROPPING RED MANDARINE 👽👹🎃
____________________________________________________________________________________
💀 19.2
💀 20.2
💀 21.2
💀 22.2
💀 23.2 vacation week
💀 24.2
💀 25.2 ...
____________________________________________________________________________________________
📜👀 A look at the details of what I'm growing 👀📜
🍊💚 Red Mandarine F1 🍊💚 by 🌱🍭 Sweet Seeds 🍭🌱
📋 Details
⚧ Gender
▪️ Feminised
➰ Genes
▪️ 55% Indica / 45% Sativa
🎄 Genetics
▪️ Red Poison Auto (SWS39) хCalifornia Orange x Skunk hybrid)
🚜Harvest
▪️ 400 - 500 g / m²
🌷Flowering
▪️ 49 - 63 days
✨THC
▪️ 16%
✅CBD
▪️ 0,2%
🏡Room Type
▪️ Indoor
🌄Room Type
▪️ Outdoor
🕋Room Type
▪️ N/D
🎂Release Year
▪️ 2019
__________________________________________________________________________
👀📷🥇 Follow the best photos on Instagram 🥇📷👀
https://www.instagram.com/dreamit420/
🔻🔻🔻Leave a comment with your opinions if you pass by here🔻🔻🔻
🤟🤗💚Thanks and Enjoy growth 💚🤗🤟

Likes
15
Share


@BostonGirlGrows
Follow
Looking good. A bit fuller. No major changes, slow and steady. I’ve been really excited to grow these ever since they arrived as freebies with one of my seedsman orders. One is getting big enough I might even add a few bendy things to open her up a bit more and hopefully add a few more bud sites over the next few weeks. 🌱 👊🏻
Likes
73
Share


@Roberts
Follow
Deep Forest Auto is moving along. Shevhad another ph bottom out. I am not providing enough irrigation and the feed has been too strong is my conclusions. Organic nutrition is high in salts. Hopefully this will be fully resolved by tomorrow. 🤞🏻she finishes up soon. Thank you Medic Grow, Gen1:11, and Doctor's Choice. 🤜🏻🤛🏻🌱🌱🌱
Thank you grow diaries community for the 👇likes👇, follows, comments, and subscriptions on my YouTube channel👇.
❄️🌱🍻 Happy Growing 🌱🌱🌱
https://youtube.com/channel/UCAhN7yRzWLpcaRHhMIQ7X4g

Processing
Likes
13
Share


@GangbudsGenesgdl
Follow
21/12/20
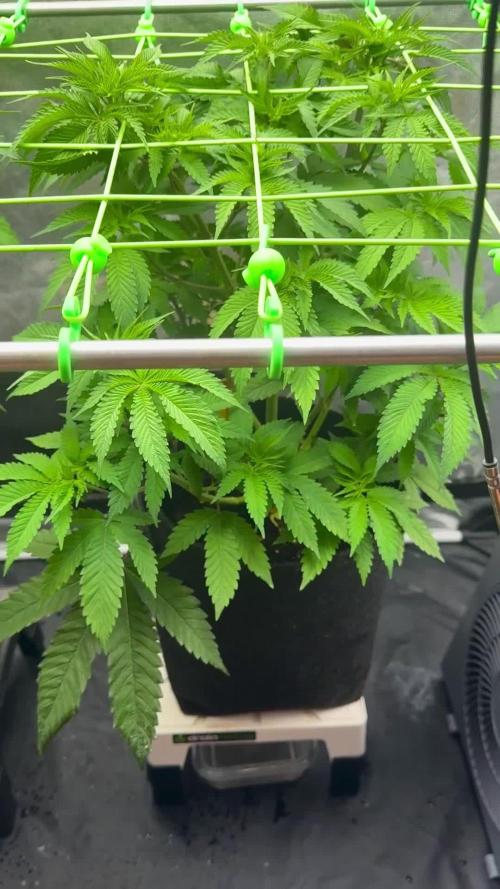
inicio de semason na esta planta esta mostrando un feno muy ibrydo los foliolos estas muy hermosos
asta la fecha solo riegos con agua
23/12/20
33 cm de atura
27/12/20 cierre de semana

Likes
Comments
Share


Likes
76
Share


@Canna96
Follow
Absolutely LOVE this strain. She has only been curing for a little over a week but I had to try her. She is one of the 3 most potent strains I have ever consumed, tastes like grapes on the inhale, and then on the exhale it tastes like a classic chemdawg, piney and gassey. You will feel the effects by the time you finish exhaling. I lover her so much I am going to run her back after I take a little break to travel. The only thing I regret with this grow is that I used much too small of a final container. No fault of the genetics, it was all me. I will run her back in a 12.5 gallon container and see what happens. My goal is to run 2 photoperieods every year, and get a Kilogram off each plant. Might be somewhat ambitious but I enjoy challenging myself and improving. I cannot wait to squeeze this lady, but I want to give her a few more weeks in the jars first. I will post some videos down the line. If anyone wants a quick pound or two of some potent ass indica leaning flower, this is your girl. I honestly don't know how I could even bring myself to grow another autoflower after smoking this lady.....She blows every auto I ever grew out of the water.

Likes
2
Share


@autofloweronly
Follow
Good week but I don’t think 😬Im getting any pollen this run. I think the silver in old. I don’t know but the plants no pollen. Jelly cake is a cross breed of wedding cake (mother) grape ape auto (father)
Likes
16
Share


@DeepRootsGrowTrees
Follow
GORILLA KING AUTO / KANNABIA
WEEK #11 OVERALL
WEEK #6 FLOWER
This week no real issues to report she's looking good buds are nice and dense and continue to grow her trichomes abound she's really sticky to the touch additionally she's got a sweet aroma to her!! Overall some great genetics from the KANNABIA TEAM!! STAY GROWING!!
THANK YOU FOR STOPPING BY AND TAKING A LOOK IT'S MUCH APPRECIATED!!!
THANK YOU KANNABIA!! 😊
KANNABIA.COM GORILLA KING AUTO

Likes
111
Share


@DogDoctorOfficial
Follow
Harvesting An ELEPHANT !!!
And after 118 day from seed and 101 from wen she started her mix veg/flowering process, i cant say for sure but i am starting to believe that this auto world do veg, then veg and flower in conjunction for a wile and only after they a wile they move to a flowering stage completely but thats another post another day lol today was harvest day for this Auto Elephant from SSSC , and let me tel you she is a delight with huge fruits, so big that i normally cut and hang the all plant and for this i did not take the risk of doing that and getting bud rot , better safe than sorry, so what i broke her in smaller peaces and put it all in the rack.
Now not much to do than waiting for it to get around 10/15% humidity and jar with it all.
This one as you guys can see from the video , this is a full covered in trichomes BIG MAMA and touching her is like touching super glue or something lol i was trying to put all the colas in one picture , but is simply just not possible , they all look great so i selected 4 of them for a true back back ground <3
Thank you Super Sativa Seed Club for this opportunity, i fell like a champion no matter what with this 2 Mamas, much respect on the work you guys did on this Elephant
As always thank you all for stoping by for your love and for it all, i fell humble and honored

Likes
25
Share


@Grower_Of_Persia
Follow
my dry and cure style is this:
4 days of hanging upside down to get water activity lower to around 0.6 in 50% humidity and 26 C temp (i know its a little high but we are in a hot summer right now and i cant get it lower even with air conditioner) and then after 4 days of drying i remove leaves and stalks, trim buds and move them to jar for the rest of their life :D . and in the first 4 days of curing i open the jar door and let hem get some fresh air in the jar for about 5 minutes and close the jar door again, after 4 days of curing like that buds are smokable but they will get better as they getting cured about 1 month.
buds are one of the hardest as fucking rocks type of buds! very dense , compact , sticky , smelly , amazing at every aspect
growing stage was 60 days and flowering stage was 70 days total (harvested tops at day 63th)
the total weight of dry buds was : top buds 174 G + lower buds 55 G = 229 G
my overview of strain with details:
the seeds:
unfortunately i only got 1 seed cracked out of 5 so i will not know how much this genetic can get different but at least i got the chance to grow once of this wonderful strain
the plant :
in every stage you can ensure that you are dealing with a high level plant ,
she will get big so you have to control her height LST and SCROG highly recommended , will grow very well with tick stalks and big fan leaves , has good resistance for stress and will respond very well to stress trainings , she really has gorilla power in herself ,
fresh buds on plant :
buds are very compact and dense even from start , fresh blossoms smells like pineapple and mango , 2 different shades of sweet smells like you hold 2 junks of pineapple and mango in your hand and you smell them together, she is a trichome and resin factory , very very sticky , very oily , strong smell
dried buds:
very compact and dense , hard as rocks , has dark colors with purple hues inside it , it smells sweet
smoke :
very smooth and sweet like lollipop , pineapple , mango like , after 2 minutes it'll kick in and you'll get higher and higher with every breath , has a strange and especial high mind high mostly

Likes
67
Share

@Canna96
Follow
Hey now, this week went pretty good! The Acid Dough from Ripper Seeds is almost done stretching, she didn't get as tall as I hoped but that was mostly my fault for training her too long. I have noticed no matter how long I train the stems outward, they always grow back up towards the middle in the end, so I am starting to think I am wasting height of colas by training a few days or a week too long. Anyways, other than that I did some light defoliation and that is about all. Super excited to see what my first run of Ripper Seeds will produce! I also added a video of a press I did earlier today of the Jack 47 by Sweet Seeds. I hope you enjoy the video, be safe and Blaze On!!!
Likes
3
Share


@leliantu
Follow
Segunda semana, las plantas crecen de forma correcta aunque de manera dispar, hay algunas que ya tienen 3 nudos (pequeños por cierto) pero hay otras que aun tiene su primer par de hojas. Esta semana comencé a darles los nutrientes según la tabla de Bio Bizz.

Likes
23
Share


@Euphory
Follow
This plant i ripped out with roots and hung it up with them. Drying 1 week in 15-19°C and 50% humidity. Cured for 1 week and then trimmed carefully. Nice BIG smelly and tasty buds came out of this beauty. Sweet smoke with berry/flowery taste and relaxing effect. I was expecting more like indica effect but nevermind. Good for stoning at home with nearest. She has also calming effect after crazy/angry day.


Likes
10
Share


@Eauderay
Follow
She is truly a banner! But sadly she was a male at the very beginning of flowering and not after sadly I did not successfully removed all pollen sacks and so she seeded here and there! Some branches more than others, I removed all those!
She seeded the watermelon candy too here and there....not a total disaster but could have been bad...Next time I will discard those very pronounced early and keep those who have only few flowers at set!
The phenotype i have is very lightly scented, sweet faint grape.
She sparkles with trichomes! I am thinking she does not smell much must be weak thc content...but been reading and they say terpenes and the not the same!
You can have little thc and high terpenes and resin contents in Mj! And vis versa!

Likes
2
Share


@NewbieLearner
Follow
Very heavy indica. Gets you so freaking stoned its awesome haha. Myself and a few mates already all said this pheno is a definite keeper! huge heads, amazing taste, incredible smell and best of all knocks like a donkey just kicked you😆😂😃
Already got clones growing for the next run! will be growing this strain probably for the next year straight.

Likes
17
Share


@Ksouth1
Follow
3/4- Last few weeks have went well. Not much to say besides she was chugging along and beefing up nicely. She has some pretty long colas and a good bunch of them. Thank you very much Seedsman for the opportunity. This is a beast of a plant, being in a 2 gallon pot and getting the size it has. She has a few weeks left still. She is getting overdrive now and will be flushed for the last two weeks. Will start to flush when her trichomes are all milky and most of the hairs have turned and shriveled. I will update as she progresses. Happy growing to everyone!
3/8- Everything is fattening up. Bud is solid, sticky and stinky. Has some huge long colas. Can't wait to see the total of all the plants. First 8 weeks of their lives, they were under the Mars hydro tsw 2000 and now they are under a new brand, Szchlux 400. It's kickass. Have it 3 1/2 feet above my plants and they are praying. Showing signs that they are getting some extreme photons It's a truly amazing light for the price. Can't wait to see how it does full cycle. Using it with the Mars hydro to cover the 4×8 room I built. It's more than I need for veg and will be great for flowering! Until next time happy growing to everyone!

Likes
6
Share


@1Prinz
Follow
Started the week by watering in the night from 24.06 - 25.06 with 300-400-400.
Biscotti is now (25.06) 57 cm high. The other ones are smaller.
Biscotti, Jack Herer and Blueberry are already flowering since around 5 days. Frosted Guava is starting to show her first nodes with hairs.
Train Wreck is starting lol pretty small and looks a little bit sick. But still he’s growing.
I sprayed also neem Oil (1ml in 0,5 ml warm water and with just a drop of kitchen soap) over Frosted Guava and Train Wreck when I watered them (24.06-25.06). Since then the spider mites very rarely appear.
29.06 watering with 400-400-400ml and with added Biobizz Fish-Mix (haven’t seen that I should switch in the flowering period to Bio-Grow), Top-Max and Bloom.
Watering with normal water 400-400-400
Likes
34
Share


@Birale91
Follow
Week 12.
Starting week 5 with a big smile.
Day 80.
Become bigger Nd bigger.
Smelling like grapes.
Start with new booster - bloombastic only 5ml to 10L all the way to the wash.
Lets see the results at the end, by comparing it to my last grows.
Day 83. Extra calmag.

Likes
80
Share

@Roberts
Follow
FBT 2307 has been killing it. She got some nice big colas on her. I switched to ph water a few days ago. I will be looking to harvest in about 10 days roughly. I did add orange essential oil to ph water. Dunno if it will effect anything. She grew great under the Mars Hydro FC4800 light in the Athena blended line nutrition. Thank you Mars Hydro. Athena, and fast buds. 🤜🏻🤛🏻🌱🌱🌱
Thank you grow diaries community for the 👇likes👇, follows, comments, and subscriptions on my YouTube channel👇. ❄️🌱🍻
Happy Growing 🌱🌱🌱
https://youtube.com/channel/UCAhN7yRzWLpcaRHhMIQ7X4g

Likes
73
Share


@Rando1314
Follow
Flushed HARDCORE this week!! Ladies are not looking well nor do they seem like they’re reacting to the flush well either!! Almost seems like they’re locked out but also having deficiencies! I could use some advice on this. 3/5 of the taller plants have yellowed out and the other 2 look great!! Pretty much all the same watering and neuts. I think the issue was that I’m using fabric pots and not allowing enough penetration to the bottom and it created a salt pocket. Correct me if I’m wrong
Updated a few more pics of the deficiency/lockout issues all the help is appreciated thanks to everyone whose chiming in and helping!! Y’all the real deal!!