
Likes
Comments
Share


@GYOweed
Follow
To my haters: I love oxygen, so put a bag over your heads.
Temps are dippin.
They drink half gal a day!
Hooo wee mofos so this week i got too high and over corrected ph up and down a medium bap cytokinin spray basically did what i want stunt height but also kinda burned it 😅
The trichomes did go bonkers so i dunno. Seems kush mints bottom right doesnt wanna move fast.

Likes
10
Share


@NOLOGIK
Follow
02/10/2019:
hi guys i'm having problems for about 4/6 days: i'll explain I gave the nutrients as usual, and the morning of the next day i found the leaves around some buds, burned and softened !, i thought it was the nutrients, but reflecting well and looking at the leaves that have the tip pointing downwards, I thought, even in a heat wave that did all of this inside my tent, but the fact that out of 3 plants only one suffered so, I Give up some doubts, if you have any opinion I would be grateful! good 4:20; all this 2 weeks from the harvest :(😵

Likes
19
Share


@sirstickyfingers
Follow
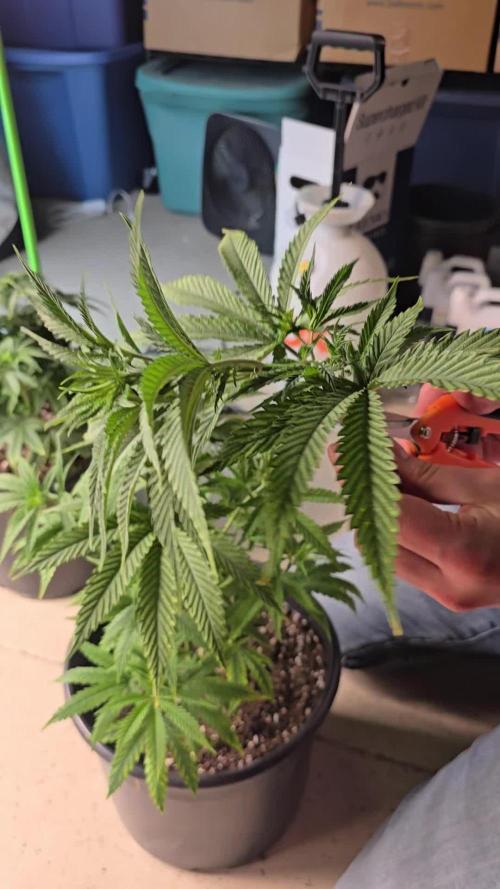
Day 35 from sprout, wk 4 Veg for these girls. This being my first grow I obviously need work on my LST techniques lol. I Am am trying to let them grow naturally for the most part and just trying to pull them higher branches aside to allow the lower growths meet the canopy. Im not sure what to do with the sour diesel as it has become like a damn hedge and so dense that im just gonna let it go until after the stretch to defoliate since i like the natural canopy it has going. They been doing really well and they are drinking alot more water now almost double what they were drinking last week. But mostly just water every other day now. I am considering on a 6 week veg depending how this next week goes.


Likes
14
Share


@danwho
Follow
9/22/2024
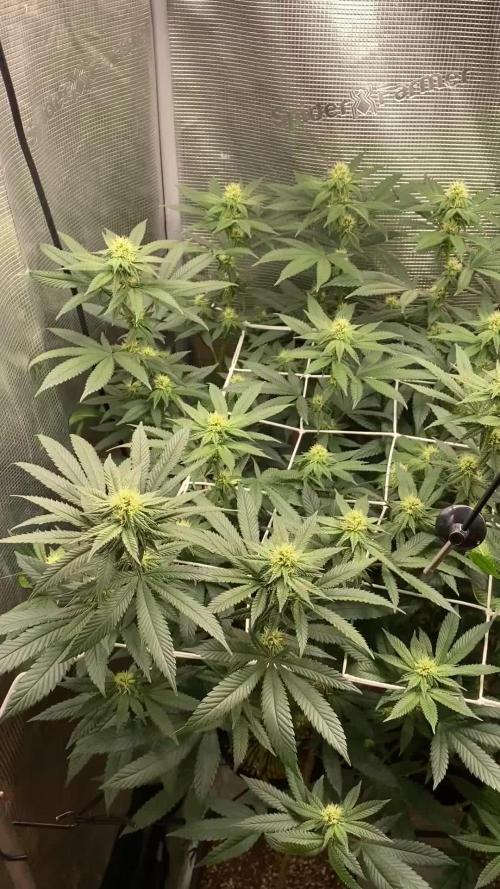
Added 80W LED lights below the canopy. Tilted the other 200W fixture to point into the canopy. Relocated circulation fans to keep air moving through the bush! Great flower development is continuing. The stretch is almost complete, but it is still stretching. Super cropping may be right around the corner. With one bucket removed from the system, the new system volume is right around 7-8 gallons.
9/23/2024
Forced to do a water change after a massive spike in PPM up to 2400. Cycled the system with about 5 gallons of pH water and pumped off about 4 gallons. Replaced 3 gallons containing appropriate nutrient concentration to get PPM back to 800 -900 range. Increased lights to 85%. Super cropped some of the lanky main stems that were growing right at the lights. Light directly over the plant is pretty much maxed out on height at this point. Looking to increase intensity by the end of this week to 90% and then to 100% by the end of week 5. Continuing to defoliate larger fan leaves a few per day.
9/24/2024
Plant is looking incredibly healthy even after the water issues. Some trichomes starting to develop on sugar leaves and flowers. There are tons of flower sights, I am excited to see how they continue to develop!!!
9/25/2024
Moved the light up to its last hanging position. There are only a few more inches of adjustment left. Trying to avoid late supercropping if I can.
9/26/2024
Pruning large fan leaves and fan leaf overgrowth. Looking to leave a lot of the smaller leaves for sugar trim collection if possible. Humidity is not an issue yet, but working to maintain 50-60% is getting close to maxing out my setup. Continuing with light defoliation will hopefully help in managing humidity.
9/27/2024
Have been adding pH-adjusted water as well as reduced nutrient concentration to keep PPM 800-900. Prioritizing bloom nutrients and keeping small amounts of micro and grow in the mix, diamond nectar at around 4mL/gallon.

Likes
15
Share


@Siriuz
Follow
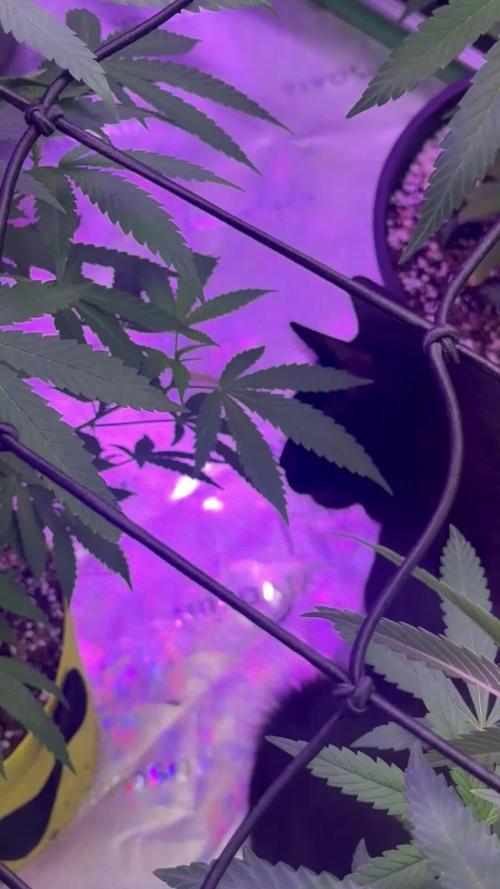
Check out the videos guys, she is flowering real good even tho we are not using any special nute like big bud for example, but i really want to try it soon, hopefully!
Still she is doing great and im happy to have her!
How are you doing growers whats up!?
Dont forget to leave a comment
Any suggestion is welcome!
We are happy to learn new things alwas,
Thanks for the support happy growing everybody
Enjoy the footage thanks to Siriuz

Likes
23
Share


@555ABKY555
Follow
the past few weeks the girl scouts have been irrigated and fertilized but the little land used has made them dwarf, I performed lollipopping due to a redness that appeared on the leaves of one in particular now it is the most luxuriant. the skunk has really grown up in the background and the little shade has earned it its luxuriance


Likes
9
Share


@KEYSTONER
Follow
Fresh outta darkness. 48hrs of lights out. Chopped and now hang drying in a 2x2 Tent. 70 degrees and 45 Rm. Happy with the results of my first grow.

Likes
55
Share


@CBD_Sweden
Follow
2018-07-17 Start of week 16 of veg.
The girls is doing awesome and growing like crazy.
I have topped them hard from the beginning and i will do a final topping this week.
I will start flower as soon as i get my 4 x HLG 260W QUANTUM BOARD KIT V.2 that i have ordered.

Likes
7
Share

@georgesa
Follow
Cloning/topping time!
All the plants are looking excellent. One SNJ stands out as being super short, bushy and dense, despite its very sativa roots. Looking forward to crossing that with one of the regs in the tent, either a Hindu Kush (for a heavy indica to balance it out), the Thai/PBB from Trident seeds, or perhaps even one of the Enfield Green Streets! Let's see how they all flower out!


Likes
4
Share

@BuddyHolly
Follow
Main plant blue dream height 6.5 feet. Largest plant I’ve ever grown, it’s been topped at least 10 times throughout the season. Any guesses on yield for a monster plant that size!?
2 Pineapple Express plants hydro harvested 3.5 ounces dried.
Transitioned 3pineapple 3 blue dream clones into grow tent. My can Dewey (dewbie) helping me prune the plants.
Medium sized outdoor plants are pineapple and mimosa orange punch.
I’ll be stacked for harvest I think 👍

Likes
49
Share


@Xquisit
Follow
Today is 12/18/18, watered yesterday with nutes ad today was picture day.

Likes
9
Share


Likes
8
Share


@Kindbudz
Follow
This is the last week of flower. These genetics are beautiful. Saliva dominant, I couldn’t wait to smoke this beautiful strain. Will be growing again.

Likes
86
Share


@PremiumBudsEU
Follow
Hello Growmies 😎😎
This week I start giving the plants a light dose of nutrients.
hopefully I can start with LST soon 😃💥
Thanks for stopping by friends, enjoy the week 🌱💚
Buy Mars Hydro FC 3000
https://marshydro.eu/products/mars-hydro-fc-3000-led-grow-light/
save some money with discount code: PremiumBudsEU


Processing
Likes
5
Share


@PETEROG
Follow
Hey everyone at week 4 know and wow have these girls grown early this week I applied some LST and all took really well to say it was my first time trying this
Likes
1
Share

@Minuteman_Organics
Follow
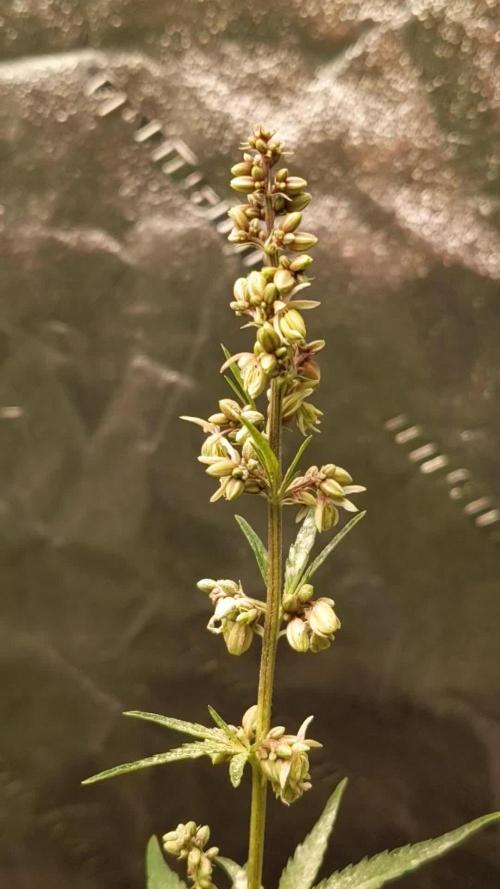
Another week done. Final selection of the 3 phenotypes I found in a 10 seed run of the f4's. I am pretty confident I'll be carrying on the dark purple/red male since heavy anthocyanins production is what I was hunting for in this particular venture.
Will be collecting pollen as I'm doing a good job keeping humidity low in the grow room so should be pretty viable. Will be crossing this into my winner from the ethos hash plant run as well as the rainbow belts
Processing
Likes
70
Share

@CBD_Sweden
Follow
Illuminauto 21 - Sour Crinkle (Grape Crinkle x Sour Crack)
Two of our fastest and frostiest varieties collide to make a sweet and sour delight!
Expect super frosty, compact nugs that won't be a toke for novices.
Destined to be a great strain for extraction work too!
Plant size - Small - Medium
Cycle time - 60-65 days from sprout
Indica/Sativa - 80/20
Frost level - Extra Ridiculous
https://www.mephistogenetics.com/product-page/illuminauto-21-sour-crinkle
--------------------------------------------------------------------------------------------------------
2017-10-09. Week 7 starts now and when Mephisto say "Frost level - Extra Ridiculous" im starting to believe it. This frosty and compact girl is 30 cm tall and i believe she is going to produce some fire buds. What do you think? Added new video and pics.