


Likes
Comments
Share


Likes
33
Share


@Hawkbo
Follow
This is probably the final week of the full tent shots, these were taken a few days ago and at this point there is only 8 plants that have not yet been harvested. I learned a lot this run, tried some new shit, grew out my own crosses, dialed things in by getting rid of the light leaks and adding the heater so it was a success. The new lights out performed my expectation and the leaf strip might become a staple in my garden. The leaf strip made me nervous I wasn't sure how it would turn out but all of my buds are noticeably larger, the lowers are filled out and as dense as the tops and it saved space, water and nutrients. The lights could have contriuted to the larger buds but the other things made it well worth it. I have been vegging out the next run for a while trying to keep them from growing too much in 1/2 gal bags so there should be some interesting plants there stay tuned.
* The ones remaining are MC2 MC3 and MC4, MC6 got tossed but I have a cut to run back. MC2 I have grown many of times and reversed for pollen, MC3 and 4 are new. 3 is almost done I should be chopping that one this week at some point and might be more impressive than 2 it has some serious nugs on it. 4 is also solid but taking a little longer than I would like it might be a 75-80 day finish. Next update I will have some good pics of at least 2 and 3, I am going to wait until I am ready to harvest before I bring 4 into the studio.
REMEMBER , IF YOUR SHOPPING FOR GEAR YOU CAN USE THE CODE “BANGDANG” FOR 10% OFF YOUR ENTIRE PURCHASE FROM ANY OF THE FOLLOWING COMPANIES.
@greenbuzzliquids
@rainscience_growbags
@gorilla_grow_tent
@growlightscience.led
NEW* @Rocbudinc Seeds on his website *
*****Gorilla grow tent discounts extend to all companies affiliated with grow strong industries which include..*****
@super.closet
Lotus Nutrients
Kind LED grow lights


Likes
67
Share


@GanjaReaper
Follow
Welcome back everyone,
As you can see are almost all seedlings growing. Some where still in the soil.
Might happend when giving water(seedlings can turn or get deeper), checked it out and they are alive and well.
All pictures are from day 4.
The humidifier had been added, so I had to adjust the room.
I spotted a corner of the room that gets dryer faster. I adjust the fan for now and see what happens.
Corners are always hard to get perfect. Sometimes the light, air, watering doesn't come there properly.
Seedlings don't need much nutrients, neighter do autoflowers. with normal soil I would recommend to only give water for 1-2 weeks, since it holds nutrients in it as well.
But since I'm using Cocos for this grow, I might have to add some basic nutrients in the upcomming week.
For this week I gave/give only water turns and Startbooster/rhyzotonic turns.
Update day 5:
- Lowerd the lights to avoid stretching, they are now at 75cm distance from lamp to pots.
I want them at 40-50 cm, but I don't want to rush it.
- Added another layer of cocos to avoid the soil from drying up therefore the roots from dying.
This will happen because of lowering the lamps down, the soil will get exposed more to heat.
As you can see, the humidifier is doing his thing haha. Pictures and videos where taken without the lights + fans on.
because of that, it will look like this. Still fun thought.
Arround 7 seeds didn't reach the surface yet, lets hope they make there way up soon.
Enjoy!
Likes
59
Share


@Professor_Chaos
Follow
Beginning of week...
Out of the blue.. For no reason at all.. I went ahead and topped her. The branches are already beginning to form.. so I just wanted to speed them up a little 🤷 lol.. I also removed the bottom node (leaves and branches).. They usually just don't grow like the 2nd, 3rd, etc... and the branches were not symmetrical whatsoever lol.. That really grinds my gears (it really bothers the shit outta me lol).. She is left with 3 nodes at the moment.. I will decide which nodes I want to use and go from there.. So I will be going up a tad on the Armor Si.. Up on the CALiMAGic, adding in some FloraGro, amd going up just a tiny bit on the Floralicous Plus to bring it up to the normal dose.. Still using the Hydroguard and the MYCO Plus (powder) at the normal doses.. Other than that, just been watering/feeding when the top of the medium is dry, and when you can clearly feel the weight of the pot (bucket of butter lol) is pretty much weightless.. Basically, I feed on a Monday.. Then just plain pH'd water on Thursday or Friday.. Then back to feeding again on Monday.. This will obviously change once the roots fill the pot (bucket o' margarine) within the next couple weeks or so.. Btw.. Not sure if I mentioned this already.. Dont feel like going back and checking lol.. But I put about 2 - 3 inches of just perlite at the bottom.. Not sure if this helps or does anything lol.. But I've seen other people do it.. Had some extra on hand.. Sure! Why not? I never let this sit in runoff.. Infact, when I water/feed, I place the pot on top of a cup so that she won't be sitting in runoff and so I can collect the runoff as it drips out the bottom.. So far, the runoff pH comes out a little low still.. Going in at 6.2 and the runoff will be like 5.8 or 5.7.. But, I do believe that it has been slowly making its way up.. I should really start buffering and finding a way to remove roots when I harves, so I can keep reusing and avoid issues.. Anyways.. She is happy and healthy.. Topped her and remove the bottom node.. That's all there is to report on so far.. Will be updating mid week and end of week as I usually do.. So excited!!! 😁
Mid week..
So it looks like the bottom 2 branches are triploids! I could be wrong.. But that's what it looks like to me! Can't be mad about that! Lol.. I can tell she is going to be a short thing.. Perfect for this grow box! Not sure what these weird markings are.. But this literally popped up overnight.. Will be keeping an eye on it!.. Hopefully nothing.. But we shall seeee!...
End of week...
She's doing good.. I removed the very top node that I left.. Lol.. Yeah I can be very indecisive when it comes to that stuff.. Can always just remove one later if I need too.. But yeah.. I've kinda just been tucking the top 2 branches under the bottom 2 branches so that the bottom 2 can get some good lighting too.. So I try to switch once a day or sometimes twice a day.. Once the tops grow a bit more they should all be able to get their own light without the tucking and whatnot.. But still just been feeding toward the beginning of the week and just plain pH'd water toward mid/end of the week.. The runoff pH is a little acidic.. But it doesn't seem to be hurting anything so far.. The roots have made it to the bottom of the pot.. They did a long time ago, but have really filled the pot alot already.. But I've pushed plants alot longer in much smaller (veg for 6 weeks in a 9oz solo cup).. Her branches are so thick and sturdy! She is gonna be so strong!.. I really need to make sure I don't LST too late cuz it's gonna be hard to bend these tree trunk branches.. But I'm playing with her at least twice a day, so I doubt I will miss the opportunity lol.. But I can't wait to taste some Blue Berry!!! On to the next week!...

Likes
5
Share


@Canadian_Bud
Follow
26-11-2022
Off to a good start, She is a little high in the cube but I'll fixer up once she getts further on in her cycle.
Starting off with a small deep water culture 2 gal with airstone. Going to make it a lot easier to just pass her into the Aeroponic envirnment. Less shock and gives me a chance to put her in a 5 gal bucket with clean fresh temperater adjusted water prior to her switch in a few weeks.
She's got her first wings!😎
1-12-2022
This one is getting a little stem strength help for now. increased light intensity to 80%. Showing her first wings with a little dance. 😎

Likes
224
Share


@Hellishjam
Follow
So I’m updating a day early only because it’s looking like a lot of rain tomorrow so here it is:
Pp 1- 36 inches
Pp2- 34 inches
Pp3- 36 inches
Os1- 35 inches
Os2- 32 inches
Os3- 36 inches
Been dealing with a lot of wind so there is some damages on them but it is what it is I’m not sure how you prep them for 50kmh winds 🤷♂️ I’m thinkin the tent would be in a pile in the grow room 😂 but anyways other then that there looking good. I’ve seen roughly 5-6 lady bugs laying eggs on the girls so that’s a good start!! No sign of pest yet but nature is prepin em. I’ve gotta get some more straw to lay down as the wind blew a lot of it away, it’s coming everything is just a waiting game.. leaving on Wednesday for work so it’s going to be exciting to see em two weeks later! Was a little nervous they were going to flip to flower but everything seems good so far haven’t noticed any major stretch or anything like that so I think we’re in the clear. The weather is taking a swing back to normal here it’s been outa wack the last little bit, anywhere from 25-30c highest with humidity was 39c I’ve never seen this in May in my lifetime up in Canada but wow if that’s a taste of what summer is going to be like I want out now lol well time to go for now see ya again on June 17th!

Likes
6
Share

@CaveGanja
Follow
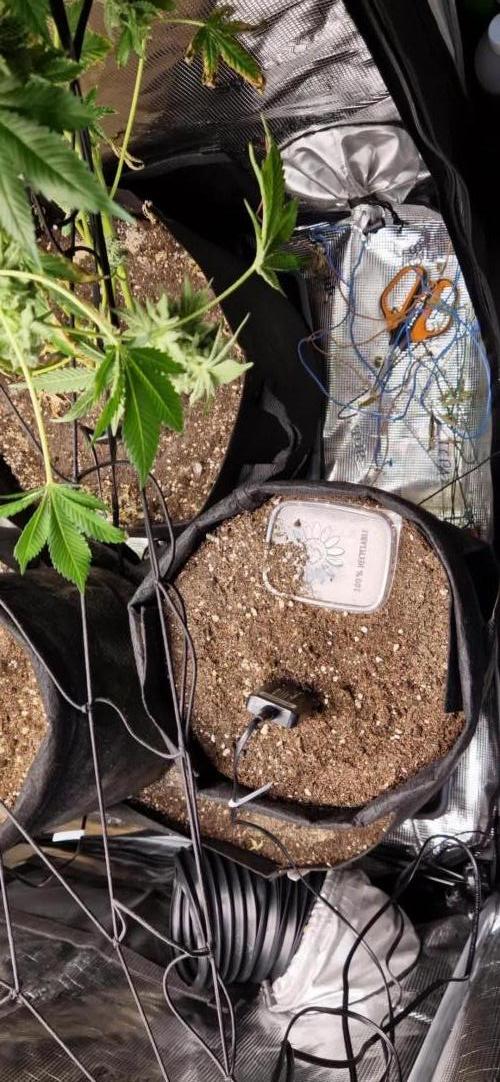
Was worth to give her 2 weeks more.
But i didnt dry her slow it was pretty hot around 24C with low humidity.
She dryt 6 days was to long i have a humidity from 58% in the jar.
I like more 62-64% that i cure it under my controll but it is what it is guess i have to do nothing and keep smoking 😎
It smokes well was glad that the fast drying did mess up the taste but it is fine orange citrus like but not like the froot more like the peel strong terpinns.

Likes
12
Share


@ChiTaN
Follow
The girl is huge, the buds are huge and meaty😃The smell is overwhelming, breathtaking :) I can't wait to finish😅

Likes
9
Share


@HIAZ_urbanbudfarmer
Follow
In the end she went longer than expected but that's cool 😎 super dense buds . I really enjoyed this strain. Very nice smoke.
Gromie's use the promo code GROWEED for a 15% discount on any Fast Buds purchase.
Likes
3
Share


@MarihuAchA
Follow
Última semana de la gorilla cookies. Ya estuve haciendo lavado así que la cortaré en los próximos días. Muy contento con los resultados
Likes
26
Share


@dataTwiiix
Follow
01/07/21: 3ème semaine de floraison. Les premiers boutons de buds se développe à leurs aises pour ma première expérience avec des graines non auto. Je suis conquis.
01/13: la troisième semaine de floraison se termine très bien :D

Likes
Comments
Share

@Cainb
Follow
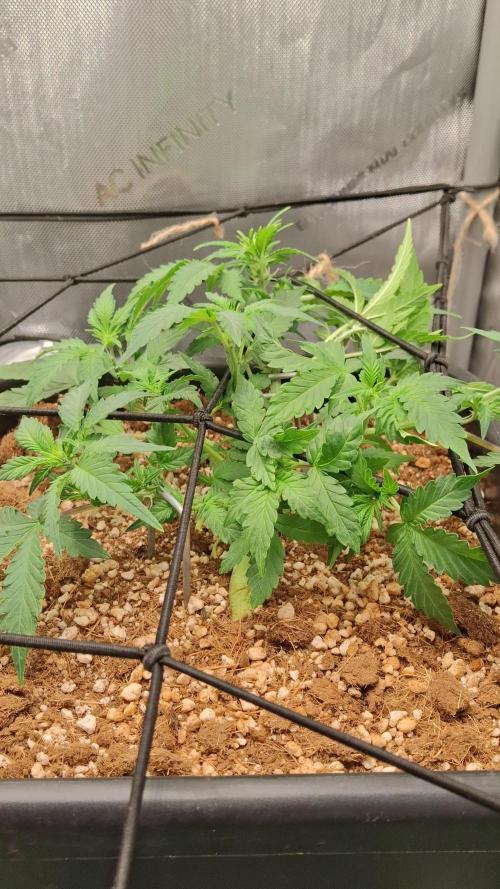
The pre-flower is just starting and they are putting on good growth.
One of the plants doesn't have the same vigour as the other, but it is still doing well.
Likes
17
Share


@soloczek
Follow
They look and smell amazing, think the RS11 will also become more purple like the cherry.
Cherry MAC muffin gets pure water (ph6,1) since week 7 of flower

Likes
105
Share


@WhiteWidow
Follow
*** 17.10.2017.***
Today i decided to start week 4, one day away from the actual begining of the next week...
She showed few calyxes that are shooting white hairs so i guess her flowering window just started so i gave her a good solution of flowering nutes, boosters and sugar.
I am so thankful that my effort is paying off, 7 days development on this automatica strain is the best progress i have seen so far in my short but rich growing experience.
She responded very good to all my moves, i decided to show you all what a proper LsT can do to your shape and groeth, and supercropping aswell..
The fishbone look is something that really caught my attention and will be perfected in my next grows.
Stay tuned and kisses from White and team Wolfpack 😎👊
P.s. @growdiaries i am havin problems with uploading calyxes photos, they are resizing forever.. all good out there? :D


Likes
14
Share


@Mr_Dior21
Follow
So It’s now week 8 on seedsman’s website flowering is done in 65 days so I have 1 more week left before the dark period. Yesterday I watered with a couple tbps of molasses other than that ive been doing regular watering with just tap.

Likes
5
Share


@Lagriculteur420
Follow
Plant are now growing well after topping stress, I've made a Lil defoliation, I think I'll switch in flowering in 1 week, they seem like their nutrients

Likes
29
Share


@Smokwiri
Follow
Almost finished, flushing
10% discount on Zamnesia seeds with code GROWITGD
